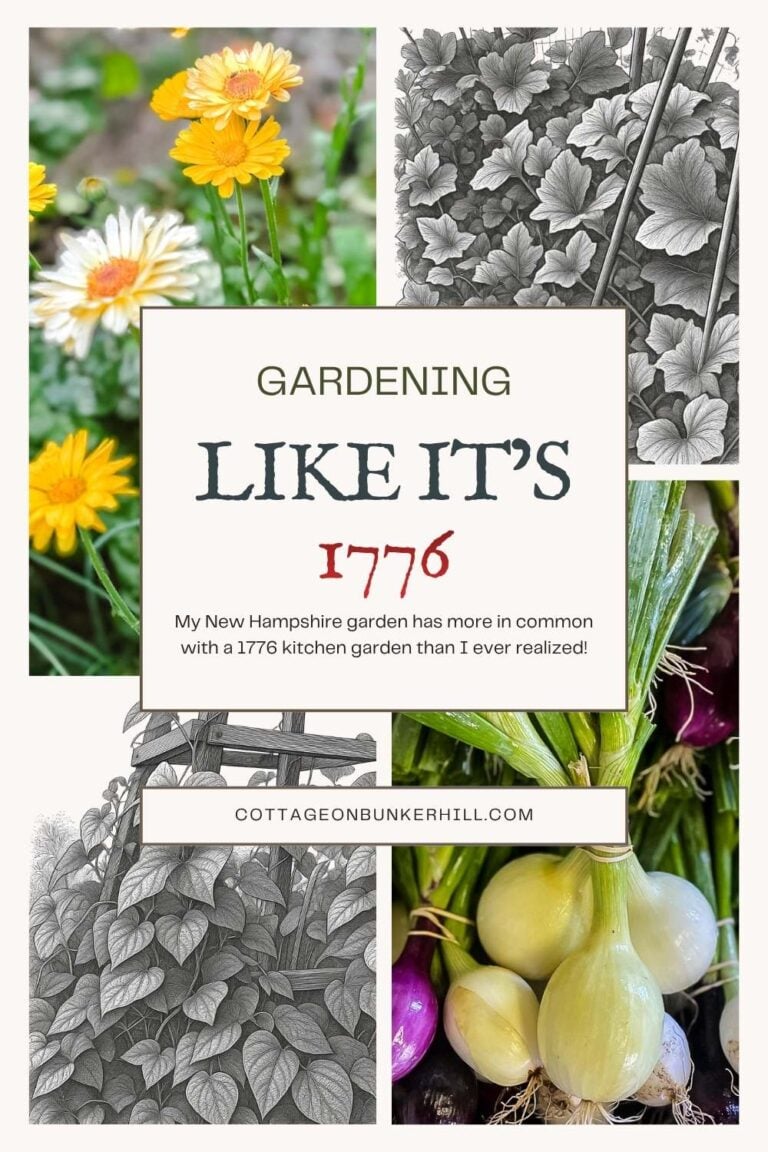
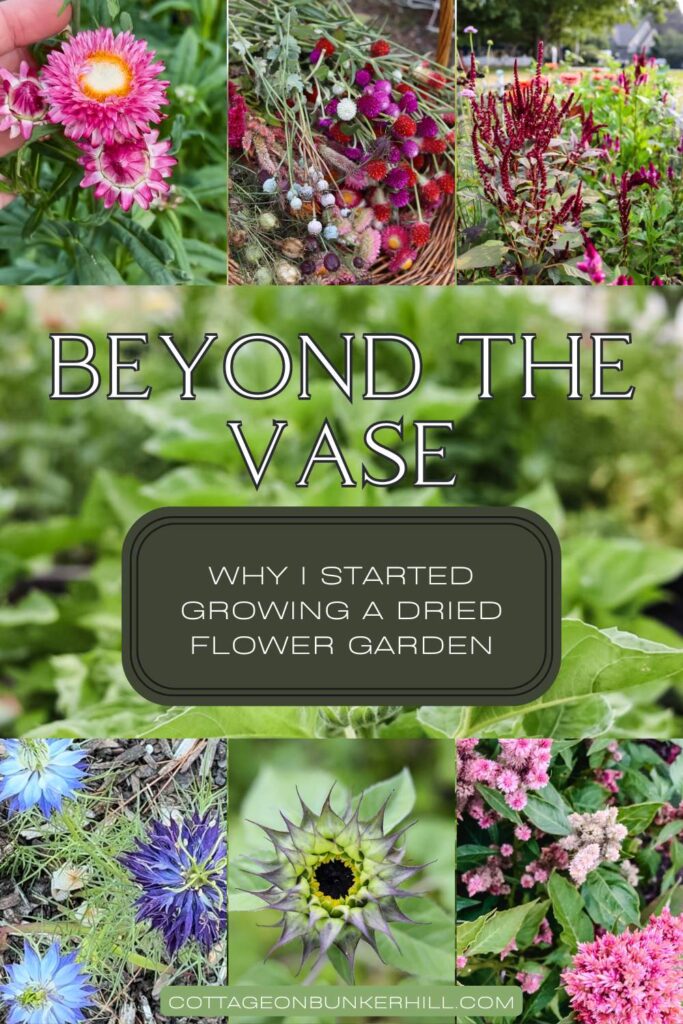
Five years ago, I added my dedicated cut flower garden here at the Cottage. I was chasing the joy of fresh bouquets, but I stumbled onto something even better: strawflowers.
That first season, I grew them on a whim. I was utterly captivated by their papery petals and vibrant, jewel-toned colors. But the real magic happened after I cut them. I hung a bundle to dry, and months later, those same blooms were adding cheer to a winter wreath on my front door. A lightbulb went off.
That was the beginning of a beautiful shift. I started growing my garden with two purposes in mind: the fleeting beauty of a vase on the kitchen table, and the lasting charm of a dried arrangement on the mantel. I began adding more and more varieties specifically for drying, and it quickly became, and remains, one of my absolute favorite parts of my gardening year.
There’s something deeply satisfying about this full-circle process. It stretches the season, makes the most of every seed, and lets me bring a tangible piece of my summer garden into my home all year long. If you’ve ever wanted to grow your own “everlasting” bouquet for wreaths, arrangements, and cozy, no-water decor, this guide is for you. I’m sharing the eight flowers that are the backbone of my dried botanical projects, exactly how I grow them from seed, and how I use them to bring that cottage garden charm indoors, long after the frost has settled.
Welcome! I’m Jennifer from Cottage on Bunker Hill. A home gardener for over 20 years, I’ve spent the last 5 specializing in our cut flower garden, learning through trial, error, and a lot of dirty knees what actually works. My focus is on growing flowers with a purpose, whether for a vase on the kitchen table or for lasting projects, using simple, repeatable methods that fit into a real, busy life.
This post may contain affiliate links, which means we receive a small commission if you purchase through our links. See our disclaimer page for more information.
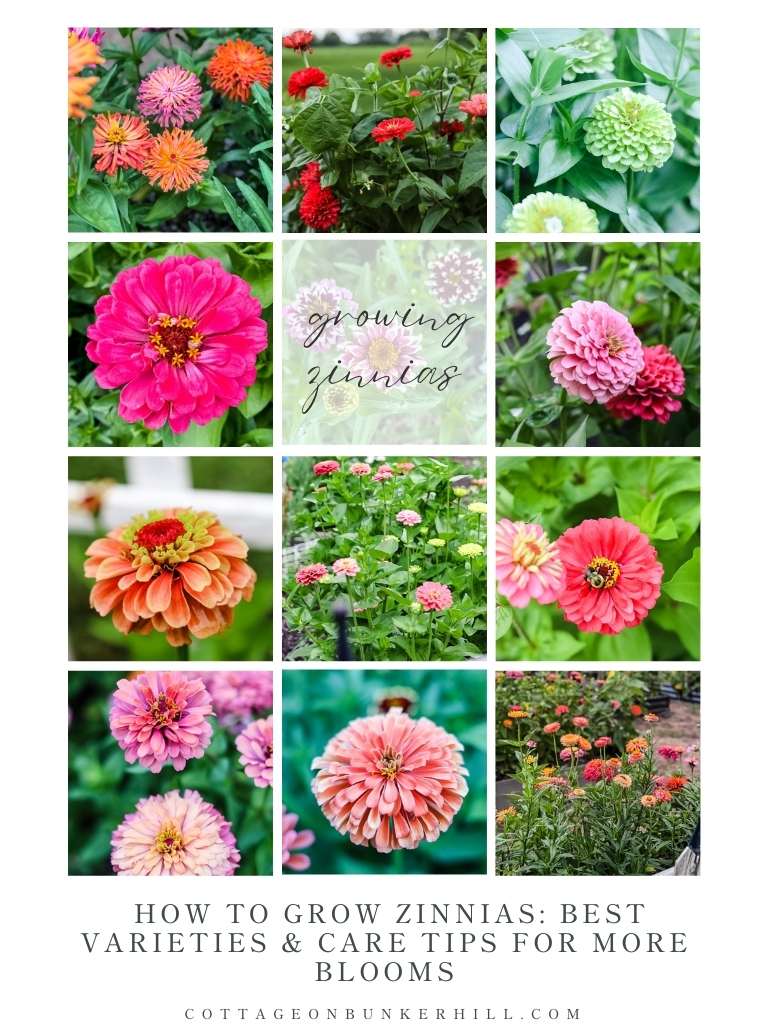
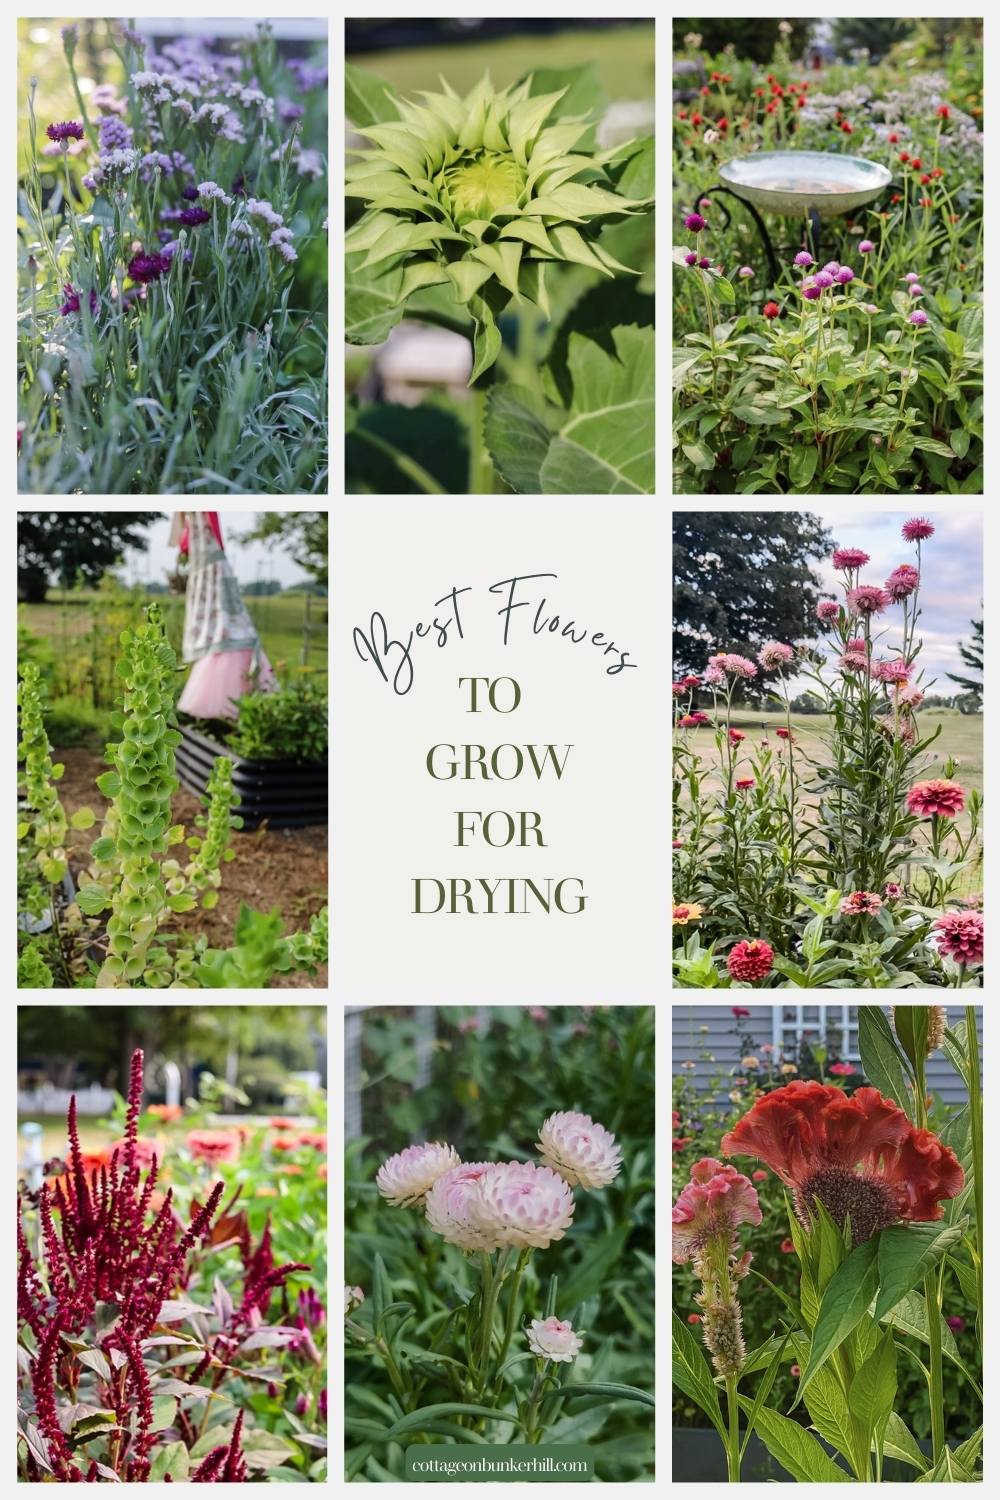
Best Flowers to Grow for Drying: A Complete Seed-to-Harvest Guide
Whether you’ve been gardening for years or just starting your first seed tray, growing flowers specifically for drying requires a slightly different mindset than growing for a fresh bouquet. Over the past five years in my garden at the Cottage, I have experimented with dozens of varieties to see which ones truly hold their color, maintain their structure, and stand the test of time in my home decor.
This guide is designed to take the guesswork out of the process. I’m sharing my “everlasting” workflow: the exact methods I use to ensure a successful harvest from the moment the seed hits the soil to the day I tuck the dried bloom into a wreath.
In This Guide, We Will Cover:
- My Faves: My hand-picked list of the most reliable flowers for drying.
- Starting for Success: Why I chose to winter sow some and start others under lights.
- The Harvest Window: The critical secret to picking flowers so they don’t “shatter” or lose color.
- Drying for Longevity: How to properly cure your botanicals for year-round use.
By focusing on these specific varieties, you aren’t just growing a garden; you are growing a craft supply list that will keep your home feeling like a cottage in bloom, even in the depths of January.
Why These Flowers?
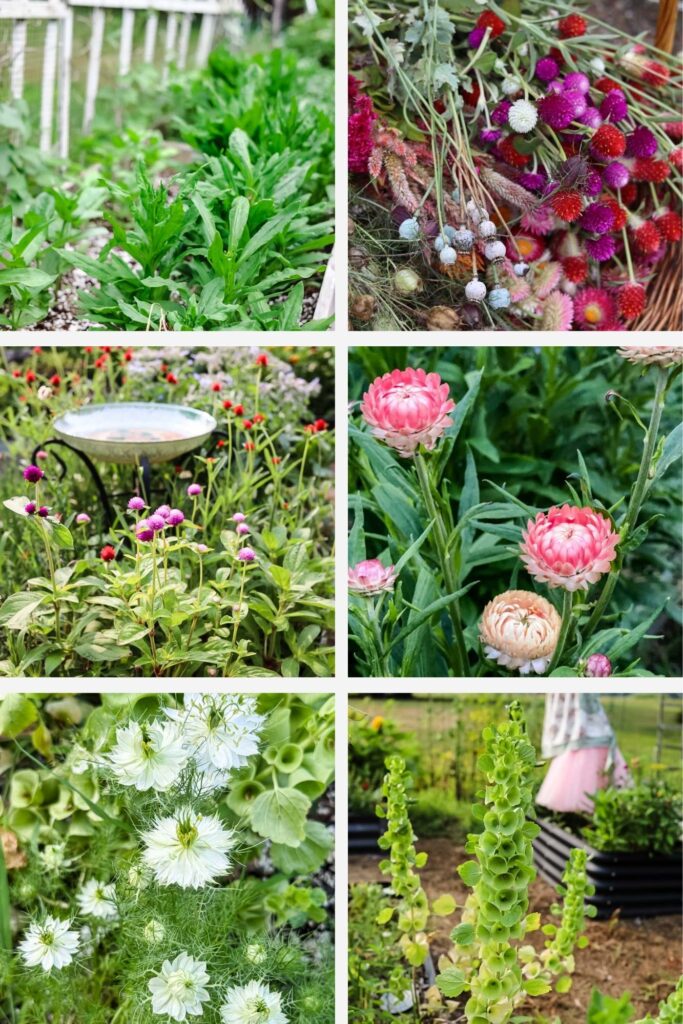
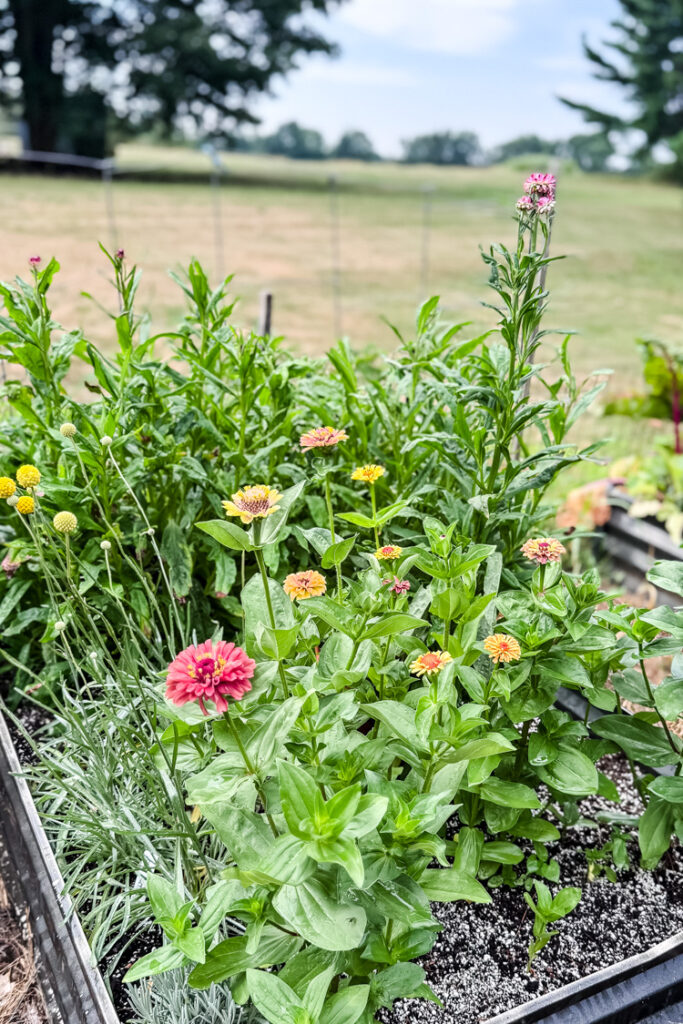
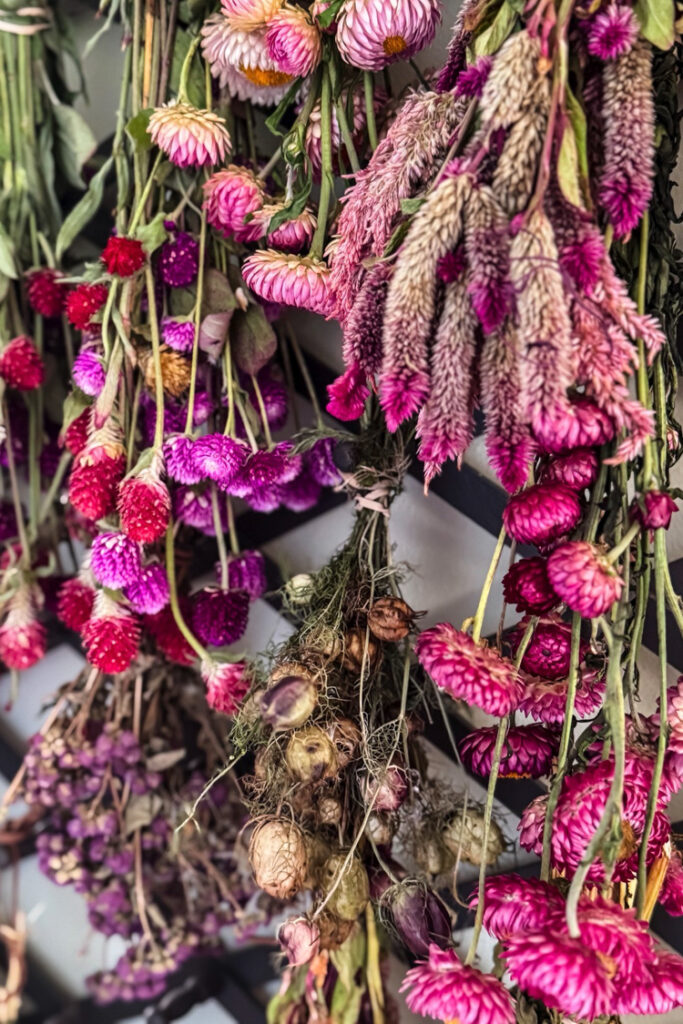
Honestly, there are hundreds of flowers, both annuals and perennials, that dry beautifully. You could fill a whole garden with them! But when I plan my cut flower beds, I focus on annuals that are easy to grow from seed, produce prolifically, and give me the biggest impact for both summer bouquets and winter projects. The flowers I’ve chosen are my personal, tried-and-true favorites. They’ve earned their spot because they reliably give me a stunning variety of colors, shapes, and textures. Plant this mix, and you’ll end up with everything you need to create rich, interesting dried arrangements all year long.
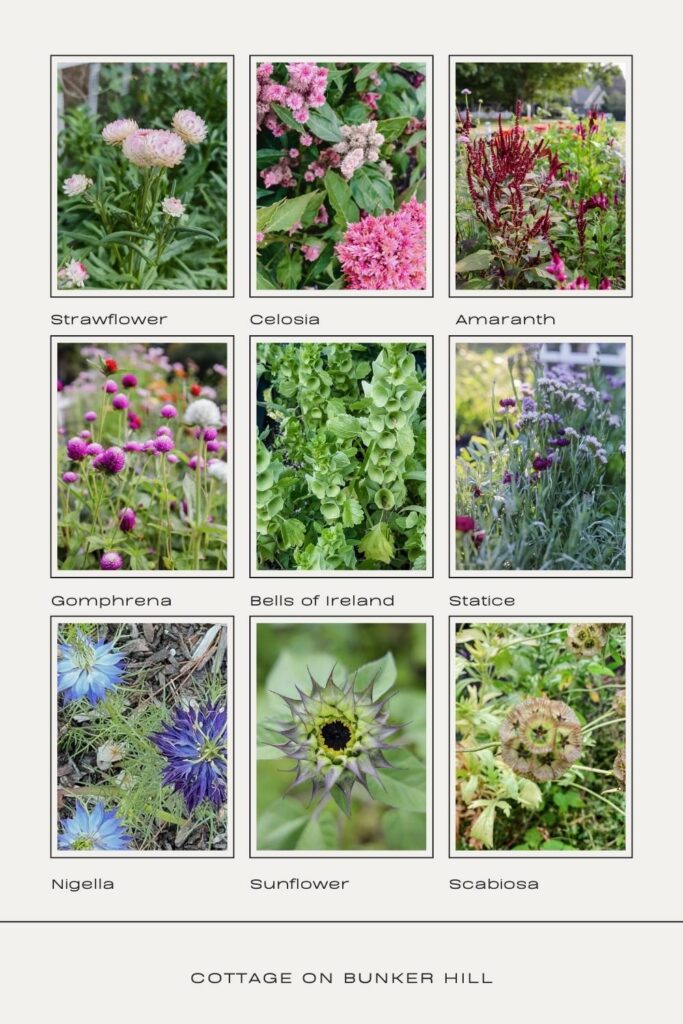
- Strawflowers- for those incredible, papery jewel-tone blooms.
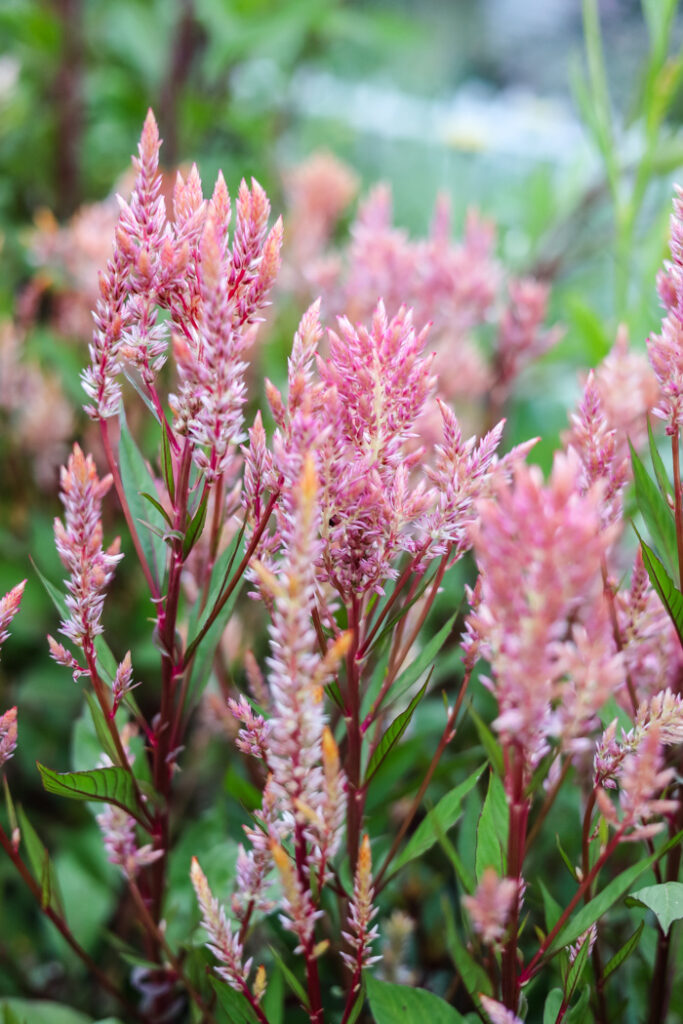
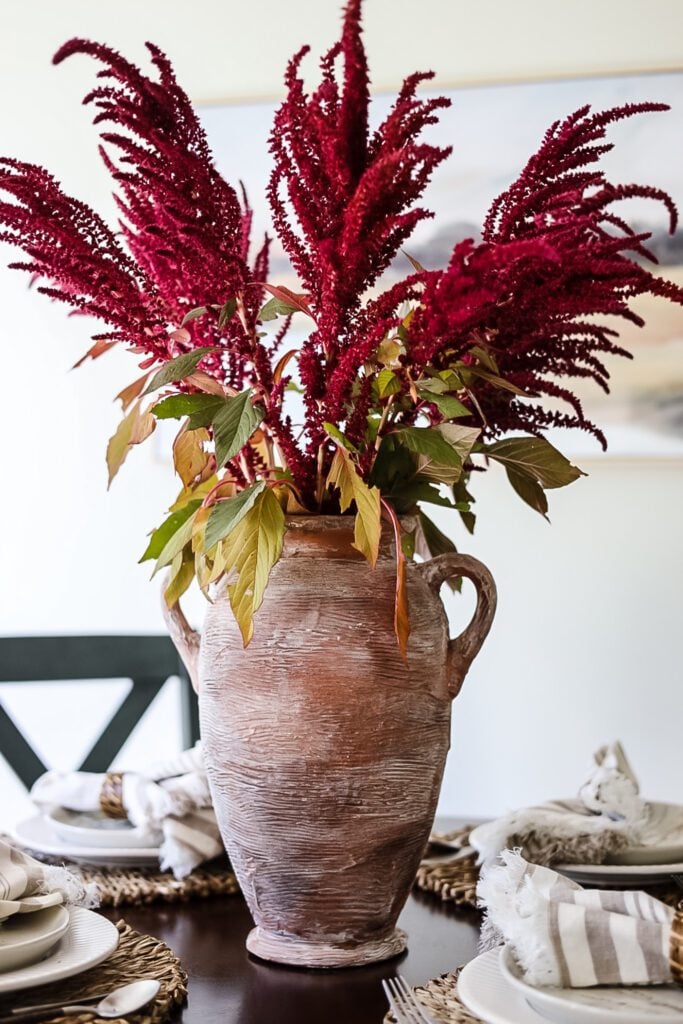
- Celosia- in all its forms: velvety plumes, quirky cockscombs, elegant wheat types. Unbeatable texture and fall color.
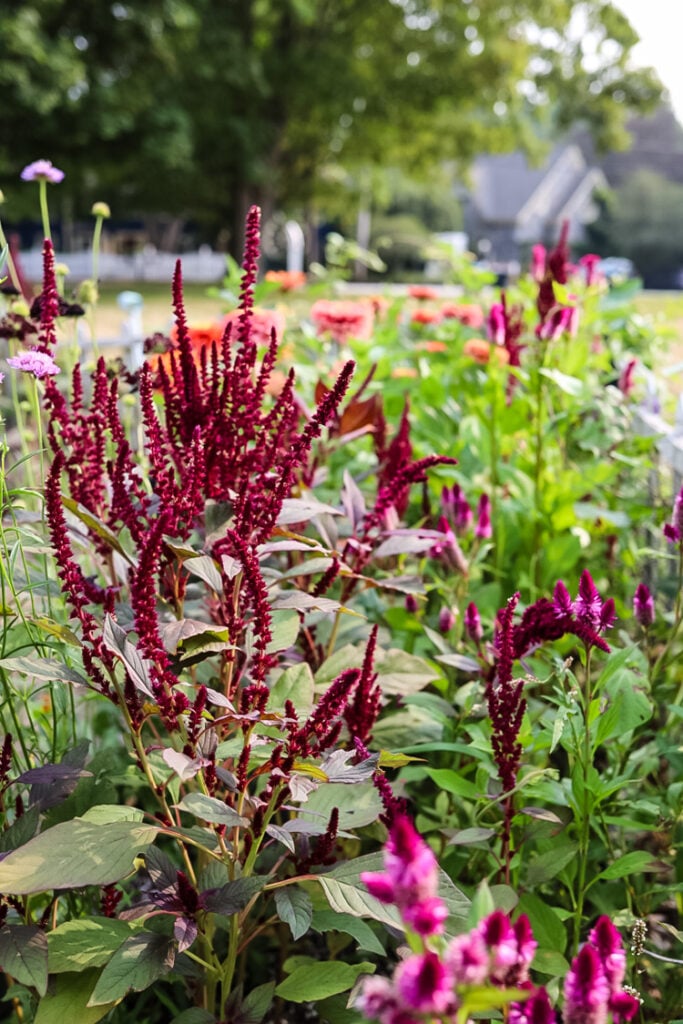
- Amaranth- for serious drama and graceful, trailing plumes.
- Gomphrena- for cheerful, clover-like pops of color on super tough plants.
- Bells of Ireland- for unique, architectural green shapes that fade to soft cream.
- Statice- for classic, papery clusters that hold their color forever.
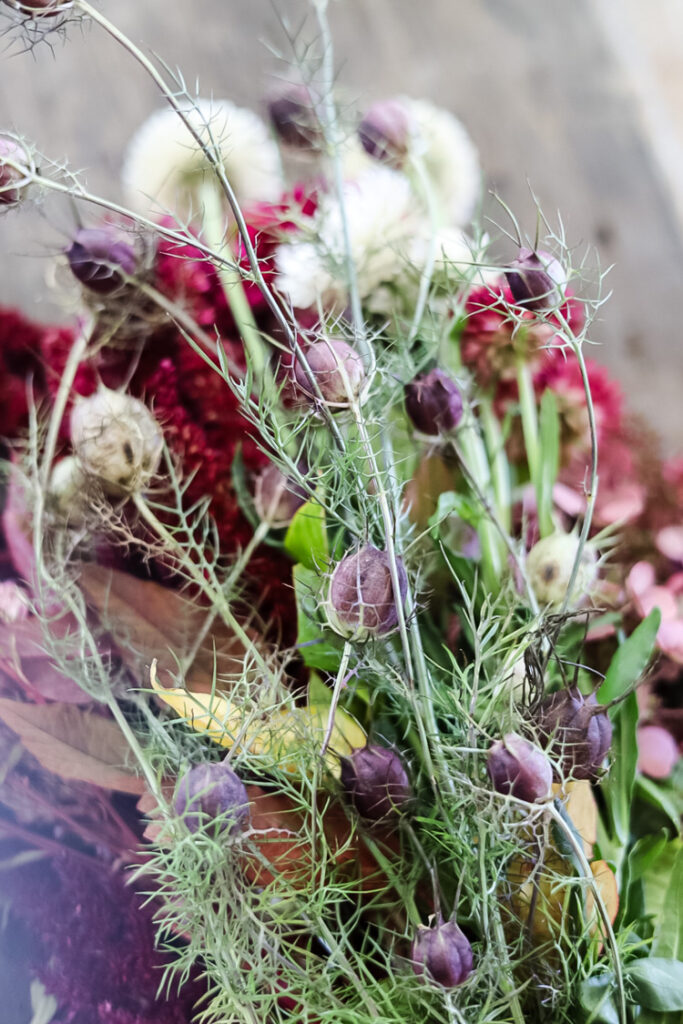
- Nigella- commonly called ‘Love-in-a-Mist’ for its delicate, pepper-shaker seed pods that add an airy touch.
- Small Sunflowers- for that timeless, sunny form dried perfectly.
- Scabiosa Starflower-interesting drumstick-shaped dried flower (sometimes called ‘drumsticks depending on the seed company)
For my gardening friends just starting out, my advice is always to start small. Plant a bright, easy patch with strawflowers, celosia, and zinnias. Here’s my thinking: Zinnias aren’t the best for drying, but they are the absolute best for instant gratification. They’ll give you buckets of blooms and the confidence to grow more.
My Garden Faves
How & When To Start Your Everlasting Flowers
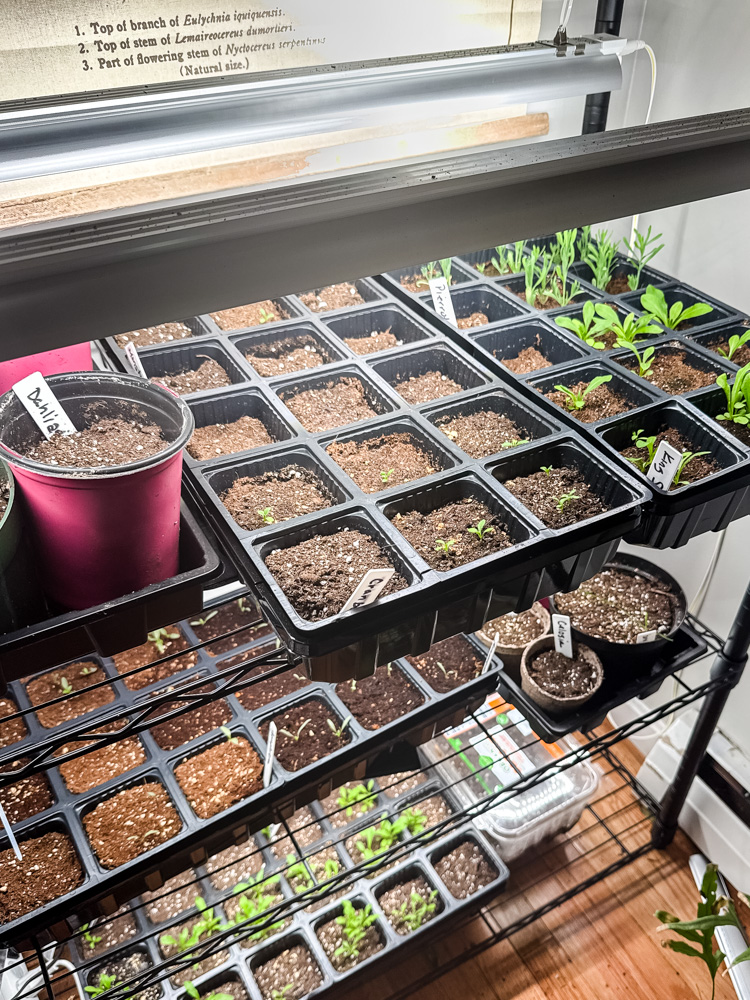
The great thing about these flowers? Most aren’t fussy. But timing is everything to get a long season of blooms for drying. I use a mix of methods: starting some indoors to get a jumpstart, and direct sowing others right where I want them to grow. Here’s my personal plan for this year’s “everlasting” patch.
Before you plan, know your zone. Use the USDA Plant Hardiness Zone Map as a guide. I’m in zone 6a. But gardening in New Hampshire has taught me to expect the unexpected, like Mother Nature throwing us a curveball with a late-season frost. My rule? I don’t plant my tender seedlings until late May.
Before you order, check the seed company’s website. They list all the specifics you need: whether to start indoors or direct sow, days to maturity, and light requirements.
I do the same with my seed packets. I sort them into two stacks: one for seeds I need to start indoors (noted by how many weeks before frost) and another for direct sowing. With limited indoor seed-starting space, I try to direct sow or winter sow as much as possible!
What You’ll Need To Get Started:
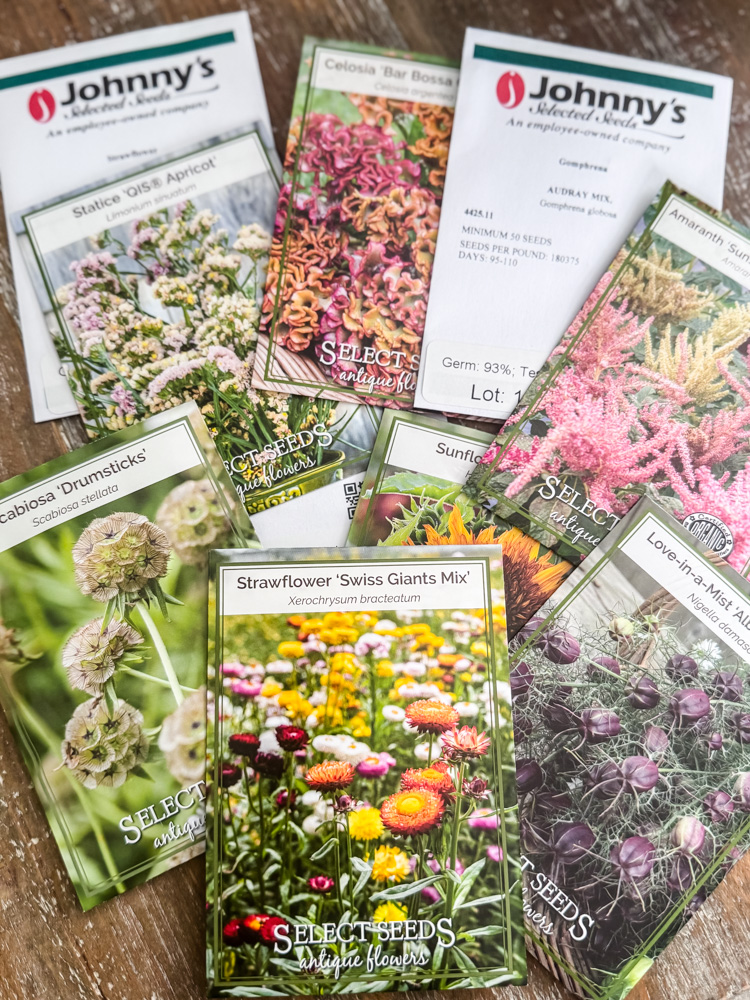
- Seeds for our flowers (my favorite sources are Johnny’s Select and Select Seeds; they are both New England based farms )
- For indoor seed starting: grow lights, seed starting mix, & trays
- Plant markers (Trust me, you’ll forget!)
- A calendar to note your last frost date, seed starting dates (Mine is around mid-May, but Memorial Day weekend is the traditional planting weekend).
- Read My Seed Starting Basics to get started
My ‘Must Grow’ Everlasting Flowers
|
Flower |
My Preferred Method |
When to Start |
Notes & Why This Way |
|---|---|---|---|
|
Strawflowers |
Start Indoors |
6-8 weeks before last frost |
They need a long season. I’ve had poor luck direct sowing here—they just take too long to bloom. |
|
Celosia |
Start Indoors |
4-6 weeks before last frost |
Needs warm soil to germinate. Starting indoors gives me those huge, dramatic plumes by August. |
|
Amaranth |
Direct Sow |
After last frost, when soil is warm |
These are fast and vigorous! I just sow the seeds in a sunny row and thin them later. So easy. |
|
Gomphrena |
Start Indoors |
6-8 weeks before last frost |
Slow starter, but a powerhouse after. I get so many more blooms by giving it a head start. |
|
Bells of Ireland |
Winter Sow/ Or Direct |
I winter sow these in Feb. |
They need a cold period and are great for trying winter sowing. They self-sow nicely too. |
|
Statice |
Start Indoors |
6-8 weeks before last frost |
Another slow-but-worth-it bloomer. The seedlings are tiny, so indoor control helps. |
|
Nigella |
Direct Sow |
Early spring |
Hates to be transplanted. Seriously, just sprinkle the seeds where you want them. |
|
Small Sunflowers |
Direct Sow |
After last frost |
They grow so fast. Direct sowing encourages strong taproots. I succession plant every 2 weeks for a longer harvest. |
|
Scabiosa ‘Starflower’ |
Start Indoors/ Direct |
4-6 weeks before last frost. |
I’ve tried starflowers both ways: indoor & direct and have had luck with both. |
Summer Care in the Cutting Garden
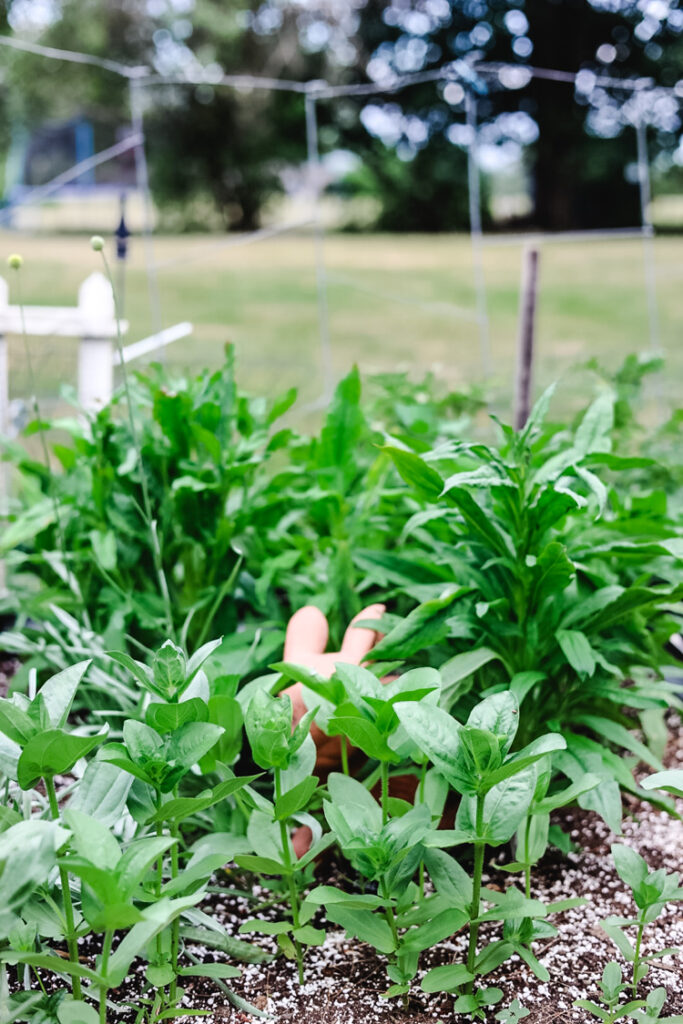
Once your seedlings are in the ground and the weather turns warm, the real fun begins. This is when those little plants explode into growth. A little attention now pays off with armloads of blooms later. My summer care routine boils down to three simple things: pinching for bushiness, staking for strength (when needed), and cutting constantly.

Strawflowers & Zinnias at the beginning of July A couple of weeks later, the flowers have tripled in size and are flowering
What You’ll Need For Summer Gardening:
- Your fingers (for pinching!)
- Garden twine and sturdy stakes (bamboo, metal – whatever you have)
- Sharp, clean snips or pruners
- A regular watering routine (morning is best)
- A bit of patience
1. Pinch For More Blooms (The Best Free Trick!)
This feels counterintuitive, but trust me, you have to pinch to get more. When plants like strawflowers, celosia, and amaranth are about 8-12 inches tall, use your fingernails (or snips) to snip off the very top few inches of the main stem, just above a set of leaves.
Why You’ll Love This: It signals the plant to stop growing tall and lanky and instead branch out from the sides. One stem becomes three, five, or even seven blooming stems. More branches mean way more flowers for you to cut and dry.
A Quick Pinching Guide:
- DO Pinch: Strawflowers, Celosia, & Amaranth
- DON’T Pinch: Gomphrena, Statice, Nigella, Bells of Ireland, Starflowers, & Sunflowers.
2. Stake Early, Before They Flop
There is nothing sadder than a perfect plume of celosia face-down in the mud after a summer storm! I’ve learned the hard way: stake before they need it.
My Simple Staking Method For a whole row or block of flowers (like my amaranth), I use the “corral” method. I push tall bamboo stakes at the corners of the bed and wrap twine around the perimeter about halfway up the plant’s height. It gently holds everyone upright, without distracting from the beauty of the flower bed. For individual, heavy-headed flowers like sunflowers, I tie them to a single, sturdy stake as they grow if they need it.
Thankfully, my garden is protected on most sides by our house and the woods behind us, so strong winds aren’t a typical challenge for me.
How To
Start a Cut Flower Garden
When & How to Harvest (Timing Matters!)
The biggest mistake most gardeners make is waiting too long to harvest. If you want those “vibrant, jewel-toned colors” I mentioned earlier, timing is everything. If a flower is fully open in the garden, it will likely fall apart or lose its shape once dried. The goal is to catch them at their peak color, but before they start forming seeds, which signals the plant to fade and die back.
Try to cut your flowers just after the morning dew dries. If you miss the morning window, dusk is your next best bet-but do a quick check for sleepy bees tucked into the blooms.
And here’s my biggest tip: cut the stems as long as you can. Long stems are much easier to hang for drying, and you can always snip them shorter when you’re ready to arrange.
The Golden Rules Of Harvesting
- Timing is Everything: Always cut in the late morning, after the dew has dried but before the midday heat. This ensures the stems have the least moisture, which helps prevent mold while drying.
- Check for Pollinators: If you harvest at dusk, always gently check inside blooms for resting bees or butterflies.
- Cut Long Stems: Always cut stems as long as your plant allows. Long stems are easier to bundle and hang, and you can always trim them shorter later for arrangements. It’s the one thing you can’t add back!
What You’ll Need For Harvesting
- Sharp, clean snips or pruners
- A basket or bucket
- Twine or rubber bands for bundling
- A dry, dark, and airy space for hanging (like a shed, garage, or spare closet)
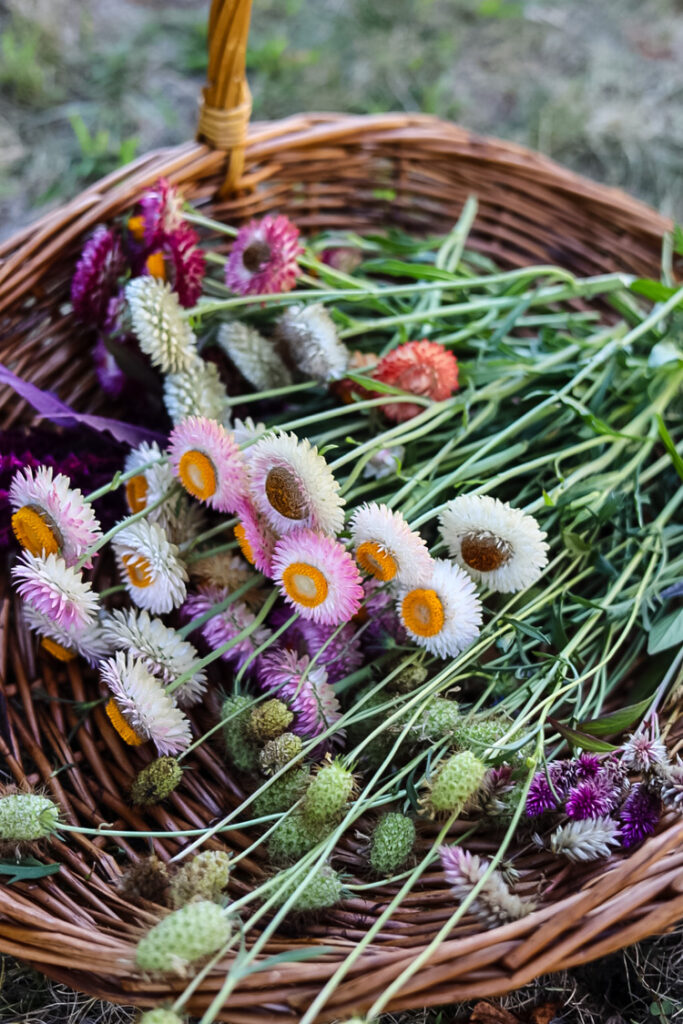
A Flower-by-Flower Harvest Guide:
Here’s exactly what I look for in each of the flower varieties.
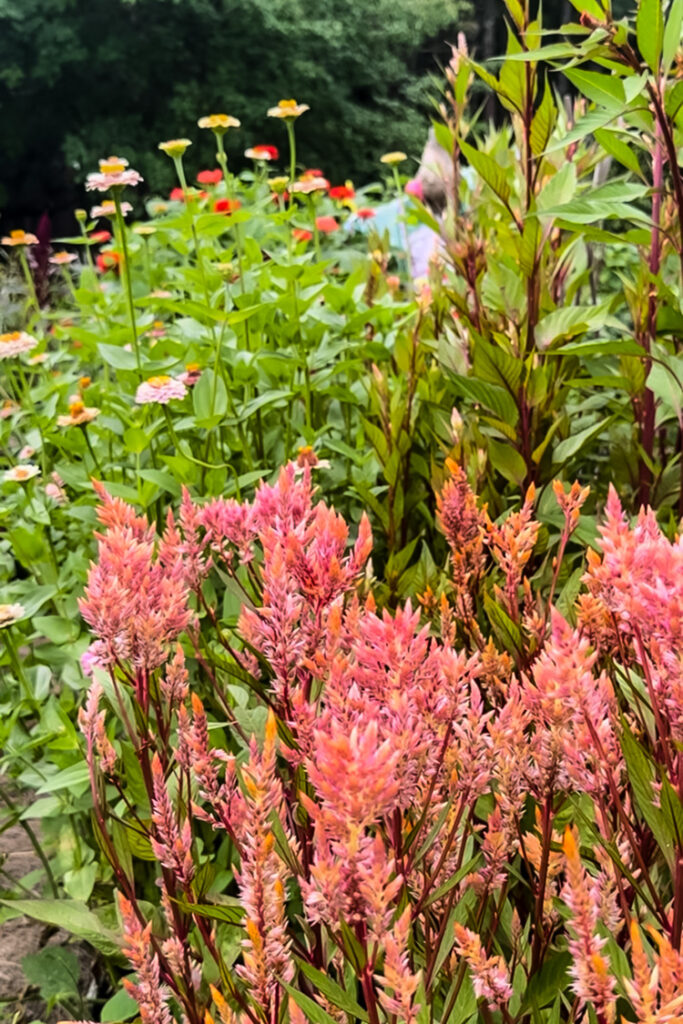
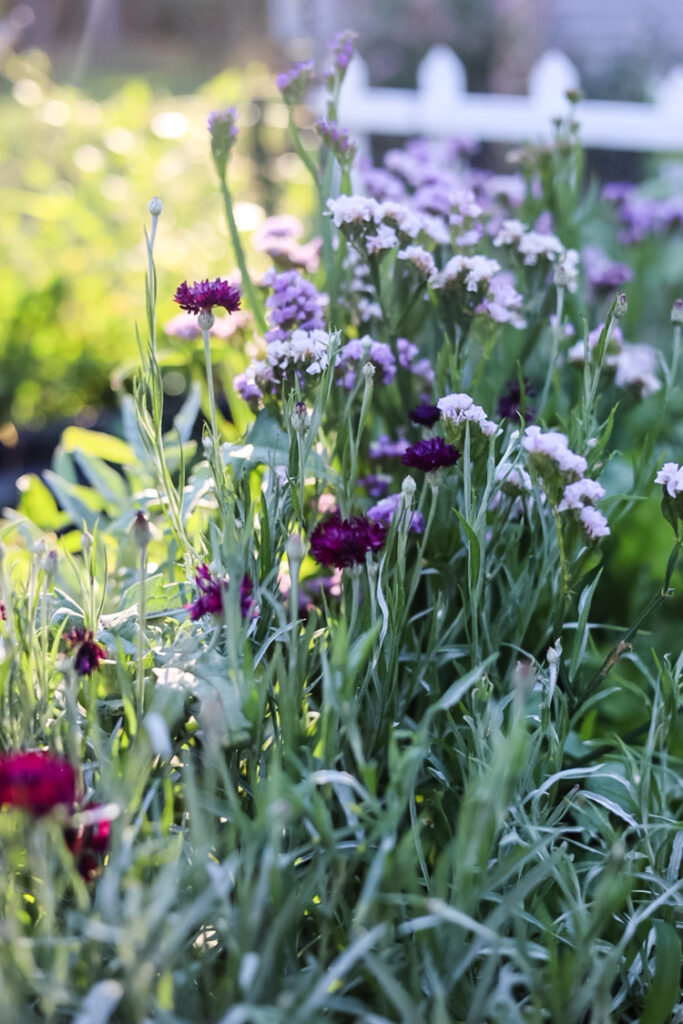
Strawflowers

Stawflower before opening ‘Bright Rose’ Strawflower 
‘King Sized Salmon’ Strawflower ‘Silvery Rose’ Strawflower

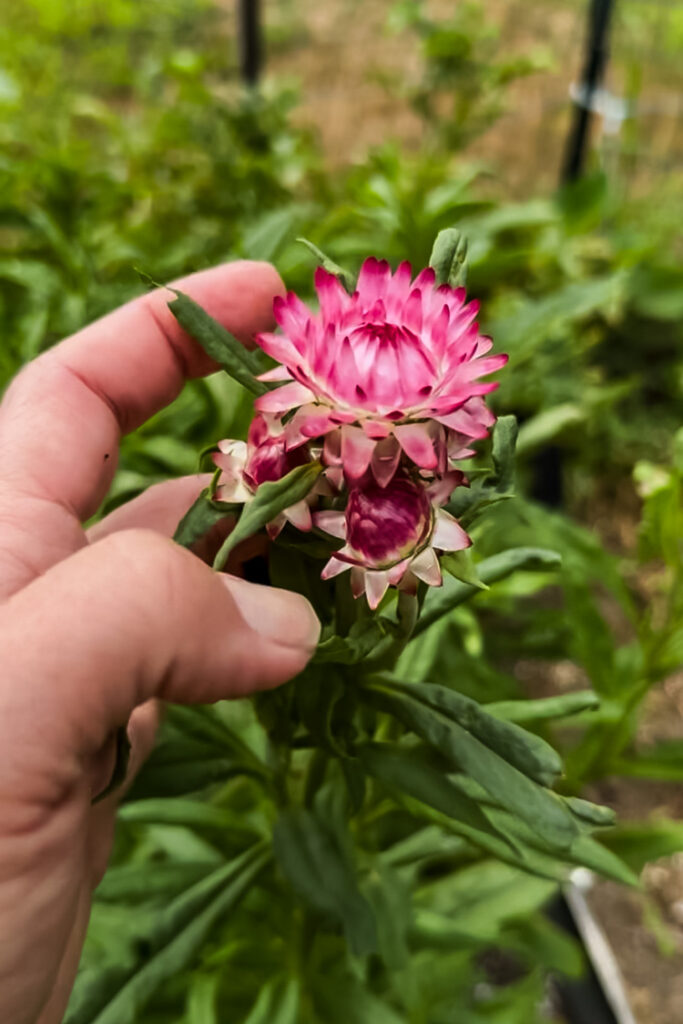
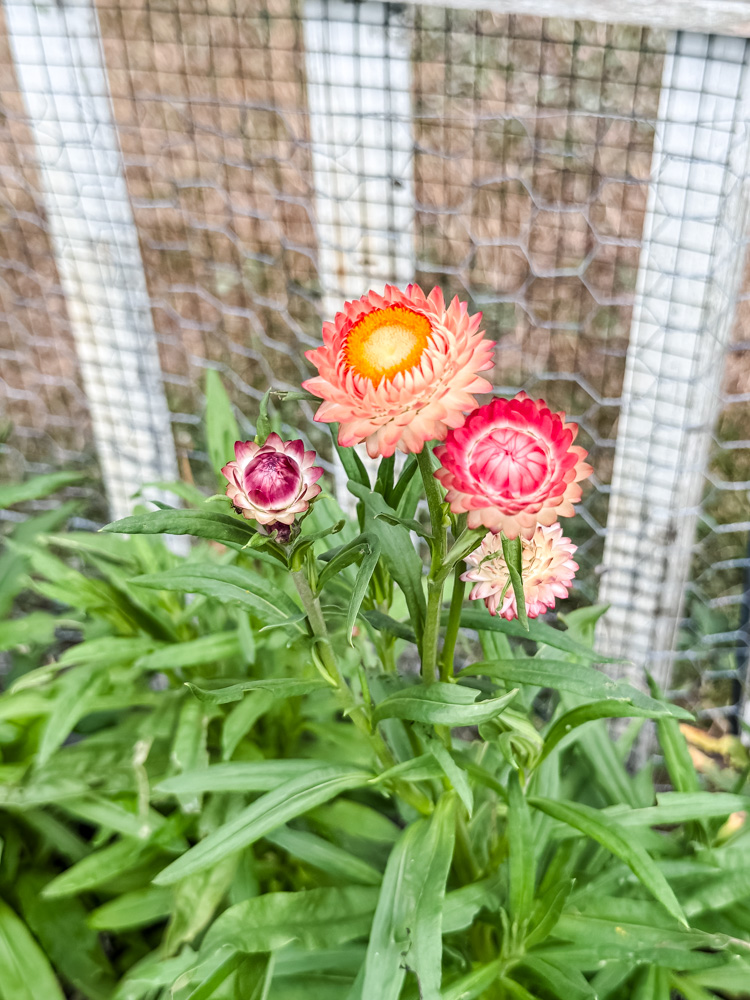
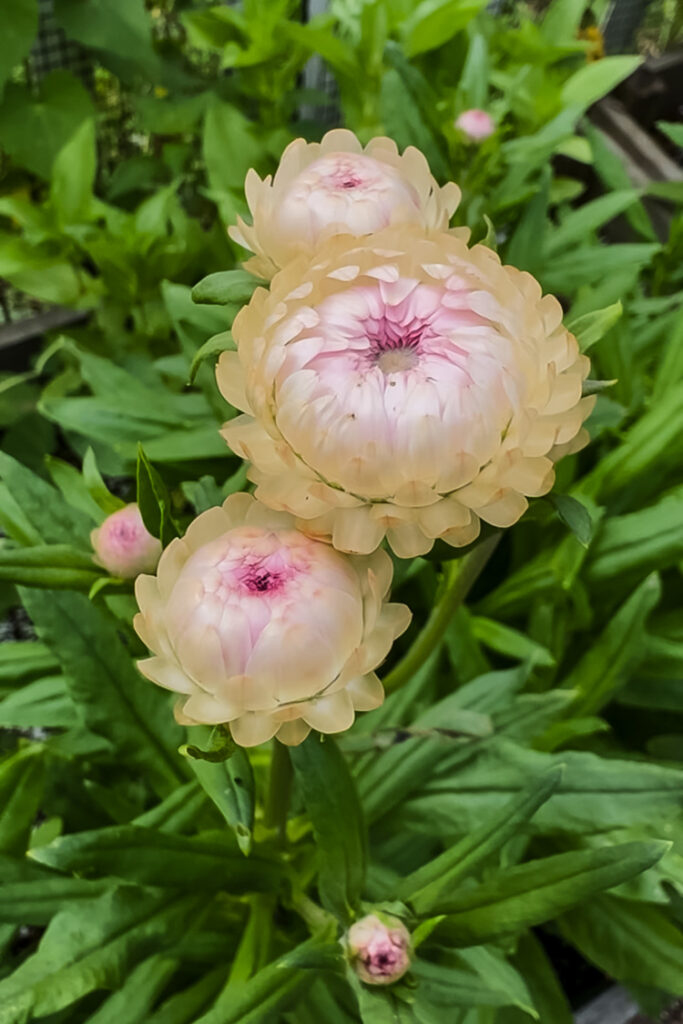
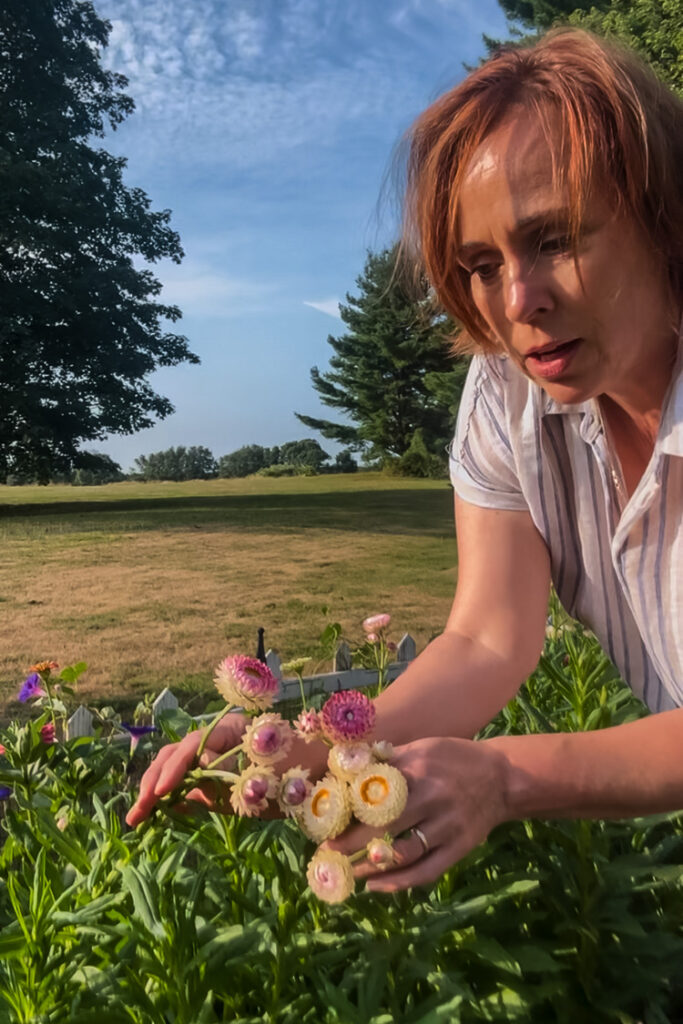
Strawflowers: Harvest when the blooms are just barely open. The center should still be tight. If you wait until they’re fully open, the center will release its pollen and the petals may shatter when dry.
Celosia
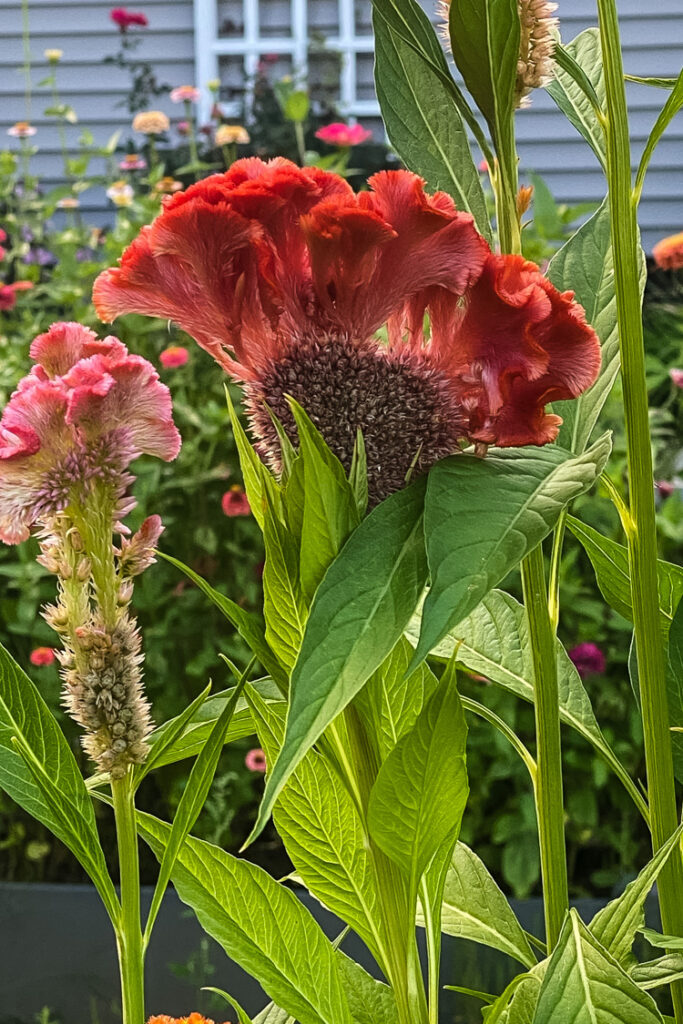

Cut when the plumes or cockscombs feel firm to the touch and the color is fully developed, but before the seeds at the bottom of the flower start to darken and drop.
Some of the varieties of celosia above were from Floret Farms, but they are sold out for the season. The purple celosia is ‘Asian Garden’ (Select Seeds)
Amaranth
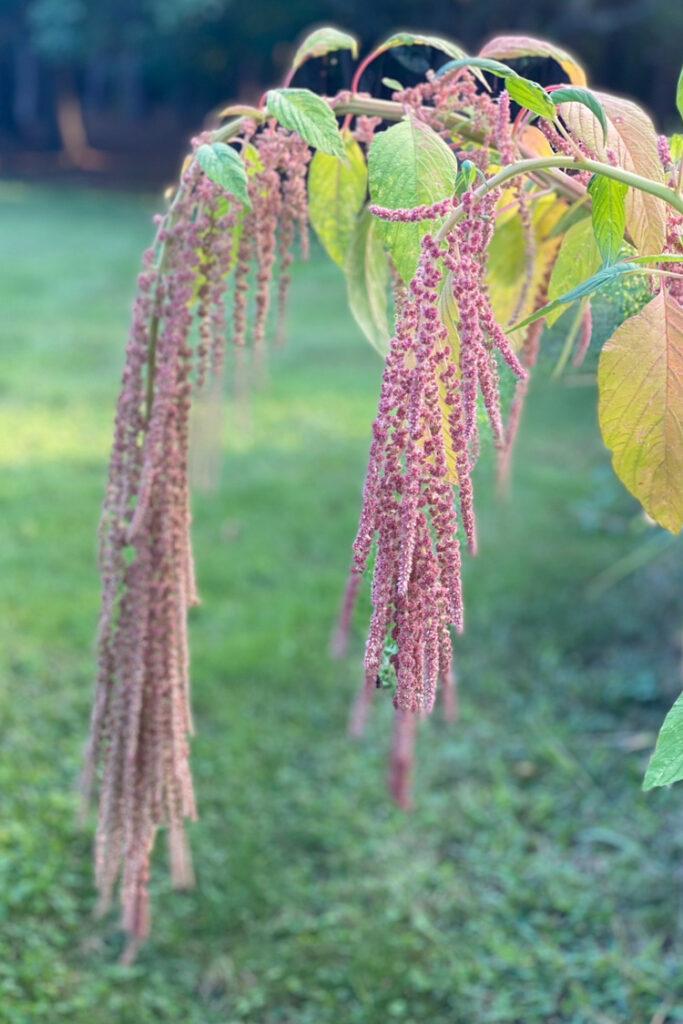
Amaranth: For hanging varieties like ‘Love-Lies-Bleeding,’ harvest when the tails are long and dramatic but still brightly colored. For upright plumes, cut when they are fully formed and before they start to feel papery.
Gomphrena
‘Strawberry Fields’ Gomphrena in back of bed
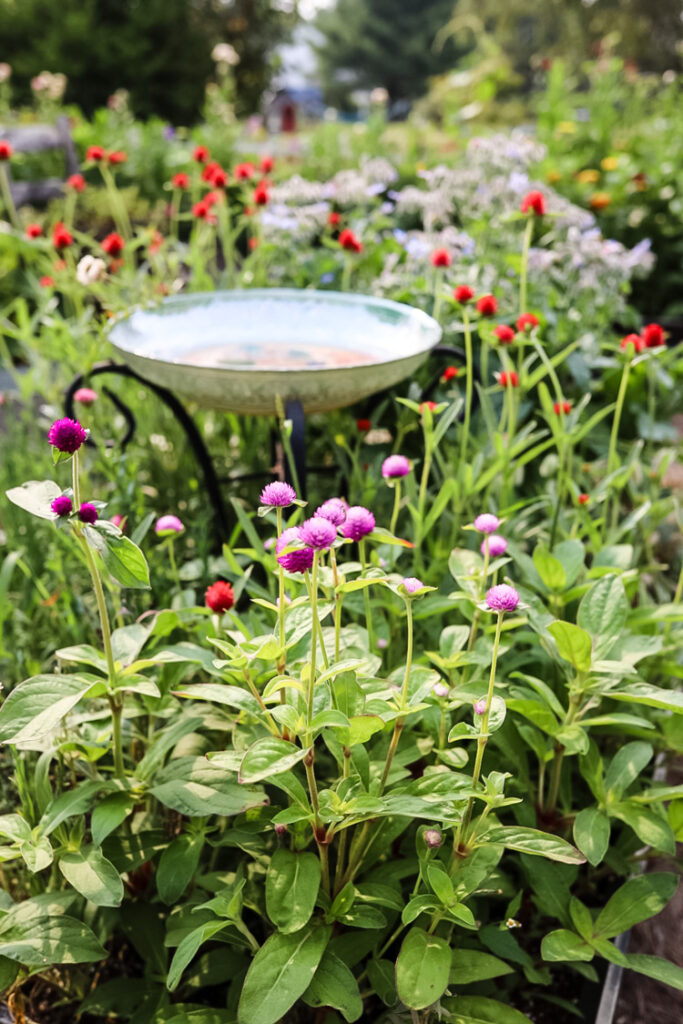
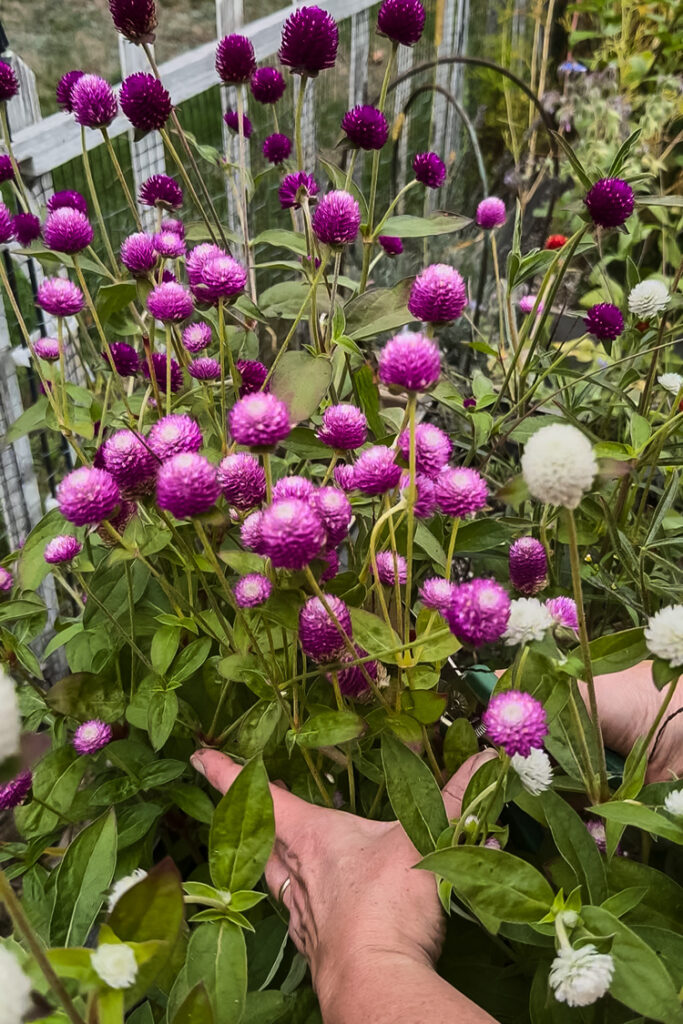
Gomphrena: Pick when the globe-like heads are fully colored and firm. They hold their shape and color perfectly.
Bells of Ireland
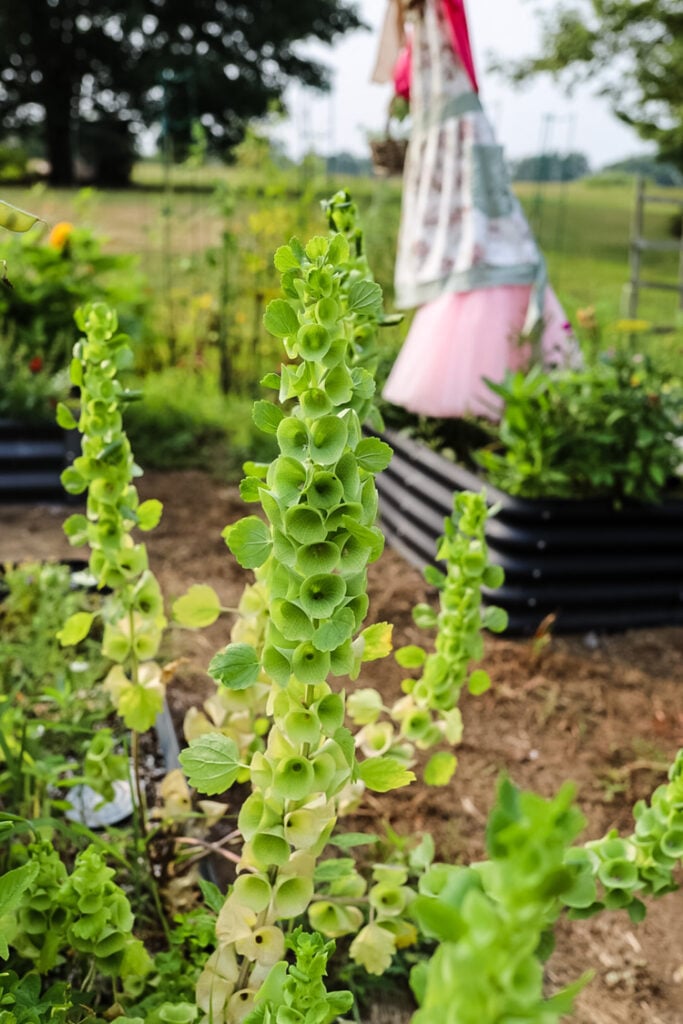

Bells of Ireland: Harvest when the green “bells” are vibrant and the tiny white flowers inside have just emerged or fallen. They will fade to a lovely cream.
I often see Bells of Ireland seeds at the home improvement stores/Walmart so you may not have to order online. I do order my seeds from Select Seeds.
Statice
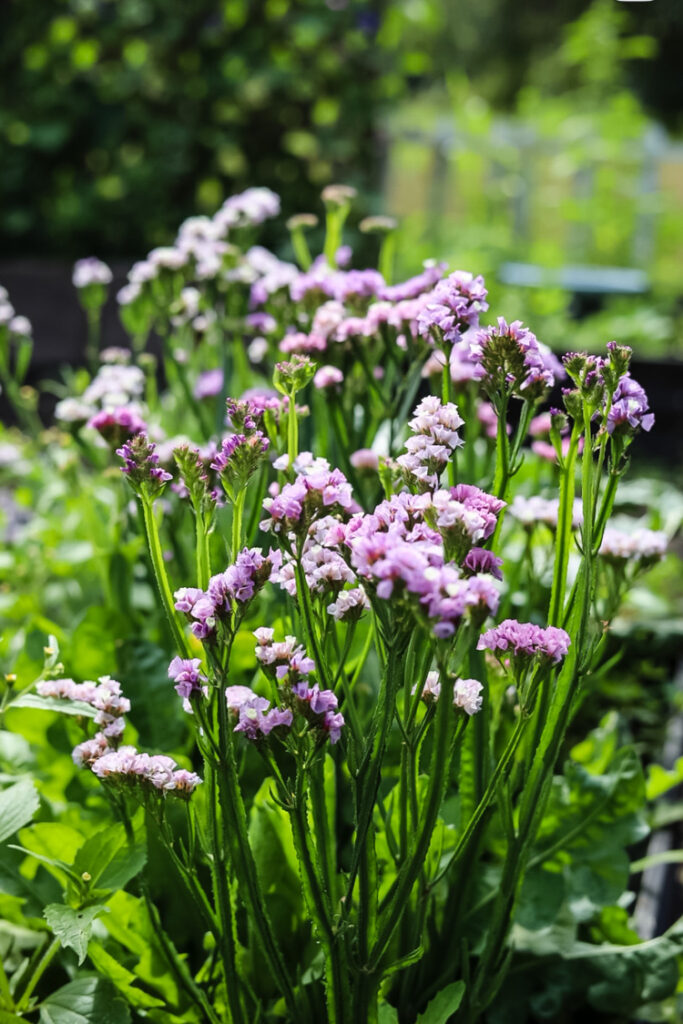
Statice: Cut when most of the tiny flowers in the cluster are open and brightly colored. Avoid cutting when only the papery calyces show.
Shown: ‘Pastel Shades’ Statice
Nigella
This is what I grow them for!
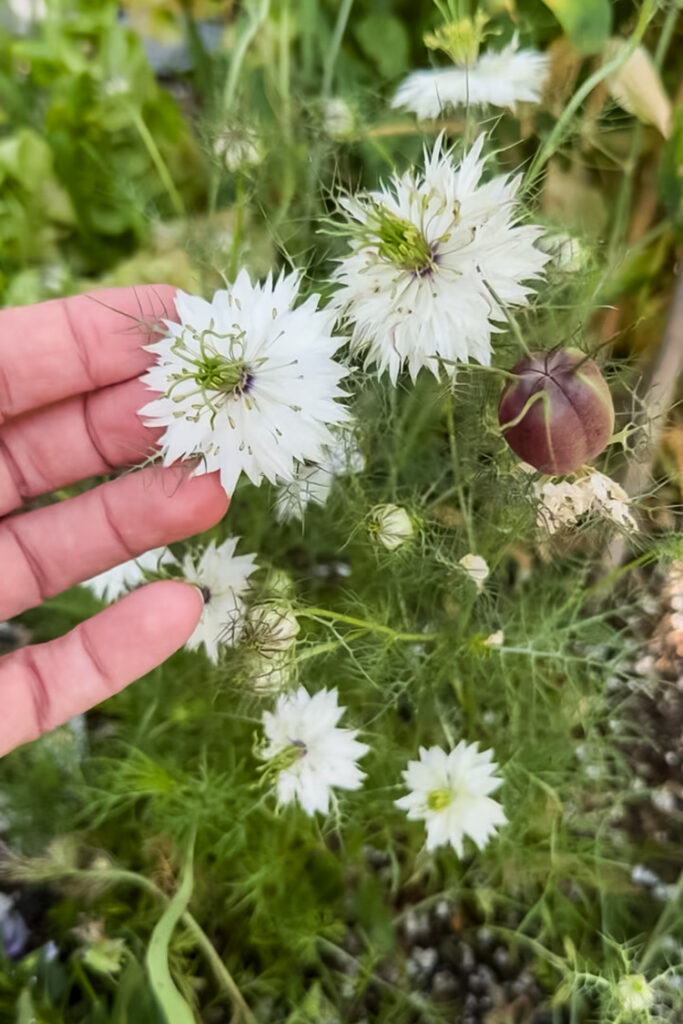
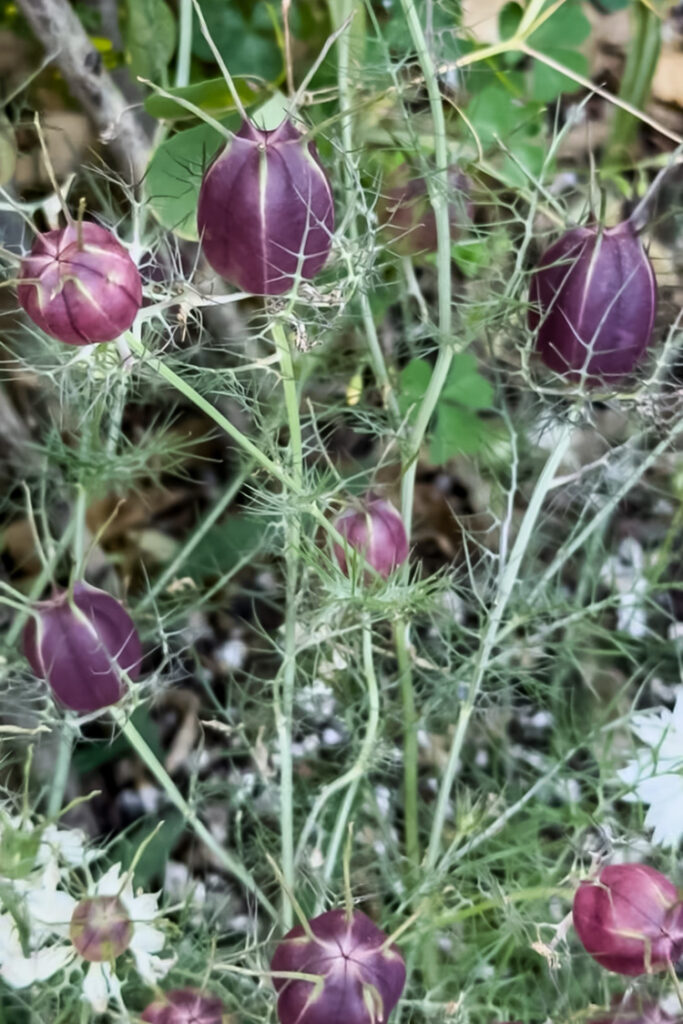
Nigella: Wait for the beautiful seed pods to fully form and turn a pale green, beige, purple, or striped brown. Let the delicate petals fall first-you’re harvesting the pod.
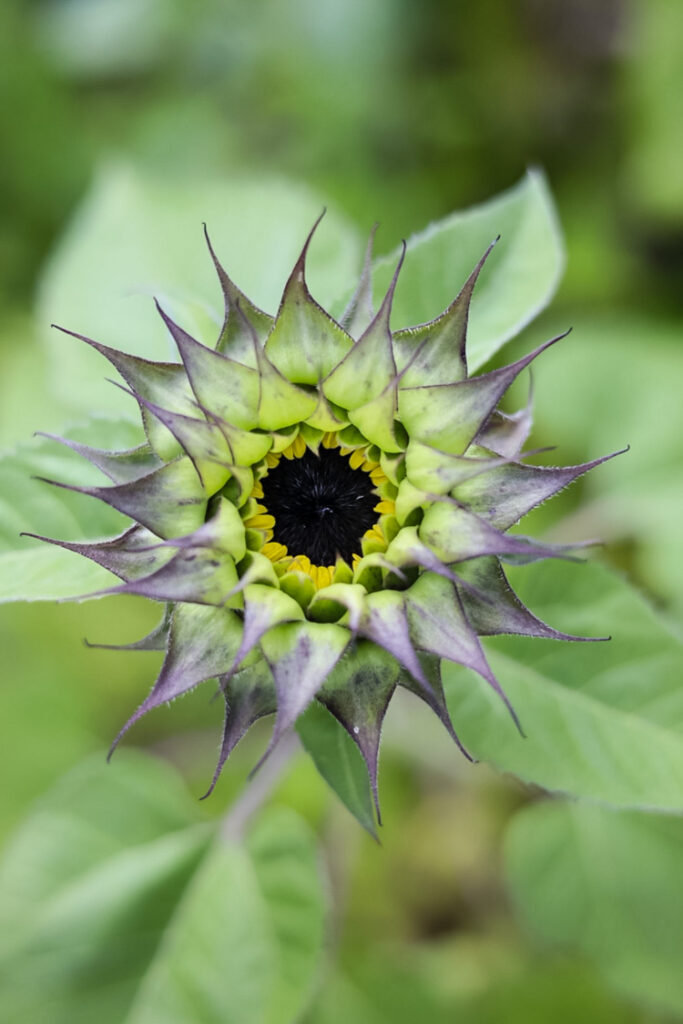
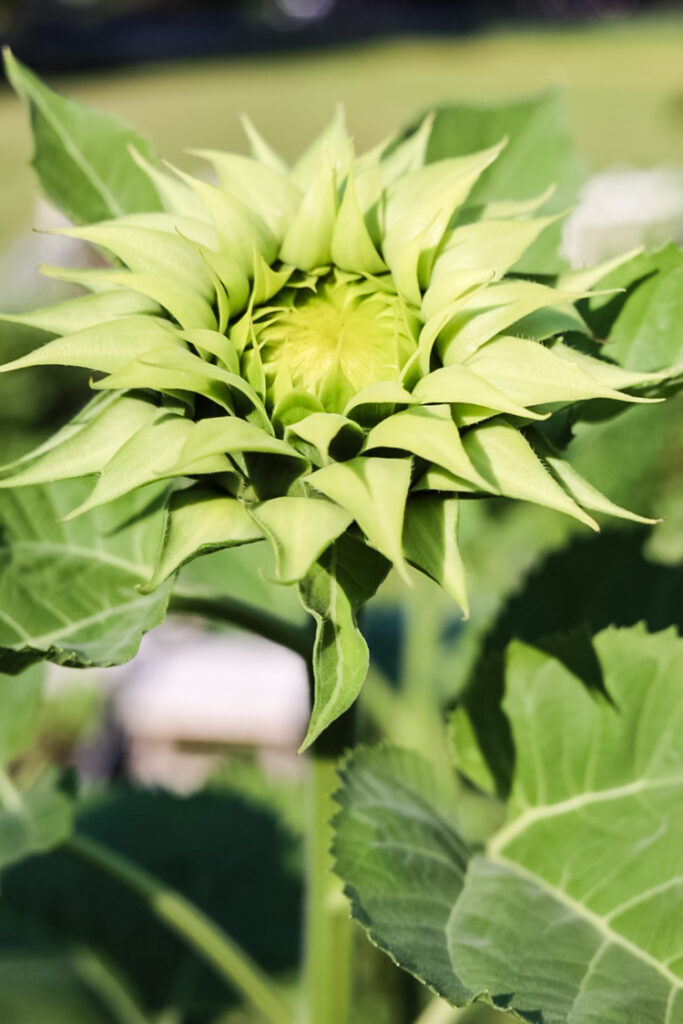
Sunflowers
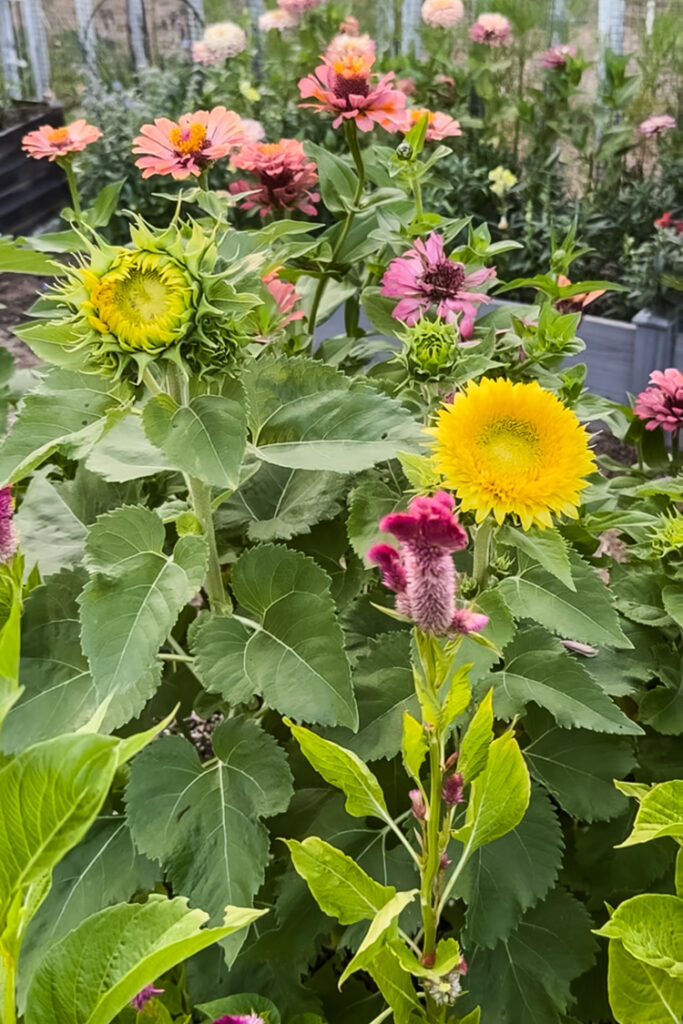
Small Sunflowers: One of my favorite flowers to grow! They always make your garden look cheerful!
- There is an interesting variety named ‘SunFill’ that I grow every season. They have the most interesting flowers that I love to add to wreaths, and I harvest them before the tiny petals open.
- Normally, you would harvest when the petals are fully open, but the center is still fresh-looking, not yet maturing into seeds. The back of the head should still be green, not yellowing.
- I succession seed with my single bloom sunflowers every 2 weeks in the Summer months for plenty of flowers to use in vases and drying.
Scabiosa ‘Starflower’

Scabiosa Stawflower: When the edges turn dark bronze, and the star-shaped centers are just beginning to turn black (they form a star shape).
My Low-Tech Drying Method: Easy Air Drying
You don’t need fancy equipment to dry your botanicals. The oldest method is still the best: air drying. It’s simple, effective, and preserves the natural shape and color of your blooms beautifully.
What You’ll Need For Drying
- Harvested flower bundles (from the previous step!)
- Rubber bands (this is key-they tighten as stems shrink)
- Twine, paperclips, or hangers
- A dark, dry, and well-ventilated space (think: a spare closet, garden shed, dry basement, or attic)
The Simple Steps For Air-Drying Flowers

- Strip the Foliage: Remove all leaves from the stems. Leaves hold moisture and can lead to mold; plus, they don’t dry attractively.
- Bundle: Gather 5-10 stems of the same flower type. Too large a bundle can trap moisture and cause mold. Secure them tightly with a rubber band (not twine;stems shrink as they dry, and twine will come loose).
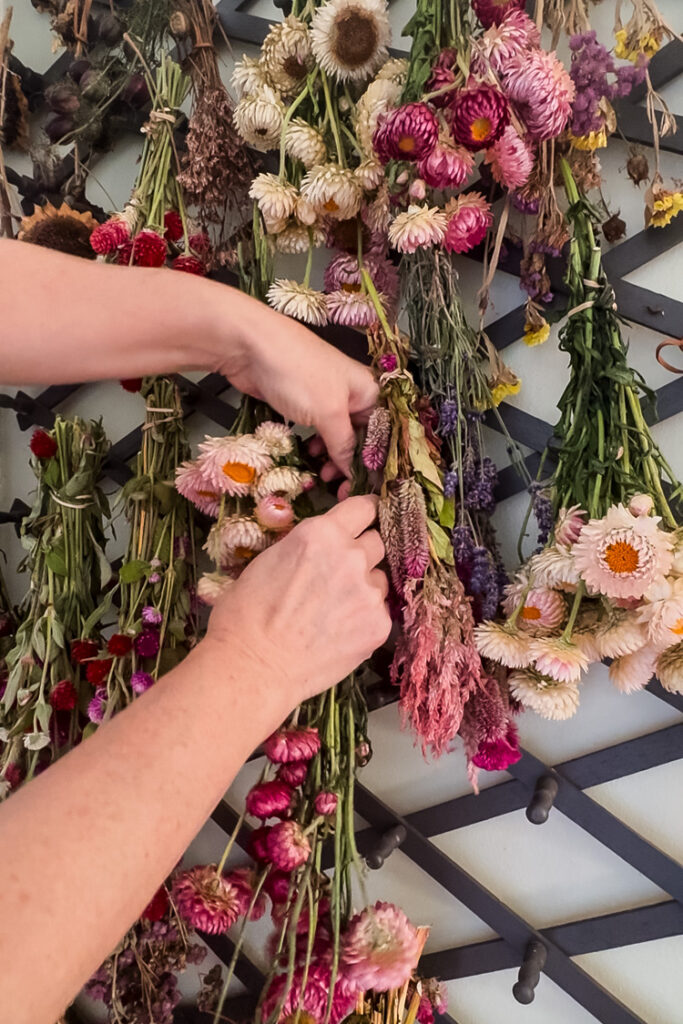
- Hang: Attach the bundles upside down to a rod, hook, hanger, or even a taut string. I use an accordion coat peg rack. Hanging them upside down helps the stems dry straight and keeps flower heads from drooping.
- Wait: Leave them completely alone for 1 to 3 weeks. The time depends on the thickness of the stems and your local humidity. They’re done when the stems snap crisply, and the flower heads feel completely papery.
- Store: Once fully dry, you can store them as-is in their bundles or gently place them in a cardboard box with some tissue paper to prevent dust. Keep them in that same dark, dry place until you’re ready to create.
Why This Works & My Biggest Tip
The magic formula is Dark + Dry + Airy. Keeping the flowers away from sunlight preserves color, dryness prevents mold, and good airflow ensures even drying.
My #1 Lesson Learned: Give your bundles plenty of space. Don’t cram them together like clothes in a closet. Good airflow between bundles is the single best way to prevent mildew, especially with dense flowers like celosia or statice.
A Note on Special Cases: For super-dense blooms like large zinnias or peonies, some people use silica gel for faster, more controlled drying. But for our list of everlasting flowers? Simple air drying works perfectly every time.
My Personal Drying Setup
I use a giant accordion-style peg coat rack that I found at a local antique shop, which I tuck into the hall between my kitchen and living room.
It’s away from direct sunlight and gets good airflow. This spot works perfectly for me because my basement is too damp in summer, and our garage gets too hot and sunny. The rack holds dozens of bundles and looks pretty while it works!
The Payoff: Bringing Your Everlasting Garden Indoors
This is the best part. After all the waiting, you finally get to play! Having a stash of homegrown dried flowers is like having a natural craft supply store right in your own home. Here are my favorite ways to use them, turning summer’s abundance into year-round cottage charm.
What You’ll Need For Projects
- Your beautifully dried flowers
- Florist’s wire (for wiring strawflowers)
- Hot glue gun and glue sticks
- Pruners or strong scissors
- A wreath base, frame, vase, or other foundation.
Growing your own flowers for drying is the ultimate satisfying loop: from seed, to garden beauty, to a tangible piece of decor that carries the feeling of summer through every season. I use my dried flowers year-round, blending them into seasonal wreaths, holiday centerpieces, and everyday arrangements. For specific project inspiration, you can always browse my full collection of Floral & Botanical Projects.
My Go-To Dried Flower Ideas To Try
Long Lasting Bouquets

The easiest place to start. Arrange a mixed bundle in a favorite vase. No water needed! I love mixing textures: the soft plumes of celosia with the round pops of gomphrena and the architectural bells. Or just fill a vase with a single kind of flower as I did here!
Colorful Front Door Wreath
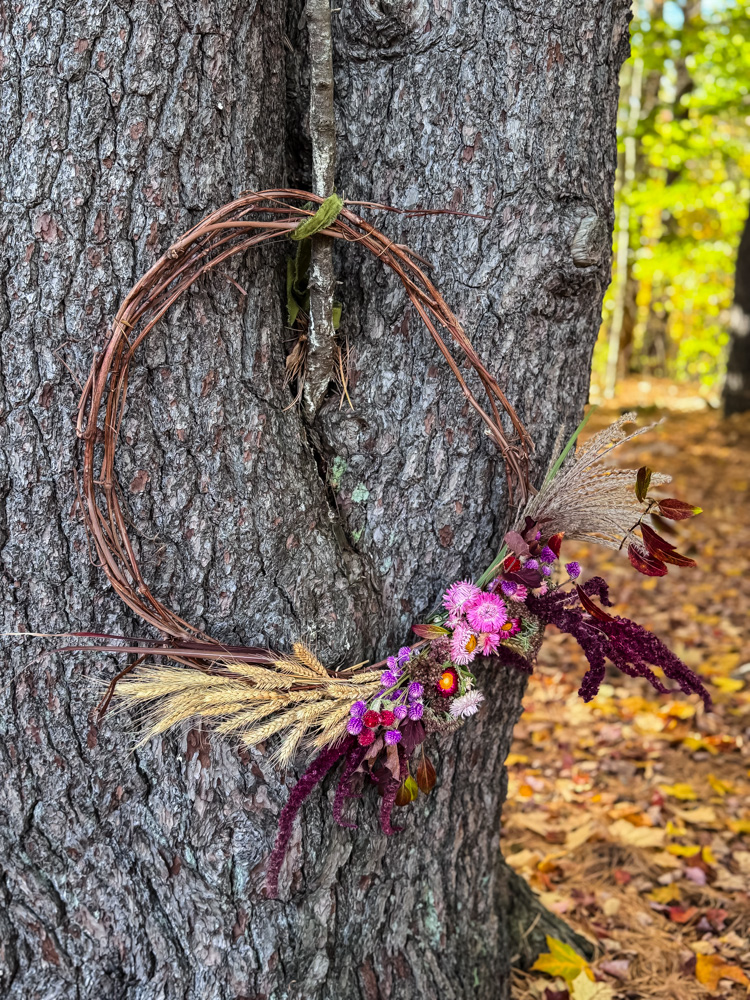


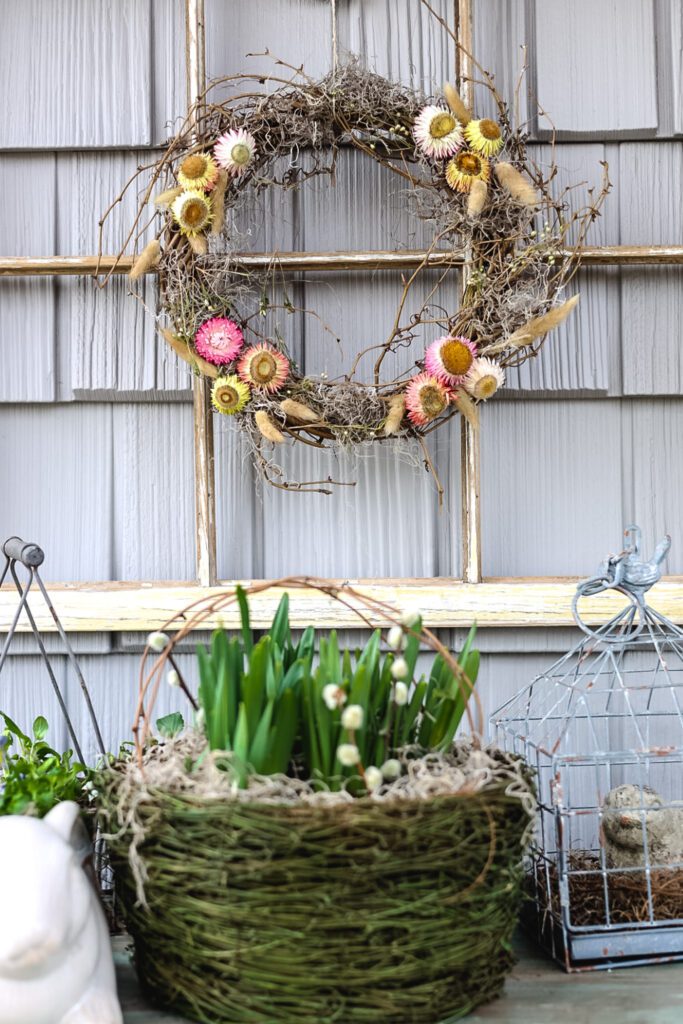


This is my signature. I use a simple grapevine or even a straw wreath base and either tuck in or hot-glue clusters of flowers. Sometimes when crafting a wreath, I use flowers cut directly from the garden and let them dry in place on the wreath.
You can either do a minimalist wreath with just a few dried blooms or go maximalist and fill up the entire wreath! The key is to mix colors, shapes & textures for depth.
Wreaths Seen Above:
Cozy Embellishments
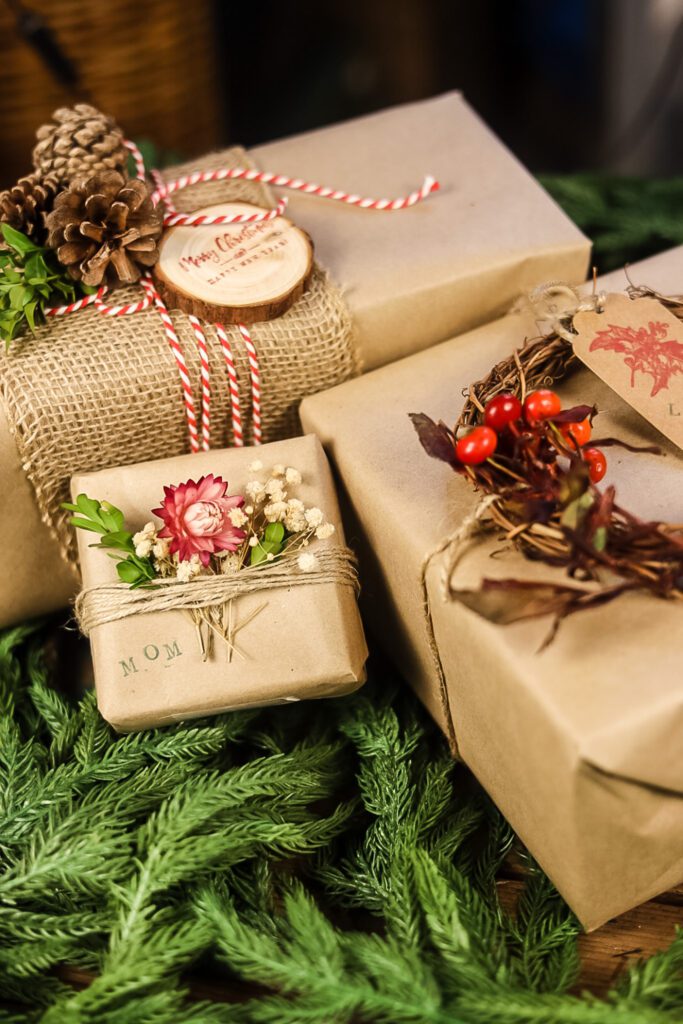
Get creative! I tingle a few small blooms onto gift packages, glue them to plain journals, or wire them onto holiday ornaments for a personal touch. A small posy tied with twine makes the sweetest bookmark.
Witch Brooms
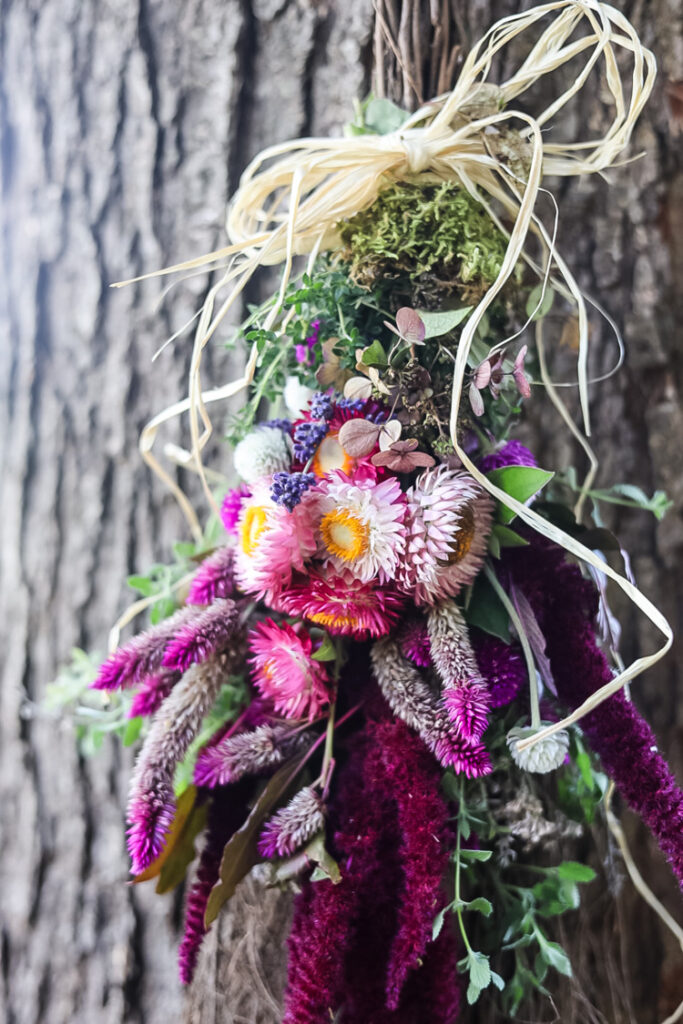

One project that I have made for the past two years is a fun decorative witch broom. Once using a store-bought cinnamon broom, and one time I crafted the broom from a stick and greenery.
Botanical Ornaments

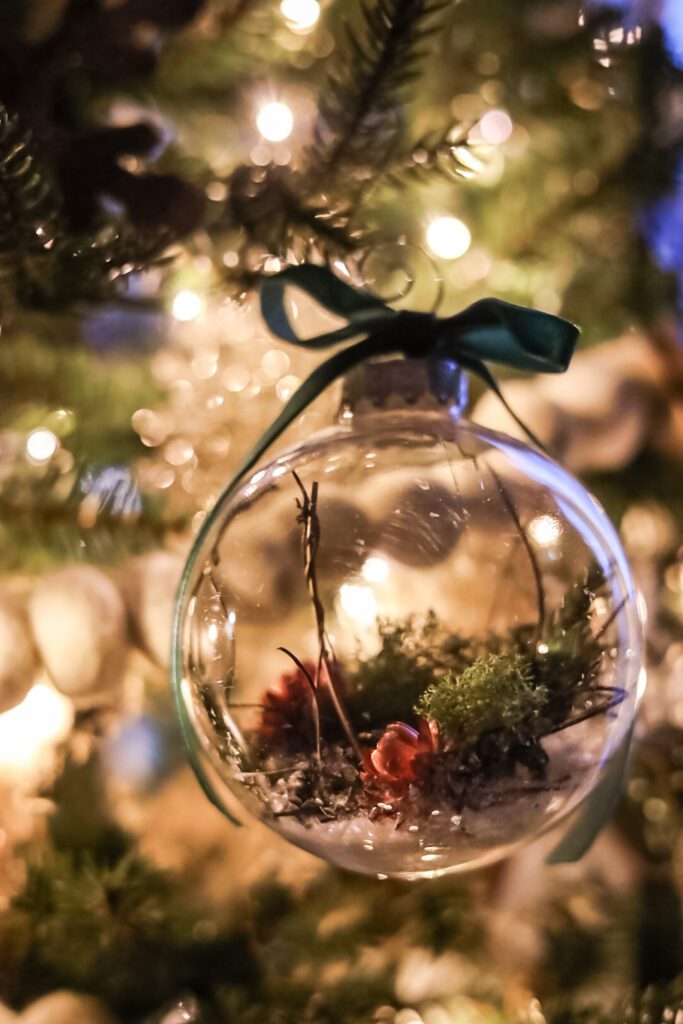
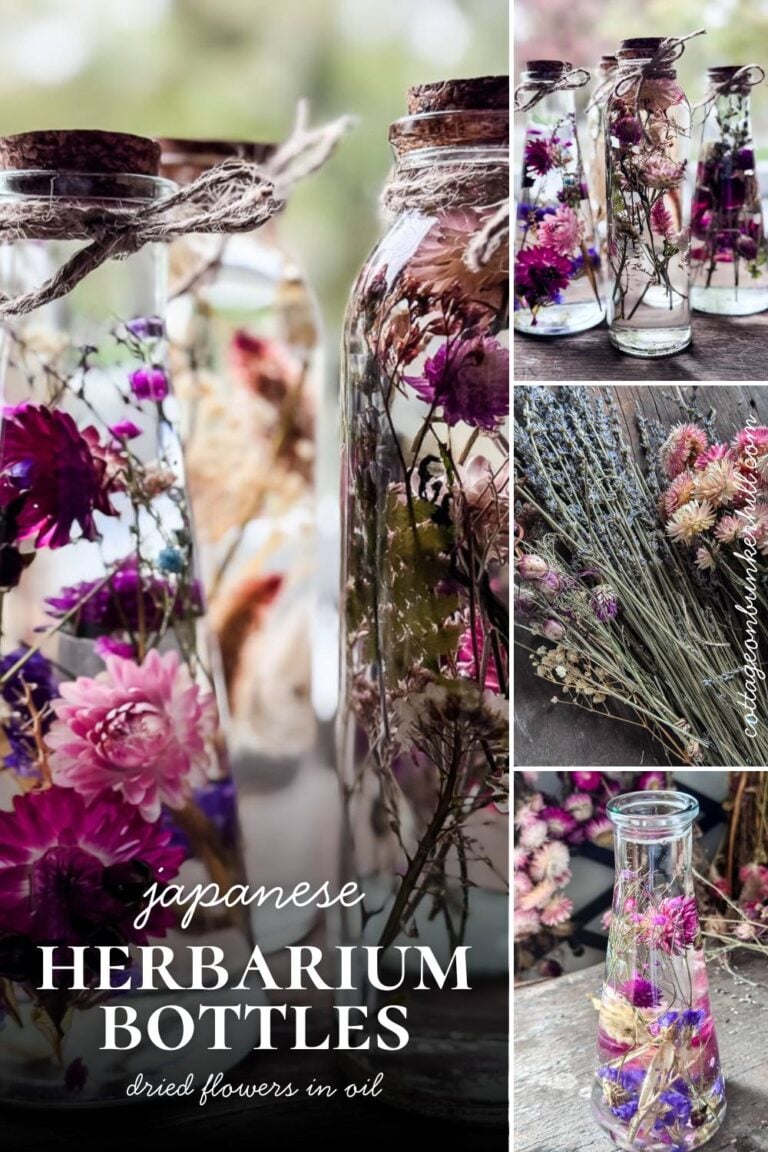
Don’t forget about Christmas! These simple glass botanical ornaments bring a natural touch to your tree, and it’s nice to remember your Summer garden.
Ready…
To make something beautiful? This dried flower harvest is just the beginning. I use my homegrown blooms in projects all year long. For step-by-step tutorials visit my Floral & Botanical Projects gallery for endless inspiration.
Your Everlasting Garden Awaits
Looking back on that first patch of strawflowers five years ago, I had no idea it would blossom into this: a garden planned not just for summer vases, but for year-round creating. That’s the true magic of growing flowers for drying: it doubles the joy. First, in the vibrant, buzzing life of the summer garden. Then, in the quiet, satisfying craft of turning those blooms into a piece of your home that lasts.
This process, from ordering seeds in winter’s quiet to pinching seedlings in spring, to harvesting on a golden summer morning, and finally arranging them on a cozy fall day, has become one of the deepest rhythms of my life here at the cottage. It connects the seasons in the most tangible way.
I hope this guide has shown you that it’s not only possible but wonderfully simple to grow your own natural decor. Start with a few of these dependable flowers. Follow my methods, and before you know it, you’ll have your own precious stash to tuck into wreaths, frame as art, or simply admire in a vase on the mantel. Remember, every seed holds two possibilities: a fleeting moment of beauty, and a lasting one. Why not do both?
xo, Jennifer

Love projects like this? Don’t miss out! Join my newsletter family for more cozy, budget-friendly DIY ideas delivered right to your inbox. You’ll get exclusive tips, early access to tutorials, and all the inspiration you need to make your home feel handmade and heartfelt.