
Give your basic cinnamon broom a gorgeous, garden-fresh makeover in just 20 minutes! This easy DIY uses seasonal clippings for a custom fall decoration full of cozy cottage charm.
There’s something so wonderfully simple and nostalgic about a classic cinnamon broom. That warm, spicy scent instantly makes a house feel like a fall-ready home! But as much as I love them, I always find myself wanting to add a little extra charm: a touch of the garden, a pop of personal style.
So this year, I looked at the beautiful, fading blooms in my late-summer beds and had a thought: what if I combined them? The result is this incredibly easy 20-minute makeover that transforms a humble store-bought broom into a stunning, one-of-a-kind fall decoration.
If you have a cinnamon broom, a few garden clippings (or a small bouquet!), and one simple supply, you can create a beautiful piece of decor that’s bursting with texture, color, and that unforgettable autumnal aroma. Let me show you how!
The 20-Minute Cinnamon Broom Makeover: A Garden-Fresh Fall Project

Why You’ll Love This Project
This post may contain affiliate links, which means we receive a small commission if you purchase through our links. See our disclaimer page for more information.
Gathering Your Materials:
- The Base: One cinnamon broom (found at Trader Joe’s, grocery stores, or craft stores).
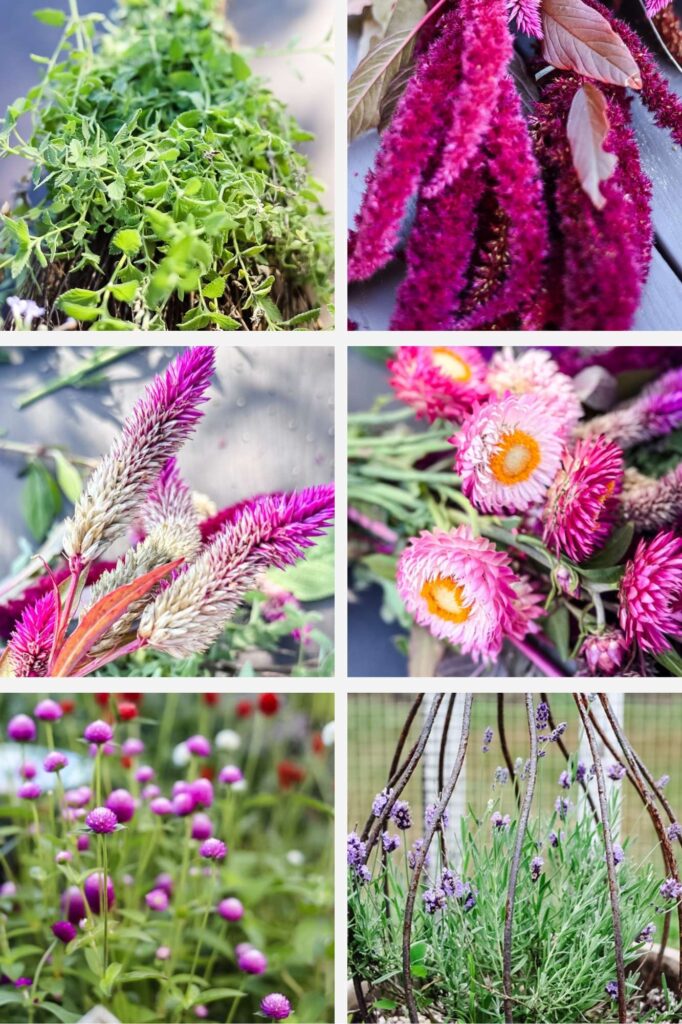
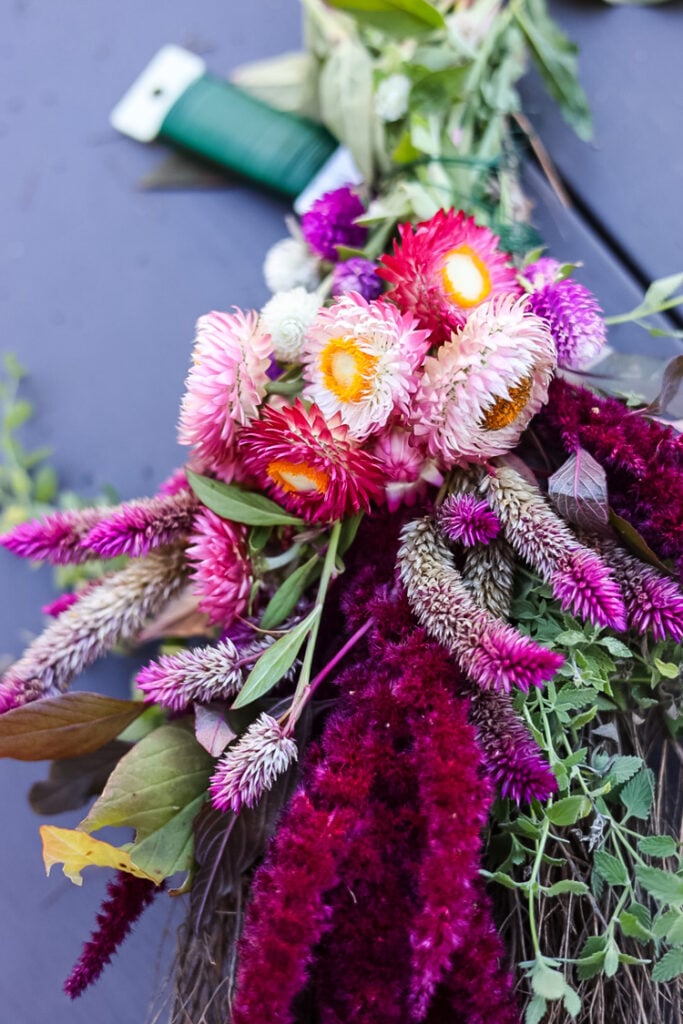
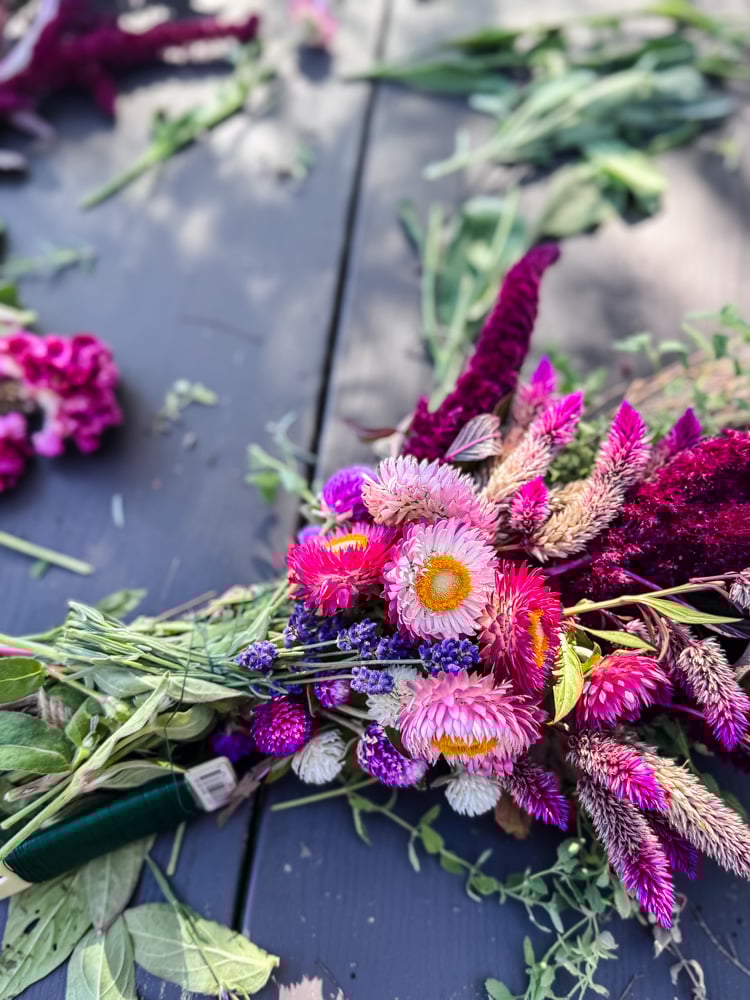
- The Florals: A variety of textures and lengths. I used:
- Greenery: Catmint
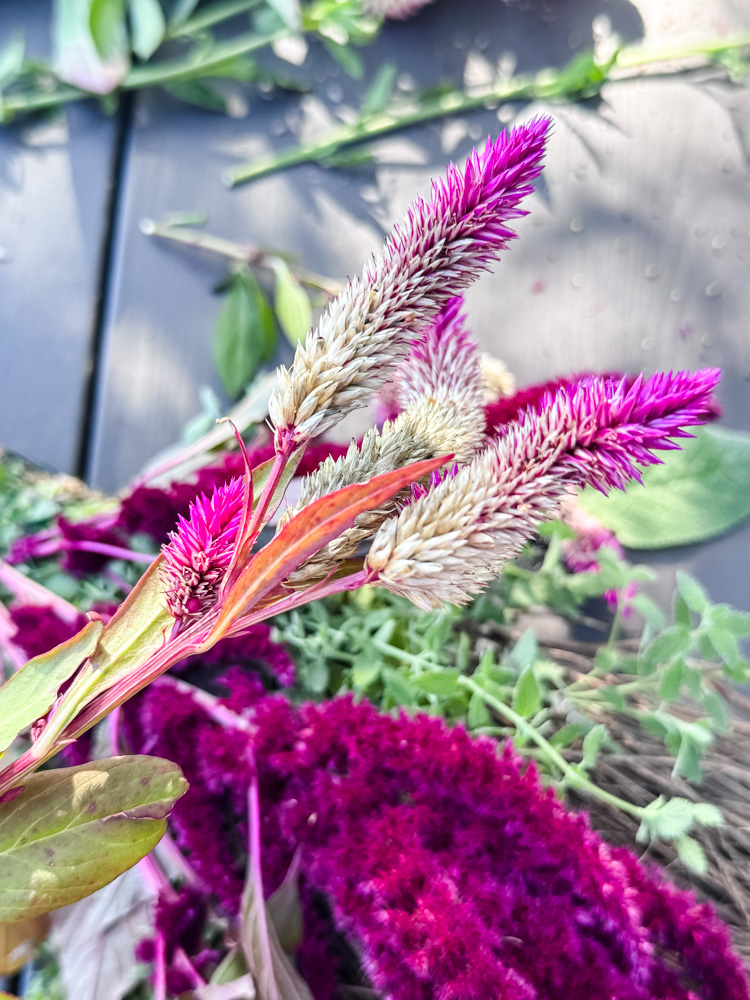
- Statement Blooms: Red Amaranth, Fuchsia Celosia, Bright Pink Strawflowers
- Filler Flowers: White & Purple Gomphrena, Lavender
- Accents: A small clump of purple hydrangea blooms, Thyme
- The Supplies: A paddle of floral wire and a pair of scissors.
- The Finishing Touch: Raffia or a ribbon of your choice.
Other Wonderful Options:
- For a Traditional Fall Look: Yarrow, Goldenrod, Sedum ‘Autumn Joy’, small sunflowers, rose hips, and sprigs of rosemary.
- For an Herbal & Fragrant Broom: Sage, Rosemary, Lavender, Thyme, and Oregano. It will smell incredible!
- Using Dried Flowers: Dried lavender, statice, baby’s breath, or eucalyptus work perfectly and will last for years.
- Using Artificial Flowers: Don’t hesitate to raid your craft stash! High-quality artificial florals are a great way to get the look with zero maintenance.
The key is to mix a variety of textures—fluffy, spiky, feathery, and round—to create a full and organic look.
Shop drued flowers

The Simple Step-by-Step Process
Ready to create your own? This tutorial is wonderfully simple, no special skills needed! The best part is how easy it is to customize; just use your favorite colors and textures to match your unique Fall style.
Prepare Your Clippings:

Gather your floral and greenery selections. Trim their stems to a workable length (around 6-8 inches is great).
I took my clippers and walked around my garden clipping flowers that I grow intentionally to use in their dried form for my projects. They will naturally dry on the broom and hold their form.
Create a Greenery Base:

Start by gathering a few sprigs of your main greenery (like the catmint). Lay them against the broom’s bristles, just below the tied top, to create a full, green foundation. Wrap your floral wire around the stems and the broom 2-3 times to secure them in place. Don’t cut the wire yet!
Add Your Tallest Flowers:
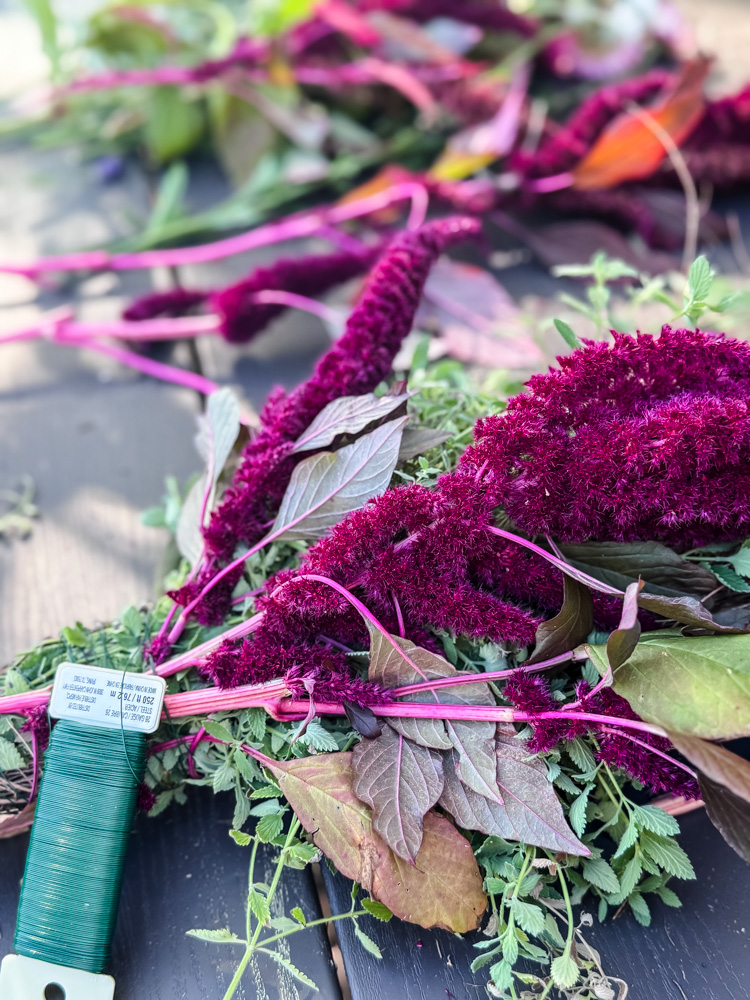
Now, take your longest, most dramatic stems (like the amaranth). Tuck them into the greenery base, arranging them to create your desired height and shape. Wrap the floral wire around these new stems to lock them in.
Layer in Mid-Size Blooms
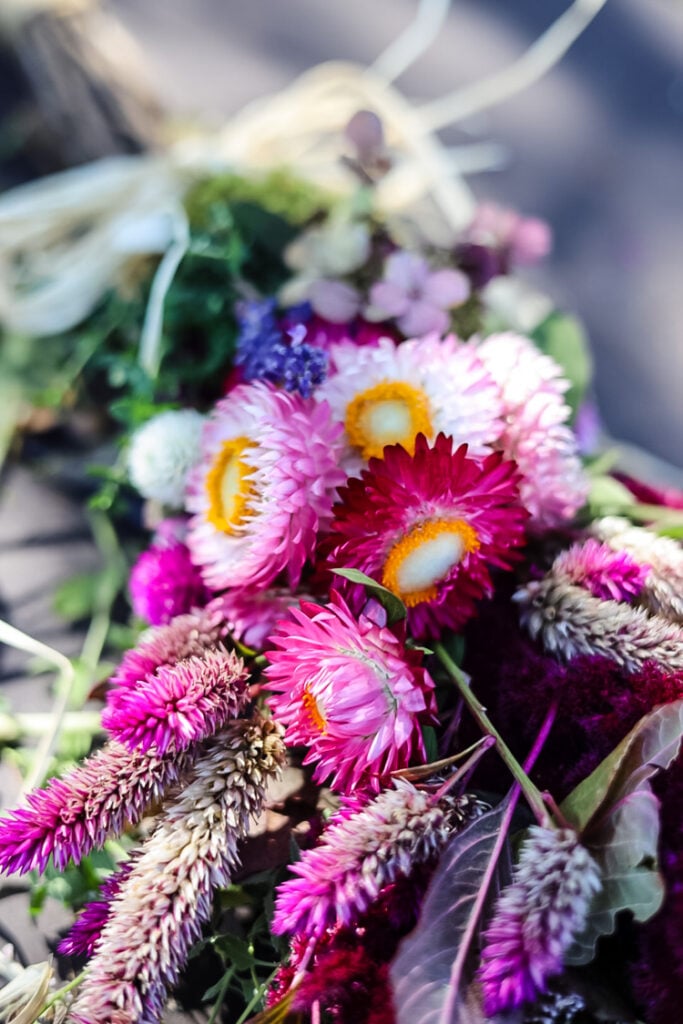
Next, add your medium-sized flowers (like the pink celosia and strawflowers). Place them around the broom, filling in the gaps and creating volume. Wrap the wire again to secure this layer.
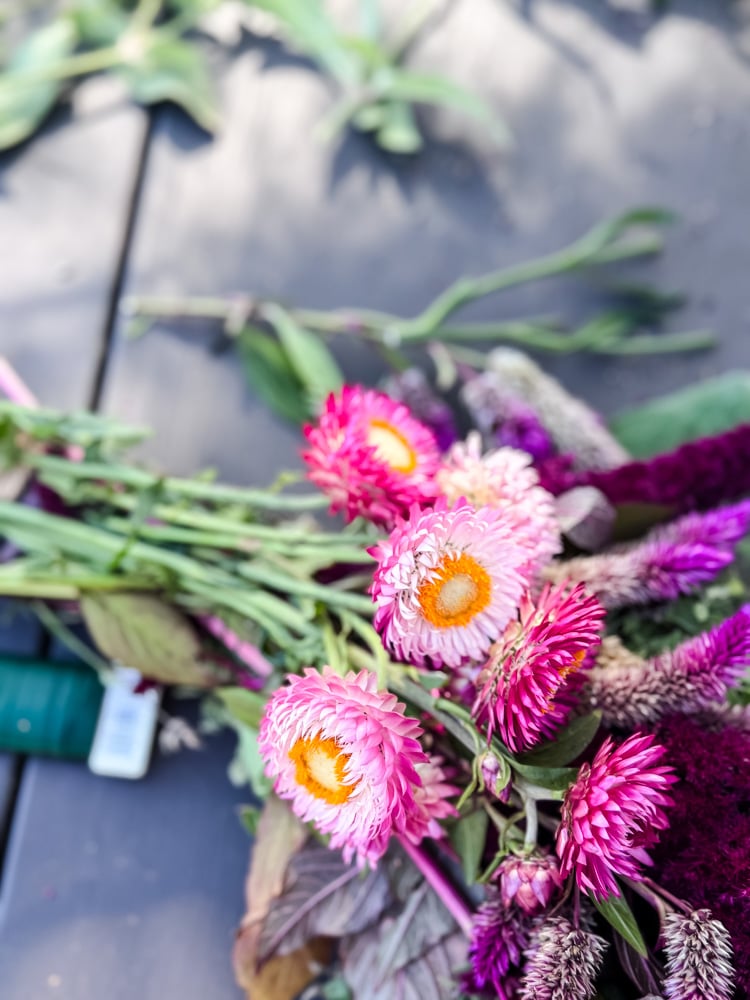
Flower Varieties Seen Here:
Fill with Smaller Textures
Now, tuck in your smaller blooms and fillers (like gomphrena and lavender). These add delicate texture and color. Wrap the wire to hold them tight.
As you are filling in the cinnamon broom with flowers, occasionally lean it up to see if it looks full from all angles.
Add Final Accents:

Finish by adding delicate sprigs (like thyme) for a fresh pop of green, and a final, special bloom (like the small hydrangea) for a focal point. Do one last wrap with the floral wire, and pull it tight.
Trim off any stems that are unruly or too long.
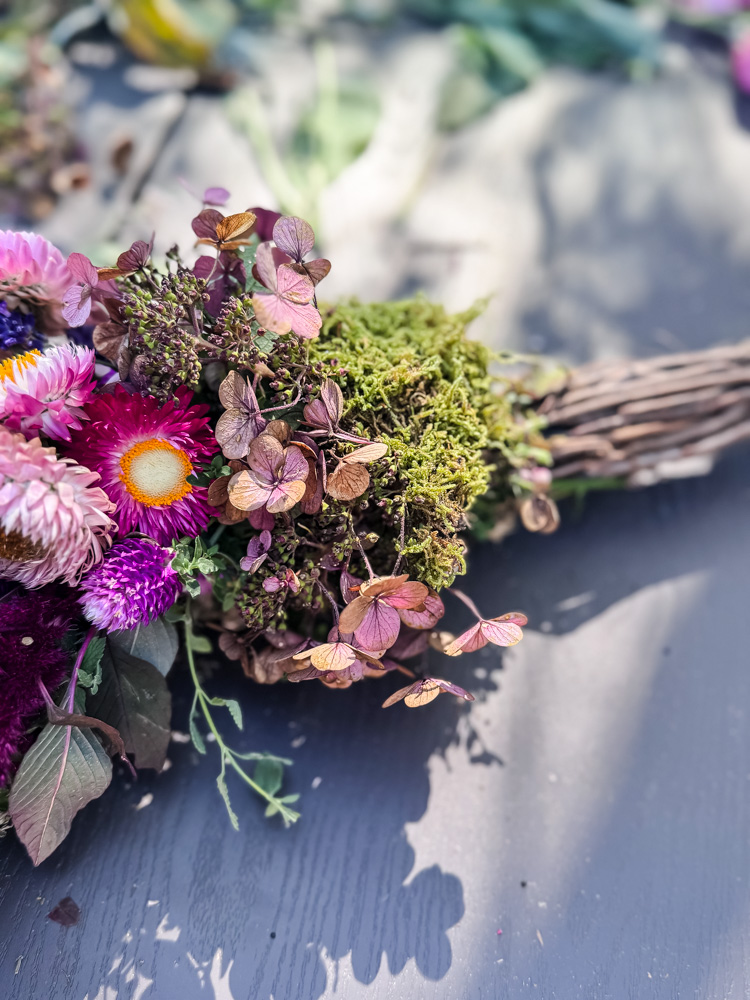
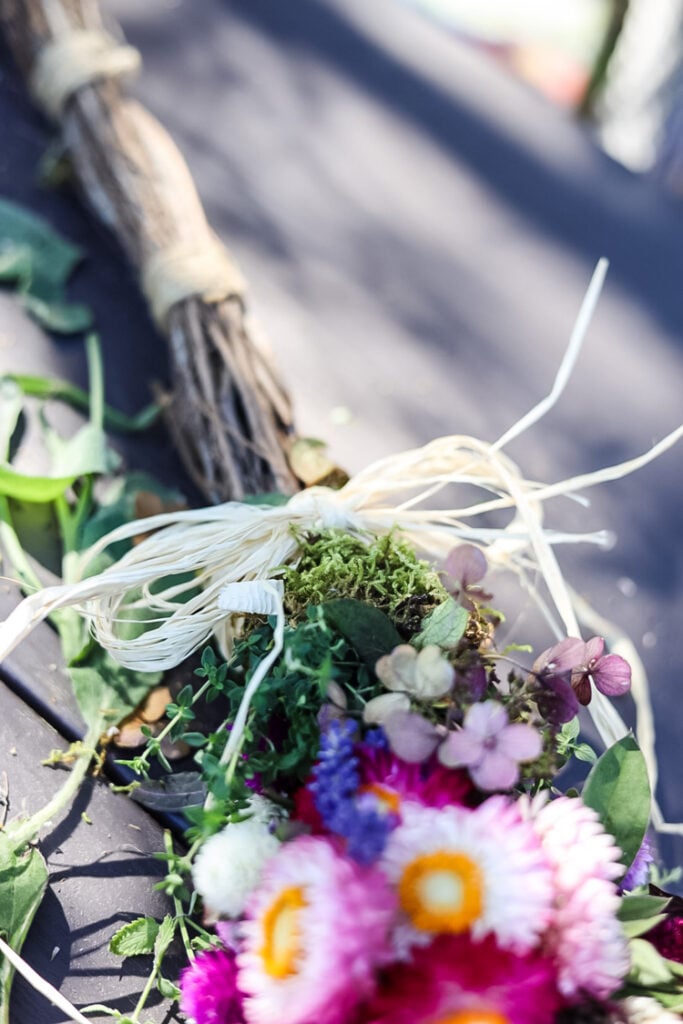
I added a small clump of moss at the top of the thyme to hide the messy floral wire wrapped around the neck of the broom. This is completely optional; I had some on hand. Cut the wire and tuck the end in securely.
The Finishing Touch:

Tie a beautiful bow with raffia or your chosen ribbon over the spot where all the floral wires are wrapped. This conceals the mechanics and adds that perfect cottage-style finish!
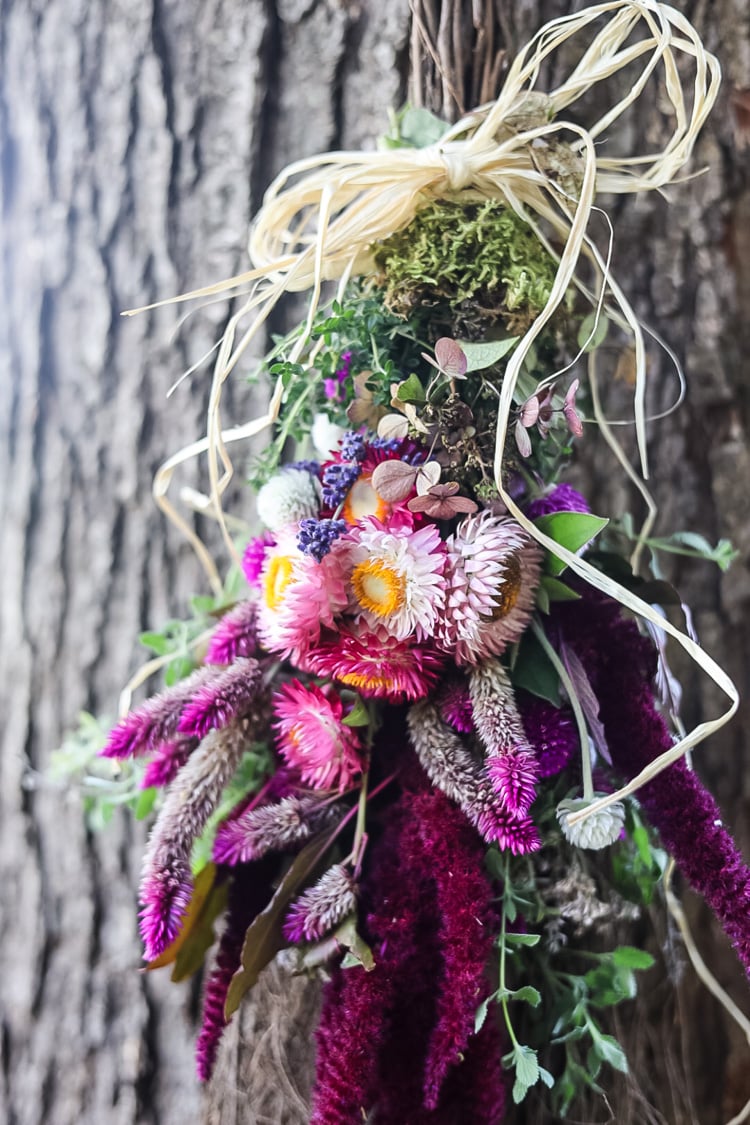
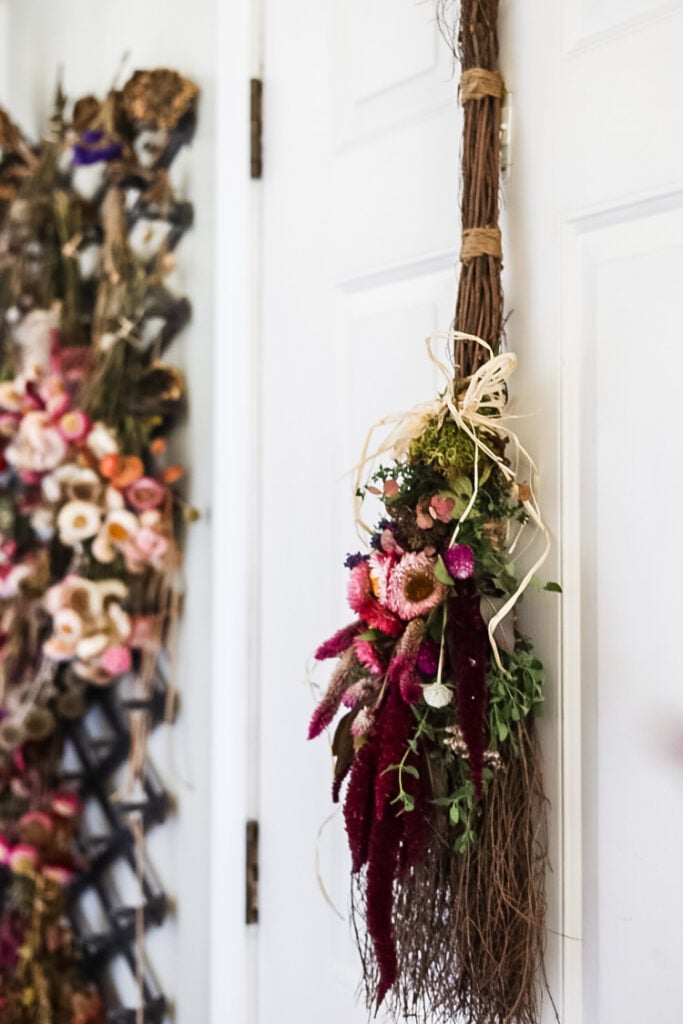
The Big Reveal: Your Custom Cottage Broom!
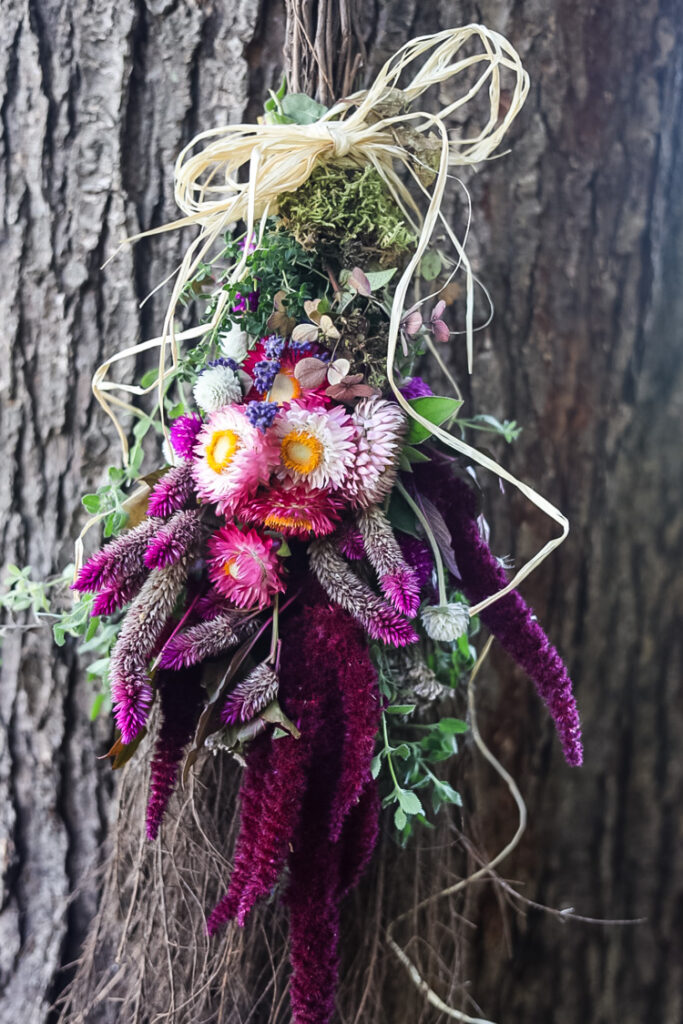
And just like that, in less time than it takes to watch your fave show, you’ve transformed a simple store-bought broom into a stunning, one-of-a-kind Fall decoration! I love how the textures of the flowers play off the rustic bristles of the broom, and that pop of pink and purple feels so fresh and personal.
Check Out More Of My Fall Broom Ideas!


Wrapping It Up

The real beauty of this 20-minute project is how it empowers you to create something uniquely yours. Whether you lean into classic autumn hues, a serene all-green herbal palette, or joyful pinks and purples, this cinnamon broom makeover is the perfect way to welcome the season with a touch of handmade charm.
It’s a wonderful reminder that you don’t need a lot of time or money to make your home feel cozy, intentional, and beautifully decorated.
A Final Thought on Creative Reuse
This project is a perfect example of how a little creativity can breathe new life into everyday items. Before you head to the store this season, take a fresh look around your home and garden. That simple broom, the last blooms in your flower beds, or even leftover ribbon from a past project can be combined to create something truly special. Honestly, it’s projects like these that make a house a home: they’re personal, sustainable, and much more meaningful than anything you can just click to buy!
See your projects featured! If you are inspired by this or any of my other DIY projects, I would love to see them and add you to the Reader’s Spotlight gallery. Send a photo to me at jennifer@cottageonbunkerhill.com
xo, Jennifer
Love projects like this? Don’t miss out! Join my newsletter family for more cozy, budget-friendly DIY ideas delivered right to your inbox. You’ll get exclusive tips, early access to tutorials, and all the inspiration you need to make your home feel handmade and heartfelt.

Fall Inspiration
for decorating your porch:
Fresh Flower Wreath Collection

Looking for more pretty ideas?See all of our wreath tutorials using fresh flowers & natural materials


Jennifer
This turned out adorable. I’ll share your link on DRA.
Thank, friend!!!
Such a cute DIY! I should make one of these with the girls. We’ll have to do some gathering on our next nature walk!😁
What a great idea, and it is so pretty! Thank you for sharing!
Thanks so much!!
LOVE this, Jennifer!! So pretty and SO easy! I bet is smells heavenly.
Thanks!! Yes, it was really easy and so nice to be working outside.