

Picture this: You step outside with shears in hand, breathing in the scent of just-picked lavender and zinnias so vibrant they look Photoshopped. No more sad, store-bought bouquets that droop by day three—just endless, free flowers grown exactly how you love them.
How to Grow a Cutting Garden: Bloom Your Way to Free, Fresh Bouquets All Season
Do you dream of walking into your garden and cutting fresh flowers for a bouquet instead of from the market? It’s not that hard! I will show you how to start a cut flower garden this year so you can have beautiful blooms of your own to cut.
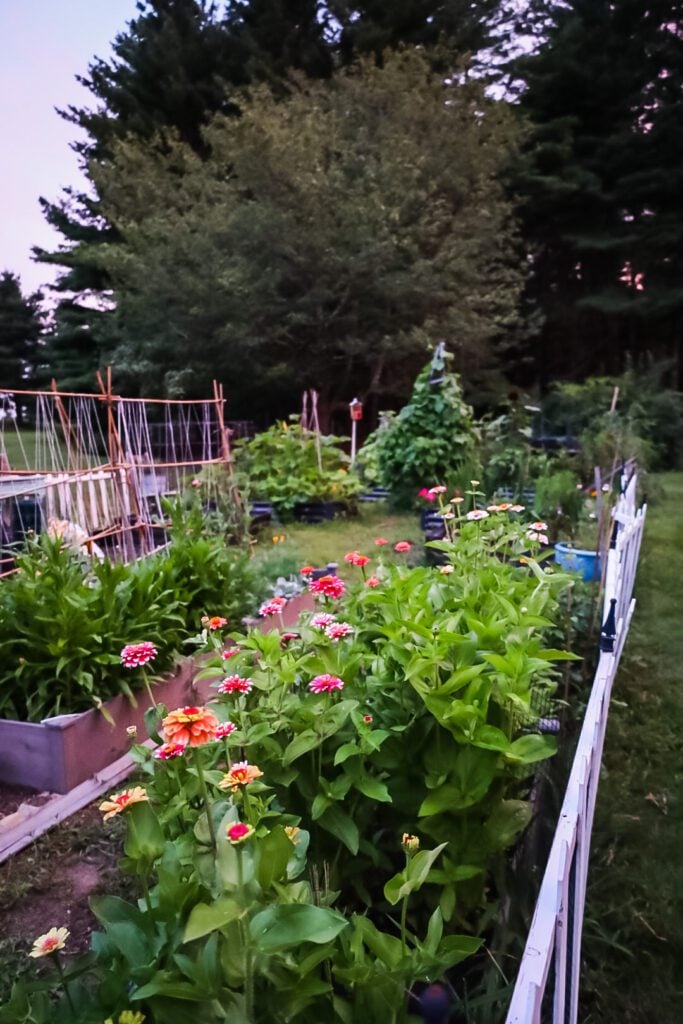
My favorite addition to my garden has to be when I expanded my garden and added a large cut flower garden to it. Looking out the window and seeing beautiful flowers all Summer long is fantastic! Today I’m sharing everything that I learned so far and tips to help you get started.

Cut Flower Garden: What You Need To Know To Get Started
First off, what is a cutting garden or a cut flower garden?? A cutting garden is planted with the intention of being able to cut the flowers during the season to enjoy in arrangements and bouquets instead of just leaving them in the garden to admire. It is usually mostly annual flowers, some greenery or filler plants, and sometimes a few perennial options.
This post may contain affiliate links, which means I may earn a small commission if you make a purchase through my links, at no extra cost to you. Read my disclosure policy here.
Finding the Perfect Spot for Your Cutting Garden

Sunlight is Key!
Your flowers will thrive with at least 6 hours of direct sunlight daily—the more sun, the more blooms! Here’s how to pick the ideal location:
Track the Light:
- Observe your yard at different times of day (morning, noon, and afternoon).
- Watch for shadows from buildings, fences, or trees—like my ever-encroaching New Hampshire pines that steal afternoon sun!
Pro Placement Tips:
- Pair with veggies: Like mine, many cutting flowers happily share beds with vegetables (both love sun and well-drained soil).
- Containers work too: No yard? Use pots on a sunny patio or balcony—dwarf zinnias and marigolds are perfect for small spaces.
Troubleshooting Shade:
If your sunniest spot gets 4-6 hours of light, try these shade-tolerant bloomers:
- Snapdragons
- Nicotiana
- Fuchsia (for hanging baskets)
Remember: As trees grow and seasons change, your sunlight will too—I adjust my planting layout slightly each year to compensate!

Remember: As trees grow and seasons change, your sunlight will too—I adjust my planting layout slightly each year to compensate!
How Big Should Your Cutting Garden Be? (Spoiler: Any Size Works!)
Good News: You don’t need acres of land to grow armfuls of blooms! Whether you have a sprawling backyard or just a sunny balcony, here’s how to scale your cutting garden to your space and time:
Even if you have limited outdoor space… if you have enough room for even one raised bed you can grow a micro-cutting garden! Just set up a raised bed, fill it with a quality raised garden blend & some compost, buy a few packets of annual seeds in varying heights and you can create a lovely garden for yourself to enjoy this year! (That’s the great thing about a cutting garden…you can plant and enjoy it all within a few months’ time!!)
It can be as large as you want to, depending on the time you have to devote to gardening, but if you are new to gardening, in general, I always suggest starting small so you don’t get overwhelmed.
quick tips

For Small Spaces (The “Micro” Cutting Garden):
- Raised Bed Magic: A single 4’x4’ bed packed with fast-growing annuals like zinnias, cosmos, and snapdragons can yield 20+ bouquets in one season!
- Container Hack: No yard? Use a large pot (at least 12” deep) for dwarf varieties like ‘Queen Lime’ zinnias or ‘Patio Mix’ sunflowers.
For Larger Gardens:
- Start Small, Expand Later: Begin with a 10’x10’ plot (about the size of a small shed) and add more beds as you gain confidence.
- Pro Tip: Leave 18” between rows for easy harvesting and weeding.
Golden Rule for Beginners:
“Tiny but abundant beats huge and overwhelming!” My first cutting garden was just one raised bed—it taught me what thrived in my soil and climate before I expanded.
Why Annuals Are Perfect:
- Instant gratification: Plant seeds in spring, enjoy bouquets by summer.
- Low commitment: No need to overwinter plants—just replant next year!
Ready to Start?
Grab 3 seed packets (tall, medium, and short varieties), a bag of compost, and let’s grow your happiest garden yet!
Choosing the Perfect Flowers for Your Cutting Garden
In a cutting garden, you want to grow a variety of flowers with different colors, different heights, and varying blooming times. Look for seeds at your local garden center or nursery. For online retailers, I love the selection at Johnny’s Selected Seeds, Select Seeds, and Eden Brothers. Burpee also has a wide variety of annual flower seeds for a cutting garden.
The Magic Formula
- For bouquets that wow, grow a mix of:
- Colors (soft pastels and bold hues)
- Heights (tall backdrops + mid-size fillers + trailing spills)
- Bloom Times (stagger plantings for flowers all season)
Where to Buy Seeds
My favorite trusted sources:
- Johnny’s Selected Seeds (professional-grade quality)
- Select Seeds (I’ve had great luck w/ their seeds!)
- Eden Brothers (huge heirloom selection)
- Burpee (reliable classics for beginners)
Pro Tip: Local nurseries often carry varieties proven to thrive in your climate!
Seed Starting Simplified:
For Beginners: Stick to direct-sow seeds—just plant them right in your garden! Try:
- Zinnias
- Sunflowers
- Cosmos
- Sweet peas
For Cold Climates (Like Mine!): Some flowers need an indoor head start. Look for:
- “Start indoors 6-8 weeks before last frost” on packets (like snapdragons or celosia). Learn more about seed starting basics and how to start your flower seeds indoors
This post may contain affiliate links, which means I may earn a small commission if you make a purchase through my links, at no extra cost to you. Read my disclosure policy here.
First-Timer Favorites:
These foolproof flowers practically grow themselves:
- ‘Benary’s Giant’ Zinnias (huge, long-stemmed blooms)
- ‘Mammoth’ Sunflowers (kids love them!)
- ‘Cupcake’ Cosmos (frilly petals that bees adore)
Remember: Your first year is about learning—pick 3-5 easy varieties and expand next season!
What I’m Growing

- Zinnias
- Dahlias
- Cosmos
- Strawflowers
- Snapdragons
- Sweet Peas
- Celosia
- Amaranth
- Sunflowers
- Achillia
The Secret to Thriving Cut Flowers? It’s All About the Soil!
Sunshine gets all the glory, but your flowers’ real MVP is rich, well-draining soil. Here’s how I built the perfect foundation for my cutting garden—with a planet-friendly twist:
My Soil Recipe for Success:
- 50% bagged raised bed garden soil mix (for structure)
- 40% compost (leaf-based or homemade for nutrients)
- 10% coconut coir (peat-free moisture retention)
- A handful of Flower-Tone organic fertilizer (my blooms double in size!)
Why This Works:
Compost = Slow-release nutrients + improves soil life
Coconut Coir = Lightens soil sustainably (and holds water even better than peat!)
Flower-Tone = Phosphorus-heavy for more blooms, less foliage
The Peat Problem (And Easy Fixes):
- Issue: Peat bogs store carbon and take centuries to regenerate. Many gardeners now avoid it.
- Alternatives: Coconut coir, leaf mold, or even perlite work similarly without the ecological cost.
Pro Tips:
- Test Your Soil: A $15 meter reveals pH needs (most flowers love 6.0-7.0).
- Feed Regularly: Reapply Flower-Tone every 6 weeks for continuous color!
Fun Fact: Healthy soil = longer vase life too—strong stems mean less wilting!
What I Learned From Growing My First Cut Flower Garden.
Last winter, I decided that I wanted to add a cutting garden to my gardens. I had fallen madly in love with all the beautiful dahlias some of my gardening friends were growing, and I was obsessed with Erin and everything about Floret Flower Farm!! I read her Cut Flower Garden book and was hooked on the idea of adding a cut flower garden.
The day that the Floret Farms seed sale started I was clicking away trying to buy all my dream seeds…I bought a variety of seeds: zinnias, poppies, celosia, snapdragons, cosmos, gomphrena, strawflowers, sweet peas, China asters, and dusty millers.

I had to have dahlias and bought some tubers from my local nursery (Gardeners Supply in Greenland, NH), and also from my friend Jennifer over at The Flowering Farmhouse, who is a flower farmer.
Starting Seeds Indoors: A Zone 6a Gardener’s Guide
Since I live in growing zone 6a, our frost-free date is in mid-May. So for some of the flowers I wanted to plant in my cutting garden, I needed to start inside. The backs of the flower seed packets have all the information that you need to know about the flower, including how many weeks before transplanting you need to start the seed. The seeds I was planning to grow it ranged from 4 weeks to about 10.
Seed Starting 101
Why Start Seeds Early?
In our chilly climate (frost-free around mid-May), getting a head start indoors means earlier blooms and stronger plants. Here’s how I mastered seed starting—and how you can too!
1. Decode Your Seed Packets:
The back of every packet tells you:
- Weeks to transplant (mine ranged from 4-10 weeks before last frost)
- Depth to plant (some seeds need light to germinate!)
- Days to germination (so you don’t panic if they’re slow)
2. My Indoor Seed Lineup:
- Early Starters (10-12 weeks): Snapdragons, Dusty Miller
- Mid-Season (6-8 weeks): Celosia, Strawflowers, Amaranth
- Tricky But Worth It: Asters
3. Lessons From My First Year:
- Sweet peas grow fast—start them just 4 weeks before transplanting.
- Amaranth needs heat (I put mine on a seedling heat mat).
- Overwatering = #1 killer (use a spray bottle for gentle moisture).
I wrote an extensive article on starting seeds indoors and what I learned from my first year of growing seeds indoors. It was a fun project, and it was perfect to keep me busy in the colder months before I could get outside in the garden.

There were plenty of seeds that I started directly in the garden, too, like all my zinnias, sunflowers, and cosmos, to name just a few. I also did some succession planting and added more sweet peas, snapdragon, and poppy seeds directly into the ground.
Zinnias love growing in warm soil…I know this flower is commonly started indoors, but 1.) I ran out of room, and 2.) they did amazingly, being sown directly! I actually didn’t even get them into the garden until almost the 2nd week of June because we were having such rainy weather and had my first flowers about a month or so later…but they were the show stoppers, and I was cutting zinnias until the frost at Halloween!!
How I Doubled My Garden Space (And Lived to Tell the Tale!)
The Big Expansion:
Last year, I took my 20’x24’ garden and stretched it to 20’x40’ to make room for my dream cutting garden. Was it backbreaking work? Absolutely. Worth it? 100%—here’s how I did it:
Step-by-Step Process:

- Marking the Battlefield:
- Measured the new 16’ extension with stakes and string.
- Pro Tip: Use flour or spray paint for temporary lines!
- The Great Till:
- Rent a rototiller (or borrow a neighbor’s—mine came with bonus tractor help!).
- Lesson Learned: Till when soil is slightly damp to avoid dust clouds.
- Grass Removal Olympics:
- Shoveled out sod chunks (the most brutal step—I earned every blister).
- Neighbor’s tractor hauled them to my compost pile (bless helpful neighbors).
- Recovery Mode:
- Collapsed inside with iced coffee, questioning all my life choices… until I saw the blank canvas waiting for flowers.
Why I Chose Raised Beds for My Cutting Garden

Reason #1: Aesthetic Obsession
Let’s be honest—there’s something magical about the look of neat raised beds overflowing with blooms. While flowers grow perfectly fine in-ground, raised beds give that organized cottage charm I crave. (Plus, no more accidentally stepping on seedlings!)
Reason #2: Critter Defense Mode
Enter the villain of my garden story: a rogue woodchuck that treated my first cutting garden like an all-you-can-eat buffet. With raised beds, I can:
- Wrap the base in chicken wire (bunnies hate this trick!)
- Add removable chicken wire domes for tender sprouts
- Finally outsmart those fluffy garden terrorists
Bonus Benefits I Discovered:
- Better drainage (no more drowning my dahlias in heavy rain)
- Warmer soil earlier in spring = faster blooms!
- No more backaches—less bending to tend and harvest

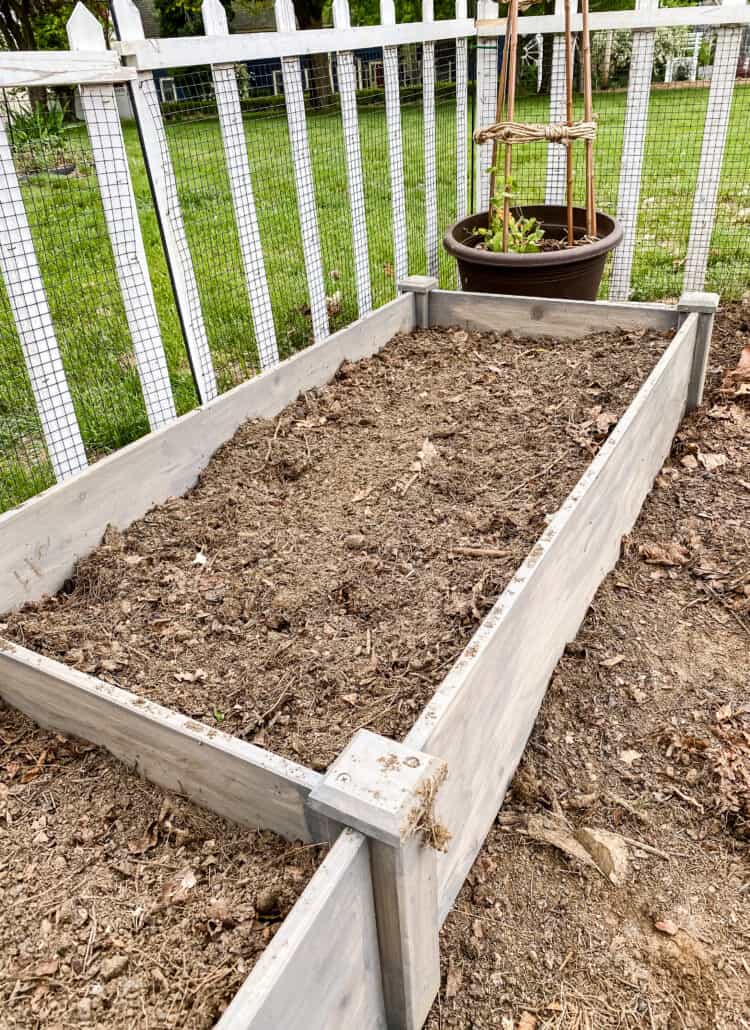
For my cutting garden, I added 8 wood-raised beds. They came in a kit and were so easy to assemble, and looked great! With the price of lumber last year, there wasn’t much difference between buying the supplies to build a raised bed or buying a kit.

One big mistake that I made was not lining the raised beds with hardware cloth before I added the dirt. I was invaded by voles everywhere in my gardens last year. They got into the raised beds and were eating some of the flowers last season.
Voles look like dark gray mice, but so fast…like superhero fast…ugh!! What voles do is tunnel under the ground and eat your plant’s roots. They also scamper above ground and just go for the base of your plants and eat through them before dragging the stalk back to their tunnels…which are everywhere!!
I can not tell you how much damage they did to my shade garden last Spring…I had to wrap chicken wire around the base of so many of my plants. They actually took out an entire gorgeous clematis vine that I had just assembled a new, larger obelisk for because it was so amazing…that one still hurts!!
This year:
So once the ground thaws, I think my first major garden chore is going to be removing the soil from the beds and putting down hardware cloth before my heart is broken again!!
Planting a Cutting Garden in New Hampshire’s Unpredictable Climate
The Memorial Day Dilemma:
Here in New Hampshire, our springs are like a box of chocolates—you never know what you’ll get! While Memorial Day weekend is the traditional time to plant, I’ve learned to:
- Watch the 10-day forecast like a hawk (no wishful thinking allowed!)
- Feel the soil—if it’s still cold and soggy, wait (even if the calendar says “go”)
- Have row covers ready for surprise frosts (ask me how I know…)
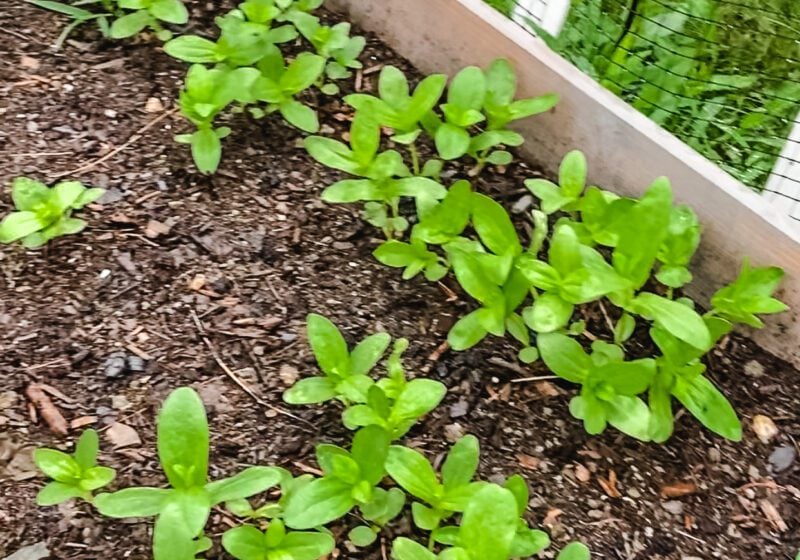
My first garden task was to plant the trays that I had started indoors that had been hardening off on my porch for the past few weeks.

My Planting Game Plan:
Planting Plan
- 1. Hardened-Off First:
- Those indoor-started snapdragons, celosia, and asters spent 10 days acclimating to outdoor life (shade to sun, 1 hour to all day).
- 2. Direct-Sow When Warm:
- Zinnias, cosmos, and sunflowers went straight into the ground after soil hit 60°F (I check with a meat thermometer—no fancy tools needed!).
- 3. Backup Babies:
- Always keep a few extra seedlings in case of mishaps or late frosts.

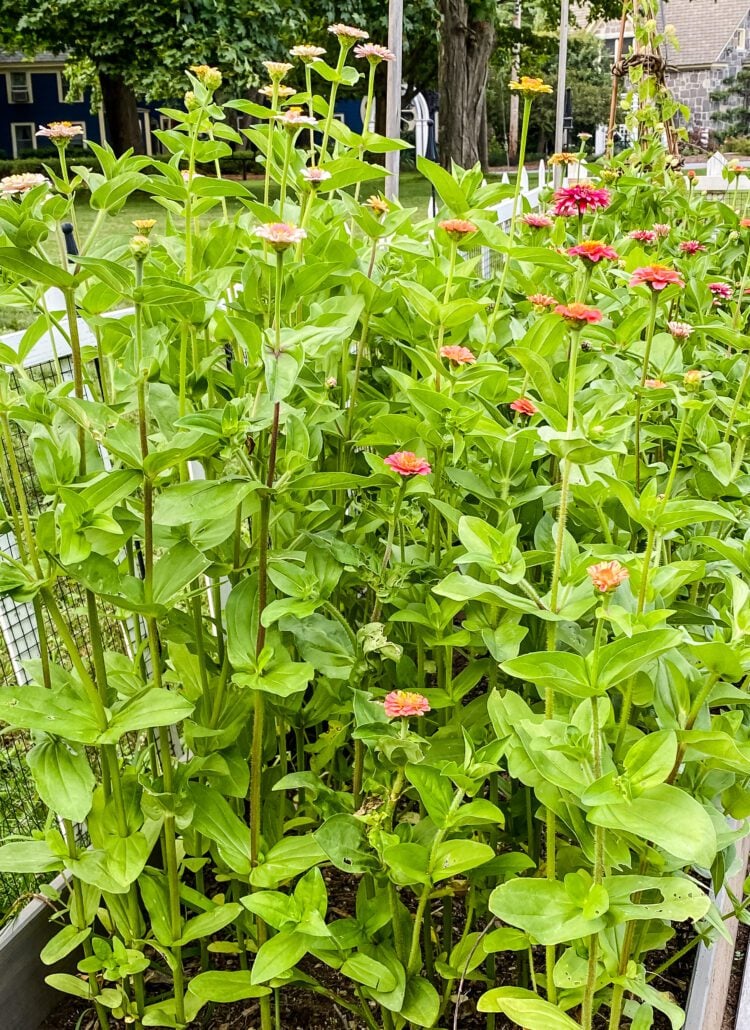
Here’s a shot after everything was planted in June. Wait until you see how this looks by September!!
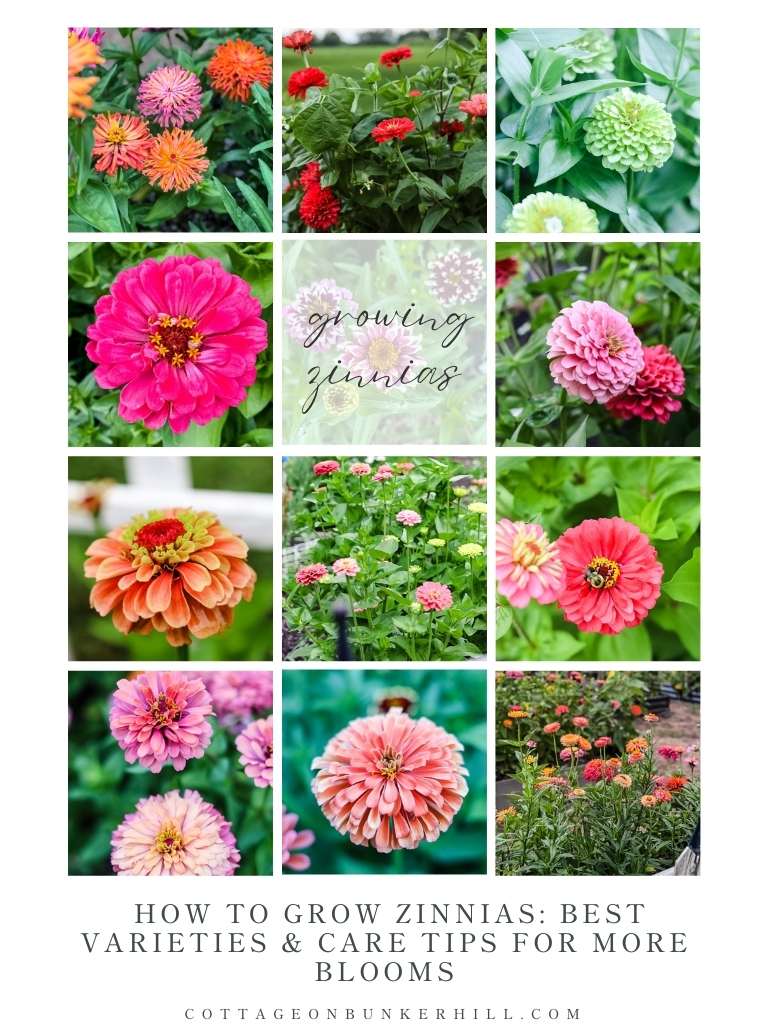
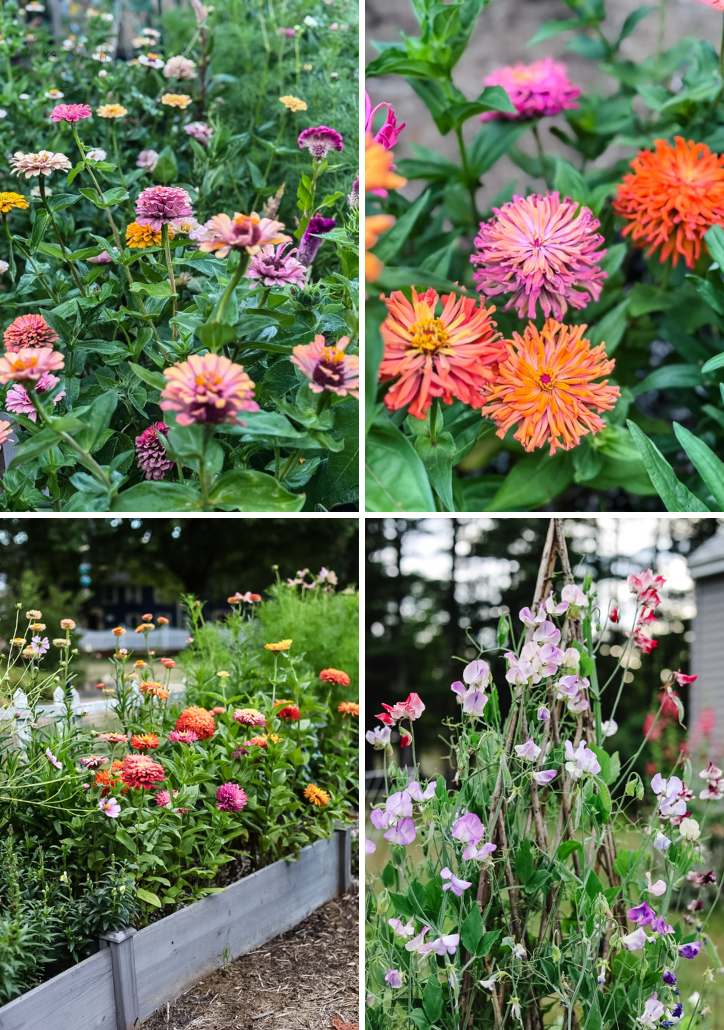
Zinnias: The Cutting Garden’s Rockstar Flower!
From Late Start to Showstopper:
I’ll admit it—I planted my zinnia seeds way behind schedule last year. But true to their reputation, these hardworking bloomers went from tiny sprouts in late June to armloads of flowers by August!
Why I’m Officially a Zinnia Fangirl:
- Speed Demons: Fastest color payoff in my garden
- Cut-and-Come-Again Magic: The more you pick, the more they bloom
- Beginner-Proof: Every single seed I planted sprouted!
I planted 8 different varieties of zinnia seeds…and I think every single one came up!! They were spectacular, and I am such a fangirl of zinnias now!!
My Zinnia Lineup:

- Benary’s Giant Carmine – Massive, sturdy blooms perfect for bouquets
- Queen Lime Blush – Romantic ombre petals (my Instagram star!)
- Cinderella Peach – Frilly, fairy-tale flowers that bees adore
- Lilliput Mix – Pom-pom cuties for petite arrangements
- Cupcake Pink – Double blooms that look like… you guessed it
- Queen Lime Orange – Vibrant citrus hues that glow in vases
- Marzurkia – Moody, striped beauties
- Mystery Variety – (Readers, help! What’s the 8th one I forgot?)
- Here’s the link to Johnny’s zinnia seeds
- Select Seed Zinnia Collection
- Here’s the link to Eden Brother’s zinnia seeds

Zinnia Cheat Sheet:
| Variety | Height | Best For |
|---|---|---|
| Benary’s Giant | 3-4’ | Dramatic focal flowers |
| Queen Lime series | 2-3’ | Vintage-style bouquets |
| Lilliput | 1-2’ | Borders/pots |

Check out my guide to growing zinnias to find out more about these garden favorites
Pro Tip: Pinch Them Early: When plants hit 12”, snip the center stem for twice the branches (and blooms!)
Stake the Giants: Benary’s can topple—use discreet flower netting
Deadhead Daily: Keeps production going until frost

Dahlias: The Crown Jewels of My Cutting Garden
Why I’m Dahlia-Obsessed:
These showstoppers became my late-season superheroes, blooming from midsummer until the first killing frost—just when other flowers fade! Unlike my zinnias (which I adore), dahlias bring:
- Drama: Dinnerplate-sized blooms that stop neighbors in their tracks
- Staying Power: 7-10 day vase life when cut at the right stage
- Addictive Variety: From spiky cactus types to romantic pompons

How I Planted My Dahlia Tubers (Successfully!):

1. Timing is Everything:
- Planted around Memorial Day (when soil hit 60°F)
- Pro Tip: Soak tubers in water for 1 hour pre-planting to rehydrate
2. The Perfect Planting Hole:
- Dug 12” wide x 6” deep (twice the tuber’s size)
- Amended with:
• Organic flower fertilizer (for slow-release nutrients)
• Bone meal (phosphorus for strong roots—my secret weapon!)
3. Tuber Orientation:
- Placed horizontally, eyes facing up (like a sleeping banana!)
- Covered with 2” of soil, then filled in as stems grew
Dahlia tips
Dahlia Care Tips I Learned:
- Pinch for More Blooms: When plants hit 1’, snip the center stem above the 4th set of leaves
- Stake Early: Use bamboo stakes and tie stalks to them for support. I like the organic look of the bamboo in my garden.
- Deadhead Daily: Encourages continuous flowering
- Fertilize Monthly: With liquid seaweed for bigger blooms

The earwigs did attack them…I have never had a problem before in my garden with them, and actually have hardly ever seen them.
If you have slug problems in your area, they will find your dahlias..so try slug bait to stop the problem.

One thing to keep in mind is that dahlias are a very late-season bloomer! They started in late August, almost September, and were still flowering when I got a freeze at the end of October…I have never been so happy to have an extremely late freeze date as last year! I wanted to see every single bloom open.
The night we were going to have a freeze, I went out and cut every last one to bring in and enjoy for as long as I could.


In cold climates, as we have in the Northeast, once there is a freeze, you can cut the plant back and dig up the tubers to overwinter in a cool, dark spot in your home.
Dahlias grow more tubers as they mature during the growing season…so you plant 1 tuber in the Spring and when you dig them up in the Fall you have a bunch that you can overwinter. Then you can separate the bunch and plant even more dahlias the following year…amazing right!!
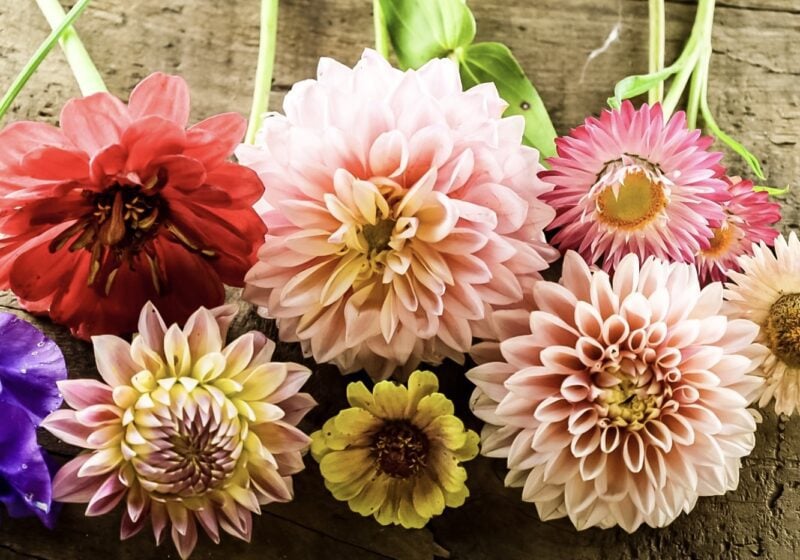
The dahlias and zinnias made the prettiest flower arrangements! I mean, just look at this centerpiece I whipped together for a Harvest Dinner.

Strawflowers: The Cut-and-Keep Superstars of My Garden
A Surprise Love Story:
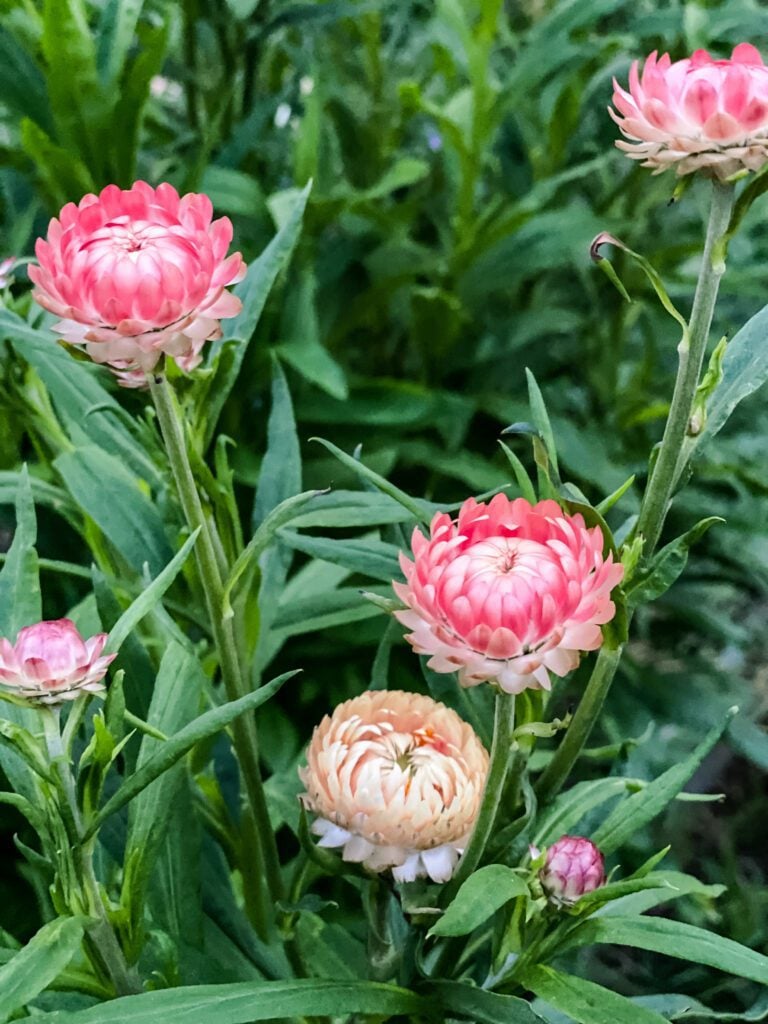
I’ll admit, I only grew strawflowers (Xerochrysum bracteatum) last year for their dried flower potential. But by season’s end? I was utterly smitten! These cheerful blooms became my low-maintenance MVPs, offering:
- Everlasting Beauty: Flowers that dry perfectly on their own
- Beginner-Friendly: Thrived on near-neglect in my busy summer
- Nonstop Color: Bloomed from July until frost without deadheading
They were easy to start directly in my cutting garden, too (I did start flowers indoors, too) . Strawflowers were low-maintenance. I made sure they were watered and fertilized, and they did the rest. Perfect flower seed for beginner gardeners to add to their cutting garden.

Honestly, I have never seen strawflowers growing in a garden! The flower buds are unbelievable…amazingly detailed and really stunning to capture in a photo. They were a true joy for me in my cutting garden!

What is super fun is that the buds close up tight at night and then slowly open during the day. Another thing to know about strawflowers is that the same flower will bloom for weeks and weeks. They were also blooming right until the freeze around Halloween.
Why Strawflowers Are Perfect for New Gardeners:
1.Foolproof Planting:
- Direct-sowed seeds 1/4″ deep after last frost
- Sprouted in just 7-10 days (no fussy germination!)
- Pro Tip: Mark rows with plant markers—seedlings resemble weeds at first!
2. Easy Care Routine:
- Water: Only when soil felt dry (drought-tolerant once established)
- Fertilizer: Once plants started growing (fish emulsion fertilizer)
3. Dual-Purpose Magic:
- Fresh Bouquets: Crisp, papery petals last 2+ weeks in water
- Dried Arrangements: Simply hang upside down in bundles—no silica gel needed!
Drying strawflowers (So Easy!)
In September, I started cutting them to bring them inside to dry. I made little bunches and hung them upside down. Strawflowers were also one of the cut flowers that I saved the seeds from to grow this year. If you leave them in the garden, they will dry and go to seed, which looks very similar to a fuzzy dandelion.

Celosia & Amaranth: The Dynamic Duo of Drama and Endurance
Seed Starting Miracle:
I swear these two grew like magic—every single seed sprouted, leaving me with a happy problem of too many plants! (Pro tip: Share extras with neighbors to make instant garden friends.)

Why Amaranth Stole the Show:
- My amaranth became a street-side attraction, looked amazing from the road!
- Towers at 5-6’ tall with cascading blooms
- Bonus: Goldfinches went wild for the seeds in fall!

What I really liked about the celosia is that it grows up straight and tall before the flowers start opening. I grew the amaranth in the back row so it could hang over the fence.

Growing Secrets for Amaranth
- Plant in full sun (they’ll flop in shade)
- Needs sturdy stakes—use bamboo
- Drought-tolerant once established
Why Celosia Became My Must-Grow Flower:
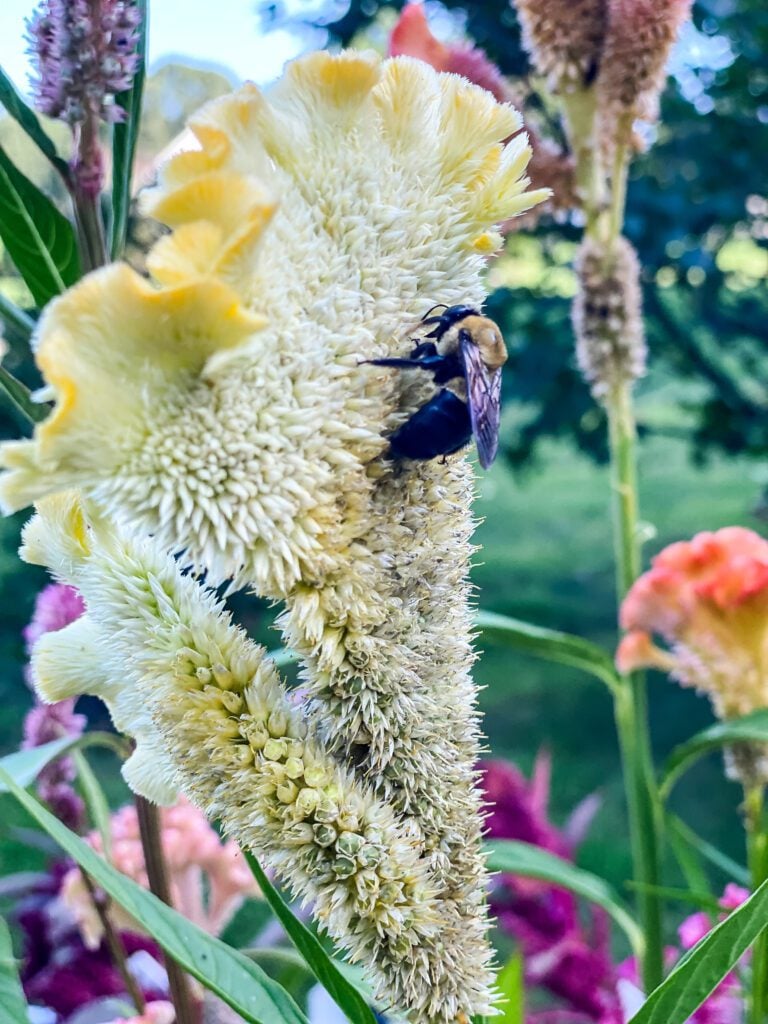
Celosia: The Bouquet Superstar!
- 3+ week vase life (outlasted every other flower!)
- Velvety texture that guests couldn’t stop petting
- Dries perfectly—still has color 6 months later
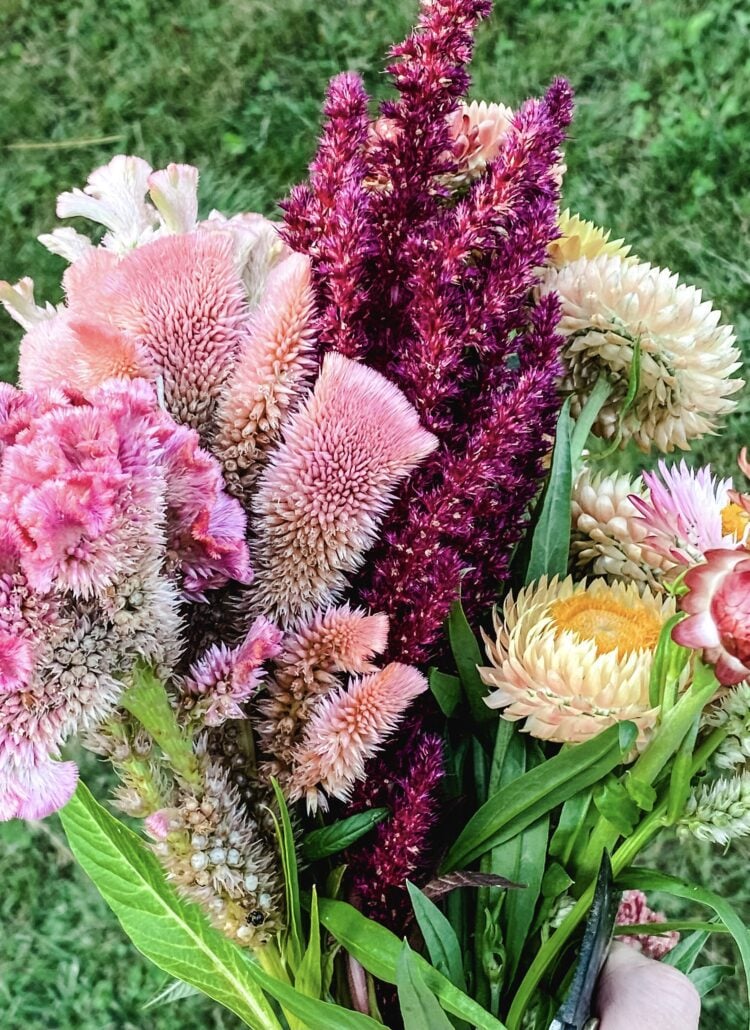
The celosia flowers were just incredible! They lasted for weeks in my bouquets, which made them a cut flower garden must-have for me this year. The celosia is just as soft and fuzzy as they look like in the picture, too!! Fun flower!!
Pro Comparison Chart:
| Feature | Amaranth | Celosia |
|---|---|---|
| Height | 4-6’ (tall thriller) | 2-3’ (mid-height) |
| Texture | Tassel waterfalls | Fuzzy flames or coscomb |
| Best For | Backdrop plant | Bouquets & drying |
- Sources for Celosia 2026: Select Seeds | Johnny’s
- Source for Amaranth 2026: Select Seeds| Johnny’s
My Snapdragon Success Formula:
Snapdragons were one of the seeds that needed to be started inside about 10-12 weeks before I transplanted them into the garden. It wasn’t difficult, and they really did take off and thrive once I planted them outside in the cutting garden,
1. Seed Starting Secrets:
- Sowed in cell trays with seed-starting mix
- Kept at 65°F (used a heat mat until germination)
- Pinched seedlings at 4″ tall for bushier plants
2. Transplanting Tricks:
- Hardened off for 7 days (they hate cold shocks!)
- Planted 12″ apart in rich, well-draining soil
3. Endless Bloom Hacks:
- Cut often, they bloom more when harvested
- Leave 3 sets of leaves when cutting to regrow faster
- Fertilize monthly with fish emulsion

Favorite Varieties:
- ‘Madame Butterfly’ (double blooms for fancy arrangements)
- ‘University of Cali Mix’ (tall spikes in carnival colors)
Snapdragons are very unusual flowers and have multiple flower buds on each stem. There is also a wide variety of snapdragon colors and heights. The more I cut stems for my arrangements, the more snapdragons seemed to appear!
I will definitely be adding more snapdragons to my cutting garden this season!!

One of the best parts of having a cutting garden is that, well, after most of my perennials were done blooming in my other gardens…it was still going strong!! This is a shot I took at the end of September…in New Hampshire…just amazing!!

Cosmos: The Carefree Superstars of My Cutting Garden
My Cosmic Love Story:
I’ll admit, I underestimated Cosmos at first. But these airy, butterfly-magnet blooms became my surprise favorites for three perfect reasons:

- They grow like magic from direct-sown seeds
- Bloom nonstop from late July (here in zone 6a) until frost
- Make every bouquet look wild and romantic (but short vase life!)


Cottage Style Touches (that aren’t flowers!)
The last thing I want to go over with you is the extra things that you can add to your garden to get that cottage garden look. Along with the raised beds in my cutting garden, I added a few garden structures for my plants to climb on. They are pretty too!
Cottage Style Garden Tower
Last Spring I put together this cottage garden tower...using a cheap…like super cheap tomato cage and bamboo stakes!! I saw some expensive ones online, and I knew I could make something similar for a whole lot less (my favorite thing to do!!)
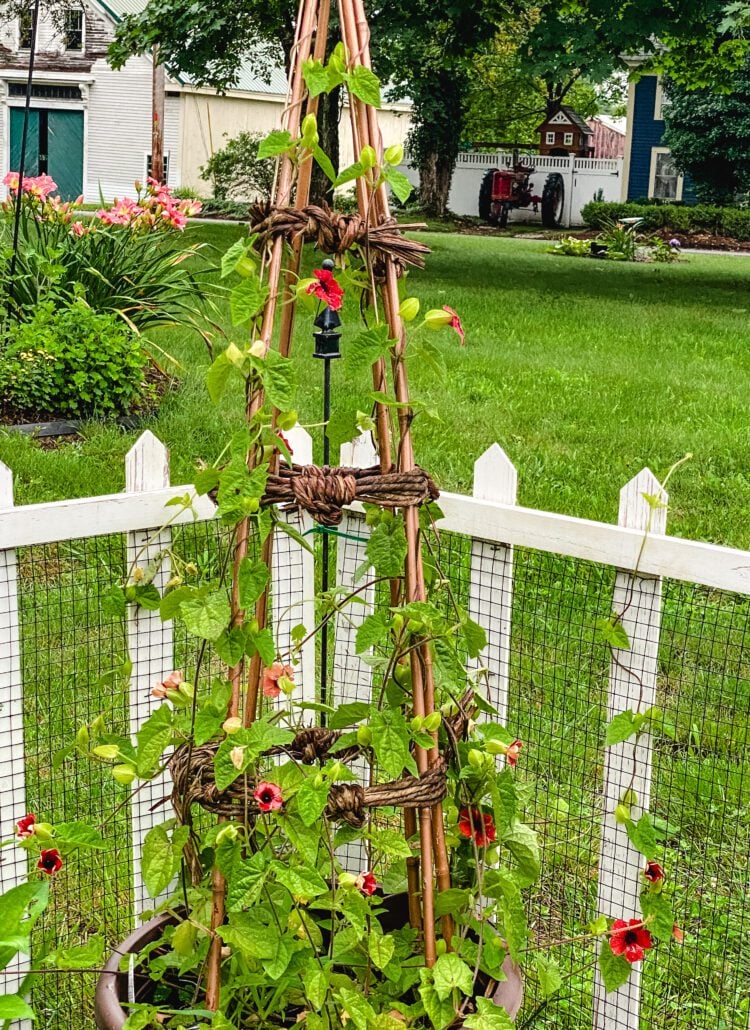
I added a black-eyed Susan vine and enjoyed watching it take over the tower as the Summer went by.

Sweet Pea Trellis
Sweet peas need something to grow up on and attach themselves to with their tendrils. I knew that I wanted to make something that fits in with the cottage-style cutting garden that I dreamed of when I was planning it out all winter. After browsing through English gardening magazines, I came up with my own version of a sweet pea trellis.
SWEET PEA TRELLIS SUPPLIES:
- 4, 5, or 6 ft bamboo garden stakes
- Ball of twine, rope, or jute twine to tie corner supports
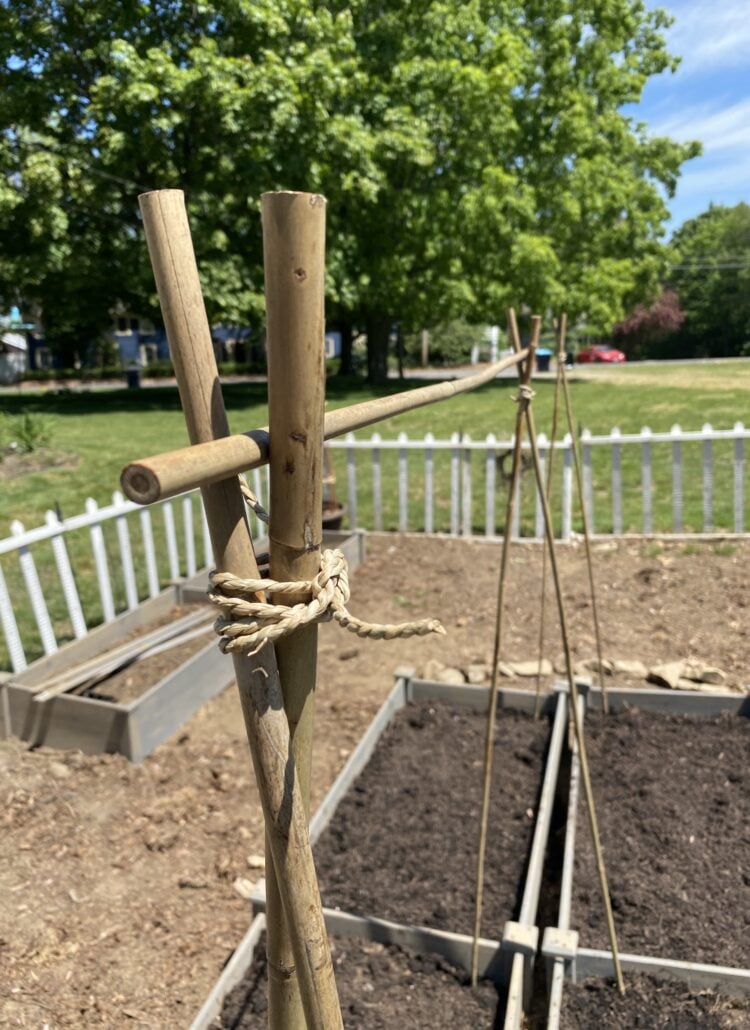
STEP 1.
- Take 2 bamboo stakes and cross them to create a V near the top ( I stuck the ends deep into the raised bed)
- Use strong jute twine or thin rope to secure the bamboo pieces together. Repeat at the other end.
- Then lay a bamboo stake across the 2 supports you have created and nestle down in the V and secure it in place with jute twine.
I am making a double-length trellis. My raised beds are 4 ft long each.

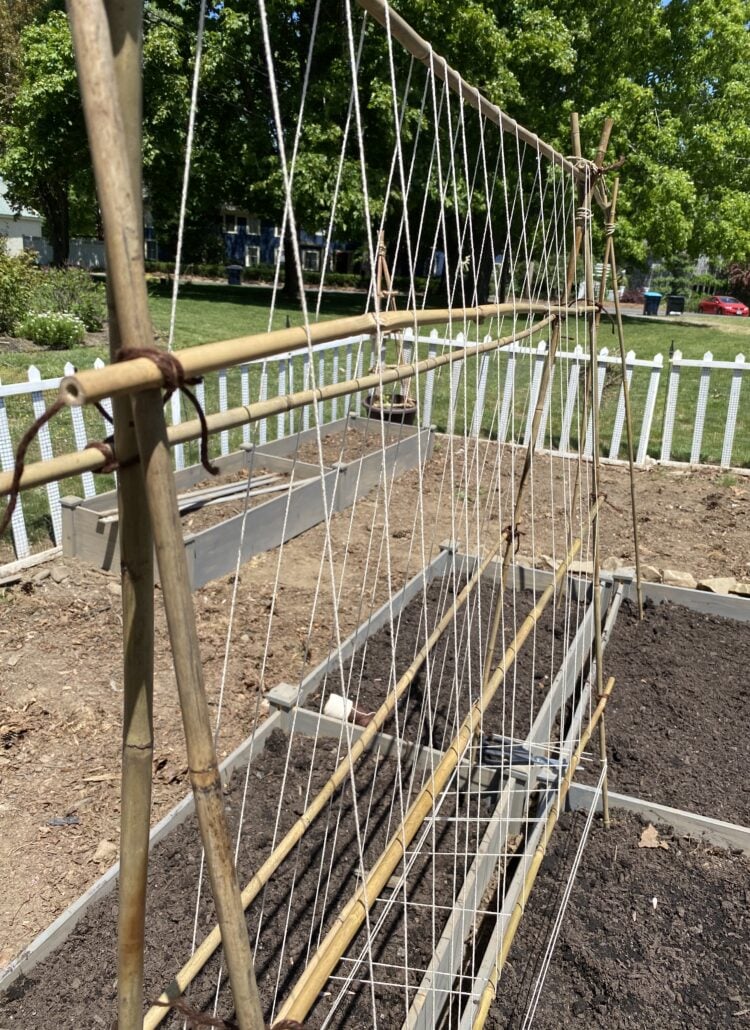
STEP 2.
- After the top supports were in, I added 3 more bamboo pieces running horizontally across the trellis, tying them in place at the ends with jute twine.
- For extra support for the entire structure, I added wood garden stakes at the ends and secured them to the trellis. (you can see them in this picture)

All I did was run the twine up and over the bamboo down the length of the trellis every few inches so the sweet peas will have something to hold on to as they grow.
After I was done, I went back and ran twine around the legs near the bottom of the trellis when I realized that there was too big of a space for the little sweet peas to reach the trellis.
If you don’t want to go through all of this trouble, you could just use flower netting and attach it to the bamboo! I’m going to do that this Spring.
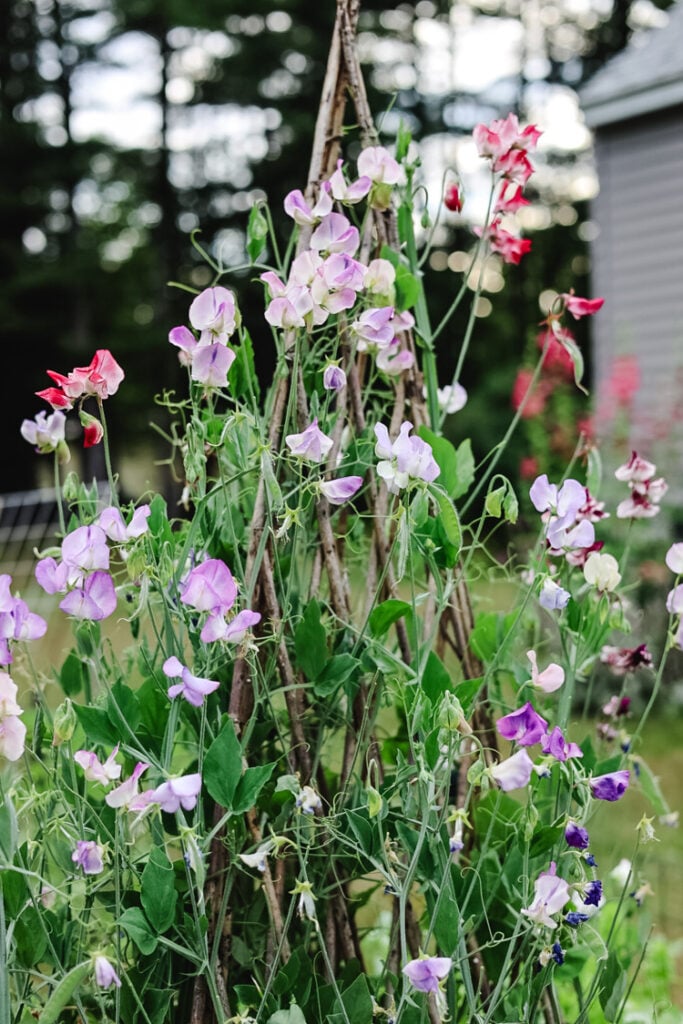
No time for DIYs? Then this willow teepee is perfect for you and for growing sweet peas. Plus it gives you an instant ‘cottage garden’ feel!
My Dumpster-Dive Potting Table Win
The Dream vs. Reality:
I’d been fantasizing about one of those charming vintage potting tables—you know, the Pinterest-perfect ones with chippy paint and built-in storage. But since mine would live outdoors 24/7 in New Hampshire’s moody weather, I refused to spend a fortune. Amazingly, I found the perfect table at a dumpster!! So it was free…the perfect price, right?!!


You can see the entire transformation of my Upcycled DIY Potting Benchf or all the details!

Proof that garden magic isn’t just in the blooms—sometimes it’s in the trash!
Why a Cutting Garden Was My Best Decision Last Year (And How Yours Can Thrive Too!)

If I could only grow one type of garden forever, it would be my cutting patch. Those armfuls of homegrown blooms brought more joy than I ever imagined—and I promise, even a 4’x4’ corner dedicated to flowers will do the same for you!
Every season in my cutting garden teaches me something new—whether it’s discovering a can’t-live-without variety or finally mastering a tricky technique.
What began as a modest plot has blossomed into my favorite gardening adventure precisely because there’s always more to learn—each new variety that thrives (or even fails spectacularly!) makes me a better gardener. The best part? This journey never ends—there will always be another stunning bloom to try next season!
See your garden featured! If you are inspired by this or any of my other DIY projects, I would love to see them and add you to the Reader’s Spotlight gallery. Send a photo to me at jennifer@cottageonbunkerhill.com
xo, Jennifer
Cottage Garden
Favorite Products
Shop my gardening favorites! Raised beds, plant supports, & tools to make your garden grow.

More Garden Help

Grow With Me Gardening Series

This is part of the Grow With Me Gardening Series here at Cottage On Bunker Hill. I want to teach you ways of starting, maintaining, and enjoying gardening. I will share all the tips & tricks that I have learned over the years growing both vegetable and flower gardens here in the Northeast.
Looking for more gardening inspiration? Here are two of my favorites to follow:


We recently purchased a brand new home and we get to decide on how we want the yard to look like. I would love to have a section of the backyard dedicated to a cutting garden. I’ve done flowers in pots before, but nothing to this size, so these tips are amazing! I can’t wait for the weather to keep warming so I can start planting things! Thanks so much for sharing!
That’s amazing! Remember to start small (ish), you don’t want to get overhwelmed when your first start out! Keep in touch, I would love to see your progress!!!
Hi my name is Ray Poitras and I live in Litchfield NH. I read your you article about cut gardening and I am encouraged by what you said.Have nice yard that I think would be great for such a project.I am not ready to start now but would like to get names of people that I can call on for advice, or better yet go and look at their flower beds, or at least send some pictures of my yard for their thoughts.
My husband was just over your way golfing last week! I don’t know anyone on your side of NH but I would join the Garden New Hampshire facebook page, really active with people from all over NH and it’s a great spot for advice and inspiration. https://www.facebook.com/groups/346908842093444
With inspiration from your blog, I planted two small cutting gardens. I bought most at the nursery, but planted sunflower and sweet pea seeds along our fence post for the sweet pea to grow on. My question to you, It looked like you didn’t leave much room between plants. I gave about 4″ space between each. My husband said I shouldn’t have. I told him it’ll choke out the weeds and make a nice full garden…..well, that’s my answer and I’m sticking to it. I told him this year is trial and error anyways. Love your blog, thank you for inspiring all of us. 🙂
I’m with you. I usually plant that close together when I seed then thin out if I have to. I’ve had so many problems with critters like chipmunks digging things up and voles that I have to plan for disaster!! Most of the pictures are from the end of the season and the flowers are fully grown. I’d love a photo of your garden as it grows ( cottageonbunkerhill@gmail.com is my direct email) -Jennifer
Great job, Jennifer! I love all of your choices to add…can’t wait to see them all in full bloom again. Have a great weekend!
I’m getting excited for garden season!!
I’m doing a cutting garden this year so your post is so helpful!! I’m excited to follow along in your series. Thanks so much for joining us for Welcome Home Saturday this week! Love having you along!
Oh thanks, Krisitn!! I’m so looking forward to it this year too!
These are such great tips, Jennifer! Thanks for all the details on how to get this started! Pinning for sure!
Thanks so much, Jen!
Jennifer,
I want to do this so badly, thank you for the inspiration friend.
Thrilled to have you join us for Welcome Home Saturday this week.
xoxo,
Brendt
Just stunning. I thank you for sharing this. It feels to be a ray of sunshine.
Thanks Diana!! I’m planning to work out there from sunrise to sunset tomorrow!!
Jennifer,
I’m still struggling with a cutting garden and love your tips. I”m going to share a link on Sunday’s post.
Thanks, Rachel! I really loved my garden last year…and patiently waiting for the ground to thaw!!
Jennifer, I loved your cut flower garden post!! I really like the pretty bamboo trellis’ you made & am going to try making some myself. I also loved seeing & reading about your pretty straw flowers…..I loved the different shades of pink rather than the oranges & golds I’m used to seeing. Thank you for sharing
Thanks so much Carol! Yes, those strawflowers were so fun to grow! I’m going to be making a pretty wreath with some of the ones I dried out very soon!
Wow this is such a great post. It’s filled with such great information.
Pinned to my garden boards.
Thanks, Cindy!! I can’t wait to get out there!
Oh my gosh, Jennifer! This is such a thought-out and thorough post. I just loved reading someone else’s perspective. Thank you for the shout-out as well. I can’t wait to see your garden this year.
Thanks! I didn’t plan on it being a thesis..but I just started writing. You are a total inspiration!!
This is the best gardening post I have ever read! I feel like it’s something I can do now! thank you for all the helpful insights and info! I think I’ll order one of those raised bed kits and I am definitely ordering those seeds! Thank you!
What a great post, Jen! You outlined everything and made it so easy to follow. I loved watching you plant and grow your garden, last year. Anxious to expand my cut garden this summer and can’t wait for those Zinnia seeds! :)Thanks for all your inspiration!!
Ok, wow!!! This post was so detailed and so amazing. Thank you for sharing all of your hard work! Your cut flower garden was stunning and I can’t wait to see it this year. I appreciate all of your tips. Our new house house has two garden boxes and I want to try to plant in them! Yay!
Thanks so much Kelly!! Yes, plant some zinnias…they were so much fun!! I loved looking through all my flower pictures writing this (especially because it’s so wintery and icy out here!!)