Learn how I created a charming DIY cottage garden tower for climbing flowers using a tomato cage, bamboo supports, and seagrass rush. Perfect for small spaces, this vertical garden project brings cottage charm to any backyard. Follow my step-by-step guide to build your own!
DIY Cottage Garden Tower
There’s something magical about cottage gardens—their whimsical charm, lush layers of blooms, and the sense of history they evoke. But what if you don’t have the space for a sprawling garden? Enter the DIY Cottage Garden Tower, a vertical gardening solution that brings the enchantment of a cottage garden to even the smallest of spaces. Whether you are being thrifty by making your own or are trying to add a unique touch to your yard, this project is a fun and rewarding way to create a stunning focal point.
In this tutorial, I’ll walk you through the steps to build your own garden tower, share tips for choosing the perfect plants, and show you how to maintain it for years of blooming beauty.

This post may contain affiliate links, which means we receive a small commission if you purchase through our links. See our disclaimer page for more information.
Gather & Prepare The Materials For Tower
Gather your supplies and head outside to start the process of putting your cottage garden tower together.
Materials for this Project
- Tomato Cage
- 4 Foot Bamboo Supports
- Seagrass Rush
- Copper Spray Paint
1. Start With A Tomato Cage

The base for my cottage garden tower is a 4-foot tomato support cage. For this project, a super cheap and kinda flimsy tomato cage is exactly what you want.
2. Bamboo Supports & Spray Paint

To make this tower I also used five 4-foot bamboo garden supports and Rust-Oleum copper-colored spray paint. Another option is to leave the tomato cage and bamboo in their natural state.
3. Spray paint the tomato cage and bamboo

Next, I gave the tomato cage and the bamboo supports a quick spray of the copper metallic spray paint; I love the Hammered spray paints from Rust-Oleum!
4. Preparing The Seagrass Rush

For my tower, I used twisted seagrass rush but I think you could also use sisal rope, jute twine, or twisted seagrass rope and achieve a similar look.
If you are using the seagrass rush I highly suggest you soak it until it softens up so that it is more malleable and easier to work with.

shop my garden favorites
Assemble The Garden Tower: Step-by-Step
Now that your materials are prepared and ready to go it’s time to assemble your garden tower.
Step 1: Create The Base

- Gather the Tops: Once the spray paint dried, I gathered the tops of the bamboo stakes together.
- Secure with an Elastic: I used a large elastic band to hold the tops in place.
- Position the Bottoms: I placed the bottoms of the bamboo stakes inside the top metal ring of the tomato cage.
- Spread Evenly: I tried to spread the bamboo stakes as evenly as possible around the cage.
- Don’t Stress Perfection: If they’re not perfectly even, don’t worry—they’ll still work just fine!
Wrapping The Tower

- Start at the Top:
- Wrap a generous amount of rush around the top of the bamboo stakes.
- Tie a simple knot to secure it (this also covers the elastic band).
- Move to the Bottom:
- Tie a simple knot around the base of the tomato cage to secure the rush.
- Begin wrapping the rush around the outside of the metal rings.
- Customize the Thickness:
- Wrap as much rush as you’d like, depending on how thick you want the band to be.
Securing The Roping

- Finish Each Section:
- Tie a knot to secure the rush at the end of each section.
- Cut off any extra rush.
- Wrap Around the Tomato Cage:
- Wrap the rush around the tomato cage where the three metal rings are located.
- Add an additional wrap near the top of the cage for extra stability and a finished look.
Finishing Touches

- Wrap Vertically:
- After wrapping the circumference of the tower, go back and wrap the rush around the bands vertically as well (see the photo above for reference).
- Trim Loose Ends:
- Don’t worry about the loose ends while you’re working—wait until the very end to give them all a neat trim.
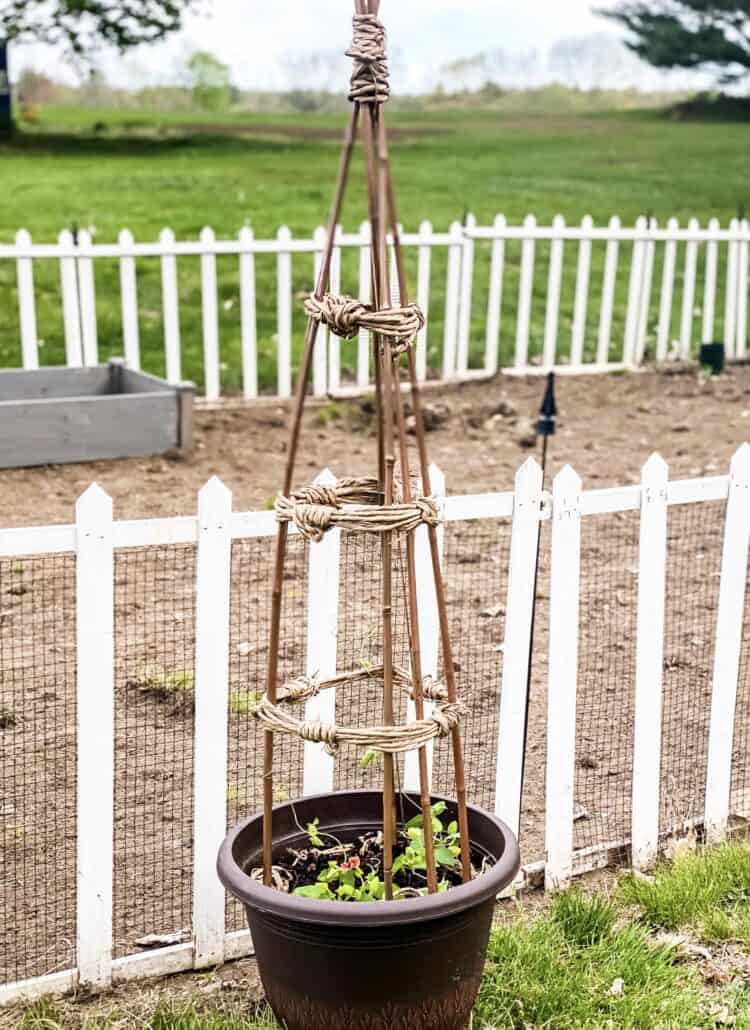
Finished Cottage Garden Tower

Isn’t it super cute??!! I’m making a few more too! For my next one, I’m going to cut off the largest ring and make a shorter version ( that’s another reason a more flimsy tomato cage is good!)
You can check out some of my other DIY plant supports HERE.
Time To Plant!

First I popped the garden tower into a large pot. I’m going to secure it in place with garden staples after I take pictures.
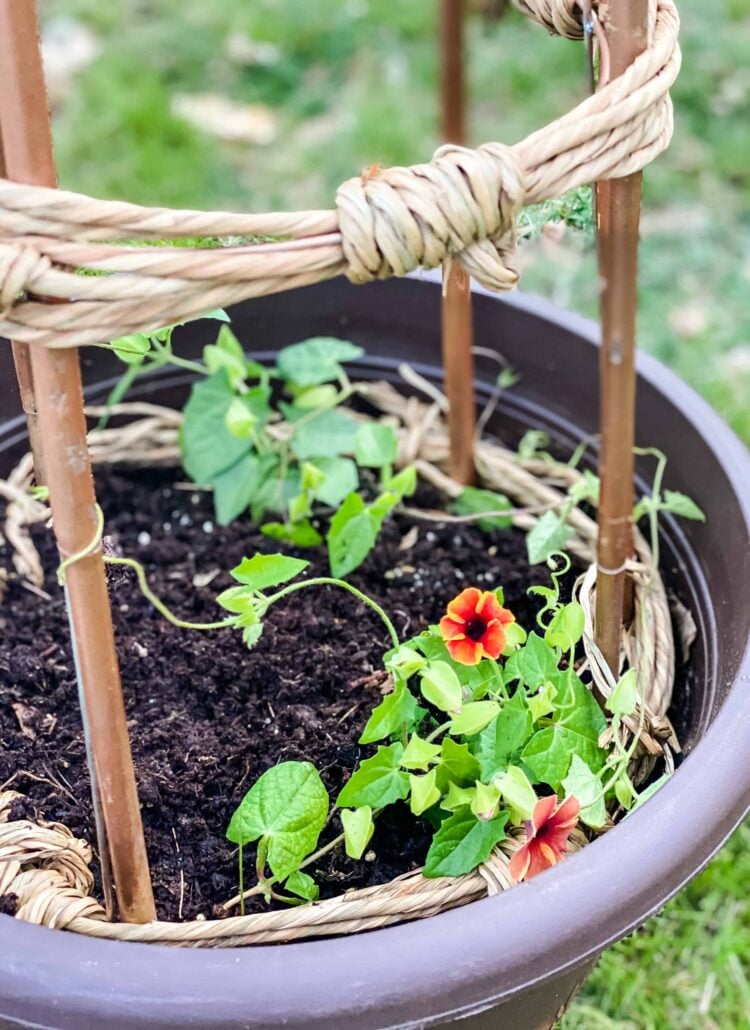
Isn’t that the happiest little flower??!!! I planted 2 of these Proven Winner Tangerine Slice A-Peel Black-Eyed Susan Vines in the pot.

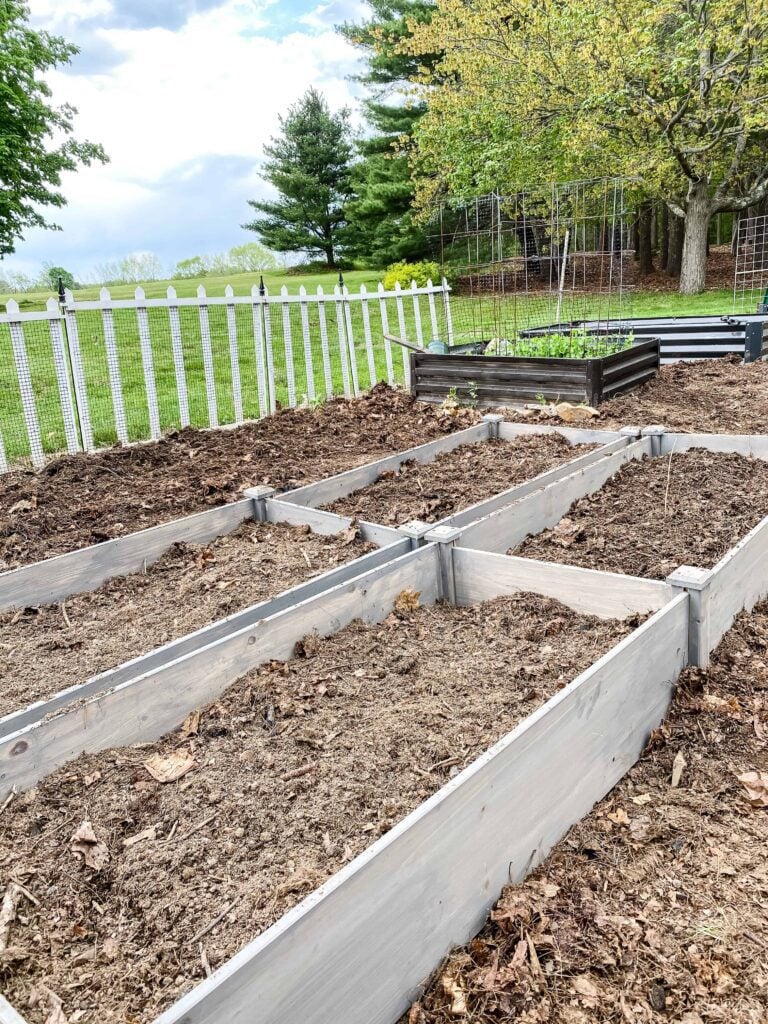
Don’t worry, the rest of that garden will be planted…check back to see my progress in the upcoming weeks–I have so much to do!!!
That’s going to be the space where my cutting garden is going to go…more raised beds are to be built this weekend. Here’s a closer look at my garden expansion.
Climbing Flowers
Climbing flowers add a romantic look to a cottage garden, making it even more enchanting. Here’s a short list of climbing flowers that would look stunning growing on your DIY tower:
- Sweet Peas
- Fragrant and delicate, sweet peas are a cottage garden classic. They come in a variety of pastel colors and thrive in cooler weather.
- Clematis
- Known for their large, showy blooms, clematis vines are perfect for adding vertical interest. They come in a range of colors, from deep purples to soft pinks and whites.
- Nasturtiums
- These cheerful, trailing flowers are easy to grow and come in vibrant shades of orange, yellow, and red. They’re also edible, adding a pop of color to salads!
- Morning Glories
- Fast-growing and prolific, morning glories produce trumpet-shaped blooms in shades of blue, purple, pink, and white. They’re perfect for a sunny spot.
- Black-Eyed Susan Vine (Thunbergia)
- This charming vine features small, sunny yellow or orange flowers with dark centers. It’s a great choice for adding a touch of warmth to your tower.
- Honeysuckle
- A fragrant favorite, honeysuckle attracts pollinators like hummingbirds and bees. Its tubular flowers come in shades of yellow, pink, and white.
- Climbing Roses
- For a truly romantic look, climbing roses are a must. Varieties like ‘New Dawn’ or ‘Eden’ offer soft, blushing blooms and a lovely fragrance.
- Cup and Saucer Vine (Cobaea scandens)
- This unique vine produces bell-shaped flowers that resemble teacups. It’s a fast grower and adds a whimsical touch to any garden.
- Passionflower (Passiflora)
- With its exotic, intricate blooms, passionflower is a showstopper. It’s also a great choice for attracting butterflies.
- Jasmine
- If you want a fragrant climber, jasmine is a wonderful option. Its small, star-shaped flowers fill the air with a sweet, intoxicating scent.
Cottage Garden
Favorite Products
Shop my gardening favorites! Raised beds, plant supports, & tools to make your garden grow.
Mid Summer Check-In

Isn’t the tower charming as the flowers have grown and wrapped around the tower? This was a great addition to my garden and a project that I made again to add to the vegetable section of my garden.


This tower is an easy way to add cottage charm to your vegetable garden too! I’ve added them to my raised beds as an inexpensive alternative to the pricey towers that I see at the nurseries and online. Style on a budget–my favorite combo!!
Creating a DIY cottage garden tower is more than just a gardening project—it’s a way to bring a piece of timeless charm into your outdoor space. Whether you’re working with a small patio, a cozy balcony, or a sprawling backyard, this vertical garden solution is a versatile and eye-catching addition. With the right plants and a little care, your garden tower will flourish, becoming a living work of art that evolves with the seasons. I hope this guide has inspired you to roll up your sleeves and start building your own cottage garden tower. Don’t forget to share your creations with me—I’d love to see how you bring this project to life!
See your projects featured! If you are inspired by this or any of my other DIY projects I would love to see them and add you to the Reader’s Spotlight gallery. Send a photo to me at jennifer@cottageonbunkerhill.com
xo, Jennifer
Looking for another cute project?

Learn how to make your very own garden scarecrow to watch over your flowers!


I love the garden tower. Never thought of using bamboo. It really turned out great.
Unbelievable ideas for gardening thanks for sharing
I love this idea. I’m definitely doing this in my garden. Thank you so much for the inspiration. I would love it if you would share this on the Fabulous Friday Link Party. You can find the link on my website. Hugs to you.
Thanks so much, Renae…I’ll do it this week!!
Wow, very amazing and creative DIY ideas for garden. I really love this article. Thank you for sharing this wonderful blog.
This is such a beautiful idea! I love it!
Thanks so much Kristin!!
This is such a great idea! I am so glad I saw this before I finished all my garden planting this year. I can’t wait to add this to outdoor decor!
Thanks Mary Beth!! I’m in the process of making a couple of more…I ran out of steam today!!
This is genius Jennifer! I need 2 for my tomatoes!!
Thanks Julie!!!!
Jennifer,
I saw where Stacy at Bricks N Blooms shared your great idea and I’d love to do the same on my Sunday, Dirt Road adventures.
I’ll share a link back to your site for all the instructions. I hope that’s ok.
Of course Rachel, grab a picture too if you want!
This is just a gorgeous idea. I’m thinking my pole beans will LOVE it!
Yes!! They will look so cute!!
Jennifer – this is so smart! We are definitely giving this a try! Thanks for the tips and detailed info.
Thanks ladies!!
Great idea! I’ve seen that rush stuff, but never knew how to use it. Great idea to soak it, so it’s flexible. I love that new vine version; will have to see if it’s offered in my area. Just got started with flower shopping. Yes, the next month will be busy; we’re adding a whole new picket fence raised bed veggie garden! Looking cute;)
Your fence is so cute!! I checked it out this morning. I’m panic stricken with how much I still have left to get done outside!!!!!
I love this so much! I’m always looking for great garden repurpose ideas and this hits the mark! So happy to be part of this super fun blog hop with you!
Thank you Michelle!! I love this group!!
Jennifer
I love this idea. I saw where Stacy shared this post. I’ve been wanting to do something similar, so I may copy your idea. It’s so clever.
Yes…because I’m about to copy your flower pot wreath to hang on my garden gate!!!
I love how you turned a nice piece into a lovely art creation for a cottage garden. It’s just my style and can’t wait to make one for my apartment cottage porch. Thanks so much for the tutorial.
Thank you so much Meegan!!
I need a few of these for my garden! Thank you so much for sharing this awesome DIY!!! Wonderful hoping with you and I hope you have a great weekend.
Thank you Chas!! I’m going to make a couple more…when I get to it (isn’t that every DIYers mantra!!)
You come up with the best ideas! I adore this project and hope to make one for my home. Years ago I scored a Black Eyed Susan Vine at a plant sale an it was so pretty and it bloomed its heart out all summer.
Thanks Paula!! I’m so excited for this year’s garden!
So sweet Jennifer, you made that simple tomato cage look AMAZING and yes, very cottage-y!! I love the flowers too, will have to look for those ones. Pinned 😉
Thanks so much Cindy!!