Are you looking for a way to add a touch of luxury to your home without spending a fortune? Look no further than this DIY vase tutorial! With just a few simple materials, you can create a vase that looks just like the ones you’d find at Pottery Barn.
How To Get The Pottery Barn Look From A Thrift Store Vase
I went out thrifting the other day…I was on a mission to find something to use for a Pottery Barn inspired DIY vase.
I love all the Pottery Barn and Restoration Hardware vases and planters that are out there right now…but I don’t $100 like them if you know what I mean!!
This post includes affiliate links; you can read my disclosure policy here.
Materials:
- Glass Vase
- Joint Compound
- Plastic Putty Knife
- Off-White Chalk or Matte Acrylic Craft Paint
- Earthy Combo (brown,taupe, gray) Chalk or Matte Acrylic Craft Paint
Step By Step:
Find A Vase

We have a Savers thrift store nearby that’s huge and I usually find cool things to flip. I was in there 30 seconds before I found the perfect vase!! One thing that I notice in most thrift stores is they usually have a shelf of glass vases that people donate.
Step 1- Cover Vase With Joint Compound

Once I got the vase home I cleaned it and removed the sticker price tag. You can use a hair dryer to remove the tag quickly, the warm air should make it easy to just peel it off in one piece.
The thing that I love about all those high-end store vases is the texture and aged look they all have!!
I have a cool and simple way to create some texture to the smooth glass vase!
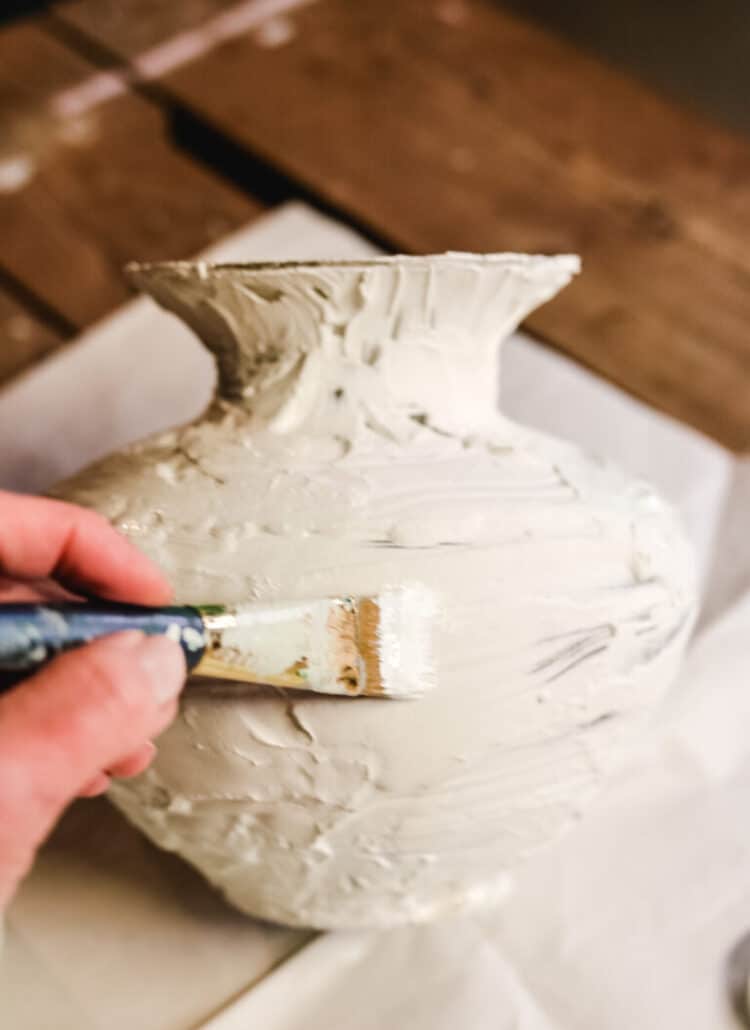
I used a plastic putty knife and coated the outside of the vase with joint compound. It’s so easy…like frosting a cake!!
Joint compound is different than spackle. Joint compound it creamier texture where spackle can be dry and cakey. Make sure to use joint compount.

You need to let it dry overnight before moving on to the painting.
Step 2- Painting The Thrift Store Vase Off-White
The next step to making this thrift store bargain look like a Pottery Barn vase is to do a little painting!

Using off-white chalk paint, I coated the entire vase with paint; then let it dry completely before moving on. A smaller paintbrush worked well to get the paint into all of the texture that the joint compound created.
Step 3. Layer On Color

Next up, I dry-brushed dark brown chalk paint over the vase.
Dry brushing is when you dip your paintbrush into the paint and then tap off most of it onto a paper towel or paper plate. This way only a small amount of paint is on your brush.
Then use light sweeping motions to just add a bit of color that really picks up all the details on whatever project that you are painting.
You can see how the dark brown paint picks up all the cool texture the joint compound created.

Then I used the same dry brush effect using a taupe brown colored chalk paint.
Stp 4. Final Quick Detail

My last quick step was to dab on a little gray paint. I used a piece of natural sponge, but a crumpled-up paper towel would have the same overall effect.
Just trying to build up the layers of color and adding depth to this former clear glass vase.
If you have ever looked at the vases an vessels that Pottery Barn and the other high end decor stores sell you will notice how they have layers of color that give them that old world look.

Finished Vase
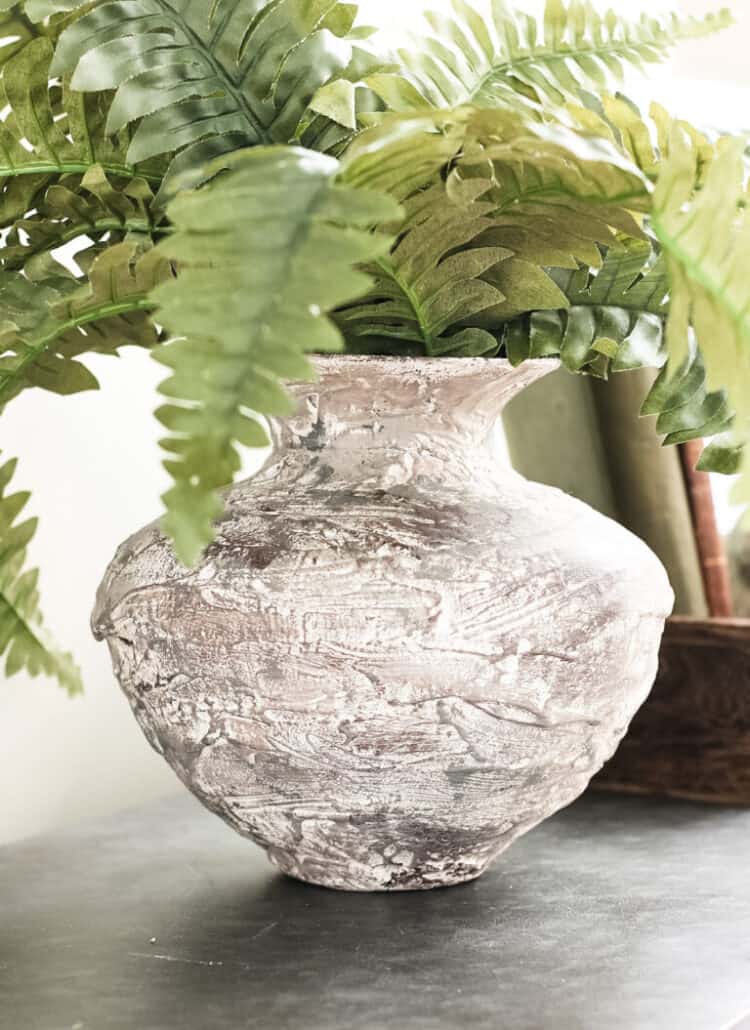
I have to say since I first made this vase 2 years ago that it has become one of the most popular DIY tutorials on this site! And guess what, I still love this vase and have it out somewhere in my house year round!!

Here I used to to hold a bunch of DIY Moss Branches that I recently made (really cool project…and easy too!)

Upcycled Vases
DIY’s to Try
Shop My Home:
Check Out the latest DIY Decorating Projects!
Check Out My YouTube Video To Watch Me Make This Vase!
So what are you waiting for? Get started on your own Pottery Barn-inspired vase today!
xo, Jennifer

A few faux fern stems in the vase and it was ready for my entryway table!


What a fabulous idea! Going to look for a cheap yet classic design vase And give this a try! Thank you!
Oh good!! It’s one of my favorite kind of DIY projects!
Very nice! The fern stems really compliment it. And I like how achievable this project is. 🙂
Thanks so much, Lynn! This is definitely one of my favorite projects and I have it out year-round.
Very nice, I would have liked to have seen the Pottery Barn vase inspiration next to your version.
Love this beautiful vase. You have excellent tutorials.
Thank you
Thank you, Nancy!! You made my day!
Instead of going out and buying a can of joint compound could I use baking soda and water to make a paste to make the texture on my vase?
Anita, I’m not sure it would adhere to the vase long-term…but I know you can just mix the baking soda right into your paint to make it textured.
This is beautiful! I’m almost positive my husband has some joint compound collecting dust in the basement. I have to try this! It looks so much easier than I thought it was going to be. And the faux fern is just perfect for it!
WOW ! ❤️