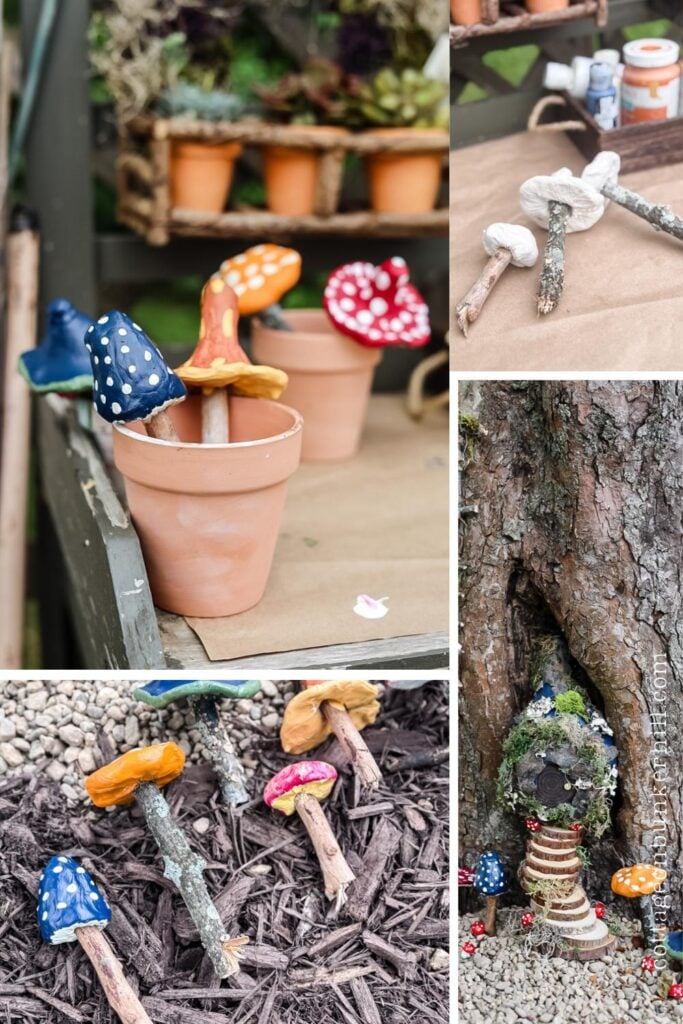
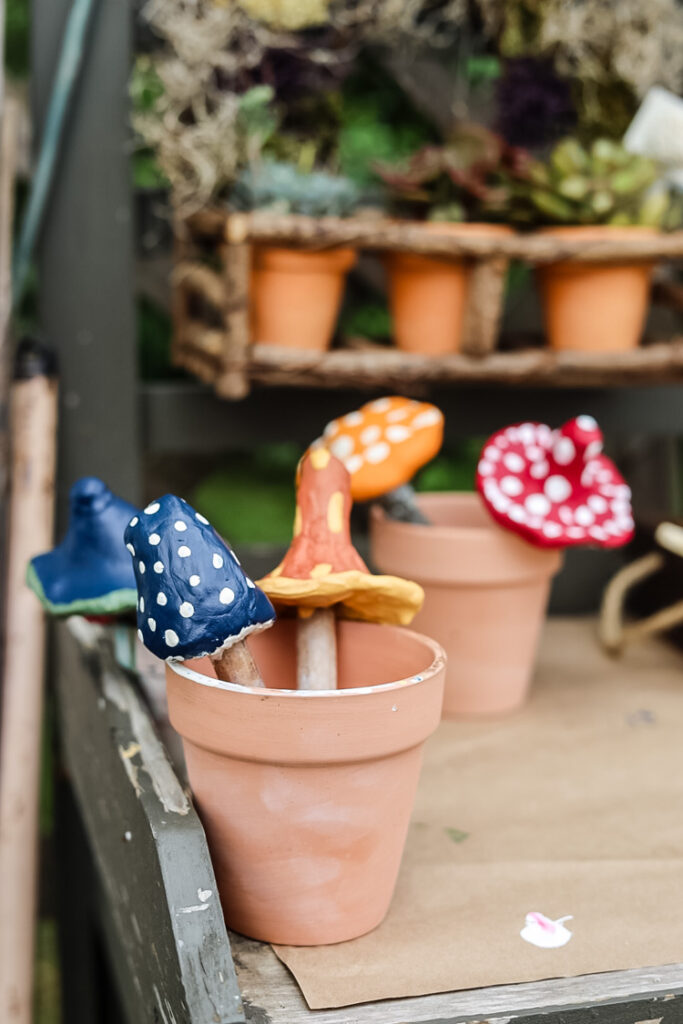
Bring your fairy garden to life with these charming, easy-to-make clay mushrooms! Made with simple air-dry clay and fallen branches, they add a pop of color and whimsy to any outdoor (or indoor!) fairy scene. Best part? No kiln, no sculpting skills-just fun!
No-Bake Clay Mushrooms for Outdoor Fairy Gardens
Let’s be honest-no fairy garden is complete without a ring of whimsical mushrooms! When I set out to create some for my own fairy tree display, I wanted mushrooms that looked organic (but wouldn’t melt in the rain). After brainstorming a few ideas, I landed on this foolproof air-dry clay technique that uses fallen branches for stems and requires zero fancy tools.
The best part? These little toadstools come together faster than you’d think. In about 30 minutes of active time (plus drying), you’ll have a whole family of durable, weatherproof mushrooms ready to nestle among your pebbles and fairy houses. Whether you prefer classic red-and-white speckled caps or earthy forest varieties, this project is all about embracing imperfections—because in fairy gardens, charm trumps perfection every time!
This post may contain affiliate links, which means we receive a small commission if you purchase through our links. See our disclaimer page for more information.
What You Will Need
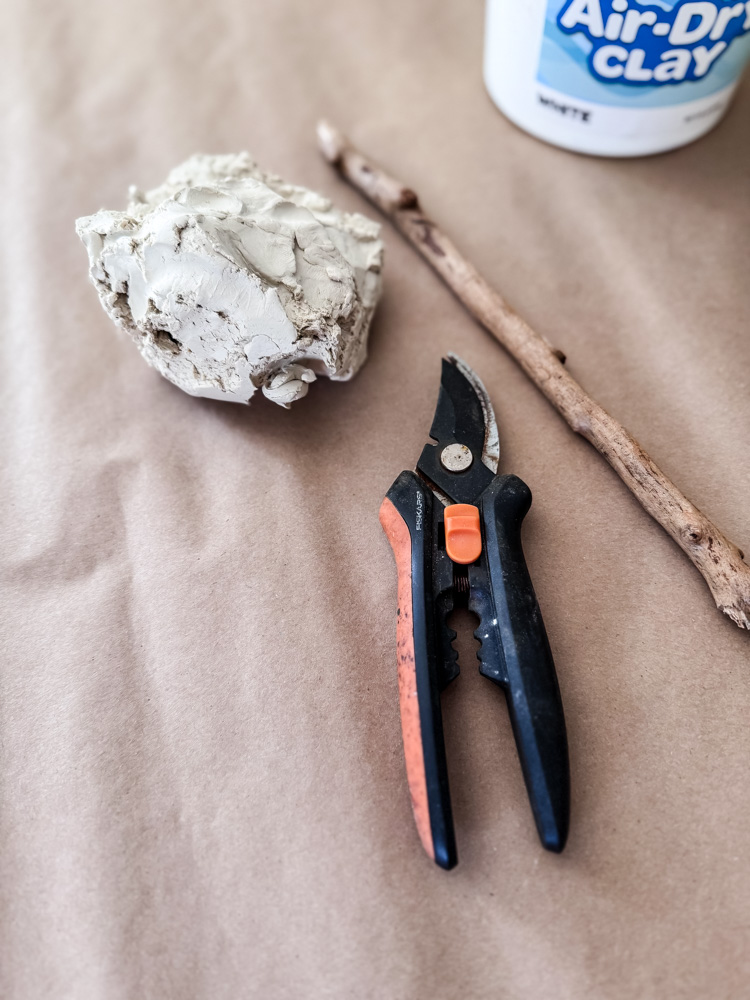
Materials for this Project
- Air-dry clay
- Fallen twigs/branches (for stems—look for slightly curved ones!)
- Garden clippers (to cut branches if necessary)
- Acrylic craft paint (bright reds, whites, speckled browns—go wild!)
- Toothpick (for detailing)
- Clear acrylic sealer (for weatherproofing)
- Small paintbrushes (including a fine-tip for spots)
Step-by-Step Tutorial
Have your supplies ready and cover your work surface ( I use a roll of brown kraft paper when I’m working on DIY’s, I bought this roll 2 years ago and do projects all the time!). Forage your branch and either break or cut it to make the mushroom stems.
1. Shape Your Mushrooms
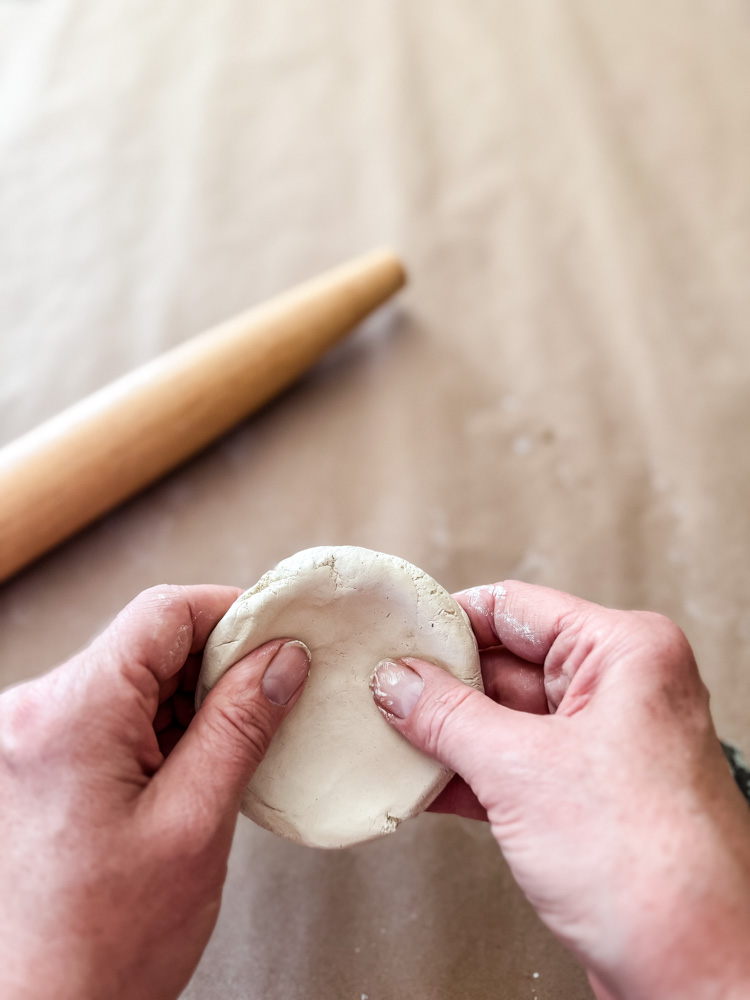
- Roll clay into a thick ball (about the size of a golf ball for standard mushrooms). Some pieces I flattened out some I left as a ball.
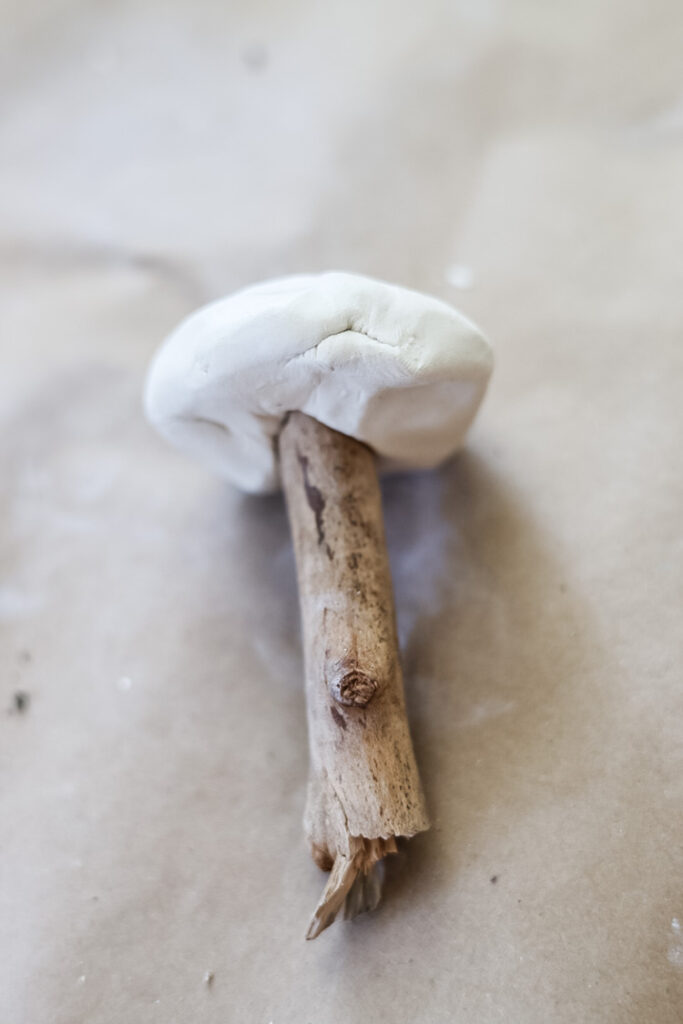
- Press a stick into the center-this will be your stem.
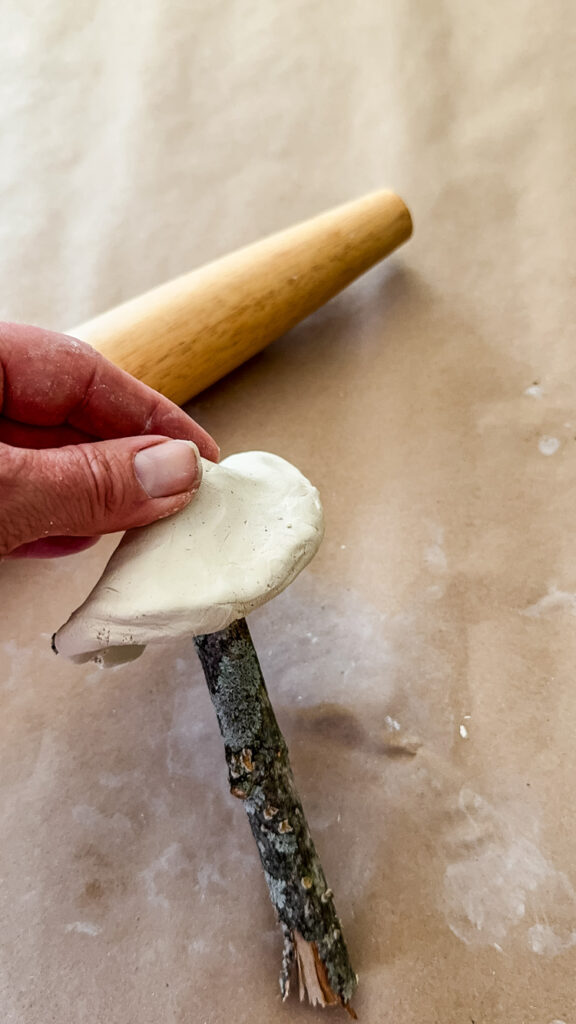
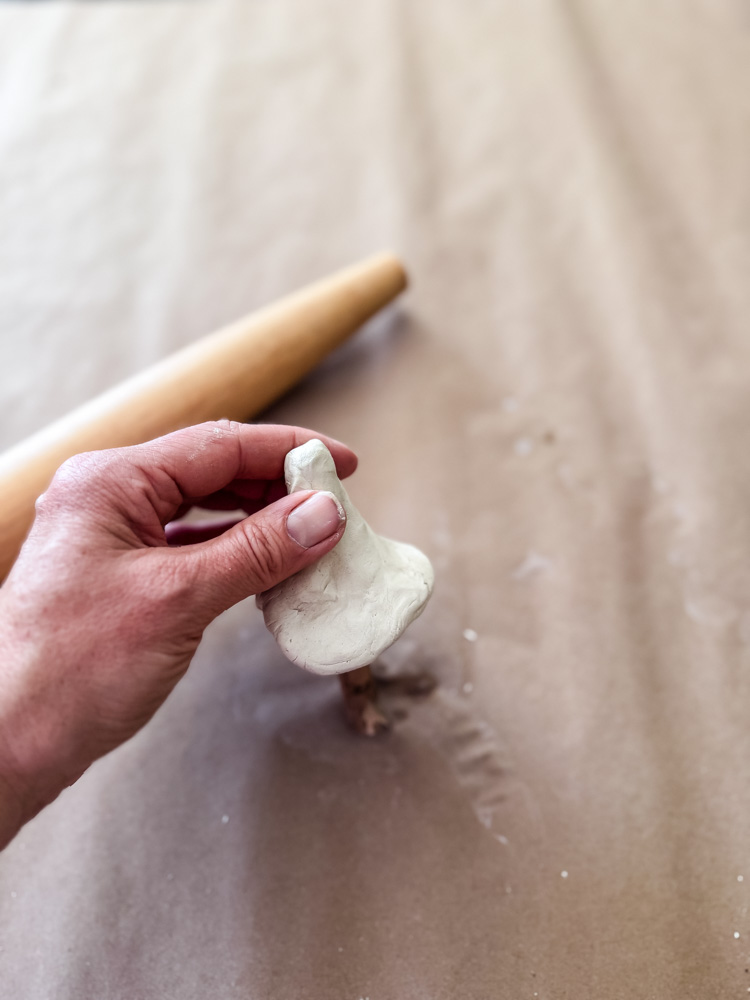
- Gently shape the cap around the stem:
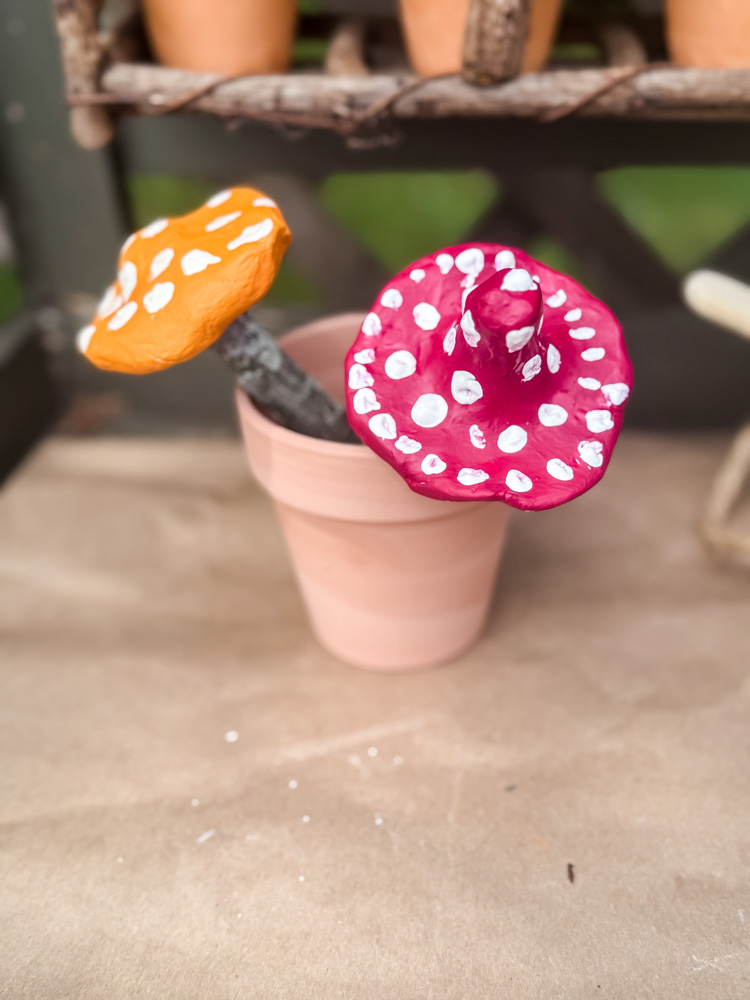
- For classic toadstools: Pinch the top into a dome.
- For fairy-tale mushrooms: Flatten slightly and curl the edges upward.
- Pro Tip: Don’t push the stick too hard—it can poke through! (I learned the hard way.)
Tip: To fix any cracks or soften edges dip your finger in water and smooth over the area.
2. Let Dry Overnight
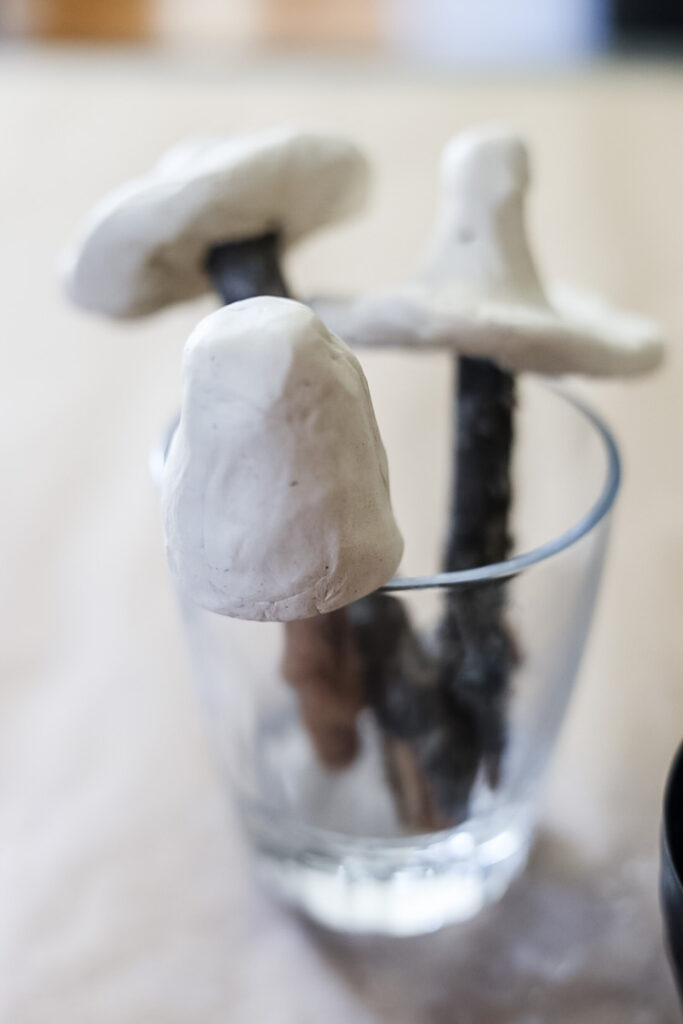
Let the mushrooms dry completely overnight; I would suggest using a glass so the mushrooms don’t end up with a flat spot.

3. Paint & Decorate
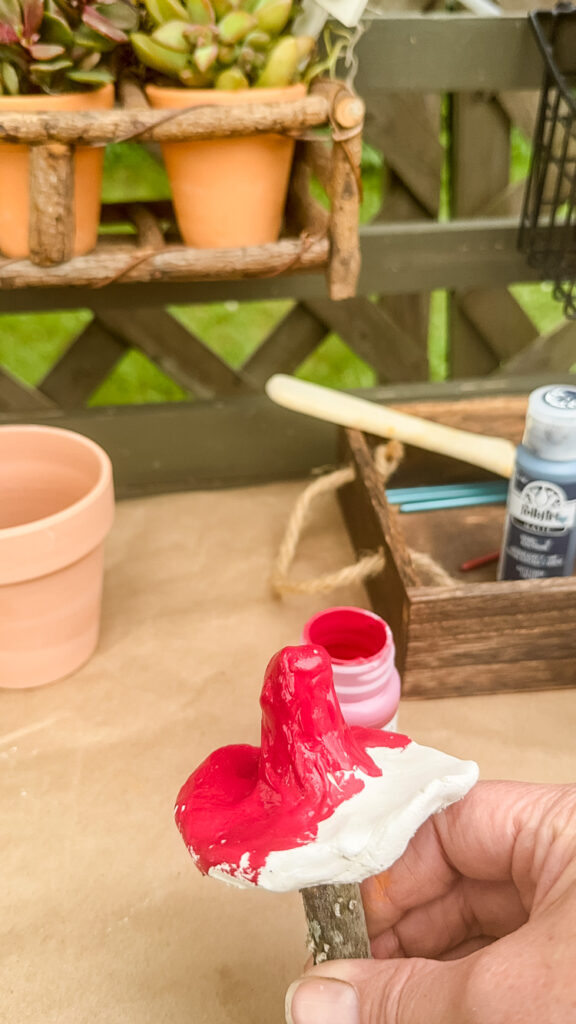

Now it’s time to get creative and have some fun!
- Use acrylic craft paints – They’re vibrant, quick-drying, and perfect for clay.
- Keep a brush for each color – No rinsing between shades = faster painting!
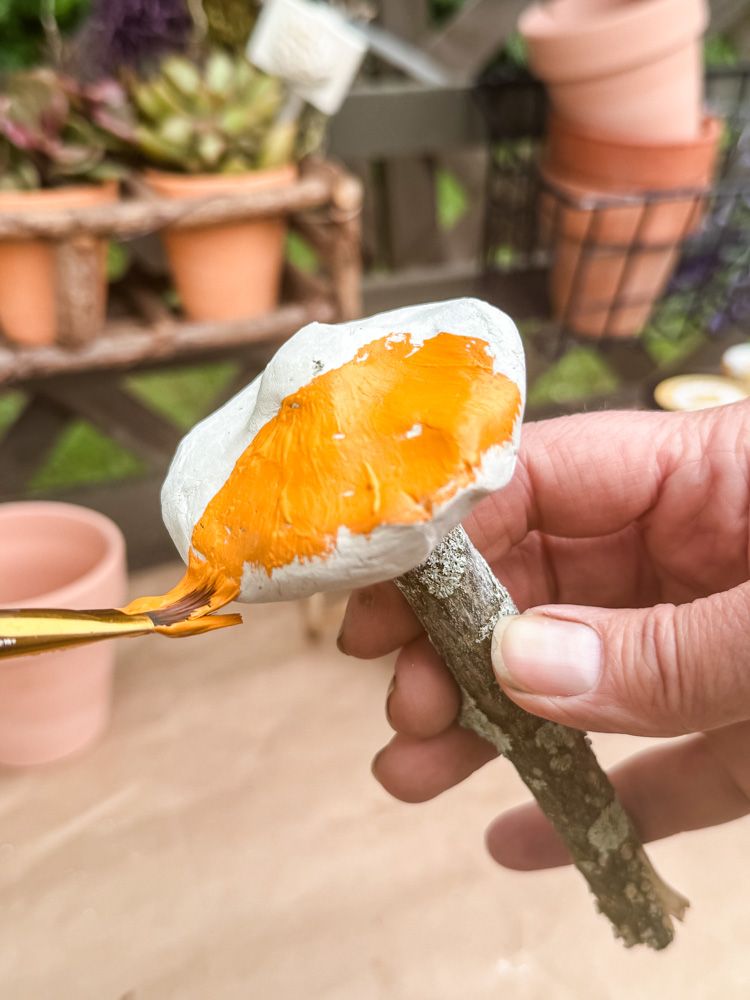
- Base coat first: Solid colors work best (red, blue, or orange).
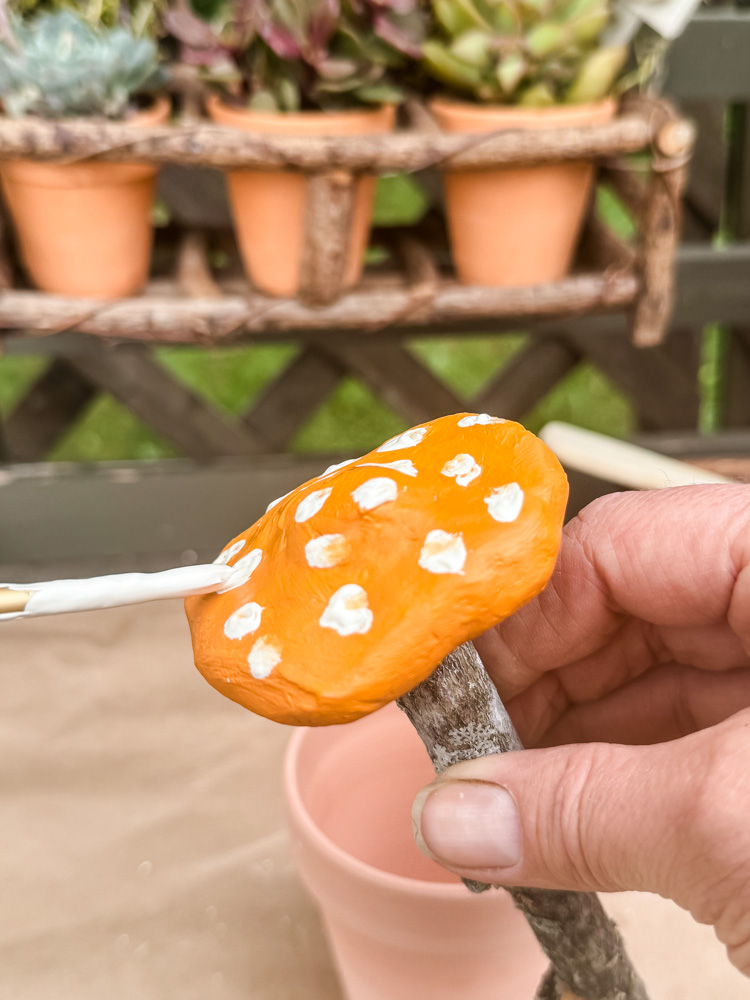
- Add spots/stripes with a fine brush (or the end of a pencil eraser for perfect dots!).
- Try ombré effects by blending two colors on the cap.
4. Weatherproof (A Must!)
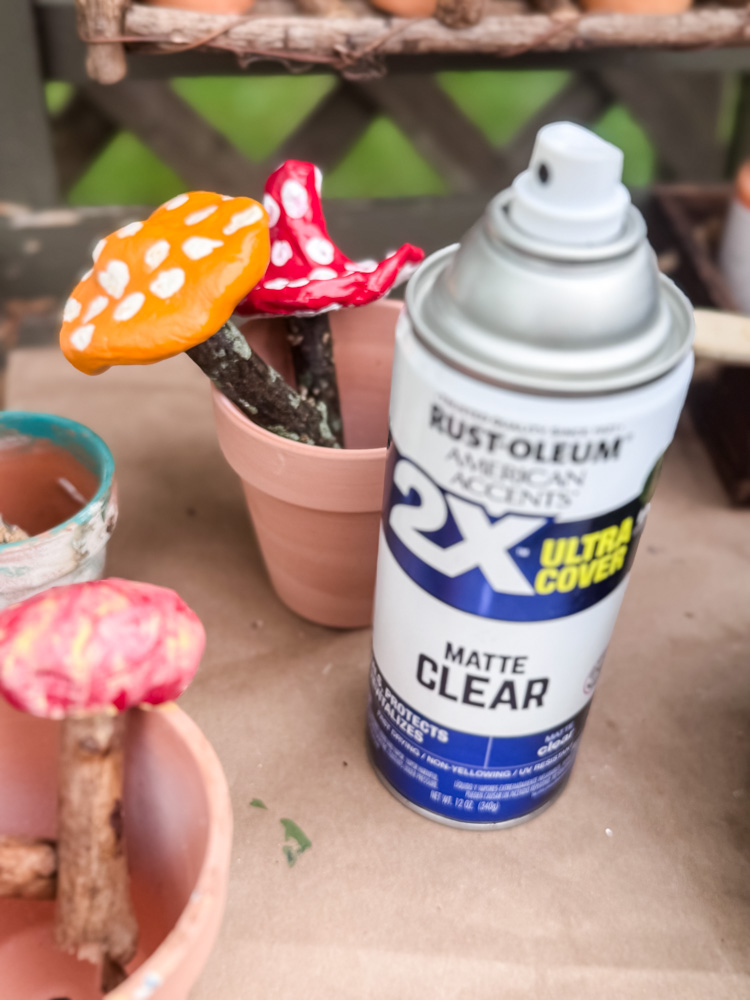
Protect your mushrooms with 2 light coats of clear acrylic sealer (both clay mushroom & stick) – this is essential for:
- Outdoor durability (rain/sun protection)
- Indoor plant use (prevents moisture damage)
- Long-lasting color (keeps paint from fading)
Troubleshooting & Pro Tips
- My clay cracked while drying! – Smooth cracks with wet fingers before it fully sets.
- Stems won’t stay in! – Add a dab of glue into the cap if it dried loose.
- I hate painting! – Use pre-colored clay or stain with watered-down paint (but painting is best, sorry!)
Style & Place Your Mushrooms
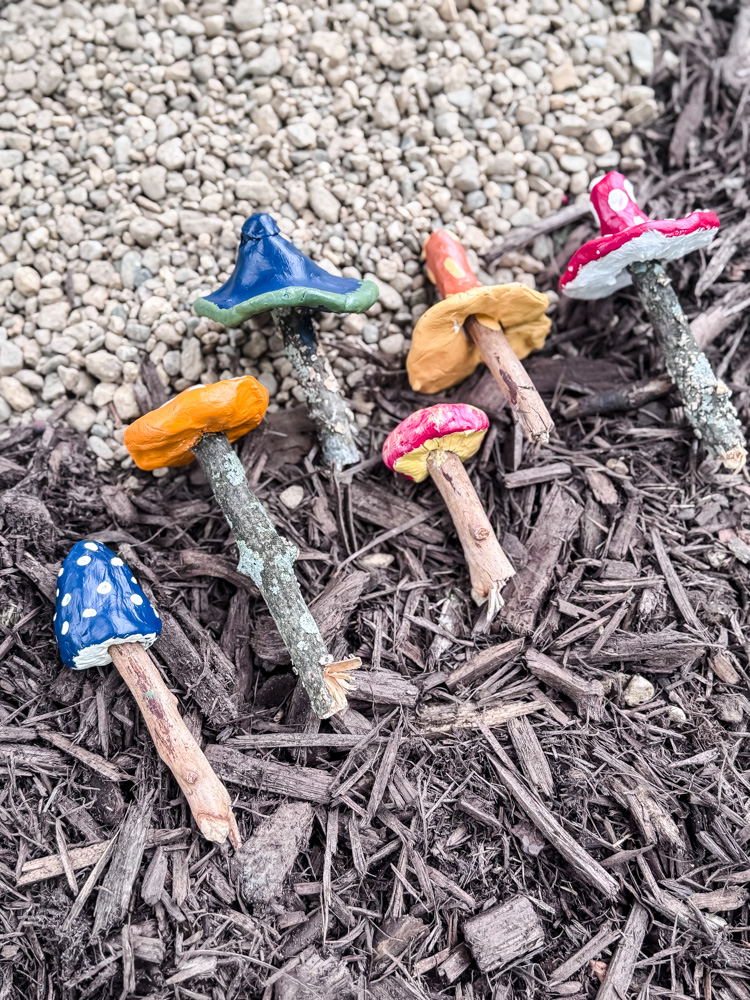
- Cluster them around your fairy tree for a “magical ring” effect.
- Tuck them under ferns or beside pebble paths for hidden surprises.
- Mix sizes-some towering, some tiny-for a natural look.
I mixed in some teeny crafting mushrooms, but one night of rain and they are peeling. I’m going to spray a few more with the spray topcoat and will report back on durability!
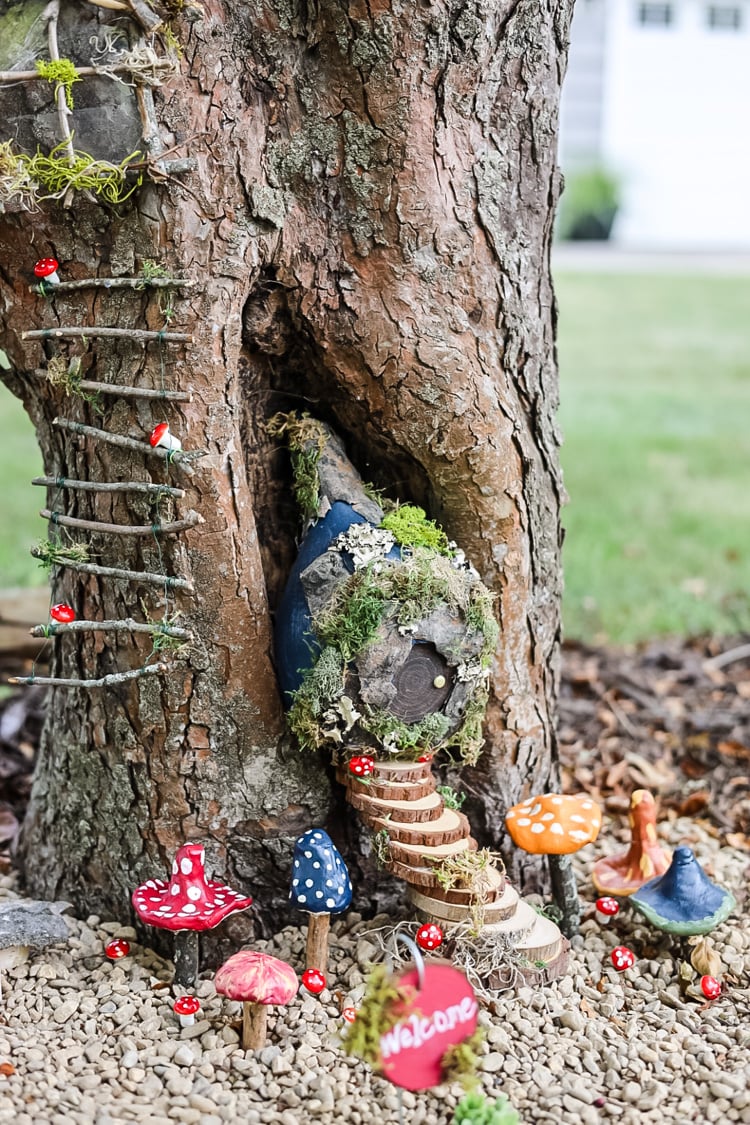
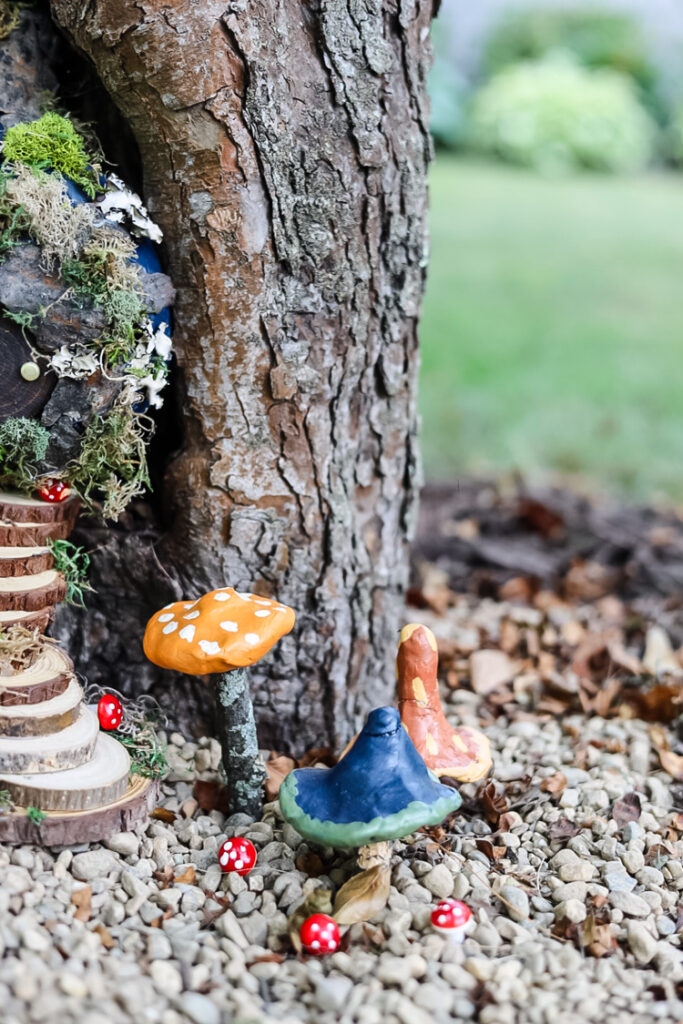
Fairy Garden Tree Garden

Learn how I made this entire fairy tree garden from foraged materials & craft supplies I had on hand. It’s a fun & affordable way to create a little bit of magic in your yard!
Bringing the Fairy Garden to Life – Final Touches & Lasting Magic
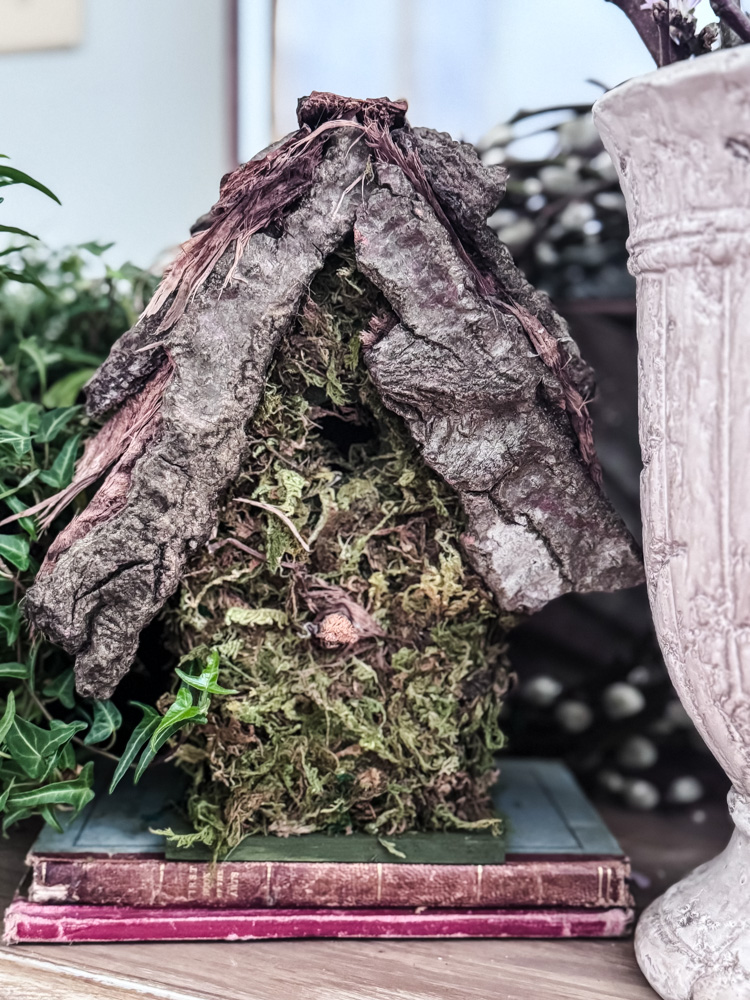
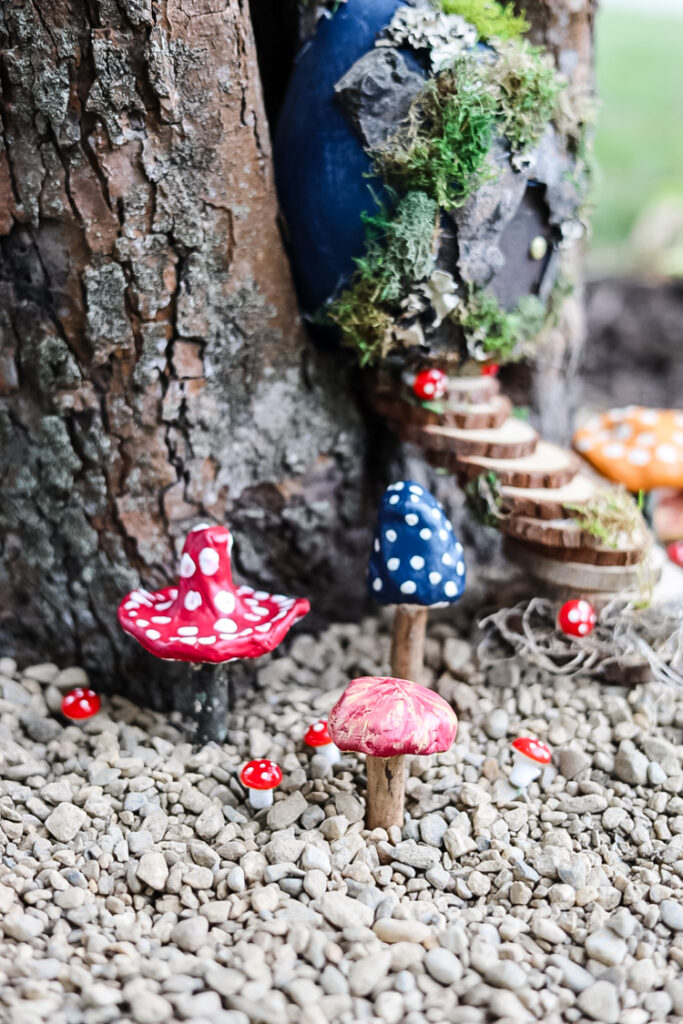
And just like that, your enchanted miniature world is complete! From the birch-bark fairy house tucked into its tree hollow to the twig ladders, pebble pathways, and now these handcrafted clay mushrooms, every detail works together to create a space where imagination takes root.

These air-dry clay mushrooms were the perfect finishing touch-durable enough for outdoor whimsy (thanks to that clear sealer!), yet playful with their bright spots and organic shapes. Scatter them around your fairy tree, nestle them along the pebble path, or let them sprout unexpectedly near the windows. Remember: imperfections add character, so don’t get caught up in making every spot perfectly round; no one will ever notice!
A Gift That Keeps Growing:
This whole project-from gourd cottage to toadstools—proves that magic isn’t found in perfection, but in repurposing what nature (and your craft stash) provides. Over time, your fairy garden will evolve: moss will creep, paint will weather, and maybe you’ll add a tiny swing or acorn-cap lantern later. That’s the fun of it!
Now it’s your turn1
I’d love to see how your fairy garden blooms! Send in your photos & questions to jennifer@cottageonbunkerhill.com so I can:
- Spotlight your creations in the reader’s gallery
- Answer questions about your own mushroom-making adventures
- Share seasonal ideas (how cute would an Autumn fairy garden be!)
Happy crafting, kindred spirits! May your gardens grow wild with wonder.
xo, Jennifer
Try This Fun Garden Project!