

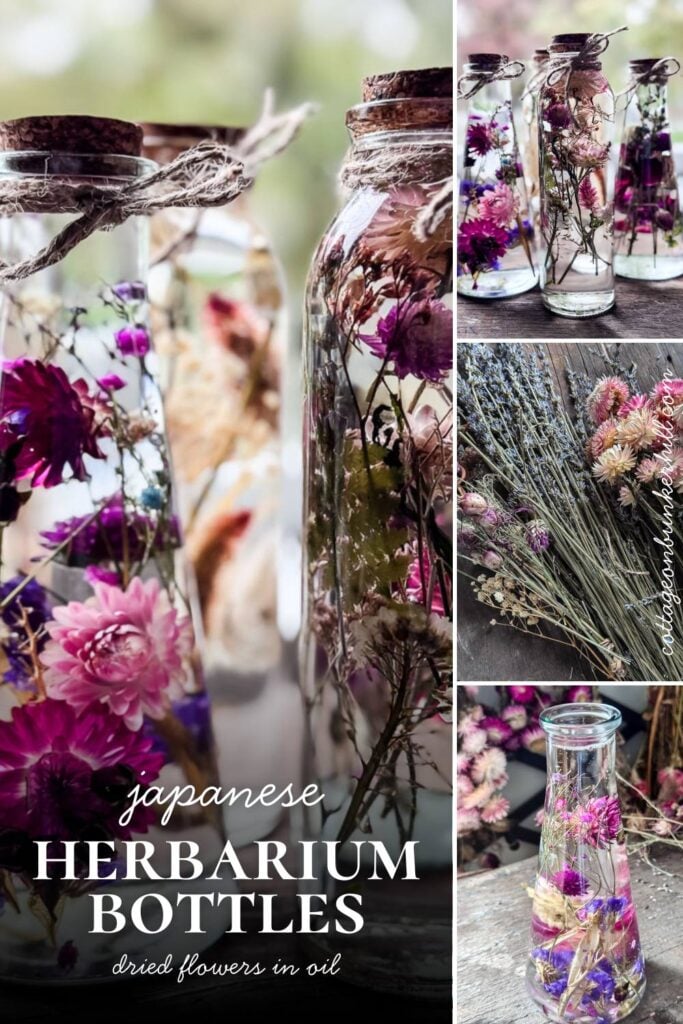
Have you ever stumbled across something online and thought, I need to make that immediately? That was me, the first time I saw Japanese herbarium bottles. Dried flowers suspended in clear glass, filled with oil, arranged like something out of a botanical apothecary, I was completely smitten.
The best part? I already had almost everything I needed growing right outside my door.
A Japanese herbarium is the art of arranging dried flowers in a sealed glass bottle filled with oil. It sounds fancy. It looks expensive. But it’s one of the most satisfying and budget-smart things I’ve made in a long time. It’s also the most me project imaginable: grow it, dry it, put it in a bottle, and call it decor.
If you’ve got dried flowers sitting around from last season (or a cutting garden full of blooms just waiting to be preserved), you are so close to having one of these on your windowsill, too!
Garden to Home
I’ve always believed the line between garden and home should be blurry. This series is all about crossing that line. Taking what grows outside and bringing it indoors in beautiful, lasting ways. New projects posted monthly.
Let’s grow together!
So, What Exactly Is a Japanese Herbarium?
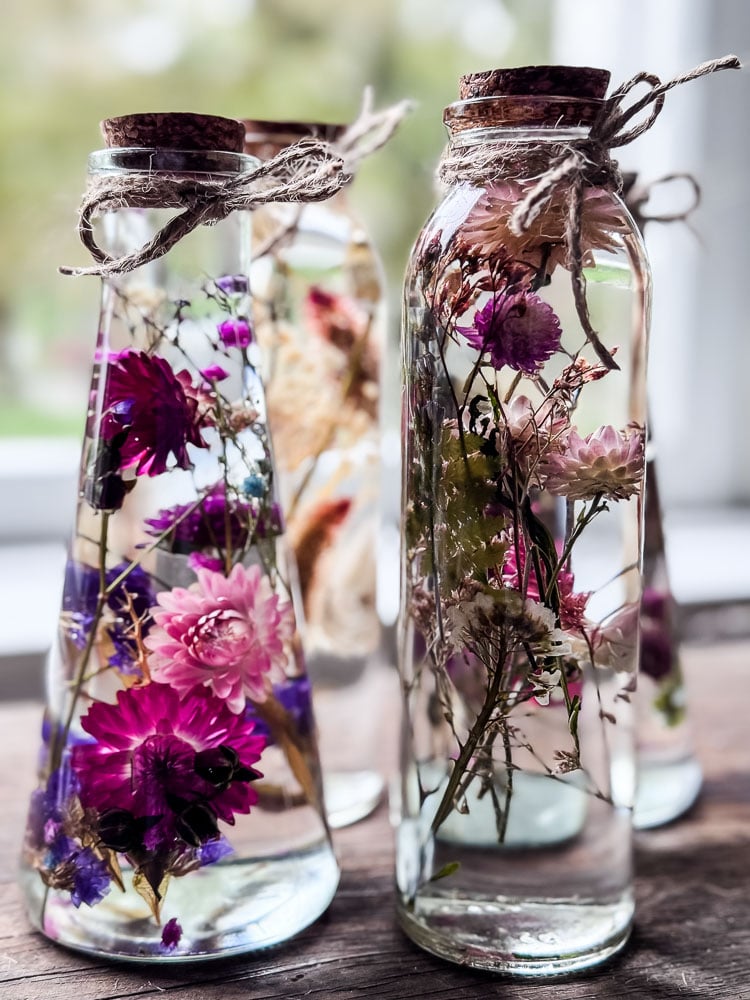
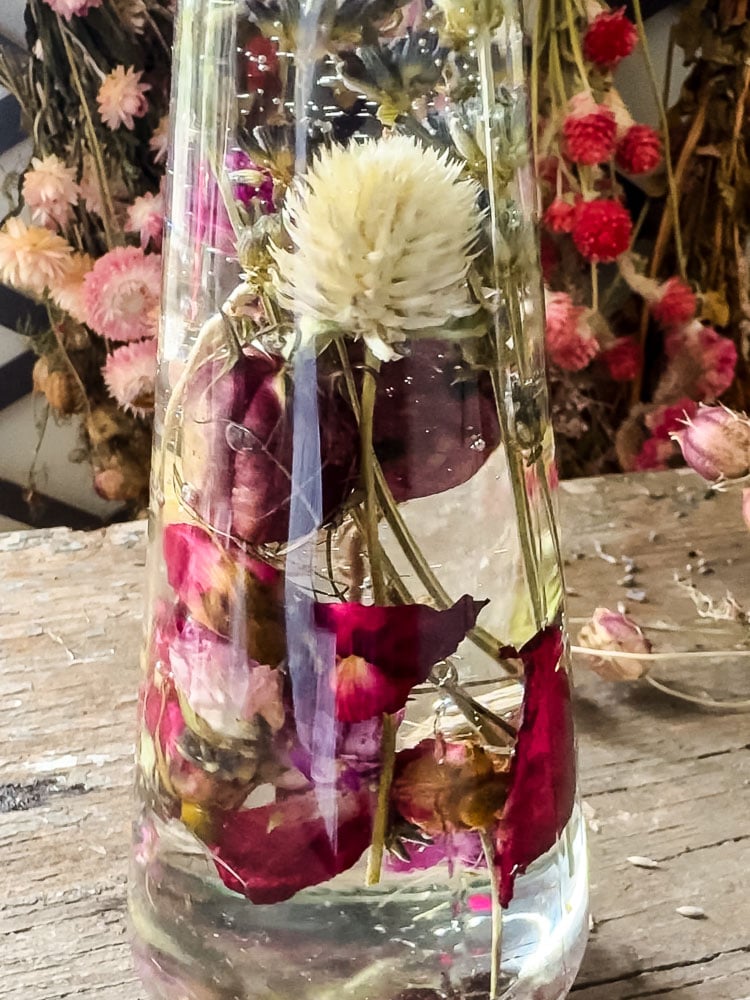
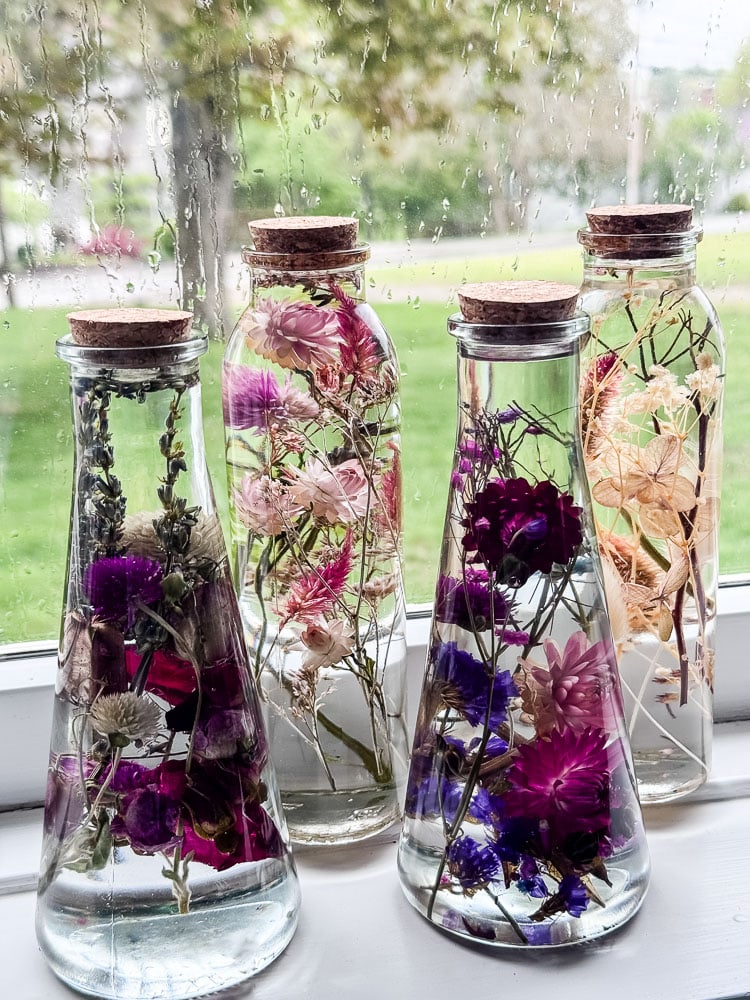
The word herbarium might make you think of dusty pressed plant specimens in a science textbook, and technically, that’s the traditional definition. But in Japan, the concept took a decidedly more beautiful turn. A Japanese herbarium is simply dried flowers arranged inside a clear glass bottle and preserved in oil. That’s it.
The oil does something almost magical! It clarifies the petals, deepens the colors, and makes everything glow when light passes through the glass. Set one on a sunny windowsill, and you’ll see exactly what I mean.
They’ve become a popular craft and home decor item in Japan, and they’re slowly making their way into the rest of the world’s consciousness for good reason. They are gorgeous!! Boutique versions sell for $30, $40, or even more. A DIY version made with flowers from your own garden? A few dollars at most, and honestly, more special.
This post may contain affiliate links, which means we receive a small commission if you purchase through our links. See our disclaimer page for more information.
Here’s What You Will Need
Materials for this Project
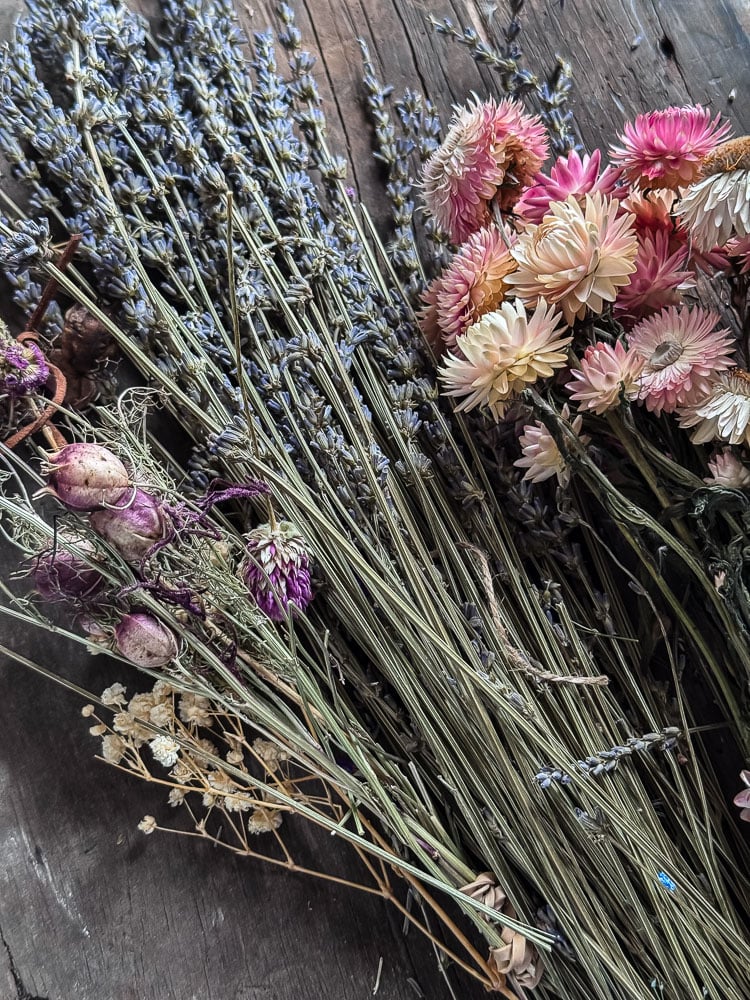
For the flowers I used:
- Dried strawflowers, globe amaranth (pop of color)
- Dried hydrangea heads
- Love-in-a-Mist pods
- Bunny tails, baby’s breath, sea lavender
- Dried celosia
- Lavender sprigs
- Poppy pod
- Rose buds/ petals
- Ferns
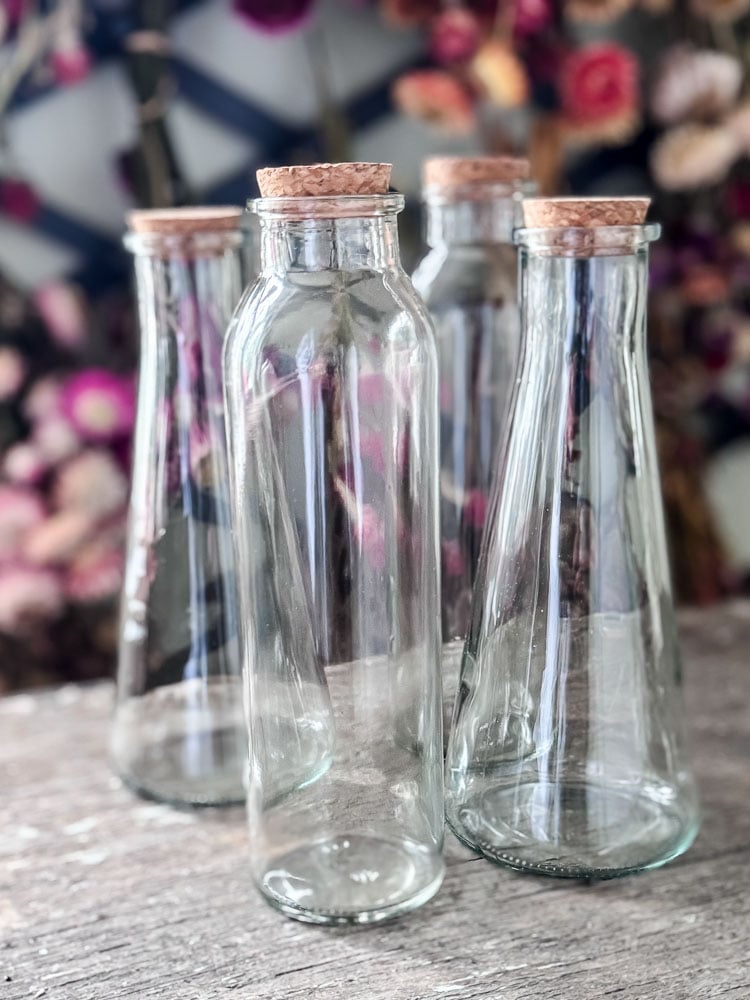
For the bottles:
- Clear glass bottles with cork stoppers or bottle caps (I used this set of tapered bottles & this set of round bottles)
- Mineral oil: this is the preferred choice for the clearest result
- A wooden skewer or chopstick for arranging
- Small scissors or floral snips for trimming stems
- Optional: hot glue gun to seal the cork
A Note On Bottles
You don’t need to buy anything fancy. Honestly, start by raiding your own kitchen. Large honey jars, jam jars, or even a mason jar would be absolutely beautiful filled with dried flowers and oil. The wide mouth actually makes arranging easier.
If you want something a little more apothecary-looking (like the tall cork-topped bottles I used), check your local thrift store first. I come across interesting glass bottles there all the time for next to nothing. IKEA, HomeGoods, and craft stores like Michaels also carry affordable, clear glass bottles with cork stoppers. Or search “herbarium bottles” on Amazon if you want a set with matching shapes or a variety of sizes.
The only real requirement is that the bottle is clear glass and has a lid or cork that seals snugly. Beyond that, any shape or size works. And mixing different bottle shapes in a grouping actually looks really lovely.
Welcome! I’m Jennifer, and I’ve always believed nature is the most beautiful art supply. For years, I’ve been preserving New England’s blooms and foliage through pressing, drying, and crafting. Let me show you how to capture a little bit of the season and bring it indoors—simply and beautifully.
How To Dry Your Flowers
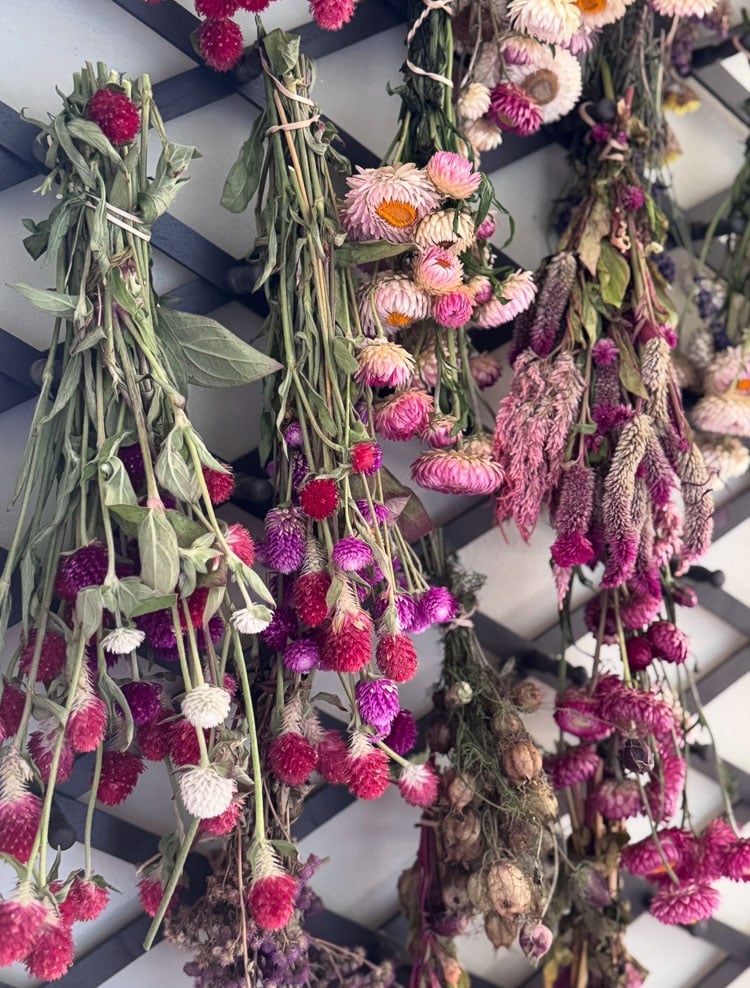
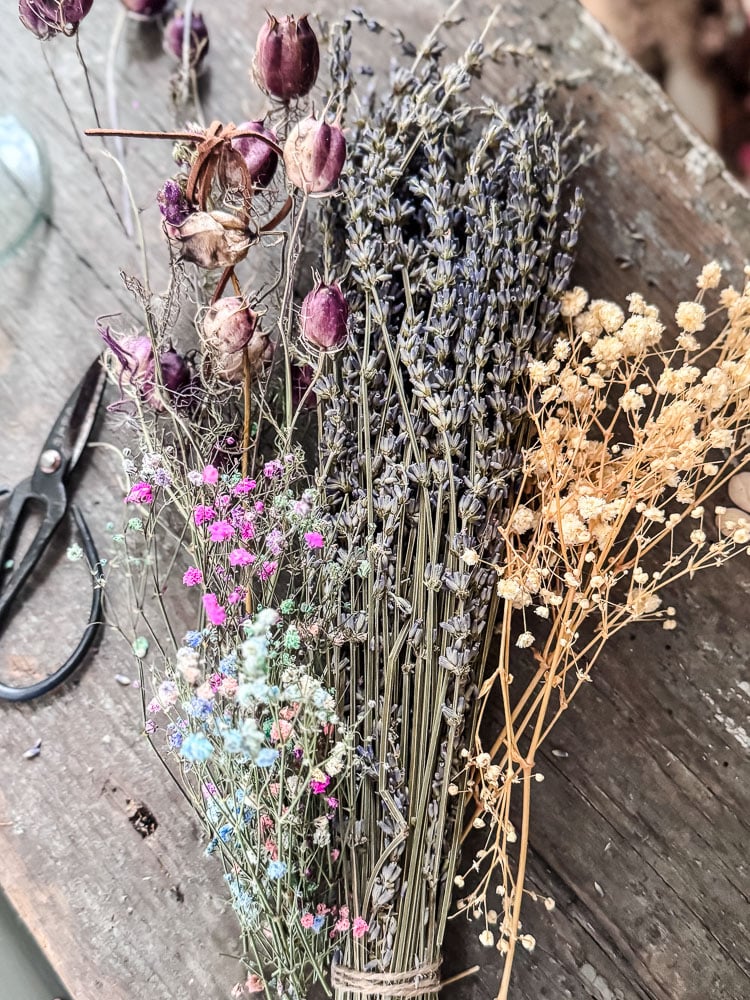
If you’re growing a cutting garden, you’re already halfway there. Most of the flowers that dry beautifully are the same ones that are effortless to grow: strawflowers, globe amaranth, statice, and lavender are practically foolproof. They hold their color, keep their shape, and look stunning suspended in oil.
For air-drying, simply gather your stems into small bundles, secure them with a rubber band, and hang them upside down in a cool, dry spot out of direct sunlight. A couple of weeks is usually enough. You’ll know they’re ready when the stems feel stiff, and the petals are papery to the touch.
If you don’t grow your own flowers, no worries!! Hit up your grocery store, farmer’s market, or Trader Joe’s and grab a couple of bouquets of flowers to dry. There is also a wide variety of dried flowers available online (Amazon & Etsy).
A few notes from my own experience
- Strawflowers and globe amaranth are the workhorses of this project. They dry quickly, keep their color beautifully, and look incredible in oil.
- Hydrangea flowers were difficult to work with for this project! I wouldn’t use them again.
- Bunny tails, sea lavender (sometimes called German statice), and baby’s breath add beautiful movement and airiness to the arrangement
- Tiny Rose buds looked like bright pink pearls & I loved them!
- Lavender adds a lovely, wispy, purple-toned element and looks especially pretty near the top of the bottle
One important rule: make sure everything is completely dry before it goes in the bottle. Any residual moisture is the main culprit behind cloudy oil, and your flowers could mold. You’ve worked too hard on these to have that happen
How To Make Herbarium Bottles
This is honestly one of those projects that looks more complicated than it is. Once you sit down with your flowers and your bottles, it becomes almost meditative. A little like arranging a tiny bouquet, except this one will last for years.
Step 1: Prep Your Flowers
Before anything goes in the bottle, do a little editing. Remove any excess leaves, trim stems to varying lengths, and break larger hydrangea heads into smaller clusters if needed. Varying your stem heights is what gives the finished bottle that layered, full look. You don’t want everything the same length.
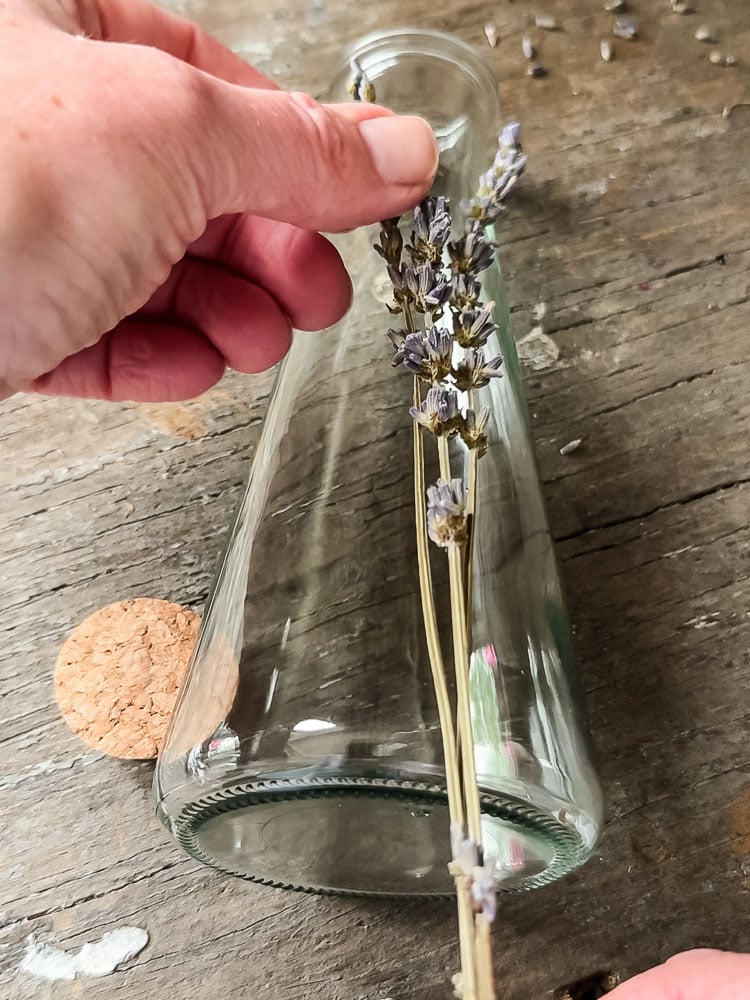
A tip is to hold a longer flower next to your bottle to figure out just how long you want it to be, then snip off the excess stem.
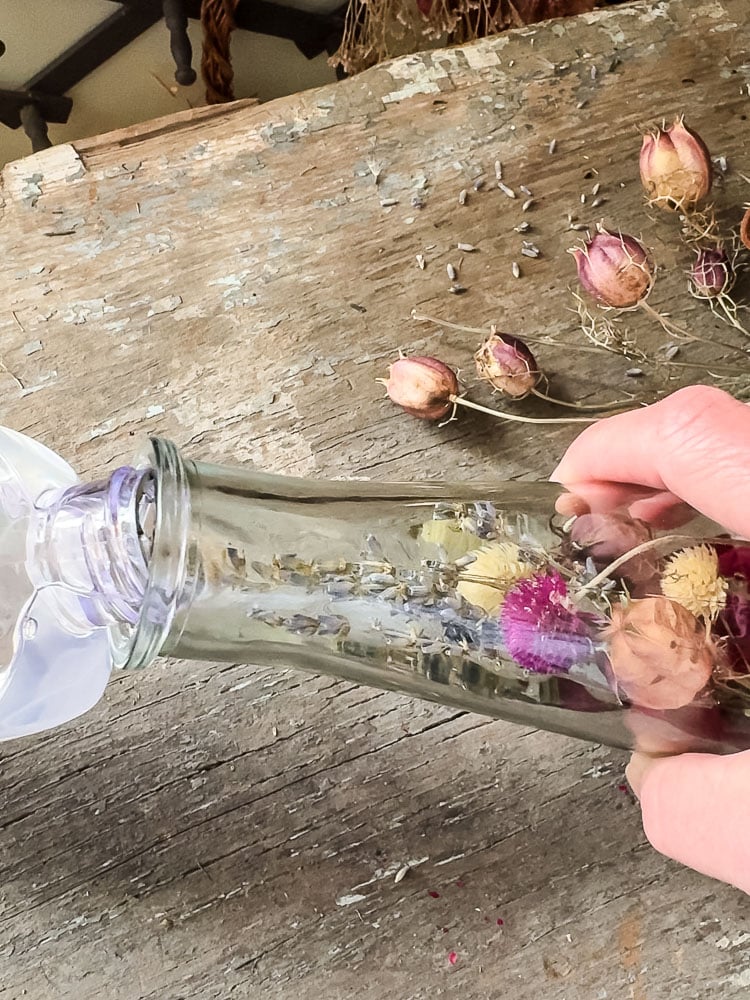
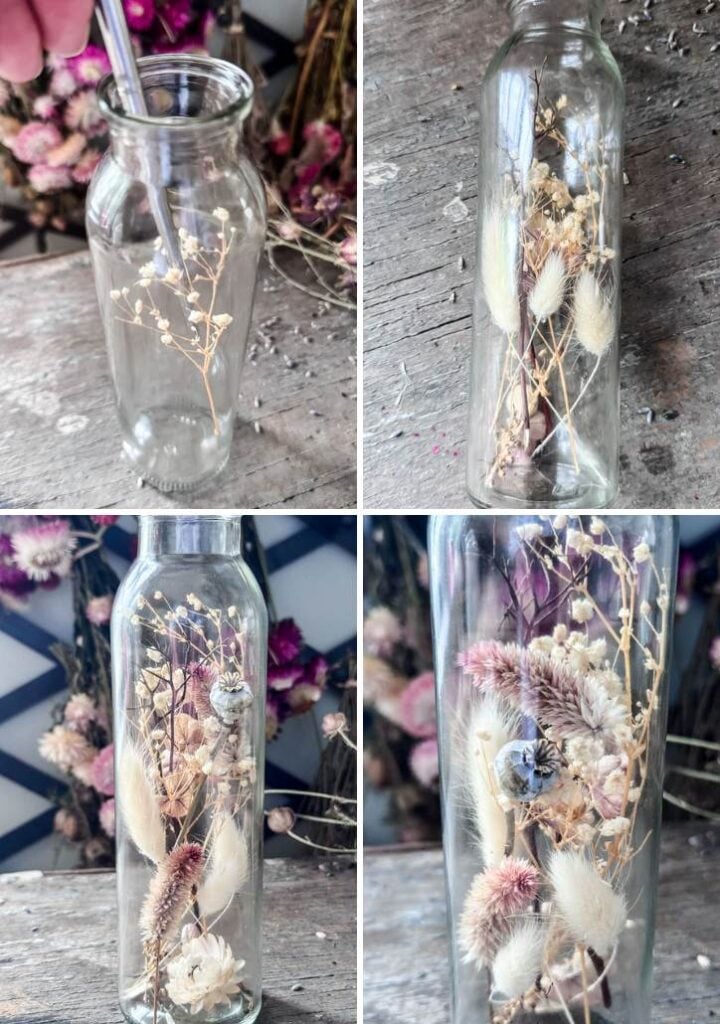
Step 2: Start Arraging Your Flowers

Begin with your filler stems like baby’s breath, bunny tails, sea lavender, and lavender. I found it easier to add these first. Especially the clumpier stems, like the baby’s breath, that take up space.
Next, I added more structured flowers first: strawflowers, globe amaranth, love-in-a-mist, or rose buds
Use a wooden skewer or chopstick to guide stems into place and nudge things around. Take your time here. This is the fun part!
Step 3: Add The Oil
Once you’re happy with your arrangement, it’s time for the oil. Pour slowly… and I mean slowly. Tilt the bottle slightly as you pour to minimize disturbance to your arrangement.
Mineral oil is my recommendation for the clearest, most beautiful result. Fill it almost to the top, leaving just a small space at the neck.
When I was researching this project, I read multiple times that baby oil can leave a cloudy effect, and let me tell you that the mineral oil is crystal clear when they are finished (I actually can’t stop looking at them on my windowsill!)
Step 4: Let The Air Escape
Leave your bottles open so the air bubbles can escape from the oil. I GENTLY tapped my bottles to encourage them to float to the top. I would recommend 30 minutes.
Step 5: Seal The Bottle
Press your cork in snugly or twist on your lid. For extra insurance, run a thin bead of hot glue around the cork before popping it in ( I did not do this)
Step 6: Clean It Up and Display

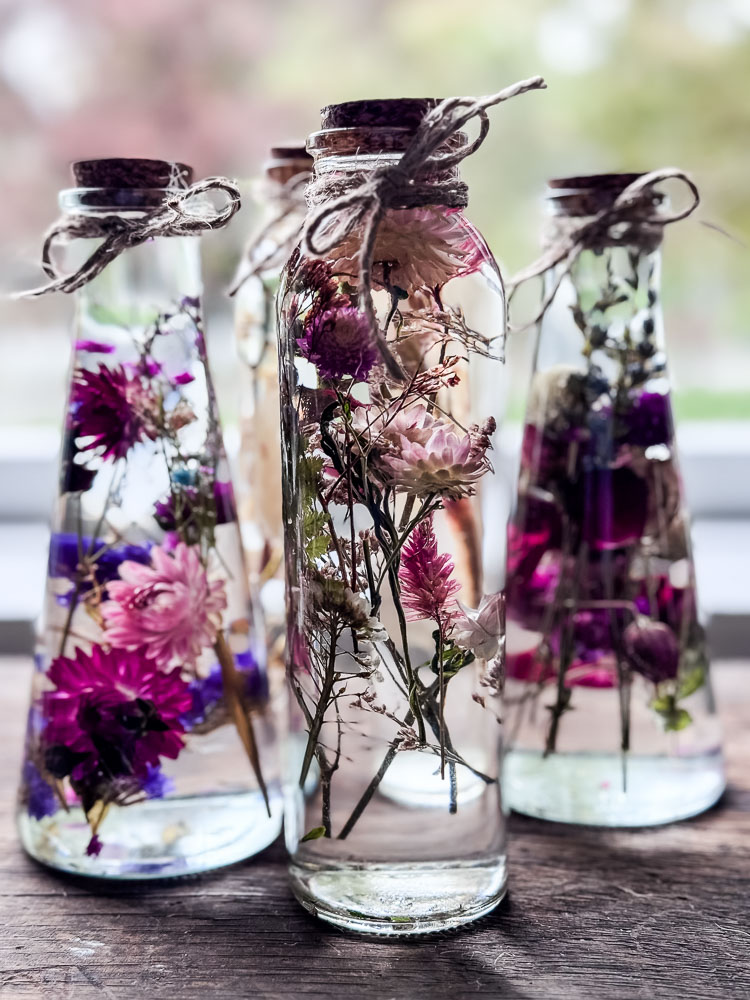
Wipe down the outside of the bottle, tie a piece of twine around the neck if you’d like a little extra charm, and find it a good home on a windowsill. That’s genuinely it.
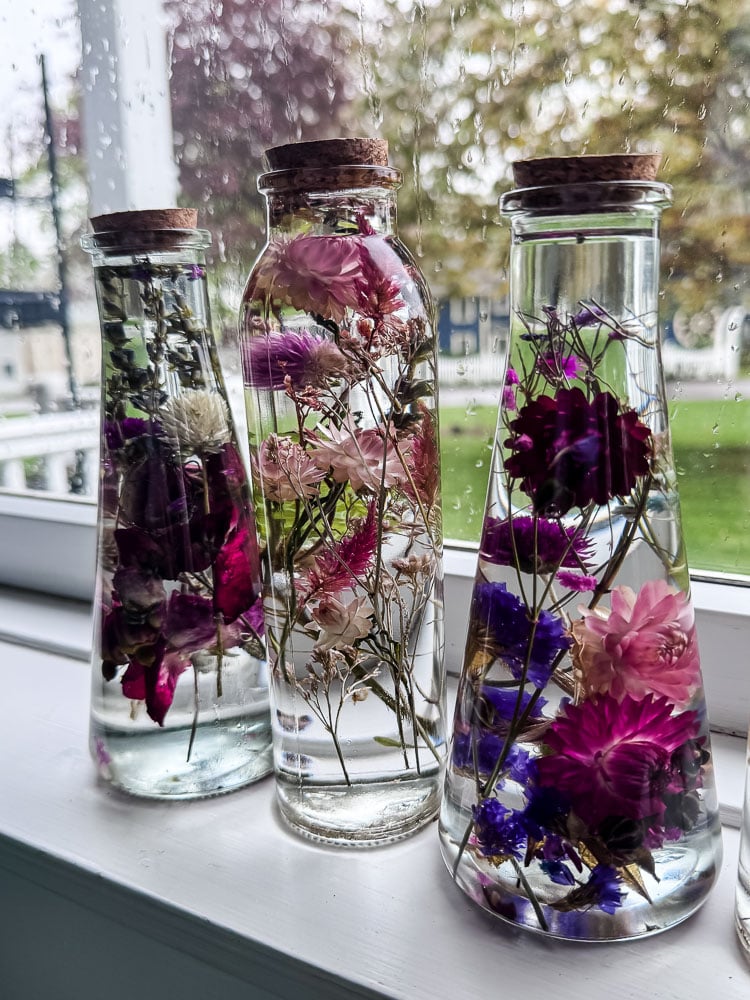
The Other 3 Herbariums & How I Styled Each One
One of the things I love most about this project is that there’s no single “right” way to do it. To show you just how different these can look, I made four bottles and gave each one its own personality. Same technique, completely different results.
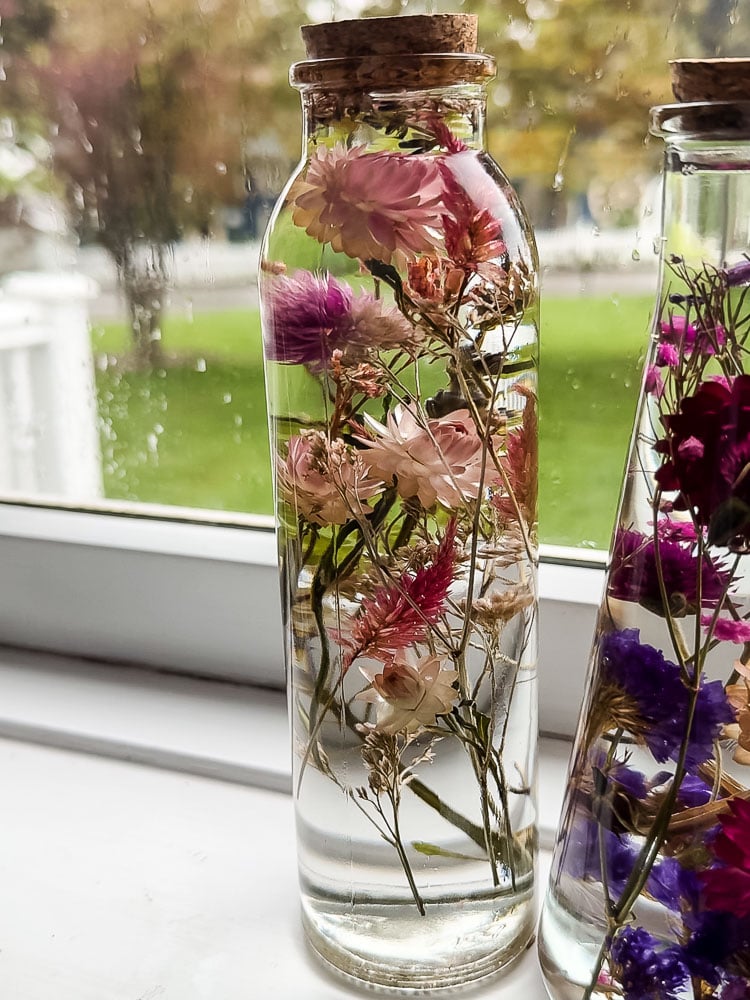
Bottle 2: Jewel Tones
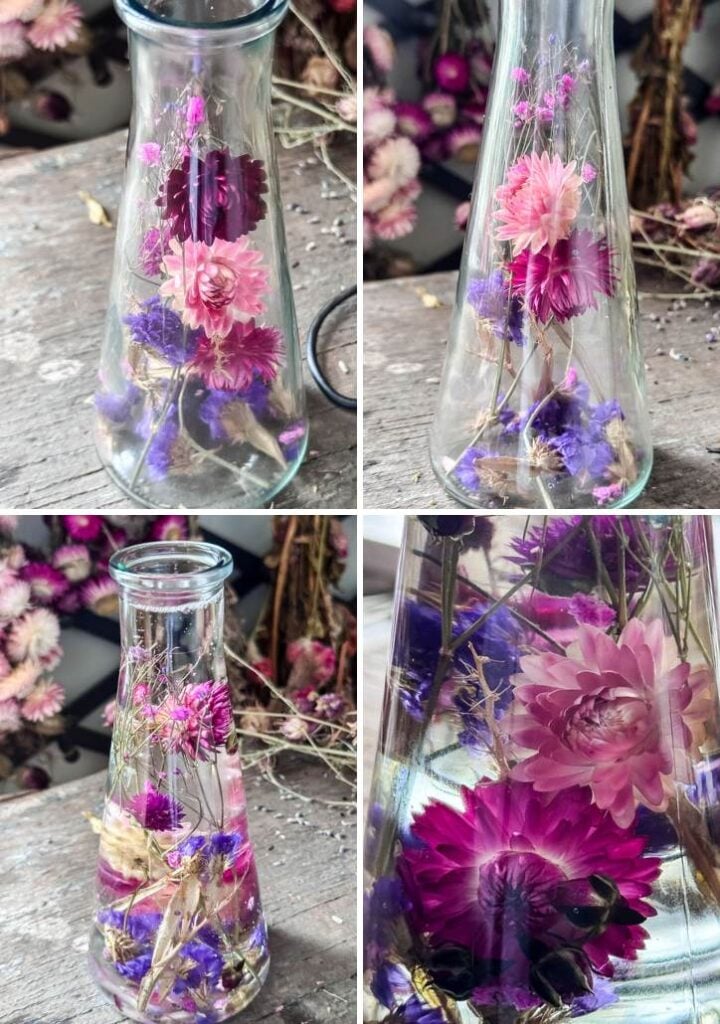
Purple statice, colorful baby’s breath, pink globe amaranth, and strawflowers. Rich, saturated, and so pretty on a windowsill. The statice adds that wispy texture that keeps it from feeling too heavy.
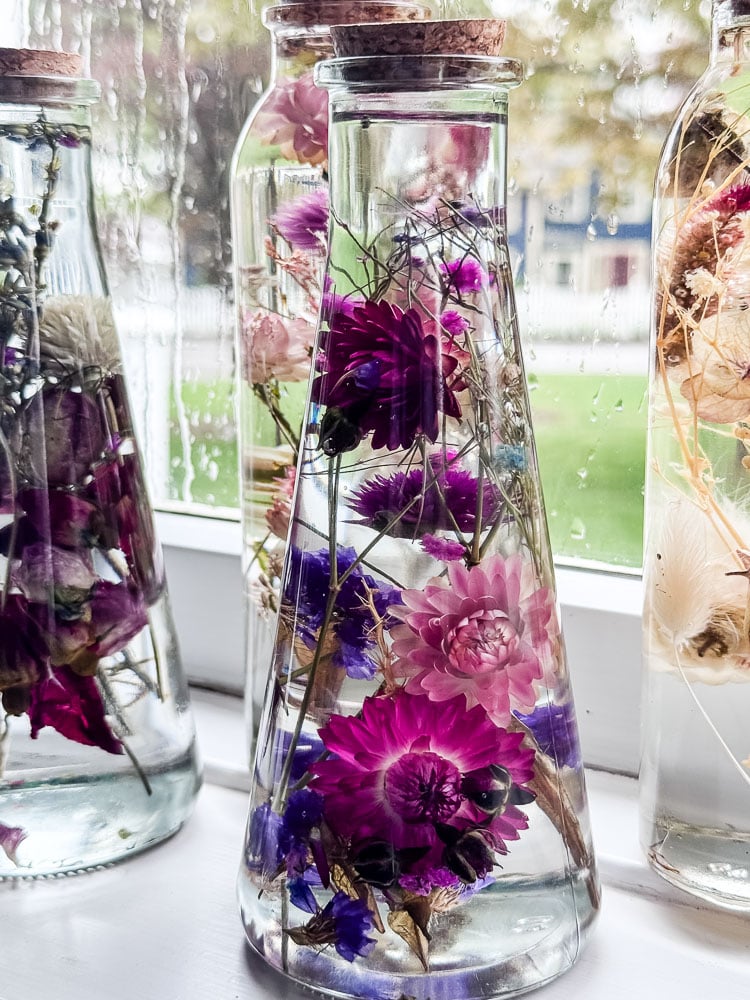
Out of the 4 bottles that I made, this one is my personal favorite of the bunch. The details on the strawflowers look unreal!
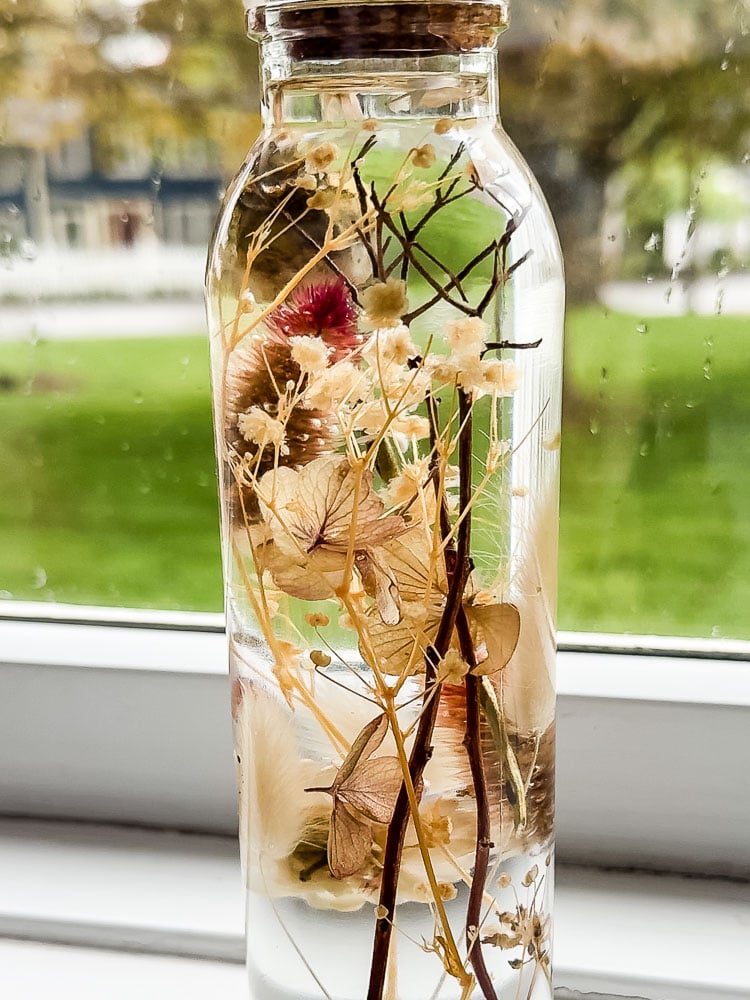
Bottle 3: Soft Neutrals
This is the quiet one of the group. Creamy baby’s breath, hydrangea flower, bunny tails, a poppy pod, soft pink celosia, and a small twig from a spirea bush. Creamy, airy, and elegant. If you lean toward a more muted, natural aesthetic, this is your bottle.
Bottle 4: All The Pinks
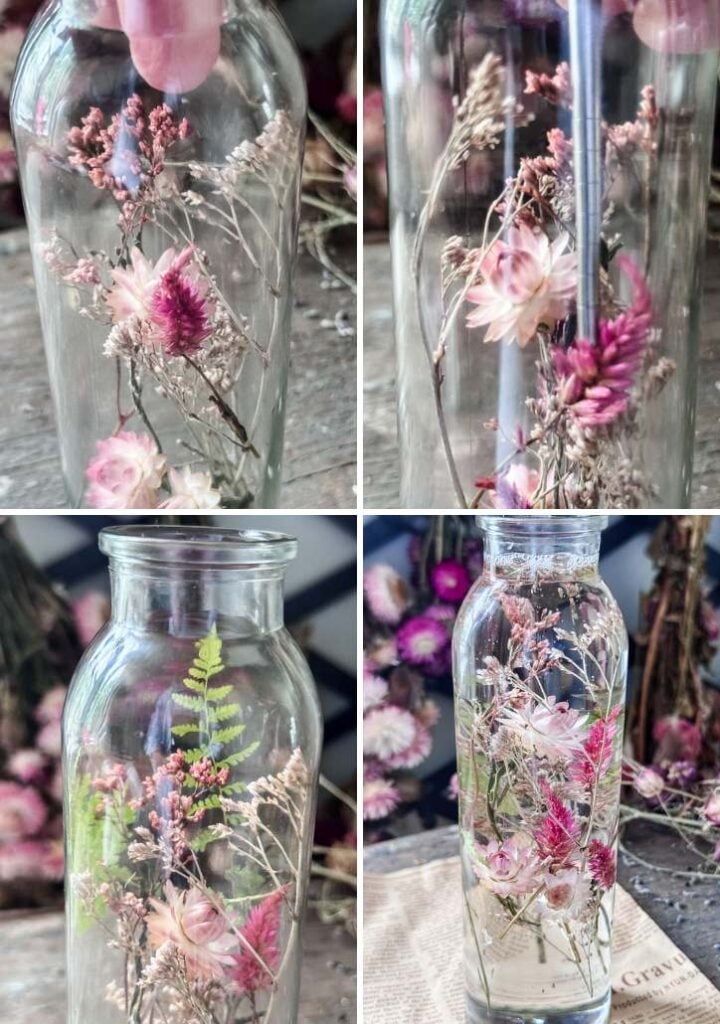
Light pink strawflowers, white strawflowers, raspberry pink celosia, and ferns. Soft and romantic without being fussy. The ferns add just enough green to keep it feeling fresh rather than sugary.
Tips, Tricks & a Few Things I Learned Along the Way
A few things to remember before you get started:
Use mineral oil, not baby oil Baby oil works in a pinch, but mineral oil is clearer and gives you that beautiful, almost-invisible look where the flowers appear to be floating. You can find it at any pharmacy, usually in the laxative aisle of all places. Don’t let that stop you, it’s perfectly clean and odorless.
Dry your flowers completely I mentioned this earlier but it bears repeating. Moisture is the enemy of a clear herbarium. If your flowers aren’t fully dry, the oil will turn cloudy. When in doubt, give them another week.
Vary your stem lengths Resist the urge to cut everything to the same height. The most beautiful bottles have layers: some stems tall, some tucked low, some flowers facing forward and some turned slightly to the side.
Work slowly with the oil Pour it in a thin, steady stream and tilt the bottle as you go. If you rush it you’ll end up rearranging everything with your skewer; which is fine, but avoidable.
Seal that cork A little hot glue around the base of the cork before you press it in goes a long way. Oil will find any gap it can, and a leaky bottle on a windowsill is not a fun discovery.
These evolve over time & that’s part of the charm A well-sealed herbarium kept out of harsh direct sunlight will look vibrant and true-to-color for the first year. After that, the colors begin to soften gradually. Reds deepen into burgundy, pinks mute into dusty mauve, whites take on a creamy vintage tone. By year three or beyond, you’re left with something that looks more like a sepia-toned botanical specimen, all texture and delicate structure in the light. Honestly? Each phase is beautiful in its own way. These aren’t meant to last forever, but they age the way good things do, gracefully.
A Little Bottle of Your Garden, Forever
There’s something really special about this project that I keep coming back to. Almost every single flower in my four bottles came from my own yard! Seeds I planted, stems I cut, blooms I dried. And now they’re sitting on my windowsill in their little glass bottles, glowing in the afternoon light, and they’ll still be there next winter when the garden is buried under a foot of New Hampshire snow.
That’s the whole garden-to-home philosophy in a bottle. Literally.
If you make one — or four — I’d love to see them. Tag me on Instagram or drop me an email with your photo. And if you’re just getting started with a cutting garden and wondering which flowers to grow for projects exactly like this one, I’ve got you covered. Strawflowers, globe amaranth, statice, lavender, bunny tails. These are some of my favorites of my cut flower garden, and they were practically made for a project like this.
Now go raid your pantry for a honey jar and get to it!
See your projects featured! If you are inspired by this or any of my other DIY projects, I would love to see them and add you to the Reader’s Spotlight gallery. Send a photo to me at jennifer@cottageonbunkerhill.com
xo, Jennifer
Love projects like this? Don’t miss out! Join my newsletter family for more cozy, budget-friendly DIY ideas delivered right to your inbox. You’ll get exclusive tips, early access to tutorials, and all the inspiration you need to make your home feel handmade and heartfelt.
pin for later


Oh Jenn
These herbariums are stunning!! I already bought some bottles and have some dried flowers (need more!). I recently saw a similar post where fresh flowers were used. I’m thinking they would have moisture in them which would dull the mineral oil. Saw an ad for “light” mineral oil….. what brand did you use? There are soooo many choices!!!
Thank you for continuing to bring beauty to every home!!!
I’m so glad I came upon your blog. You’ve inspired me to tackle several of your projects with beautiful results. The herbariums are next! Thank you for sharing your lovely ideas.
Diana- THANK YOU!! You made my day!