Give an old wreath a fresh new purpose! This easy upcycling project transforms grapevine branches into a stunning swag that can be customized for any season. Using a base of natural grapevine and fresh greenery, you’ll create a beautiful decoration that celebrates the colors and textures of your favorite time of year.
Perfect for adding a touch of handmade charm to your home, this versatile swag is a delightful way to express your creativity.
Simple Beauty: A Rustic Floral Swag for Your Home

Give an old wreath new life with this simple upcycling project! Transform leftover grapevine branches into a stunning swag that celebrates the beauty of each season. This DIY is all about using natural elements – think lush greenery, delicate blooms, and whatever else inspires you. With a few simple steps, you’ll create a unique and beautiful piece for your home that reflects the changing seasons.
Filled with fresh eucalyptus, statice, baby’s breath, and a variety of your favorite blooms, this swag is a natural and elegant way to add charm to your home.
This post may contain affiliate links, which means I may earn a small commission if you make a purchase through my links, at no extra cost to you. Read my disclosure policy here.
Gather Supplies
- Reused Grapevine Branches from Wreath
- Fresh Flowers (such as eucalyptus, statice, baby’s breath, and your choice of spring blooms)
- Floral Wire
- Floral Shears
- (Optional: Velvet Ribbon or Fabric for Embellishment)
Creating the Swag Base

I’m always looking for ways to reuse and upcycle things that I already have before buying new ones. In my wreath supply stash, I have a large grapevine wreath ( 24 inch wreath) that has started coming apart after years of use.
Repurposing grapevines from a wreath offers a clever base for this floral swag. Their natural curve eliminates the need to shape the base, saving you time and effort.

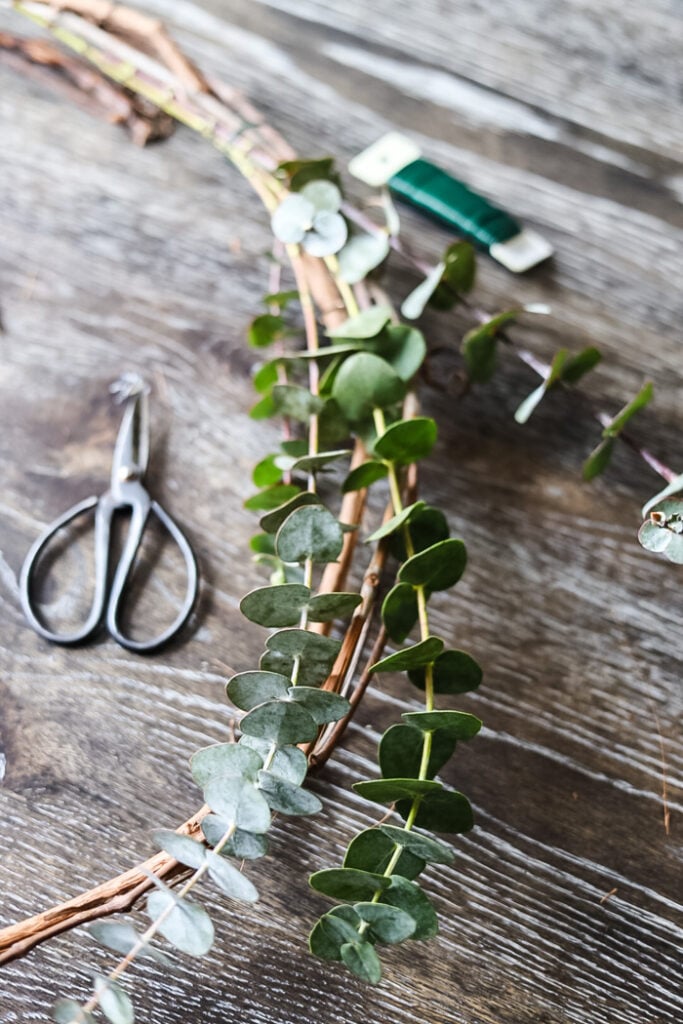
I cut a few of the grapevines using garden shear but I think utility scissors could probably do the job too. Here is the part that is up to you when making your swag: decide on how thick of a base you want to create, I am staying on the more minimal end.
Add Eucalyptus

For this swag, I am using fresh eucalyptus that I picked up at Trader Joe’s. They always have a variety of eucalyptus for sale, at $3.99 a bunch you won’t find a better price!
Feel free to substitute artificial eucalyptus if you have trouble finding fresh. Preserved eucalyptus would be perfect for this project too.

Start on one side of the swag base and stack a few pieces of eucalyptus on top of the grapevine. Use a floral wire paddle and wrap the wire around the eucalyptus and grapevine base until it feels secure.

Repeat the process on the other side of the grapevine swag.

Once you have both sides done add some shorter pieces of the eucalyptus on either side of the center point.
Add Fresh Flowers
Now to add the pretty factor to this floral swag! I’m using flowers that I had left over from this cottage-style wreath project.
My advice would be to choose flowers that naturally dry out and keep their shape for a longer-lasting swag. Look for flowers like statice, baby’s breath, wax flowers, and sea holly.
If using artificial flowers choose stems with smaller flowers for a softer, pretty-looking swag.

Work your way out from the center on both sides. I started by adding small clumps of the purple statice down both sides of the swag. Using floral wire to secure in place.

After the statice was in place I repeated the process with the white baby’s breath.

In the center of the swag is where I added the pretty white mini daisylike flowers and small purple wax flowers.

The final flower that I added to this swag was the bright pink stems of Veronica.

Finishing Touches

To finish off this flower swag I tied a simple bow in the center with my favorite frayed edge velvet ribbon (a bargain at Hobby Lobby at $2.49 when it’s on sale!)

Displaying Your Upcycled Spring Swag
Swags are perfect for hanging above mirrors, on cabinet fronts, or over a window or door.

The curved shape of the swag works perfectly with my arched entryway mirror. It hugged the shape.

It was the perfect touch to bring more of the outdoors inside since it is still cold here in March.
But having flowers and plants around makes it seem like the garden season is here! (wishful thinking!)

See your projects featured! If you are inspired by this or any of my other DIY projects I would love to see them and add you to the Reader’s Spotlight gallery. Send a photo to me at jennifer@cottageonbunkerhill.com
xo, Jennifer
shop my favorite crafting supplies
Visit My Amazon Store
Pin For Later

25 DIY Projects Using
flowers & botanicals

Can You DIY Pottery Barn Style? (This Thrifted Vase Says Yes!)
Have you ever admired a Pottery Barn vase but cringed at the price tag? Don’t fret! Today I’m going to show…

DIY Decor Delights: Easy Projects for Year-Round Style
Are you tired of constantly redecorating for every season? Year-round style is the answer! Creating a home that feels cozy and…

DIY Vintage Butterfly Botanical Wall Art: A Beautiful and Budget-Friendly Project
Are you looking to add a touch of vintage charm and natural beauty to your home decor? Look no further than…


I love this! Inspiration for a wedding backdrop next week.
Thanks Leslie!!
Such a lovely wreath, Jennifer. I love the style of it.