
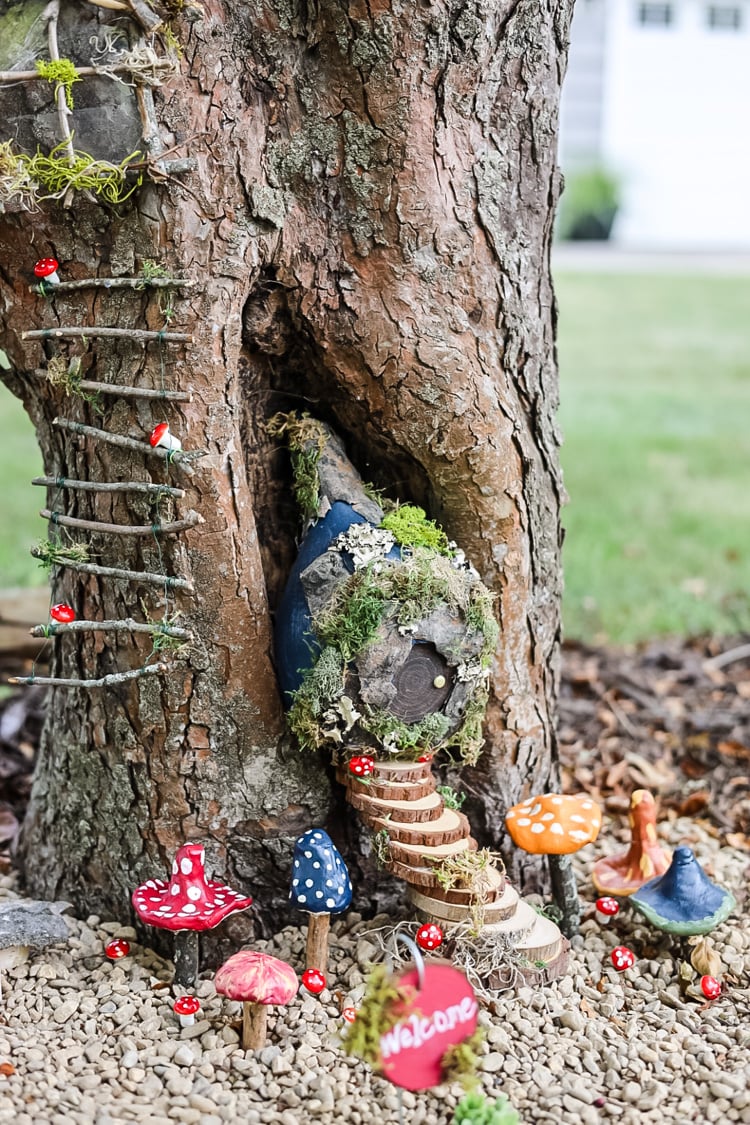
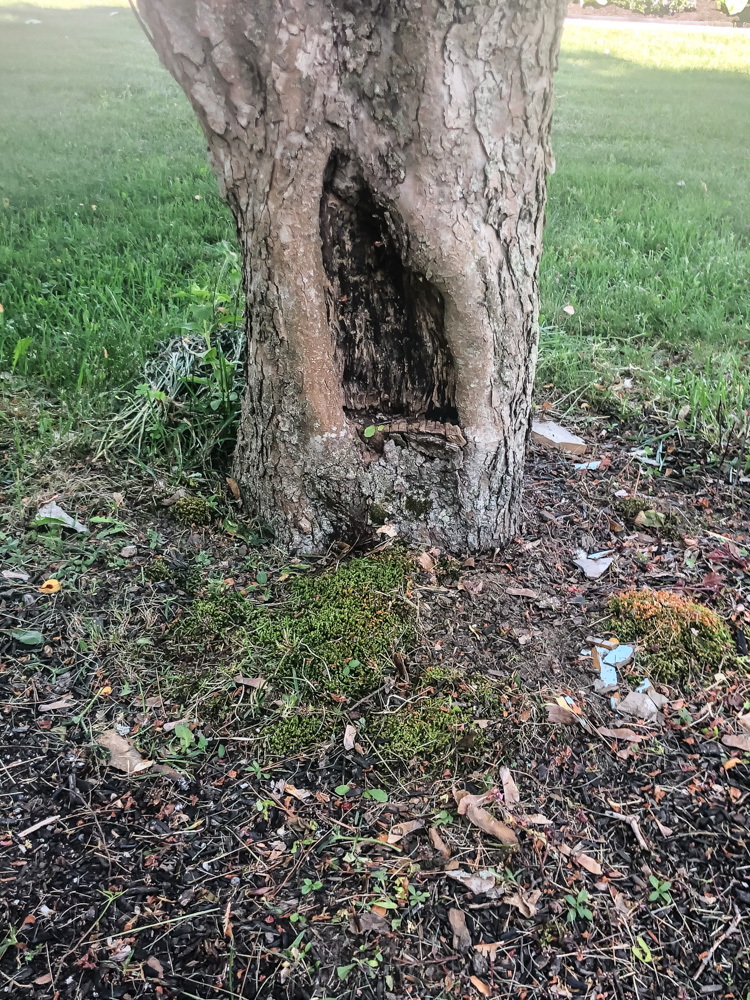
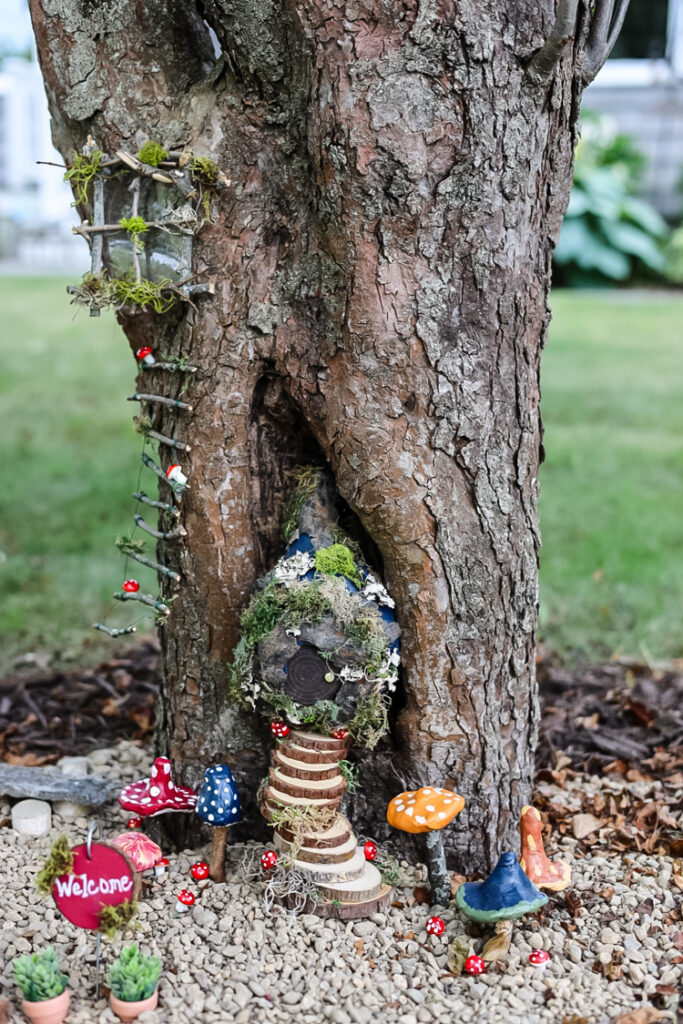
When I noticed the natural hollow at the base of our crabapple tree, I knew it had potential. Instead of leaving it as just another garden feature, I decided to turn it into something special-a fairy tree garden. This wasn’t about creating a perfect fairy-tale scene (though it’s certainly whimsical!), but rather about adding a little unexpected charm to our front yard using simple, natural materials.
The star of the display? A fairy house made from a homegrown gourd, wrapped in birch bark and tucked right into the tree. I kept the design rustic and organic, adding wood-slice steps, a twig ladder, and handmade clay mushrooms for extra personality. The best part? This whole project cost almost nothing-just some creativity and a few foraged supplies.
If you’ve got a tree with character (or even just a shady corner in your garden), this DIY fairy tree is a fun, low-pressure way to add a playful touch to your outdoor space. No elaborate miniatures or store-bought decor needed—just a little imagination and whatever nature provides. Let me show you how!
How to Make a Fairy House in a Tree Hollow (Using Gourds & Foraged Finds!)
OK! Now, let me walk you through how I created this little fairy garden out of foraged finds and a few common craft supplies. I love an inexpensive DIY project!
Fairy Tree Garden Supply List
This post may contain affiliate links, which means we receive a small commission if you purchase through our links. See our disclaimer page for more information.
This project is all about using what you have! Here’s what I used—but feel free to improvise
Foraged Materials:
- Tree with a hollow (or use a stump, log, or planter as a base)
- Dried gourd (for the fairy house—homegrown or store-bought)
- Birch bark (or substitute with weathered wood, acorn caps, or pinecones)
- Twigs & small branches (for ladders, windows, and framing)
- Moss (live or preserved)
- Pebbles or small stones (for pathways and landscaping)
Basic Craft Supplies:
- Acrylic paint (for coloring the gourd-I used navy blue)
- Strong craft glue & hot glue gun (to attach bark, moss, and twigs)
- Air-dry clay (for handmade mushrooms and other tiny decor)
- Small wood slices (for stairs & door)
- Twine or thin wire (to secure ladders and frames)
- Spray Clear Topcoat for weatherproofing
Optional (But Fun!) Extras:
- Miniature fairy lights (battery-operated for a magical glow)
- Clay mushrooms
- Tiny garden accessories (think handmade signs, a fairy swing, or a pebble “firepit”)
No Gourd? No Problem! Fairy House Alternatives
All available at craft stores, dollar stores, or your backyard!)
- Unfinished Wood Birdhouse
- Why it works: Ready-made structure! Just remove the perch, paint/stain it, and glue on bark or moss.
- Bonus: Drill a round door for a “hobbit hole” look.
- Terra Cotta Pot (Upside-Down)
- Why it works: Flip it, paint on a door, and add a roof (use bark, twigs, or a saucer).
- Bonus: Paint it to look like stone or brick with acrylics.
- Coconut Shell (Halved)
- Why it works: Naturally waterproof and rustic. Glue moss to the outside for a “living” roof.
- Tip: Find them at grocery stores
- Pinecone “Log Cabin”
- Why it works: Glue pinecones side-by-side into a square shape—instant rustic cottage!
- For beginners: Use a small cardboard box as a base, then cover it with pinecones.
- Plastic Bottle (Cut & Covered)
- Why it works: Cut the bottom off a soda bottle, wrap it in burlap/bark, and add a twig roof.
- Kid-friendly: Safe for little hands to decorate!
- Milk Carton (Miniature Version)
- Why it works: Rinse, paint, cut a door, and coat with glue and sand or coffee grounds for a “stucco” look.
Finding the Perfect Tree Hollow (Or Creating Your Own!)
Not every yard comes with a picture-perfect fairy tree hollow—but don’t worry! With a little creativity, you can transform ordinary spots into enchanting fairy homes. Here’s how to find (or fake) the ideal setting.
1. Ideal Natural Features to Look For
- Tree Hollows & Knotholes
- Best candidates: Mature maples, oaks, apples, or willows often develop natural cavities.
- Size matters: A hollow at least 6–8 inches wide fits most fairy houses.
- Safety check: Avoid active insect nests or rotting wood (tap the tree—if it sounds hollow everywhere, skip it).
- Exposed Roots & Stumps
- Gnarled roots create instant doorways-just tuck a fairy house between them.
- A weathered stump? Hollow out a small niche with a chisel (or use it as a base to build a hollow).
- Fallen Logs & Branches
- Look for logs with natural curves or holes—they make ready-made fairy hideouts.
2. No Hollow? No Problem! DIY Solutions
Option 1: The “Faux Hollow
- Weathered log: Prop a hollowed-out log section (available at garden centers) against a tree.
- Planter base: Use a half-buried terracotta pot or wooden bowl as a faux tree base. Cover the edges with moss!
Option 2: Build a Hollow
- Materials: Chicken wire + paper mache (for lightweight shaping), or stack birch bark sheets into a curved wall.
- Pro tip: Add lichen & moss for an aged look.
Option 3: Repurpose Garden Features
- Rock crevices: Nestle a tiny house between boulders.
- Overgrown shrubs: Trim a small “doorway” into the foliage.
3. Placement Tips for Maximum Whimsy
Best Spots For Fairy Gardens
- Shady & Sheltered Spots
- Fairies (and their decor!) prefer dappled shade-under trees or beside bushes.
- Avoid full sun (fades paint/moss) or low areas (can flood).
- Near Gardens or Pathways
- Tuck your fairy tree near flower beds, ferns, or stepping stones to make it feel “discovered.”
- Edge of a walkway = More visibility (and smiles from visitors!).
- Lighting Matters
- Place where morning or evening light hits for a magical glow.
- Avoid dark corners (your hard work deserves to be seen!)
Crafting the Fairy House: A Rustic, No-Fuss Guide
When I first dreamed up this fairy garden project, I knew my ever-growing stash of DIY supplies had to contain the perfect fairy house base. Let’s be real-as a DIY blogger, I’ve become the ultimate ‘don’t throw that away, it might be useful someday’ collector. (Admit it, you probably have a stash like this too!)
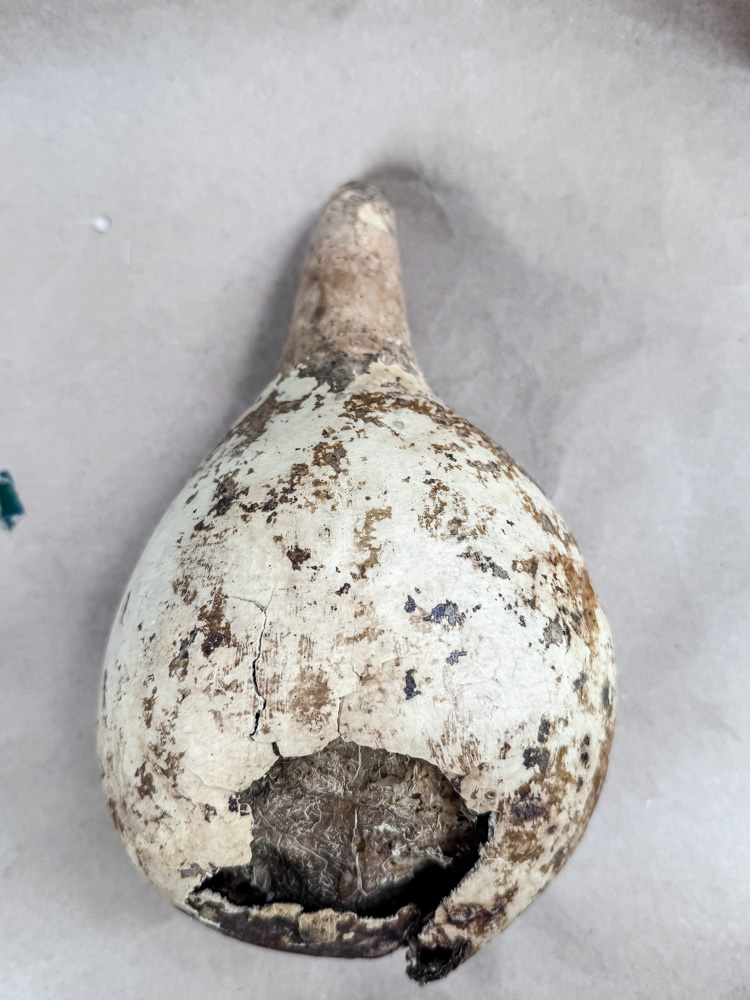
After some digging through my eclectic hoard of craft supplies and foraged treasures, I spotted the ideal candidate: a dried gourd from last year’s garden. But here’s the best part—you absolutely don’t need a blogger’s stockpile to create magic. Whether you’re repurposing a thrift store find, a kitchen scrap, or a backyard discovery, I’ll show you how to work with what you’ve got.
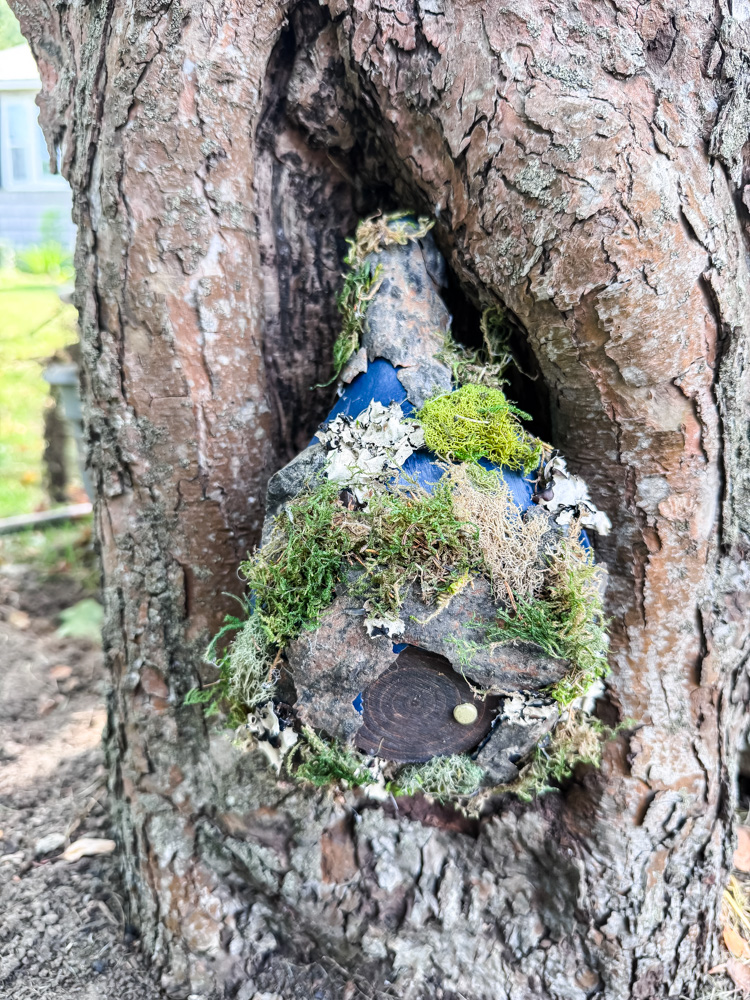
1. Painting The Gourd Base
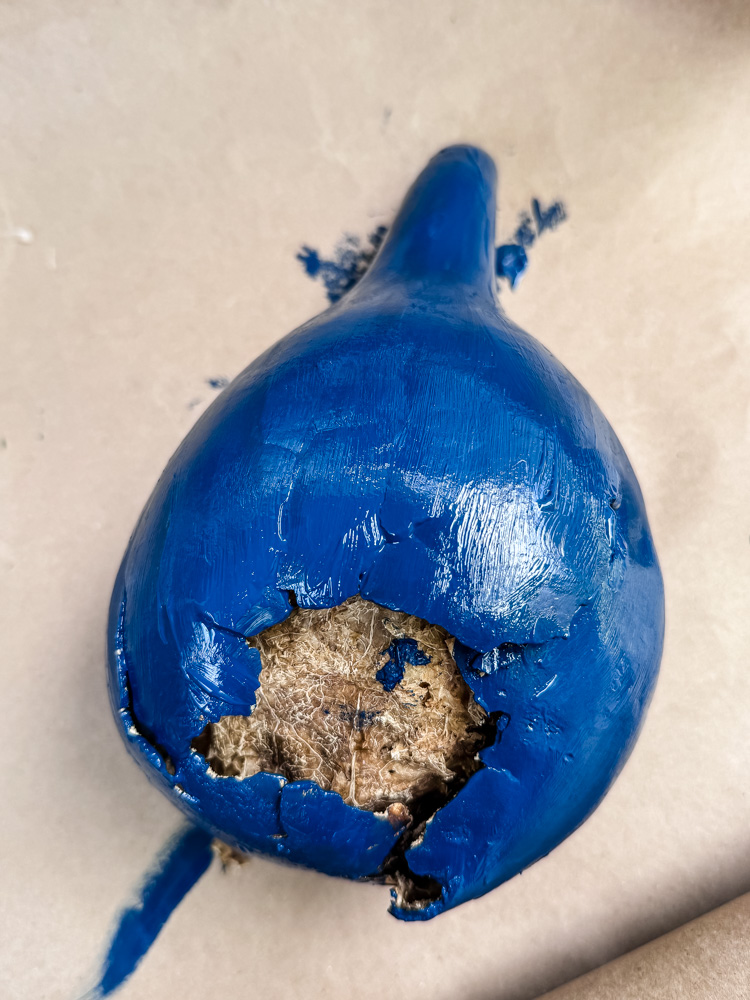
My fairy house started with this imperfect dried gourd – complete with a natural ‘feature’ (a hole from when I dropped it!). If you’re using a fresh bottleneck or birdhouse gourd:
- Let it dry completely (seeds should rattle inside when shaken)
- Carefully carve a round door using an Xacto knife – go slow to avoid cracks!
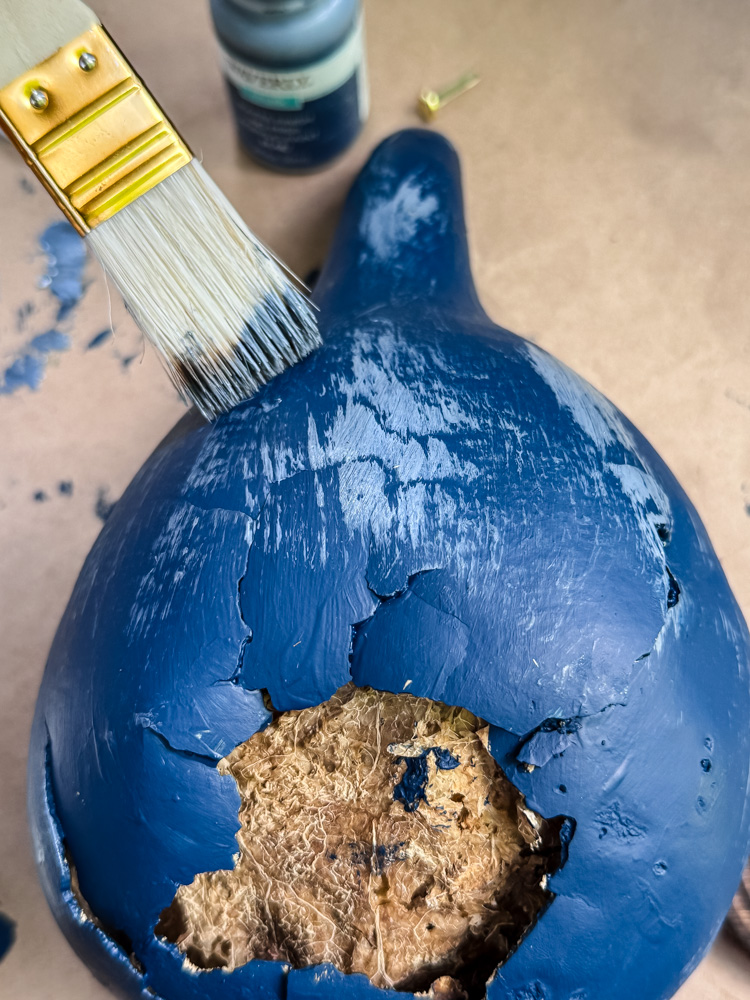
For the finish:
- Base coat: Rich navy blue acrylic paint
- Dry-brush technique: Lightly dragged a softer blue over the surface while the base coat was still slightly tacky
Pro Tip: Those ‘oops’ dents and holes? They add character – just work them into your design!
2. Crafting A Fairy Door
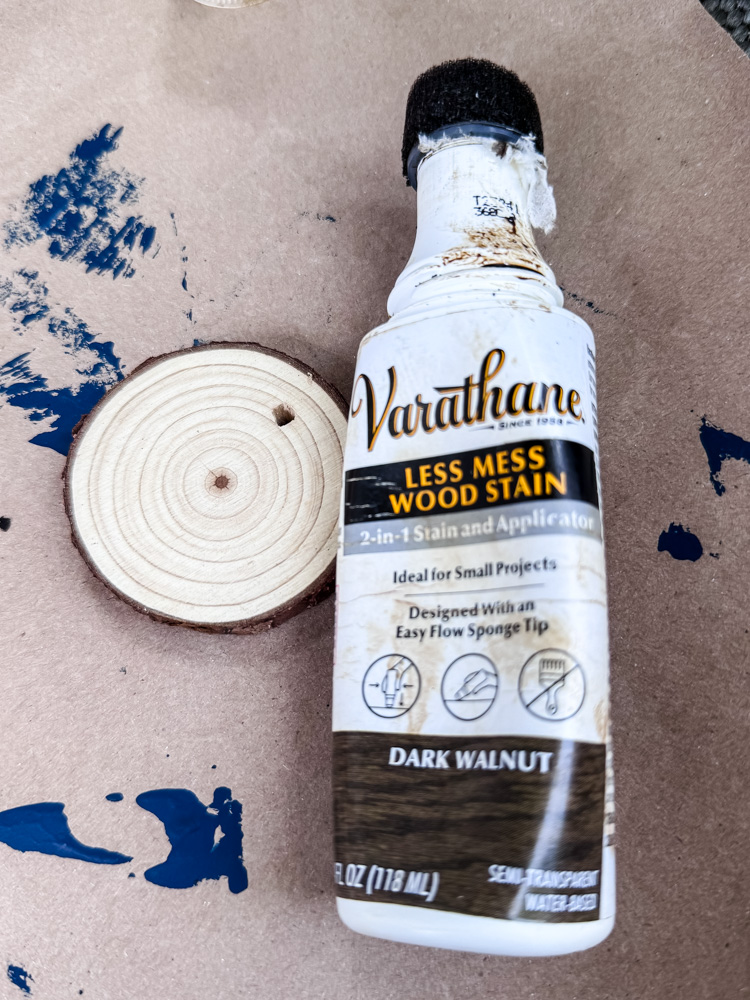
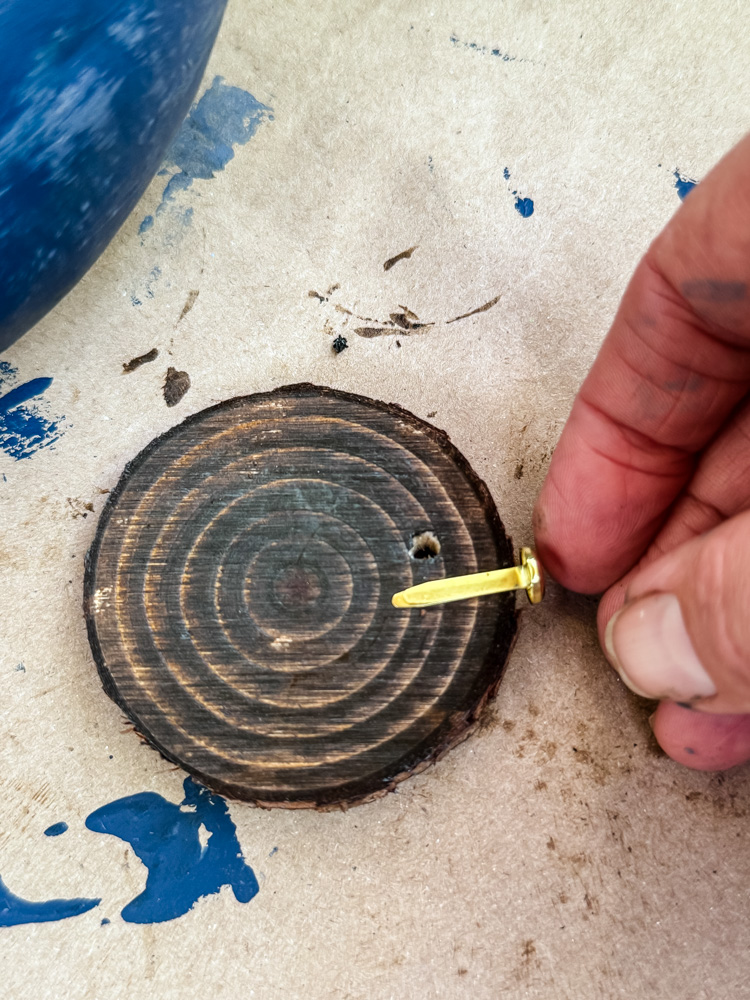
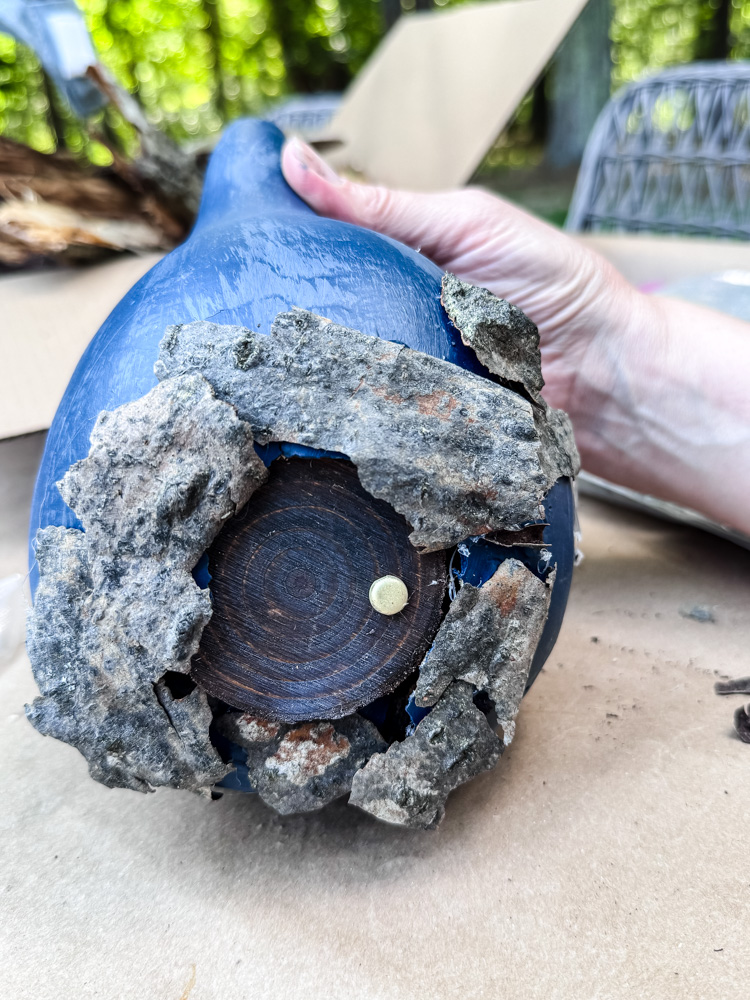
For the fairy door, I kept it simple with a wooden craft slice – here’s how:
- First, I stained it using Varathane’s Less Mess Wood Stain (seriously, this stuff is a game-changer for small projects – no drips!)
- Then I added instant charm with a brass paper fastener as the doorknob – just poke it through and bend the prongs in back.
Total time? Maybe 5 minutes for the cutest little fairy entrance you’ve ever seen!
3. Creating a Natural Exterior
With the paint dry, it was time to transform this gourd into a proper fairy cottage! Here’s how I brought it to life:
- Materials Used:
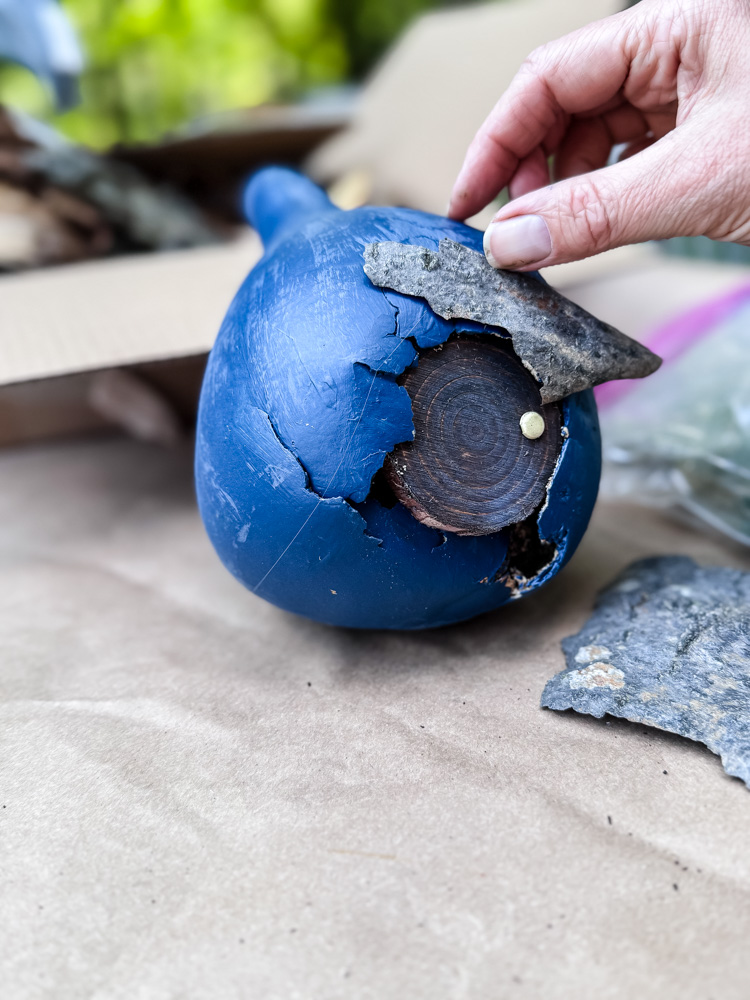
- Birch bark (collected from fallen trees in my woods)
- Moss & lichen (foraged or craft-store bought)
- Hot glue gun (for quick, sturdy adhesion)
Application:
- Birch siding: Tear bark into small, uneven pieces and layer them onto the gourd, securing with hot glue. I surrounded the door and scattered the birch over the gourd and also covered the “chimney” portion.
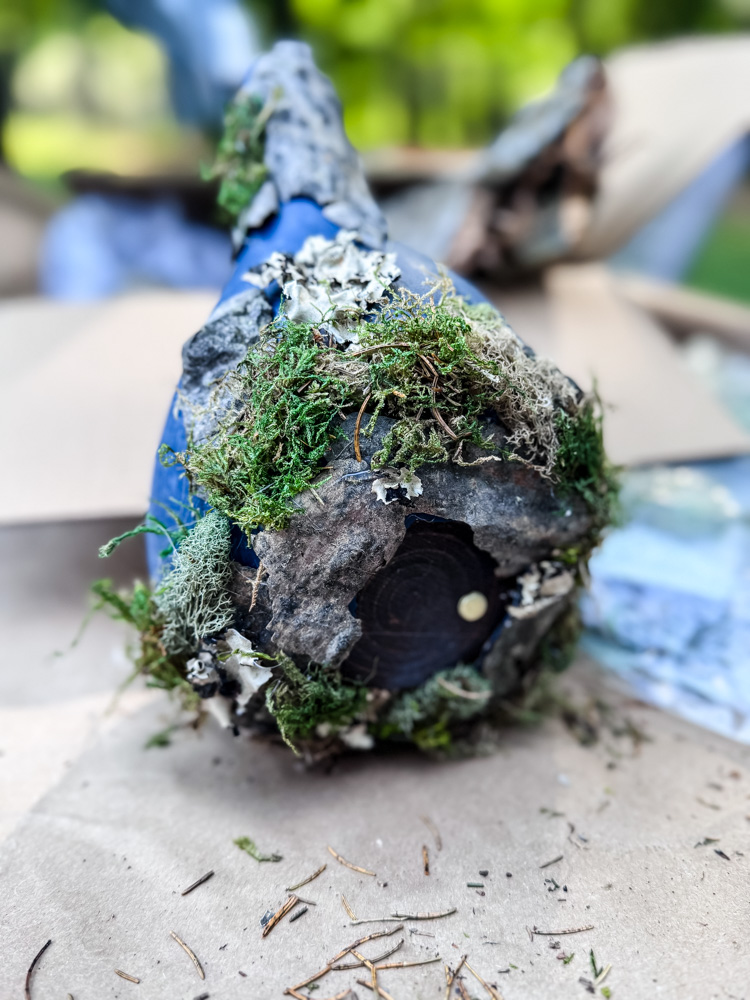
- Moss accents: Glued clumps onto the gourd and the roof for an “aged” look.
- Lichen details: Scatter tiny pieces on the gourd as an accent.
No birch bark? Try:
- Twigs (for a log-cabin effect)
- Acorn caps (as miniature roof tiles)
- Pinecone scales (for textured siding)
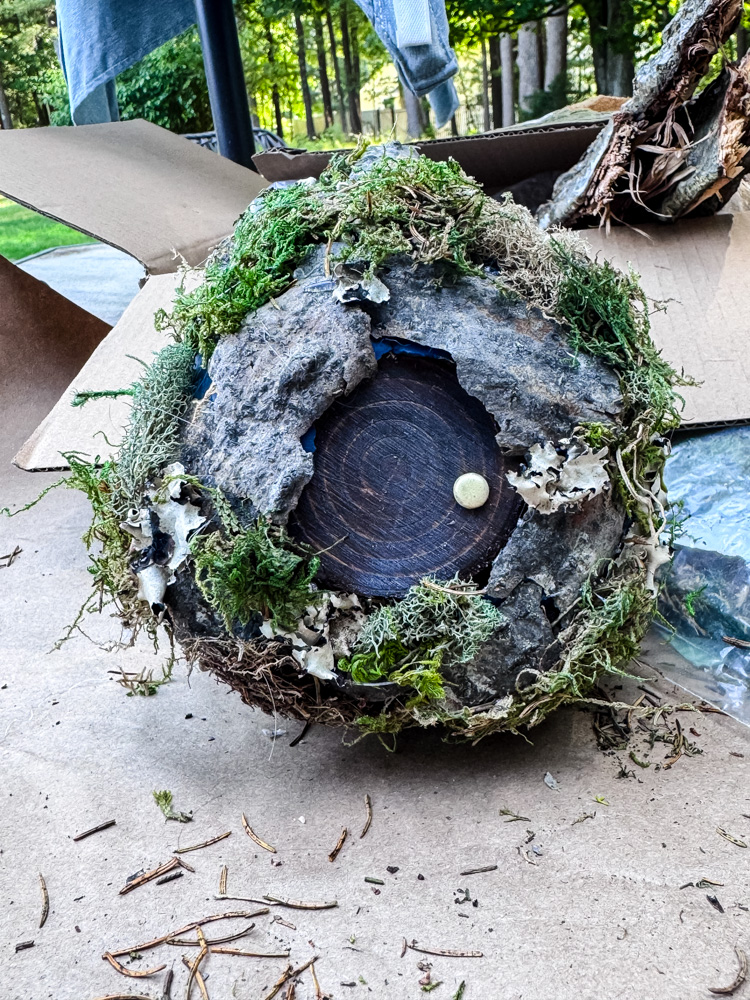
The final step of the fairy house was to spray a coat of matte clear topcoat to protect it from the elements.
Pro Tip: If your glue strings show on your projects, wait until they cool, then gently brush them off with a soft toothbrush or paintbrush.


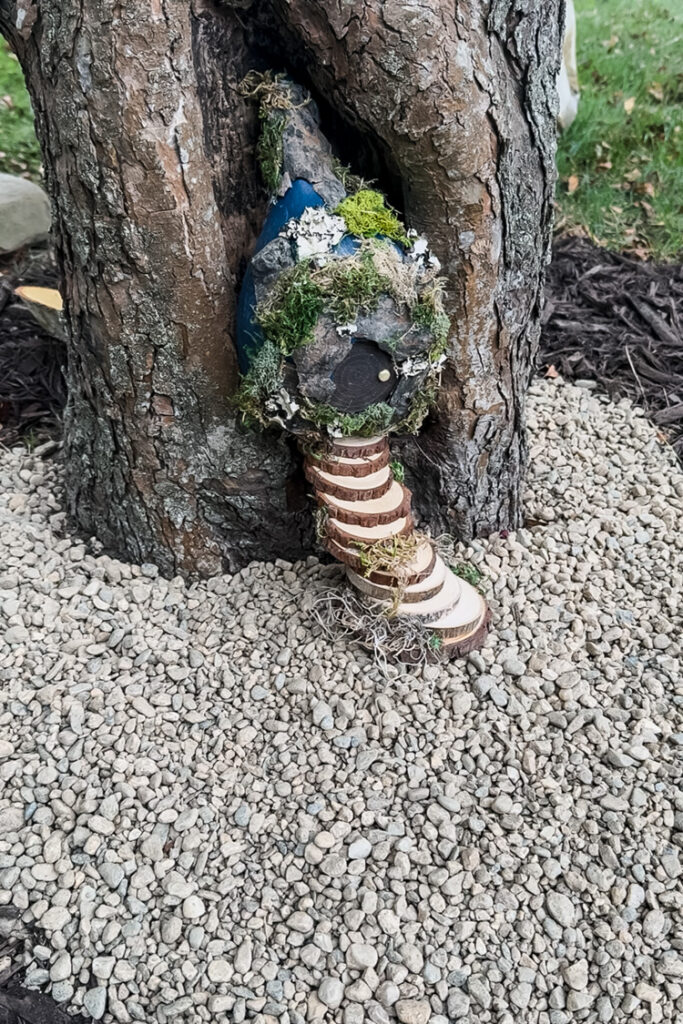
Adding Whimsical Accessories to Your Fairy Tree Garden
Now that my fairy house is nestled snugly into its tree hollow, it’s time to bring the whole scene to life with enchanting little details! These finishing touches add personality and make this fairy garden feel like a hidden, magical world.
1. Creating a Fairy Garden Floor
- Pebble Pathway:
- Spread small, smooth pebbles around the tree base to define the space.
- Or arrange them in a meandering path for a natural, “walked-upon” look.
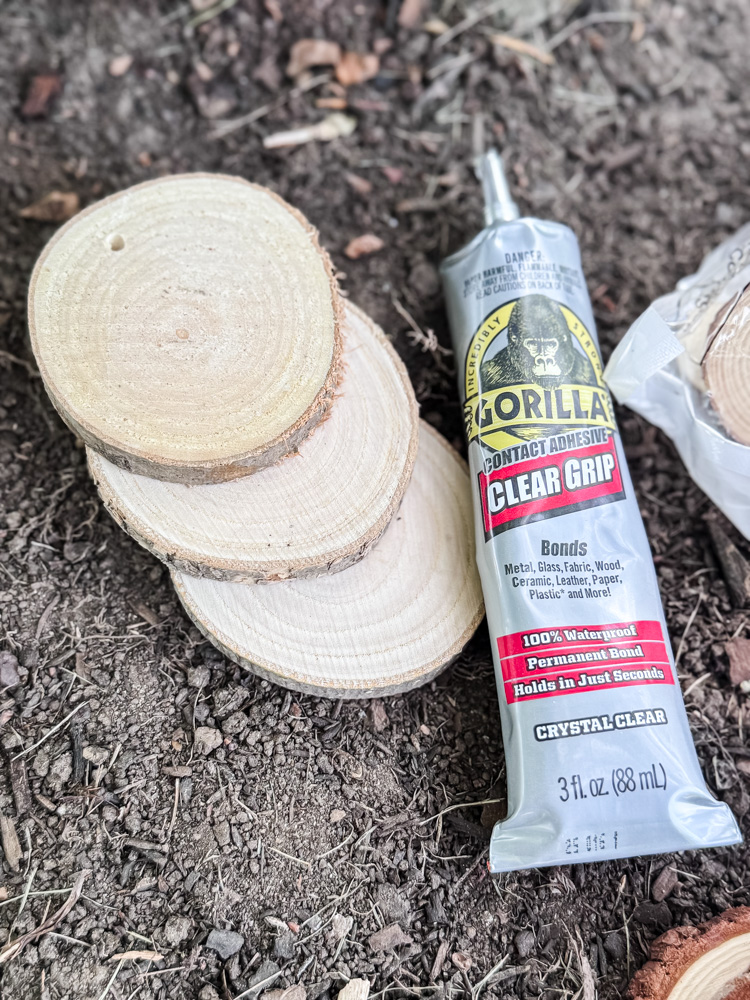
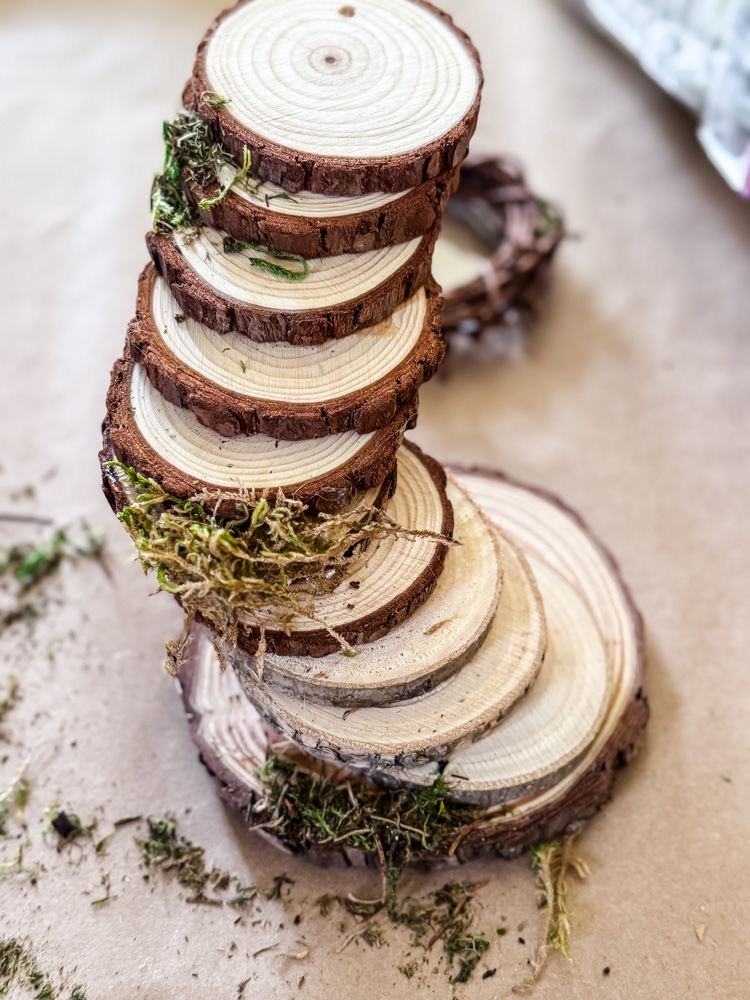
- Staircase to the Door:
- Arranged 3 sizes of wood slices in a staggered ‘step’ pattern
- Used a combo of hot glue (instant hold) & Gorilla Glue (permanent strength)
- Added bits of moss for that fairy look.
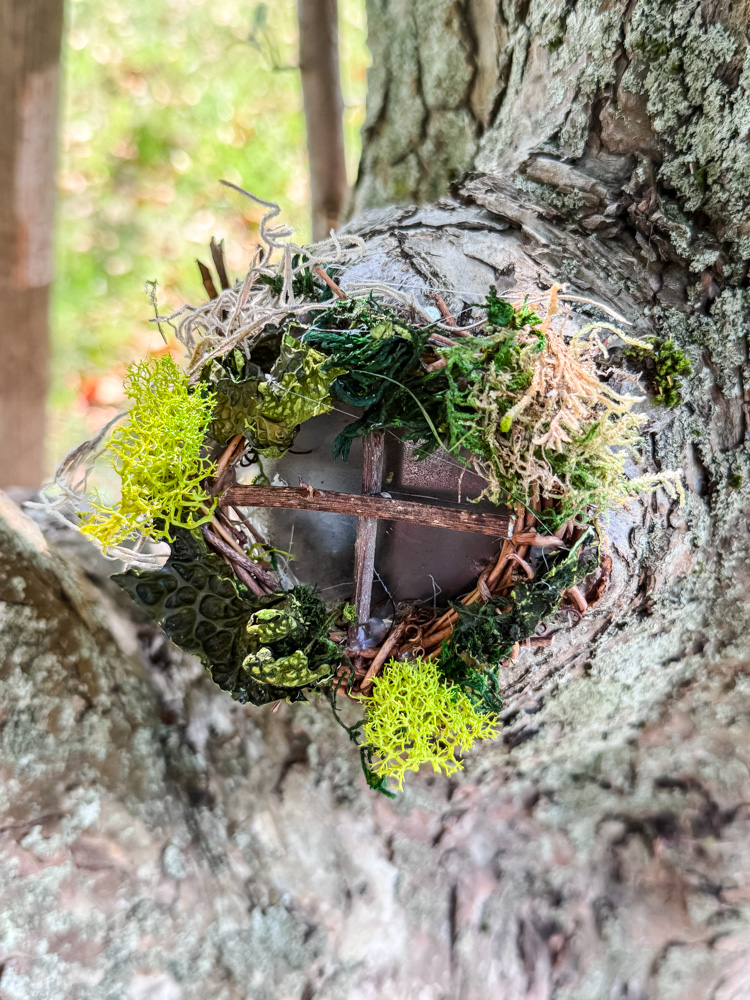
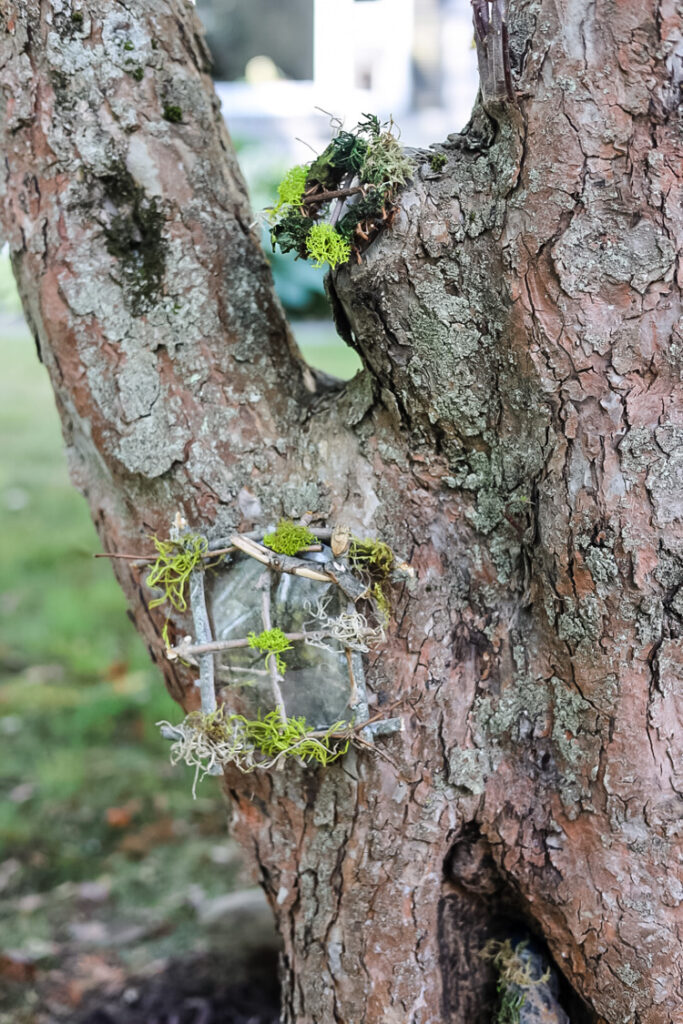
2. Whimsical Windows for the Tree (Round)
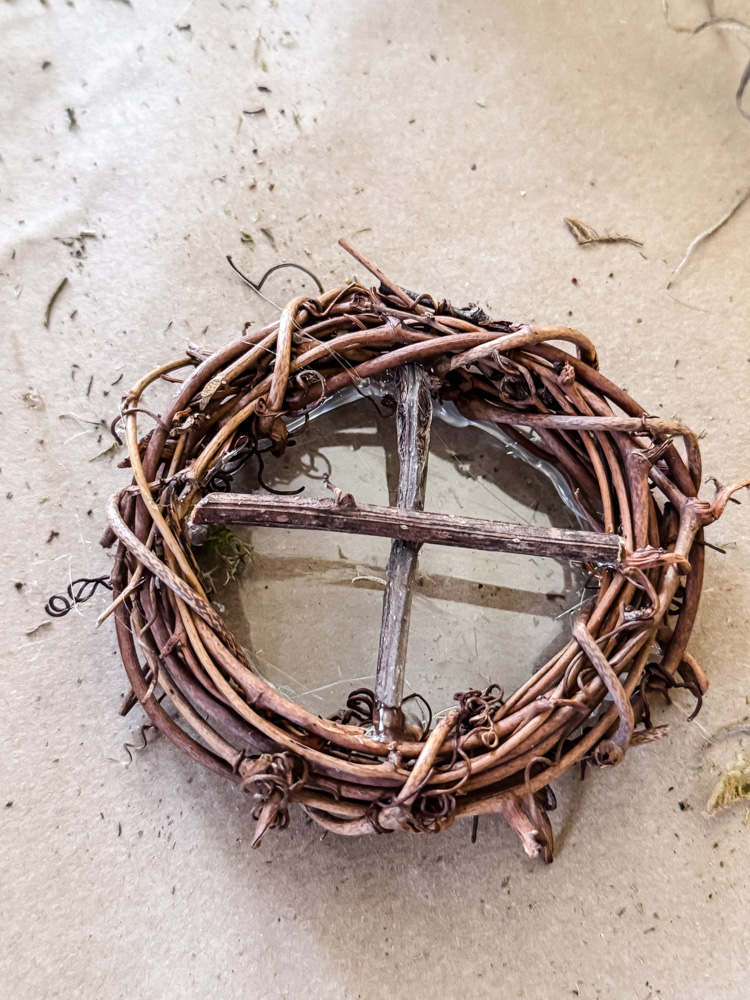
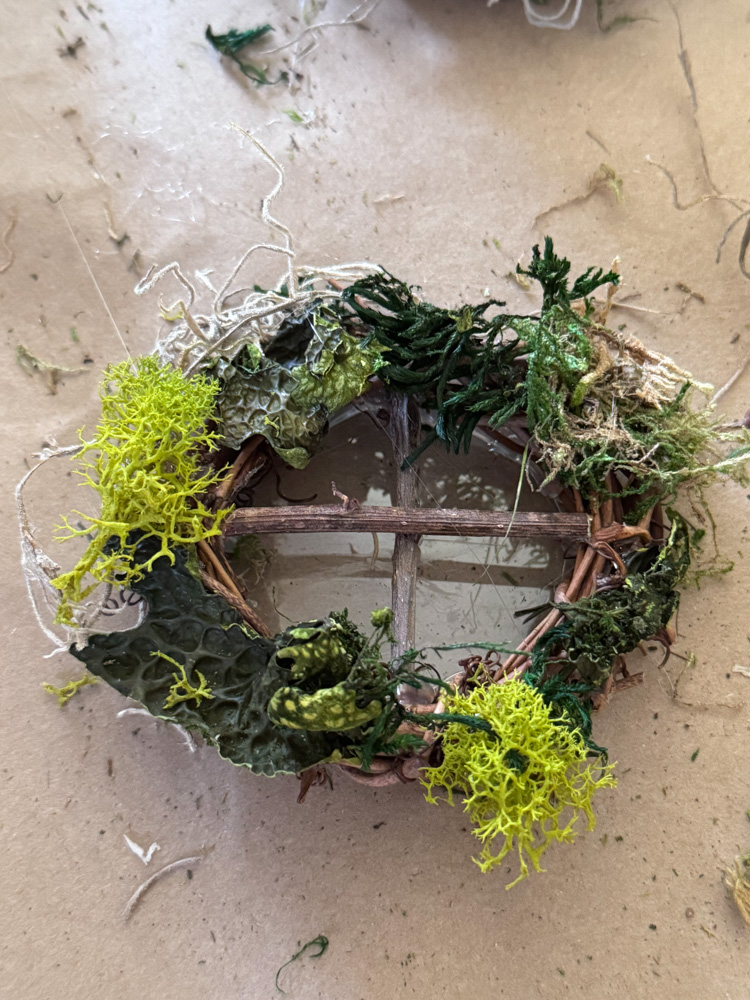
Round Window (For a Cut Branch Spot):
- Materials: Mini grapevine wreath, twigs, moss, clear plastic (from packaging), tiny nail.
- How-To:
- Glue twigs in a cross pattern inside.
- Attach a clear plastic backing for “glass”(cut from a salad package)
- Line the wreath with moss for a “leafy” frame.
- Hang with a small nail over the cut branch spot.
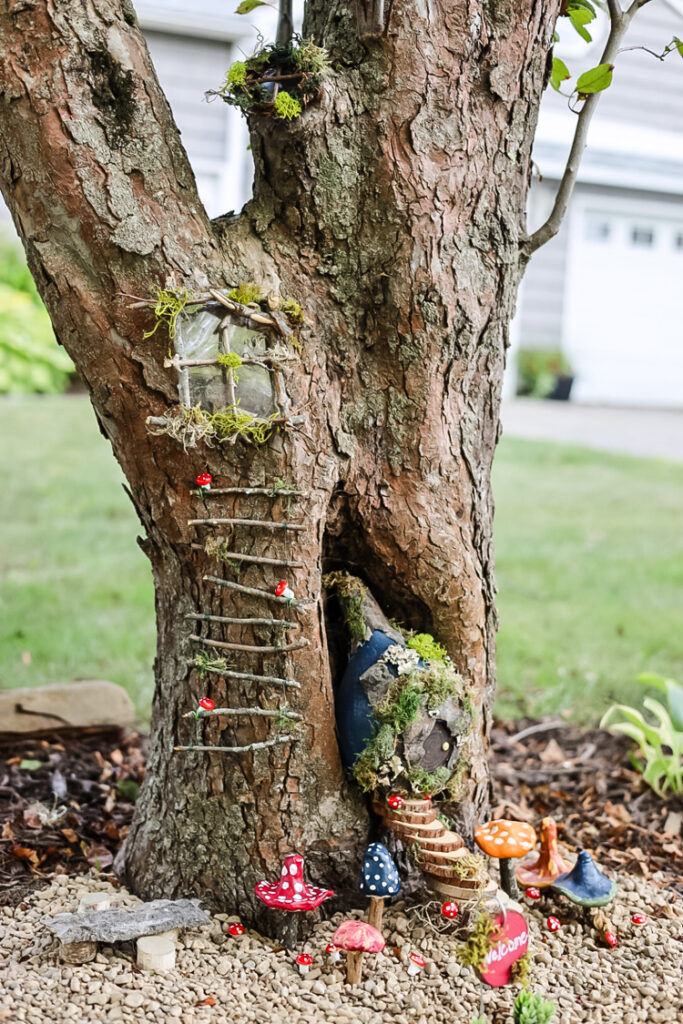
3. Rectangle Fairy Tree Window
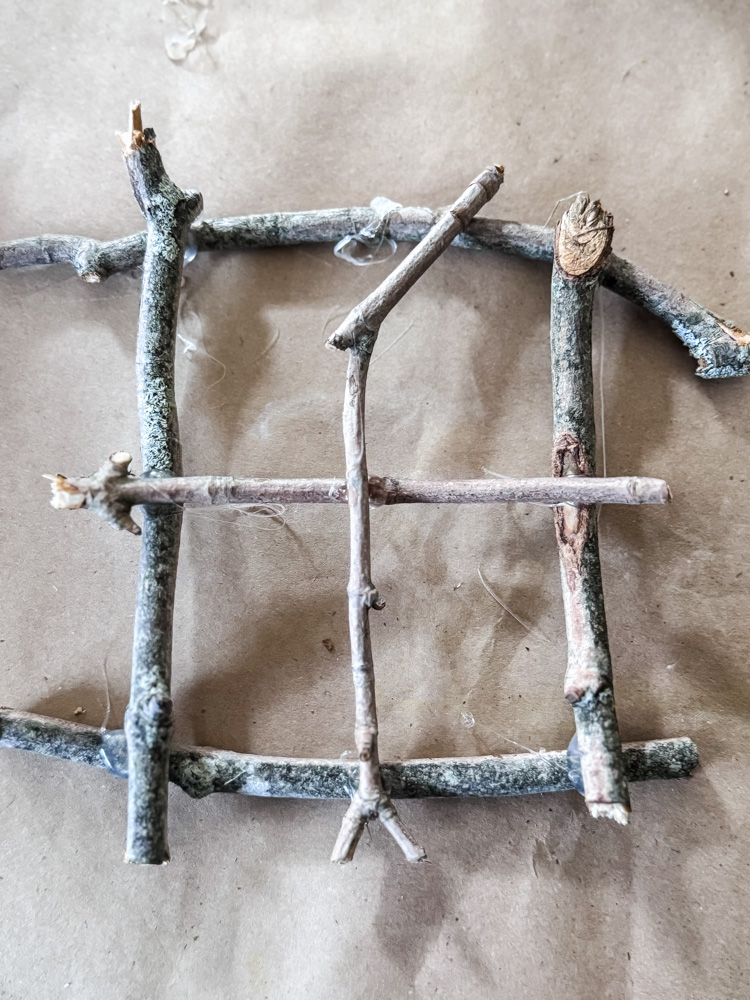
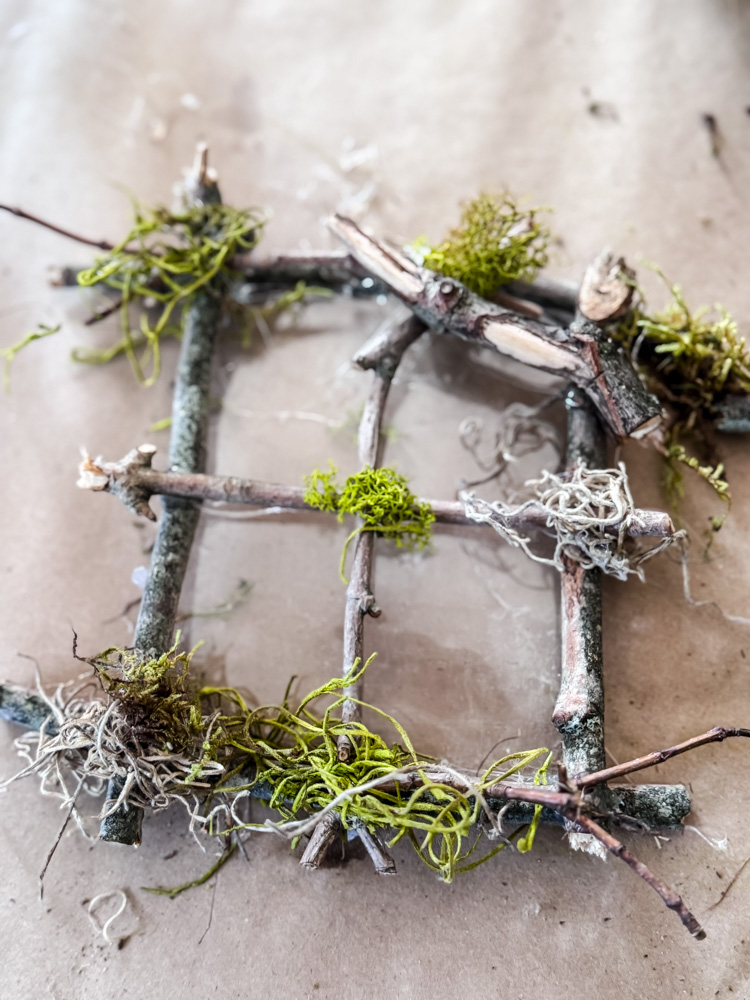
- Materials: Small straight twigs, moss, plastic packaging, hot glue.
- How-To:
- Glue twigs into a rectangular frame.
- Add crossbars for a “paned” look.
- Glue moss along the edges for a natural touch.
- I added a crooked little branch for effect.
- Secure plastic behind for a glimmering windowpane.
- Used a small nail to hang on the tree.
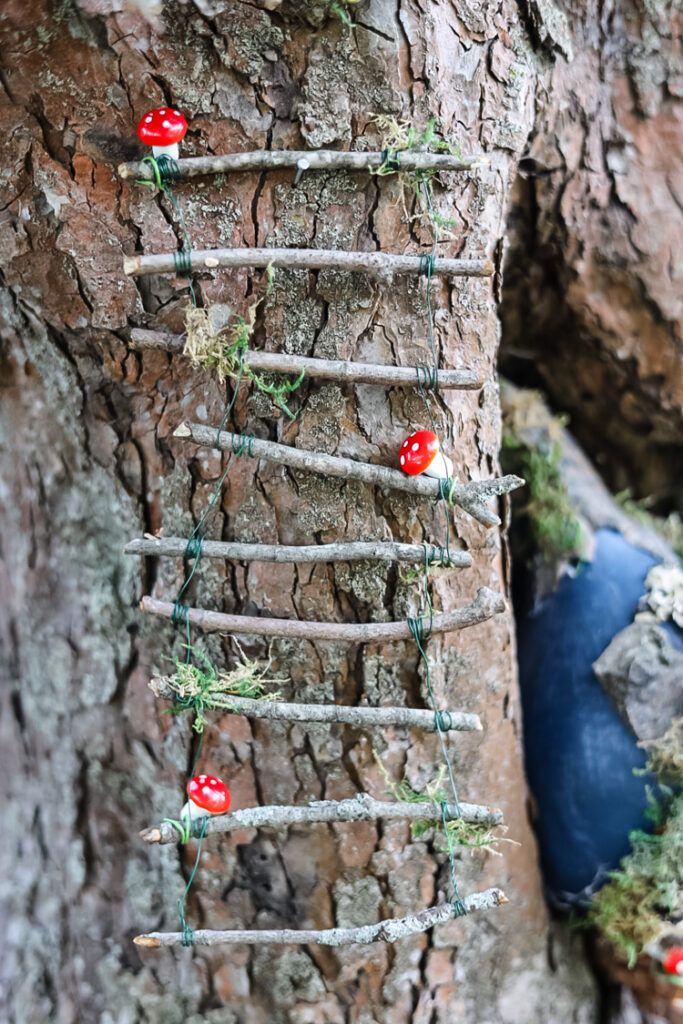
4. Fairy Ladder
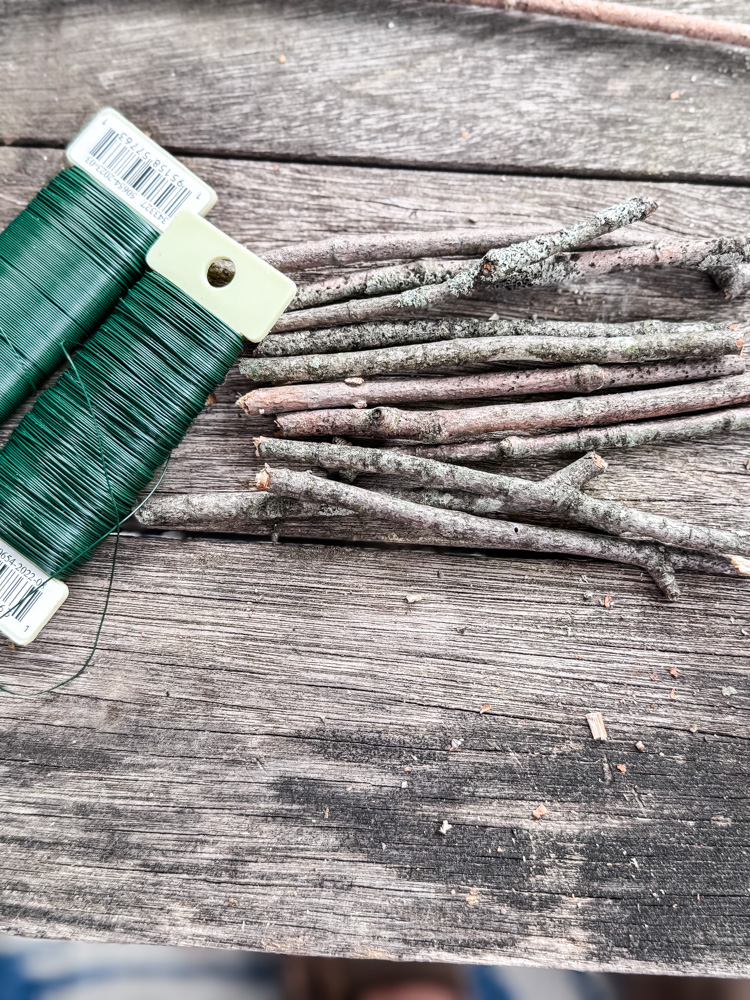
Then it hit me—how would the fairies climb down from their windows? Obviously, they needed a ladder! Here’s how I made one in just a few minutes:
- Cut a thin branch into 3-inch pieces ( I cut the 1st rung and used it as a guide to cut the rest).
- I used 2 paddles of floral wire to make this process even quicker! Wrap the wire near the edge of each branch “rung,” spacing each rung 1.5-2 inches apart.
- Added bits of moss on some rungs (I wrapped the moss with the wire)
5. Welcome Sign
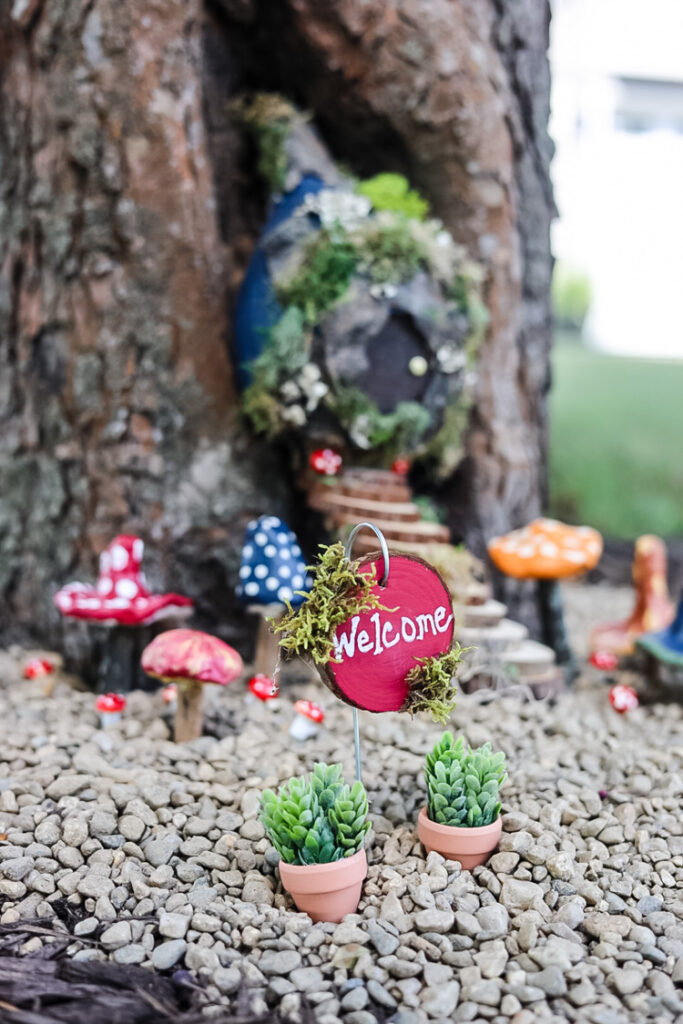
- Welcome Sign:
- Use a wood slice plant marker. I painted it red and used a white paint pen to write “Welcome” and glued bits of moss.
- Miniature Pots & Plants:
- Fill tiny pots with pieces of faux succulents (secured with hot glue)
- Place them near the sign
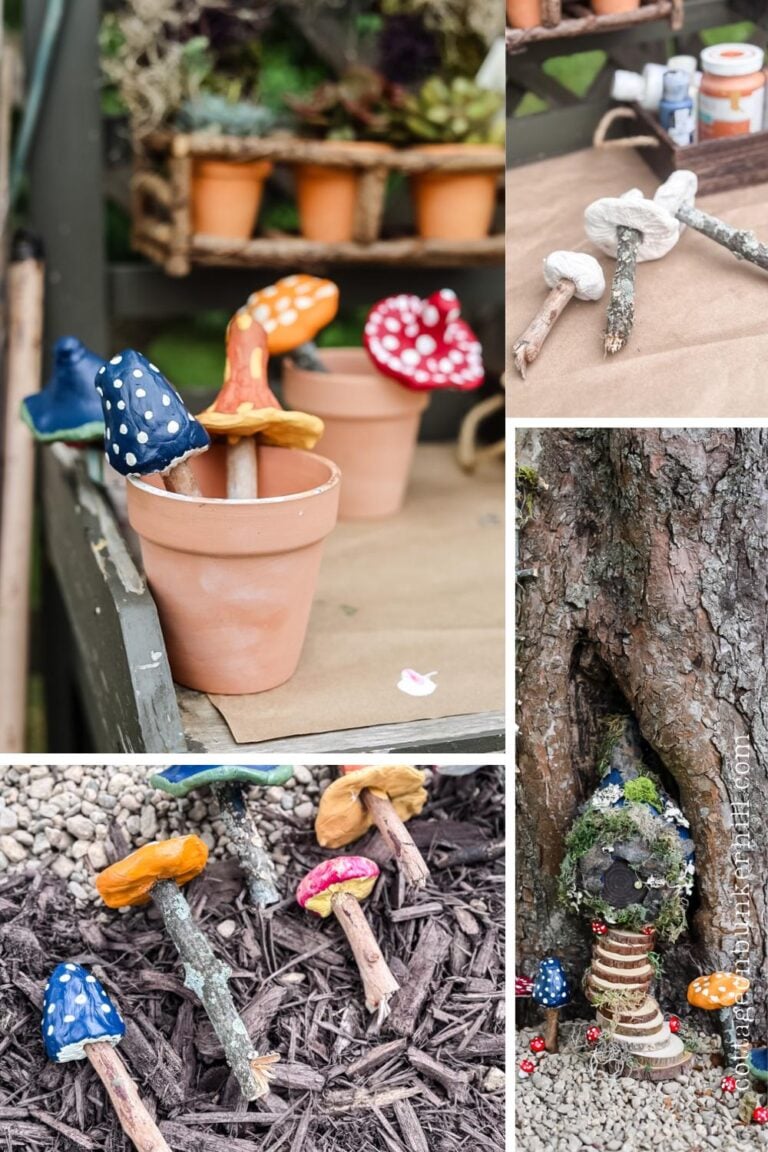
6. Mushroom Magic!
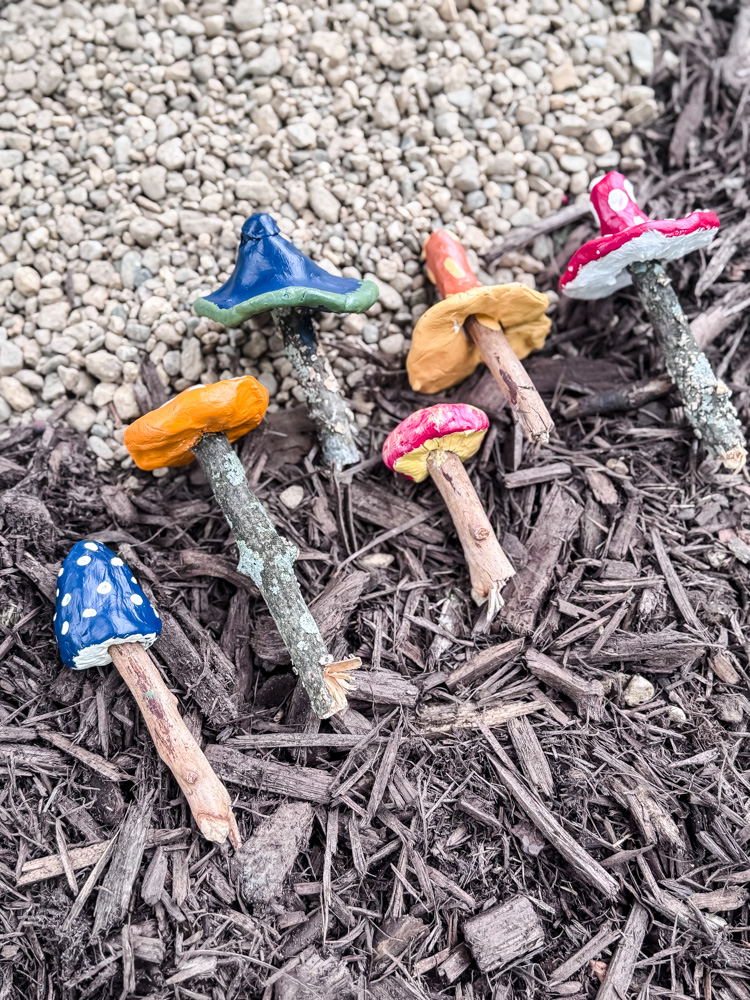
(Because this post is getting long—and those mushrooms deserve their own spotlight!)
- Sneak Peek: Handmade clay mushrooms in bright colors, scattered around the tree.
- Full Tutorial: Check out my easy air-dry clay method (with no fancy tools needed)
Final Touches & Your Turn to Create!
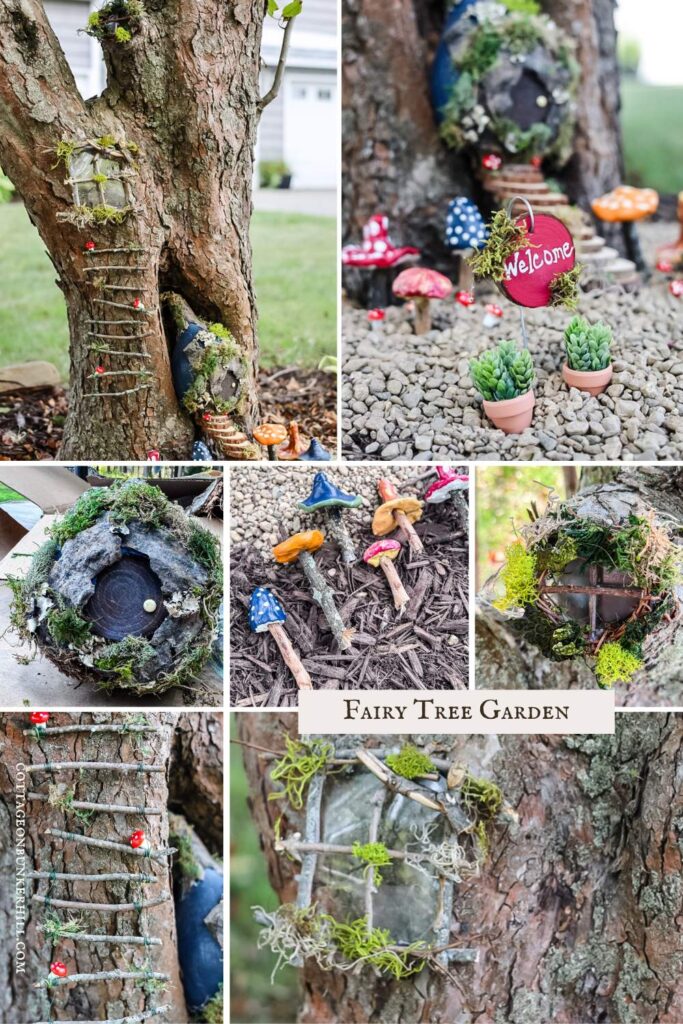
Well, friends, we’ve done it! What started as a simple tree hollow is now a whimsical fairy tree garden—complete with a gourd cottage, pebble pathways, twig ladders, and those adorable windows (which, yes, now have proper fairy access!).
A Quick Recap of the Magic:
- Repurposed a gourd (or coconut shell, birdhouse—you pick!) into a cozy fairy home.
- Built a mini landscape with wood-slice stairs, pebble paths, and foraged decor.
- Added playful details like windows with “glass,” a welcome sign, and mushrooms.
Fairy gardens aren’t about perfection—they’re about playfulness. Forget the rules, raid your recycling bin, and let your inner kid (or actual kids!) lead the way. After all, the fairies won’t judge if your ladder’s a little crooked!
Now It’s Your Turn!
I’d love to see your fairy garden creations! So send your photos to jennifer@cottageonbunkerhill.com so I can feature your photos in the reader’s spotlight page. Also, I’d love for you to comment below to:
- Share your clever hacks (because you all inspire ME too!)
- Answer any questions about your own projects
xo, Jennifer


This is adorable and something that my kids would love to help create! I can’t wait to have them start helping me with it! Thanks so much for sharing!
Yes, cute project for kids!!
This is absolutely adorable! I hope to steal (be inspired by) your idea for a tree in our neighborhood park. The Grandma in me can’t resist.
I loved doing this project! It was one I never got to last year. I’m thinking of doing a pumpkin version for Fall.
What a fun project to do with my grandkids. How did you mount the twig ladder to the tree. Can’t wait to gather my supplies 🙂
A teeny nail!
This totally has doll house vibes, something I always wanted to make, but this seems easier and more fun! Thanks for sharing, yours is adorable!
Thanks so much Vicki!!
That’s the cutest!! You have inspired me with a stump to create one here…my great nieces will love it!!
Absolutely adorable! I’m adding this to my list of fun projects to do soon…my pomegranate tree has the perfect trunk. Thanks!
You’ll have to send me a picture…also a pomergranate tree sounds dreamy!!
Thanks Leslie!!