
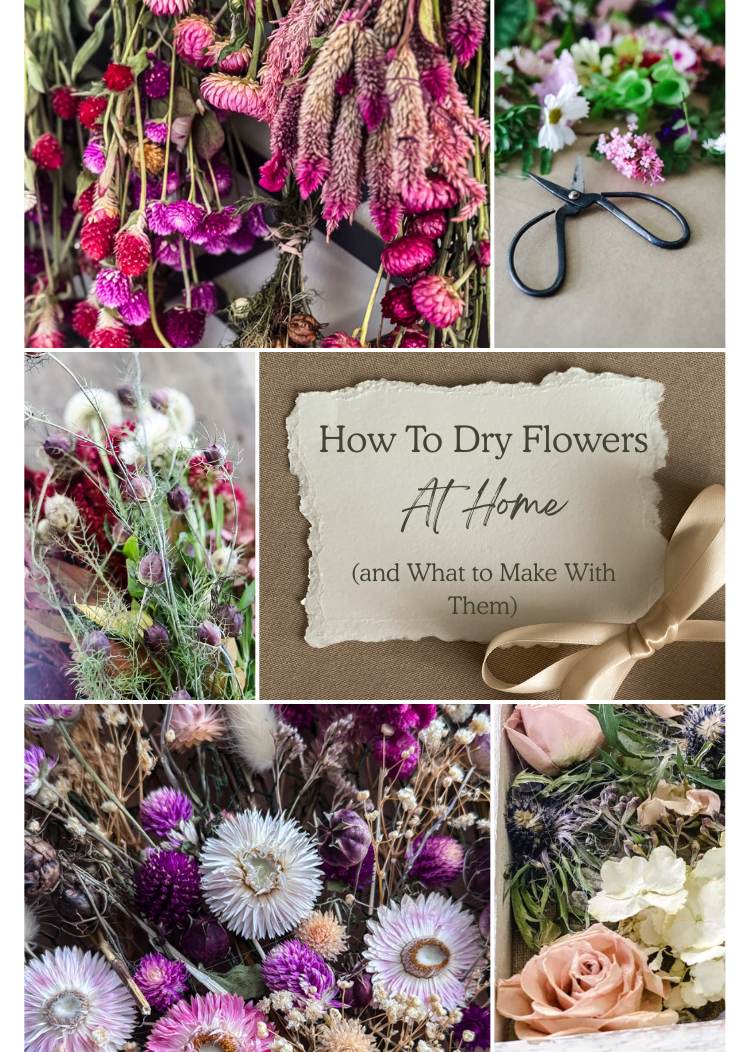
Fresh flowers don’t last, but dried flowers can stick around for years. If you’ve ever wanted to hold onto blooms from your garden, a special bouquet, or just a bunch of grocery store stems that were too pretty to toss, drying them is easier than you think. In this guide, I’ll walk you through the three best methods for drying flowers at home, plus show you what to actually do with them once they’re dry.
Which Method Is Right For You?
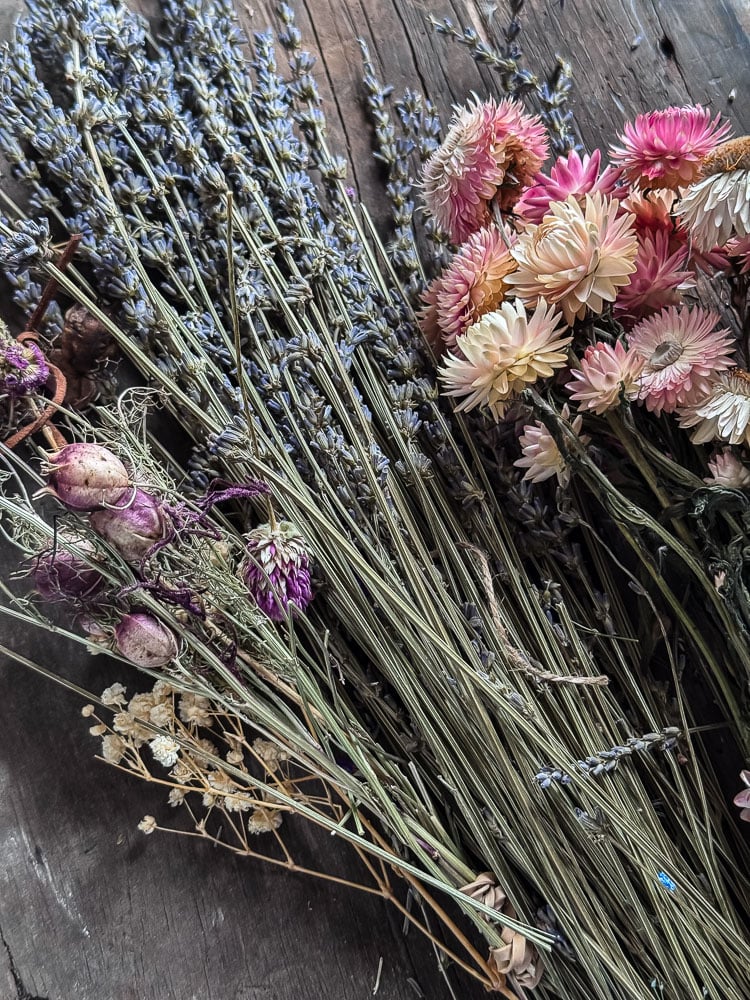
Air drying: The simplest method. Hang bundles upside down and let time do the work. Best for sturdy flowers like lavender, strawflowers, statice, and celosia. Takes 2–3 weeks but requires zero supplies.
Vase drying: The best method for hydrangeas. You let them dry slowly in a vase with just a little water- no hanging required. Gives beautiful results with almost no effort.
Silica gel: The method to use when you want to preserve the shape and color of more delicate flowers like roses and zinnias. Takes a few days to a couple of weeks, but the results are impressive.

This post may contain affiliate links, which means I may earn a small commission if you make a purchase through my links, at no extra cost to you. Read my disclosure policy here.
Welcome! I’m Jennifer, and I’ve always believed nature is the most beautiful art supply. For years, I’ve been preserving New England’s blooms and foliage through pressing, drying, and crafting. Let me show you how to capture a little bit of the season and bring it indoors—simply and beautifully.
Air Drying Flowers: The Easiest Method
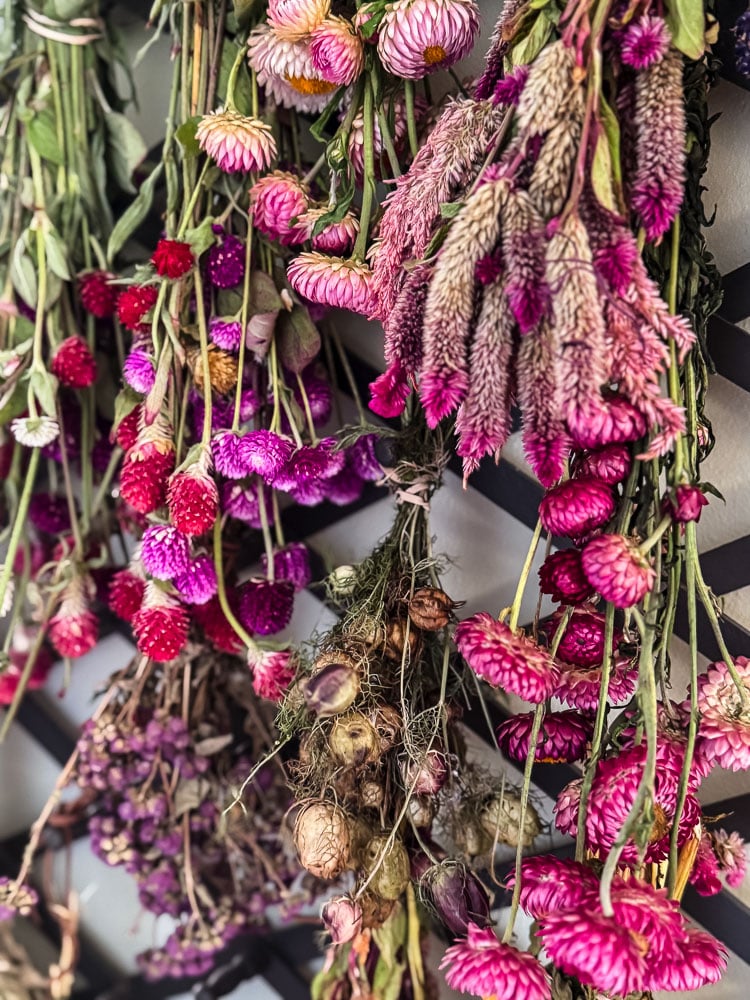
Air drying is the method I use most. It requires nothing special, just a little patience and a good spot to hang your bundles. This is how I dry most of my cutting garden flowers every summer, and honestly, it’s become one of my favorite late-season rituals.
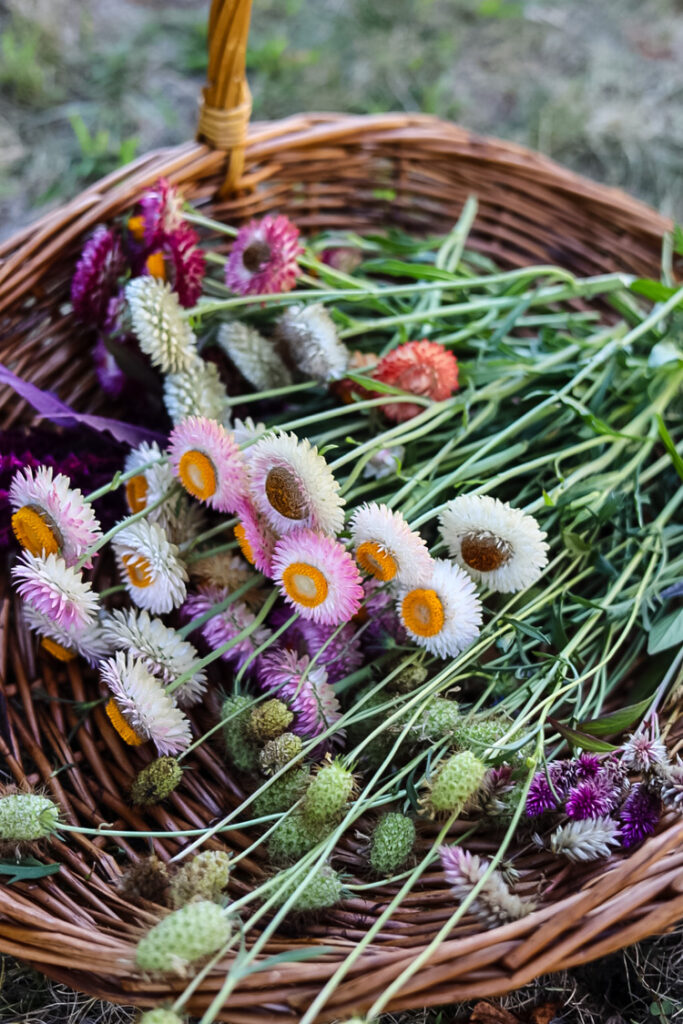
Best flowers for air drying: lavender, strawflowers, statice, celosia, roses, baby’s breath, nigella pods, globe amaranth, and most grasses. In general, flowers with lower moisture content and sturdier petals dry the best this way.
How To Do It
- Cut stems as long as possible; you can always trim them down later. Remove any extra foliage from the stems.
- Bundle flowers into small groups and secure with a rubber band, jute twine, or a twist of floral wire.
- Hang the bundles upside down in a spot that’s dry, dark, and has decent airflow. A basement, closet, or covered porch all work well.
- Keep them out of direct sunlight. Both while drying and after. The sun will fade the colors faster than anything.
- Wait 2–3 weeks until the petals feel dry and papery to the touch.
- Store finished bundles in a cool, dark spot. I keep mine hanging on an accordion peg rack
Vase Drying: The Best Method for Hydrangeas
If you grow hydrangeas, this one’s for you. Instead of hanging them upside down, you let them dry slowly right in a vase, and it couldn’t be simpler.
The key is timing. Wait until late in the season when the blooms naturally start to shift color, and the petals begin to feel a little papery. That’s your signal that the flower is ready to dry well.

How To Do It

- Cut stems and remove the leaves.
- Place the hydrangeas loosely in a vase with about 1.5 to 2 inches of water. Don’t crowd them.
- Leave them alone. As the water slowly evaporates, the hydrangeas will dry in place.
- That’s really it!
The results are beautiful. The dried hydrangeas hold their shape and color really well with this method, and you end up with blooms that are perfectly preserved.

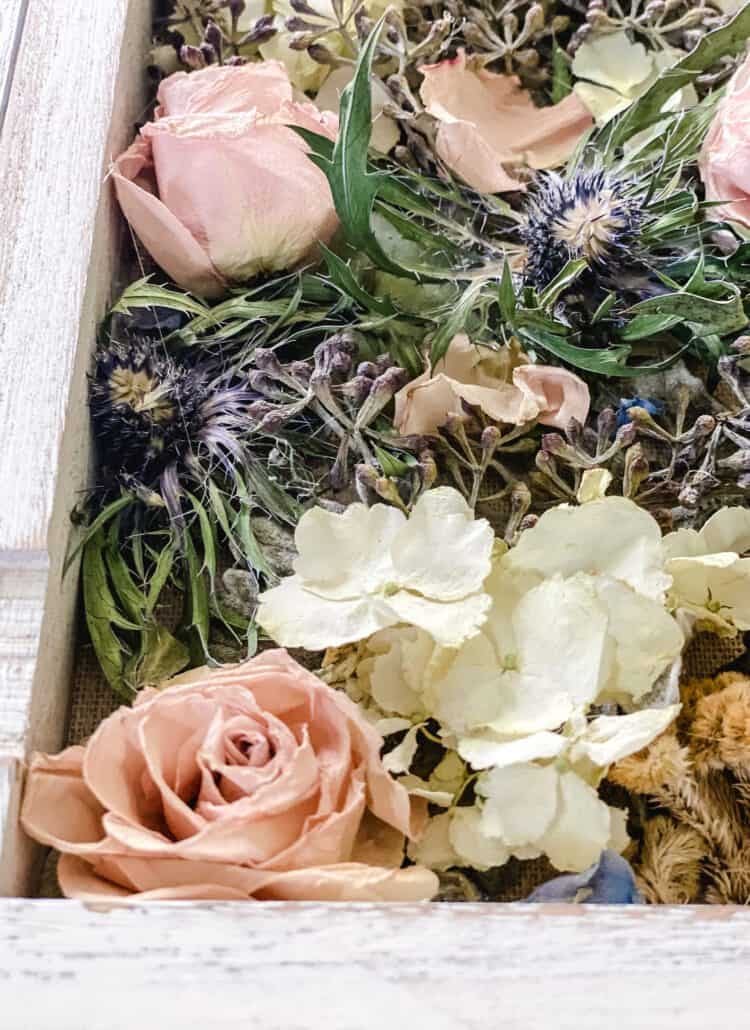
Silica Gel: The Best Method for Preserving Shape and Color
Silica gel is the method to reach for when you really want to preserve a flower. When the shape and color matter, and you don’t want them to shrink or droop the way air-dried flowers sometimes do. It’s how I preserved the flowers from a friend’s wedding centerpiece to make her a keepsake shadowbox, and the results were genuinely stunning. The roses came out looking almost fresh.
Silica gel is a desiccant, which in simple terms means it pulls moisture out of whatever it’s buried in. You can find it at most craft stores or on Amazon, and the good news is it’s reusable.
What You’ll Need
- Silica gel flower drying crystals (enough to fully cover your flowers)
- A plastic container with a lid, like a large food storage container, works perfectly
- A soft paintbrush for cleanup
How To Do It
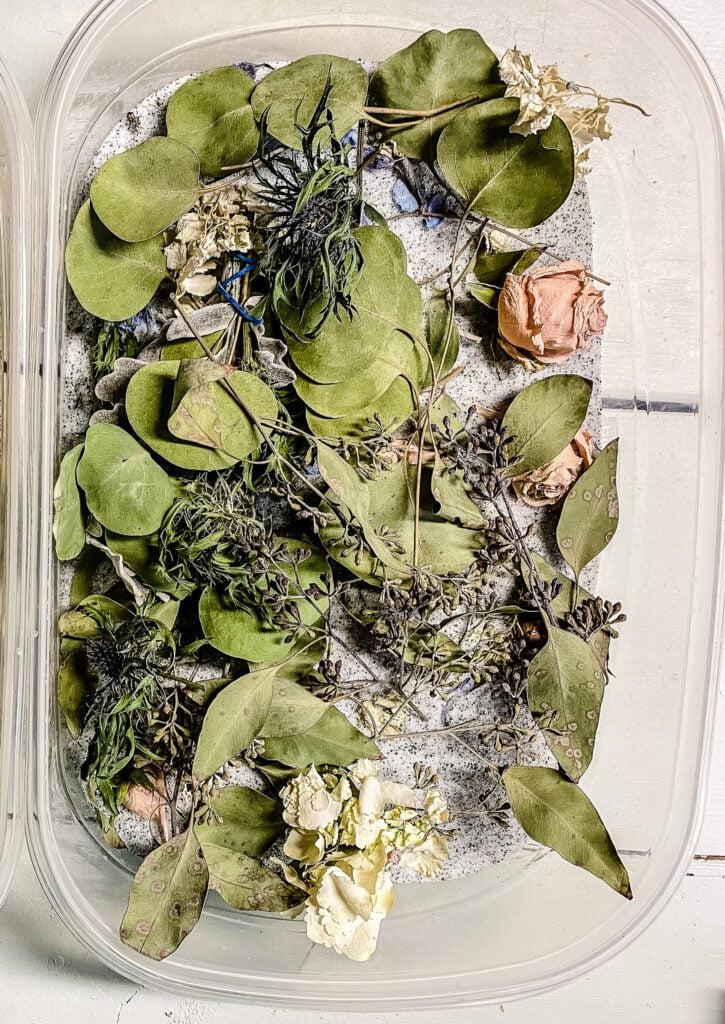
- Trim stems short and remove any extra leaves or petals.
- Pour a layer of silica gel into the bottom of your container.
- Place your flowers face-up on top of the gel.
- Slowly and carefully pour more silica gel over and around the flowers until they’re completely covered.
- Seal the container so no moisture gets in.
- Wait. Depending on the flower, this takes anywhere from a few days to two weeks. Check after 3–4 days. Petals should feel dry and papery when they’re done.
- Gently remove the flowers and use a soft paintbrush to brush away any remaining silica gel from the petals.
- Display or store out of direct sunlight.
One tip: Go slowly when you’re pouring the silica gel over the flowers. It’s easy to accidentally crush delicate petals if you dump it in too fast.
try this too!
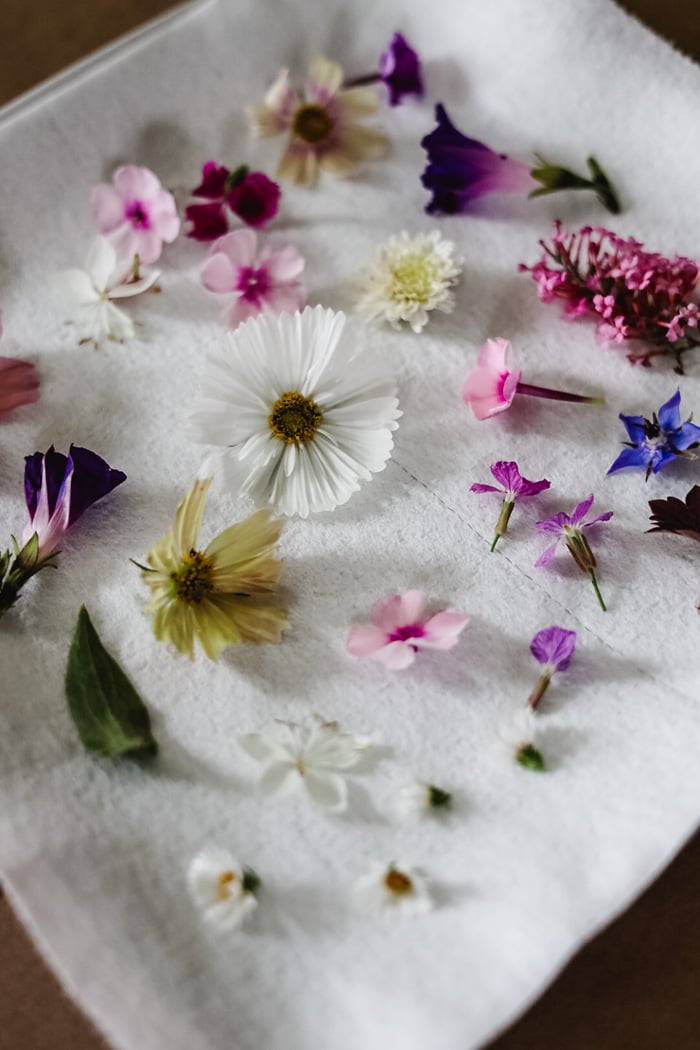
Microwave Pressed/Dried Flowers
Here is a hybrid method for quick-drying flowers, but flatter.
What to Do With Your Dried Flowers
This is honestly my favorite part. Once you have a good stash of dried flowers, the possibilities are everywhere. There are so many ways to use dried flowers in your home when you are decorating. Simply putting them in a vase, making a wreath with dried flowers, or using dried flowers to make botanical imprints are a few ideas.
Here are some of my favorites:
Display Them In A Vase
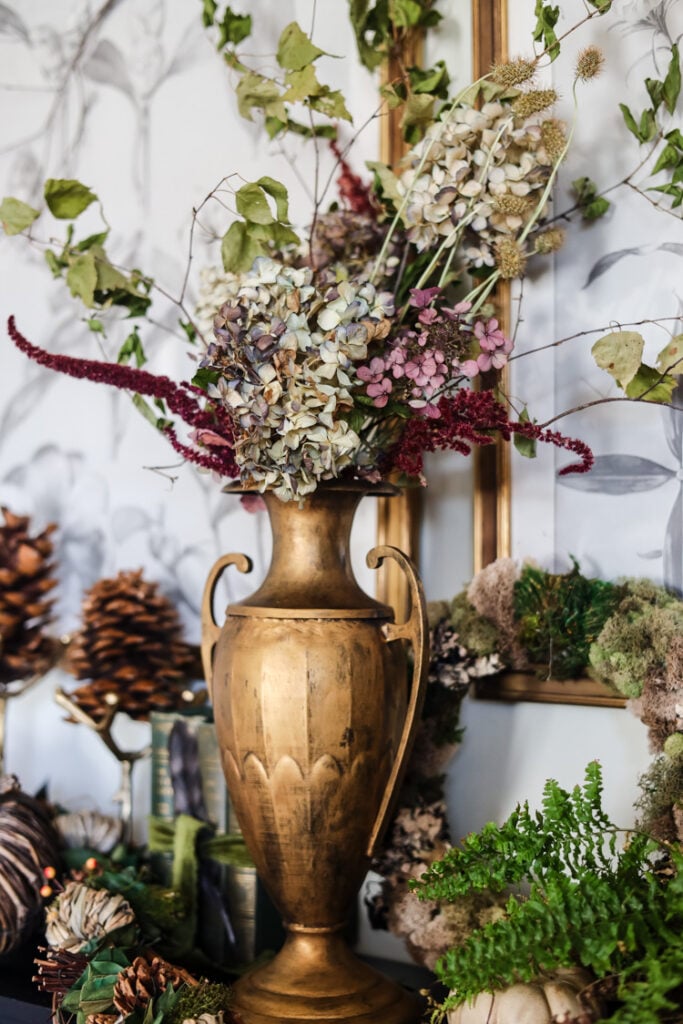
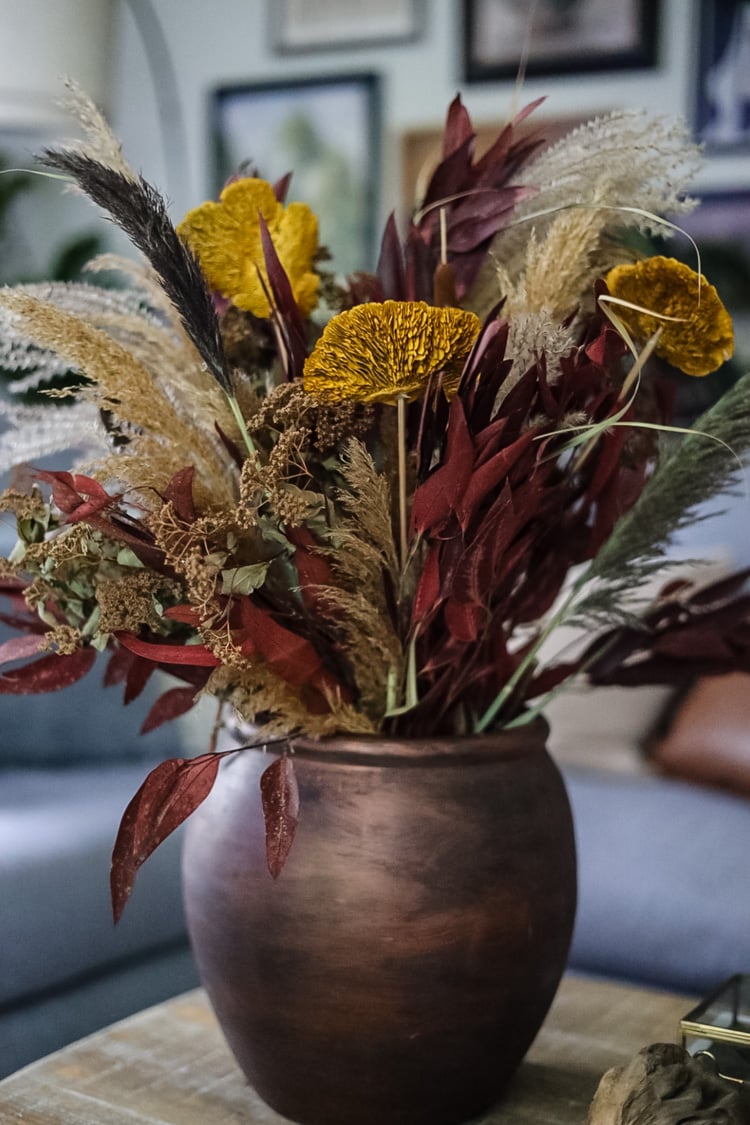
The simplest thing you can do, and sometimes the best, is to fill a pretty vase or urn with your dried blooms. For an interesting Fall look, I filled this thrift store metal urn with an interesting combination of dried hydrangeas, scabiosa, amaranth, and small leafy twigs. The best part is that it cost me nothing!
Be sure to mix textures and heights the same way you would with fresh flowers when you are building an arrangement with dried stems.

. A big handful of dried strawflowers or starflowers (I grow Scabiosa ‘Drumsticks’ in my cutting garden specifically for this) stuffed into a vintage crock or a DIY pottery-style vase looks beautiful and lasts all season.

For the holidays, I filled a large vase with fresh greens and eucalyptus and topped off the arrangement with dried starflowers. (here are the seeds I grew)


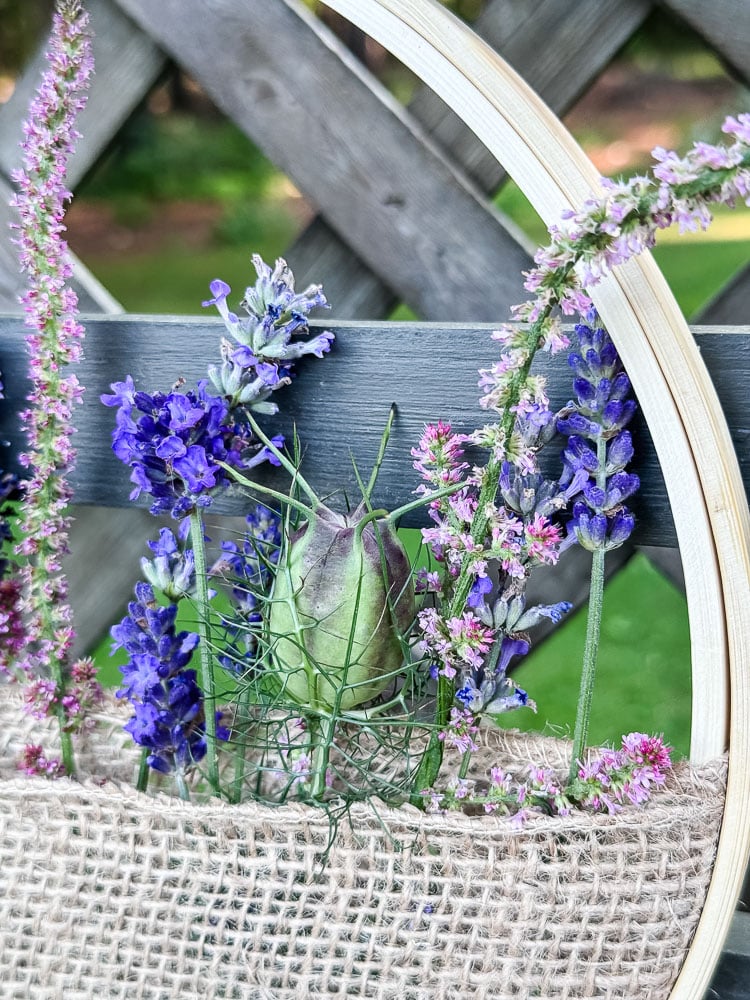
Make A Wreath
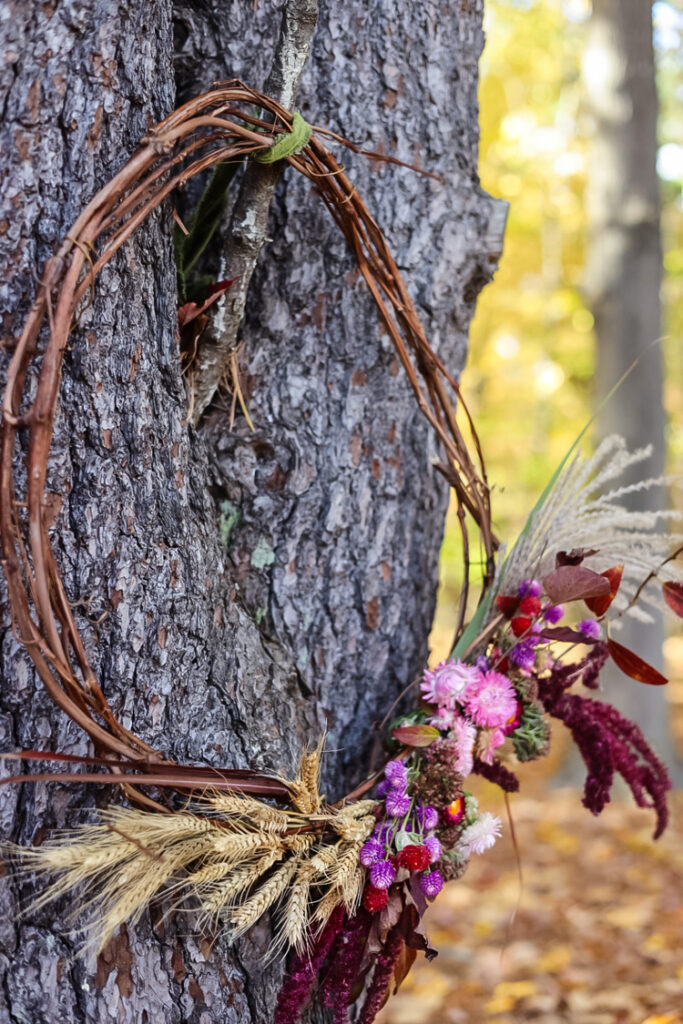
Dried flowers make some of the most gorgeous wreaths, and they hold up far longer than fresh ones. I’ve made everything from a lush fall garden wreath packed with flowers I grew myself to a simple moss-based bunny wreath with strawflowers for spring. If you have dried flowers on hand, a wreath is always a good idea!


- Foraged Fall Wreath
- Pumpkin Wreath
- Bunny Head Wreath
- Fall Garden Wreath
- Dried Flower & Blue Hydrangea Wreath
- Dried Sunflower Wreath
Make Potpourri

One of the simplest projects there is. Air dry some small roses. Trader Joe’s has inexpensive bunches that are perfect for this. Then remove the stems, tumble the dried blooms into a shallow bowl, and add a few drops of rose essential oil or rose geranium oil for fragrance. Done. It makes a beautiful little vignette on a side table or bathroom shelf.
Make a Dried Flower Hanging Frame
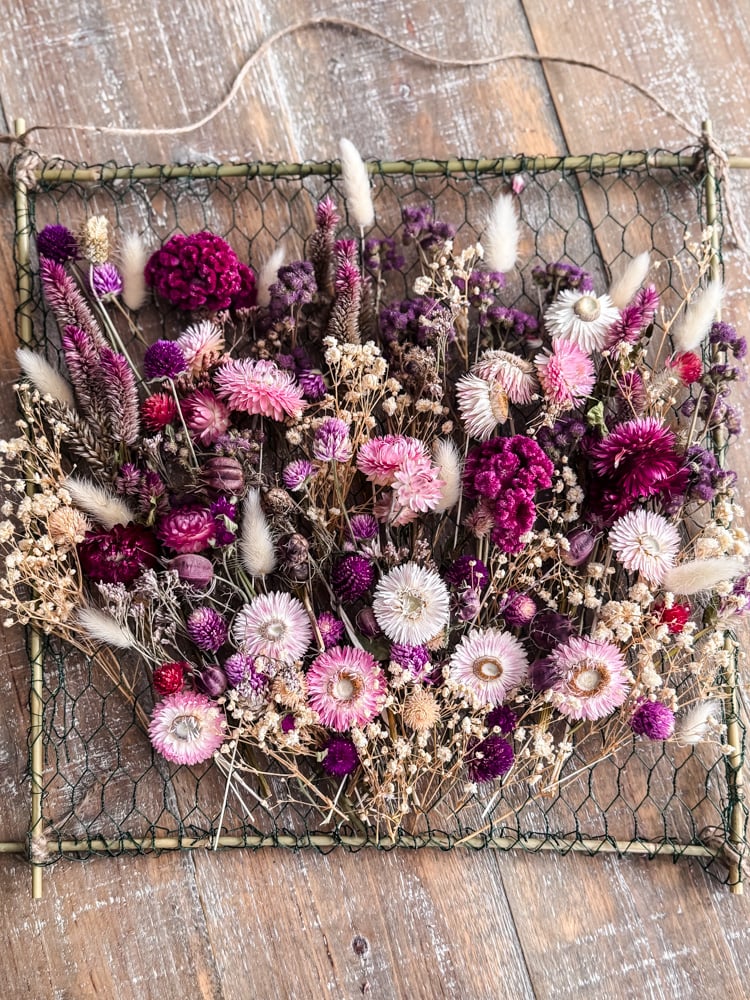
This is one of my favorite ways to display dried flowers right now. Using bamboo stakes and chicken wire, you can make a hanging frame that looks like something from a high-end home shop — for almost nothing. It’s the kind of project that looks complicated but really isn’t, and it shows off your dried flowers beautifully.
Preserve Them in Oil (Japanese Herbarium Bottles)
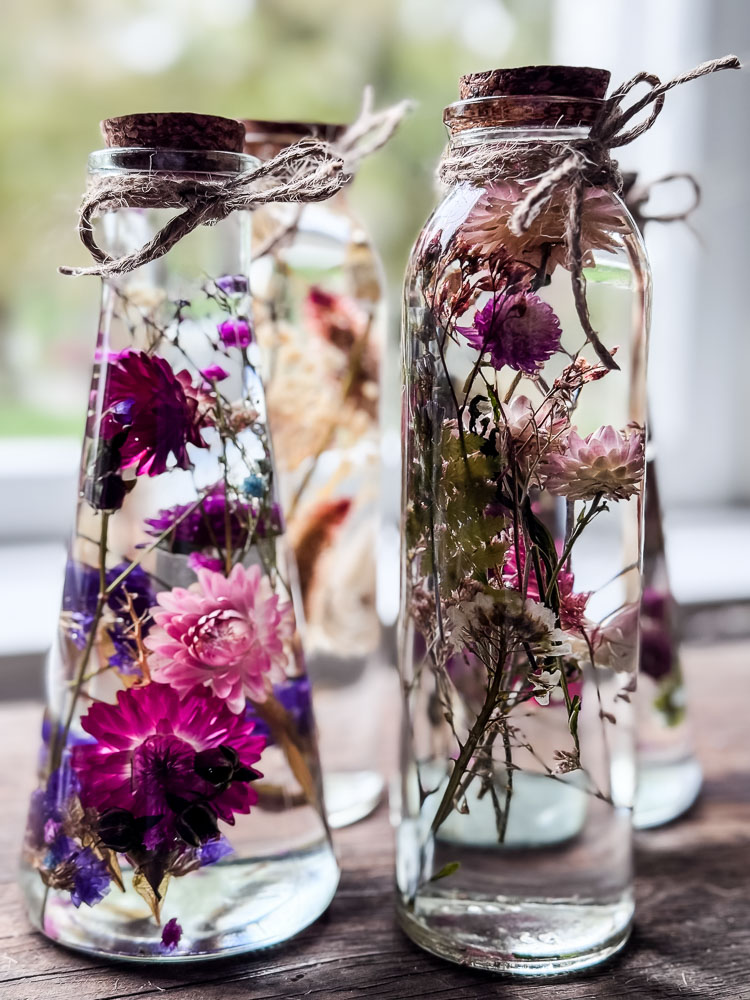
This one is a little different from the other projects here. Instead of displaying your dried flowers in the traditional sense, you suspend them in clear mineral oil inside glass bottles. The result is stunning, almost like a living still life. It’s a technique called Japanese herbarium, and once you see it you’ll want to make one immediately. A perfect way to showcase flowers you grew yourself.
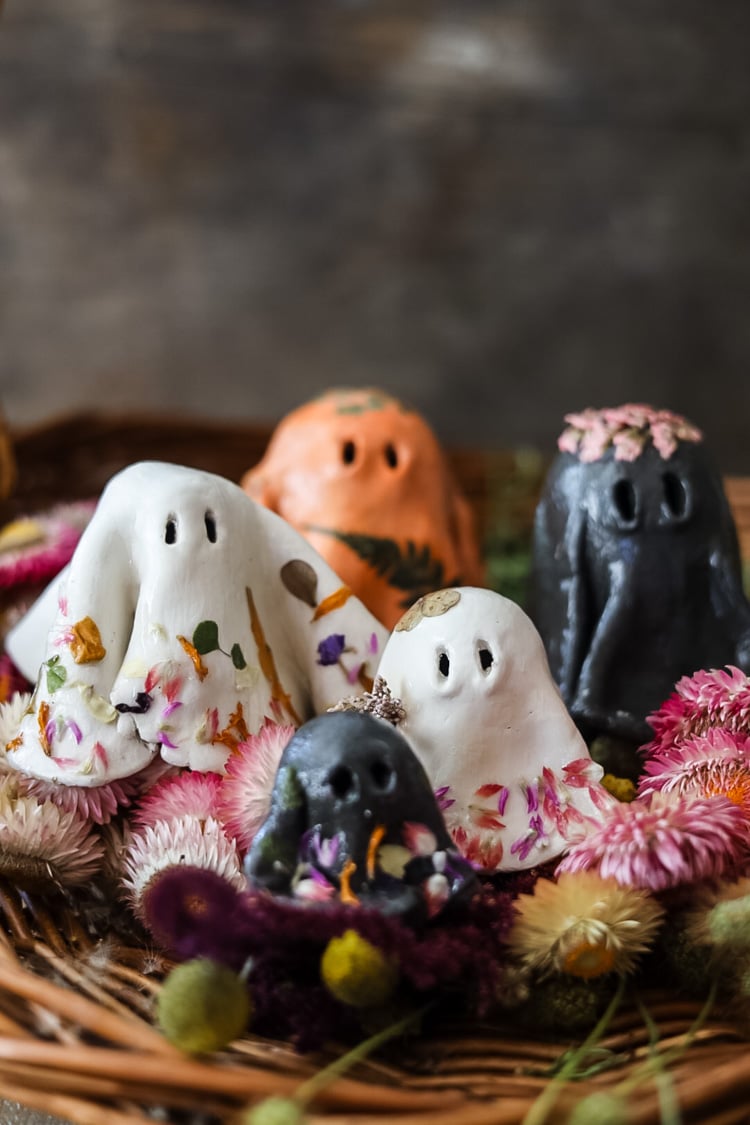
Make Clay Imprints

This one surprises people every time. Press dried botanicals: baby’s breath, eucalyptus, small flower heads into air-dry clay before it sets and you get the most beautiful botanical imprint. I’ve made heart ornaments, flower plaques, and clay magnets this way. It’s a great project for using up smaller stems and bits that aren’t showy enough for a vase.

Another air-dry clay project. This time I used terracotta colored air-dry clay and a few different botanicals to make imprints. Then used paint markers to color in the imprints before attaching the clay to the wood plaque frames.
Fill Glass Ornaments

A quick holiday idea! Tuck small sprigs of dried baby’s breath or tiny dried flowers into clear glass ornaments for a natural, delicate look on the Christmas tree. Takes about five minutes and looks like something you’d find at a boutique for $30.
Make A Botanical Shadowbox

Here is an idea for displaying your dried flowers! Make this Pottery Barn-inspired woven shadowbox frame to tuck a few of your flower stems into. Lovely organic look for your home.
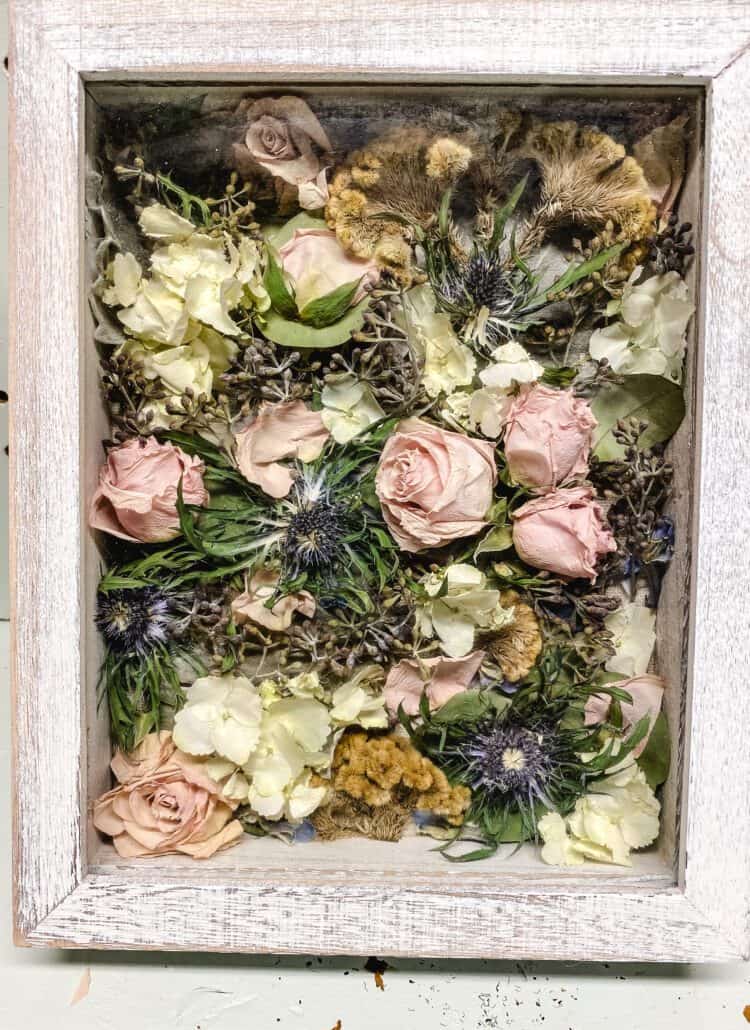
Making a Shadowbox Wedding Keepsake w/ Dried Flowers
This is the project I made for my friend using her wedding flowers preserved in silica gel. Arrange your dried blooms in a deep shadowbox frame, glue them in place, and you have a piece of wall art that actually means something. It also works beautifully with flowers from your own garden as a way to remember a particularly good growing season.
Ready To Start Drying?
The best time to start is whenever you have flowers on hand. A bunch from the farmers market, the last roses of summer, a handful of lavender from the garden. You don’t need much to get started, and once you do, you’ll never look at a wilting bouquet the same way again.
If you make something using any of these methods, I’d genuinely love to see it. Send me a photo at jennifer@cottageonbunkerhill.com, and I’ll add you to the Reader’s Spotlight gallery.
xo, Jennifer
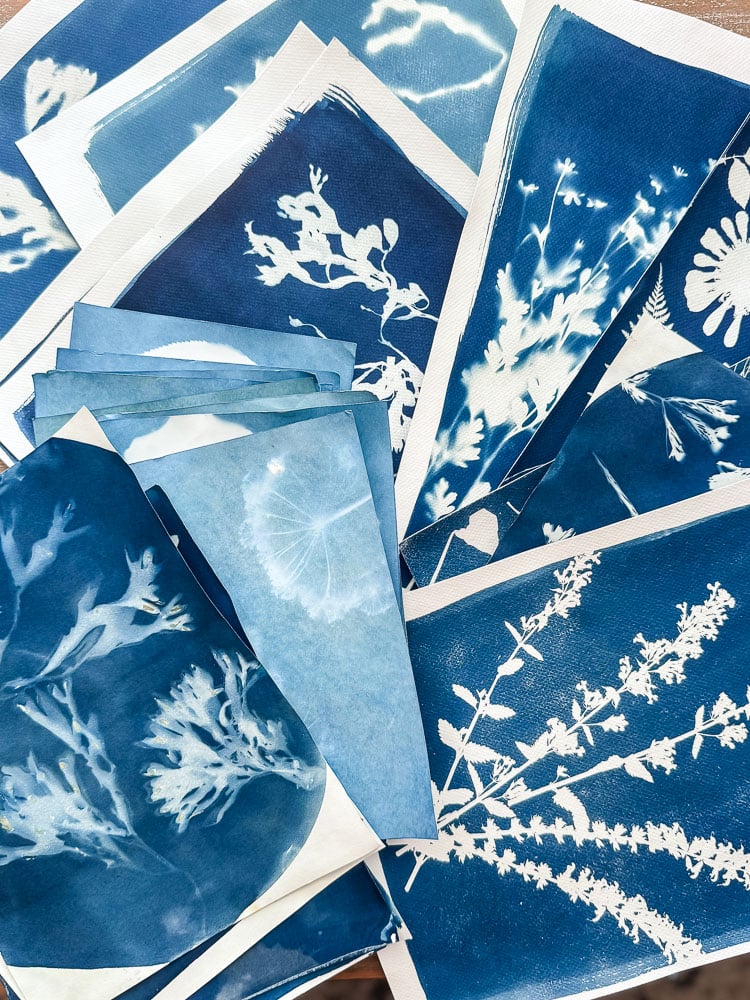
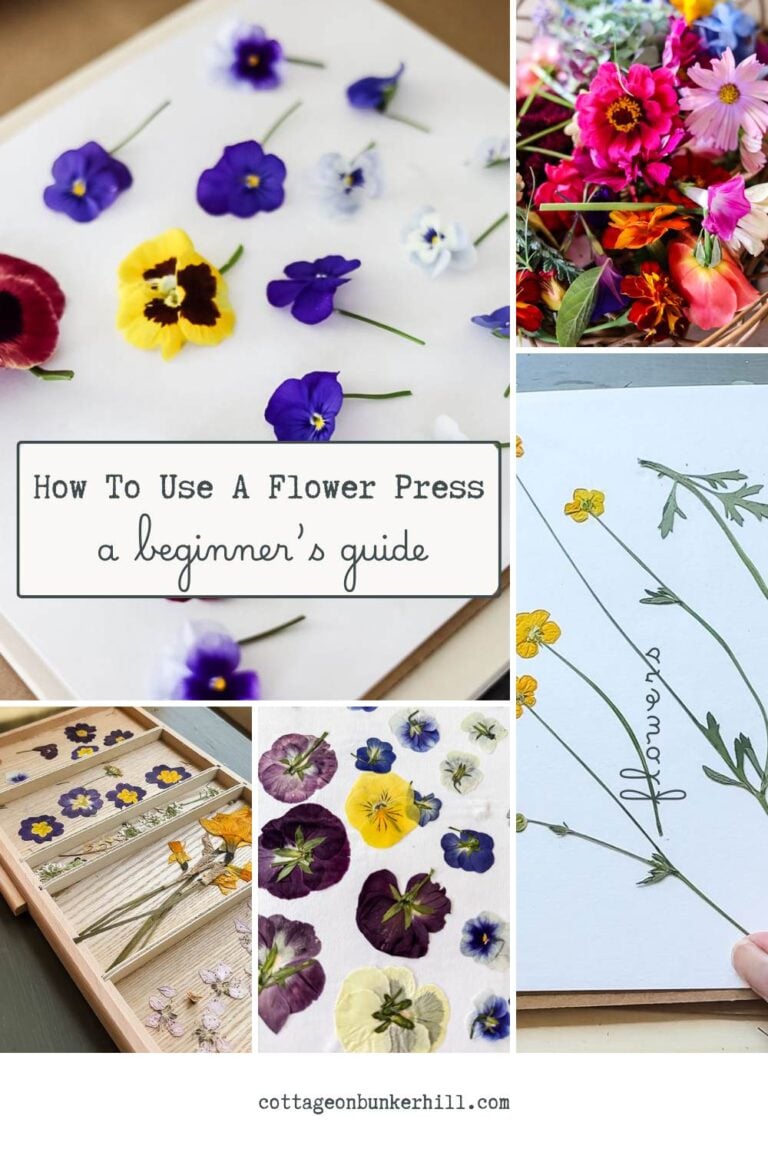
learn how to
Press Flowers
Let me teach you how to press flowers at home.

25 DIY Projects Using
flowers & botanicals
Here are my latest flower projects


What am I doing wrong? My hydrangeas dry nicely but don’t retain their color.
Betty, it’s usually from light exposure. That’s the #1 think that makes them turn pale.
Lots of great ideas to preserve flowers!! I’m in the process of drying hydrangeas right now. This year we got wonderful blooms but they just don’t last long enough. Constant sun and excessive heat burns them out too quickly. I hope my results are good!!
I remember all the beautiful wreaths. Love your suggestions. They get me excited to try all the time!! Thanks bunches!!
What a great idea. I have a pretty frame from Christmas. A gift from a friend. It’s one of those hanging all glass frames. I need to dry some flowers and put in the frame. Thanks for the great idea.
I love this post, Jennifer! So much great information. I love drying my flowers from the garden.
I’m giving nigella one more try this year because I’m obsessed with the dried pods. I had zero luck with them last year.
A wonderful post Jennifer!
Thanks so much, Linda!!!
Love your methods!
Thanks, my sweet friend!! Miss your face.