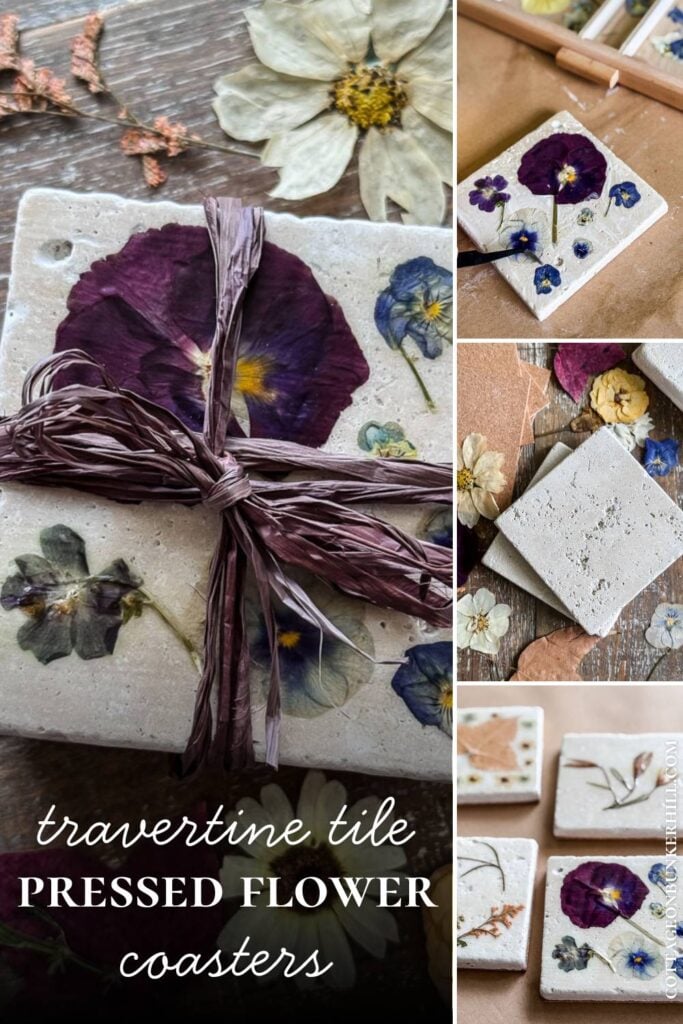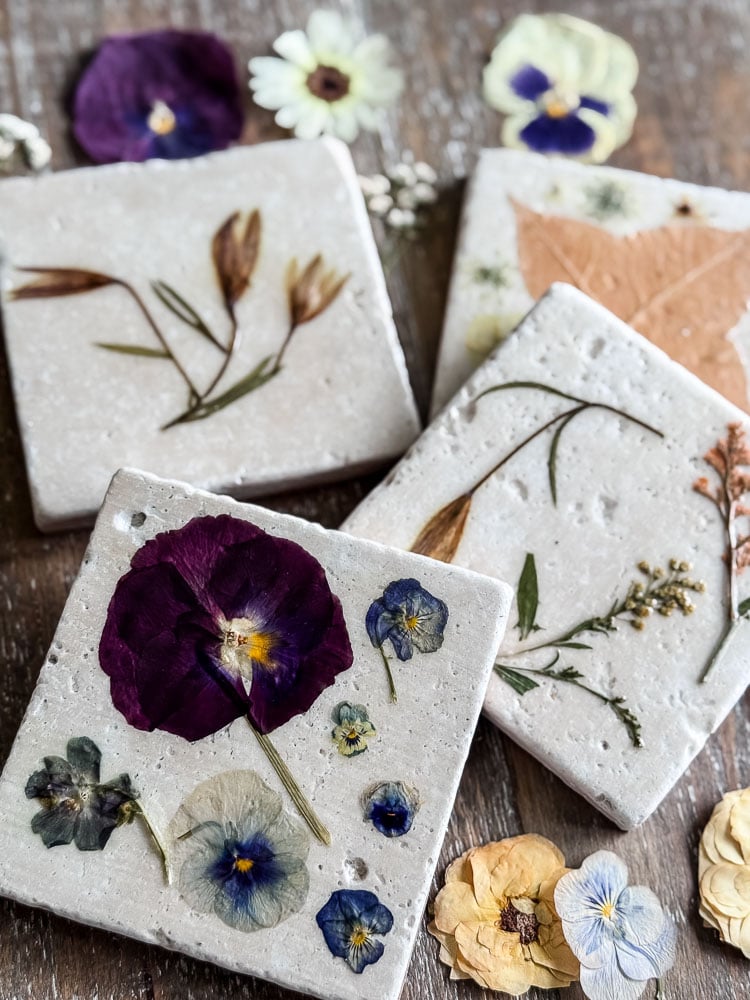
This month’s garden-to-home project is one of those satisfying crafts that looks far more complicated than it actually is. I turned simple 4-inch travertine tiles into delicate pressed flower coasters, and I’m walking you through every step so you can make your own.
If you’ve been pressing flowers and aren’t sure what to do with them beyond framing them, I have a project for you. These pressed flower travertine coasters are one of those projects that look like they came from a boutique gift shop but are easy to craft at home, especially if you’re already growing and pressing your own blooms.
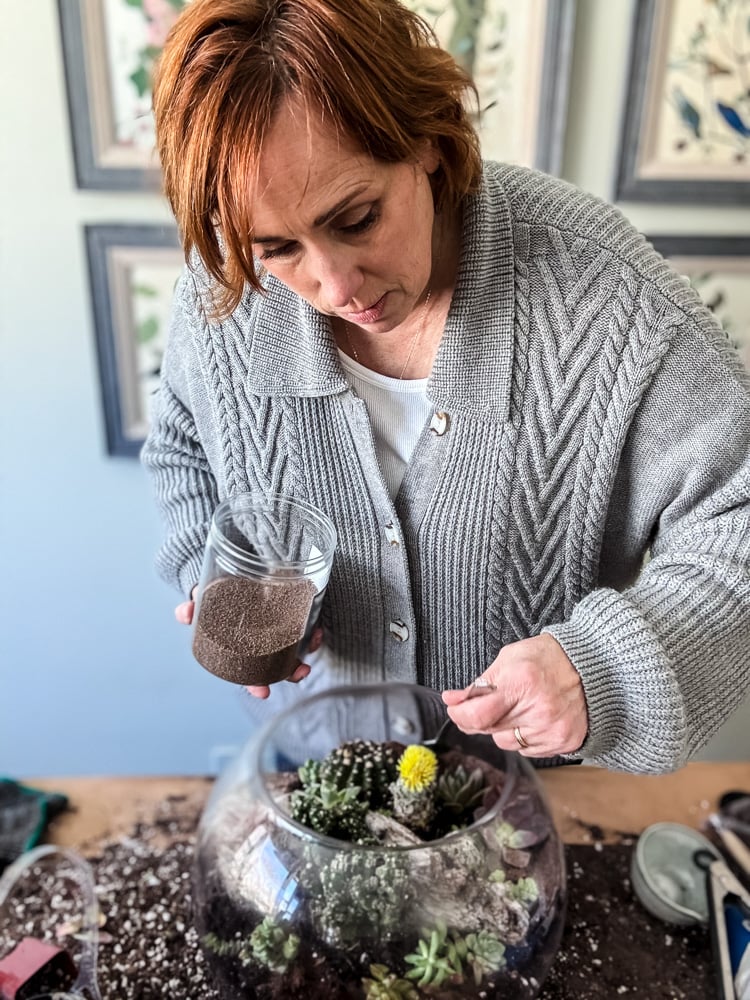
Welcome! I’m Jennifer, and I’ve always believed nature is the most beautiful art supply. For years, I’ve been preserving New England’s blooms and foliage through pressing, drying, and crafting. Let me show you how to capture a little bit of the season and bring it indoors-simply and beautifully.
Garden to Home: Pressed Flower Coasters on Travertine Tile
I made these as part of my Garden to Home series, and they might be the most practical thing I’ve made for it yet. The travertine tile has this natural, warm texture that looks absolutely beautiful under pressed botanicals. It’s simple, it’s budget-smart, and every single coaster ends up being its own little piece of art.
Garden to Home
I’ve always believed the line between garden and home should be blurry. This series is all about crossing that line. Taking what grows outside and bringing it indoors in beautiful, lasting ways. New projects posted monthly.
Let’s grow together!
This post may contain affiliate links, which means we receive a small commission if you purchase through our links. See our disclaimer page for more information.
What You’ll Need
Materials for this Project
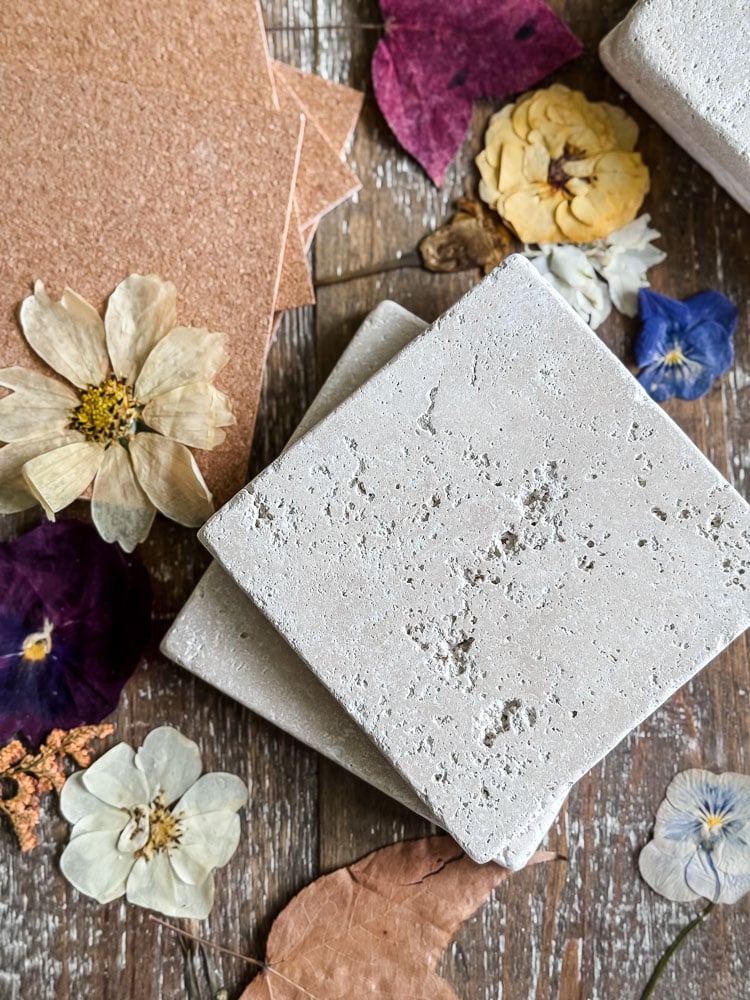
- 4-inch travertine tiles(I had to order mine online, my local hardware store didn’t carry them in stock, so plan ahead) here’s a gray version
- Pressed flowers: thin and flat is key here (more on that in a minute)
- More muted pressed flowers
- Mod Podge (matte formula)
- A foam brush or soft flat brush
- Matte spray clear coat (I used 2 light coats)
- 4-inch square cork adhesive squares for the back
- Tweezers for placing flowers
A Note On The Flowers
This is the one part of the project where I want you to slow down and think before you dive in. The flowers you use need to be very thin and very flat. This isn’t just an aesthetic preference; it’s practical. A coaster needs to sit flat on your table and support a mug or glass without rocking. Thick petals create bumps, and bumps are a problem.
Pansies are genuinely perfect for this. They press beautifully flat, they hold their color reasonably well, and the variety of sizes means you can mix large statement blooms with smaller filler flowers on the same tile. I used pansies from my own garden that I had pressed, along with a set of pressed flowers I had ordered online (the same ones I used for my notecard project). Between the two, I had a nice range of shapes and textures to work with.
My brighter flowers, some of the more vivid blooms I had pressed, were too thick, and I set those aside. The coasters I ended up with are more muted and neutral, which I actually love. They feel very botanical and earthy. But if you want bold and colorful, just make sure those flowers are properly pressed flat first.
How To Make Them
This is overall a pretty simple DIY project! You do need some patience, though, because the Mod Podge has to dry completely between coats.
Step 1: Seal The Tile
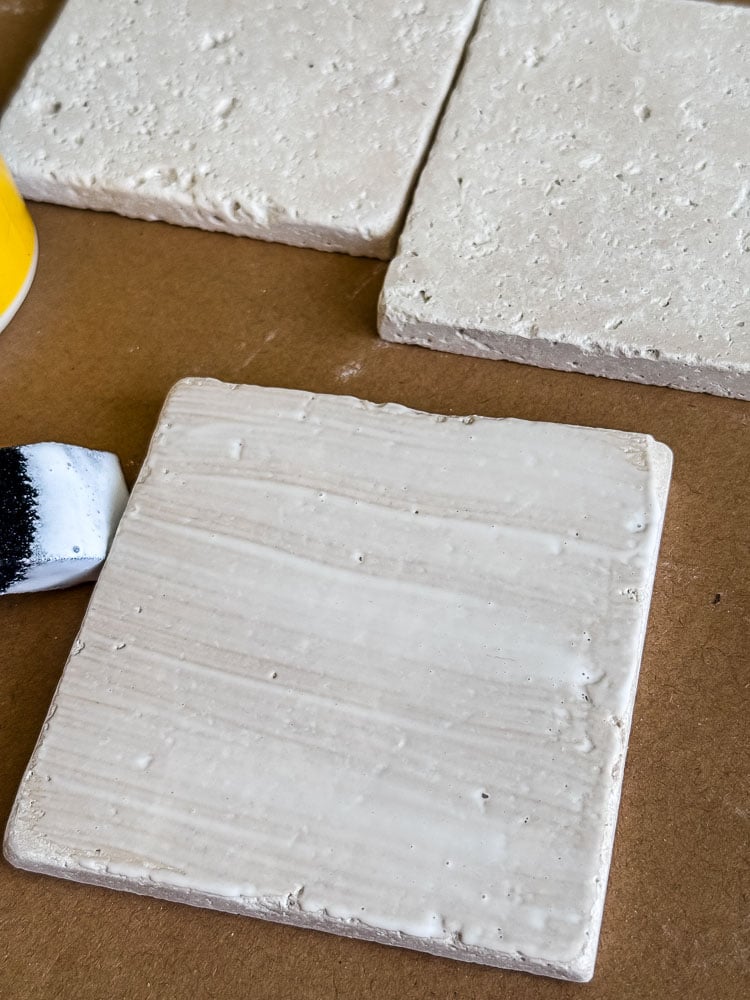
Before you touch a single flower, seal the top and sides of your travertine tile with a coat of Mod Podge.
Travertine is porous, and sealing it first gives you a more even surface to work on and keeps the tile from absorbing your adhesive unevenly. Let this dry completely before moving on.
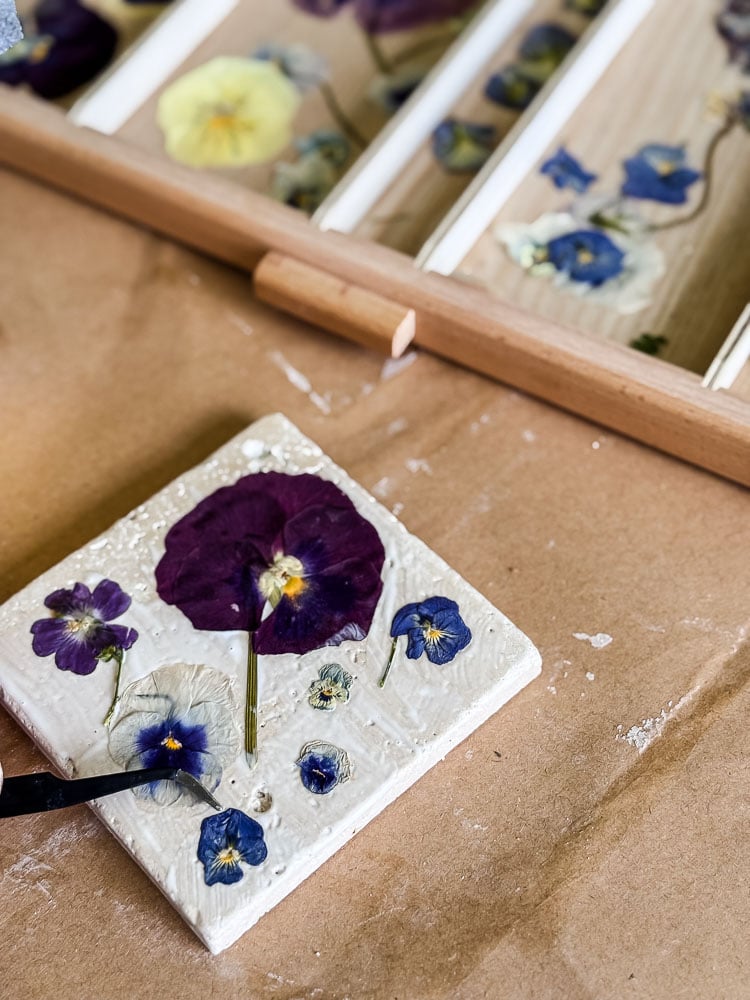
Step 2: Arrange Your Design
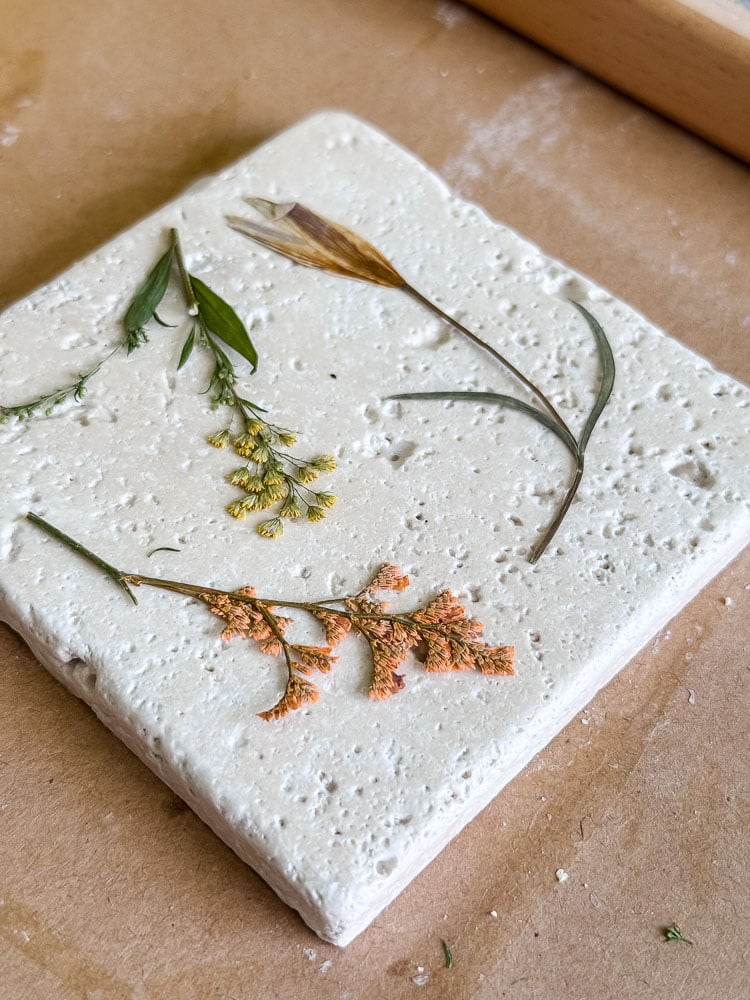
Before you commit to anything with glue, lay your flowers out on the tile dry and play with the arrangement.
Travertine tiles have natural pits and texture, so you may find that some flowers lie flatter in certain spots than others. Use tweezers if you can; your fingers are sometimes too large and too oily for fiddly flower placement.
- Flowers seen are from this set of pressed flowers
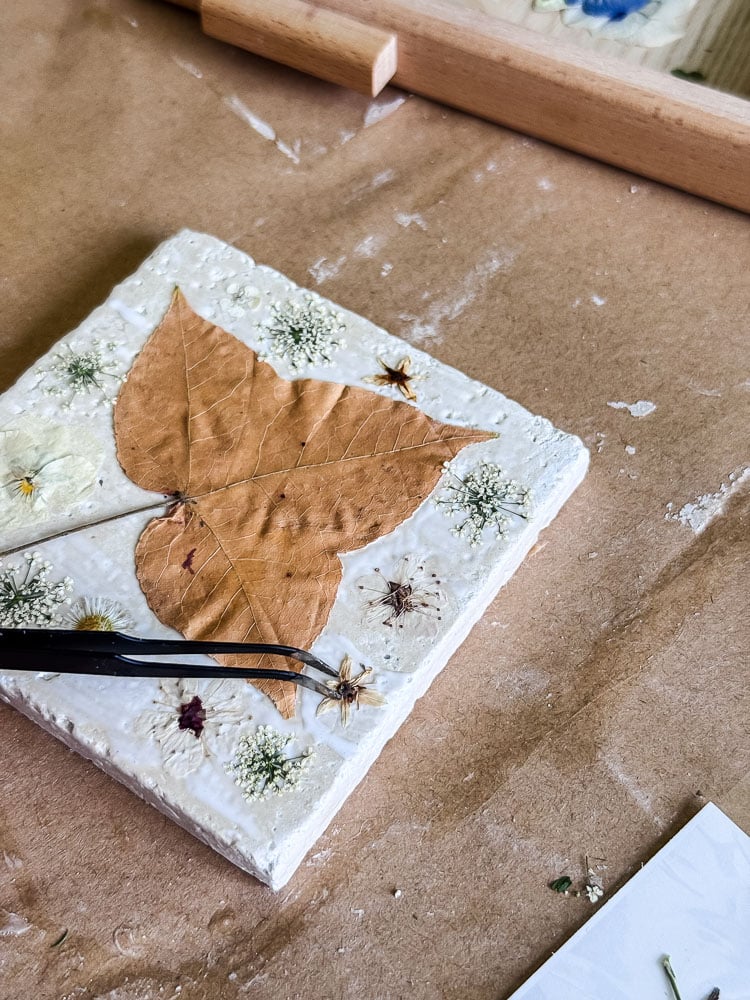
Step 3: Adhere The Flowers
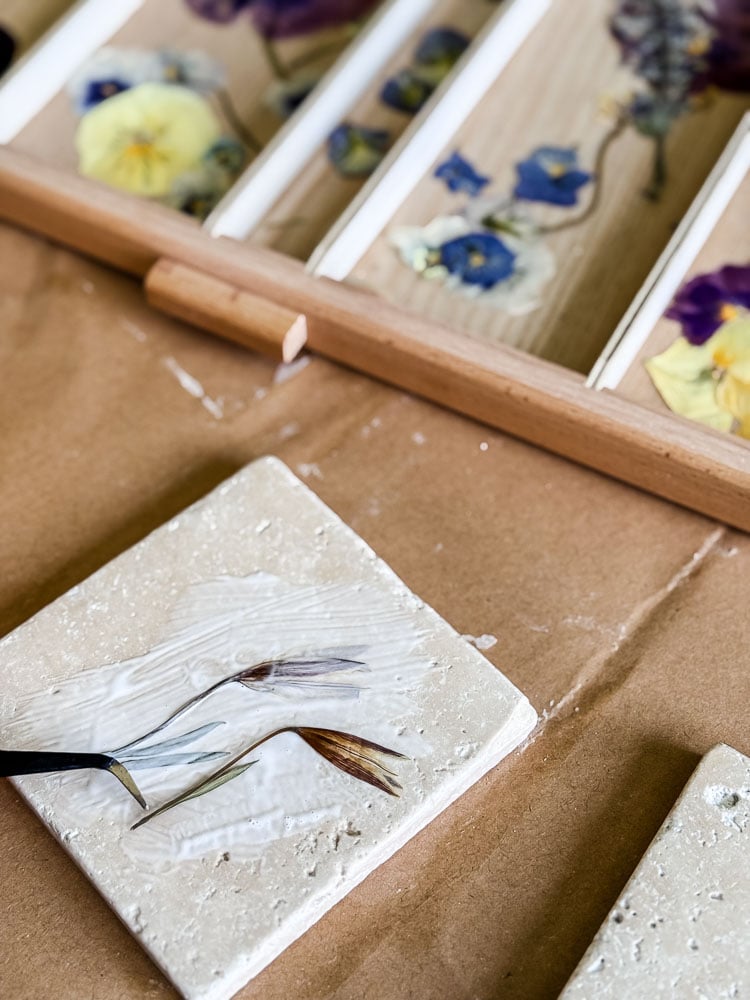
Brush a thin layer of Mod Podge onto the tile where your flowers will go and gently press them into place using your tweezers. Work one flower at a time, especially with larger blooms. I used my finger to smooth any bumps in the flowers (especially the pansies)
Once your flowers are arranged, brush a thin coat of Mod Podge across the entire tile surface.
And this is where you need a really light touch. Use a soft sponge brush or paint brush and work gently so you don’t shift anything out of place.
While the Mod Podge is still wet, take a minute to check that everything is lying flat with no bumps or air bubbles. I actually used my index finger to smooth down any stubborn spots (yes, it’s a little sticky- just go with it), then went back over with the brush to smooth out any fingerprints before it dried.
Design Note
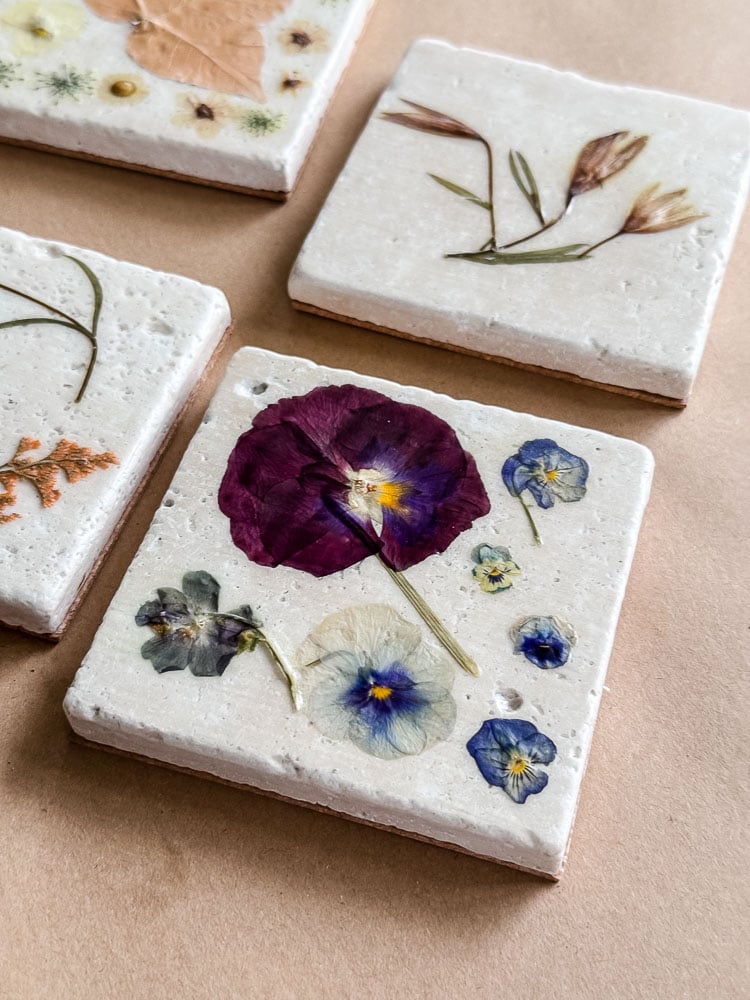
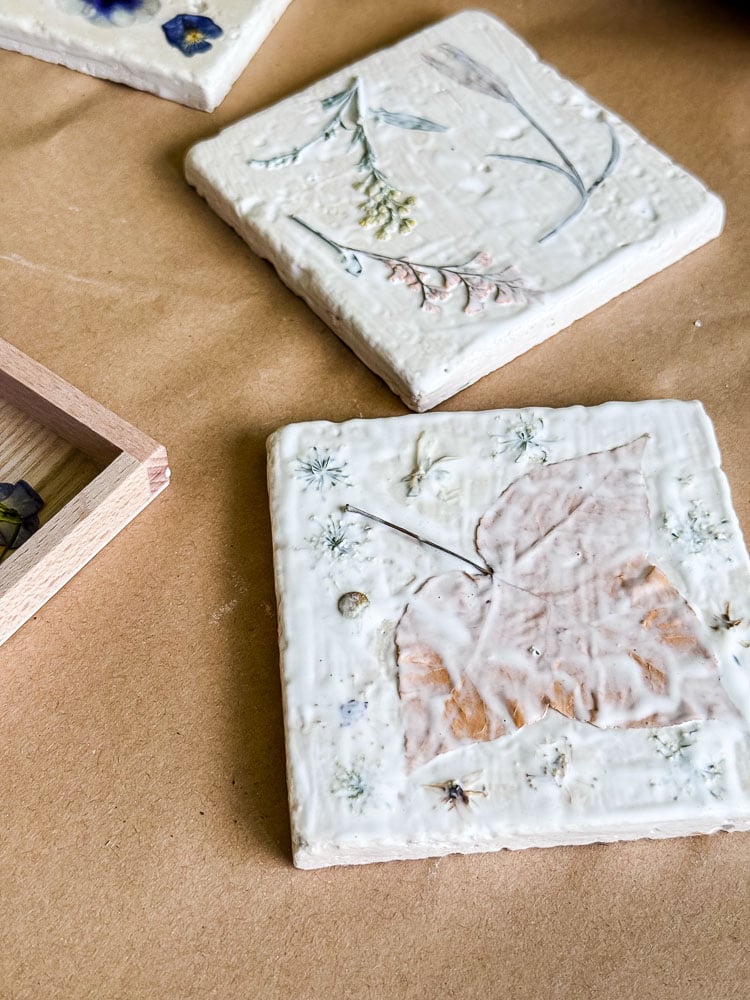
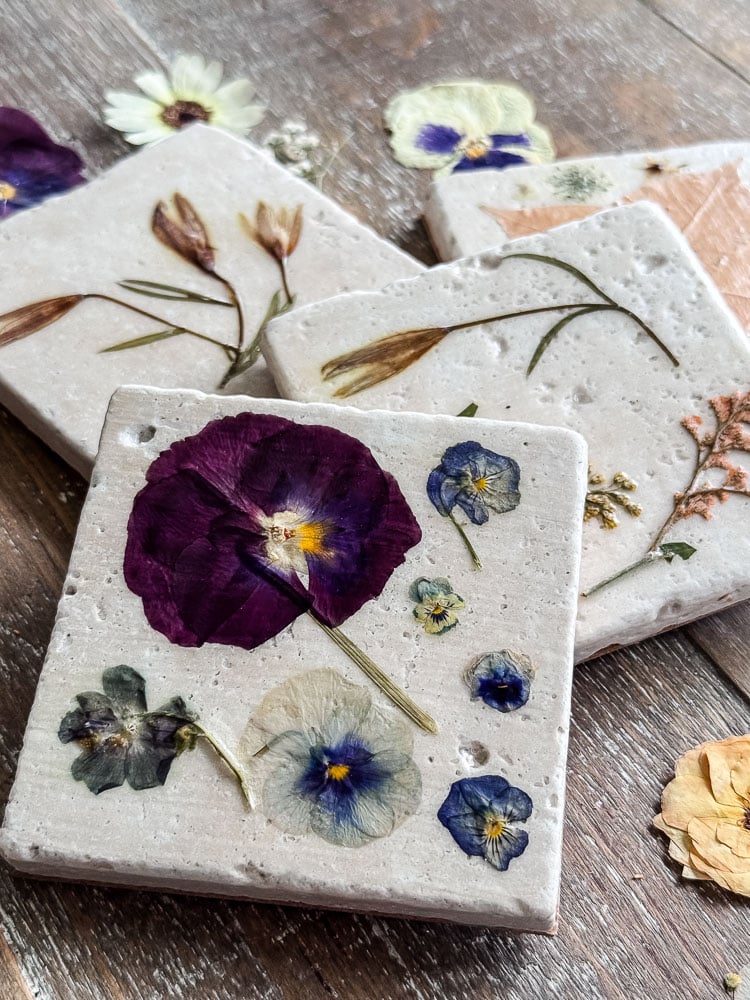
One thing I love about this project is that there’s no wrong way to arrange them. You can create a cohesive set where each coaster has a similar style, like all pansies, or a consistent botanical sprig design.
Or you can do what I did and make every single coaster different. Honestly, a mismatched set might be my favorite thing about mine. They feel collected rather than manufactured, which is very much the vibe I’m going for.
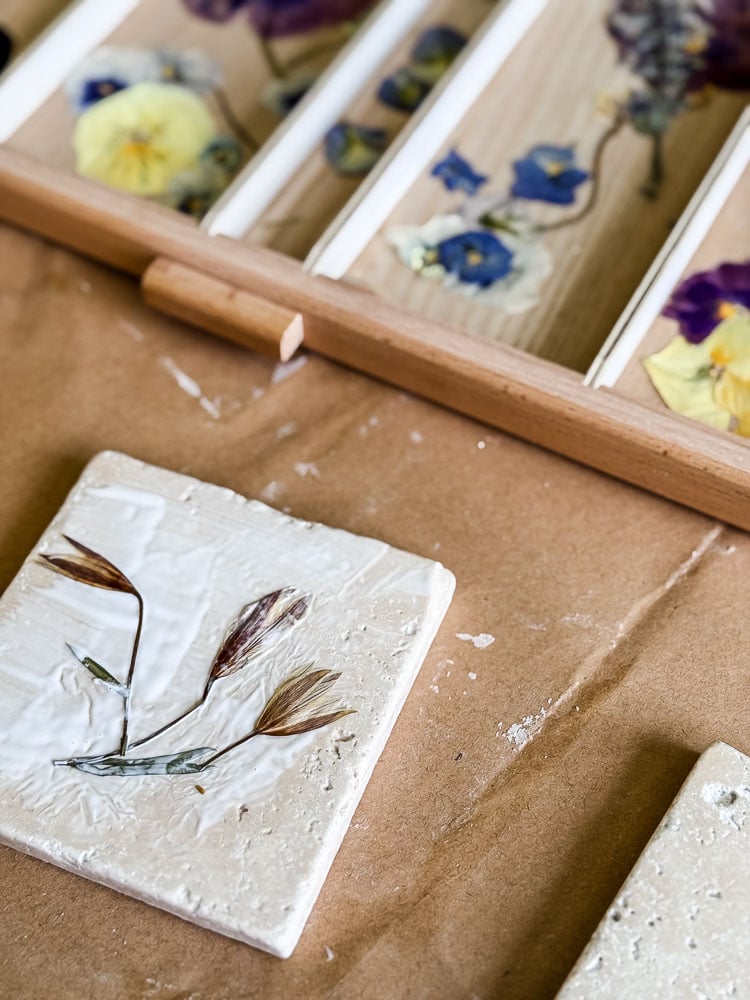
Step 4: Top Coats of Mod Podge
Once your flowers are adhered and completely dry, apply 2 additional coats of Mod Podge over the entire surface.
Wait longer between coats than you think you need to. I’m serious about this. I deliberately waited well past the point I thought they were dry before adding the next coat.
You want each layer fully cured before you add another, and especially before you apply your spray top coat. Rushing this step is where cloudiness and adhesion problems happen.
Step 5: Spray Top Coat
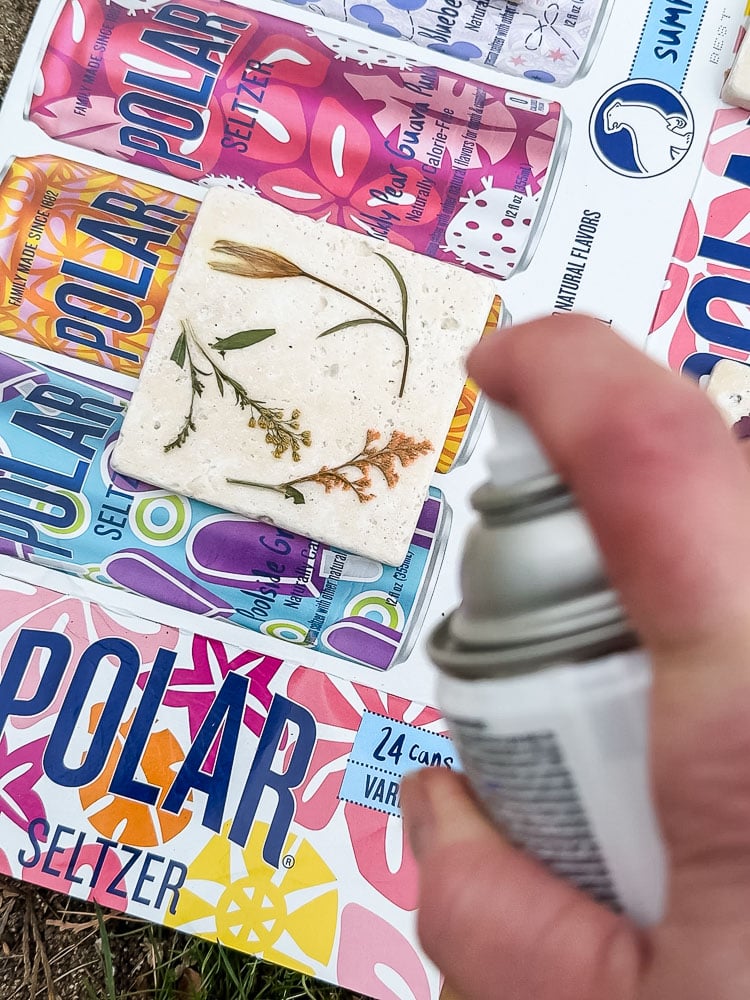
Finish with 2 light coats of a matte spray clear coat.
Hold the can at least 12 inches from the surface and use a sweeping motion. You’re not trying to douse the tile, just build up an even protective layer.
Two thin coats are better than one heavy one, which can drip over your flowers and ruin all that careful work. Let each coat dry fully before applying the next.
The spray top coat is what makes these actually functional coasters. It’s the waterproof layer that handles condensation, so don’t skip it or swap it out for something else.
Step 6: Cork The Back
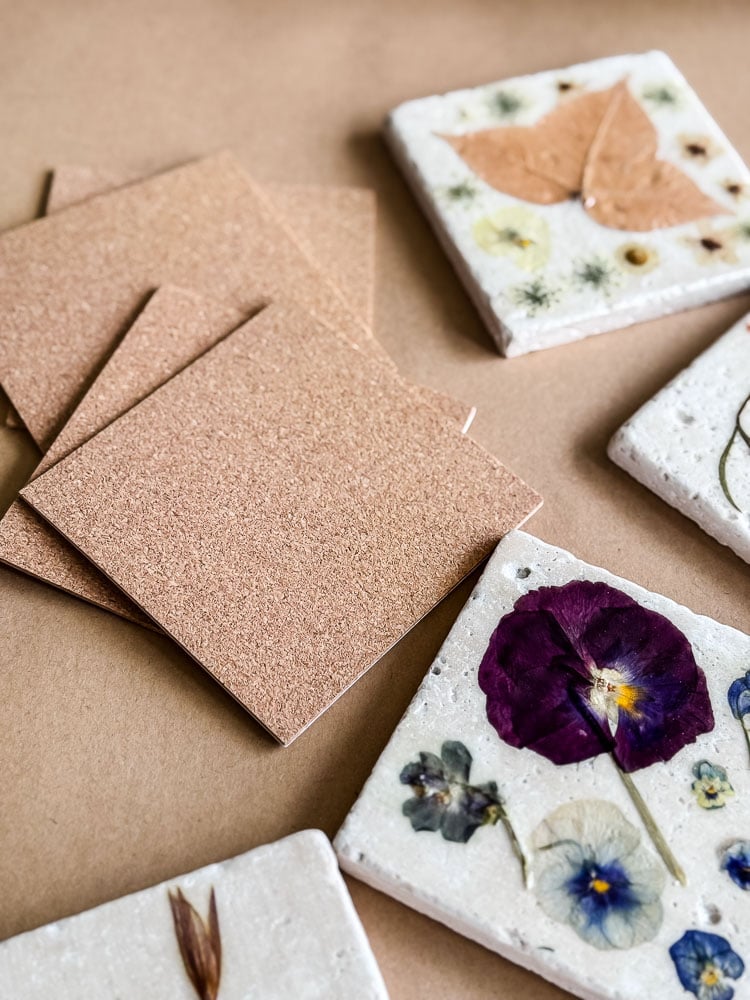
Once everything is fully dry, peel and stick your 4-inch cork adhesive squares to the back of each coaster.
This protects your surfaces and keeps the coasters from sliding around. Now you are done!

Before you start using them, stacking them, or wrapping them up as a gift, give that top coat a few days to fully cure. I know it’s hard to wait when they look this good, but it’s worth it.
Quick Guide: Pressed Flower Travertine Coasters
- Seal the tiles: Apply 1 coat of Mod Podge to the tops and sides. Let dry completely.
- Choose your flowers: Use very thin pressed flowers so your cup sits flat.
- Decoupage the flowers: Work flower by flower—brush Mod Podge on the tile, press the flower in place, then brush a light coat over the top. Smooth out bubbles and edges.
- Add top coats: Let the flower layer dry, then add 2 more coats of Mod Podge. Wait longer than you think you need between coats to prevent cloudiness.
- Seal for moisture: Apply 2 coats of matte spray topcoat, allowing proper dry time between coats.
- Add cork backing: Stick 4-inch square cork adhesive sheets to the bottom of each tile. Trim excess if needed.
Tips Before You Start
•Order your tiles in advance. I made the mistake of assuming my local hardware store would carry 4-inch travertine tiles when I had the idea for this project. They didn’t. Check before you run out to shop, and give yourself a few days for shipping if needed.
•Thin flowers only. I know I already said this, but it bears repeating. Thick petals = uneven surface = wobbly coaster. Press your flowers for at least 2-3 weeks before attempting this project.
•Watch for air bubbles. After placing a flower, gently smooth from the center outward. Air pockets look cloudy when they dry and can lift later.
•Cure time matters. Mod Podge dries fast but cures slowly. The tackiness issues people run into with coasters almost always come down to not waiting long enough between steps. Be patient with yourself and with the process.
•Work in a dust-free area for the topcoat. Tiny particles like to land on wet sealer and stay there forever. Choose a clean space and let the coasters dry somewhere protected.
•Cork backing isn’t just decorative. It keeps the stone from scratching tables and muffles that ceramic “clink” sound every time you set down a mug.
•These make wonderful gifts. A set of four coasters, each with a slightly different arrangement, wrapped in a ribbon? That’s a thoughtful, handmade gift that costs very little and looks like it cost a lot. They’re especially lovely, made with flowers from your own garden~ there’s something really special about that.

These coasters have become one of my favorite things sitting on my coffee table right now! I used a mix of flowers, some pressed from my own garden, some from a set I had ordered online, and honestly, you can’t tell the difference once they’re on the tile. The point of Garden to Home has never been that everything has to come from your backyard. It’s about slowing down, using what you have, making something with your hands, and bringing a little bit of the natural world into your home. These coasters do exactly that.
If you make a set, I’d love to see them! I love it when you send me your photos, or you can always tag me on Instagram/Facebook. And if you’ve been pressing flowers and weren’t sure what to do with them beyond framing them, now you know!
See your projects featured! If you are inspired by this or any of my other DIY projects, I would love to see them and add you to the Reader’s Spotlight gallery. Send a photo to me at jennifer@cottageonbunkerhill.com
xo, Jennifer
Love projects like this? Don’t miss out! Join my newsletter family for more cozy, budget-friendly DIY ideas delivered right to your inbox. You’ll get exclusive tips, early access to tutorials, and all the inspiration you need to make your home feel handmade and heartfelt.
Pin to Save!