

In the world of DIY, sometimes the most beautiful projects are also the simplest. Today, I’ll show you how to create stunning heart wreaths with just two key ingredients: grapevine wreath forms and a bunch of dried flowers. Yes, you read that right! With these minimal supplies, you can craft beautiful and romantic heart wreaths that will add a touch of effortless elegance to your home decor.
Effortless Elegance: DIY Heart Wreaths with Just 2 Ingredients
One of the things I love most about this project is its simplicity. You might not consider yourself particularly crafty or creative, but I promise you, making your own wreaths is easier than you think! In fact, wreaths were one of the very first DIY projects I tackled for my home years ago. Little did I know that this simple passion would eventually lead me on the path to teaching others how to create beautiful things for their own homes!
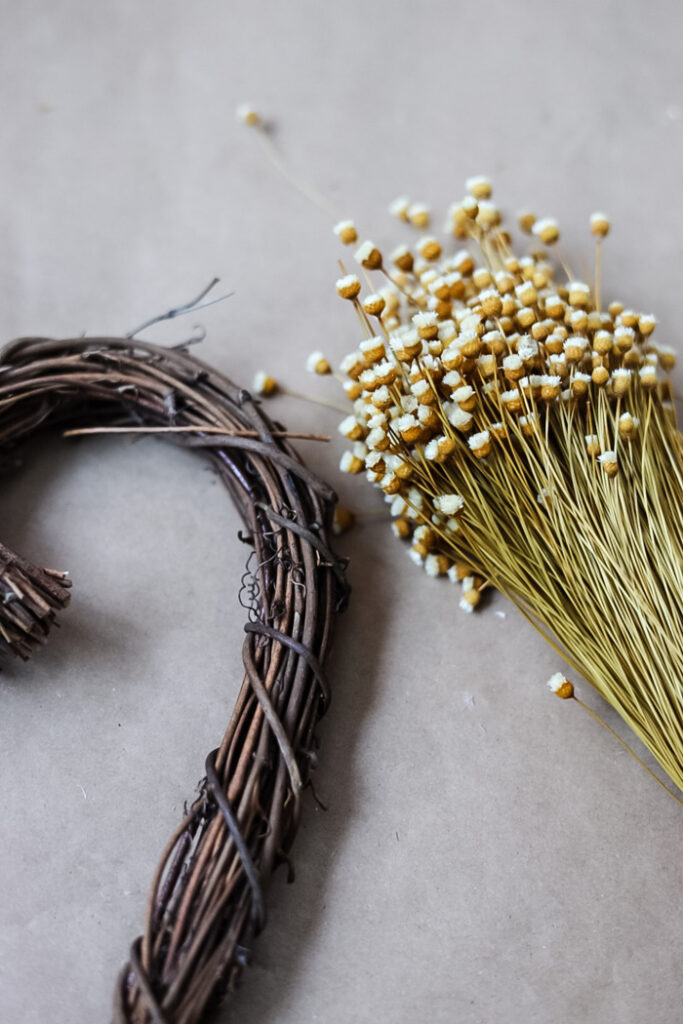
I’ll show you the basics of making a dried flower wreath using just 2 ingredients: a grapevine wreath form (I’m using heart shapes today) and a bundle of dried flowers from the craft store. You might have noticed that craft and home decor stores often sell pre-made dried flower bouquets featuring a mix of different flowers. These bouquets are perfect for creating simple wreaths because the flowers are already beautifully coordinated. You don’t have to spend time wandering the aisles, comparing different bunches and trying to figure out if they look good together!
This post may contain affiliate links, which means I may earn a small commission if you make a purchase through my links, at no extra cost to you. Read my disclosure policy here.
Gather Supplies
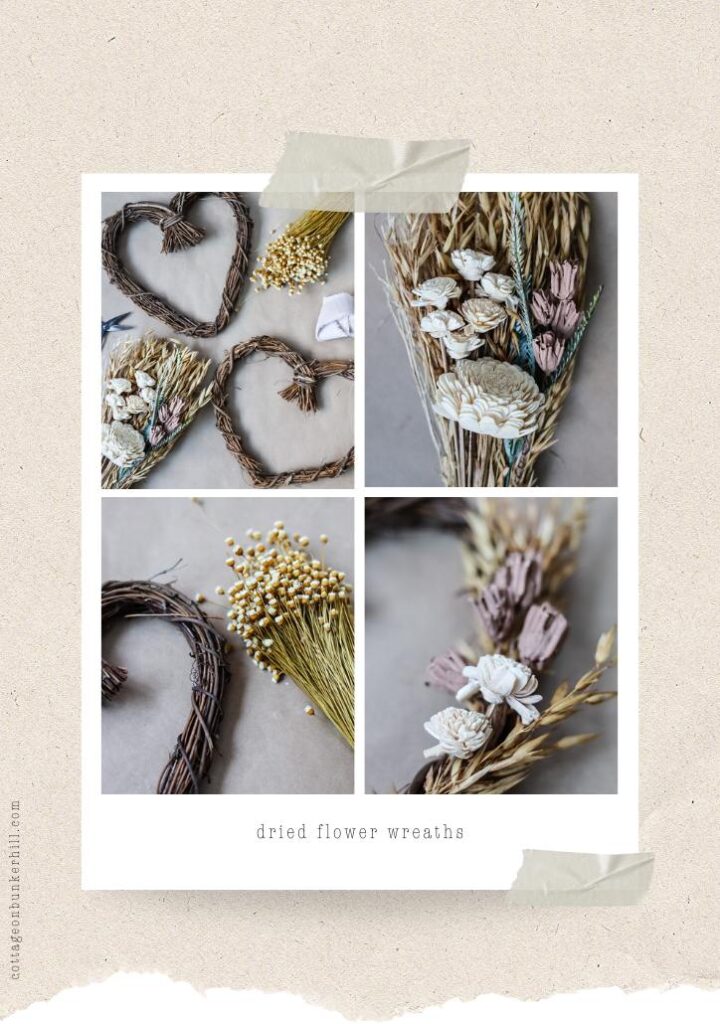
Today I will demonstrate 2 types of dried flower wreaths. First up is a grapevine heart wreath using a mixed bouquet and then a simple wreath DIY using only 1 type of flower.
While I am using 9-inch wreaths if you want to make a larger 12-inch wreath just double the amount of dried flowers you purchase. I found my heart wreaths at Hobby Lobby in the wedding supply aisle, Michaels stocks 12-inch wreaths year-round. Amazon does sell them but they are expensive and I don’t want to recommend overpriced things to my readers.
The flowers that I am using were found at Hobby Lobby. Most craft stores carry mixed dried flower bouquets, there are hundreds on Amazon, and I often see nice bunches at Trader Joe’s too!
what you will need:
- Small heart grapevine wreaths
- or larger grapevine heart wreath
- Mixed bouquet of dried flowers(Michael’s)
- Single flower dried flower bunch (what I’m using)
- Hot glue gun & glue sticks
- Scissors
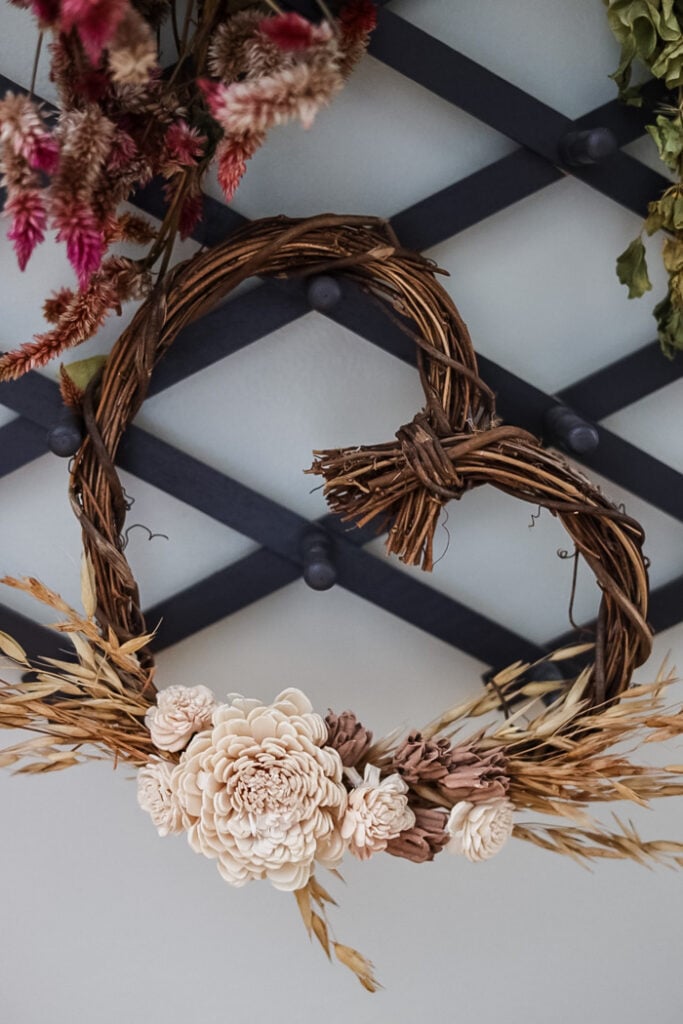
Wreath 1: Using Multiple Dried Elements
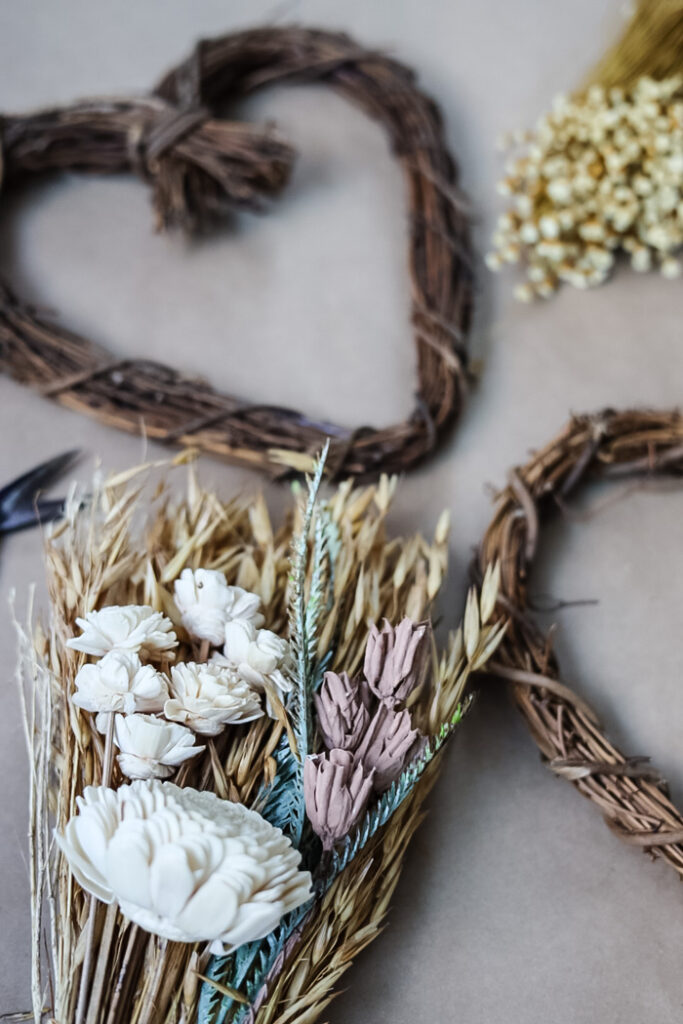
For the first wreath, we’ll be using a pre-made dried flower bouquet containing three elements: dried oat stems, white sola flowers, and pink flowers. If you’re working with separate bunches of dried flowers, choose a neutral-colored dried grass or wheat. For the flowers, select two types that differ in shape and texture to create a more visually interesting and polished look,
Protect your workspace! I like to cover my counter with kraft paper before I begin. Now, plug in your glue gun and gather all your supplies so they are easily accessible
Prepare the Dried Flowers
If you’re working with a pre-made bunch of dried flowers, gently separate the individual stems and blooms into separate piles to make it easier to work on the wreath.
The white flowers in the bouquet are sola flowers. Sola flowers are made from a lightweight wood and are a beautiful, eco-friendly alternative to traditional flowers.
Step 1: Dried Oat Stems
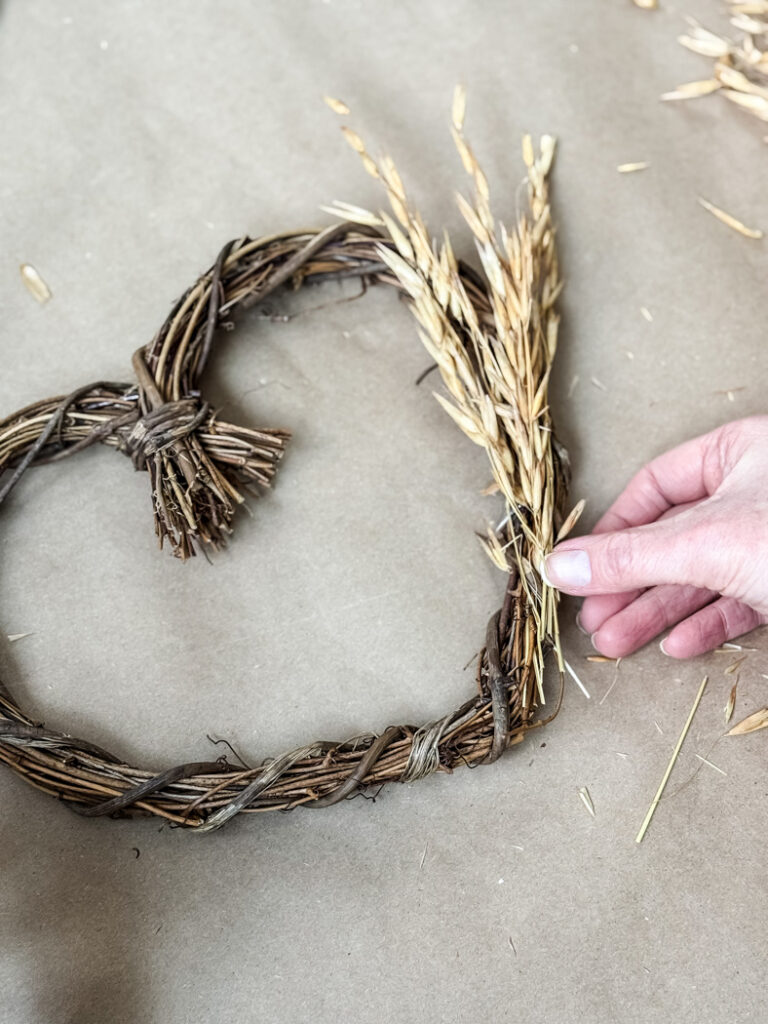
Let’s begin creating our asymmetrical masterpiece! Start by attaching a few pieces of the dried oat stems (or a similar dried element) to the right side of the grapevine heart wreath. First, trim the long stems down to an inch or two.
Use a small amount of hot glue to attach the stems to the wreath frame. This will serve as the starting point for our asymmetrical design
Step 2. Add First Flower Element

Next, I began to incorporate the pink flower pods. Starting from the bottom of the dried oats, I carefully applied hot glue to the back of each pod and adhered them to the wreath frame. I layered the pods over the grass, creating a beautiful and cascading effect.
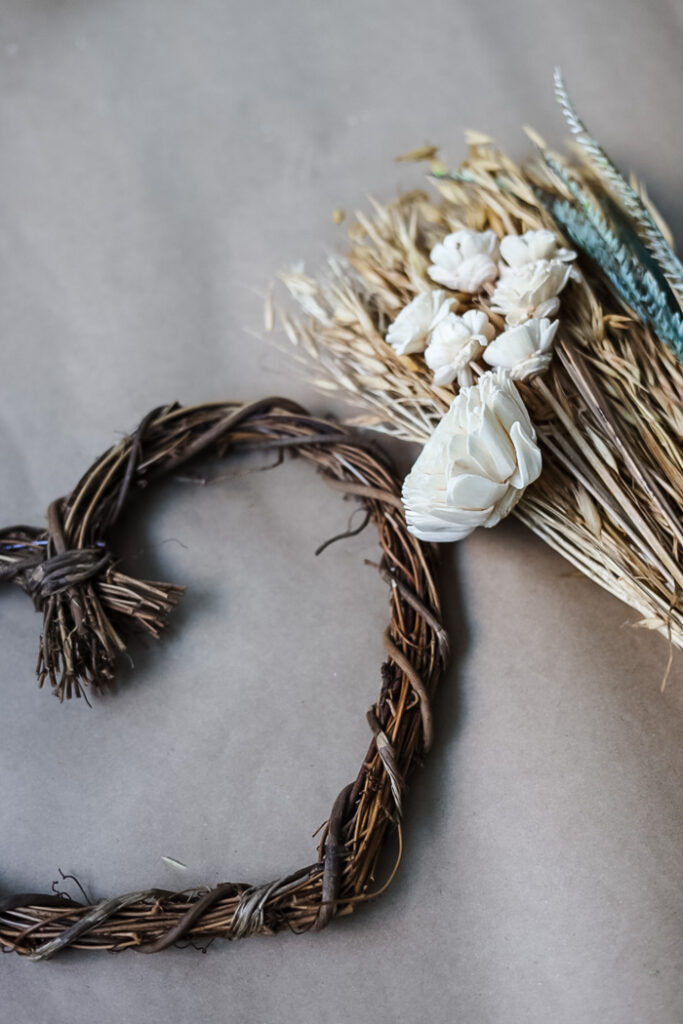
Step 3. Add Showstopper Flowers

Now for the showstopper! I carefully selected the largest sola flower and applied a generous amount of hot glue to its base. I then positioned the flower on the wreath and gently pressed it down, ensuring it was securely attached.
Accent Flowers

To enhance the floral arrangement on the wreath, I carefully placed a few smaller sola flowers around the main flower. I varied their placement to create a more organic and natural look.
Final Touch

To create visual interest, I added a few sprigs of dried oats on the other side of the white sola flower cluster. I arranged them so that they faced in the opposite direction of the initial oat stems, adding a playful touch to the design.
Finished Dried Flower Wreath #1

Isn’t it pretty? See how easy this wreath DIY was to create! Isn’t it amazing how simple materials can create such a beautiful piece? This dried flower heart wreath is proof that you don’t need to be a professional crafter to make something truly special!
Minimalist Magic: A Simple Dried Flower Heart Wreath
Next let me show you a simple yet elegant wreath crafted using a single type of dried flower, reminiscent of delicate baby’s breath but in a warm, neutral beige tone. The flowers are densely clustered around the grapevine heart frame, creating a full and airy appearance. The overall effect is one of understated beauty and effortless charm.
Creating The First Layer
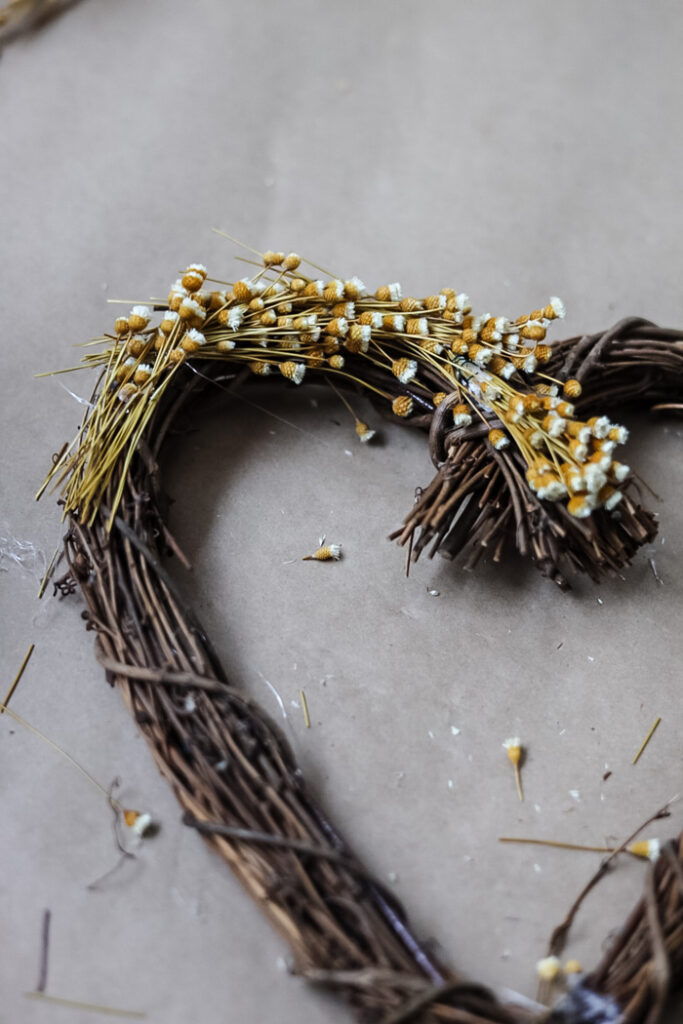
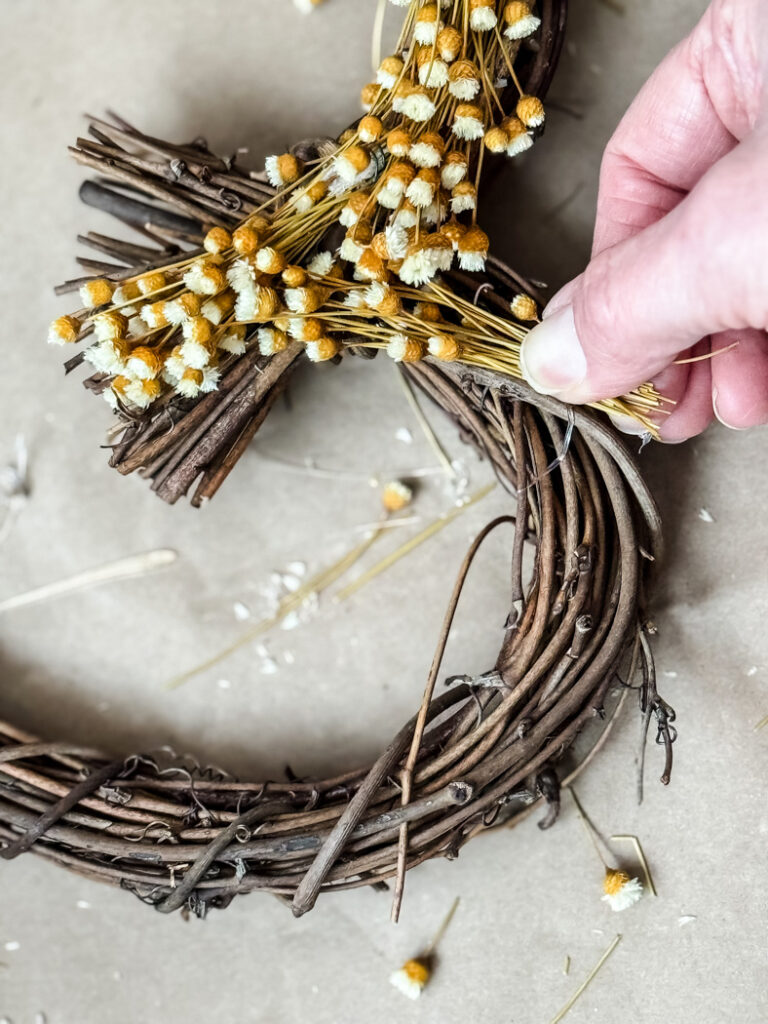
To begin, gather a small clump of dried flowers and trim the stems to approximately one inch. Hold the cluster tightly together and apply hot glue to the wreath form. Adhere the cluster to the end of the left bow of the wreath frame.
Now, create a second cluster of flowers and, while holding them together, apply hot glue to the base. Carefully place this cluster over the first, ensuring the stems overlap for a more secure and cohesive look. Continue down the left side of the wreath adding more clusters of the flowers.
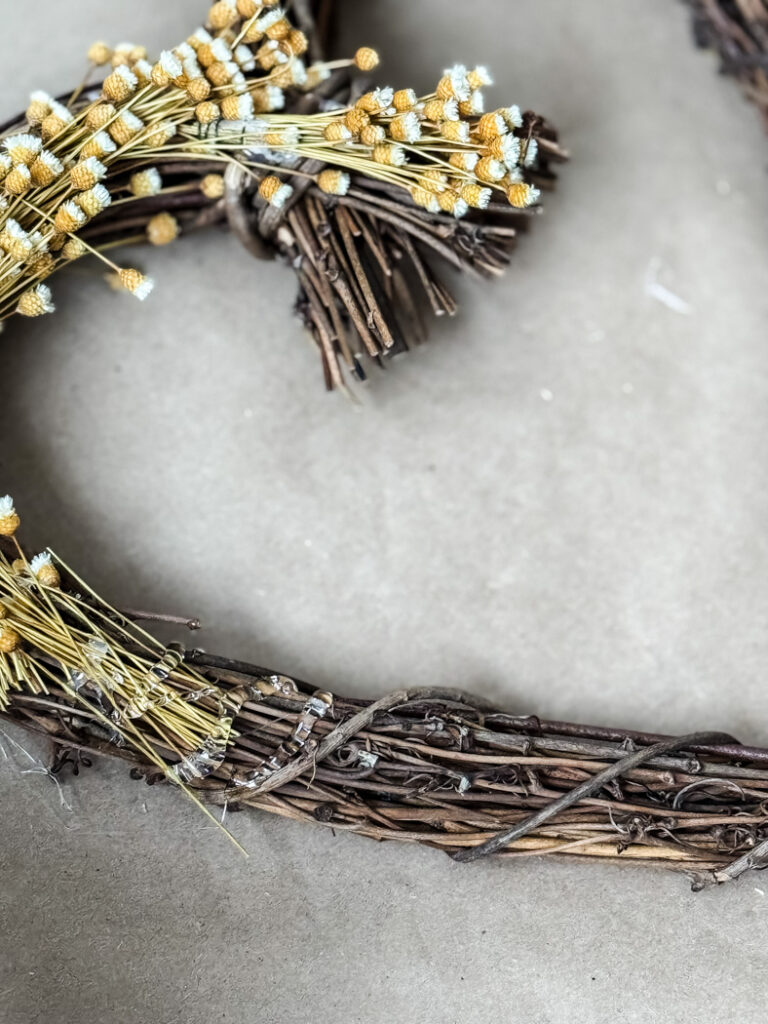
Once you’ve covered the left side of the wreath with flowers, begin working on the right side. Attach the flower clusters, making sure they point upwards to create a sense of direction and flow.
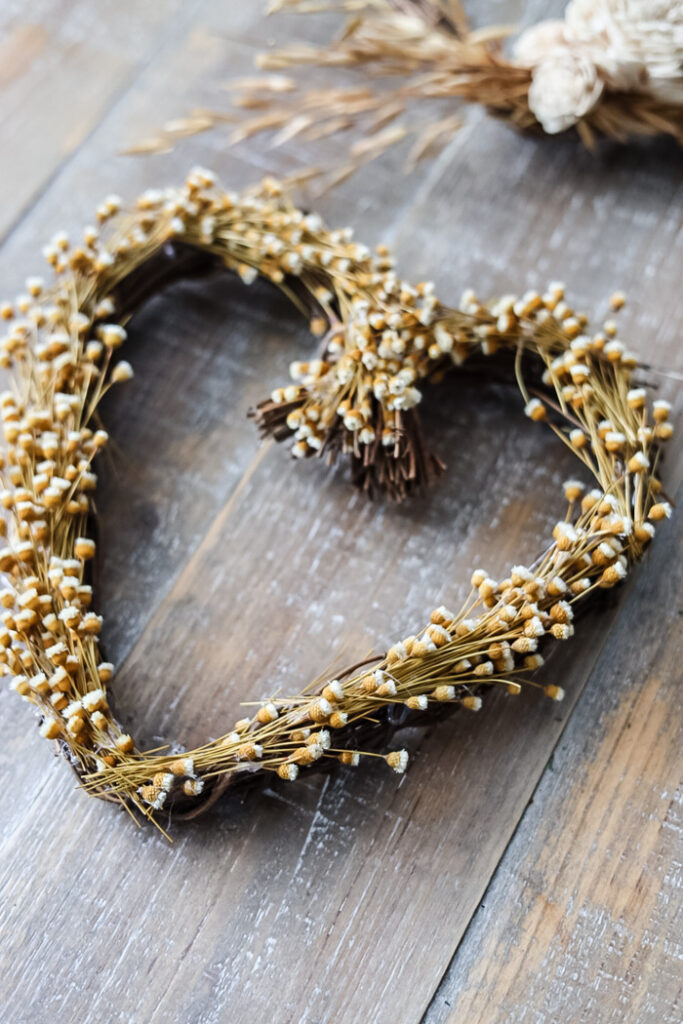
Continue adding flower clusters down the right side of the wreath until you reach the bottom. At the point where the two sides of the heart intersect, carefully trim the stems of a few flowers to a very short length. Use these short stems, coated with hot glue, to conceal the overlapping stems from the left and right sides of the wreath, creating a neat and professional finish.
The Finished Wreaths

And there you have it! Two stunning heart wreaths created with just a few simple supplies. This project proves that crafting beautiful and unique home decor doesn’t have to be complicated or expensive. With a little patience and a sprinkle of creativity, you can craft beautiful pieces that will bring joy to your home. Once you get down the technique you will be able to make wreaths for every season. I can’t wait to see the beautiful wreaths you create!
See your projects featured! If you were inspired by this or any of my other DIY projects I would love to see them and add you to the Reader’s Spotlight gallery. Send a photo to me at jennifer@cottageonbunkerhill.com
xo, Jennifer


Thank you for these decorating ideas for a heart shaped wreath. I have a twig heart wreath and I’ve been wondering what to do with it – I really like the dried flowers and the way they look on the wreath!
It’s such a pretty look!