If you’ve been following along here for any length of time, you know I’m a real-plants person. I grow my own cutting garden, I preserve botanicals, I press flowers… I am not typically the person who reaches for the faux version of anything.
And yet. Here we are!
I actually started down the road of making a living succulent wreath this summer. I did the research, I understood the process, and then I did the math: by the time the cuttings rooted (two to four weeks, realistically), I’d be looking at maybe July through early September before our New Hampshire nights get too cold for succulents to be happy outside. That’s not a lot of payoff for a project that I won’t have much time to enjoy!
So I pivoted. And I am so glad I did.
The living version is already on my calendar for early next spring. That way, we’ll all have the whole summer to enjoy it, especially those of us in the colder corners of the country where the warm season feels like it’s over before it started. But this summer? We’re doing the smart version.
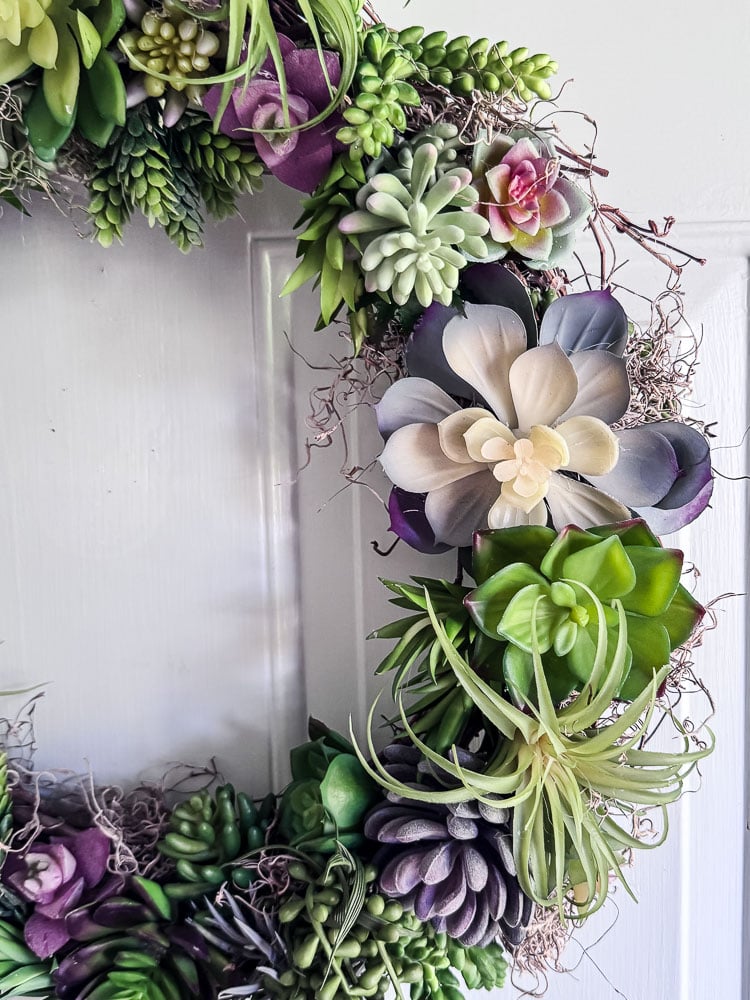
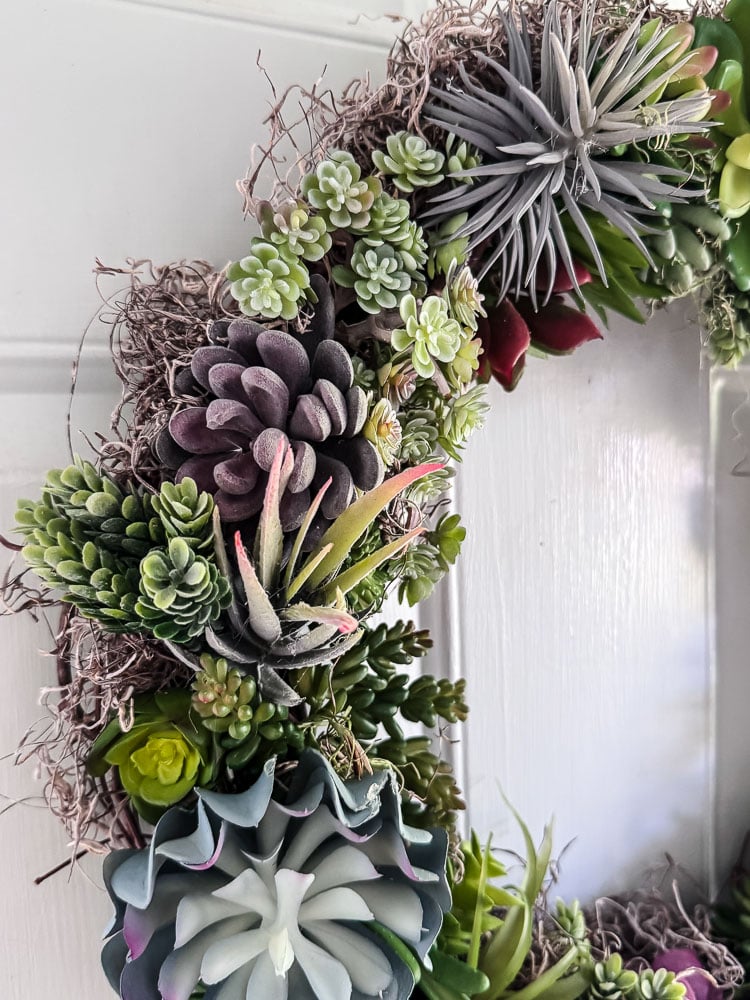
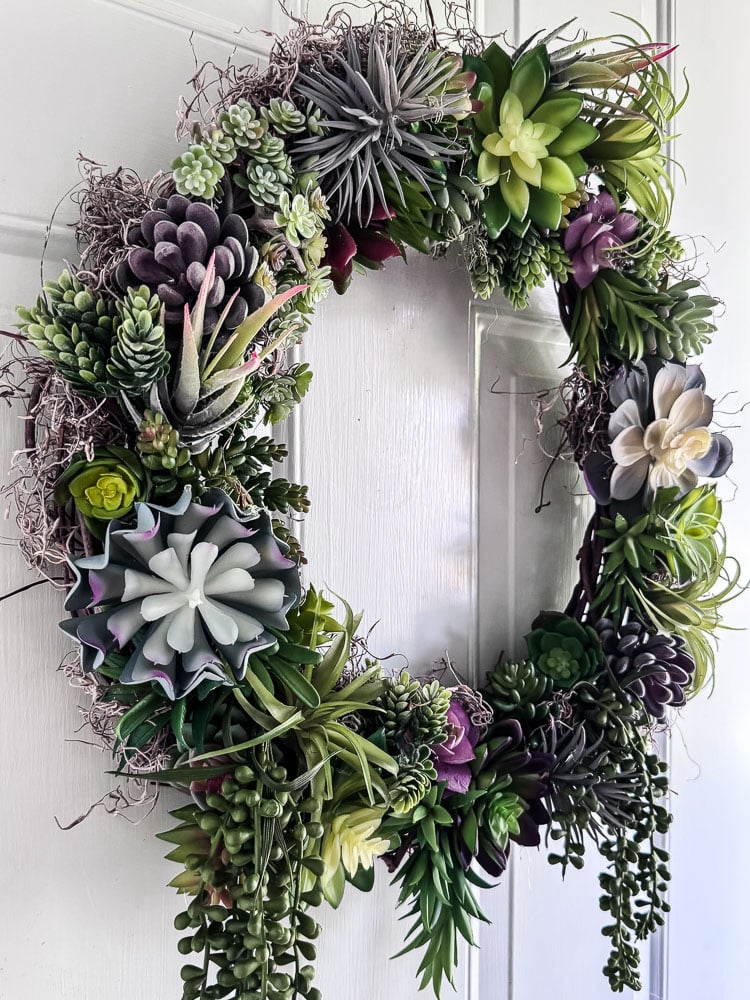
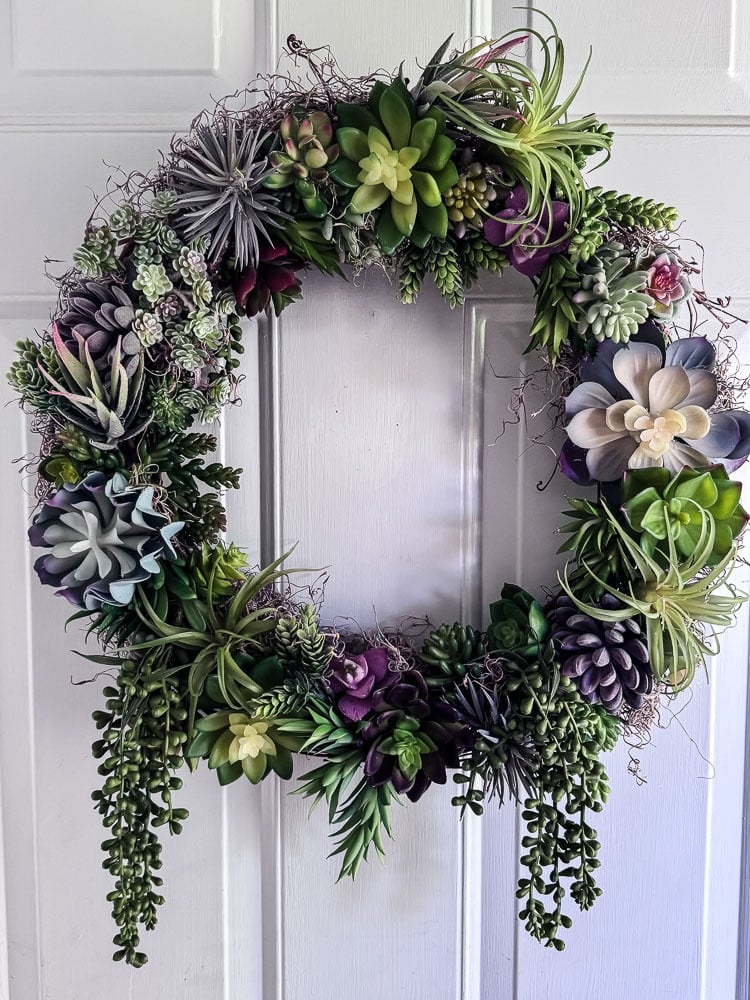
Here’s the thing about this wreath: I would not lead with “it’s fake” if you saw it on my door. The variety of textures, the layered colors, the trailing string of pearls at the bottom… it looks lush and intentional and honestly a little moody in the best possible way.
The other thing? I made it almost entirely from succulents I already had in my craft room from a previous project. So this one cost me basically nothing. If you’re starting from scratch, I’ll give you the full cost breakdown. It’s a little more than the typical wreath project I share with you all, but it’s still very reasonable for what you get, and unlike a fresh wreath, this one goes back in a box at the end of the season and comes out again next year.
Let’s make it.

Welcome! I’m Jennifer, and I’ve been sharing my home’s journey since 2019, always with a focus on budget-friendly and achievable style. If you love the charm of New England but need it to work for real life, you’re in the right place. I break down my projects to help you create a home that tells your story, without the overwhelm.
Why Faux Actually Makes Sense Here
I want to spend just a minute on this because I know some of you are side-eyeing me right now.
Faux succulents for a wreath aren’t a compromise; they’re genuinely the smarter choice in a few specific situations. If your front door gets little to no direct sun (mine is on a covered porch), real succulents would struggle anyway. If you live somewhere with a short warm season, as I do in Zone 6a, New Hampshire, the living version has a pretty narrow window. And if you want something you can hang, forget about, and bring back out next May looking exactly the same, faux is your answer.
I’ll do the living succulent wreath next spring when the timing actually makes sense. For now, this is the practical, beautiful, no-fuss version, and I’m not apologizing for it.
This post may contain affiliate links, which means we receive a small commission if you purchase through our links. See our disclaimer page for more information.
What You’ll Need
This wreath doesn’t require many materials, which is lovely! A grapevine wreath form, two packs of faux succulents, and a bag of Spanish moss are really all you need on the supply side. You’ll also want a reliable glue gun, and I’m going to strongly recommend Gorilla brand glue sticks over the generic ones.
I’ve made more projects than I can count at this point, and once I switched to Gorilla, I never went back. The hold is stronger, which matters when you’re pressing a chunky echeveria onto a wreath form and hoping it stays put. (Gorilla, if you’re reading this, my DMs are open.)
One thing worth knowing: the way I made this wreath, densely packed succulents with Spanish moss tucked into the gaps at the end along the inner and outer edges, is just one approach. If you want a softer, more minimal look with the moss playing a bigger role, you could use fewer succulents and let the moss do more of the work. You could even do succulents only across the bottom half of the wreath for a really striking asymmetrical look (I think this one would look fab!).
In either of those cases, you’d probably only need one pack of succulents instead of two.
Materials for this Project
- 18-inch grapevine wreath form (available at Michaels, Hobby Lobby, or Walmart)
- Approximately 40-44 bulk artificial succulents (depending on density). I also had this set. This succulent set is a bit more colorful
- Spanish moss
- Hot glue gun: Gorilla brand hot glue sticks are my favorite. They have a stronger hold and better open time than generic sticks, and for a project like this, where you need pieces to stay put, it’s worth the extra couple of dollars.
- Floral wire (optional, for extra security on large pieces)
- Silicone finger protectors: hot glue & wreaths go together, and so do hot glue & fingertips. Grab a set before you start. You’ll thank me.
Total cost of buying everything new: approximately $50–55. For a wreath this size and this lush, that’s genuinely a good value. I was doing a price check on Etsy and just saw a comparable wreath for $194!!! And again, this one lasts for years.
What Size Wreath Form Should You Use?
Not everyone needs an 18-inch wreath. Maybe your door is smaller, or you want something a little more budget-friendly to start.
Here’s a rough guide to how many succulents you’ll need based on wreath size, using the same lush, fully-covered look you see here:
•12-inch form: approximately 22–26 succulents, one pack gets you there, which makes this the most budget-friendly option at around $22 for the succulents alone.
•14-inch form: approximately 28–34 succulents you’ll need to dip into a second pack, but you’ll have some left over for a smaller project or to fill any gaps.
•18-inch form (what I used): approximately 44 succulents, two full packs.
Keep in mind these estimates are based on the dense, lush coverage you see in my wreath. If you prefer a slightly more open, airy look, you may be able to get away with a few fewer. The sets include a nice mix of sizes, so your larger anchor pieces will do more heavy lifting than the small fillers.
Before You Start: Sort Your Succulents
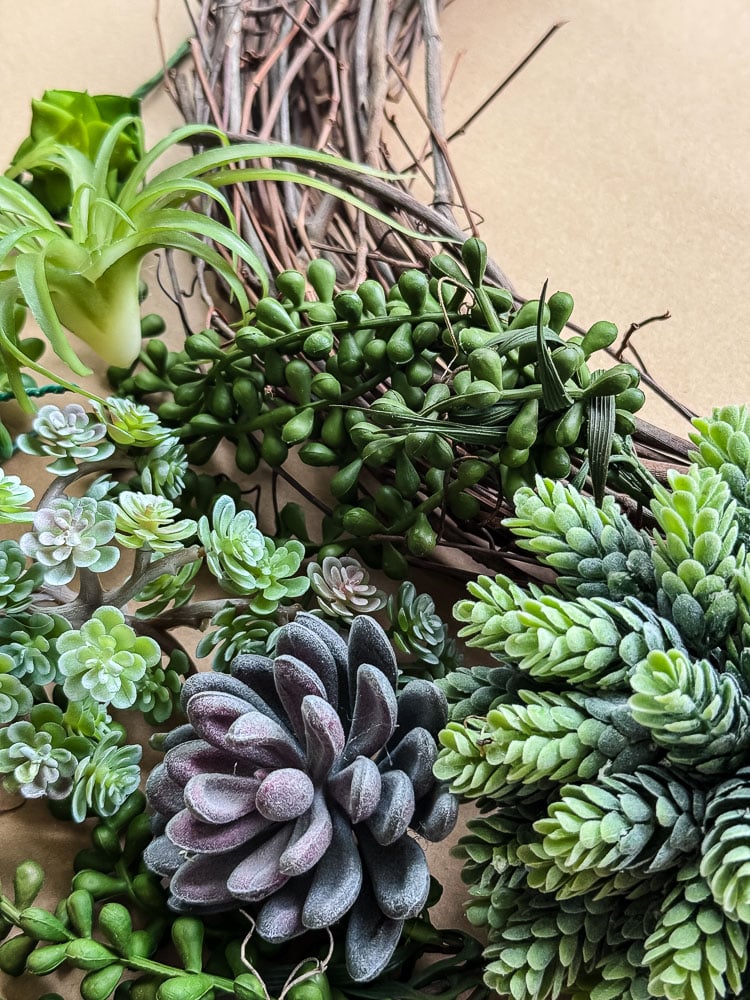
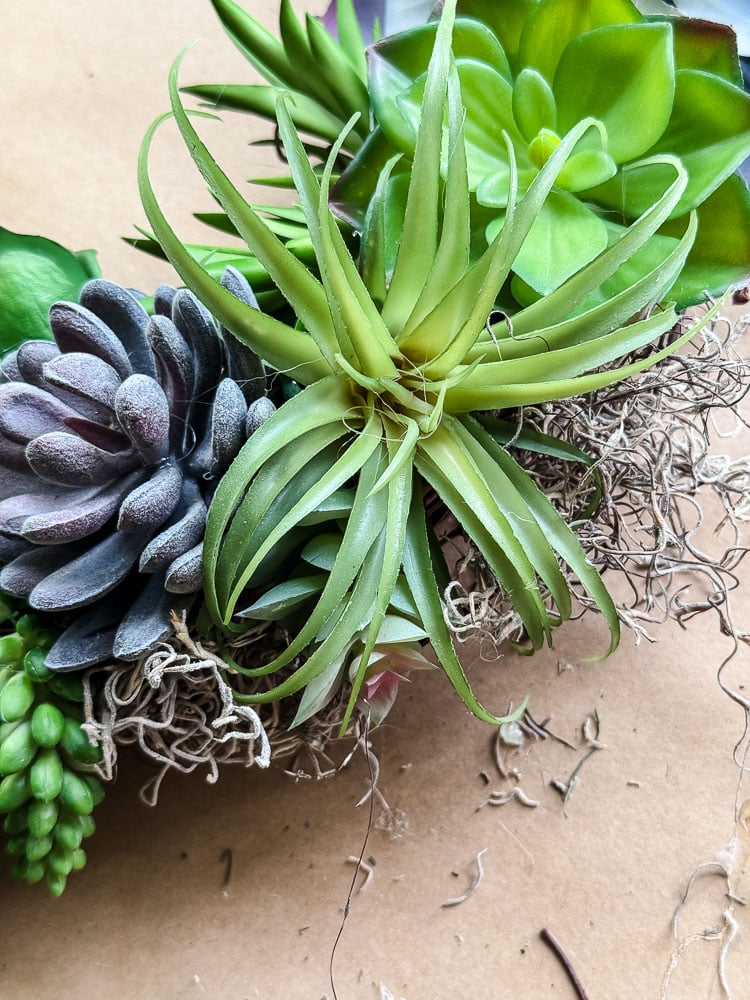
Before you fire up the glue gun, dump both packs out and take a few minutes to look at what you have. The set I recommended has a good mix of echeveria rosettes, string of pearls, burro’s tail, aloe picks, air plant shapes, yucca, and sedum in sizes ranging from small filler pieces up to larger statement rosettes.
Loosely group them by style and get a sense of your color range. You’ve got greens, purples, silvery-blues, and cream tones to work with.
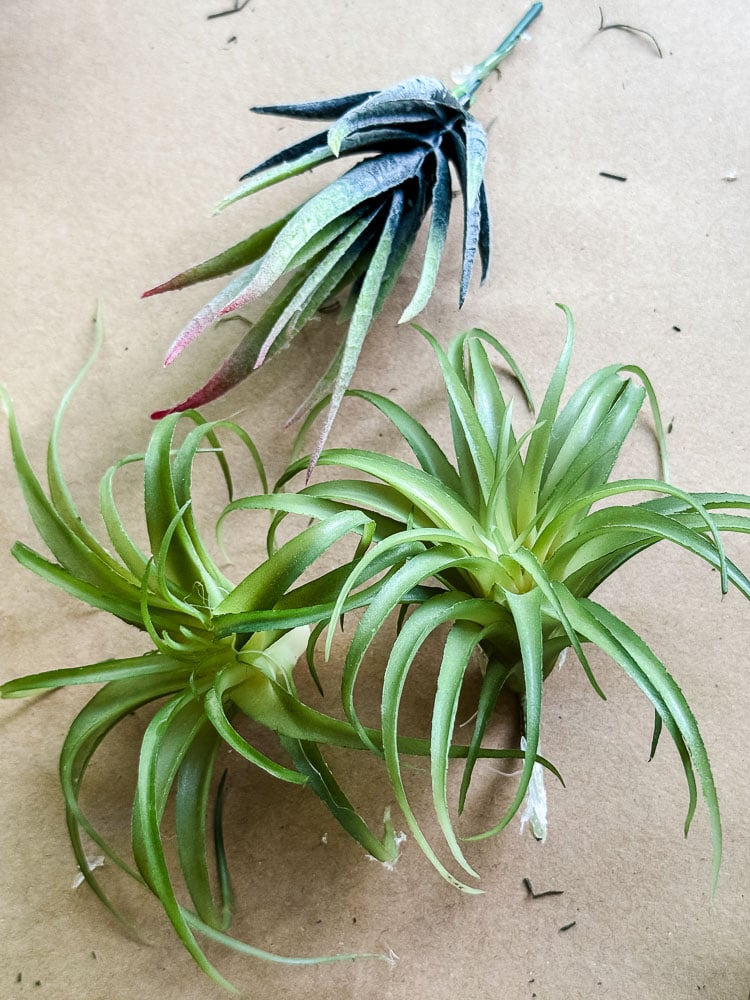
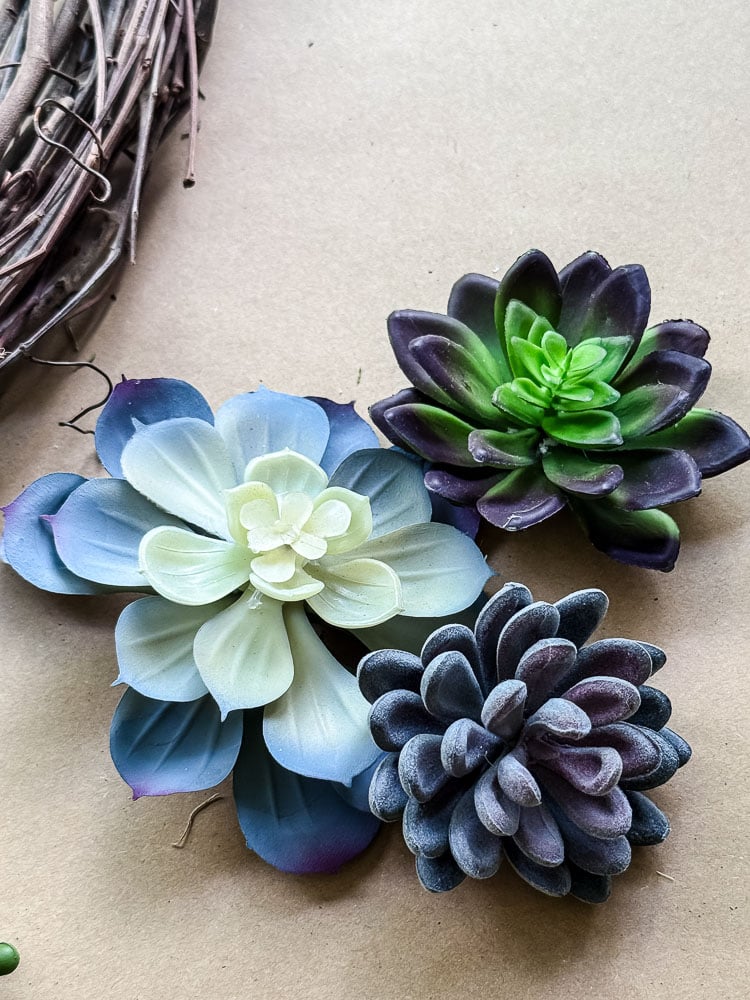
I made 3 piles: trailing succulents, spiky styles, and then the rosette/flower shapes. You don’t need a plan- but having everything visible means you can grab what you need as you go rather than digging through a pile with a glue gun in your hand.
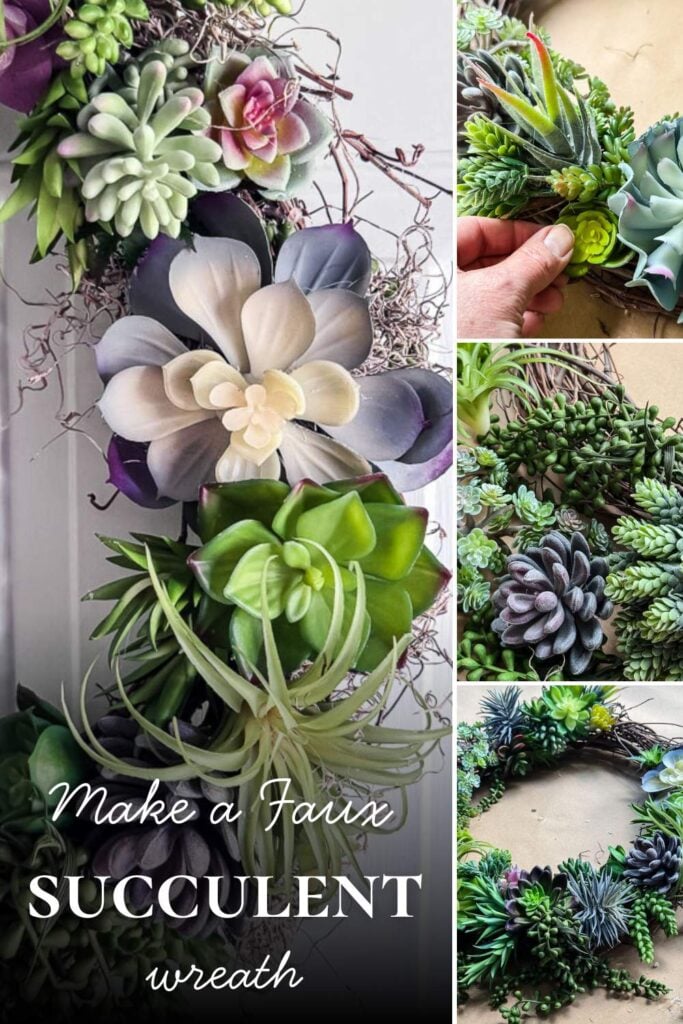
How to Make It: Step by Step
Even though this wreath might appear to be difficult, it is actually pretty simple and straightforward! If you are new to crafting, I always encourage readers to start with a wreath.
Step 1: Start With Your Anchor Piece
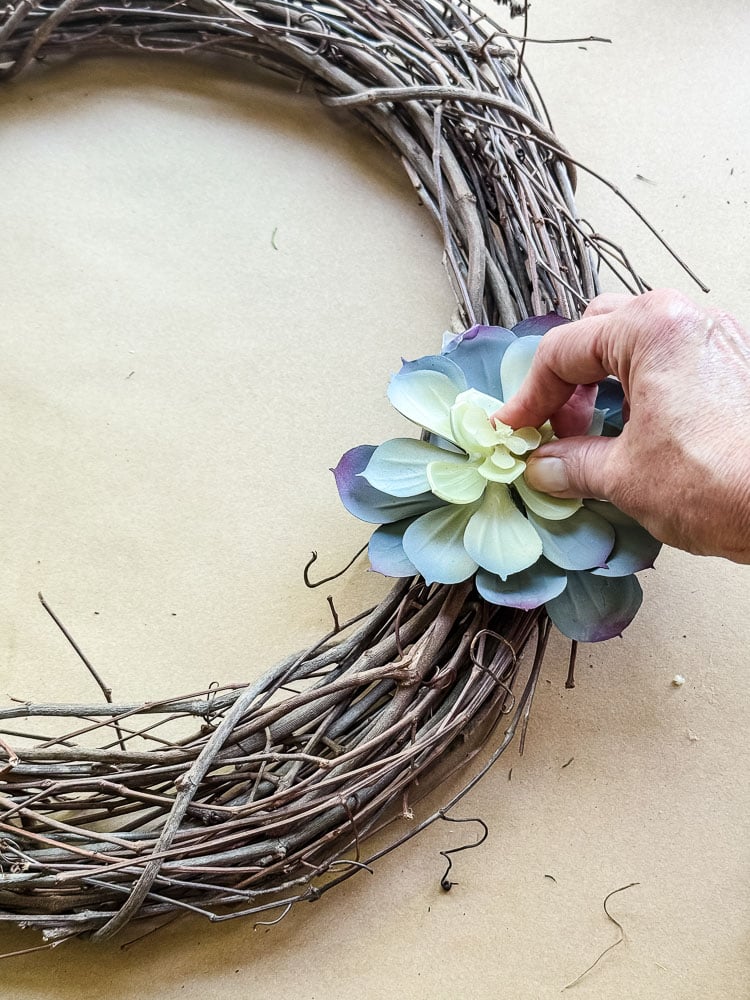
Pick up your largest, most eye-catching echeveria. For me, it was one of the pinkish or purple-toned rosettes, and I placed it at the 3 o’clock spot of the right side of the wreath. This is your anchor, your starting point, your visual north star. Everything else builds from here.
Add a generous amount of hot glue to the base and press it firmly onto the grapevine. Hold it for a few seconds before you let go. With a piece this size, you want full contact.
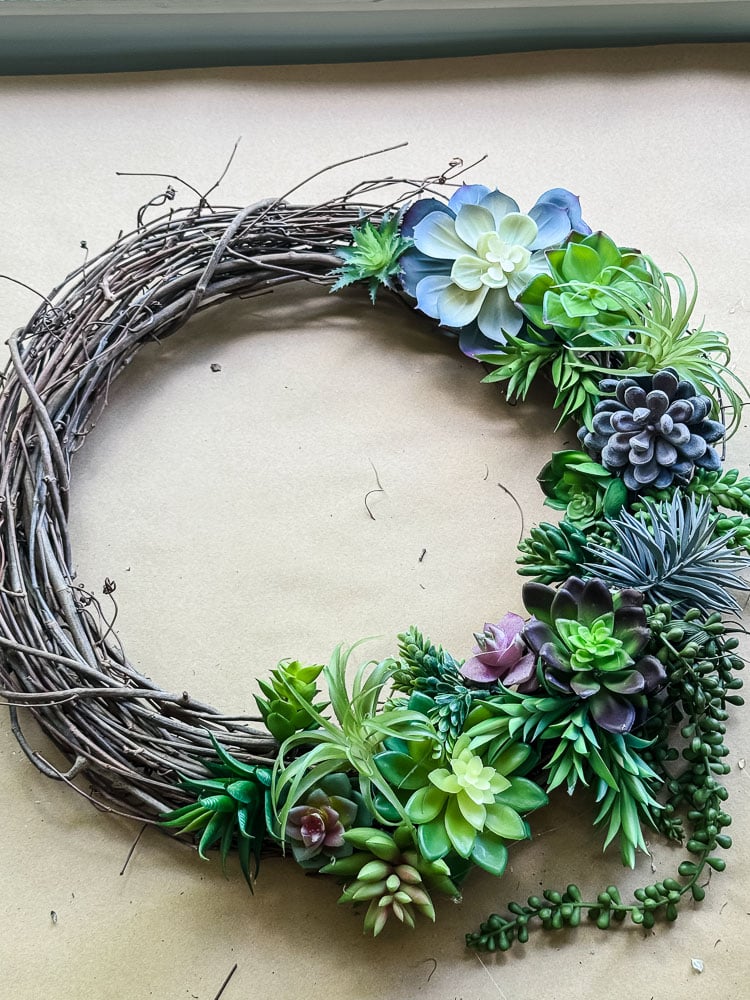
Step 2: Work Your Way Around In One Direction

From your anchor piece, start working down the right side of the wreath and up and around the left. As you go, alternate three things: color, texture, and size. A big rosette next to a spiky succulent next to a cluster of small sedum. A purple next to a green next to a silvery-blue. You’re not following a formula; you’re just making sure no two similar things sit right next to each other.
Hold two options up to the spot and go with whichever one feels right. This is genuinely intuitive once you get going, and I promise there’s no wrong answer here.
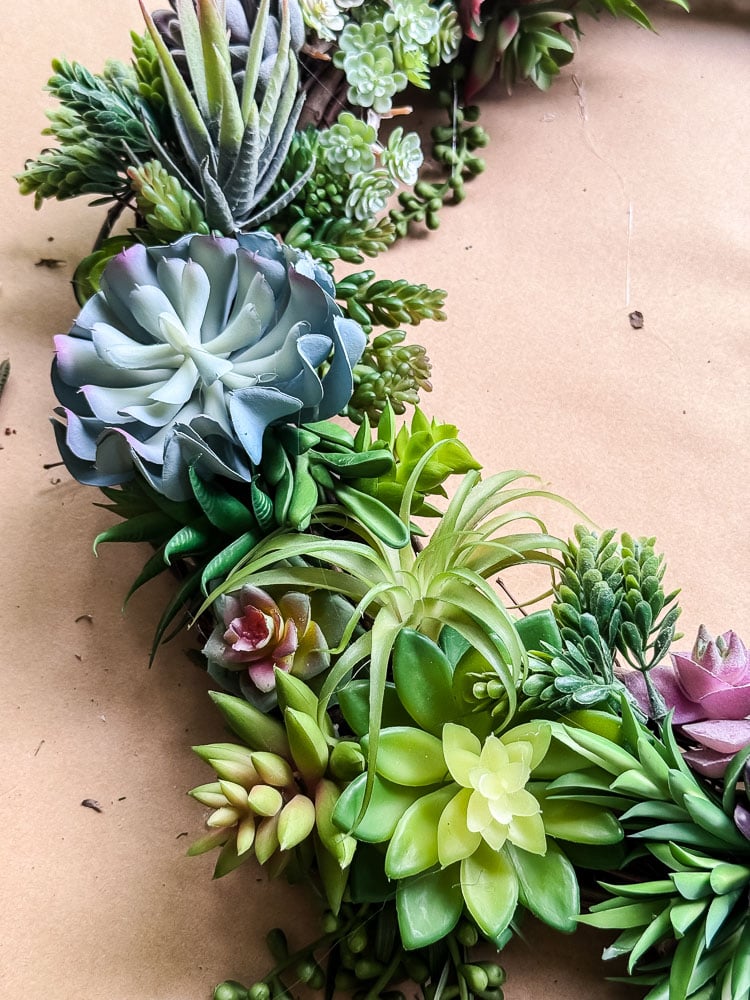
One more thing worth mentioning! think of your wreath as having dimension, not just a flat top surface. As I was placing my succulents, I angled some of them facing outward toward the viewer, some tilting inward, and tucked a few underneath others. That layering is a big part of what gives the finished wreath that lush, almost sculptural look, rather than feeling like everything is just glued flat in a ring.
Step 3: Know Your Two Attachment Methods
Not all faux succulents attach the same way, and knowing this upfront will save you some frustration.
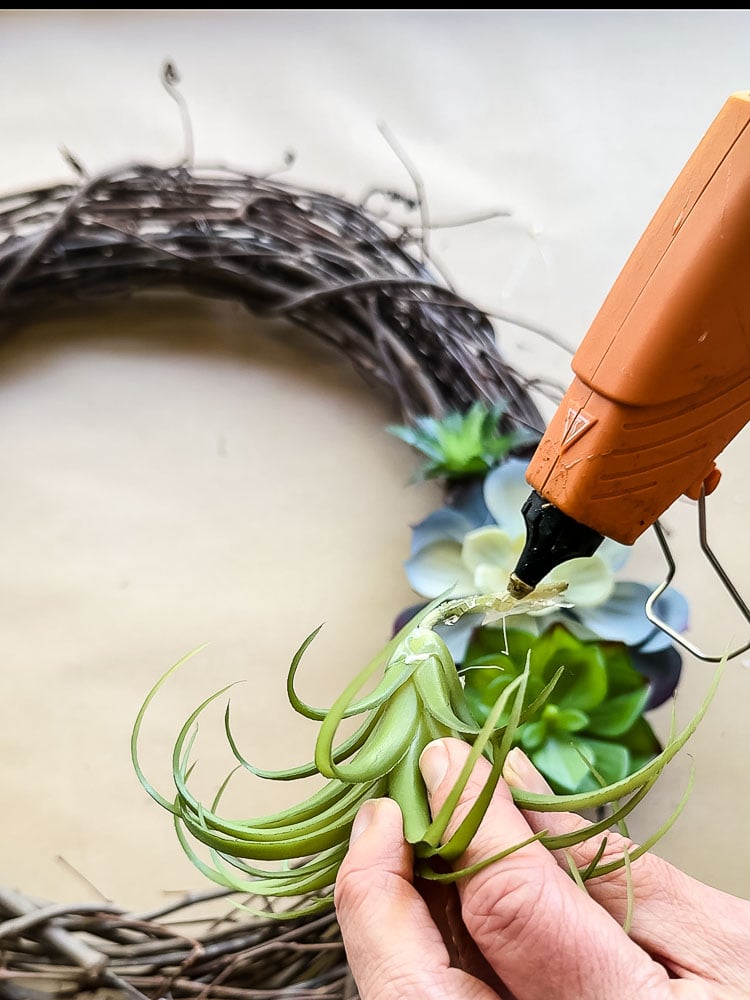

Wire-stemmed pieces: Dab hot glue on the wire stem and tuck it down between the grapevine branches. The vines grab the stem and hold it securely — these are your easiest placements.
Flat-base pieces: Apply hot glue directly to the flat base of the succulent and press firmly onto the grapevine surface. Hold for a good 5–10 seconds before releasing. These need a solid flat contact point to stay put.
Large or heavy pieces: Use a generous amount of glue AND consider wrapping a small piece of floral wire around the stem and through the grapevine for extra security. Especially for any big echeveria that has some weight to it.
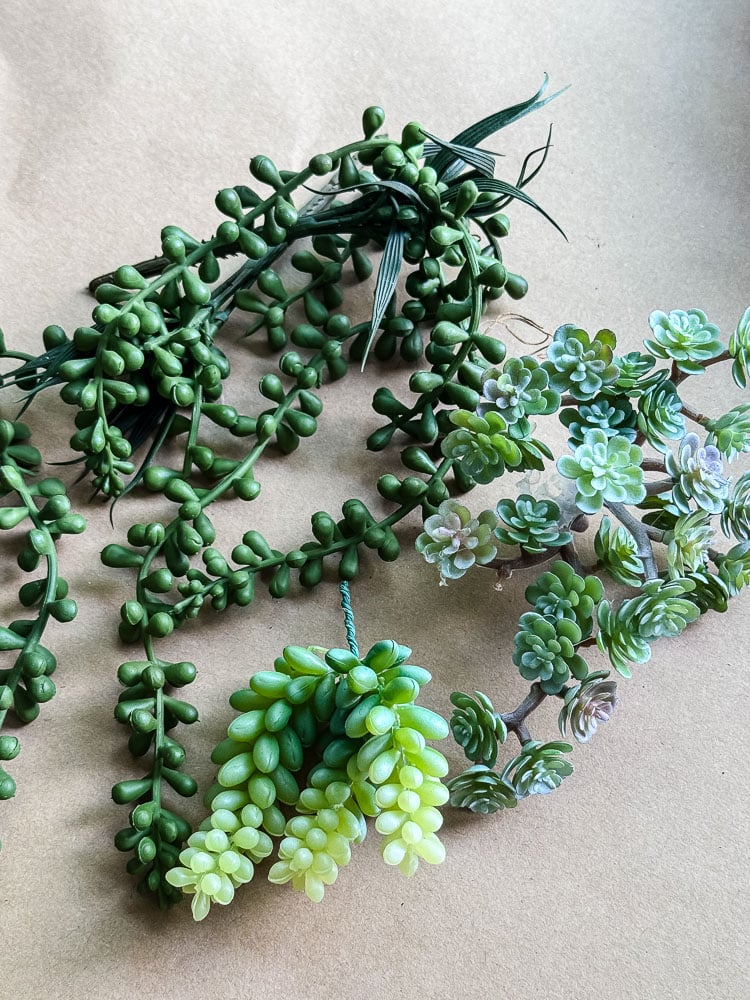
Step 4: Save The Trailing Pieces For Last
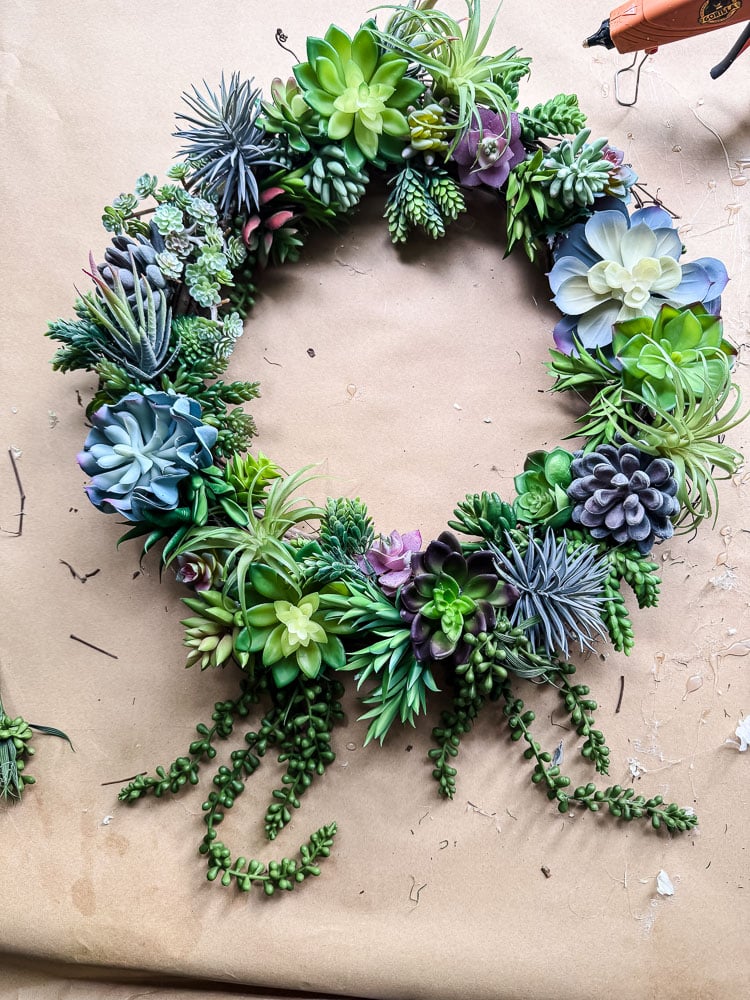
When you reach the bottom of the wreath, this is where your string of pearls goes. Let them drape naturally downward rather than trying to tuck them into the form.
That cascading movement at the bottom is what gives the wreath its organic, finished look. It breaks up what could otherwise feel like a uniform ring and draws the eye down beautifully.
I had originally put them in as I was working my way around the wreath, but you know what, I had to take them out and move them in the end-it would have been easier to just do it as the last additions.
Note: I had to trim down the longest strands of both of the strings I had popped in the wreath…they were distractingly long. But I did take those trimmed off strings and hot glue them in other empty spots on the wreath (we don’t want to waste a thing around here!)
Step 5: Finish With Spanish Moss
Once all your succulents are in place, take small loose clumps of Spanish moss and tuck them into the grapevine along both the inner and outer edges of the wreath. Between succulents. You’re not covering everything, just filling in the spots where the grapevine is peeking through and softening any transitions between succulents that feel a little abrupt.
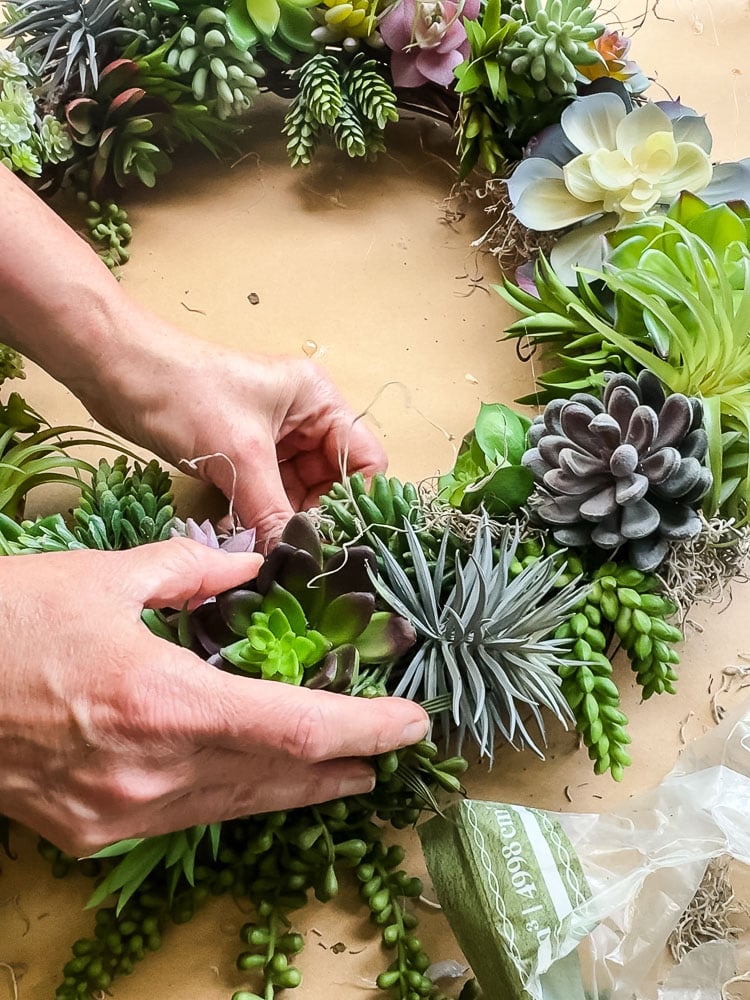
This is the step that makes the whole thing feel organic and finished rather than craft-project-y. The moss disappears into the arrangement, but you’d absolutely notice if it weren’t there. Work your way around both edges until you’re happy with how it looks. No glue needed, the grapevine holds it naturally.
A Few Things I Want You to Know
•There is no wrong way to arrange these. I mean it. When I wasn’t sure which succulent belonged in the next spot, I tried a couple of different options. I’m a visual person and need to see it first! Sometimes I thought “ugh, I don’t love that” after I had glued it, but hot glue is pretty forgiving if you work fast.
•Asymmetry is your friend. This wreath doesn’t need to be a perfect ring of evenly spaced rosettes. The organic, slightly uneven arrangement is exactly what makes it look realistic rather than manufactured.
•Use the silicone finger protectors. I mentioned this in the supply list, and I’m mentioning it again. Hot glue at wreath-making temperatures is no joke.
•One practical note before you hang it: this wreath is heavier than your average faux floral wreath. The succulents add up! I’d recommend a sturdy wreath hanger or a heavy-duty magnetic hanger for this one. This is not the wreath for a Command hook!
•This wreath belongs on a covered, protected door. Mine hangs on my covered front porch, and it’s perfect there: protected from direct sun and rain, which means it will stay looking beautiful for years. In full sun and weather, faux succulents will fade and deteriorate. Give it some shelter, and it will reward you.
•Store it flat in a box between seasons. I also save the plastic zipper bags that bedding comes in to store wreaths (love a free option!) Future you will be very grateful-it will keep the dust out!.
The Bottom Line
Sometimes the practical choice is the right choice. This wreath took me a little over an hour, and I had all the supplies on hand. It’s going to hang on my front door looking lush and gorgeous for summer, and I can always reuse it next year
The living succulent wreath is still on my list, and I mean it this time; it’s literally on my calendar. Early spring, so we have the whole summer to enjoy it together. I’ll link it right here when it’s up.
Until then, I’m perfectly happy with the faux version on my door-I’m sitting on my front porch (I call it my outdoor office), looking at it as I type up this tutorial for you.
Oh, and if you are looking for more wreath ideas (I have a ton!!) check out this with 40+ ideas for every season & style. Also, my guide on what you really need in your supply stash to start making wreaths (I highly encourage you to just make all of your own!)
See your projects featured! If you are inspired by this or any of my other DIY projects, I would love to see them and add you to the Reader’s Spotlight gallery. Send a photo to me at jennifer@cottageonbunkerhill.com
xo, Jennifer
Love projects like this? Don’t miss out! Join my newsletter family for more cozy, budget-friendly DIY ideas delivered right to your inbox. You’ll get exclusive tips, early access to tutorials, and all the inspiration you need to make your home feel handmade and heartfelt.
my crafting must-haves
shop my amazon store
Fresh Flower Wreath Collection

Looking for more pretty ideas?See all of our wreath tutorials using fresh flowers & natural materials