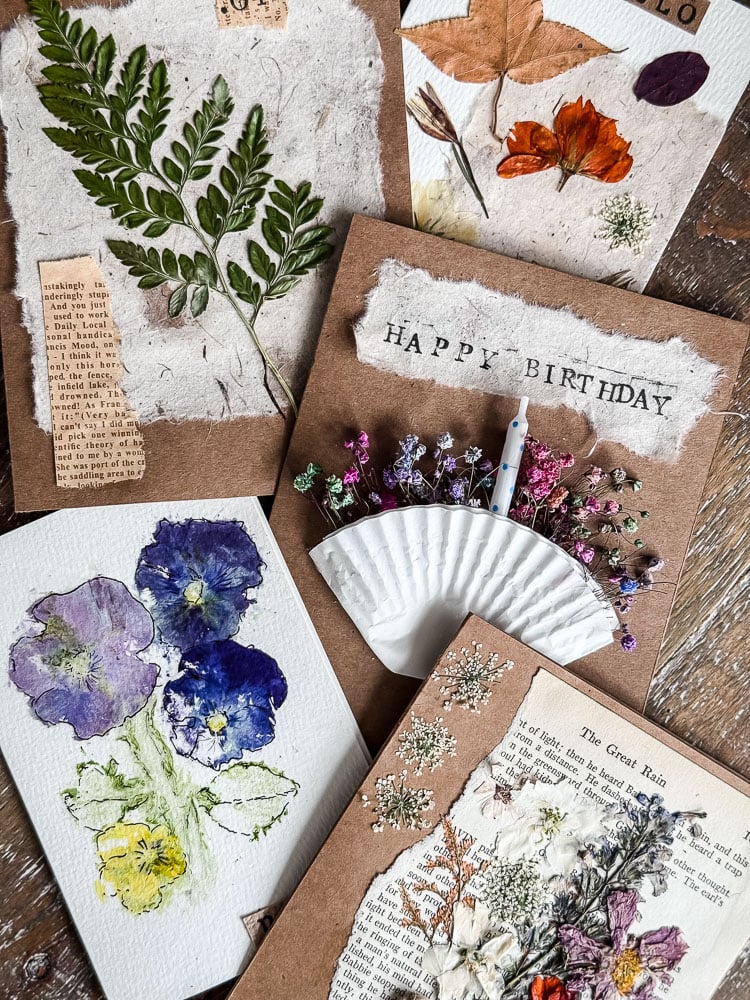
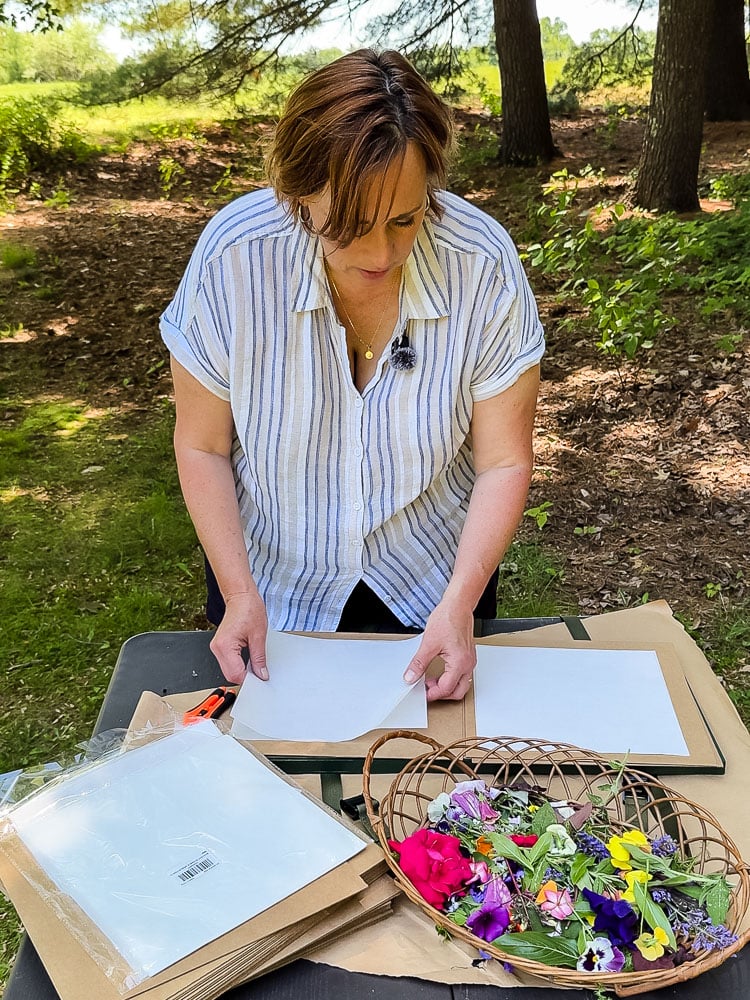
If you’ve been around here for a while, you know I press a lot of flowers. It’s one of my favorite ways to take something from the garden and turn it into something that lasts: art, cards, bookmarks, botanical decor. I love it all!
The problem? My flower press gets filled up so quickly ( I have a 12-in x 12-in one currently). So when I started researching larger presses this Spring, I nearly fell out of my chair at the prices. We’re talking over $100, and some were even more. For two boards and some hardware!
No, thank you!
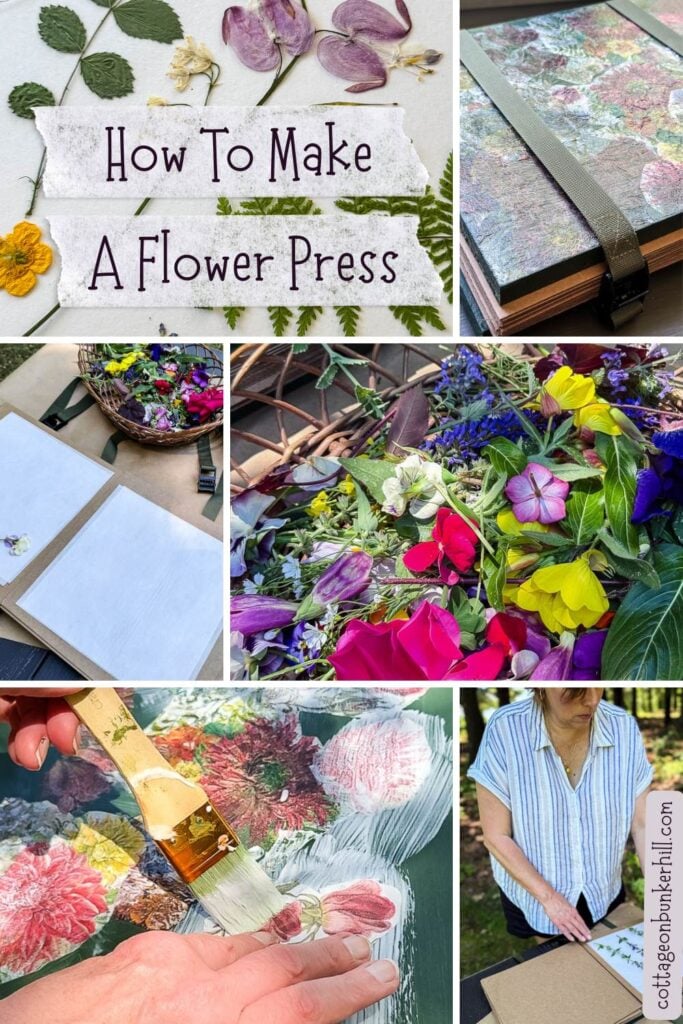
I did what I always do when the retail price makes me irrationally annoyed: I made my own. And honestly? I think mine turned out prettier than anything I could have bought.
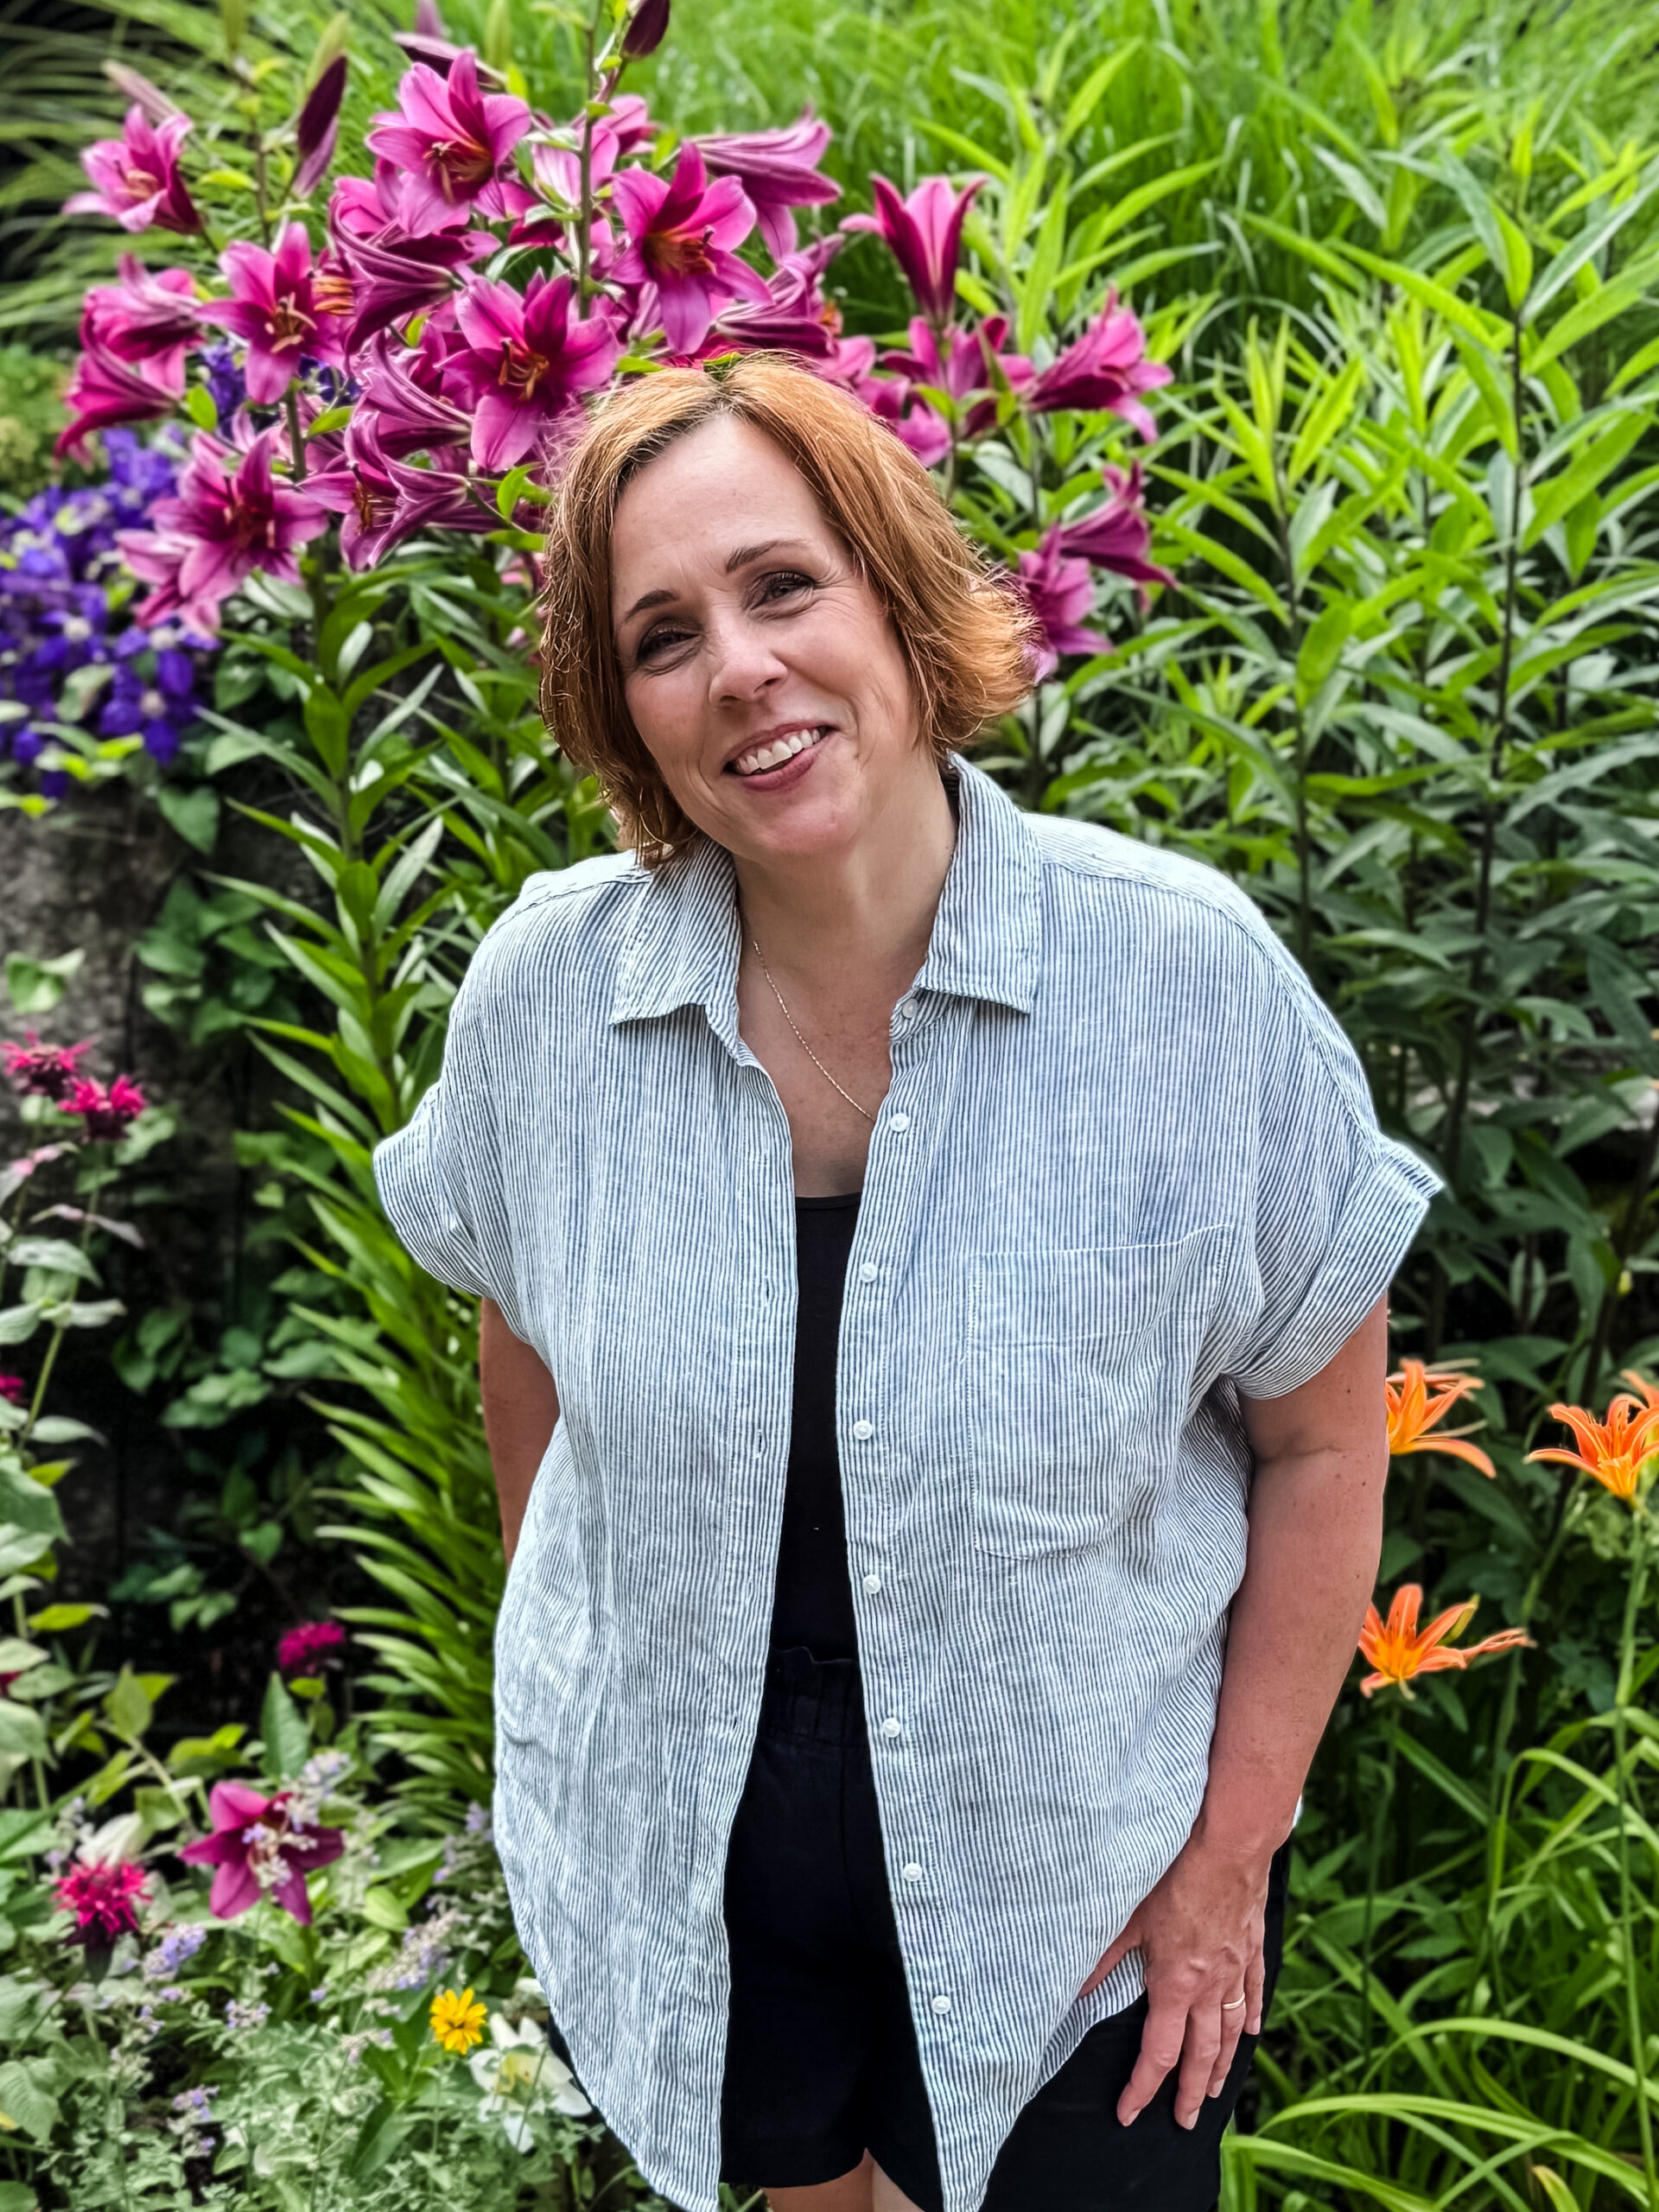
Welcome! I’m Jennifer, and I’ve been sharing my home’s journey since 2019, always with a focus on budget-smart and achievable style. If you love the charm of New England but need it to work for real life, you’re in the right place. I break down my projects to help you create a home that tells your story, without the overwhelm.
This post may contain affiliate links, which means we receive a small commission if you purchase through our links. See our disclaimer page for more information.
What Makes This Press Different
Most DIY flower press tutorials have you drilling bolts through the corners and using wing nuts to tighten everything down. That works fine, but it also means you’re fussing with four corners every time you want to open or tighten the press, and if one side is tighter than the other, your pressure isn’t even.
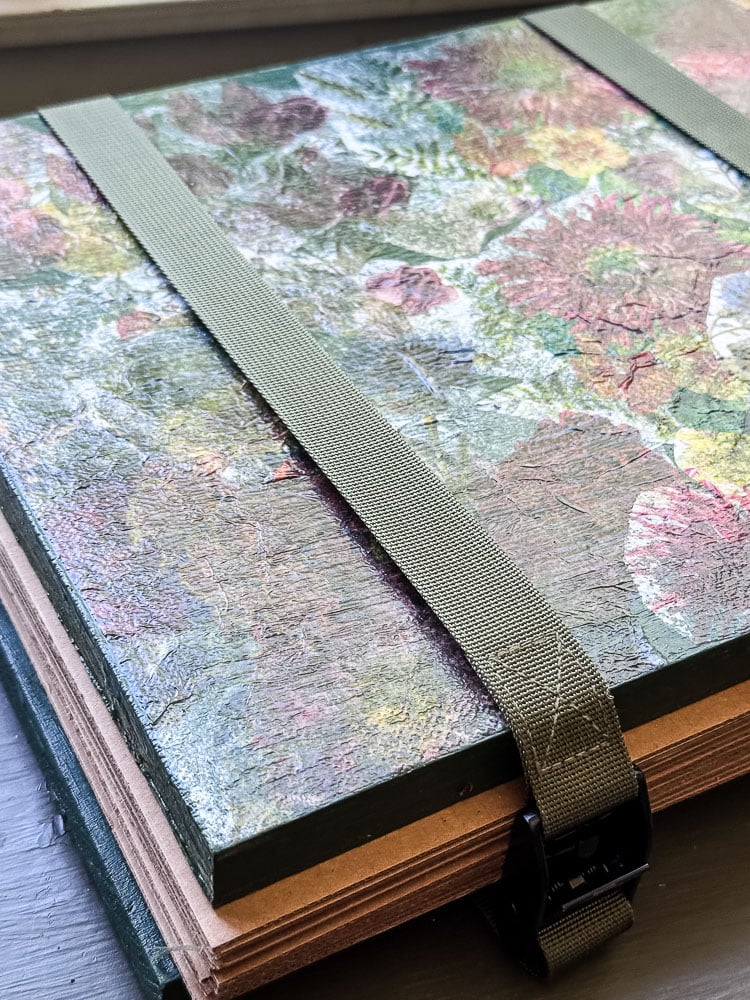
I went a different route and used tie-down straps with cam buckles, the kind you’d use to strap luggage or cargo. I know what you might be thinking: can straps really give you the same pressure as bolts? In my experience, yes. Three cam buckle straps pulled tight actually give me even, consistent pressure across the whole board, comparable to my bolted press, just faster and easier to adjust. Instead of wrestling with four wing nuts, I can tighten the whole thing in about three seconds.
Once I tested it, I couldn’t imagine going back.
Why This Cam Buckle Design is a Game-Changer
Traditional flower presses rely on long bolts and wing nuts at the corners. To be honest, trying to evenly spin four different bolts without your flower layers shifting drives me a little nutty!
By switching to 1-inch utility straps with cam buckles, you can:
- Save Your Hands: If you suffer from hand pain, arthritis, or weak grip strength, spinning tight wing nuts can be downright painful. Cam straps let you use your body weight to pull down and lock in massive pressure instantly.
- Apply Perfect, Even Tension: You get steady downward pressure across the entire board in seconds.
- Adjust on the Fly: You can easily adjust the height of your press to accommodate a few blooms or dozens of layers.
What You’ll Need
For The Press Itself:
- 2 precut wood boards, 1″ x 12″ x 24″ (I found mine at Lowe’s)
- 3 tie-down straps with cam buckles
- 3 short wood screws (slightly shorter than the board thickness, so they don’t go through)
- Pack of 11″ square blotting sheets (~$11 for 50 sheets)
- or these thicker blotting sheets
- Pack of 12″ square cardboard sheets (~$18 for 55 sheets)
- Scissors/Drill or screwdriver
For Decorating (optional but so worth it):
- Craft paint in your choice of color (I used a couple of small bottles in green, ~$2–3)
- Decorative paper napkins
- Matte Mod Podge
- Foam brush/Chip brush
How To Make A Flower Press
For my flower press, I painted it and then decoupaged floral-patterned napkins to the top board. After I finished making my press, I had a face-palm moment and thought that I could have actually done real pressed flowers ( I didn’t even think of that…I’ll save that Idea for my next one!)
Don’t want to paint? I think this would look fabulous with stained wood, too. Oooh, stained wood and pressed flowers (I’m adding that to my notes before I forget that combo!)
Step 1: Painting Your Boards
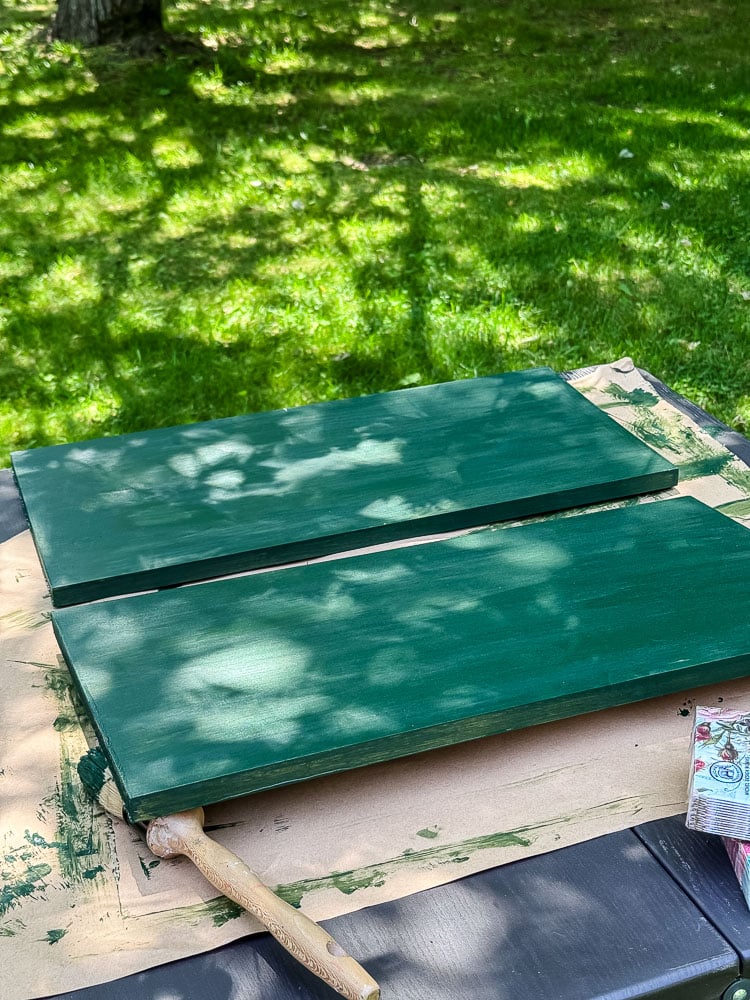
Give both boards two coats of craft paint in whatever color speaks to you. I went with a deep green that I knew would complement the floral napkins I had in mind. Truth be told…the bottom of the bottom board is painted brown because I ran out of green paint and wanted to just use up what I already had at home.
You could also stain the wood for a more natural look, or honestly leave them as-is if you want to keep things simple; the press will work just as beautifully either way.
Let the paint dry completely before moving on.
Step 2: Decoupage The Top Board (Optional, But Recommended)
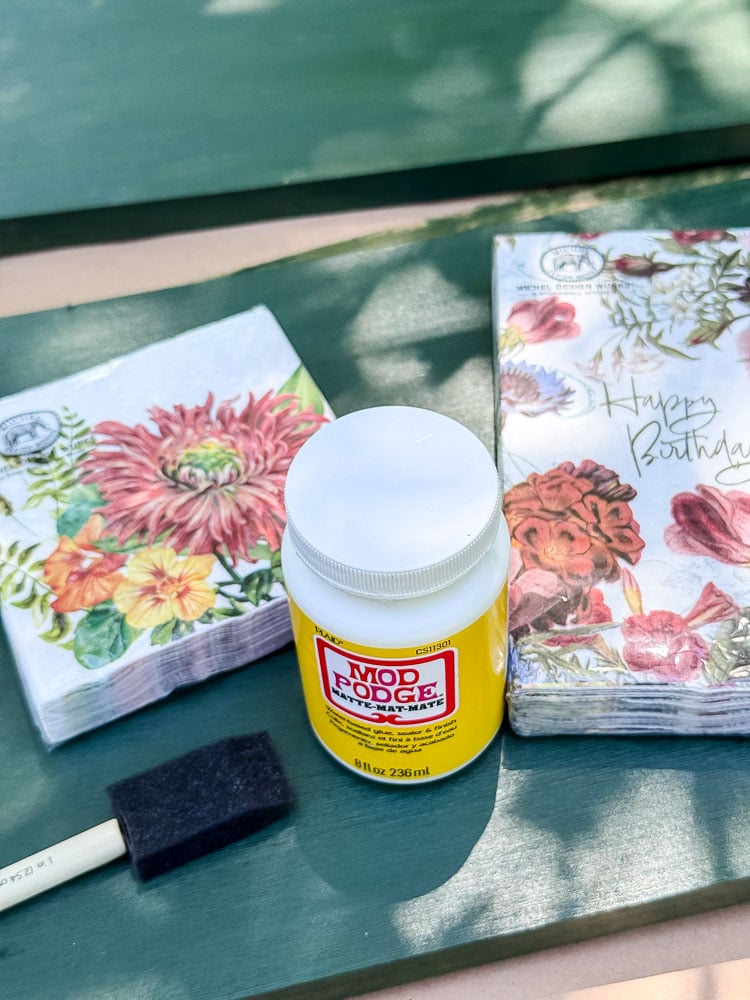
This is where you make your press yours. I used beautiful floral paper napkins that I’d picked up on a girls’ trip up to the White Mountains over the winter. I bought them not knowing what I’d use them for, and they turned out to be absolutely perfect for this.
My recommendation is to hit up your local Marshalls or Home Goods for napkins, they usually have pretty ones for just a few dollars (the ones on Amazon are a bit pricey
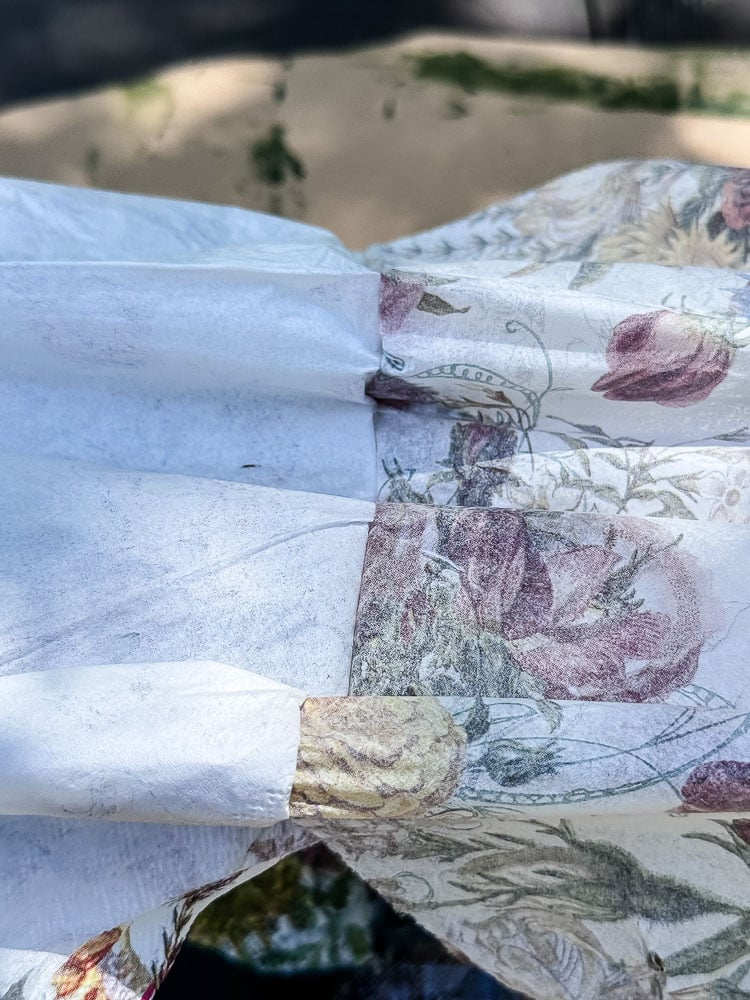
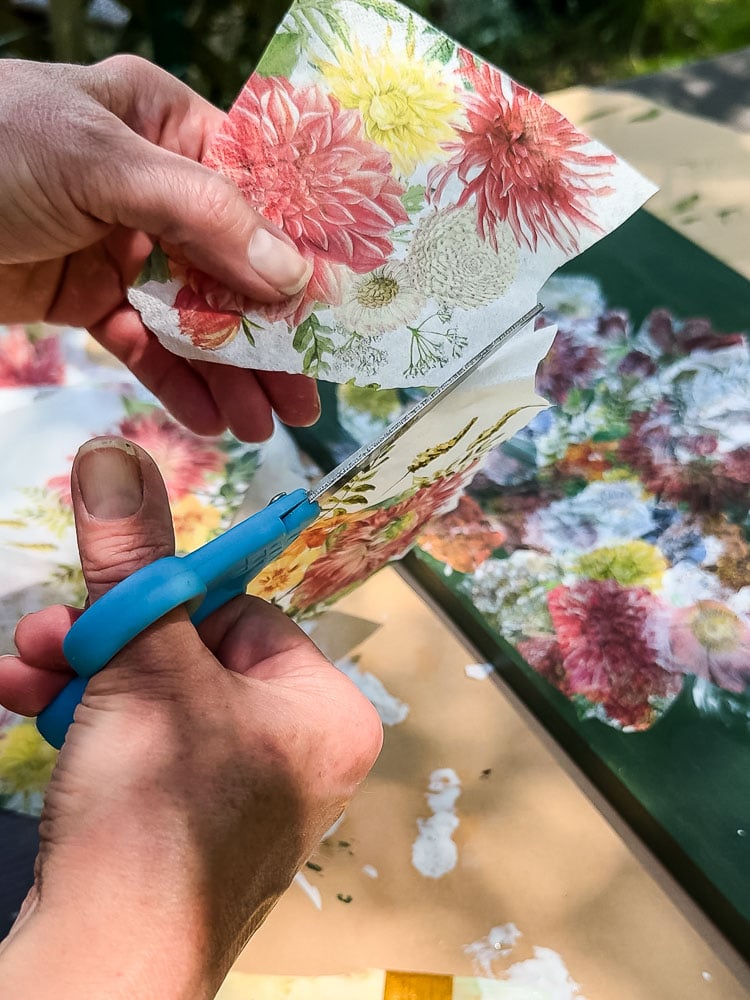
To decoupage napkins, peel the printed layer away from the backing layers (napkins are usually 2–3 ply, but you want just the decorative top ply). Cut out either clusters or individual flowers (I did a mix of both).
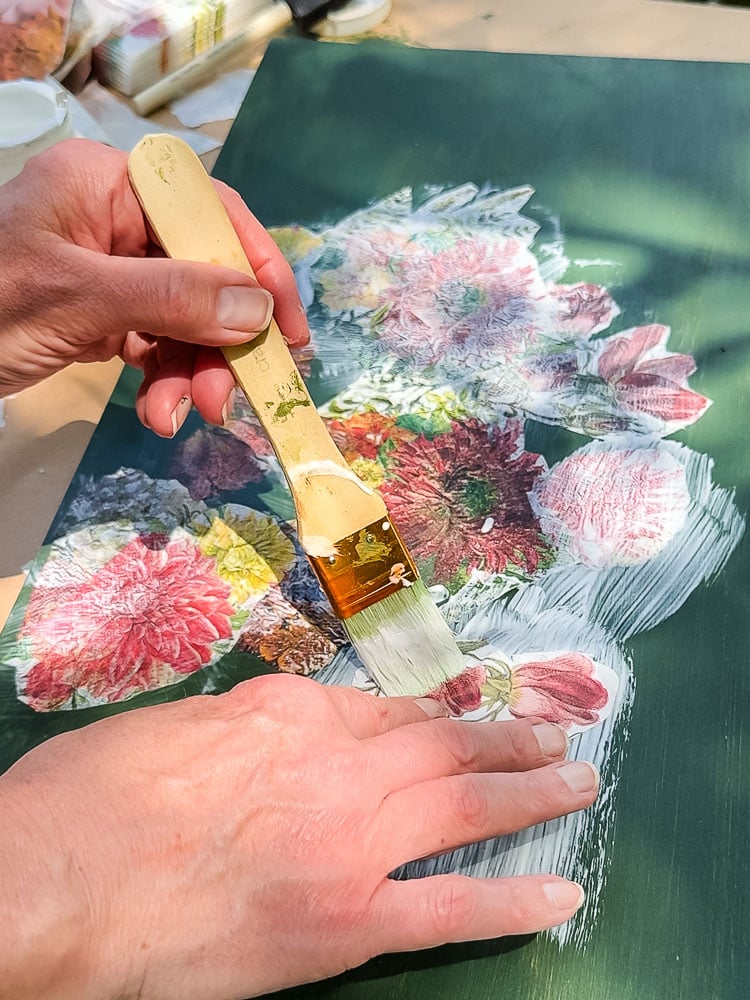
Then, brush a thin layer of Matte Mod Podge onto your board, lay the napkin layer down, smooth out any bubbles gently with your fingers, and then brush another coat of Mod Podge over the top.
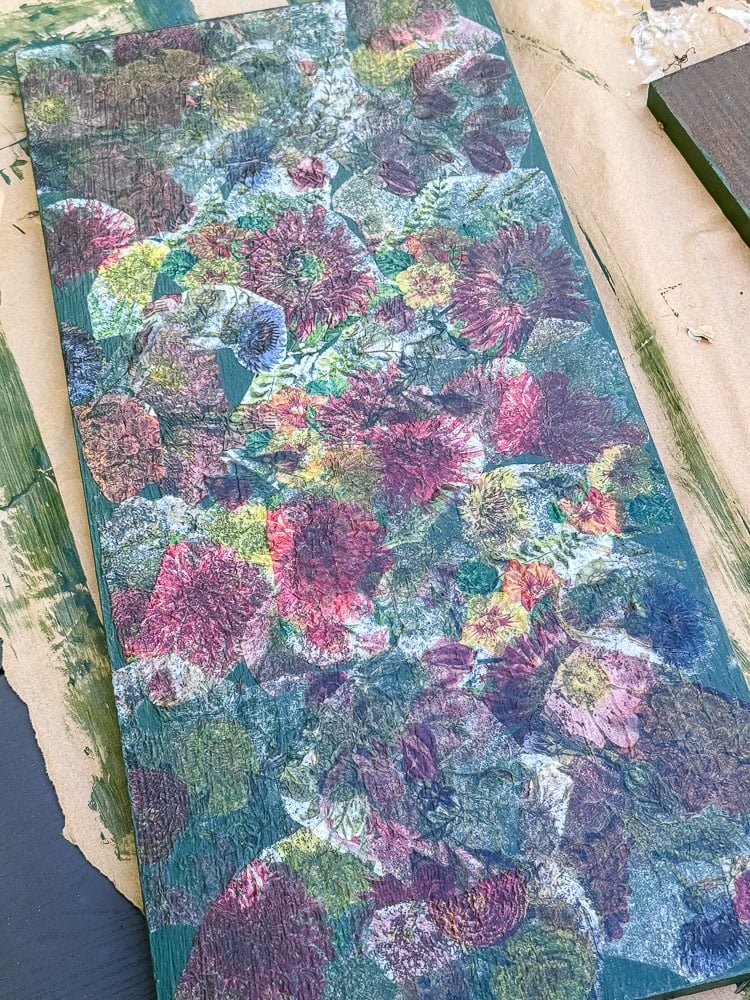
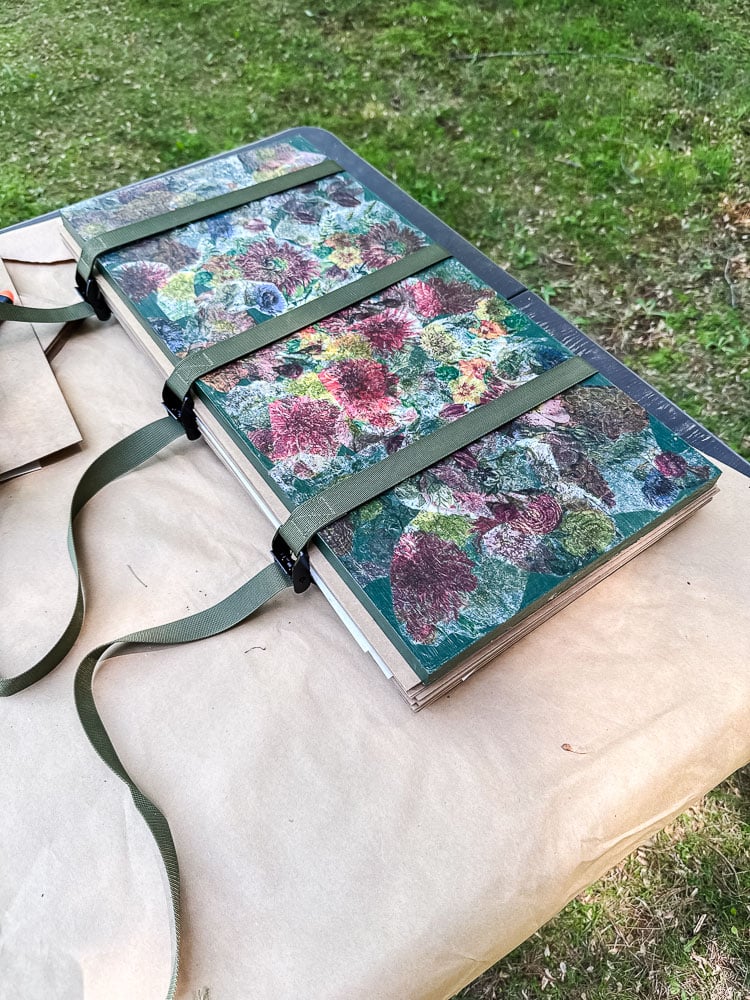
Now here’s the thing, I didn’t have an exact plan when I started adding the flowers and ended up covering the entire board. But you could just do a few flowers in the middle or create a pattern…or do what I did and let the spirit take you and cover the entire surface!
Let it dry fully, then add one more sealing coat of Mod Podge over the entire top of the board and sides. The result is a beautiful, slightly textured surface that looks like it could be an art piece on its own
Quick Decoupage Guide:
- Peel the printed layer away from the backing layers; you only need the top layer
- Brush a thin layer of Matte Mod Podge onto your board
- Lay the napkin layer down and smooth out any bubbles gently with your fingers
- Brush another coat of Mod Podge over the top
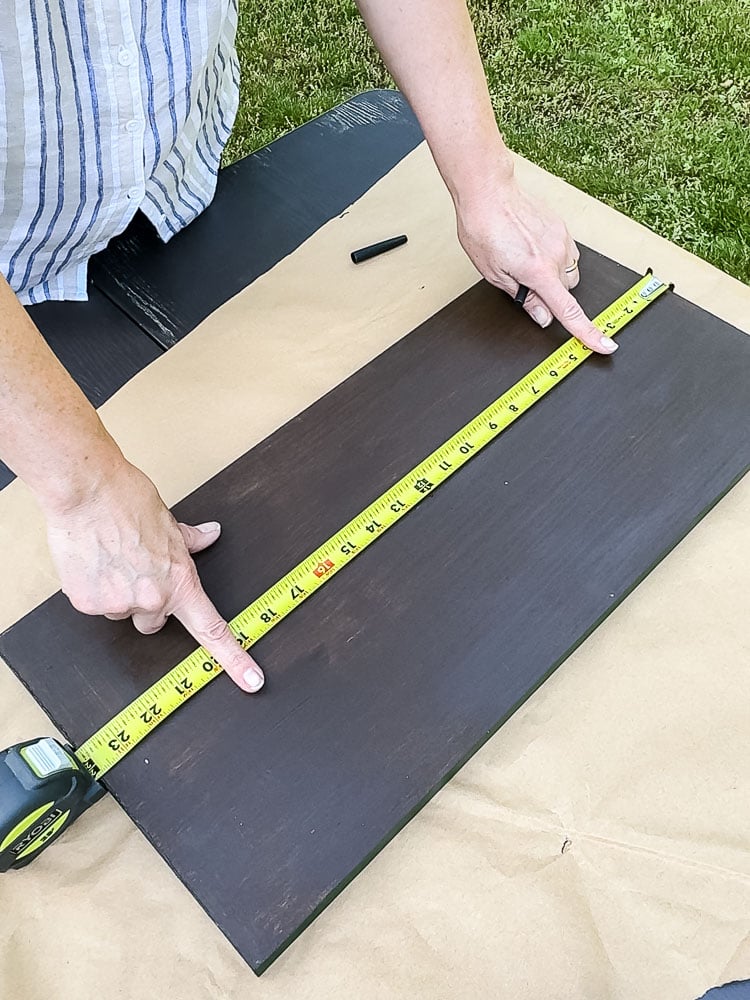
Step 3: Figure Out Your Strap Length
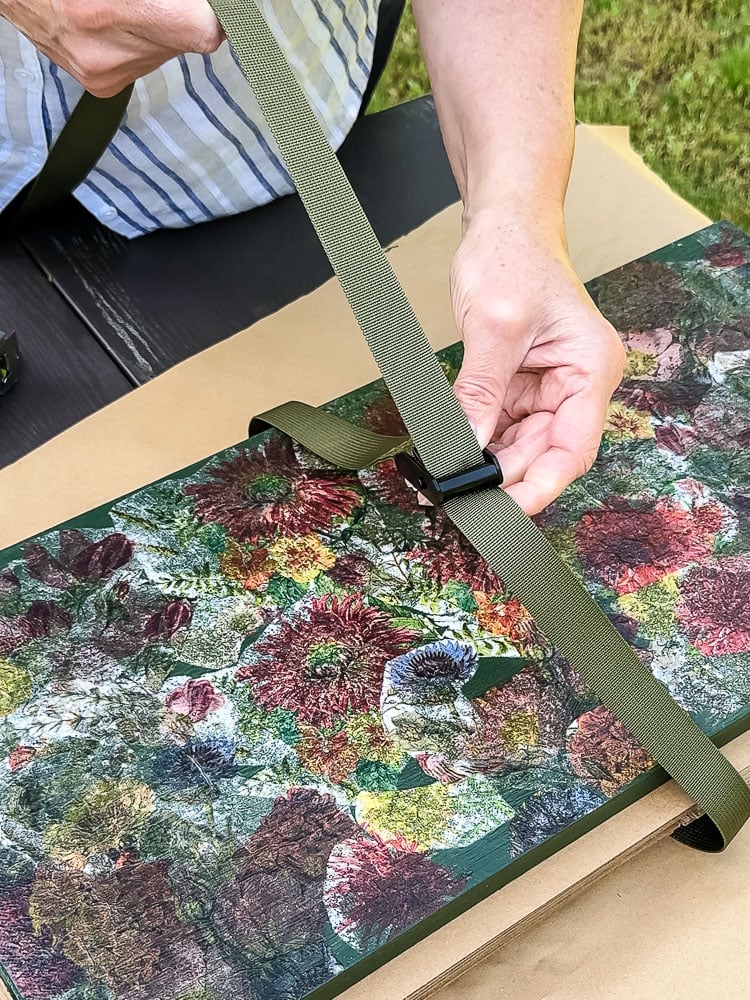
Before you trim your straps, do a test run. What I did was to stack up the cardboard squares inside the press as if it were completely full of flowers. You want to measure for the maximum capacity, not an empty press.
The strap will need to be snug when the press is fully loaded. I trimmed mine down to 42 inches each, which gave me good tension with plenty of room to tighten. It does leave you with an extra length of the strap, but that’s where I held on to tighten the cam buckle.
Note: You will see that my buckles rest on the front of my press when it is finished. If you want your buckles on the top of the press, just figure out the strap placement and then flip over the press and mark that exact spot on the strap. Both ways are fine!
Trim and melt or tape the strap ends so they don’t fray down the road.
Step 4: Attach the Straps to the Bottom Board
Lay your bottom board face down. You’re going to attach three straps to the back, one centered at the 12-inch mark (the middle of the board) and one on each side, 4 inches in from each edge.
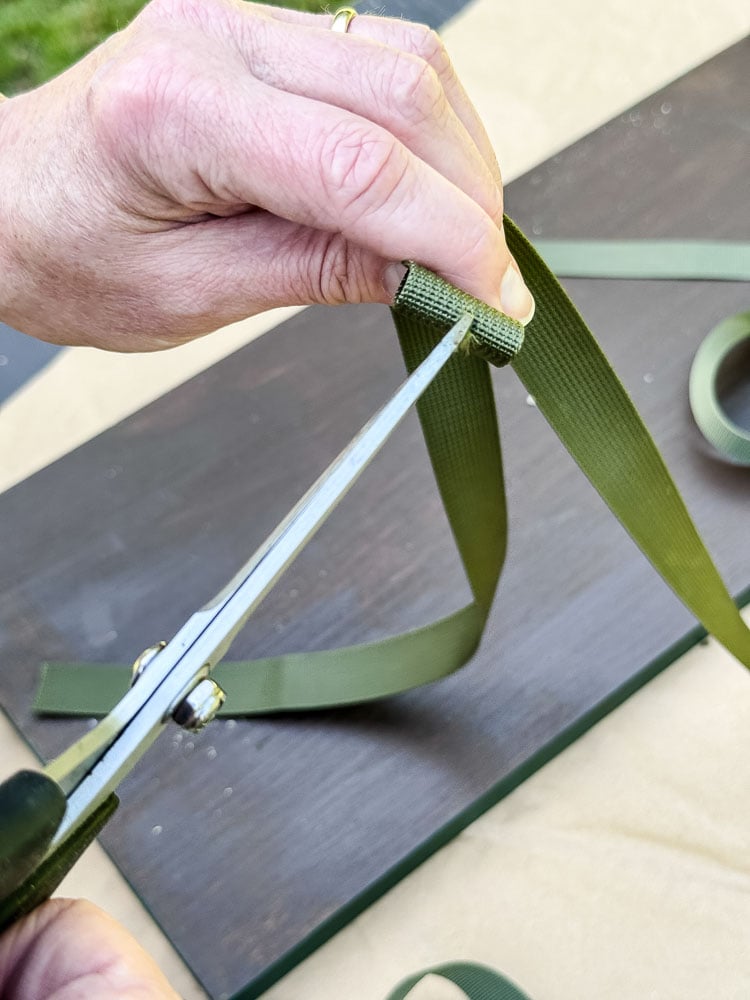
Before you attach each strap, find the center of your 42-inch length and mark it with a marker. Fold the strap over at that mark and snip a small slit (just enough for end of the screw to fit through) through both layers. This gives your screw a clean path through the fabric so it doesn’t wrap and bunch around the strap when you drive it in.
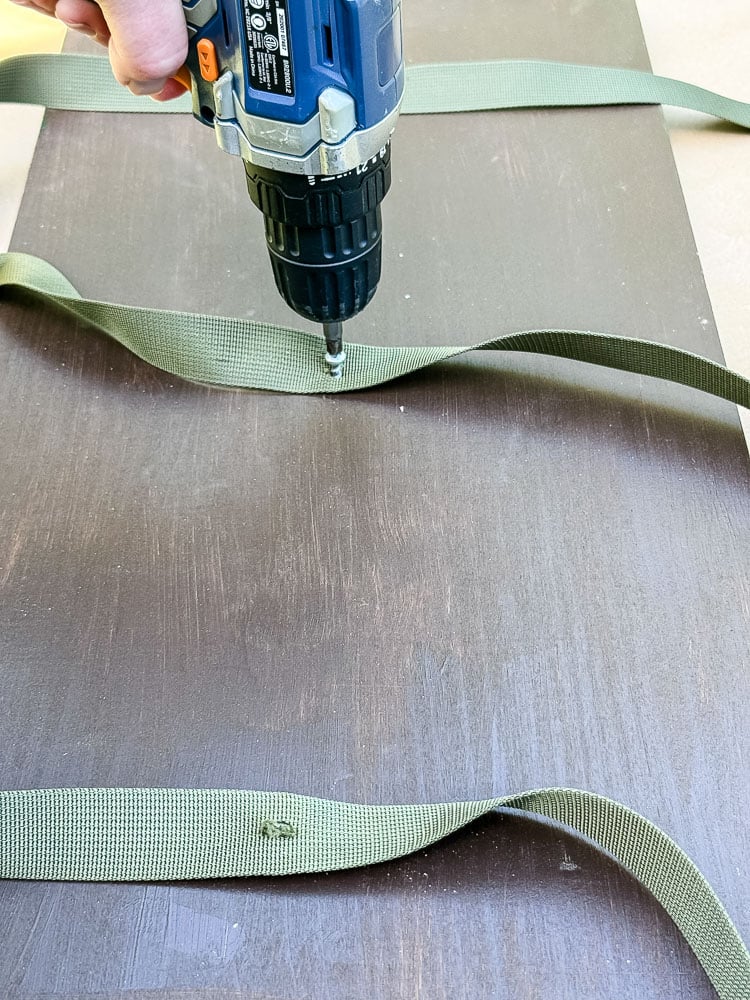
Drill a pilot hole into the board at each strap location before driving in your screw. This step is especially important if you’re using pine, which can split easily without one. Then secure each strap with a short wood screw; use one that’s slightly shorter than your board is thick, so it doesn’t poke through the front.
Step 5: Thread the Buckles and Test

Once your straps are trimmed, thread them through the cam buckles and test everything out. Here’s something that surprised me: I assumed the buckles would end up resting on top of the press, but they actually land on the front, which turns out to be even better. They’re right there and easy to grab when you want to tighten things down. Happy accident!
How to Use Your Flower Press
One thing I love about this size press that I didn’t fully anticipate: because I’m using 12-inch blotting and cardboard sheets on a 24-inch board, each layer actually has two sides. I essentially have two presses in one. If you have a cutting garden that goes absolutely wild in summer, and mine does, that capacity matters. I can press a serious amount of flowers in a single session without having to wait for a layer to free up.
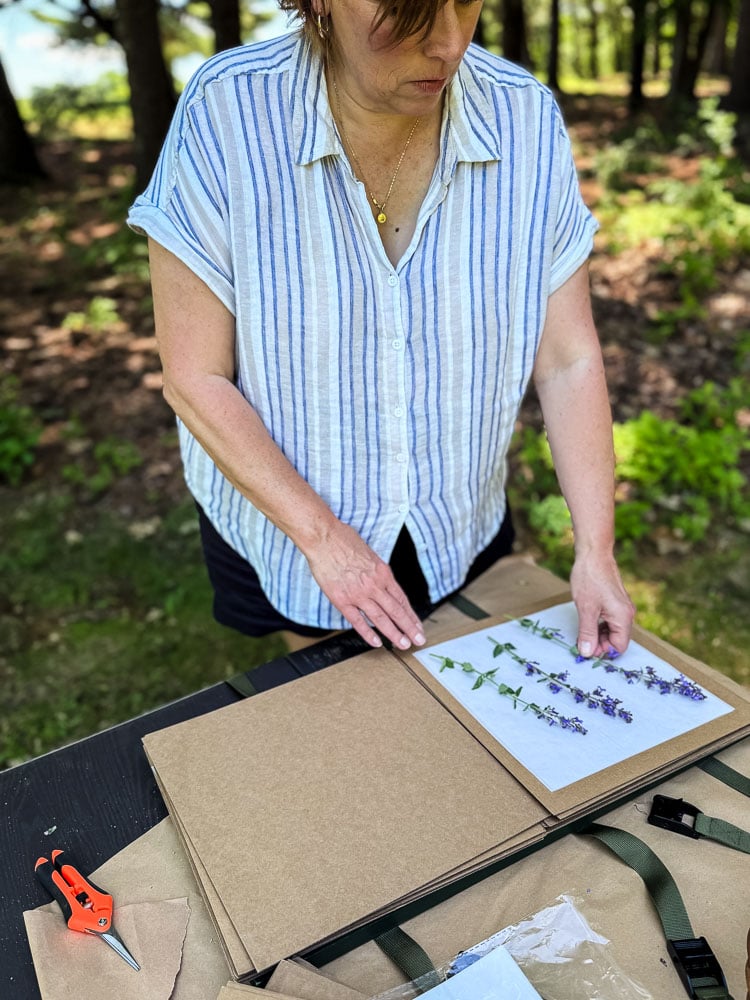
Layer your cardboard and blotting sheets alternately, placing flowers between the blotting sheet layers. Repeat this stack for as many flowers as you have. Then strap it down, tighten the cam buckles firmly, and wait. The blotting sheets I ordered are much thinner than the ones in my other flower press, so I doubled them up because I have never worked with them before.
The cardboard sheets actually have an important job in a flower press. They act like tiny air tunnels that allow air flow through the ridges from the sides, helping to draw moisture away from the blotting paper and out of the press.
Cardboard–>Blotting Paper–>Flowers–>Blotting Paper–>Cardboard
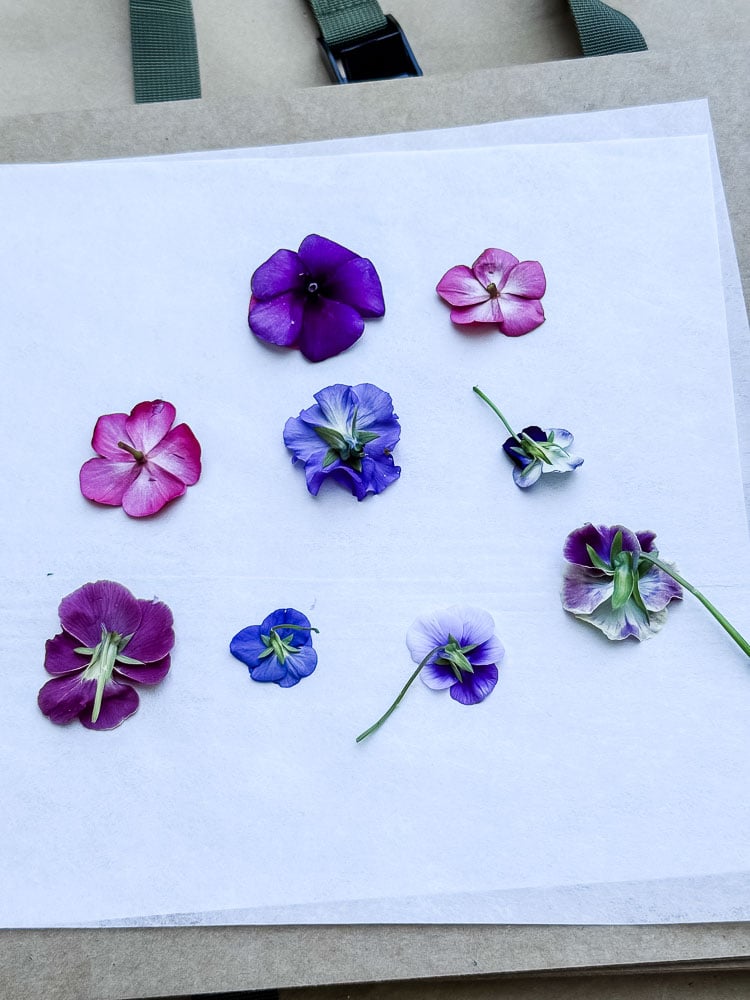
Most flowers need at least one week, and some take 2–3 weeks to press fully, depending on how thick and moisture-heavy they are. Delicate things like pansies and cosmos go quickly; thicker blooms like zinnias need more time.
Quick Guide: How to Press Flowers the Right Way
If you want a more in-depth read on flower pressing, check out my full guide on how to use a flower press here. In the meantime, here are a few easy tips to get you started:
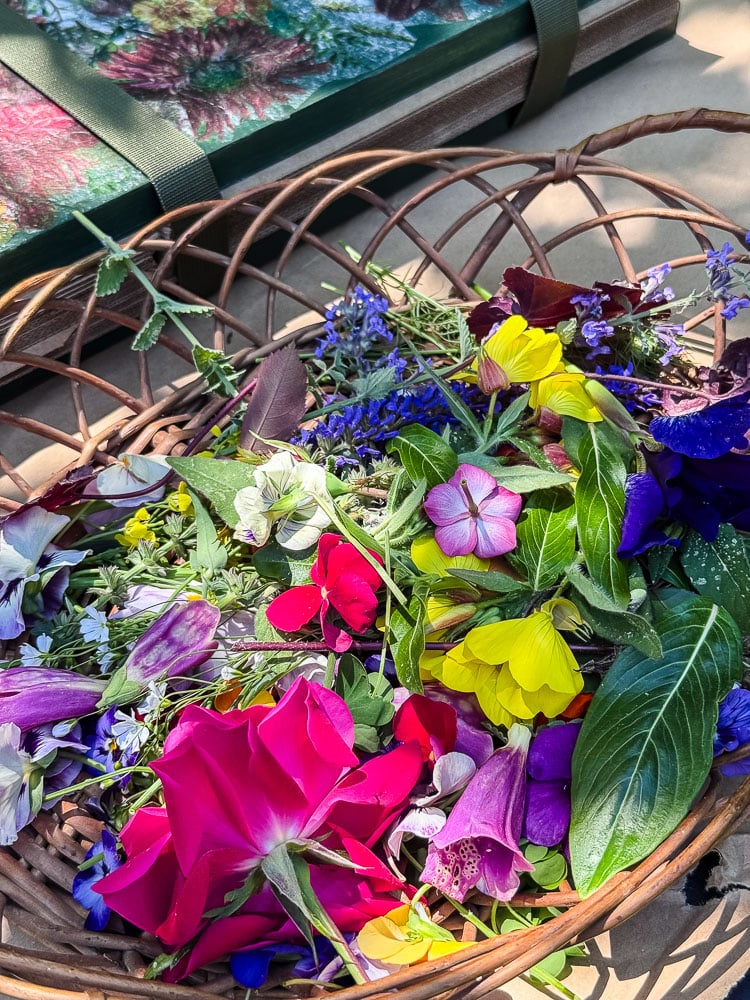
- Harvest at the Right Time: Pick your flowers on a dry afternoon after the morning dew has completely evaporated. Pressing wet flowers leads to brown, muddy colors.
- Build Your Press Sandwich: Lay down a piece of corrugated cardboard, then a sheet of blotting paper. Arrange your flowers so they aren’t touching, then cover with another sheet of blotting paper and a piece of cardboard.
- Balance the Weight: For the best results, use flowers of the same thickness for each layer of the press. If you are pressing thicker flowers, give them their own layer and distribute them evenly across the board so the top piece of wood doesn’t tilt.
- Crank Down the Straps: Thread your green cam straps around the width of the press, pull tightly to lock in the tension, and let the magic happen! Keep it in a warm, dry room for 1–3 weeks.
Worth Every Minute
This project came together in no time (yes, there is the drying time, but hands-on time isn’t very long), and I genuinely love how it turned out. The decoupaged floral cover gives it a handmade, vintage vibe that no store-bought press is going to have, and the strap system makes it so much easier to use than the traditional bolt style.
If you’re a flower presser and you’ve been held back by the cost or size of commercial presses, I hope this gives you the push to just make one. You’ll have a press that’s bigger, prettier, and more personal than anything you’d find online and for a fraction of the price.
Now, if you’ll excuse me, I have a garden full of flowers that are very ready to be pressed.
See your projects featured! If you are inspired by this or any of my other DIY projects, I would love to see them and add you to the Reader’s Spotlight gallery. Send a photo to me at jennifer@cottageonbunkerhill.com
xo, Jennifer
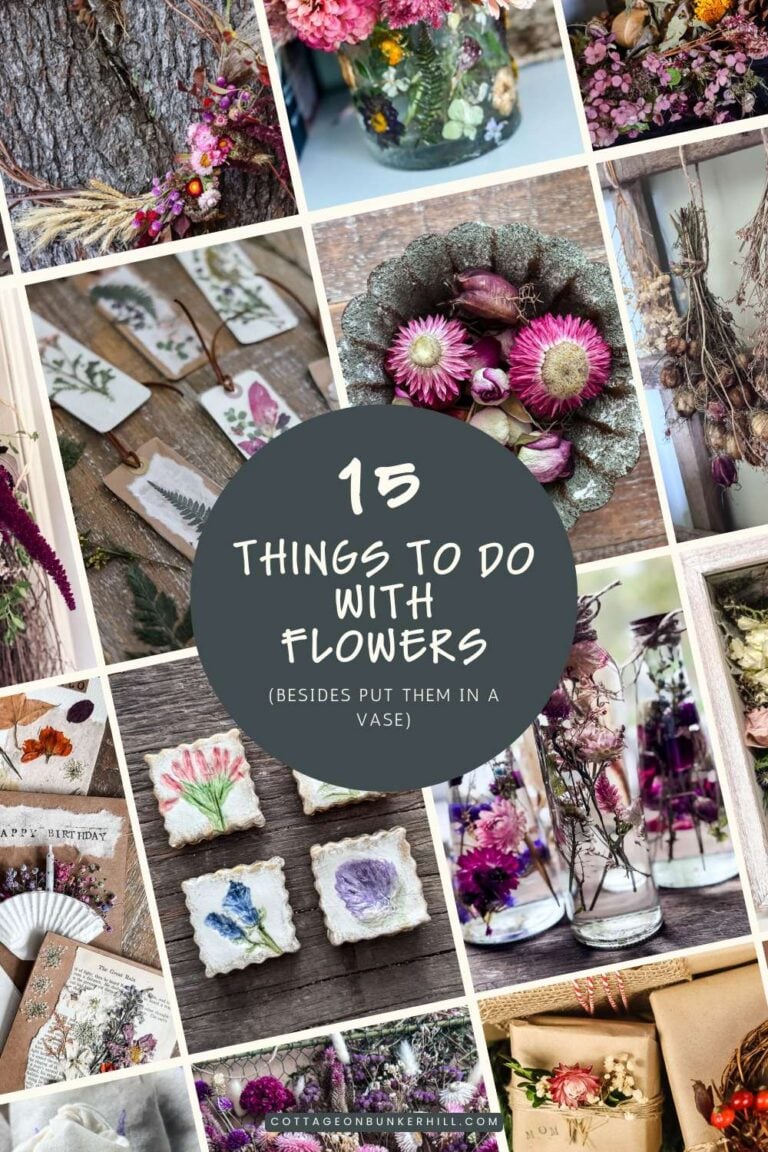
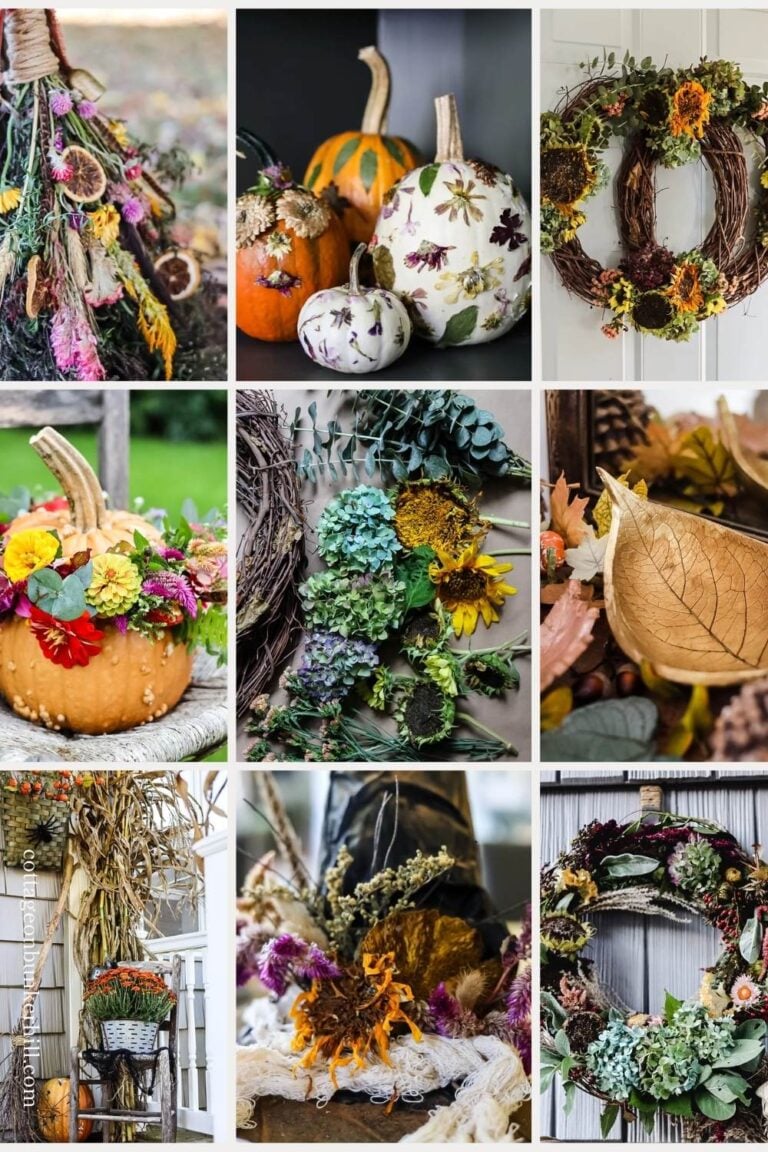
Pressed Flower Ideas To Try
- How To Use a Flower Press: Learn the basics
- Bookmarks: Laminate pressed flowers for a functional keepsake.
- Decoupage Vases: Turn your pressed flowers into beautiful vases
- Framed Art: Create a beautiful botanical display for your home.
- Greeting Cards: Add a personal touch to handmade cards.
- Flower Plaques: Using vintage book pages & flowers