

Looking for a way to bring the beauty of nature and vintage charm into your home? These pressed flower decoupage plaques are the perfect blend of rustic elegance and creative fun—and they’re easier to make than you might think!
Vintage-Inspired DIY: Decoupage Plaques with Pressed Flowers & Book Pages
There’s something timeless about combining the beauty of nature with the charm of vintage elements. In this tutorial, I’m sharing how to create beautiful decoupage plaques using pressed flowers and a touch of vintage flair. These handmade pieces are perfect for adding a rustic, nature-inspired touch to your home decor or gifting to someone special.
This project is easy, affordable, and endlessly customizable. With a few simple supplies—like wooden plaques, pressed flowers, vintage book pages, and Mod Podge—you can create one-of-a-kind pieces that celebrate the beauty of both nature and nostalgia.

This post may contain affiliate links, which means we receive a small commission if you purchase through our links. See our disclaimer page for more information.
What You Will Need:
Materials for this Project
- Unfinished wooden plaques (various shapes and sizes).
- Wood stain or paint
- Vintage book pages
- Pressed flowers and leaves. (or press your own)
- Mod Podge (I would suggest Matte)
- Gold Rub ‘n Buff or metallic paint (for edging).
- Scissors or a craft knife.
- Paintbrush or foam brush.
- Tweezers (for handling delicate flowers).
Why Make Pressed Flower Decoupage Plaques?
Pressed flower decoupage plaques are more than just pretty—they’re meaningful, versatile, and full of charm. Here’s why I love making them:
- Customizable: You can use flowers and book pages that match your personal style or home decor.
- Perfect for Any Occasion: Whether it’s a gift, holiday decor, or just a fun project, these plaques are always appreciated.
- A Touch of Nostalgia: The combination of pressed flowers and vintage book pages adds a unique, timeless appeal.
Step-by-Step Tutorial:
Step 1: Prepare the Wooden Plaques

The plaques I’m using are unfinished, so they needed a coat of stain to bring out their natural beauty. For this project, I used Varathane Less Mess Wood Stain, which is as easy to apply as shoe polish—perfect for small projects like this! Staining is usually one of my least favorite crafting tasks, but this product has won me over. It’s odorless, user-friendly, and makes the process a breeze.
Painting is another option, my suggestion would be either a walnut brown or black. If I make this project again I am going to do black.

- Sand the plaques lightly if needed (only if you have rough spots).
- Apply wood stain or paint to the plaques and let them dry completely.
Step 2: Decoupage Vintage Book Pages

- Trace the shape of each plaque onto the vintage book pages and cut them out. If your plaques have a beveled edge, angle your pencil inward as you trace around the edge to ensure the book page fits perfectly.

- Apply a thin layer of Mod Podge to the plaque and carefully place the book page on top. Smooth out any air bubbles.
- Then apply a top coat of Mod Podge to seal the paper. Let dry.

Step 3: Arrange and Glue the Pressed Flowers
Now for the fun part—adding the flowers and leaves to your plaques! My advice? Take a few minutes to play around with the design and layout before you start gluing. Once you apply Mod Podge, it’s not very forgiving, and moving delicate flowers or leaves can be tricky without damaging them.

- Apply a thin layer of Mod Podge to adhere the flowers to the plaques (I dabbed a little Mod Podge in each spot where I was working).
- Use tweezers and/or fingers to arrange the pressed flowers and leaves on the plaques.

plaque designs
Scroll through to see the 4 unique plaque designs I created for this project! Whether you prefer detailed or simple designs, these plaques always turn out beautifully.


Step 4. Let Dry

- Brush a coat of Mod Podge over the entire front of the plaques.
- Let dry completely.
Pro Tip: If any stems hang over the edge of your plaques, wait until the Mod Podge dries completely before trimming them flush with the edge.


Step 5: Add Gold Edging (Optional)

- Use gold Rub ‘n Buff or metallic paint to highlight the edges of the plaques for a touch of elegance.
Finished Plaques

Once the Mod Podge is dry, your plaques are ready to hang! The set I used is lightweight and thin, so I’ll be using Command strips for easy hanging. Other options include small sawtooth picture hangers or even attaching a pretty ribbon to the back to create a hanging loop.
Tips For Success

- Use Flat Flowers: Flowers with thin petals, like pansies or daisies, work best.
- Work in Small Sections: Apply Mod Podge to one area at a time to prevent it from drying too quickly.
- Let It Dry Completely: Allow each layer of Mod Podge to dry fully before moving on to the next step.
- Experiment with Designs: Try different flower combinations and layouts for a unique look.
Creative Variations

- Seasonal Plaques: Use flowers and foliage that match the season (e.g., holly for Christmas, pansies for spring).
- Themed Plaques: Create plaques inspired by specific occasions (e.g., weddings, baby showers, or holidays).
- Personalized Plaques: Add initials, quotes, or small embellishments for a custom touch.
FAQs About Pressed Flower Decoupage Plaques

- How long do pressed flower decoupage plaques last?
- With proper sealing, they can last for years.
- Can I use store-bought pressed flowers?
- Yes, but pressing your own adds a personal touch.
- What’s the best way to hang these plaques?
- Use picture hooks, adhesive strips, or ribbon for easy hanging.
- Can I use other adhesives instead of Mod Podge?
- Yes, try clear-drying craft glue or epoxy for a different finish.
Now It’s Your Turn!
Pressed flower decoupage plaques are a simple yet stunning way to bring the beauty of nature and vintage charm into your home. Whether you’re making them for yourself or as gifts, they’re sure to add a touch of rustic elegance to any space. So grab your supplies, press some flowers, and start creating!

I’d love to see your pressed flower decoupage plaques and add your project to the Reader’s Spotlight gallery. Send a photo to me at jennifer@cottageonbunkerhill.com
xo, Jennifer
Pressed Flower Ideas To Try
- How To Use a Flower Press: Learn the basics
- Bookmarks: Laminate pressed flowers for a functional keepsake.
- Decoupage Vases: Turn your pressed flowers into beautiful vases
- Framed Art: Create a beautiful botanical display for your home.
- Greeting Cards: Add a personal touch to handmade cards.
featured
pressed flower art
My top choices & supplies that I have used in my pressed flower tutorials

Love Flowers? Me too
Dried & Pressed Flowers
check out some of my favorite tutorials:
-
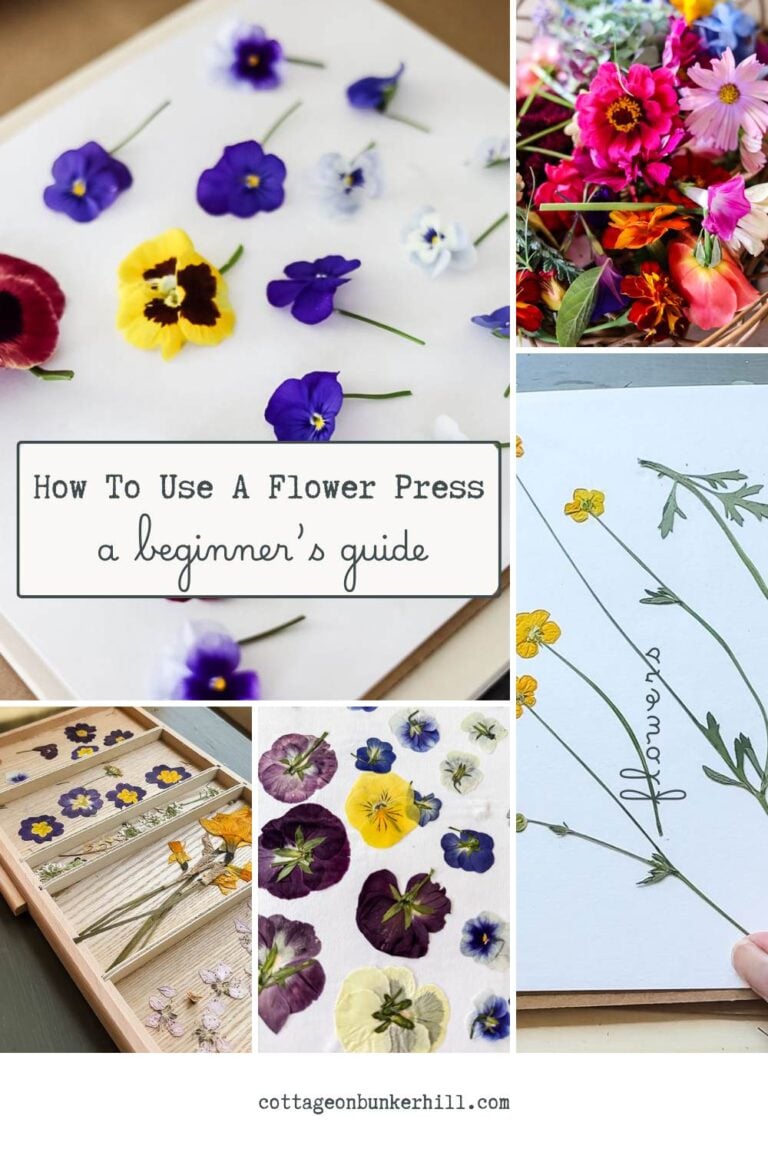
How to Use a Flower Press: A Beginner’s Guide

I’ve pressed hundreds of flowers at this point, from Trader Joe’s ranunculus in the middle of a January snowstorm to roses,…
-
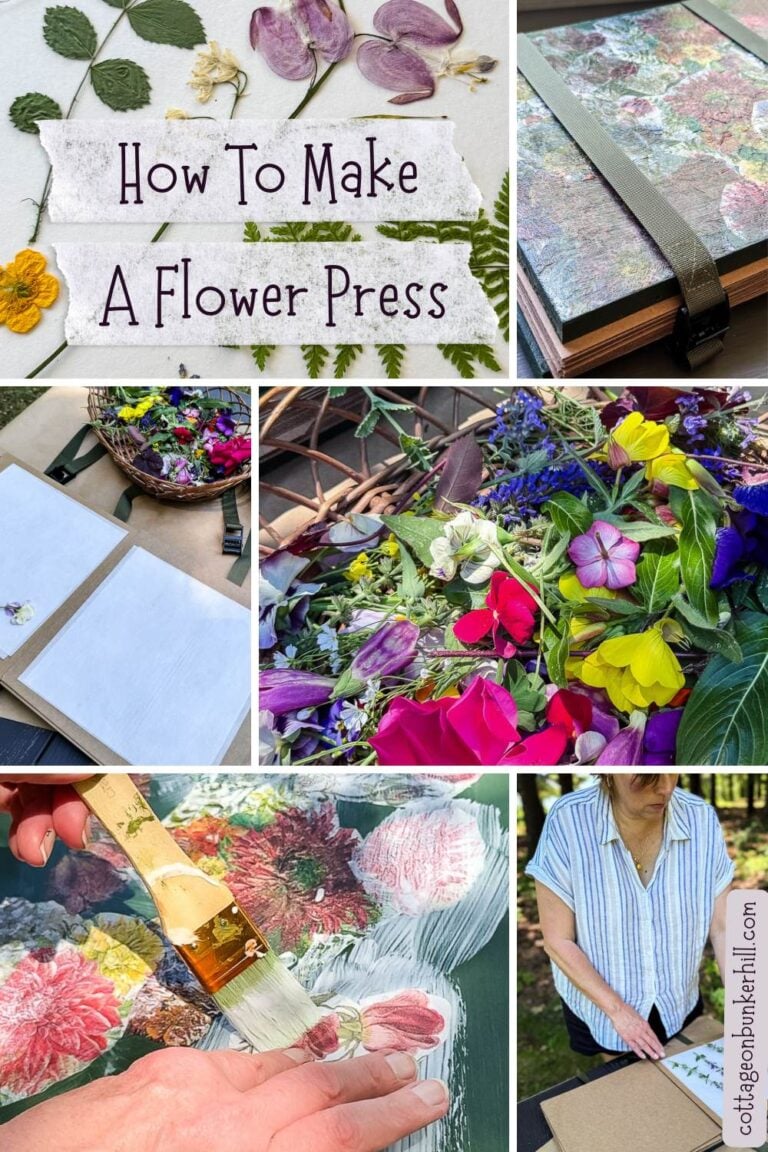
How to Make a Large Flower Press (No Bolts, No Fuss)
If you’ve been around here for a while, you know I press a lot of flowers. It’s one of my favorite…
-
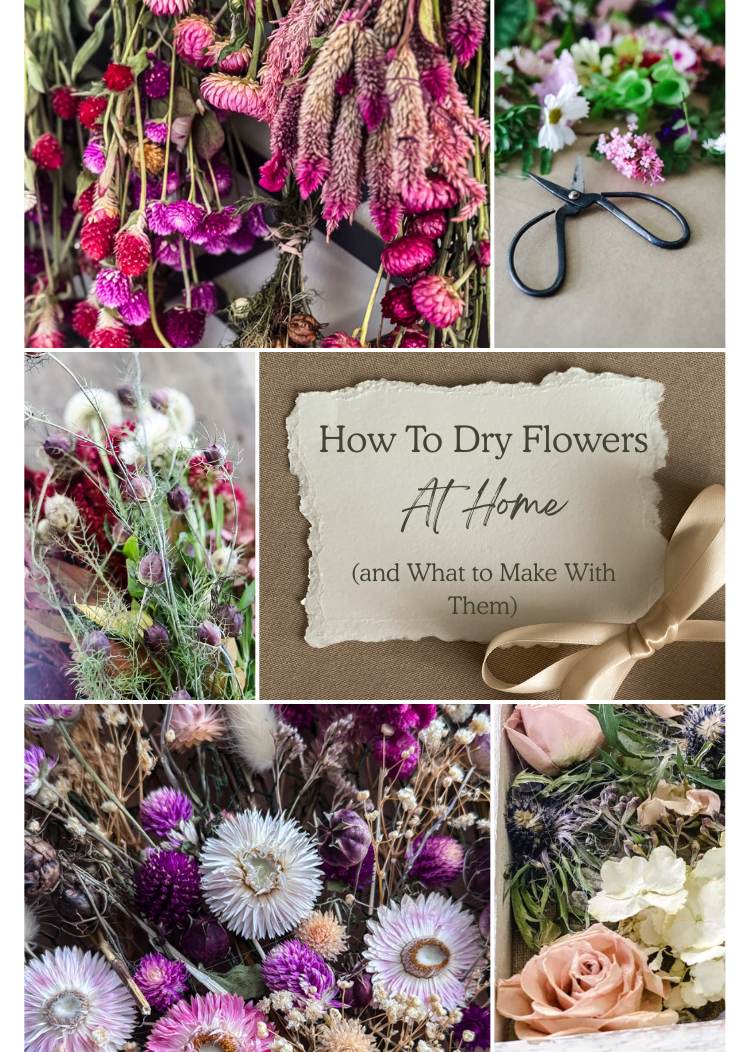
How to Dry Flowers at Home (and What to Make With Them)
Fresh flowers don’t last, but dried flowers can stick around for years. If you’ve ever wanted to hold onto blooms from…


I really like what you do. Your website is lovely as well; very nicely laid out, and Iike the step by step, followed by views of the finished project. Also the links throughout.
I’m so glad Kathleen!! As a crafter myself I get so discouraged when I click on an image from Pinterest and the blog post has barely any info on it! It drives me nuts! So I really try to get all the details and photos for every step clear…because I really want you all to be able to get the same results at home.
Beautiful Jen!
What spray or seal do you use to finish and preserve them?
Great ideas Jenn. The pressed flower plaques are really lovely. I think I want to try herbs….they would look pretty in the kitchen!😊
Oooh, that would be so pretty!! Send me a pic if you do make them!