
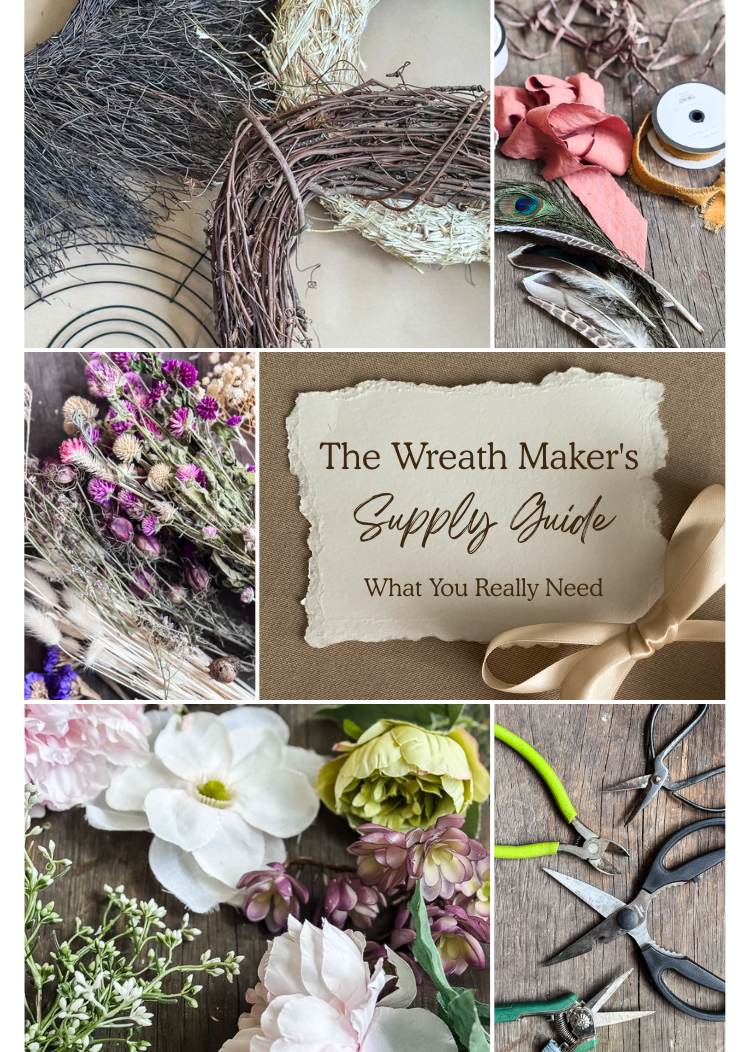
Everything You Need to Get Started (and Keep Going)
Let me paint you a picture. You’ve decided you’re going to make a wreath. You’ve seen the inspiration photos, you have a general vision, and you are feeling good. Then you walk into the floral aisle at Michaels and… nothing. Just a wall of stuff that may or may not be what you need, wire in seventeen gauges, foam in four different colors, and approximately one million types of greenery that all look slightly different and none of which are labeled in a way that means anything to you.
I’ve been there. We’ve all been there.
After years of wreath-making (and more than a few supply-related mistakes), I finally put together this guide to walk you through exactly what you need, what everything is called, and when to use what. Whether you’re about to make your very first wreath or you’ve made a few and you’re still a little fuzzy on the mechanics, this is for you.
Let’s get into it.

Hi! I’m Jennifer, and I’ve been sharing my home’s journey since 2019, always with a focus on budget-friendly and achievable style. If you love the charm of New England but need it to work for real life, you’re in the right place. I break down my projects to help you create a home that tells your story, without the overwhelm.
This post may contain affiliate links, which means we receive a small commission if you purchase through our links. See our disclaimer page for more information.
Part 1: Wreath Forms
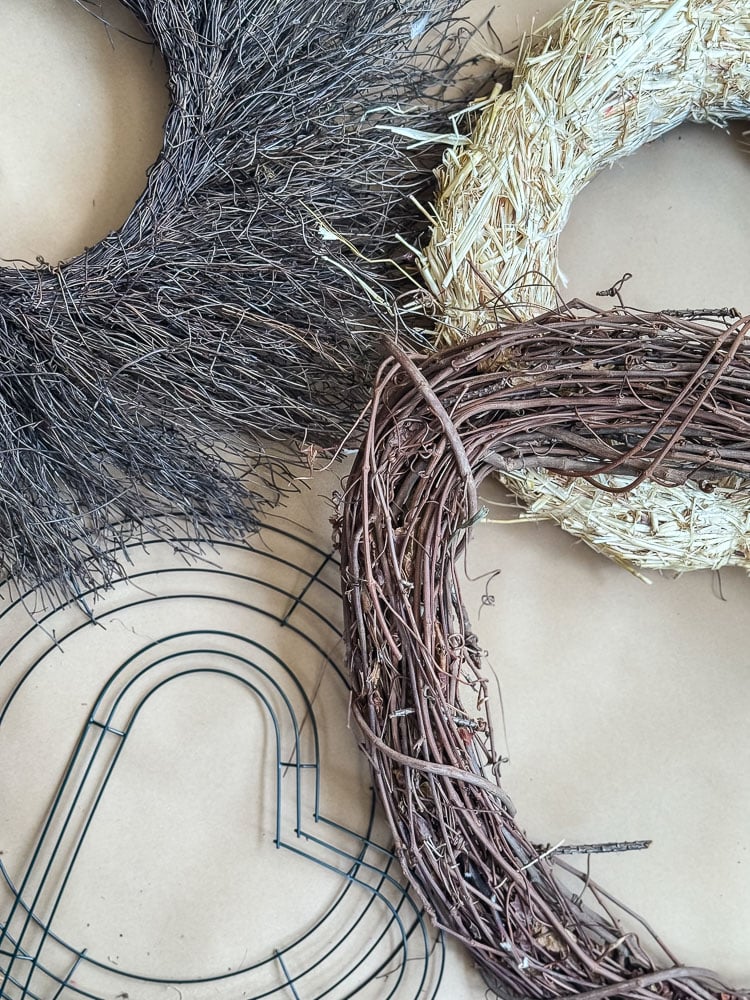
The wreath form is your foundation, the structure everything else is built on. And the choice really does matter, because different forms work better with different materials and different styles. Here’s a rundown of the most common ones you’ll encounter.
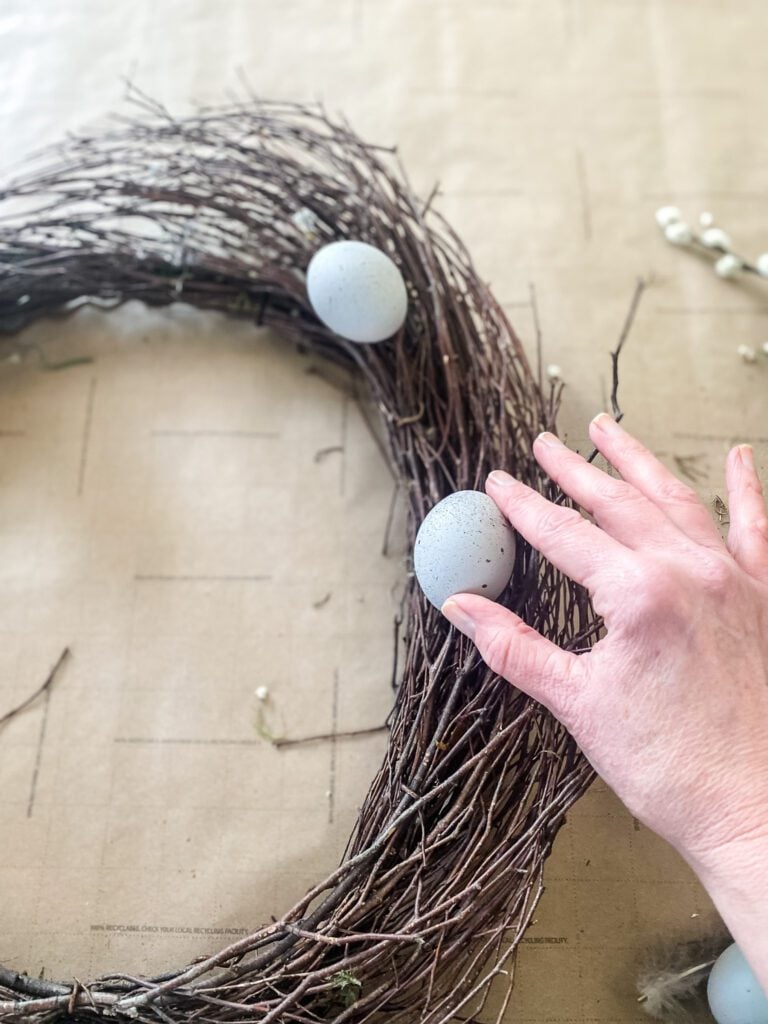
Grapevine

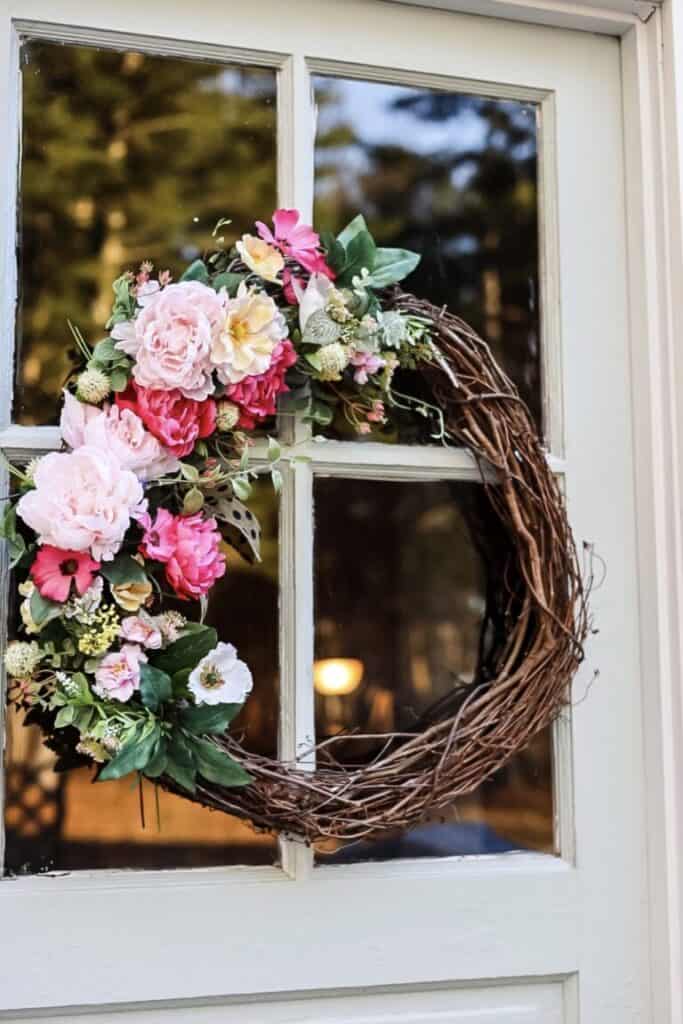
Grapevine is the workhorse of the wreath world, and for good reason. It’s natural-looking, sturdy, and incredibly forgiving to work with. You can tuck stems right into the vines without any glue or wire in a lot of cases. It has a rustic, organic quality that pairs beautifully with dried botanicals, preserved flowers, and even faux stems.
Grapevine forms come in a range of sizes (typically 10″ to 24″ in diameter) and vary quite a bit in density. A tighter, denser grapevine is better for a finished look with fewer gaps; a looser one has more texture and character but may need more material to fill.
If you’re a beginner, a grapevine form is genuinely the most forgiving place to start.
- 18-inch grapevine wreath
- Heart-shaped wreath
- Oval wreath (I love this shape!)

Wire/Metal Frames
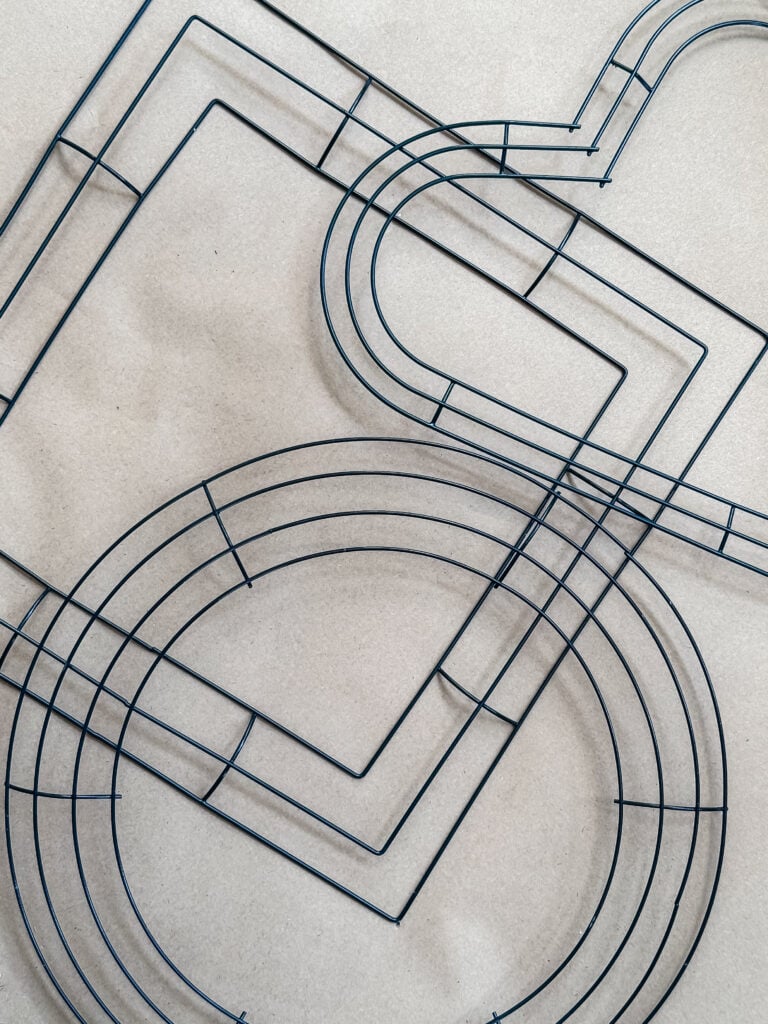
Wire frames are open metal forms, think of a ring or a series of concentric rings held together by crossbars. They’re the go-to form for wreaths where you’re building up layers of material (think lush, full, overflowing wreaths) or wrapping the frame entirely.
You’ll also find shaped metal frames in just about every craft store/dollar store: bunny heads, pumpkins, witch hats, stars, hearts, and more. These are so fun for seasonal projects because the shape does a lot of the work for you. You fill or wrap them the same way you would a round frame, but the silhouette is already built in.
A few things to know about wire frames: they show through if you don’t cover them completely, so they require more material than a grapevine. But they’re also very lightweight and give you a lot of control over the shape and density of your finished wreath. They’re popular for rag, boxwood, eucalyptus, and really any fresh or faux green wreath.


Foam Forms

Foam forms come in two varieties, and they are not interchangeable:
- Floral foam (wet foam): The green foam you’ve probably seen at the craft store. This is designed to be soaked in water and used with fresh flowers. It keeps stems hydrated and holds them in place. It’s not great for anything other than fresh arrangements.
- Dry foam: Lighter in color (often white or brown), dry foam is for dried or faux materials. Stems are poked directly into it and held securely. It’s denser than wet foam and doesn’t crumble as easily.
I’ve used foam forms a handful of times here on the blog: my mixed moss wreath and the hydrangea book page wreath are both good examples of what you can do with them.


Straw Forms
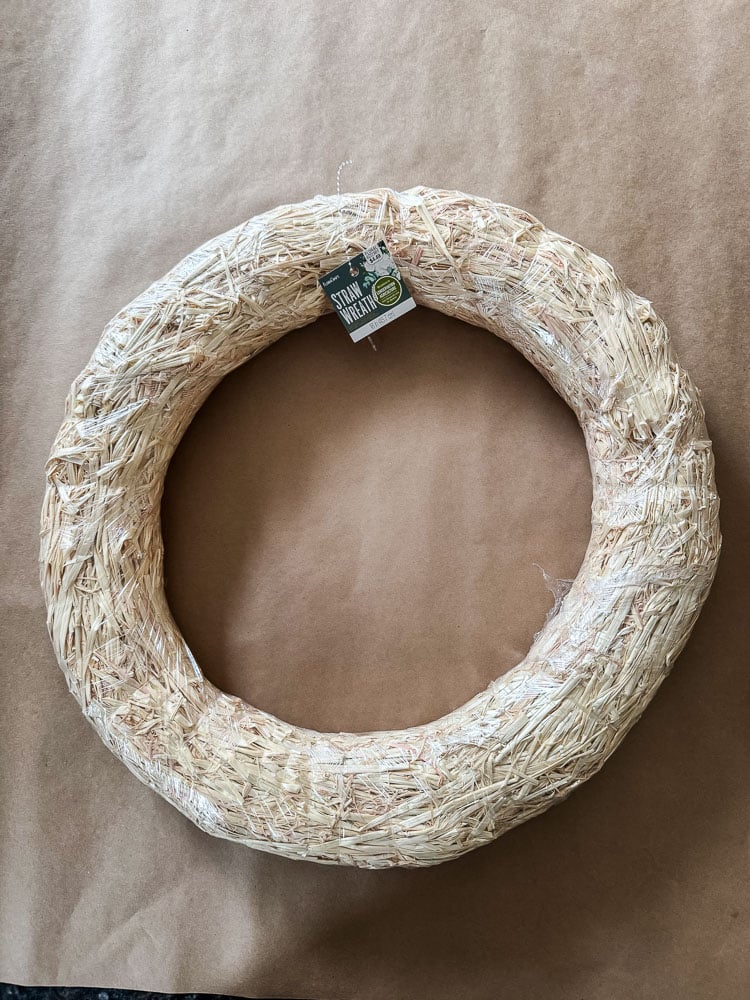
Straw forms are genuinely underrated. They’re sturdy, they have a little more give than foam, and they hold pins and wire beautifully. They’re a great option for dried and faux designs.
They are a fantastic natural base for making a live wreath, too.

Twig /Willow Forms
Twig and willow forms are similar in feel to grapevine but have a more refined, polished look. The weaving is usually tighter and more uniform, which gives you a cleaner base to work with. They tend to run a little more expensive than grapevine, but they’re beautiful for a more elegant dried or botanical wreath.
Willow specifically has a lovely natural color that photographs well if you’re leaving any of the base exposed in your design. I haven’t made a willow wreath because they are $40 at Michael’s...and I am cheap!


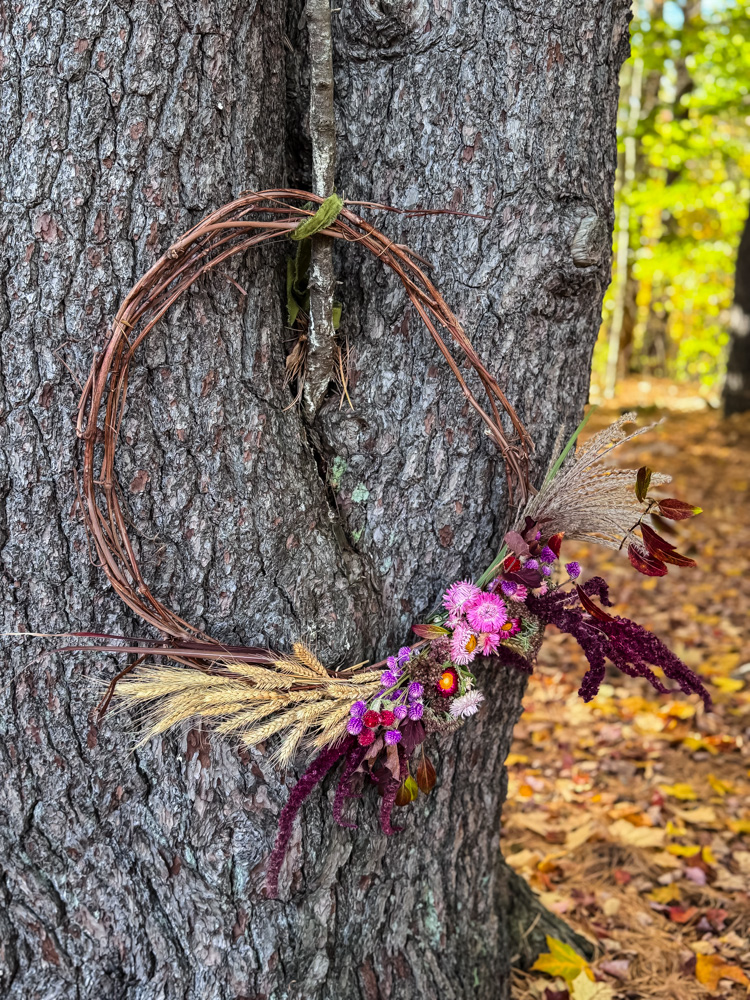
Foraged Vines & Twigs
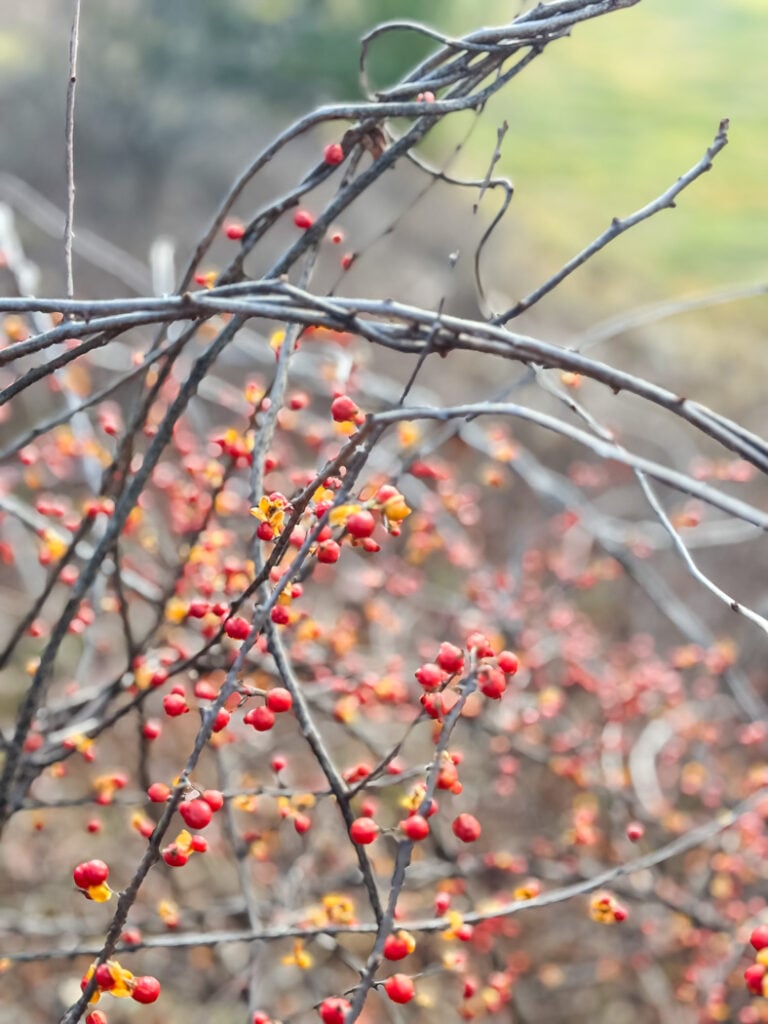
Of course, you can always skip the craft store entirely and make your own form. If you have access to flexible vines: bittersweet, wisteria, Virginia creeper, wild grape, you can coil and shape them into a wreath form while they’re still pliable, then let them dry into shape. I’ve done this with bittersweet vine gathered from the woods behind my house and grapevine from a farm in town, and honestly, the resulting form has more character than anything you’ll find on a store shelf.

The process is simple: gather long flexible stems, coil them into a circle, and weave the ends back into the form to hold the shape. I’ve done a teardrop-shaped wreath and overlapped the ends of the branches and secured them with floral wire. The natural twists and imperfections are part of the charm. Once dry, you treat it exactly like a store-bought grapevine form.
Wood Rings / Hoops

Wood, MDF, and metal hoops are a little different from the other forms on this list. They’re a solid ring rather than a textured or open base, which gives you a clean, modern foundation to work with. You’ve probably seen them all over Pinterest in boho-style designs where flowers or greenery are arranged loosely across the bottom of the ring, leaving a good portion of the wood/metal exposed as part of the aesthetic. That minimalist, airy look is really the hoop’s signature style.
But they’re more versatile than that one look suggests. I used a wood ring as the base for my dried orange slice wreath, and it was perfect. The smooth surface gave me a clean edge to work against.

Quick Guide
Which form is right for your project? Here’s the short version:
- Grapevine → dried, faux, mixed botanicals, rustic or organic styles
- Wire frame → fresh or faux greenery, lush layered designs
- Foam → dense, structured designs with precise placement
- Twig/Willow → dried, botanical, more polished natural look
- Foraged Vine/Twigs→organic, looks great with greenery or flowers
- Hoops→ clean, modern looks
Part 2: Floral & Botanical Materials
This is where things get fun- and where it’s easy to get overwhelmed. Broadly, your materials will fall into one of three categories: fresh, dried, or faux. Each has its place, and understanding the difference will save you both money and frustration.
Fresh / Living Materials

Fresh materials are exactly what they sound like: real, living plants that you’re using at or near their peak. Think spring bulbs, pansies, eucalyptus, and greenery clippings or garden flowers. Fresh wreaths are gorgeous and fragrant, but they have a limited lifespan. Depending on the materials, you may just get a few weeks for something like a hyacinth bulb.
If you want to extend the life of fresh stems in a design, look for floral water tubes (sometimes called water picks): small plastic tubes with a rubber cap that hold a small amount of water for individual stems. They’re inexpensive and genuinely useful for fresh arrangements.
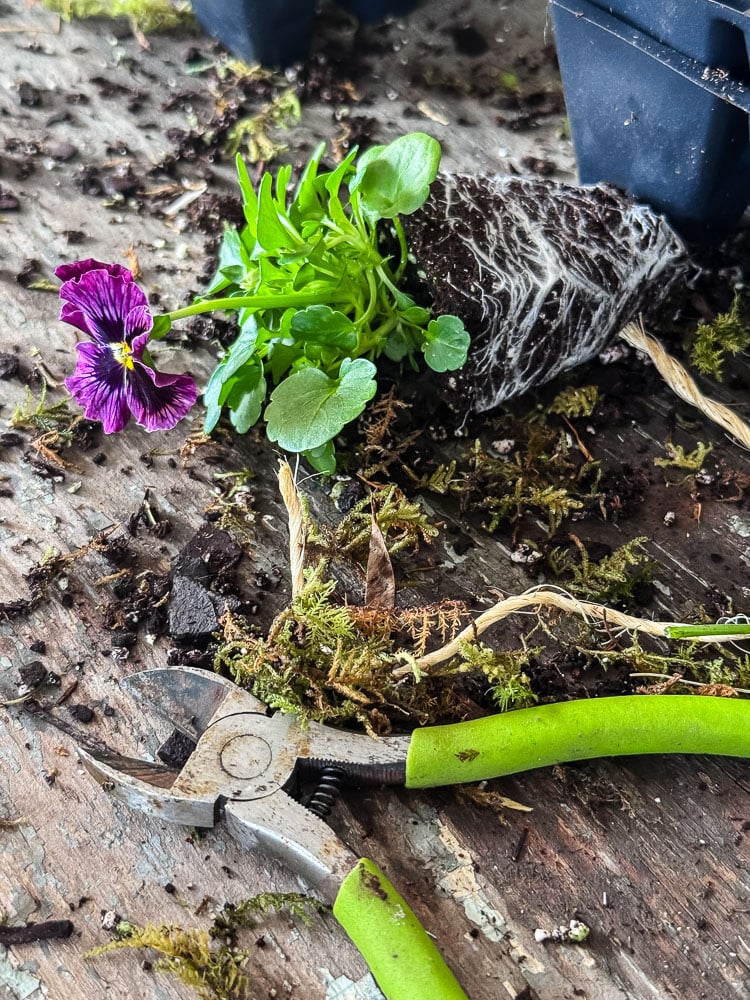
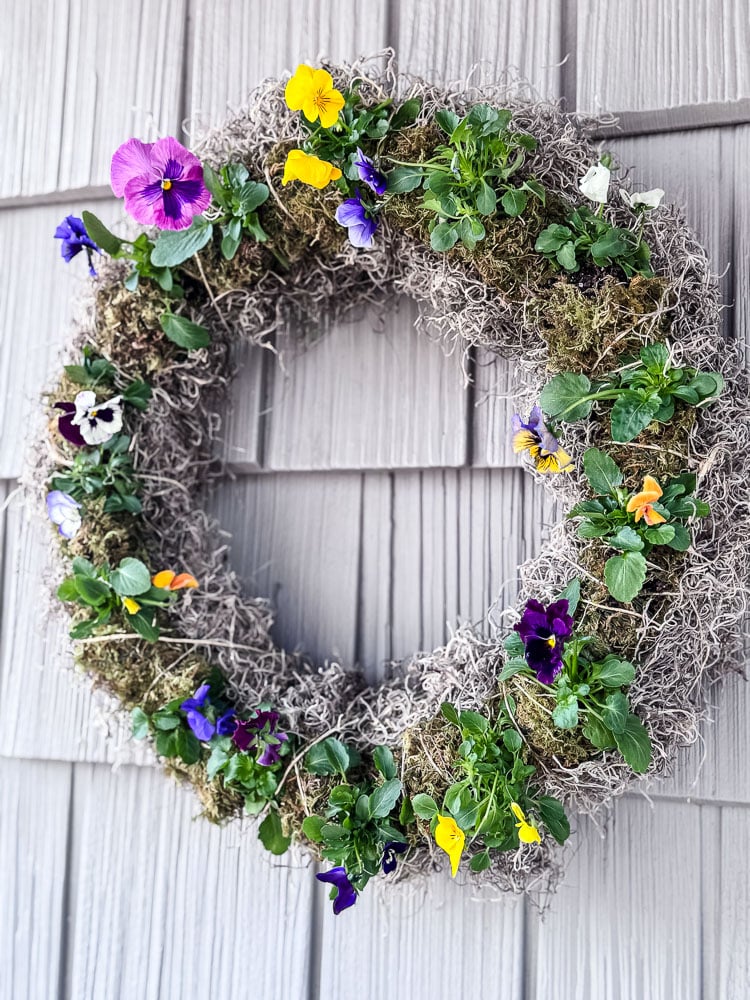
Fresh materials also include living plants like a living pansy wreath, where plants are actually rooted in the form and will continue to grow. These are a different beast entirely and are absolutely worth trying if you want something that lasts a full season outdoors.

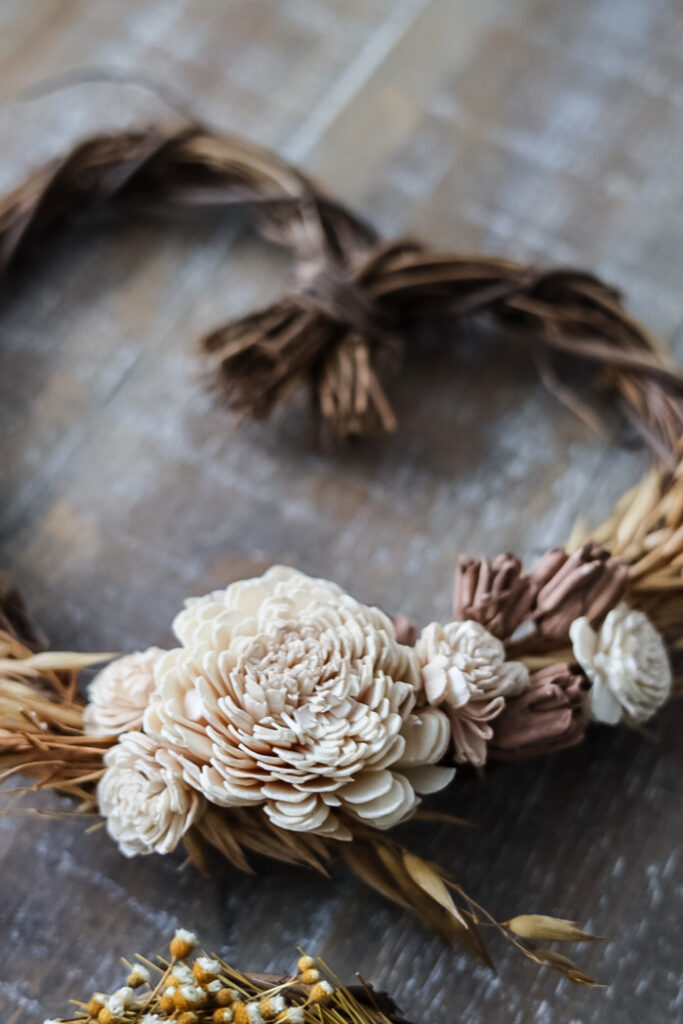
Dried Materials
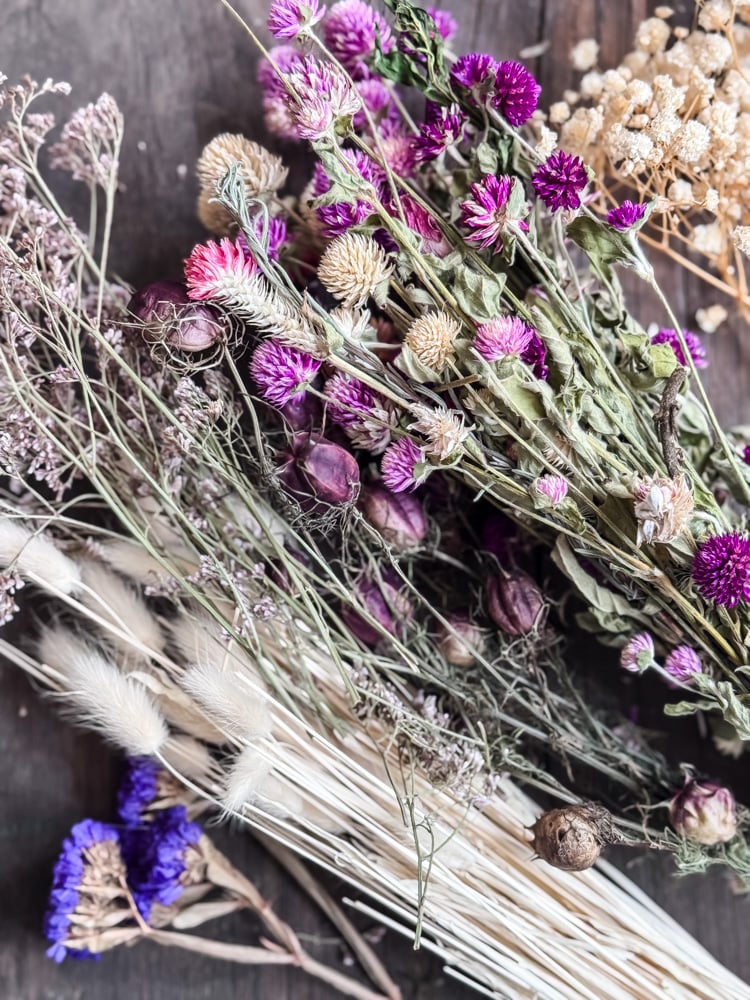
Dried botanicals are my personal favorite category and the backbone of so many of the wreaths I make. The appeal is obvious: they’re long-lasting, they’re beautiful, and if you grow your own, they’re essentially free.
- Air-dried flowers and stems: lavender, statice, strawflowers, ammobium, grasses, seed heads. Most air-dry beautifully with almost no effort (hang upside down in a dry spot and wait).
- Purchased dried stems: you can find these at craft stores, Trader Joe’s, and sometimes even your local grocery store’s floral dept.
- Seed heads and pods: nigella, poppy pods, and lotus pods. These add incredible texture and are very long-lasting.
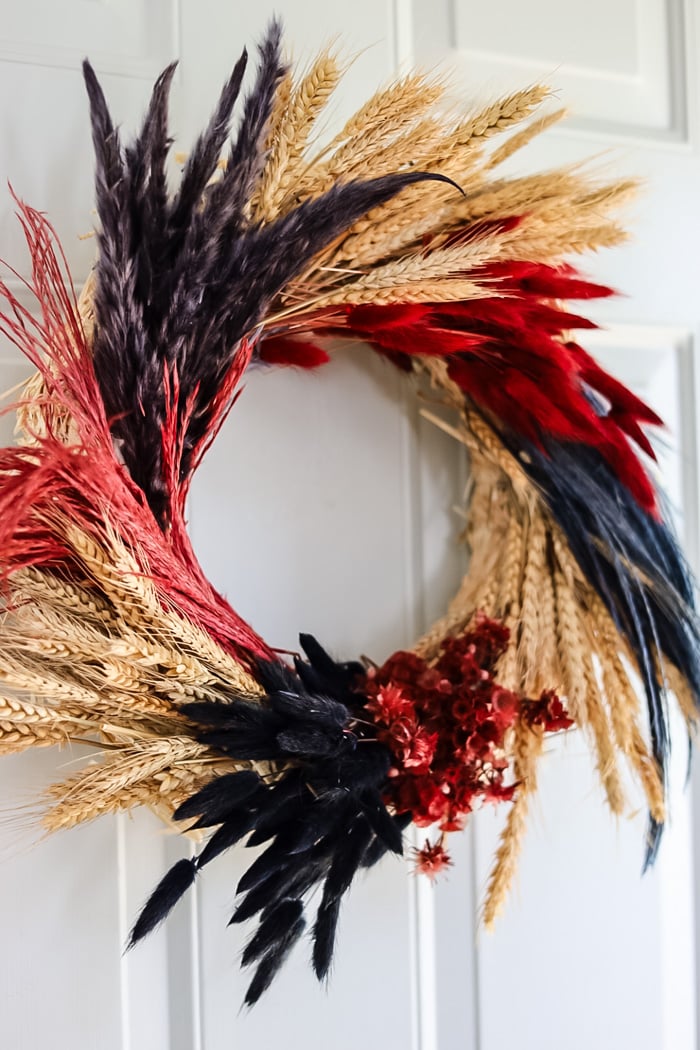
- Dried grasses and pampas: bunny tail grass, pampas, wheat, oats. These give movement and a soft, airy quality to a design.
- Dried citrus slices, cinnamon sticks, pinecones: these fall more into the “accent” category but are staples for fall and winter wreaths.
One thing I’ll mention: dried materials are more fragile than faux, and some will fade over time, especially if placed in direct sunlight. That’s part of their charm, but it’s worth knowing going in.
Faux Materials
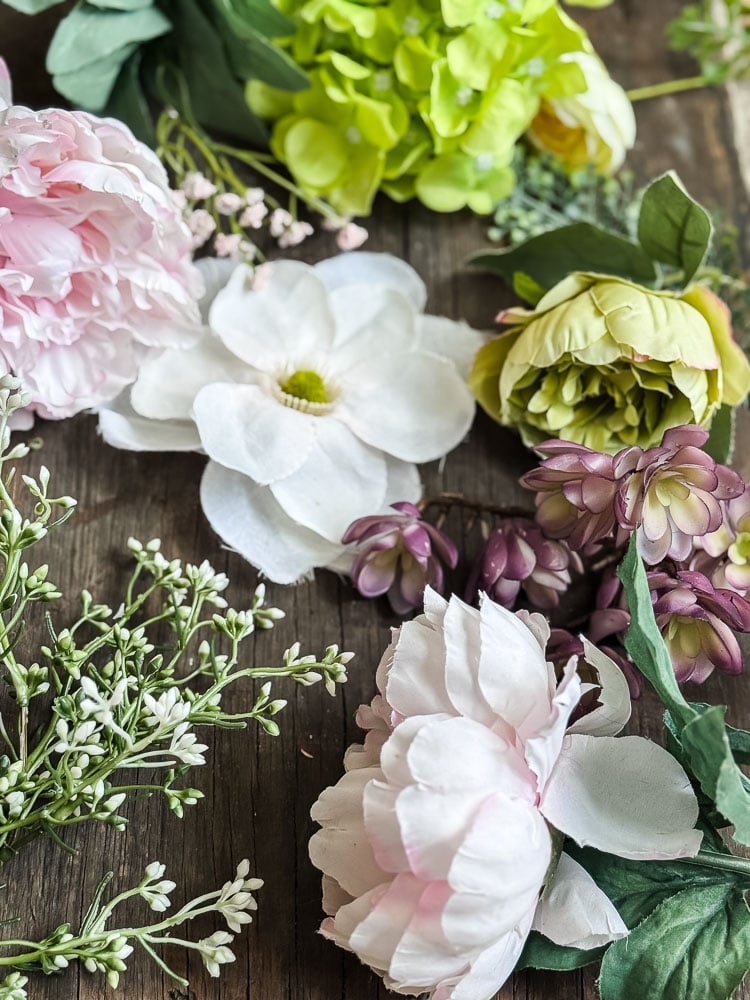
Faux has gotten a genuinely bad reputation in some circles, and I think that’s a little unfair. Not all faux is created equal, and when it’s good, it’s really good. The key is knowing how to spot quality.
When you’re evaluating faux stems, look for:
- Realistic color variation: good faux greenery has lighter and darker tones within the same leaf, just like real plants. If it’s a single flat color all the way through, put it back.
- Flexible stems: quality faux stems have wire in them that lets you bend and shape them. Stiff plastic stems that won’t bend are usually a sign of lower quality.
- Texture: run your fingers over the leaves or petals. Better quality faux has texture that mimics the real thing; cheap faux feels plasticky and smooth in a way that’s obvious up close.


When does faux actually make sense? Honestly, for a lot of situations. An outdoor wreath that will see sun and rain? Faux holds up in a way that dried simply won’t. A wreath you want to pull out and reuse year after year? Faux is your friend. A large statement piece where the cost of enough dried material would be high? Faux keeps it budget-smart. There’s no shame in mixing faux and real, either. Faux greenery as a base with real dried accent pieces layered on top is a very practical and beautiful approach.
Pro Tip: If your faux flowers arrive squished from shipping (it happens), a hair dryer on a low heat setting can work wonders. Hold it a few inches away and gently warm the petals. They’ll soften, and you can coax them open with your fingers. It also works on flowers that have just been stored too long and lost their shape. Give them a minute to cool and reset before you start arranging.


Part 3: Attachment & Mechanics
This is the section nobody talks about, and it’s the one that will make the biggest difference in how confident you feel as a wreath maker. Understanding your tools and attachment options and when to use each is honestly the difference between a wreath that looks polished and one that looks like it’s about to fall apart (I say this from experience).
Making The Cut: What You Need
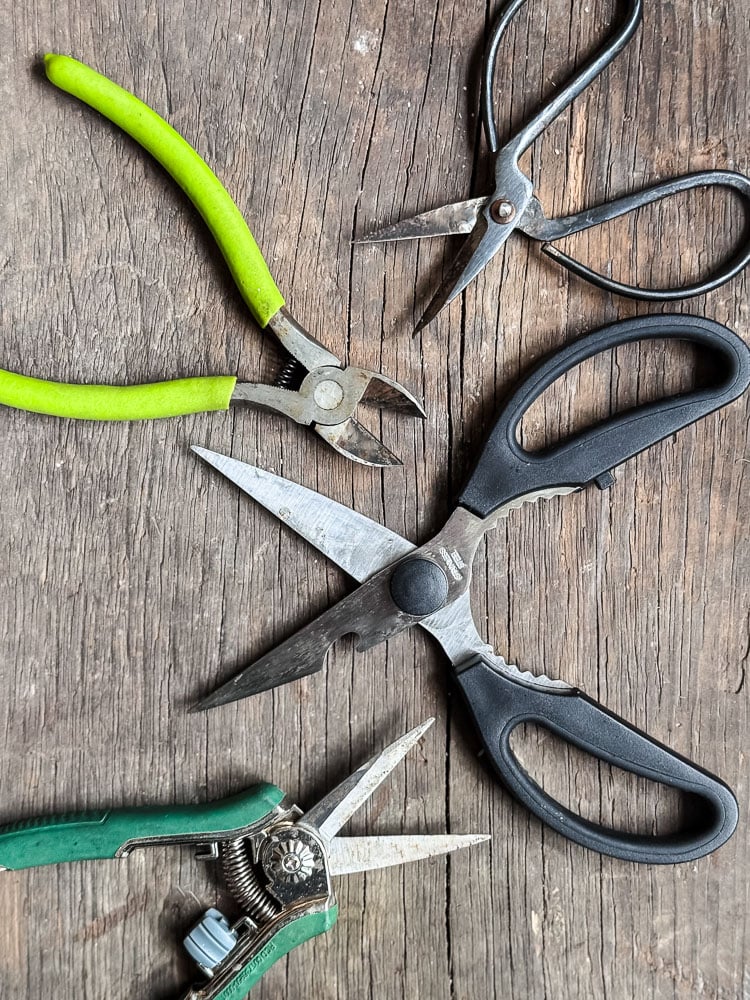
This might seem obvious, but having the right cutting tool for the right material makes a real difference — and using the wrong one is a good way to ruin a pair of scissors.
- Scissors: You want a dedicated pair for floral and craft work, separate from your fabric scissors and definitely separate from your kitchen scissors. Floral stems, wire-wrapped faux stems, and ribbon will dull a blade quickly, so don’t sacrifice a good pair.
- Floral snips: These are small, spring-loaded scissors designed specifically for cutting fresh and dried stems. They’re incredibly precise and easy to control, which matters when you’re trimming a stem to exactly the right length. If you do any amount of fresh or dried work, a good pair of snips is worth having.
- Wire cutters: Essential if you’re working with floral wire, faux stems with heavy wire inside, or metal floral picks. Don’t try to cut wire with scissors — you’ll nick the blade, and it’s just not worth it. A basic pair of wire cutters from the hardware store works perfectly fine.
Hot Glue
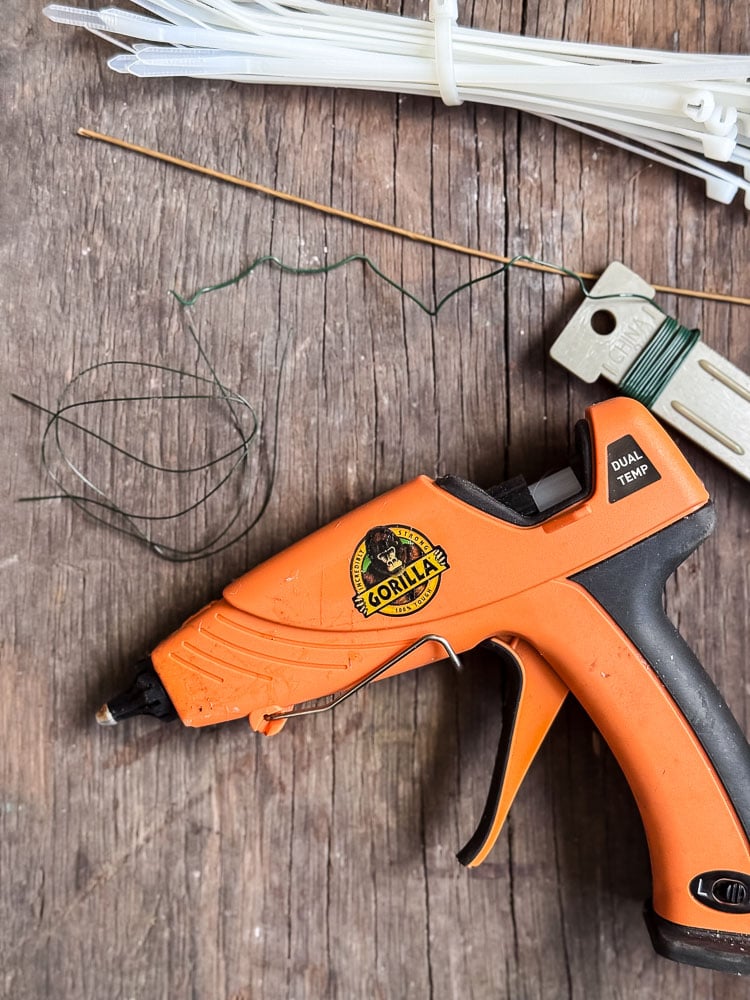
Hot glue is the MVP of wreath making. It’s fast, it’s strong, and it works on almost everything. A few things to know:
- Temperature matters. A low-temp glue gun is gentler on delicate dried materials and significantly reduces your burn risk. High-temp glue is stronger and works better on heavier materials and foam. Many crafters end up with both.
- Glue stringing is a fact of life. Those little cobwebby strings that appear as you work? Normal. Let them dry completely and then brush or pick them off. Trying to remove them while they’re warm just makes it worse.
- Work in small sections. Hot glue sets fast! You don’t have a lot of time to adjust once you’ve placed something. Glue a small area, place your material, hold for a few seconds, then move on.
I swear by my Gorilla hot glue gun & I think their glue sticks are the best from my crafting experience, much stronger than the others I have used over the years.
Floral Wire

Floral wire is used to attach things that can’t be glued or need extra security: bundles of stems, heavy elements, anything going onto a wire frame. It comes in different gauges, and the gauge numbers tell you the thickness:
- Lower gauge number = thicker, stronger wire (good for heavier materials or wiring bundles onto a form)
- Higher gauge number = thinner, more flexible wire (good for delicate work, wrapping small stems, or securing lightweight elements)
Paddle wire (wire on a spool that you unroll as you work) is incredibly useful for wiring bundles of greenery or dried stems onto a form continuously. Cut wire (pre-cut lengths, usually sold in a bundle) is better for attaching individual elements.
Others You May Come Across (But I don’t typically use)

Floral Tape
Floral tape is one of those things that looks a little unremarkable until you understand what it actually does. It’s a self-sealing, slightly stretchy tape that bonds to itself when wrapped, not to your hands, not to surfaces, just to itself and to stems. It’s used to bind stems together, extend wire stems, and create more secure attachment points.
The key to floral tape is stretching it as you wrap. It won’t stick if you just press it on; you have to pull it taut as you go. Once you get the feel for it, it’s a really useful tool.
Floral Picks
Floral picks are small wooden or plastic sticks with a fine wire wrapped around one end. They’re used to add a wire stem to items that don’t have one like pinecones, ornaments, ribbon loops, dried citrus slices, anything that needs to be “picked” into a foam or straw form.
To use a pick, place the item at the top of the stick and wrap the wire around both the pick and the item’s stem (or base) to secure it. Then push the pointed end of the pick into your form. Simple, but very useful.
U-Pins / Greening Pins
These are small U-shaped metal pins, similar to bobby pins but sturdier. They’re designed for foam and straw forms, and you use them to pin stems, moss, ribbon, or any flat material directly into the surface. If you’re working with foam or straw, a pack of greening pins is helpful.
Zip Ties
The unglamorous secret weapon. If you’re attaching something heavy, something that’s going to be outdoors, or something that hot glue really isn’t going to hold, a zip tie will. They’re invisible once you tuck them in, and they are not going anywhere. Don’t overlook them.
Part 4: Finishing Touches & Hanging Out
You’ve built your wreath, now let’s talk about the details that actually make it look finished and keep it on your door.
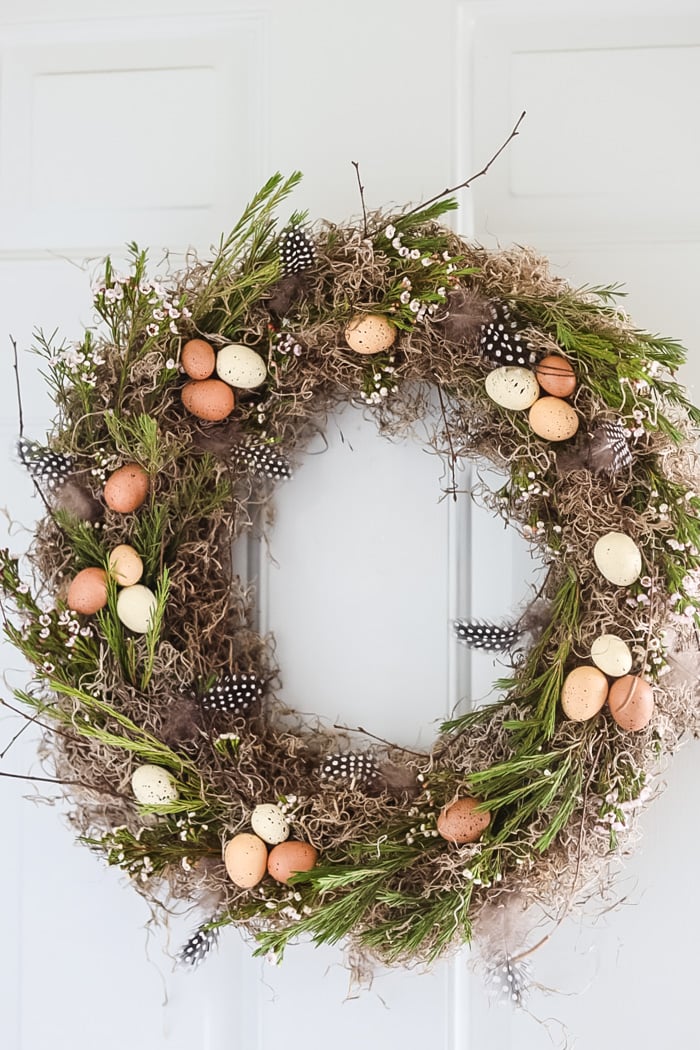
Moss
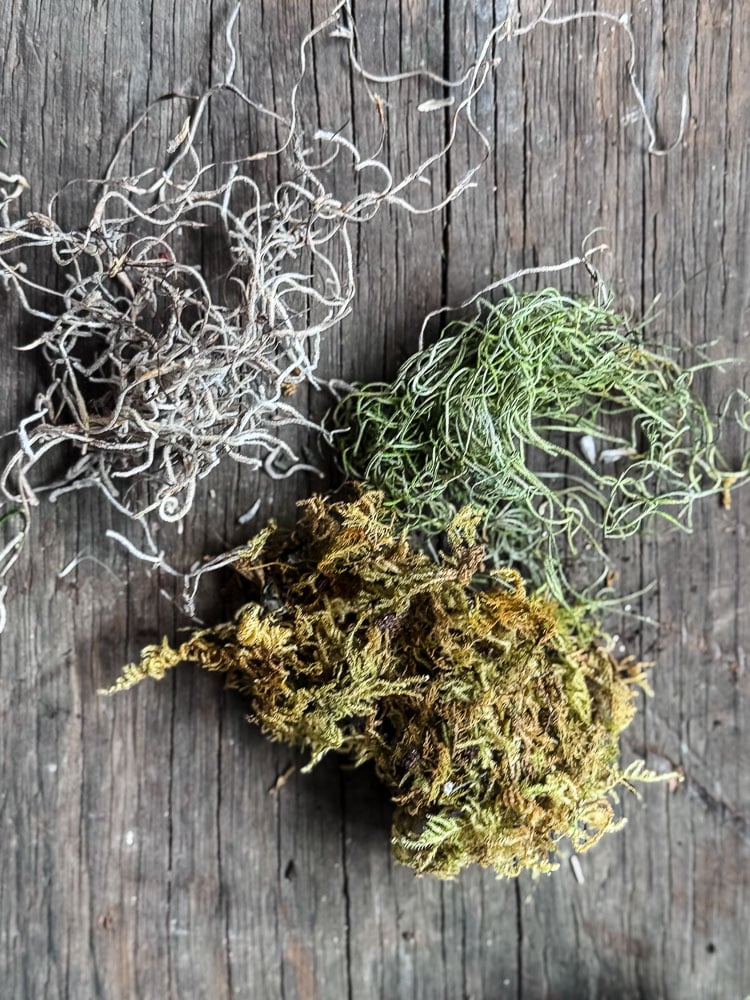
Spanish moss and preserved sheet moss are genuinely underrated wreath-making staples, and I’d argue they belong in every wreath maker’s supply stash. Their primary job is gap-filling. Anywhere your base is showing through where you don’t want it to, a little tucked or glued moss fixes it instantly. But moss also adds texture, depth, and a lovely organic quality to a finished wreath. I reach for it on almost every project at some point.
Spanish moss has that soft, wispy, drapey quality that works beautifully in boho and natural designs. Preserved sheet moss is denser and more structured, great for covering larger areas cleanly. Both are inexpensive, widely available, and last indefinitely. Grab both and keep them on hand- you’ll use them more than you expect.
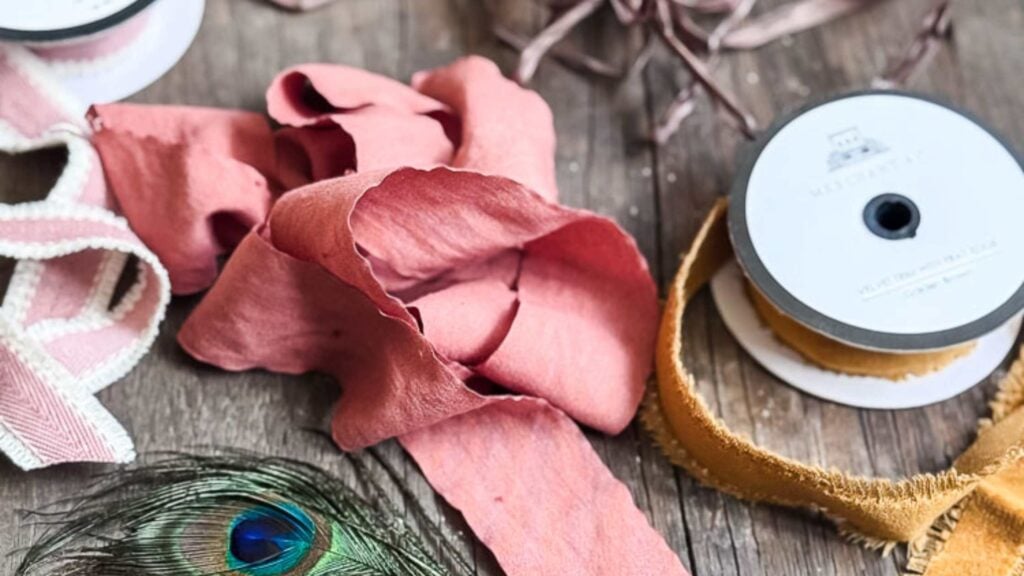
Feathers
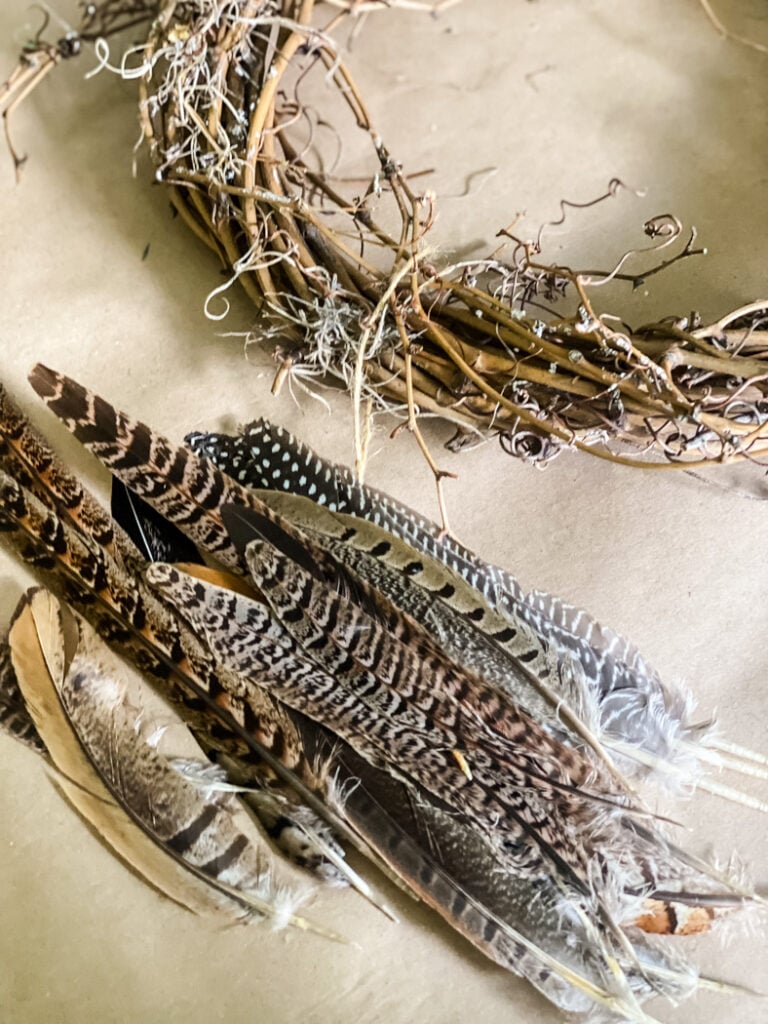
This one might surprise you, but a pack of feathers is one of the simplest ways to make a wreath look genuinely designer. There’s something about the texture and movement of feathers that reads as intentional and elevated in a way that’s hard to put your finger on! They just make a wreath look more considered. Tuck a few into a fall wreath, a boho dried arrangement, or even a holiday design and see what happens. They’re inexpensive, they come in natural tones, and they take about 30 seconds to add. Highly recommend keeping a pack in your supplies.
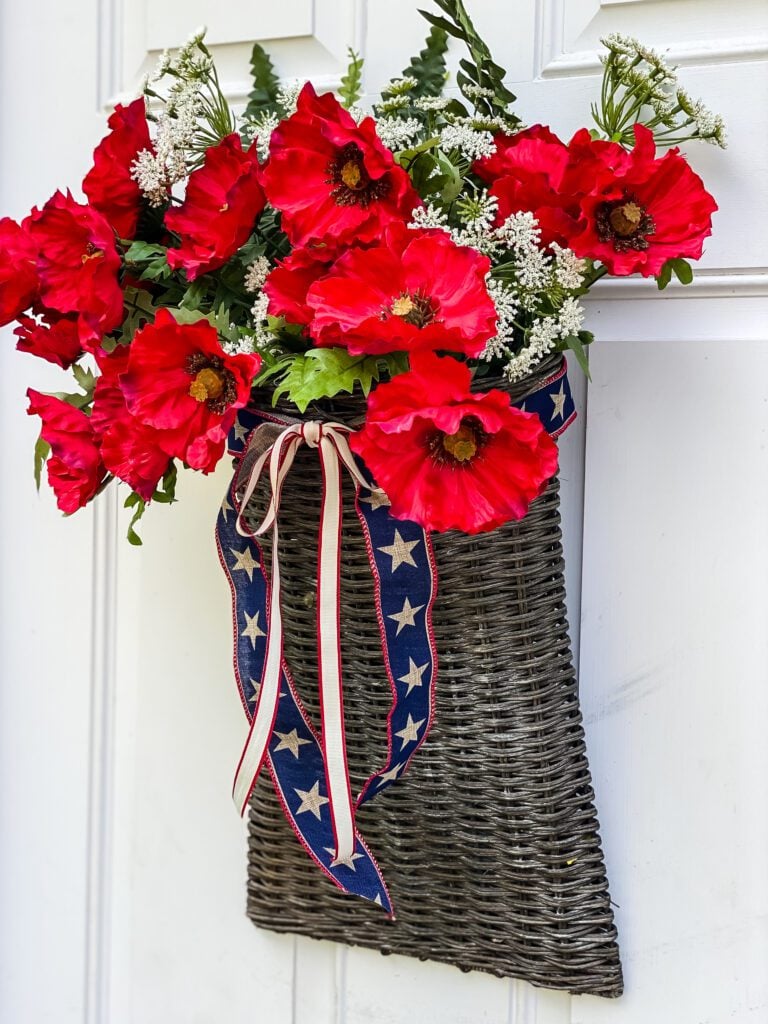
Ribbon
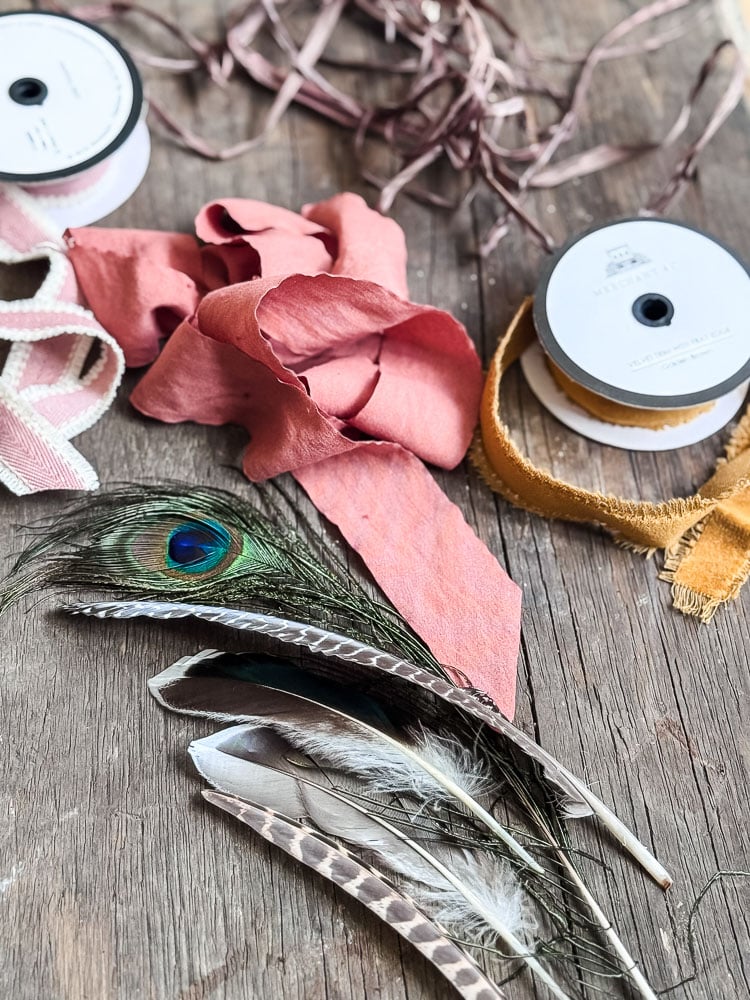
Ribbon is where you can really personalize a wreath, and the type you choose makes a big difference in how it holds up and how it photographs.
- Wired ribbon is your best friend for wreaths. The wire running along both edges holds its shape. Bows stay bowed, loops stay looped. It also photographs beautifully. Look for wired ribbon in fabric and craft stores; it’s worth paying a little more for quality.
- Non-wired ribbon can work for simple loops or hangers, but bows will droop over time, especially outdoors. Save it for indoor use where longevity is less of a concern.
- Burlap, linen, velvet, buffalo check: the texture of your ribbon can really define the style of the whole wreath. Burlap and linen read casual and natural; velvet feels elegant; buffalo check is classic and farmhouse.


Weaths Featured
I love using chiffon ribbon for a casual, more modern-looking bow on my wreaths. Hobby Lobby is my source for the best-priced velvet ribbon on the market. I have used their frayed-edged ribbon in countless projects here on the blog, and when it’s on sale, it’s about a $2 roll!
Wreath Hangers
How you hang a wreath depends on your door and your wreath’s weight. The most common options:
- Over-door wreath hooks: the simplest solution. These hang over the top of the door and have a hook on the front where the wreath hangs. They come in different lengths to account for different door thicknesses and wreath sizes. Good for most situations.
- Command strips / adhesive hooks: great for interior walls and doors where you don’t want to put a nail. Check the weight limit carefully. Most standard command hooks hold up to about 5–7.5 lbs, which covers most wreaths.
- Magnetic Hanger: If you have a metal front door, this is a great option! Holds heavy wreaths securely.
You’re More Ready Than You Think
And can I say something to my friends who don’t consider themselves crafty? Wreath making is genuinely one of the best places to start. There’s no cutting in a straight line, no precise measurements, no waiting for anything to dry flat. You’re layering things onto a form until it looks good to you… and it almost always looks good. If you’ve ever told yourself you’re not a DIY person, I’d love for you to try this one first.
Here’s the thing about wreath making: it looks more complicated from the supply aisle than it actually is once you’re at the table. You don’t need every tool or every form to get started. A grapevine wreath form, a hot glue gun, some dried stems, and a roll of wired ribbon will take you a long way.
The goal of this guide isn’t to send you out to buy everything on this list; it’s to give you enough context that you can look at what’s in front of you and know what you’re working with. That confidence is half the battle.
Ready to put it to use? You can scroll through most of my wreaths and get the tutorials below, just click the ‘see them all’ button!
40+ creative
DIY Wreath
tutorials
See your projects featured! If you are inspired by this or any of my other DIY projects, I would love to see them and add you to the Reader’s Spotlight gallery. Send a photo to me at jennifer@cottageonbunkerhill.com
xo, Jennifer
my crafting must-haves
shop my amazon store
Love projects like this? Don’t miss out! Join my newsletter family for more cozy, budget-friendly DIY ideas delivered right to your inbox. You’ll get exclusive tips, early access to tutorials, and all the inspiration you need to make your home feel handmade and heartfelt.


I enjoyed this post. You would love my mother’s wreath-making area. She has a section of a two-story barn-style garage. My mother used to make wreaths as a floral designer. After she retired from the florist business, she still enjoyed making them to sell. Guess that’s why I enjoy making them too. You have so many great tips in this post! Hugs, my friend.
Thanks Tammy~ I’d love to see her wreath area, I bet she has some good tricks & tips up her sleeve!
This was a fun read! My mom and I made wreaths for every season when my kids were small. I had a source for wild grape vines right down the road, and we worked on the big back deck off the kitchen. Some of my fondest memories, because mom is gone now and my boys are all grown up. Thank you!
Oh, Nancy, I love that! What a lovely memory to cherish of your Mom. ~hugs, Jennifer
Jennifer – What an amazing, comprehensive guide to wreath-making, thankyou! The tree of life wreath has really called out to me, and I’m going to try to make it! I love that you use resources from Dollar Tree – the store near me has pretty decent craft supplies so I’ll check it out. I had a question, have you ever made one of those boxwood wreaths?