
Is there anything more welcoming than a burst of spring at your front door? After a long winter, my entryway felt dull and heavy. I wanted a touch of seasonal joy that was light, fresh, and full of life—without the price tag of a boutique floral wreath. This simple DIY Pretty Spring Wreath was the perfect solution. It’s all about com
This post includes affiliate links; you can read my disclosure policy here.

Don’t worry…I’m not going to try and shove ALL those flowers into this wreath!!! I will be using them for a few different projects for Spring.
What You Will Need:
The exact flowers that I used when I made this wreath are no longer available, but I have sourced the closest matches to the original flowers and colors.
How To Make This Wreath
For this wreath, I’m using a 24″ grapevine wreath, but they can be hard to find, so an 18-inch wreath would work too. I just wanted a big, bold statement.
My formula for putting a wreath together is to start with the showstopper flowers that I want to be the centerpiece of the wreath.
For this wreath, it is the bright pink and light pink peonies. I just LOVE peonies!!

An odd number of stems is more visually pleasing. For the showstopper flowers, I used 3 of the big, bright, and light pink peonies.
Floral wire cutters are the best thing to use for cutting each stem away from the bunch. Then I find the spot I want the flower and tuck the wire into the grapevine to secure it in place.
I don’t use hot glue in case I want to take the wreath apart and use the stems somewhere else next year.

After I had the peonies in place, I started to fill in around them with some of the other flowers.

I’m using yellow and white flowers to play off the pinks. I tucked in yellow anemone flowers along with a few white poppies.

Oh, these little pink rose picks remind me of beach roses! They have some eucalyptus attached to them, too. One went at each end of the wreath. (These pink rose stems are the closest I can find now)

To finish filling in the wreath, I wanted to add a couple of different textures. The white thistle balls and a few sprigs of colored lavender added some more interest to the Spring wreath.
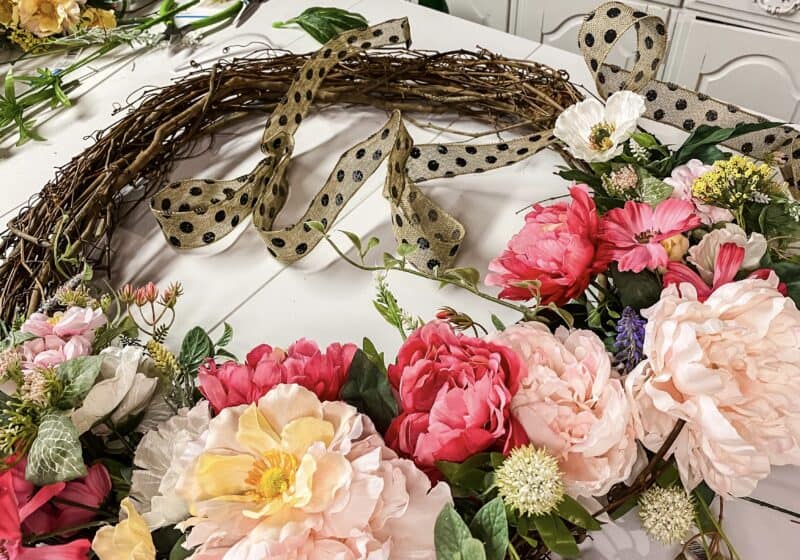
Lastly, I added a ribbon. I picked a burlap with black dots; an unexpected choice, but it gives a little pop. I grabbed this ribbon at the Dollar Tree.

For this simple bow, I gathered the ribbon and made 3 equal-sized loops then secured the bottom with a pipe cleaner. Then used the pipe cleaner to attach the ribbon to the grapevine wreath.

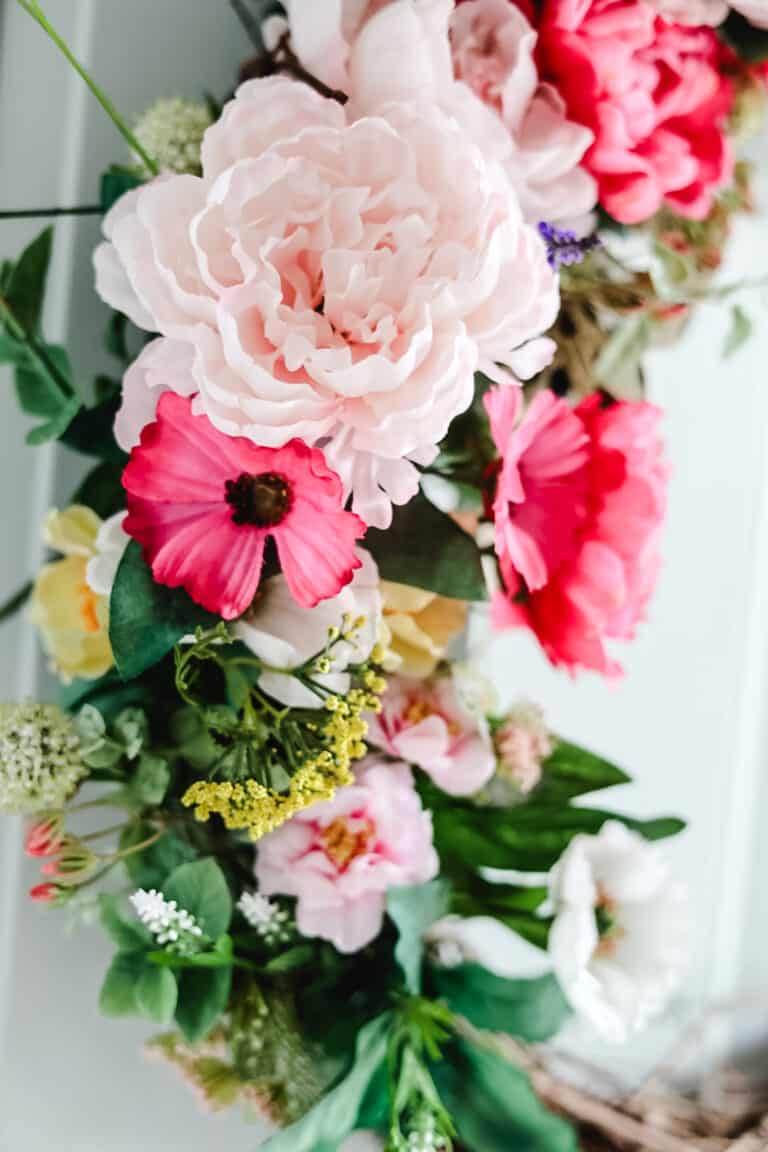
Finished Spring Wreath
Isn’t it pretty?? It’s so easy to make a really stunning wreath on your own…have you seen some of the prices for those Etsy wreaths??? You can make this beauty for a fraction of the cost and in under 20 minutes!!

And that’s all there is to it! Hanging this new wreath on my door instantly lifted my spirits and made our entryway feel fresh and welcoming. It’s such a simple way to celebrate the season
See your projects featured! If you are inspired by this or any of my other DIY projects, I would love to see them and add you to the Reader’s Spotlight gallery. Send a photo to me at jennifer@cottageonbunkerhill.com
xo, Jennifer
my crafting must-haves
shop my amazon store


The colors and types of flowers you chose are so pretty!
Thanks Marie!! I’m crushing over the pink colors; definitely think it will be my “color” for my planters this year too!!
I think pink peonies and same day delivery are the keys to my heart. Beautiful wreath Jennifer!
This is gorgeous, Jennifer! I love the mix of pastel and brights.
I’m crushing on the colors too!! I think I’m going to use this combo in my planters this year.
I love those peonies and those thistle balls! Beautiful job!!
Yes, Grab some at Michael’s! I’m so impressed with the peonies this year and those little balls add so much detail I’m going to go grab a couple more bunches.
Jennifer, this wreath is gorgeous. Love all of the colors.
Thanks Tammy!! I think I’m going to do bright pink in my planters this year too…when it’s warm enough here!!
You did an amazing job on this wreath! I think the ribbon is perfect! It adds just the night touch! Make sure the squirrels stay away from it!! 😉
OMG!!I was dreaming about crazy sqirrels last night!!
Your wreath is lovely. Peonies are my favorite.
Dorothy, Mine too!! It’s my favorite flower in my garden!!
What a beautiful wreath Jennifer! I just found your blog and it’s lovely! Thanks for the great tutorial and inspiration!
Thank you so much Barbara!! I appreciate that!