Transform old books into a stunning floral masterpiece! Learn how to create a beautiful and eco-friendly book page hydrangea wreath. This easy DIY project is perfect to use year-round and for any season.
Transforming Pages into Petals: A DIY Book Page Hydrangea Wreath
I’ve always loved the idea of repurposing old books. There’s a certain magic in breathing new life into something that was once loved and read. Today, I’m excited to share a project that’s both beautiful and sustainable: a DIY book page hydrangea wreath.

This project is perfect for bookworms and crafters alike. It’s a great way to add a touch of vintage charm to your home decor, and it’s incredibly satisfying to see how something as simple as a book page can be transformed into a stunning wreath. So, grab your favorite old book and let’s get started!
This post may contain affiliate links, which means I may earn a small commission if you make a purchase through my links, at no extra cost to you. Read my disclosure policy here.
Materials List

- Foam wreath form (I’m using a 14″)
- Wide ribbon
- 3.5 inch flower paper punch
- Old book
- Hot glue gun and glue sticks
- Pencil
Step-by-Step Tutorial
This wreath is simple to make but requires patience because it takes a couple of hours to make a wreath this size. I personally love to do repetitive craft projects! This one is perfect to make while having a good show playing in the background. (I put on the new Martha Stewart documentary on Netflix; I definitely recommend that one!).
No matter the size of the foam wreath form you choose, the steps involved in creating this wreath will be identical.
1. Preparing the Wreath Form:
To create this beautiful book page hydrangea wreath, you’ll need a foam wreath form. The rounded shape of the foam provides the perfect base for attaching the paper flowers. You can use any size wreath form, but for this project, I’m using a 14-inch form.
Before adding flowers, you will need to cover the foam with ribbon. This step is essential as the hot glue can potentially melt the foam and too make sure the green doesn’t peek through. A wide, neutral-colored ribbon, such as burlap, works well. However, feel free to use any ribbon you prefer. For this wreath, I am reusing a length of wide burlap ribbon taken off of an old project.

To begin, wrap the foam wreath form with your chosen ribbon. Start anywhere on the wreath and secure the end of the ribbon with a few dots of hot glue. Continue wrapping the ribbon around the form, keeping it taut. Once the entire wreath is covered, cut the excess ribbon and secure the end with hot glue.

2. Punching the Book Page Flowers
Grab an old book that you no longer need or find one at the thrift store. The size of the book will determine how many paper flowers you can punch out of each page of the book.
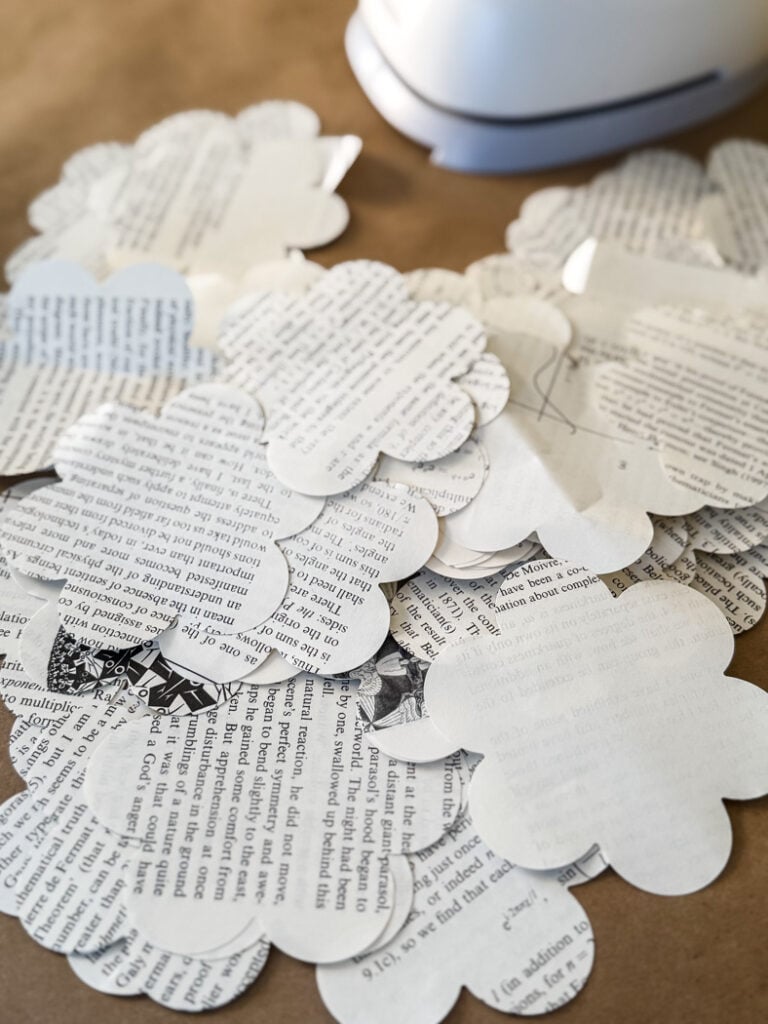
To create this wreath, you’ll need a large 3.5-inch flower-shaped paper punch. This tool, typically priced around $20 on Amazon (I did check the other big craft stores but couldn’t find a flower punch this large), is essential for cutting out the flower shapes from your book pages. While a large circle punch could be used, it won’t produce the same ruffled, petal-like effect.

Prepare to punch out hundreds of flower shapes from your chosen book. I started by punching about 200 pages and could punch 2 flowers on each sheet of paper. The punch is strong enough that you will be able to do 2 or 3 book pages at a time and this task is easy and doesn’t require hand strength to use the punch.
Honestly, I stopped counting the paper pages as I was making the wreath, if I ran out of paper flowers I just punched a few more pages and continued on making the wreath.

3. Assembling the Wreath:
Once you’ve made a stack of paper flowers, it’s time to assemble the wreath. While the process is simple, it can take a couple of hours to fully cover the wreath with flowers. Plug in your hot glue gun and if it has a heat setting put it on low.

1.) To shape your flower, take an unsharpened pencil and a paper flower. Center the flower on the flat end of the pencil and gently smooth the paper around it. Then, while holding the paper, twirl the pencil to curl the petals

2.) Add a drop of hot glue to the bottom of the paper flower and adhere it to the wreath form, gently press to hold in place. Start with the outer edge of the wreath form, gluing on the twirled flowers.
When working with hot glue make sure to protect your fingers from burning by using silicon fingertip protectors.

3.) Once the outer edge of the wreath is covered in the paper flowers move on to the smaller inner circle of the wreath form.

4.) Next, begin the second row of flowers, placing them close to the first row. To achieve a full, finished look, ensure the flowers are tightly packed together, leaving no gaps in the wreath form.

Then you just keep circling the wreath and gluing the book page flowers onto the wreath. Very easy process!

And like I said earlier, I stopped counting the flower circles and just cut more as I needed them to cover the wreath.

DIY Book Page Hydrangea Wreath: Finished

By following these simple steps, you can create a stunning, upcycled hydrangea wreath that will add a touch of vintage charm to your home. Remember, the key to a beautiful wreath is patience and precision. Take your time, and enjoy the process of transforming old books into a work of art.
Tips and Tricks
- Patience is Key: This project may take a few hours to complete.
- Book Selection: An old hardcover is perfect for this project
- Hot Glue Safety: Use caution when handling hot glue.
- Customization: Add personal touches, such as a ribbon.
See your projects featured! If you are inspired by this or any of my other DIY projects I would love to see them and add you to the Reader’s Spotlight gallery. Send a photo to me at jennifer@cottageonbunkerhill.com
xo, Jennifer
40+ creative
DIY Wreath
tutorials


I love the idea of recycling pages of a book to make this wreath. A great idea!