

I handed over $25 at the thrift store checkout… and walked out with everything I needed to give my garden a cozy, colorful makeover. Here’s how it happened!
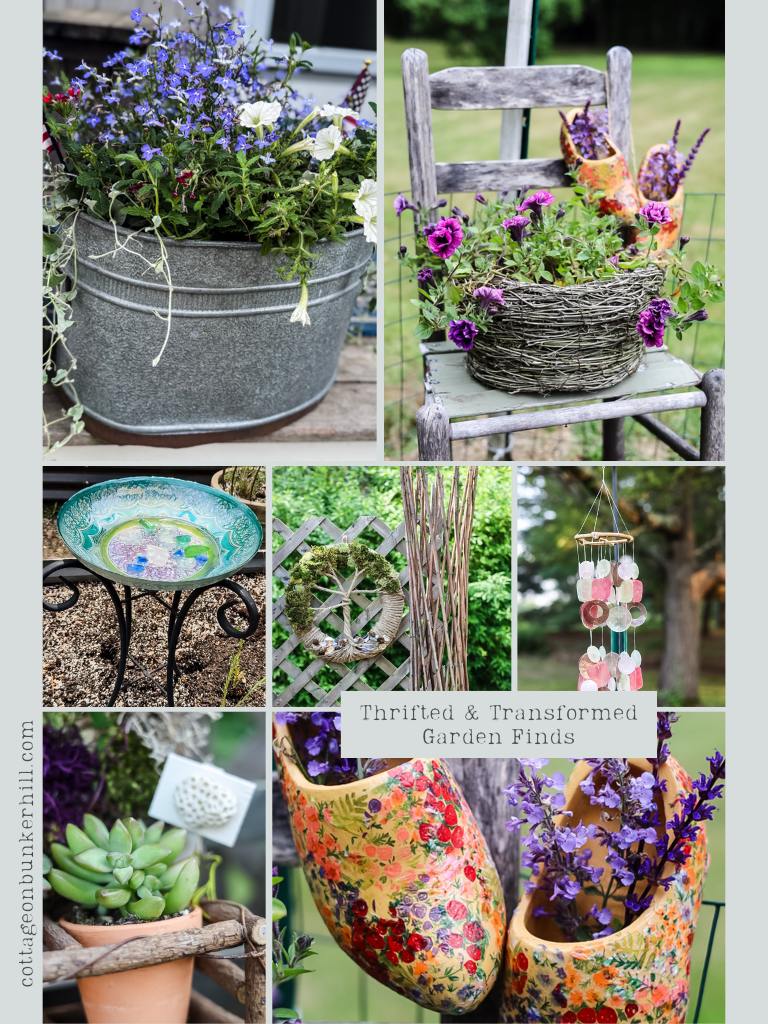
Thrifted & Transformed: My Cottage Garden Makeover on a Budget
Thrifting for my garden isn’t just about saving money—it’s about uncovering hidden potential. That donated glass bowl? A birdbath waiting to happen. The rusty tub? Instant vintage planter vibes. This time, I challenged myself to stick to a $25 budget for the thrifted ‘bones’ of each project (though I’ll admit, a few needed minor supplies to shine). The result? A garden filled with one-of-a-kind charm, each piece with its own thrifted backstory.
Why Thrifting Makes My Garden (and Home) Special
I’ll let you in on a little secret: nearly everything in my home and garden has a second and story. From vintage chairs holding flowers to repurposed shutters turned trellises, thrifting isn’t just a hobby- it’s how I create spaces filled with soul. This year, I set myself a fun challenge: transform my garden using only $25 worth of thrifted finds (plus a little DIY magic, of course). Armed with cash, a 20% off coupon, and a keen eye for potential, I hit my local thrift store—and here’s what I brought home!
Here’s the loot that caught my eye—five overlooked treasures just waiting for a garden glow-up. (Total spent: $24.95… because yes, I counted the pennies!)
Thrift Store Haul
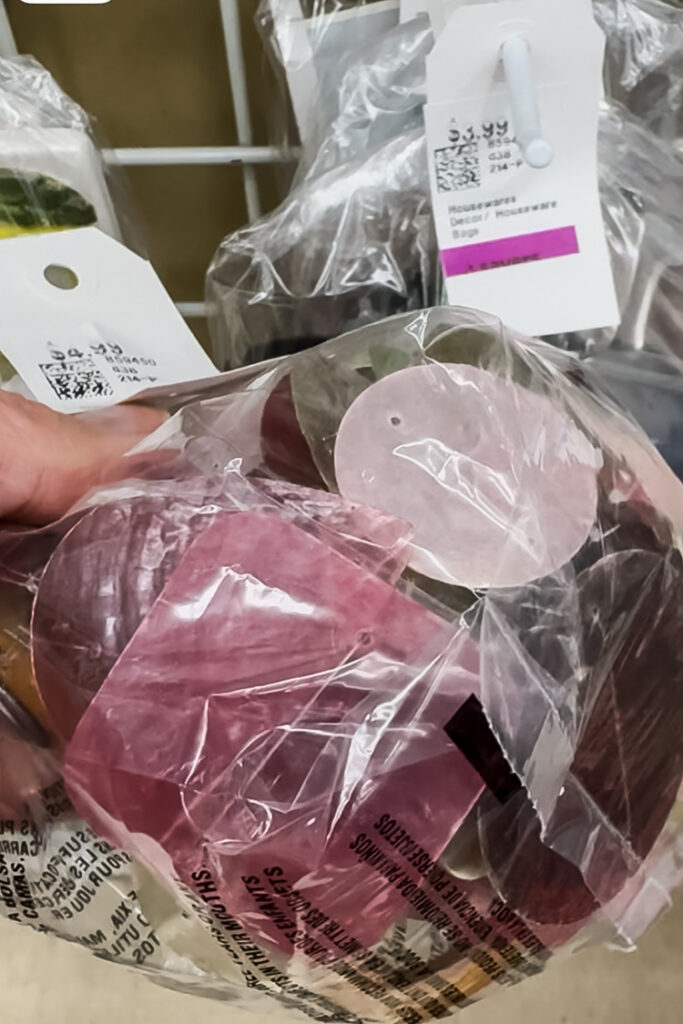
- Outdated Wall Planter – A cutesy mess of pink satin ribbons and plastic ivy, but underneath? A sturdy grapevine frame with tiny terracotta pots—hello, succulent display!
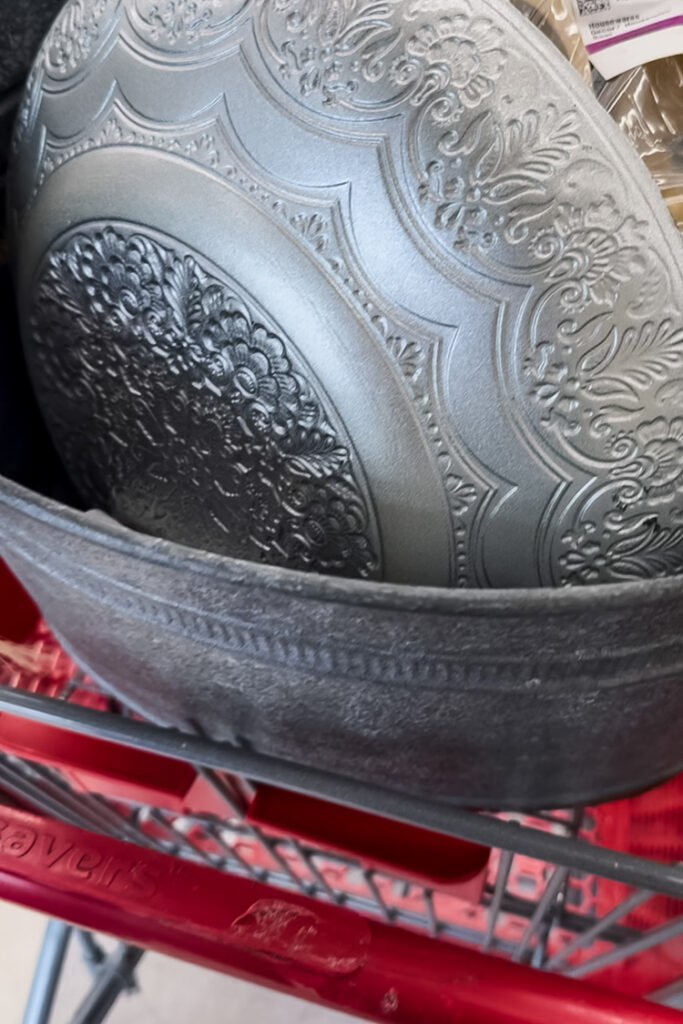
- Vibrant Blue Glass Serving Bowl – Looked brand new, and that color? Instant birdbath vibes in the sunlight.
- Glass Windchime – Dusty and silent (was it broken? I gambled for $4).
- Large Metal Tub –In great condition, with a coppery bottom begging to hold blooms.
- Nautical Rope Bundle – A large bag of dollar store craft rope, I had a project in mind that I hadn’t bought rope yet for so this was good timing and price.
At first glance, they might seem random- but to me, they were a cottage garden starter kit. Here’s how each one transformed!
Thrifted Wind Chime Rescue
The $4 Mystery: Did It Even Work?
I’ll admit it-I snatched this packaged glass wind chime off the shelf without testing it. For $4, I was willing to gamble on its potential. The colors blended perfectly with my garden, echoing the same palette as the flowers.
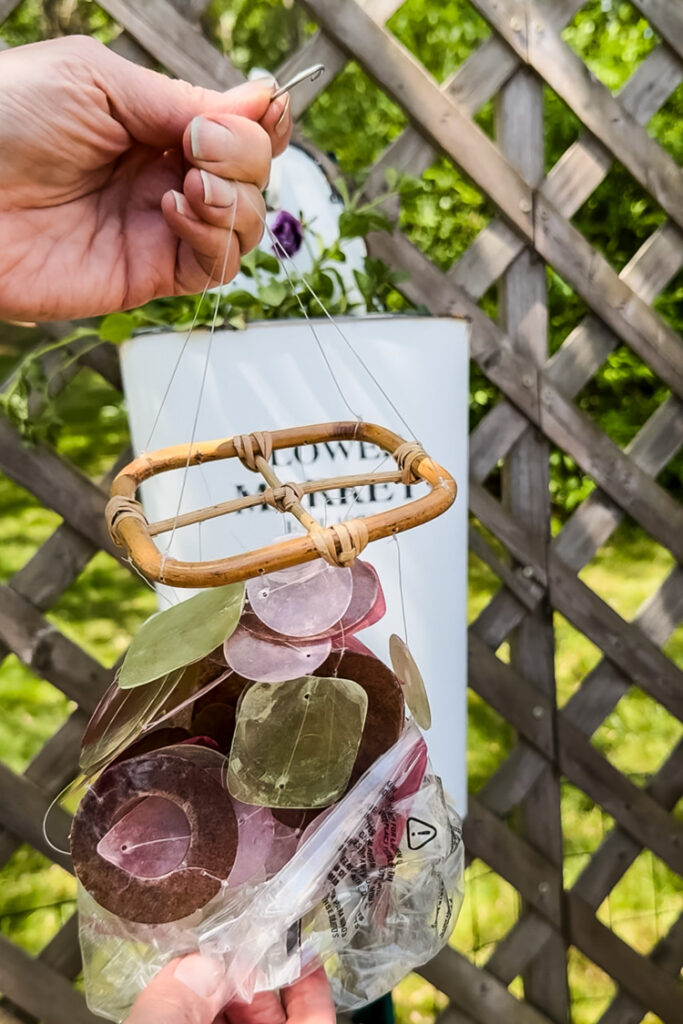
I was so happy when I took it out of the bag at home and it was perfectly in tack without any breaks in the chimes.
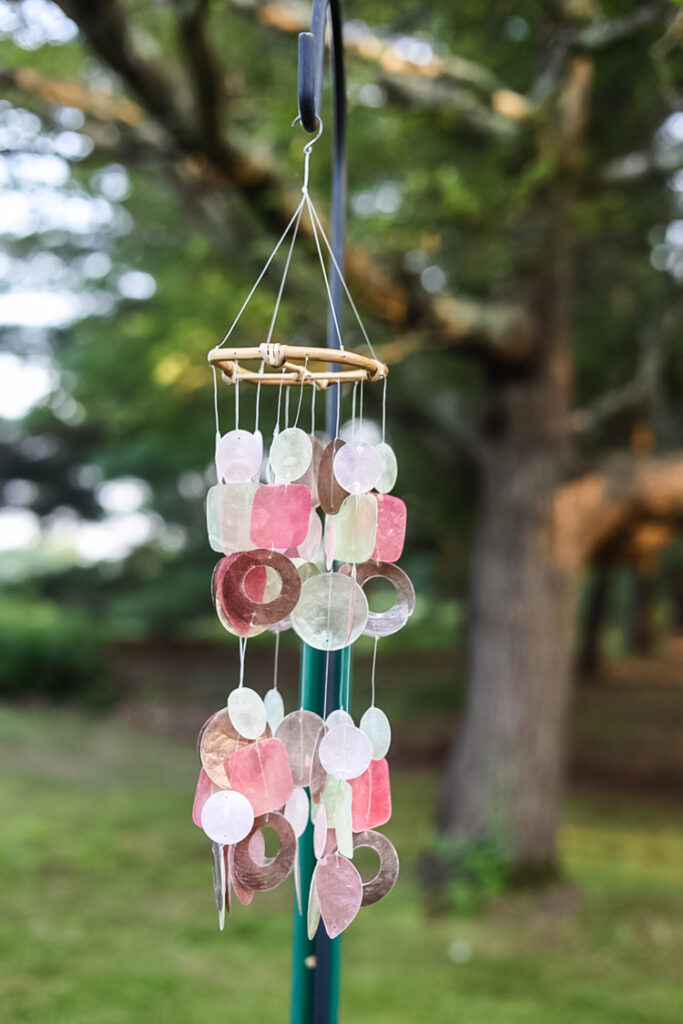
Its new home is in the back corner of the garden, hanging on a shepherd’s hook behind my wicker chairs and table. It’s so nice to listen to the chimes when I’m taking an iced coffee break!
One thrifted find down, four to go! Next up: The least garden-ready item in my haul… that nautical rope bundle!
The Nautical Rope’s Second Act: A Tree of Life Wreath

This bag of crafting nautical rope was a bargain!! At my Savers thrift store, I always take the time to visit the wall of miscellaneous baggies full of goodies! There were at least 10 packs of rope inside the bag.
It was time to make a fresh garden wreath for this year, and I had a pretty cool one in mind using this rope.


It’s called a Tree of Life wreath. I’ve dedicated an entire tutorial to this wreath so you can make one yourself following my step-by-step instructions. The finished wreath is hanging on the lattice at the back of the garden next to the potting bench.
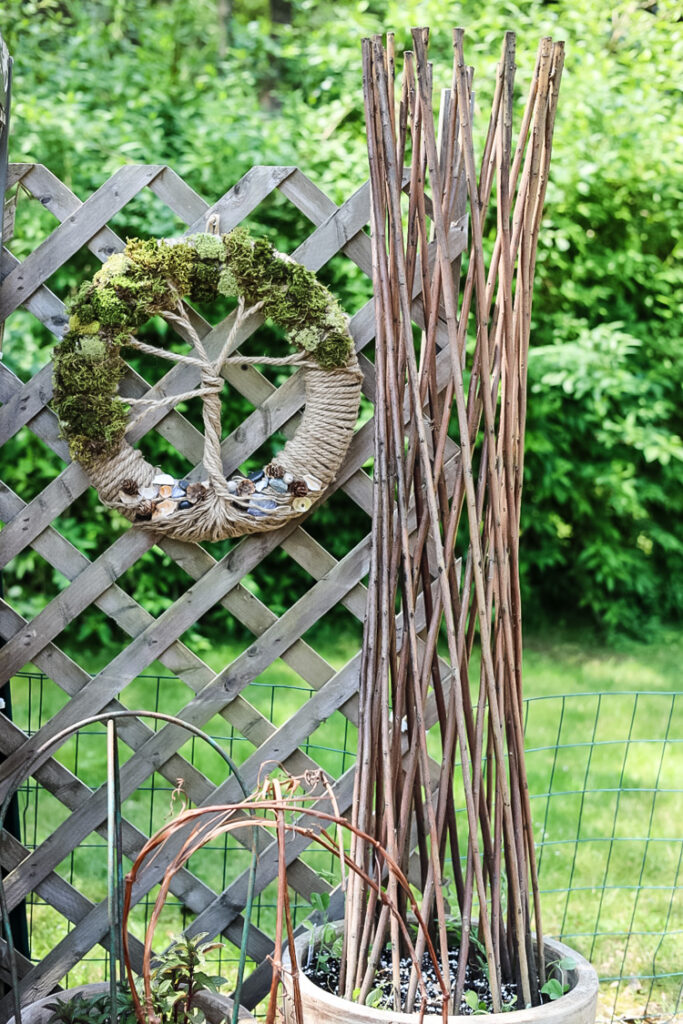
Total Cost: rope-$4.50, $0 supplies (I had the wreath frame, moss, & shells on hand)
Instant Elegance: The 2-Minute Thrifted Birdbath
A Brand-New ‘Old’ Treasure for My Pollinators
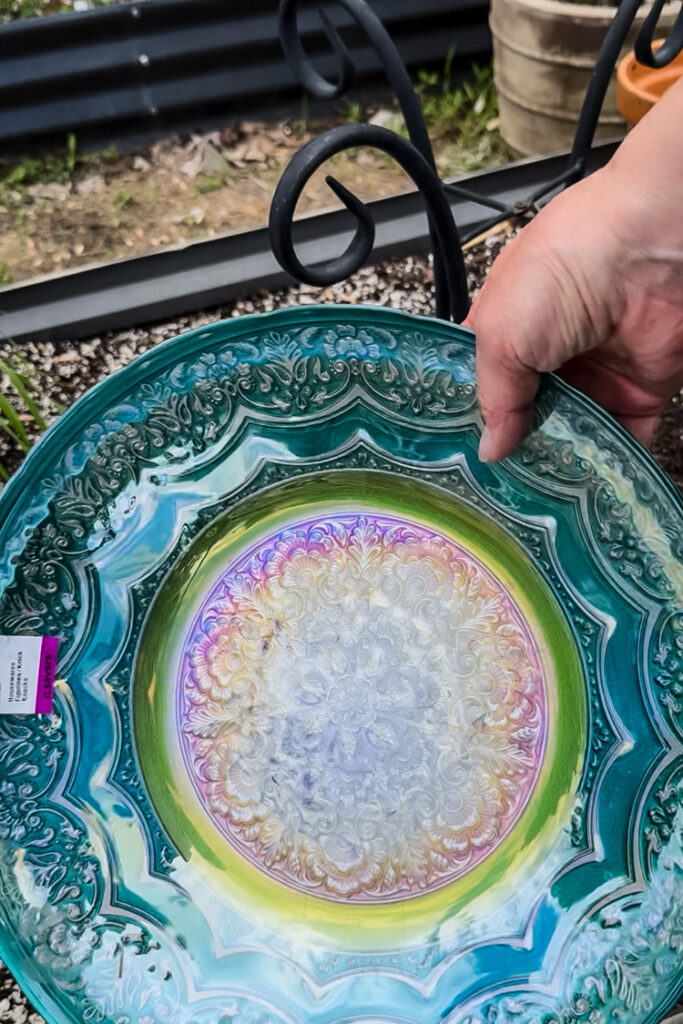
Some thrift finds feel like fate—like this pristine blue glass serving bowl, its silver backing gleaming without a single scratch. (Who gives away something so perfect? My gain!) Even better? I’d hoarded a metal birdbath stand for years after its original basin broke. In a stroke of luck, the bowl fit the stand exactly.
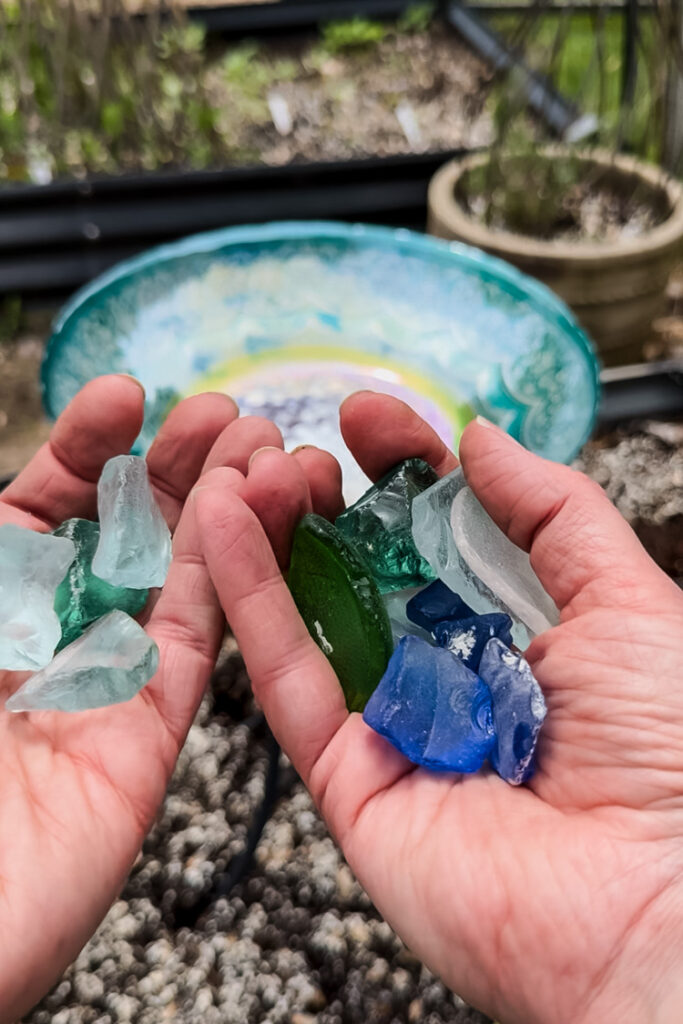
To create some spots for my visiting pollinators to rest, I added a handful of colorful sea glass from my collection (one benefit from living near the beach!)

The ‘DIY’ (If You Can Call It That):
- Placed the bowl on the stand in my raised flower bed-no tools needed.
- Added sea glass to the bottom (for pollinators to land on).
- Filled with water… and waited for the birds to RSVP.
Total cost: $5 for the bowl (half-off tag day!) + $0 for the stand (thanks, past me). Now it catches sunlight by day and reflects twilight by evening—zero effort, maximum magic.
Drink Tub to Patriotic Display
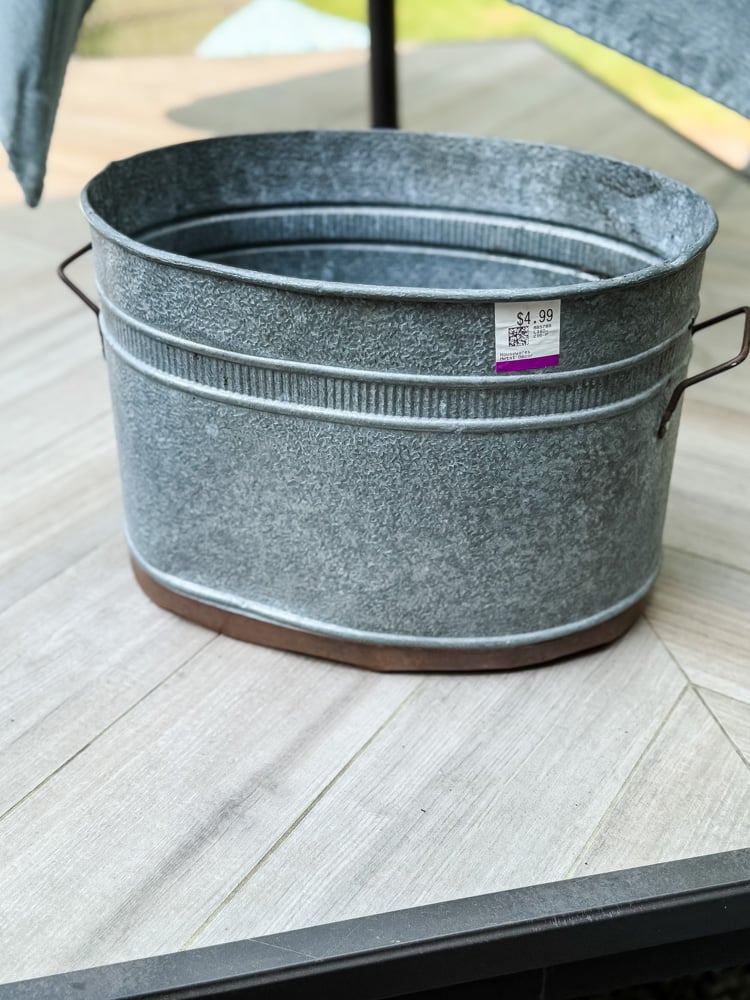
This large metal tub was another thrift store score that was in great condition. I think it had been used for party drinks (it had a bottle opener tied onto the handle). But to me? It was the perfect spot for Summer flowers
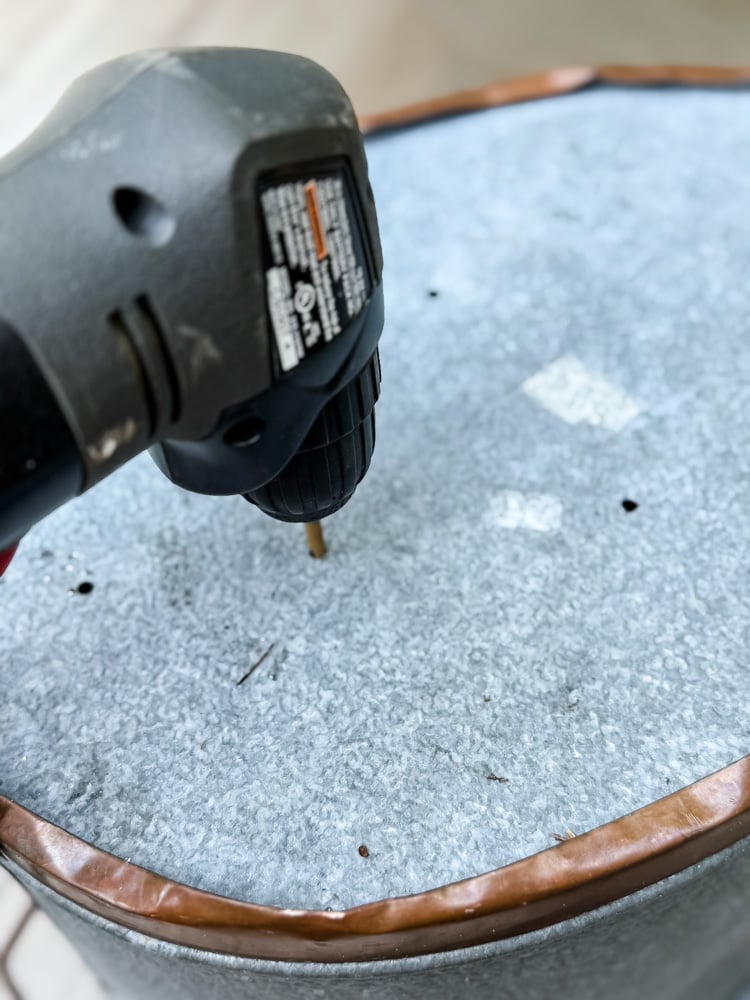
Before planting, always drill drainage holes in your thrifted container—soggy roots are a one-way ticket to unhappy plants! If you don’t have a drill, a hammer and nail will do the trick (just tap a few holes from the underside). Easy fix, huge difference!
Pro Tip: Place a coffee filter over the holes before adding soil—keeps dirt in but lets water drain!


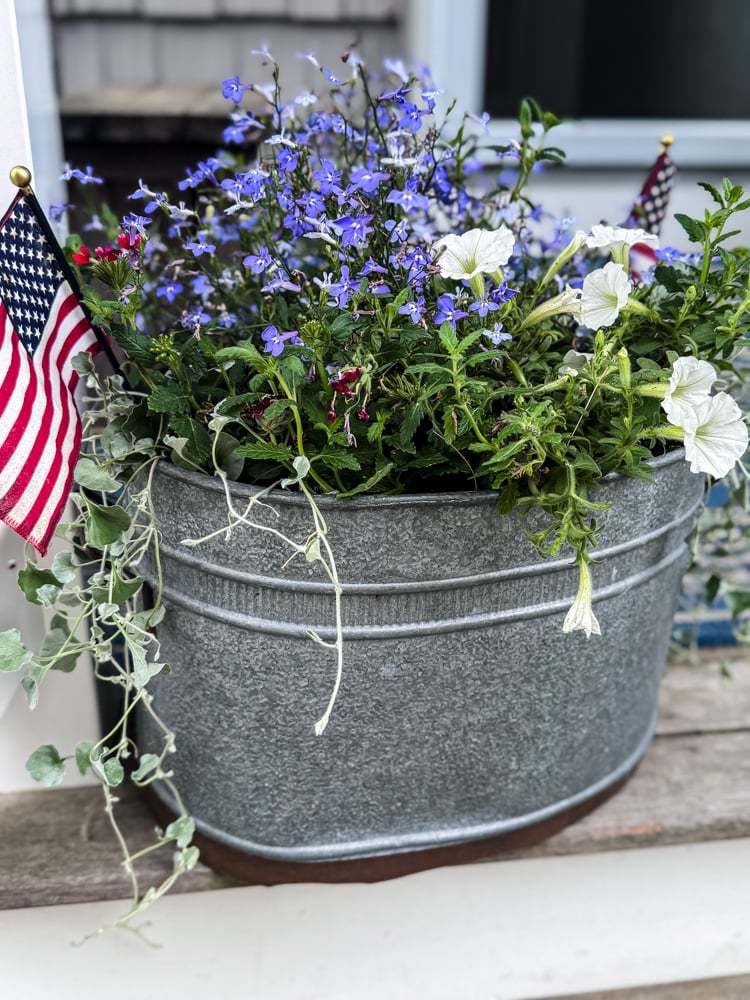
Inspired by Summer’s patriotic palette, I filled the big metal tub with red verbena, pretty white petunias, trailing blue lobelia, and a couple of greenery spillers on each side (bonus: hummingbirds adore this combo!). A couple of small American flags completed this Summer planter.
The 3-Step Transformation:
- Drilled drainage holes
- Filled with potting soil
- Pack with blooms—because subtlety has no place in a cottage garden.
Total cost: $5 for the tub + $20 for annual flowers (the real splurge, but worth it)
From Tacky to Tranquil: A Coastal-Inspired Succulent Planter
How a $5 Thrift Store Eyesore Became a Zen Masterpiece
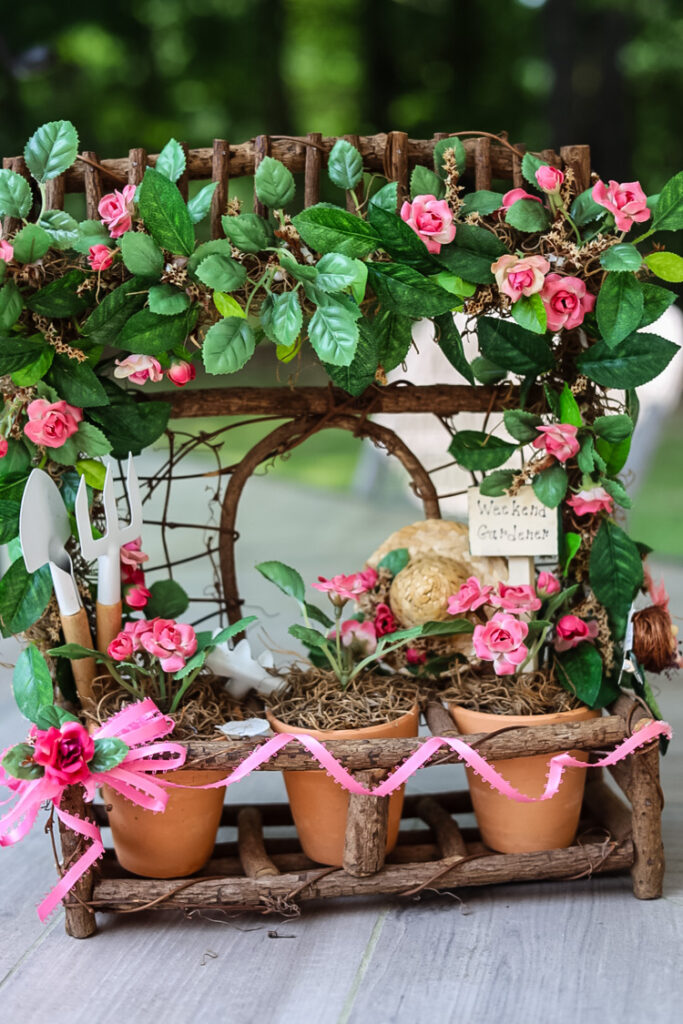
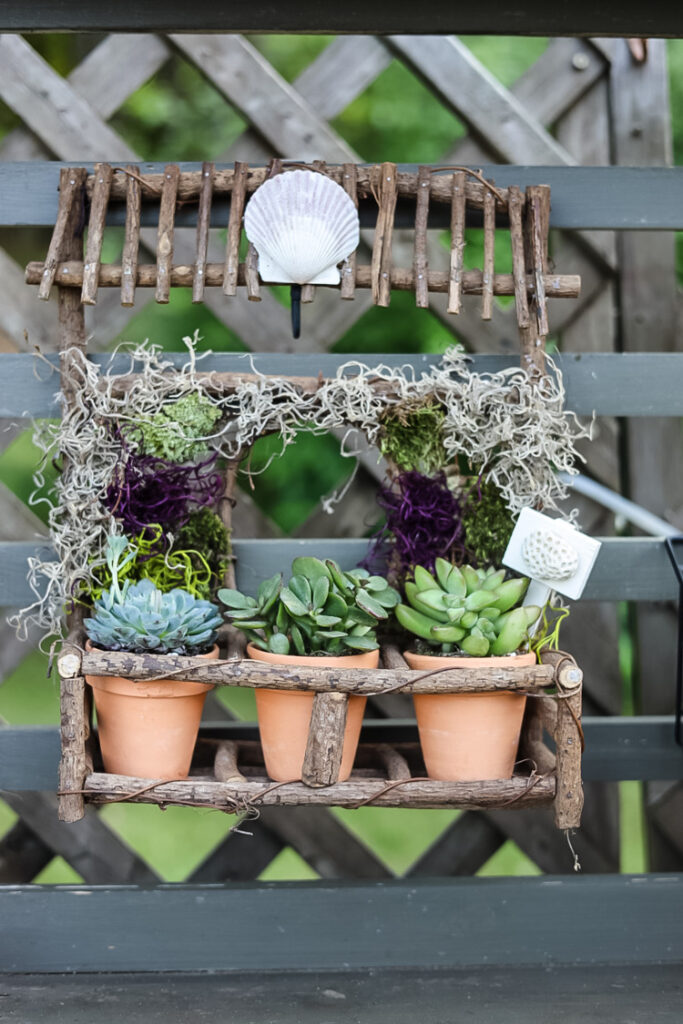
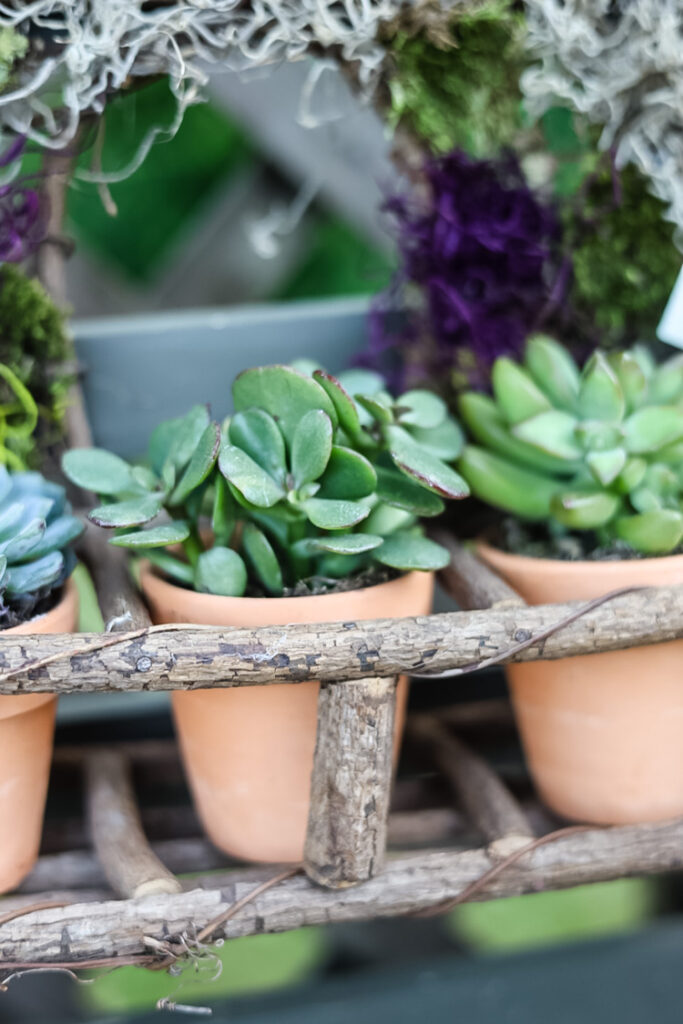
This poor wall planter was drowning in pink satin ribbons and plastic ivy—but underneath, I spotted three tiny terracotta pots and a grapevine frame with serious potential. Here’s how I gave it an organic, coastal makeover.
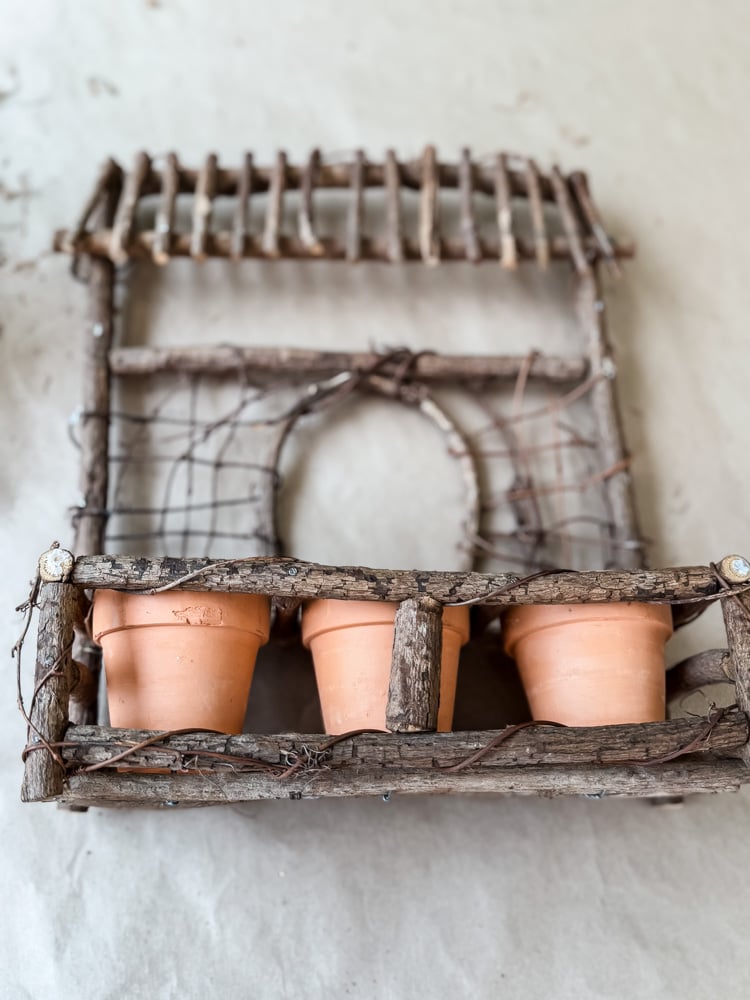
First things first, I had to rip off all of the glued-on decorations. Someone put it together lovingly, and it was well made, but not my style at all. Once it was cleaned off it was time to redecorate!
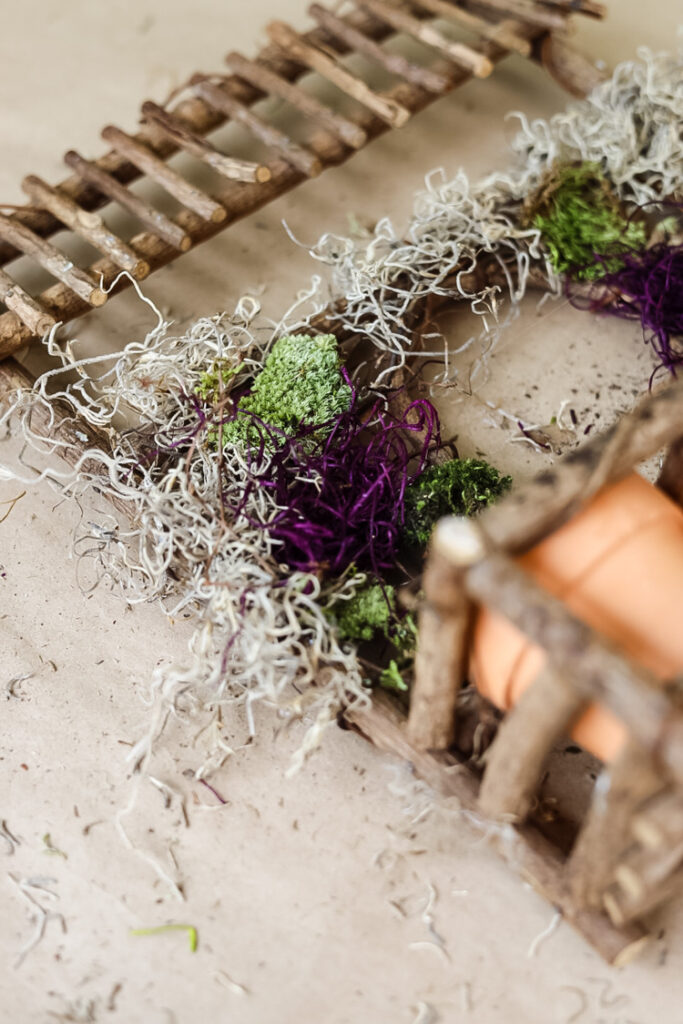
For that perfectly imperfect organic texture, I layered different mosses using hot glue:
- First, Spanish moss – draped loosely to create wispy depth.
- Then, pressed clumps of real moss – tucked into gaps for earthy contrast.
- Added a few pieces of purple Spanish moss for a fun pop of color.
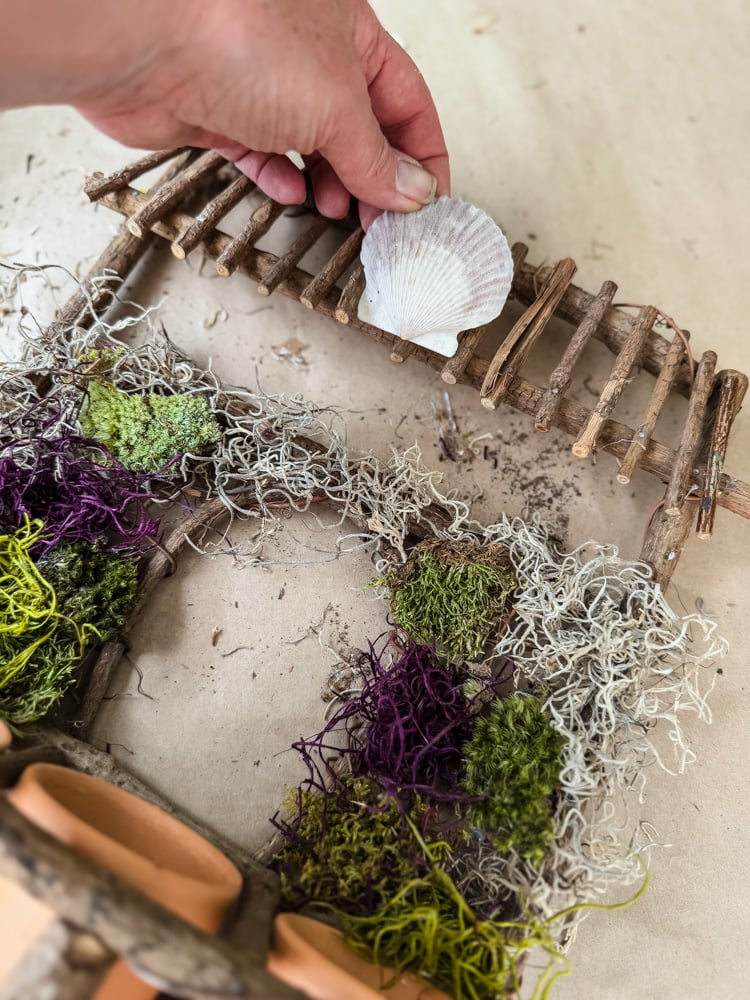
To give it that breezy coastal charm, I added two special touches:
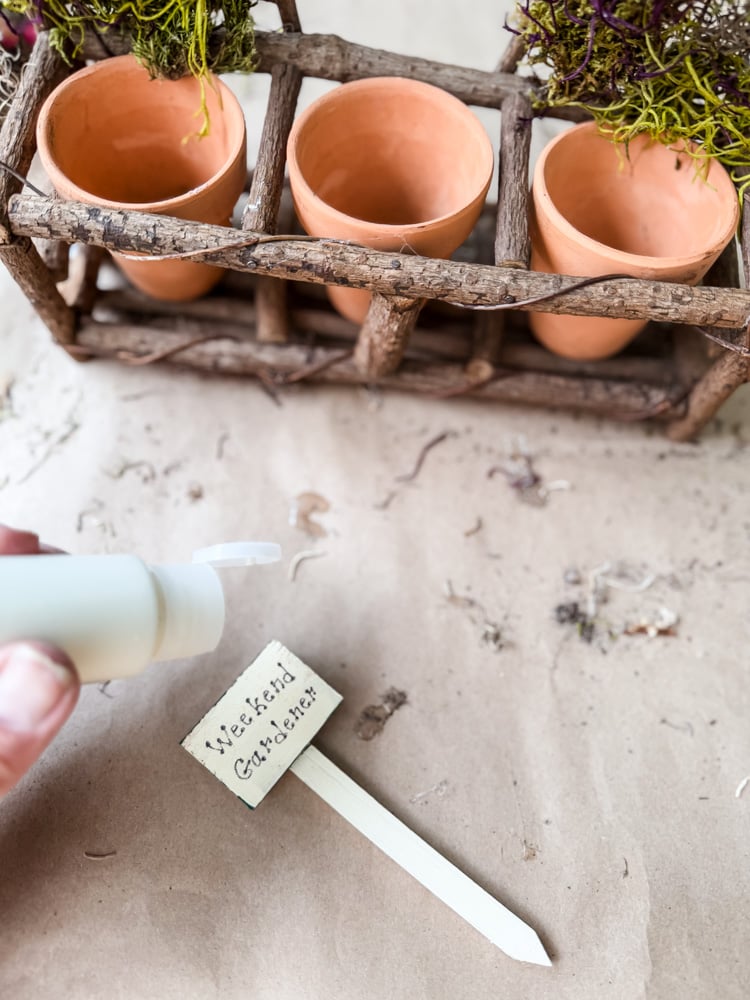
- A refreshed sign – Painted over the original “Weekend Gardener” label and accented it with a tiny piece of coral.
- A scallop shell ‘crown’ – Hot-glued to the top for instant beachy vibes.
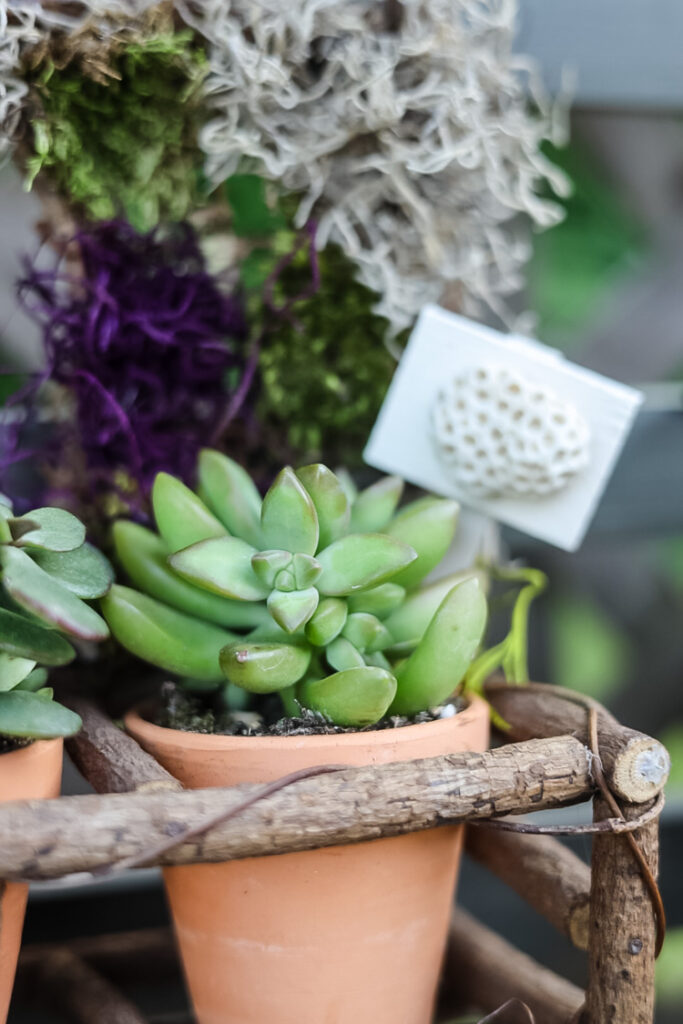
To complete the look, I popped 3 small succulents into the terracotta pots and headed out to the garden to hang it on the potting bench.
The Glow-Up Steps:
- Stripped it bare (goodbye, garish ribbons!).
- Hot-glued Spanish moss and real moss for earthy texture.
- Added a seashell ‘crown’ at the top for a beachy touch.
- Planted succulents in the pots (low-maintenance + chic).
- Repainted the original sign and glued on a tiny shell as a signature detail.
Total cost: $5 for the planter + $0 for moss/shells (foraged from my stash). Now it’s a quietly stylish accent on my garden potting table—proof that even the frumpiest thrift finds can find their groove!
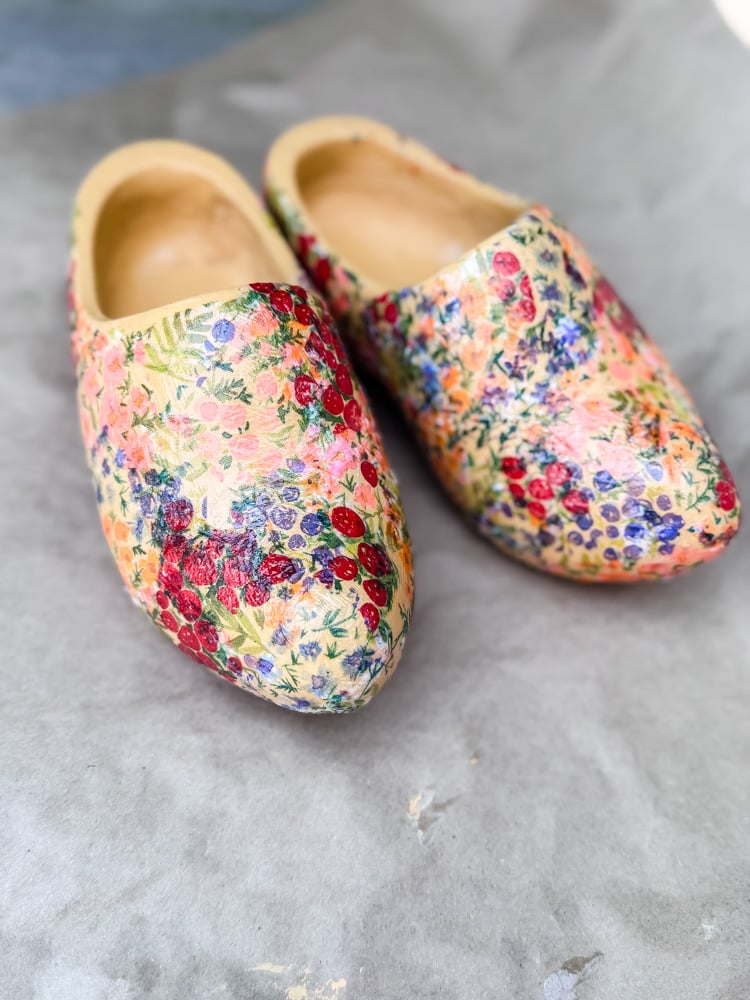
The Sweetest Little Clogs: A Dutch-Inspired Garden Whim
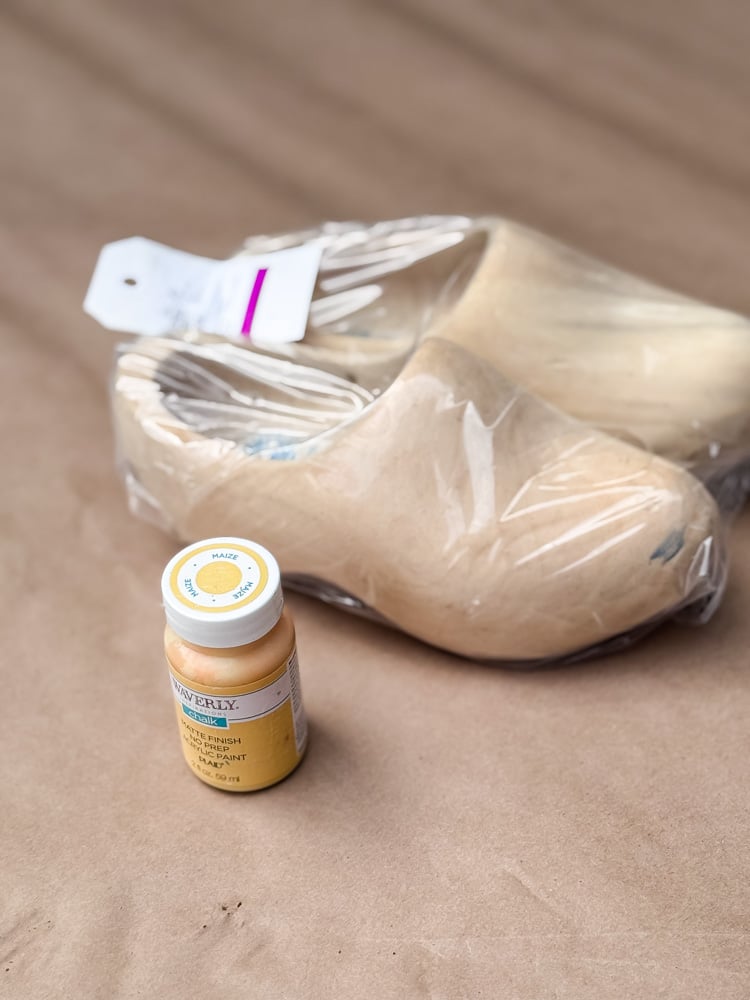
These tiny wooden clogs (marked ‘Holland’) were just begging for a Cottage on Bunker Hill makeover. Here’s how I turned them into a playful garden accent
OK, a few months ago I spotted a pair of big, glorious yellow Dutch clogs with hand-painted windmills… and left them behind. In my defense, it was February, and spring felt light years away. But like all the best abandoned treasures, they haunted me. “Why didn’t you just buy them, Jennifer?!“
Fast forward to this haul: The thrift gods smiled when I found these child-sized wooden clogs and immediately threw them into my carriage!
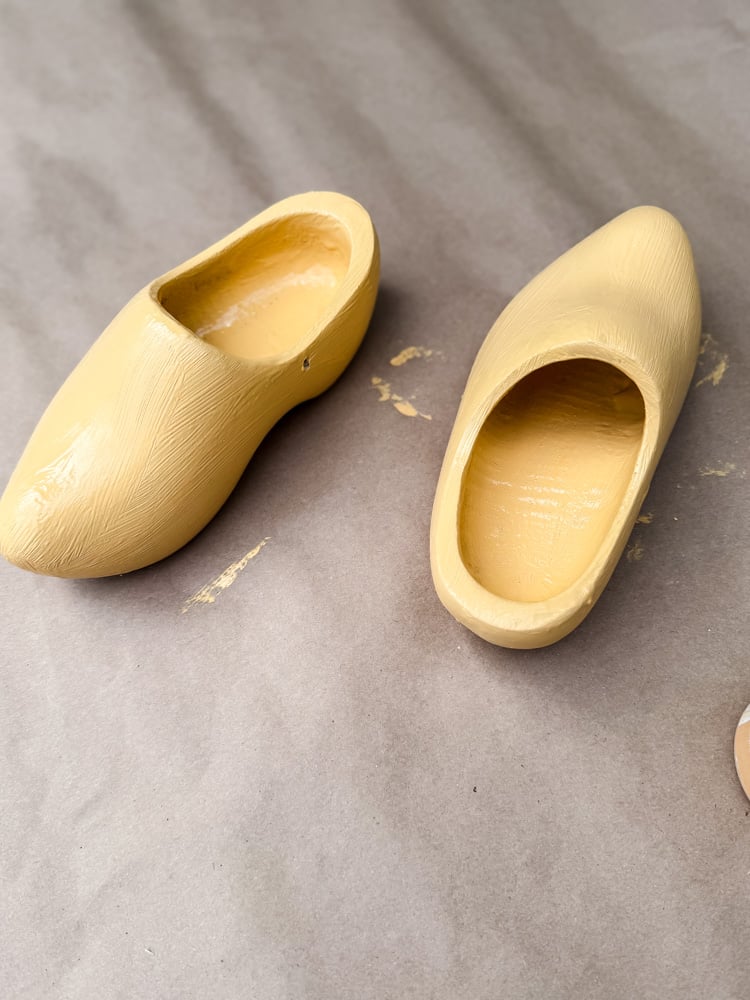
One coat of yellow chalk paint was all I needed to cover the clogs before starting to decoupage them.
How I Decoupaged the Clogs with Napkin Flowers
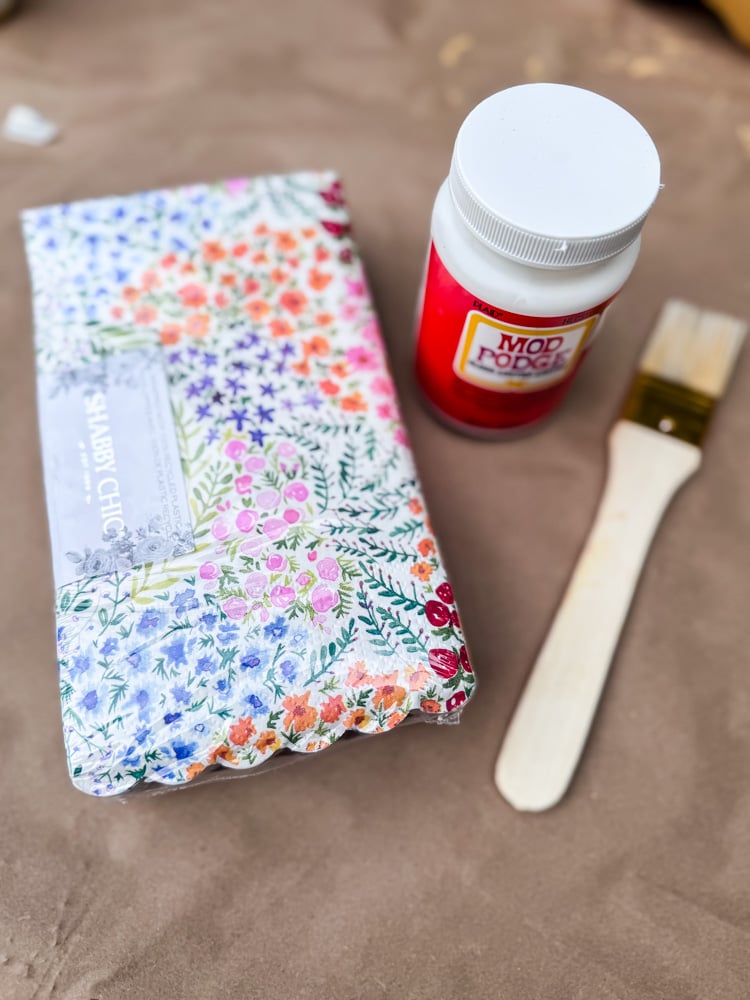
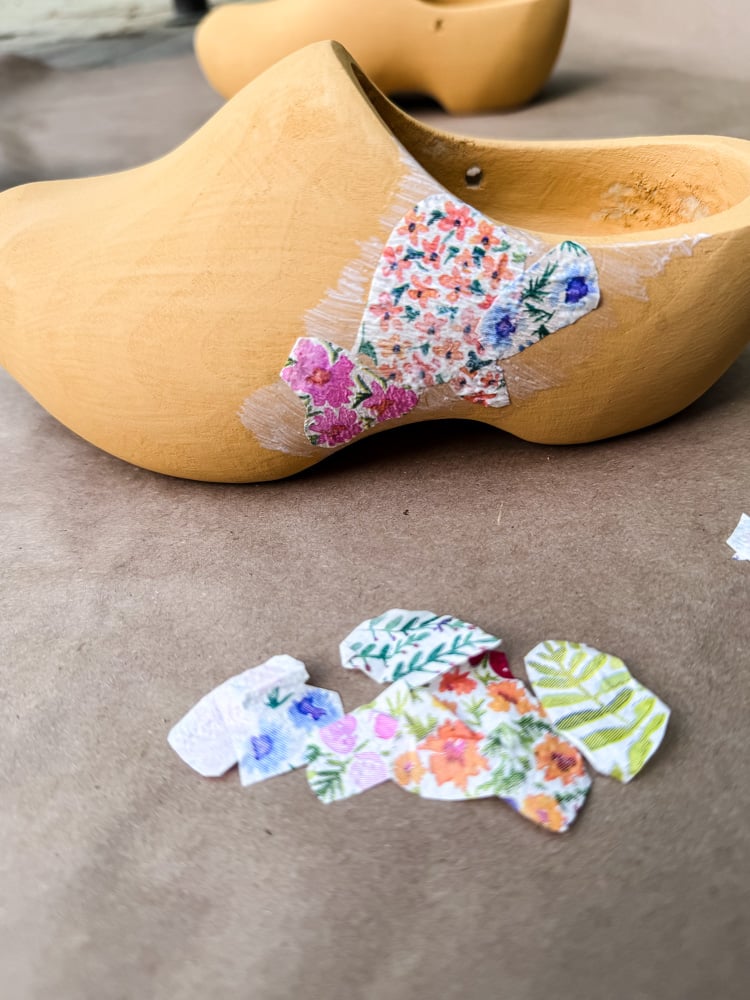
- Cut & Separate: Snip out the napkin’s floral designs, then peel apart the layers (you only need the top printed ply!).
- Glue & Smooth: Brush a thin layer of Mod Podge onto the shoe, press the napkin piece down, then gently swipe more glue over it to seal. (Puckering? Smooth with your fingers as it dries!)
My Tip: Use a small, stiff brush for glue and be generous! You don’t want the brush dragging the paper napkin pieces.
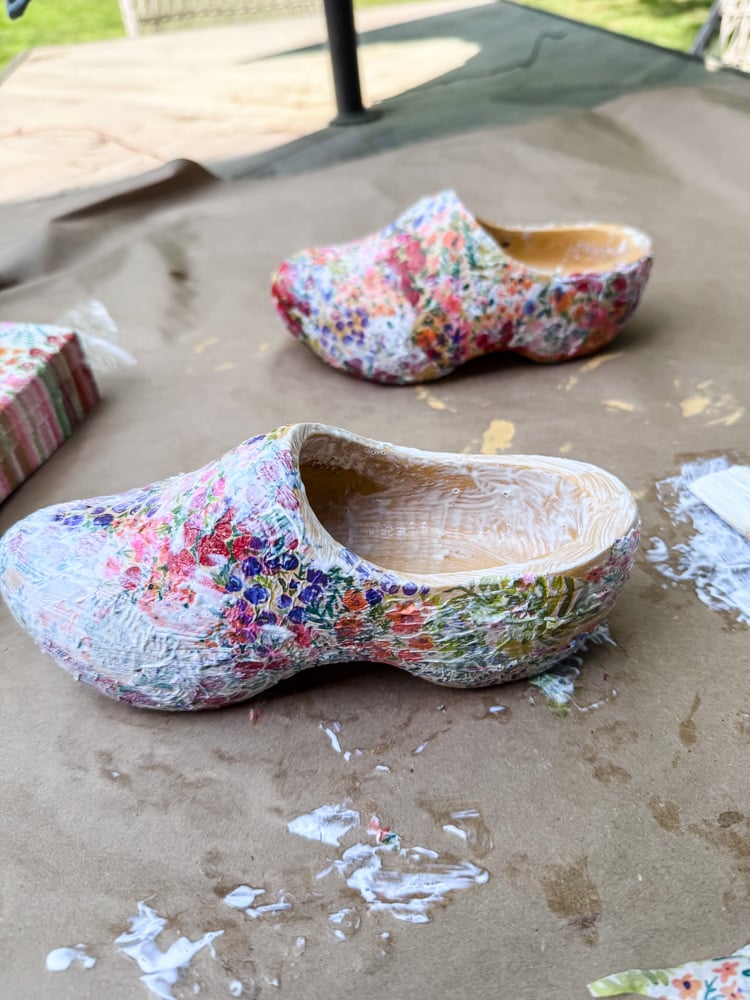
- Repeat & Layer: Overlap pieces for a collage effect-no perfection needed!
- Seal It: I brushed another layer of Mod Podge over the clogs and let dry. Then sprayed a clear protective topcoat for weather resistance.
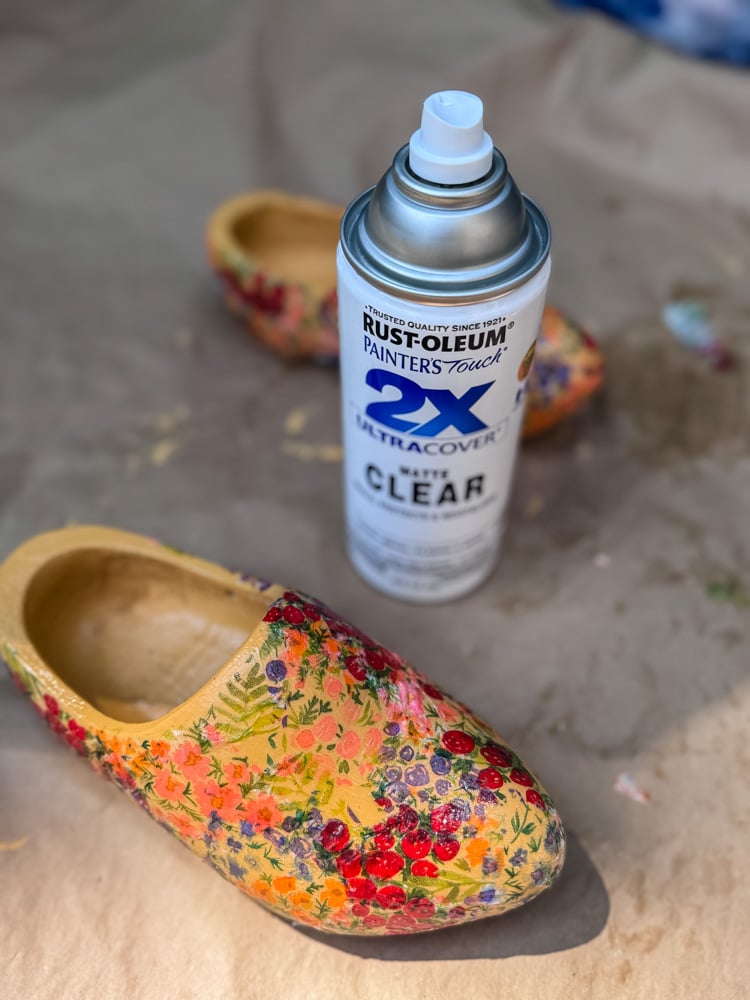
Once the topcoat had dried, I ran a piece of jute through the hole on each side of each clog so they could be hung.

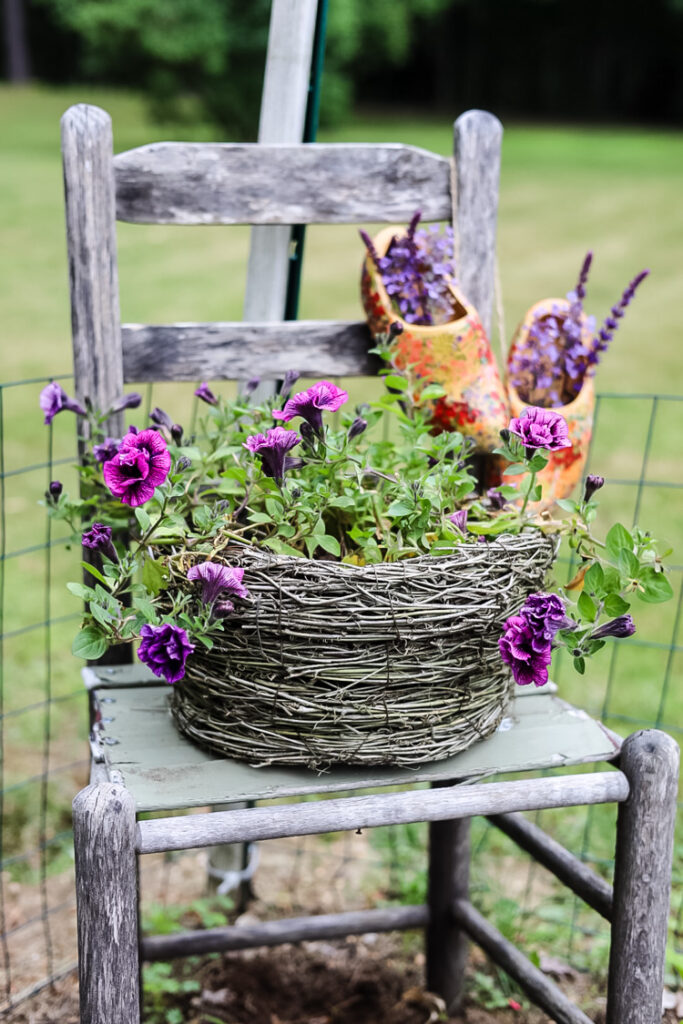
The cute thrifted clogs look so charming hanging over the back of a chair in the cottage garden.
Styling Tip: While I tucked fresh salvia sprigs into the clogs for photos, faux flowers would be darling for long-term charm (and no wilting!). Paired with a flower-filled basket on the chair’s seat, it’s a tiny European escape in my own backyard.
The Transformation:
- Painted them sunshine yellow – Instant happiness!
- Decoupaged floral napkin scraps – A few Mod Podge swipes gave them a vintage-meets-whimsy pattern.
- Strung them with jute twine – Hung them over the back of my $2 thrifted garden chair (a favorite find!).
A Garden (and a Story) in the Making
Now, with my thrifted treasures tucked among the flower beds and hanging around the garden, all that’s left to do is wait- for the lobelia to spill over the tub’s edges, for the succulents in that upcycled planter to stretch toward the sun, and for the birds to discover their new glass bath.
The best part of a cottage garden? Watching it grow. This year, it’ll be extra fun to see how these thrifted pieces look alongside the flowers. It’s a reminder that beauty doesn’t have to be perfect or expensive; it just needs a little imagination and patience. (Okay, and maybe a hot glue gun.)
7 Thrifting Tips for Garden Magic
- Embrace the Ugly: Look past dirt/rust—focus on shape and material (metal, glass, terra cotta = gold).
- Check the “Useless” Aisle: Vases, colanders, and baking pans make perfect planters.
- Test for Sturdiness: Windchimes silent? Bowl chipped? No problem—if it can survive a little DIY love.
- Think Beyond “Garden”: Picture curtains as tablecloths, old hooks as plant hangers, drawers as raised beds.
- Shop Off-Season: Grab cheap urns in winter, holiday lights in spring (pro tip: white twinkle lights = year-round fairy vibes).
- Repurpose Hardware: Drawer pulls become hose guides, old ladders turn into trellises.
- Always Carry a Tape Measure: That “too big” trough might fit perfectly under your kitchen window.
Bonus: “If it makes you smile (or laugh), buy it—you’ll figure out the ‘where’ later!”
See your projects featured! If you are inspired by this or any of my other DIY projects, I would love to see them and add you to the Reader’s Spotlight gallery. Send a photo to me at jennifer@cottageonbunkerhill.com
xo, Jennifer
Cottage Garden
Favorite Products
Shop my gardening favorites! Raised beds, plant supports, & tools to make your garden grow.
-
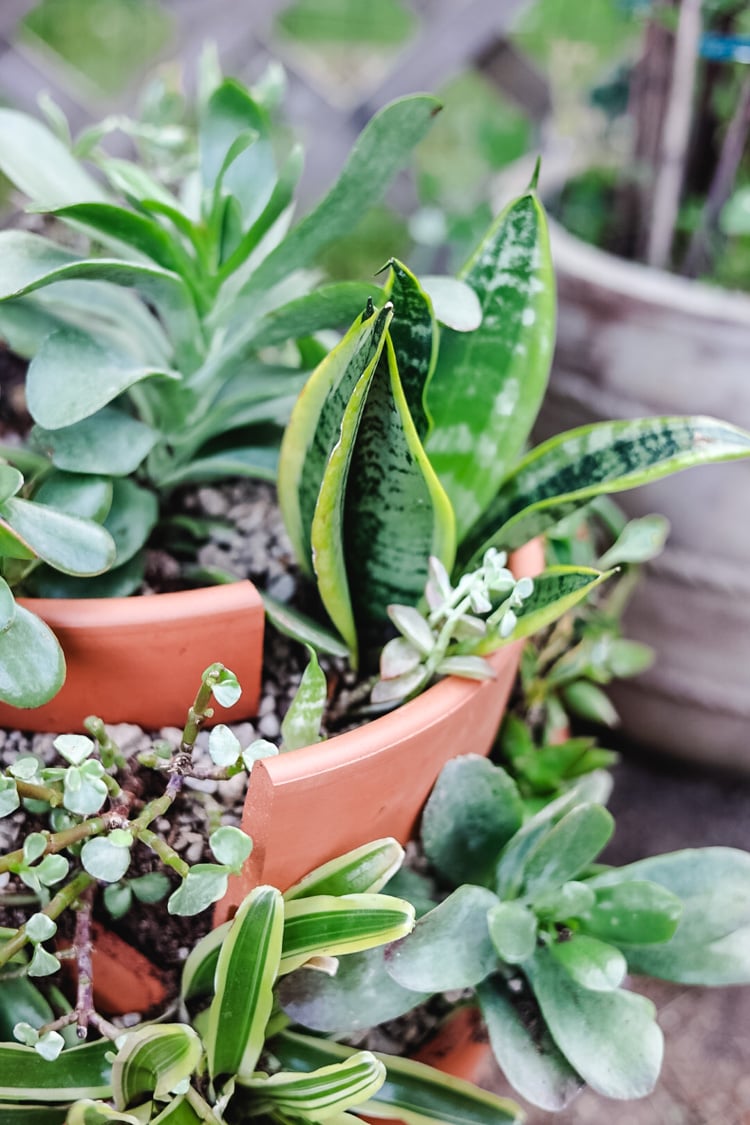
Why I Intentionally Broke My Terracotta Pot (And You’ll Want to Too!)

Discover how smashing a terracotta pot created my favorite succulent planter! (Sometimes, a little destruction leads to the most beautiful creations!) I’ll admit it…I took…
-
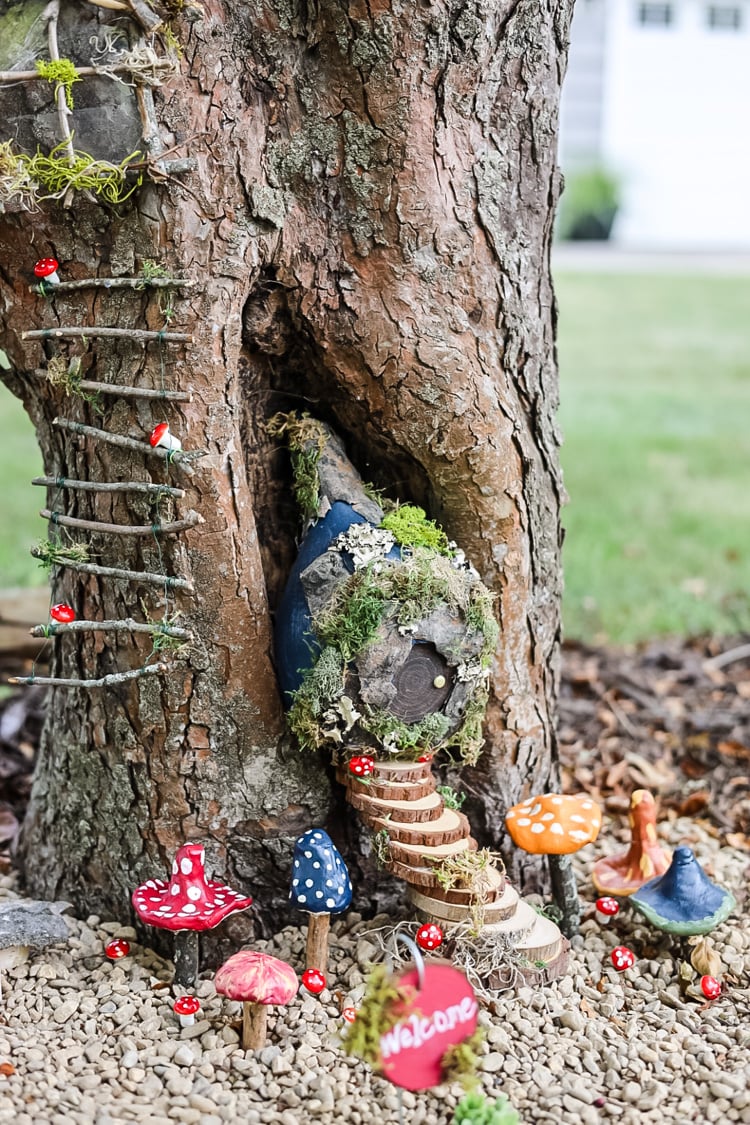
Whimsical Fairy Tree Garden: A DIY Project for a Magical Yard
When I noticed the natural hollow at the base of our crabapple tree, I knew it had potential. Instead of leaving it as just another…
-
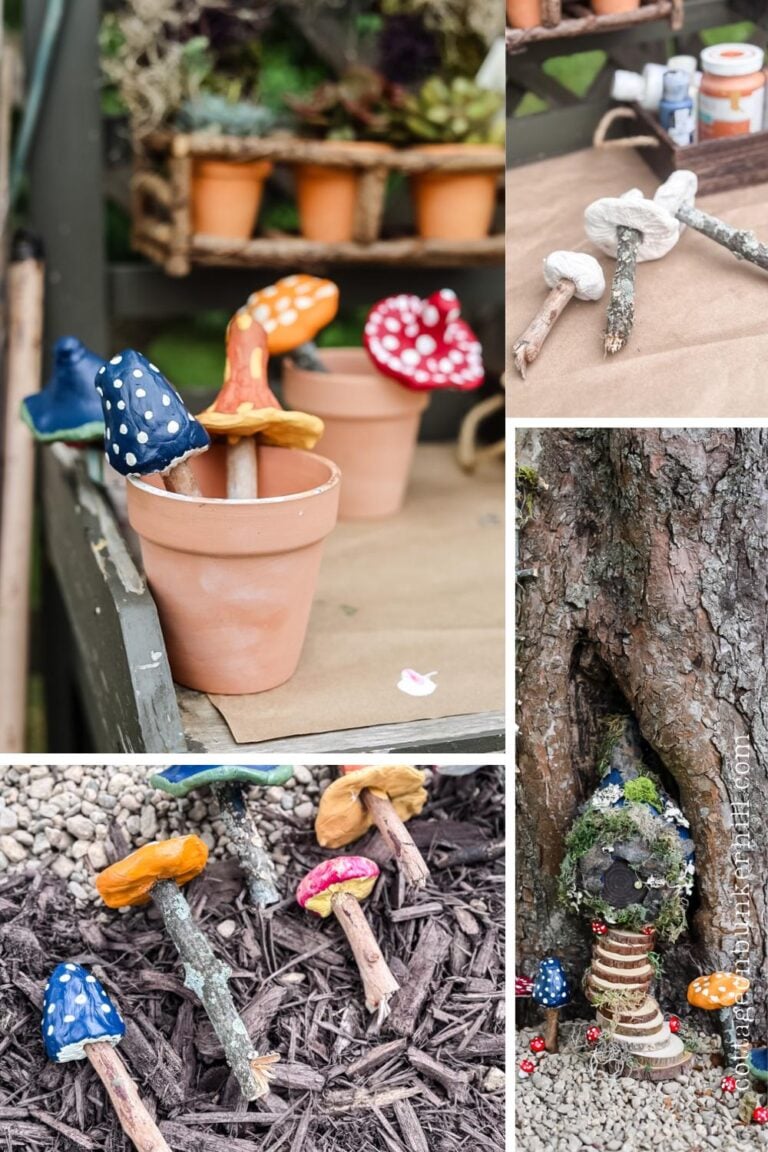
DIY Air-Dry Clay Mushrooms for Fairy Gardens (No Fancy Tools!)
Bring your fairy garden to life with these charming, easy-to-make clay mushrooms! Made with simple air-dry clay and fallen branches, they add a pop of color…


Great finds Jennifer! Been thrifting for 40 + years Just picked up a Capiz shell windchime for $2 for our deck – I just had to untangle the strings when I pulled it out of the bag. 2 years ago I found a 12″ artist glass bowl for a birdbath top – $4. We found a modern table lamp with a twisted metal stem and weighted bottom ($4) – my husband took the lamp apart and in the center, attached a dollar store plastic charger topped with a soft foam collar that holds the bowl in place. I just tip the bowl to empty & refill. It still looks like new & the birds love it!
I love all of that!! It’s really the best way to decorate.
So many creative ideas, friend! Love those shoes!
Thanks Kimmy!
This is SO GOOD, Jennifer!!! Such creative ideas and for SUCH a cheap price!! The clogs have to be my fav:)
I know!! It’s funny some things are so overpriced at this particular store and others are bargains!
Love all these projects, so fun! I’ve been sprucing up our back covered patio to give it a colorful eclectic look and you’ve given me some inspiration, and I do love thrifting! Thanks for sharing!
Vicki, Thrifting is the way to go!!
Oh Jenn
I am so excited to try some of the truly “charming” garden creations. We are in the process of gathering “junk” for an annual tag sale. My husband might be a bit perturbed if he sees me pull out some of that junk for a great cottage garden. But he will be pleasantly surprised when he sees what it turns into!!!! I’m on a mission now!! Thank you for all the fun ideas!
LOL, I wish I was closer because I prob would have bought it all from you!
How clever you are, I really enjoyed this.
I’m so glad! I love saving things from the thrift store shelves!