
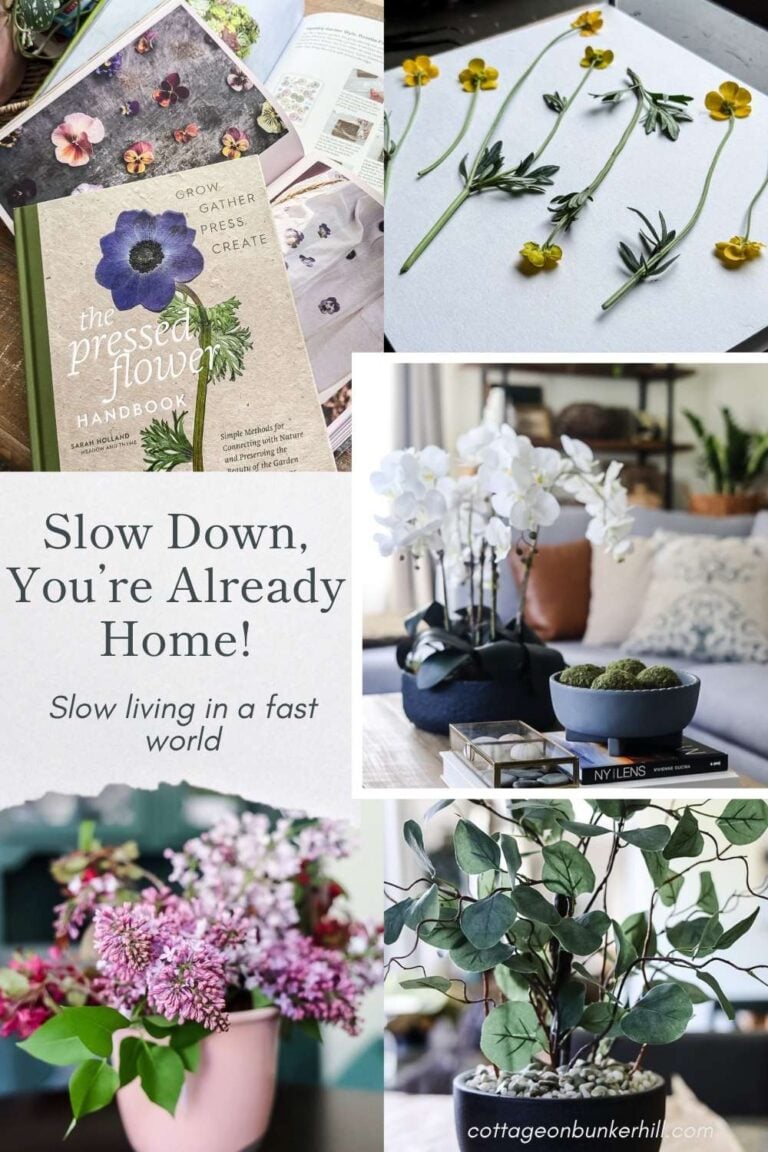
There’s something truly magical about a closed terrarium. It’s a tiny, self-sustaining world under glass, a living piece of art that brings the quiet, lush feeling of a forest floor right into your home. I’ve always been fascinated by them, but I’ll admit—they can seem a bit intimidating. What plants? What layers? How do you not overwater it?
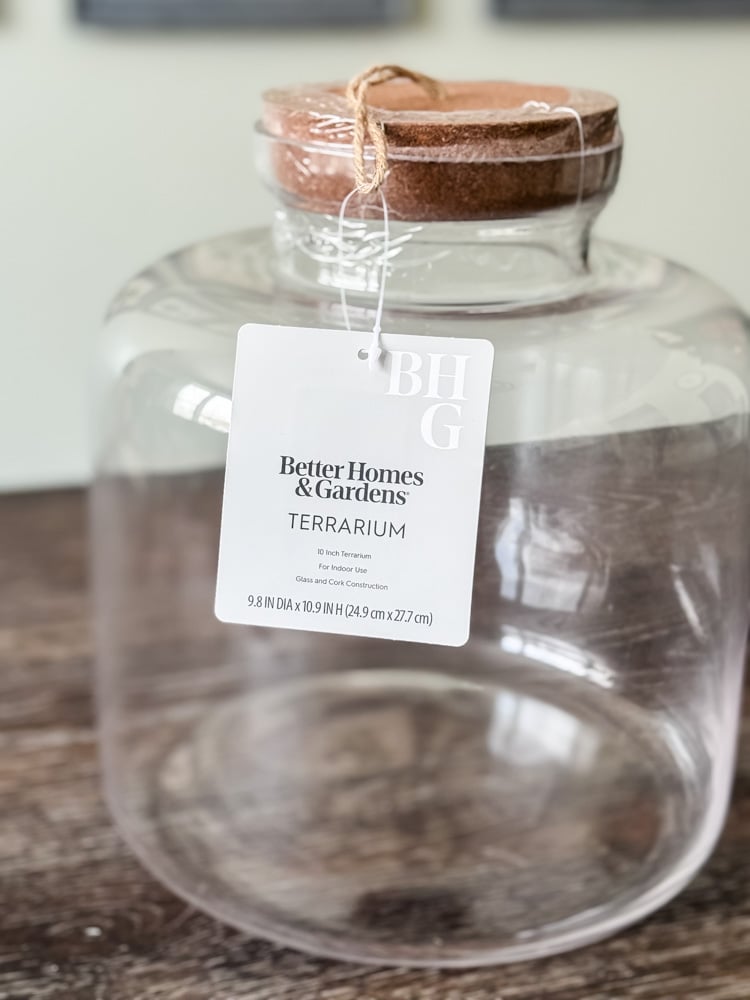
After so many of you requested terrarium content this year, I knew it was time to create the ultimate beginner-friendly guide. So, I picked up this gorgeous, classic cylindrical terrarium from Walmart and spent a wonderfully messy morning putting it all together. I’m sharing every step, every layer, and the one simple care rule that makes this a truly “no-fail” project. This was a fun one to create!
Hi, I’m Jennifer. To me, home is an ongoing practice in intentional living. Through the rhythms of the New England year, I look for ways to make our spaces not only beautiful but truly nurturing. I’m so glad you’re here to explore it with me.
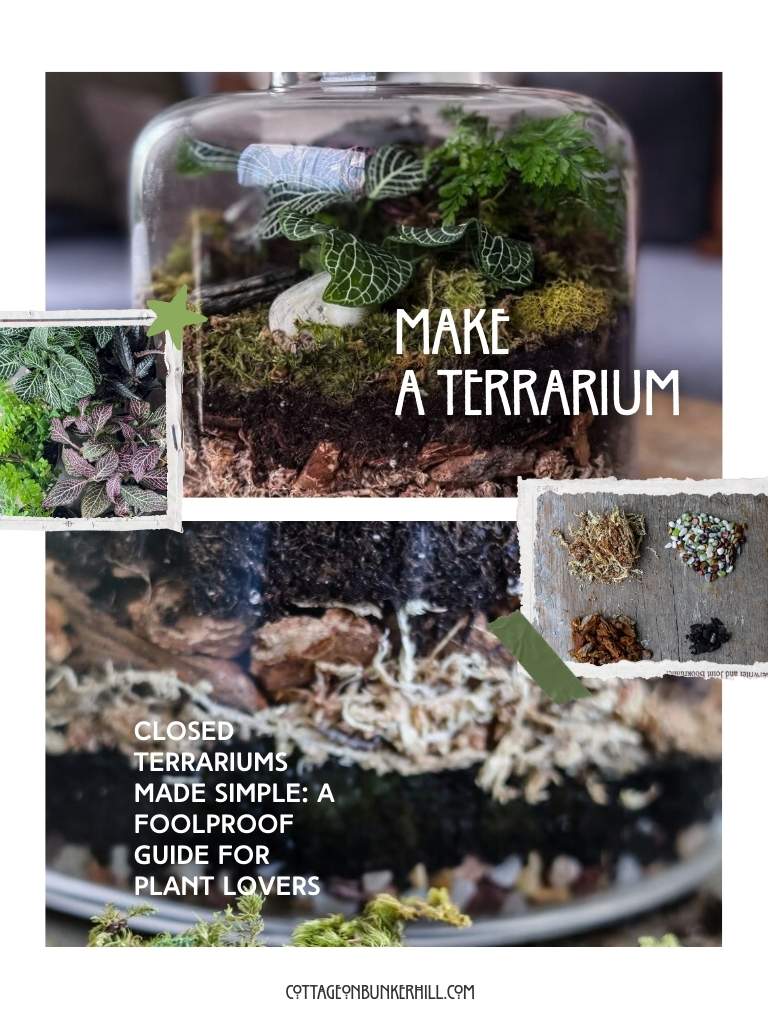
Closed Terrariums Made Simple: A Foolproof Guide for Plant Lovers
Today, I will show you exactly what you will need to create your first closed terrarium, why you should follow my layering rules, and what plants will thrive in this environment.
This post may contain affiliate links, which means we receive a small commission if you purchase through our links. See our disclaimer page for more information.
Why a Closed Terrarium is So Special (and Easy!)
Before we get our hands dirty, let’s talk about why this works. A closed terrarium is a miniature ecosystem. The glass container creates a humid environment where water evaporates, condenses on the glass, and “rains” back down to the plants. This means that once it’s correctly balanced, it requires incredibly little maintenance, mostly just admiring it! The key is starting with the right foundation and the right plants.
Gather Your Supplies
Here is what you will need to create your first closed terrarium.
Materials for this Project
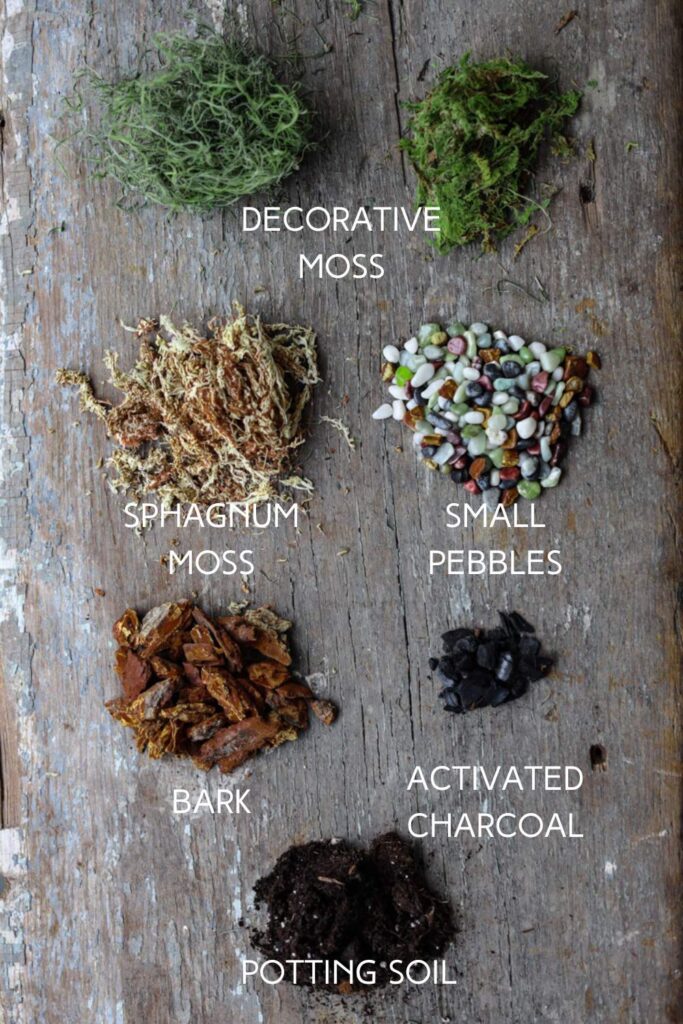
- The Vessel: BH&G Cylindrical Glass Terrarium
- The Layers (From Bottom to Top):
- Neutral River Pebbles (for drainage)
- Activated Charcoal (to keep things fresh and prevent mold)
- Sphagnum/Orchid Moss (a barrier layer)
- Orchid Bark (my favorite textural touch)
- Light, Well-Draining Potting Soil
- Sheet Moss (for the final “forest floor” look)
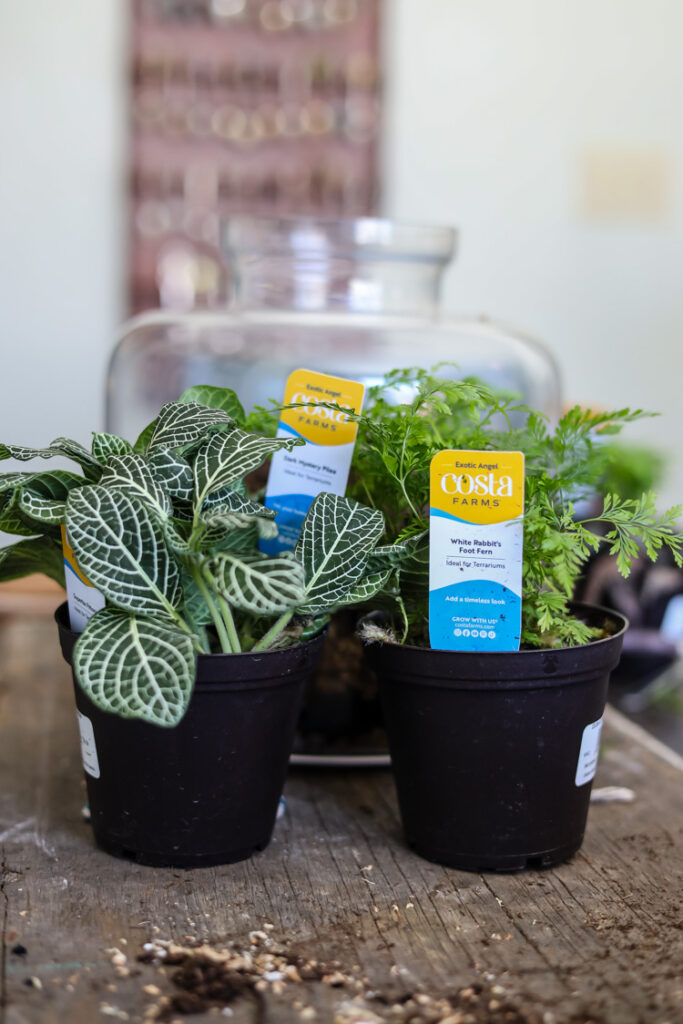
- The Plants: I sourced small, humidity-loving varieties from Lowe’s. (See the full list in the next section!).
- The Tools: A small trowel, a spray bottle, and… my homemade terrarium tools! (Inspired by a vintage Martha Stewart episode, I crafted my own from bamboo and old silverware. They’re not pretty, but they got the job done!).
- The Decor: Three smooth beach stones for a natural focal point.
- Helpful Book:

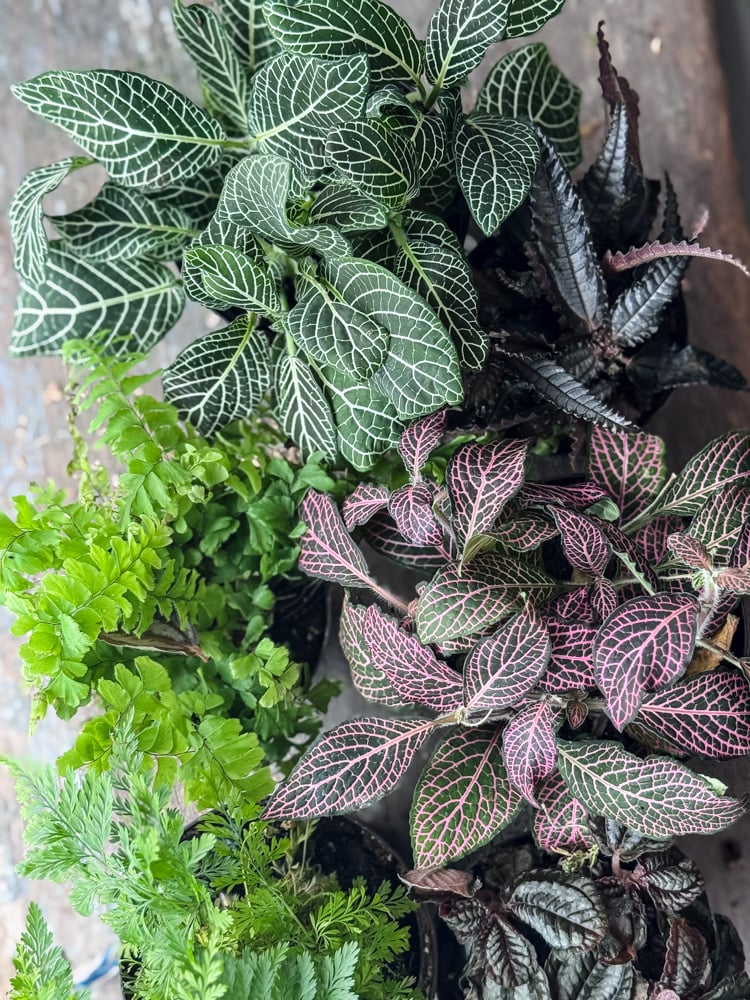
The Starring Cast: Best Plants for a Closed Terrarium
Not all plants thrive in a humid, closed environment.
The right plants are everything. For a closed, humid environment, you want slow-growing, moisture-loving varieties with smaller leaves that won’t outgrow the space in a season. I like to think of them in categories: the Colorful Showstoppers, the Lush Carpets, the Delicate Spillers, and the Textural Ferns.
Top Picks For Closed Terrariums
For Pops of Color & Pattern:
- Nerve Plant (Fittonia): The absolute classic. It’s striking pink, red, or white veining that adds a vital, beautiful contrast against all the green.
- Polka Dot Plant (Hypoestes phyllostachya): Another fantastic choice for color, with speckled leaves in pink, red, or white.
The Textural Foliage (Perfect for Mid-Ground)
- Peperomia: With their puckered, striped, or succulent-like leaves, they add incredible texture and stay beautifully compact.
- Aluminum Plant (Pilea cadierei): Its silvery, quilted leaves sparkle in the low, dappled light of a terrarium.
- Friendship Plant (Pilea involucrata): Has deeply textured, bronze-green leaves that look like they’re from a fairy tale.
The Lush Creeping Carpet
- Baby Tears: Forms a dense, bright green mat that creeps beautifully over soil and stones.
- Creeping Fig: The miniature variety is key here! Its tiny leaves will slowly cling to the glass or driftwood, creating a lovely, aged effect.
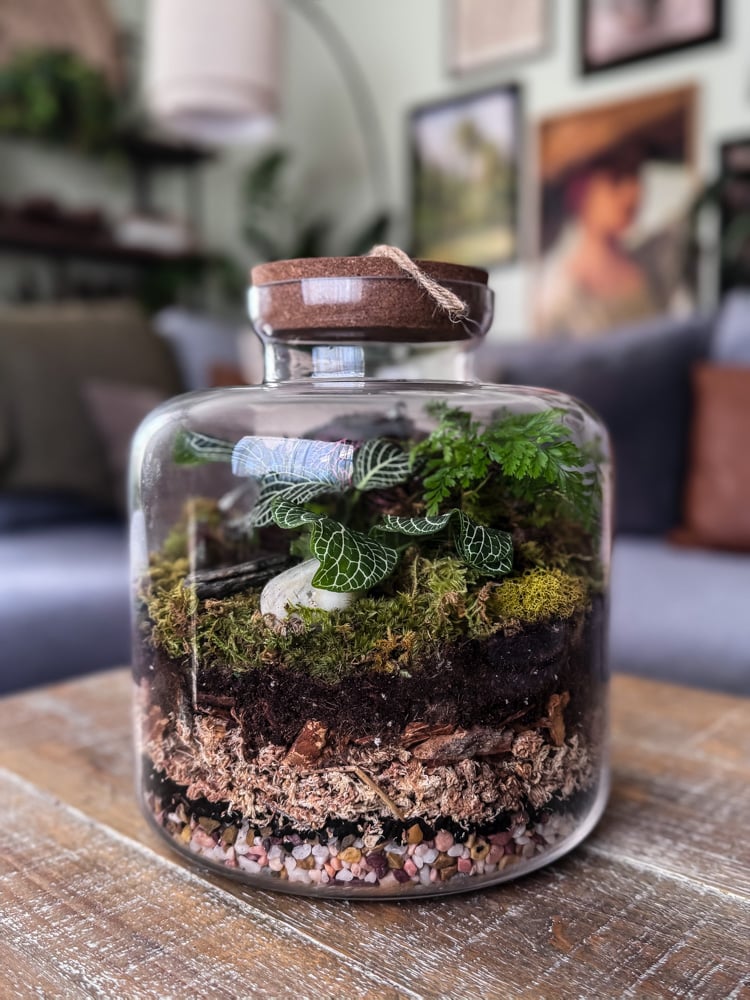
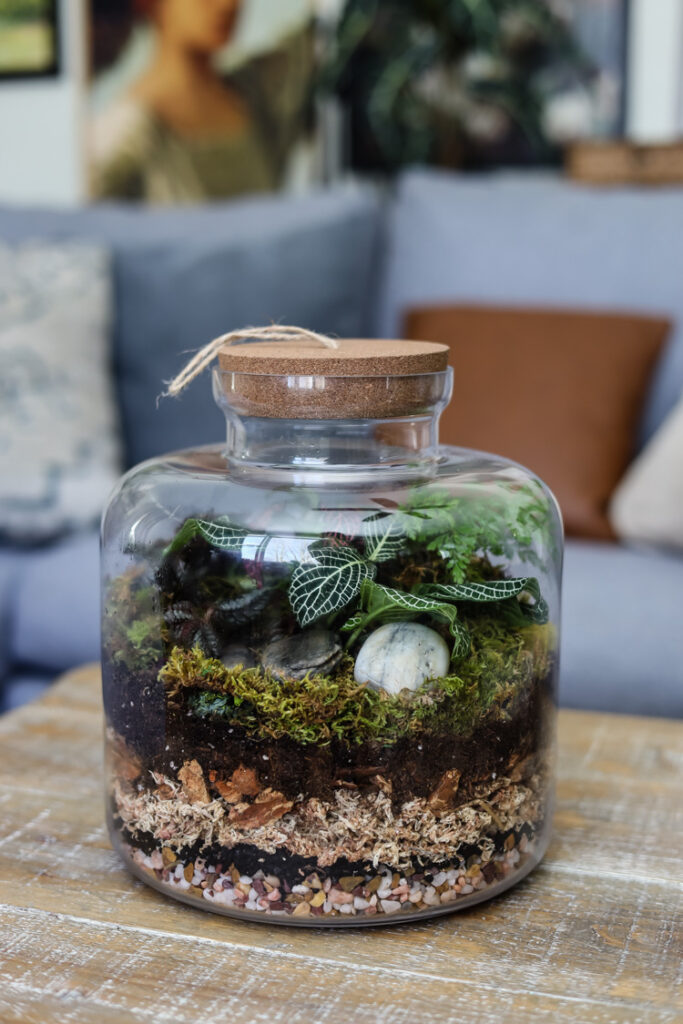
- Living Moss (Sheet Moss, Cushion Moss, Fern Moss): This is the secret ingredient. Pressed onto the soil creates an instant ‘forest floor’.I used a mix of different shades and textures.
The Delicate, Feathery Ferns
- Button Fern: Offers neat rows of small, round leaflets on dark stems-very tidy and architectural.
- Maidenhair Fern: Has adorable, compact, fan-shaped leaflets,
- Rabbit’s Foot Fern: Known for its furry, creeping rhizomes that look like rabbit’s feet. It adds a wonderful, soft texture.
Pro Tip from My Workbench: Even small nursery pots can be too bulky for your terrarium’s scale. Don’t be afraid to gently divide plants like the Fittonia or Pilea into smaller, manageable clumps. This helps with fitting them in artistically and is less stressful on the roots than trying to jam a whole root ball in.


Here’s everything I used for my miniature forest:
Step-by-Step Assembly: Building Your Miniature Ecosystem
This is where the magic happens, layer by intentional layer. I followed this exact process, and seeing it come together was so satisfying. Let’s build your terrarium from the ground up.
Prep Work
Before You Start:
- Give your glass vessel a good clean to ensure a clear view of your masterpiece!
- Cover your work area with newspaper
- Round up all of your supplies.
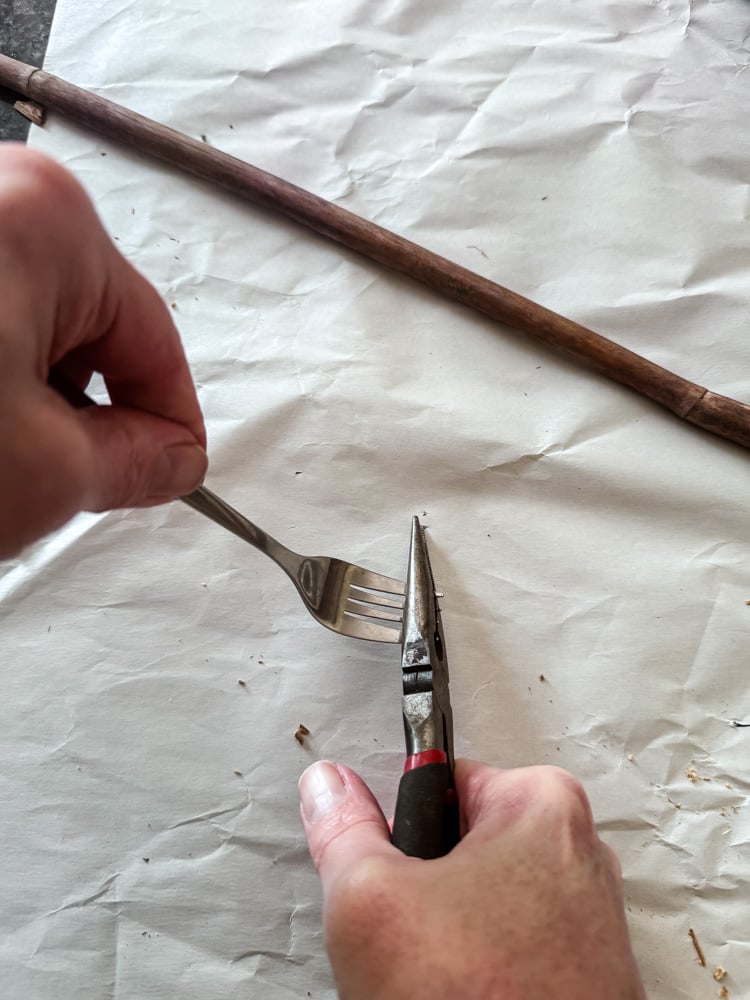
I didn’t want to buy new special ‘terrarium tools’, so I crafted my own inspired by a 1990s Martha Stewart Living episode! Using a bamboo garden stake and a cheap fork, It might not be as pristine as Martha’s, but it worked like a charm for planting in tight spaces.
I also grabbed a potato masher to use to tamp down the various layers as I built the terrarium. It goes to show you don’t need fancy gear to start!
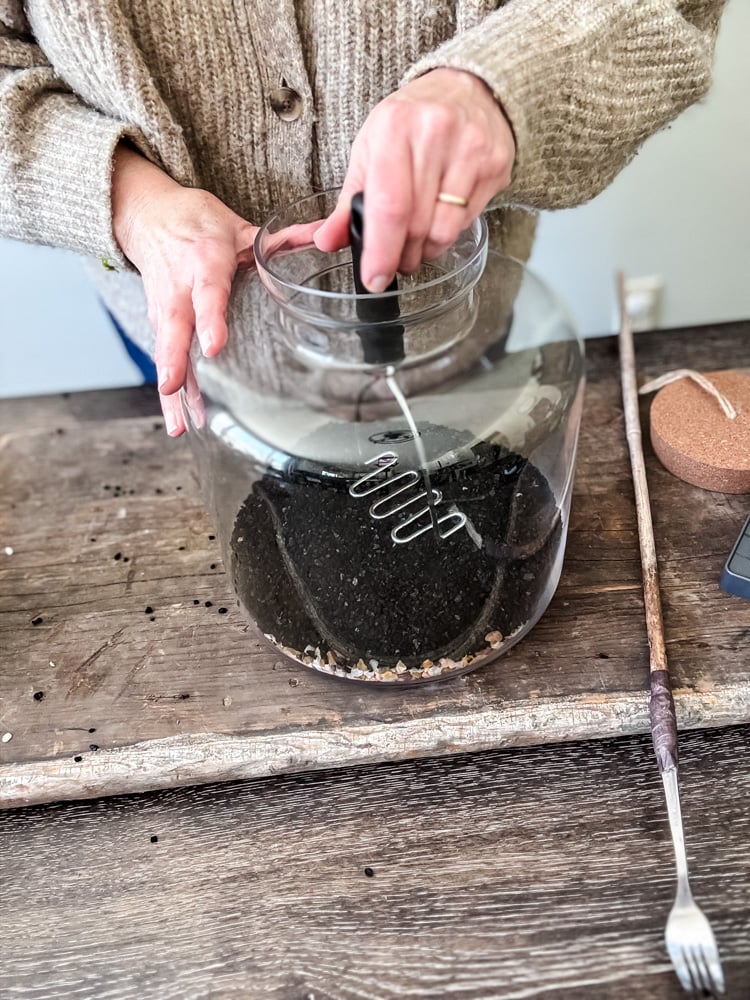
Step 1: The Unseen Foundation (Drainage)

The first step is to add a layer of pebbles or small decorative stones to the bottom of your terrarium container. Please do this gently, especially if, like mine, the glass is on the thinner side.
- What: A 1-2 inch layer of neutral river pebbles or small aquarium gravel.
- Why: This is non-negotiable. It creates a reservoir for excess water, keeping it away from plant roots and preventing the number one terrarium killer: root rot.
- My Tip: I love the look of smooth, natural pebbles. They add a clean, polished base even before we add the first plant.
Step 2: The Purifying Layer
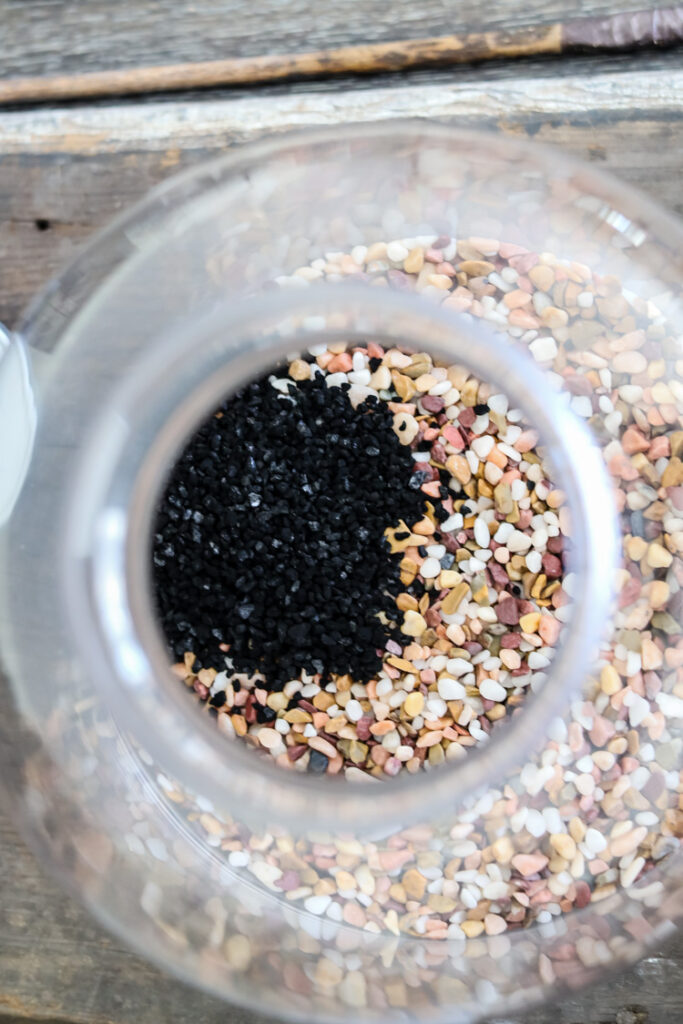
Sprinkle a thin layer of horticultural charcoal over the pebbles and tamp down.
- What: A thin, even sprinkle of activated charcoal over the pebbles.
- Why: This acts as your terrarium’s filter. It absorbs impurities, keeps the water fresh, and helps prevent mold and funky odors-it’s the secret to a healthy, long-lived ecosystem.
Step 3: The Protective Barrier
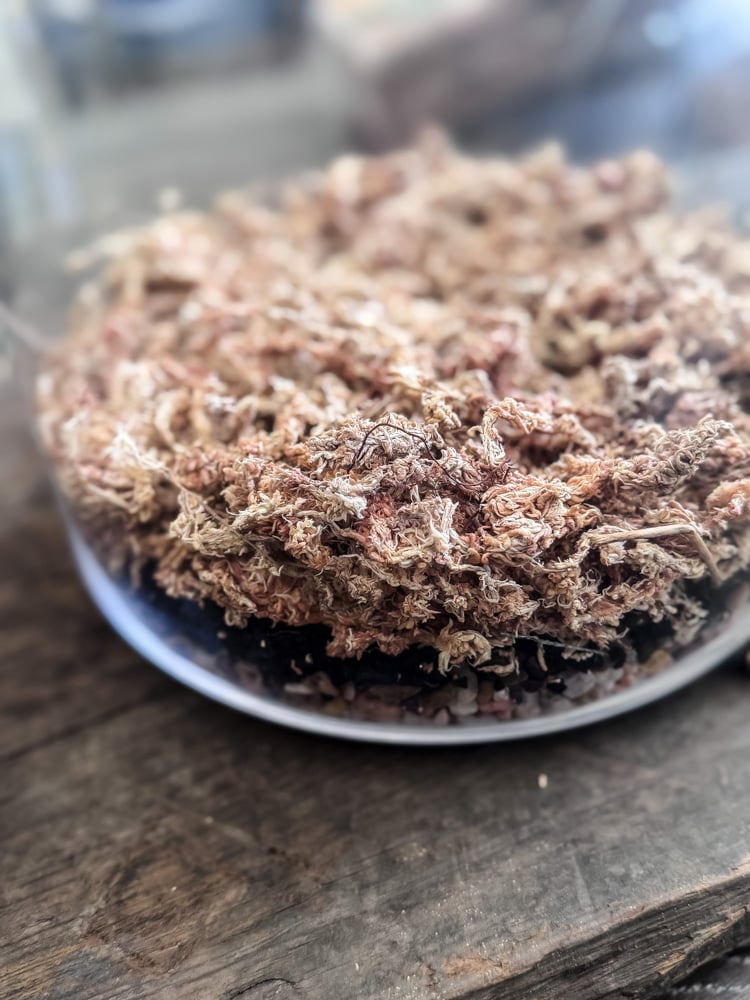
This next layer is an important one for keeping your terrarium nice & tidy looking! A layer of sphagnum moss on top of the gravel/charcoal layer will block the potting soil from seeping through.
- What: A fluffy layer of sphagnum moss (I’m using orchid moss).
- Why: This brilliant step creates a barrier that prevents your soil from slowly washing down into the drainage layer over time. It keeps everything neatly in its place.
Step 4: My Textural Twist (Optional but Lovely)

Here’s where I added my own spin. A handful of chunky orchid bark scattered over the moss adds fantastic aeration and a super natural, “forest-floor” look even before we add plants. This is optional, but I adore the dimension it gives.
- What: A handful of chunky orchid bark scattered over the moss.
- Why: This was my personal touch! It adds fantastic air pockets and gives that wonderfully natural, “forest-floor” texture even before we add soil. It makes the whole setup feel more organic.
Step 5: The Heart of It All (Soil)
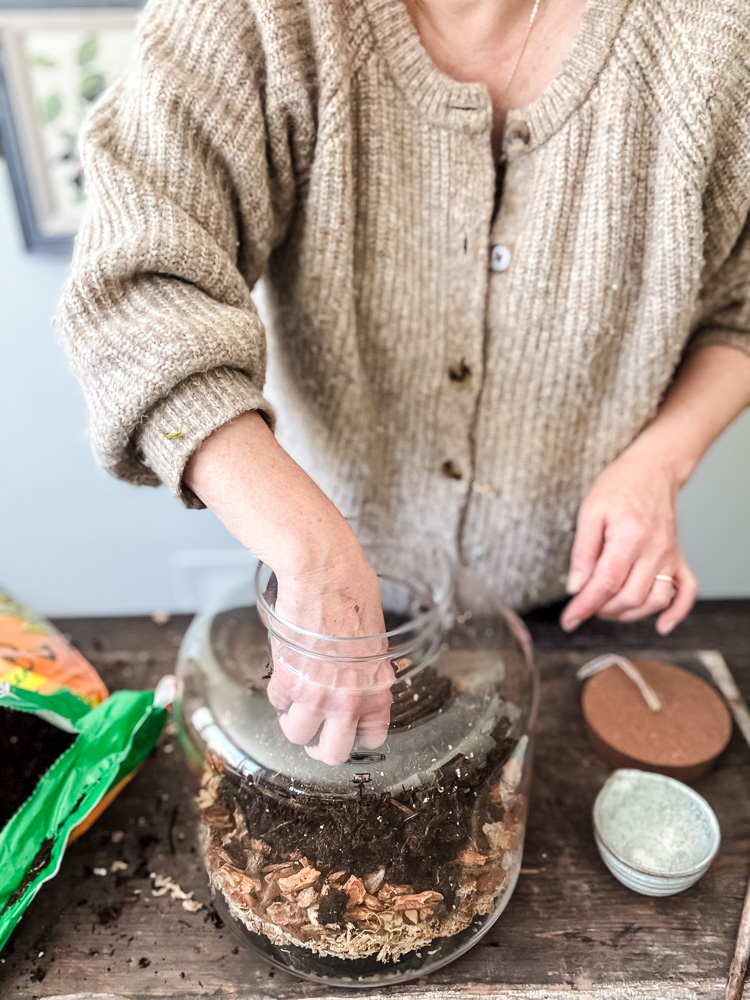
Now, add your main soil layer. Use a light, well-draining potting mix—never garden soil, which is too dense. Aim for 2-3 inches, enough for small roots to settle. Gently pat it down to create a soft, even landscape.
- What: 2-3 inches of a light, well-draining potting mix. Use a sterile indoor plant or tropical mix-never dense garden soil.
- Why: This is your plants’ home. It needs to hold moisture but also allow for air circulation. Gently pat it down to create a soft, rolling landscape for planting.
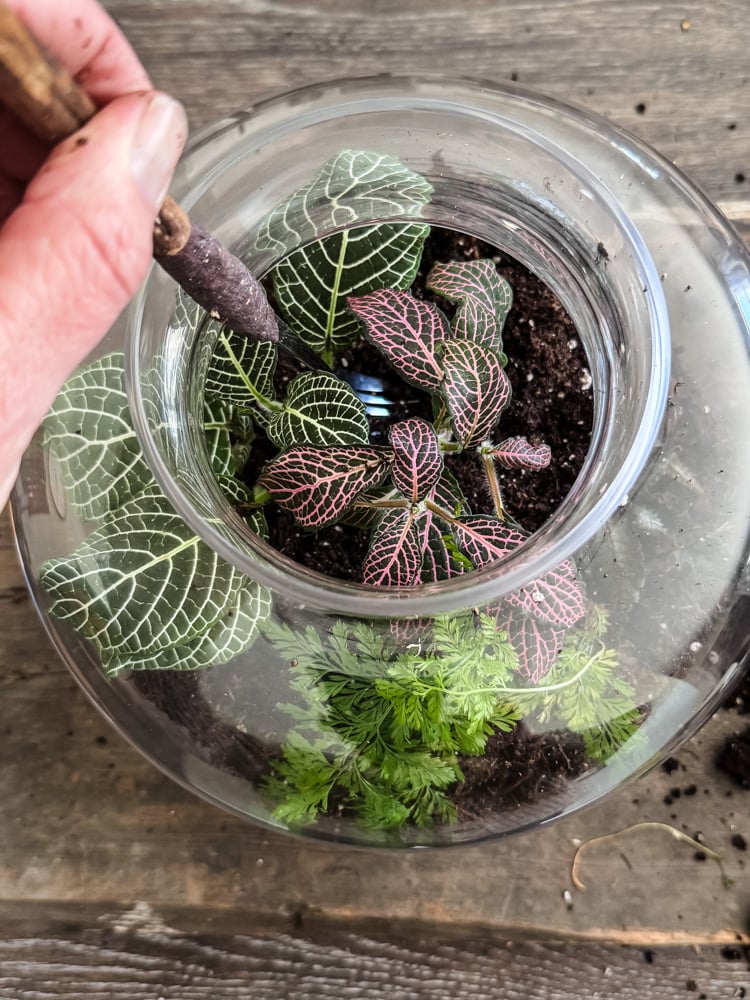
Step 6: The Artful Part – Planting & Design
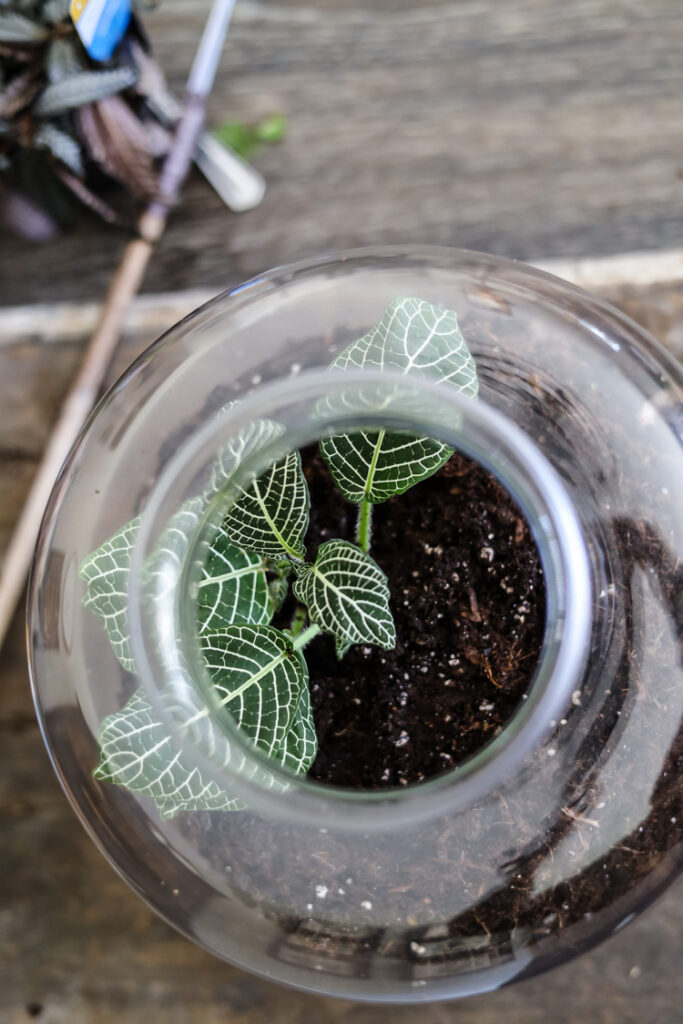
This is where your miniature world comes to life. Before planting, take a minute to figure out your placement.
- Plan Your Layout: Play with heights and textures! I like to place taller elements (like a fern) toward the back or center, and let creepers (Baby Tears, Creeping Fig) spill toward the edges.
- Plant with Care: Make a small hole with your tool or finger. Gently remove your plant section, loosen the roots slightly, and nestle it in. Use your tools to firm the soil around it.
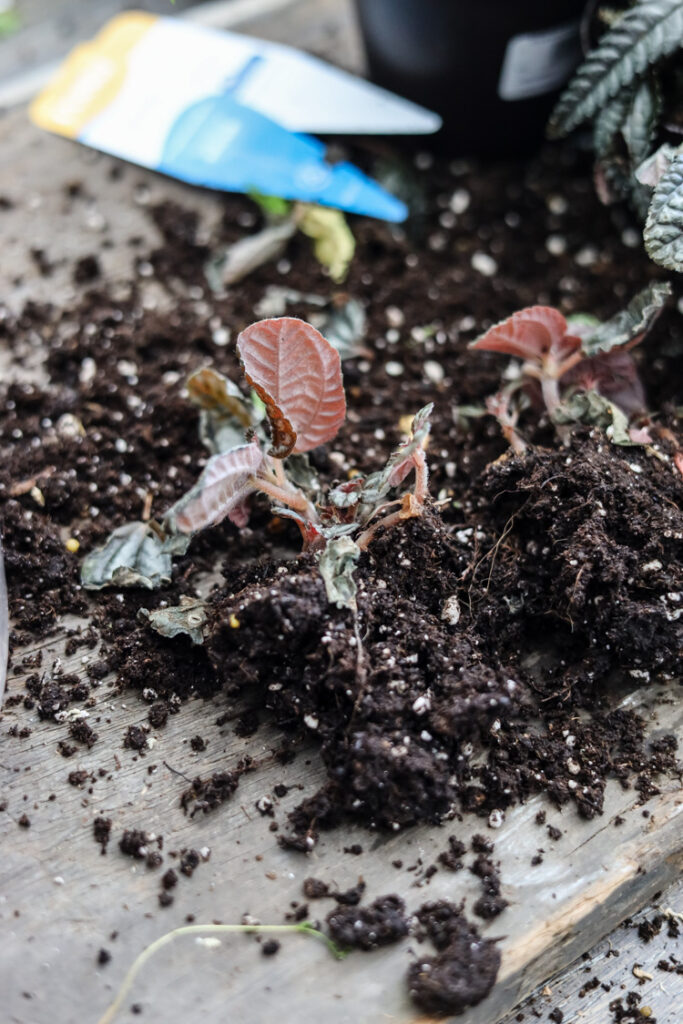
Since even small nursery pots are often too large for the terrarium’s proportions, I divided every single one of my plants. It’s simple: slide the plant out of its pot and gently tease the roots apart into smaller sections. This fits them into the landscape better and encourages them to spread out naturally.
Step 7: Final Touches

Once all plants are in, cover any exposed soil with pieces of beautiful sheet moss, cushion moss, or fern moss. Press it gently into place. This living carpet locks in moisture and creates that instant, magical, aged effect.
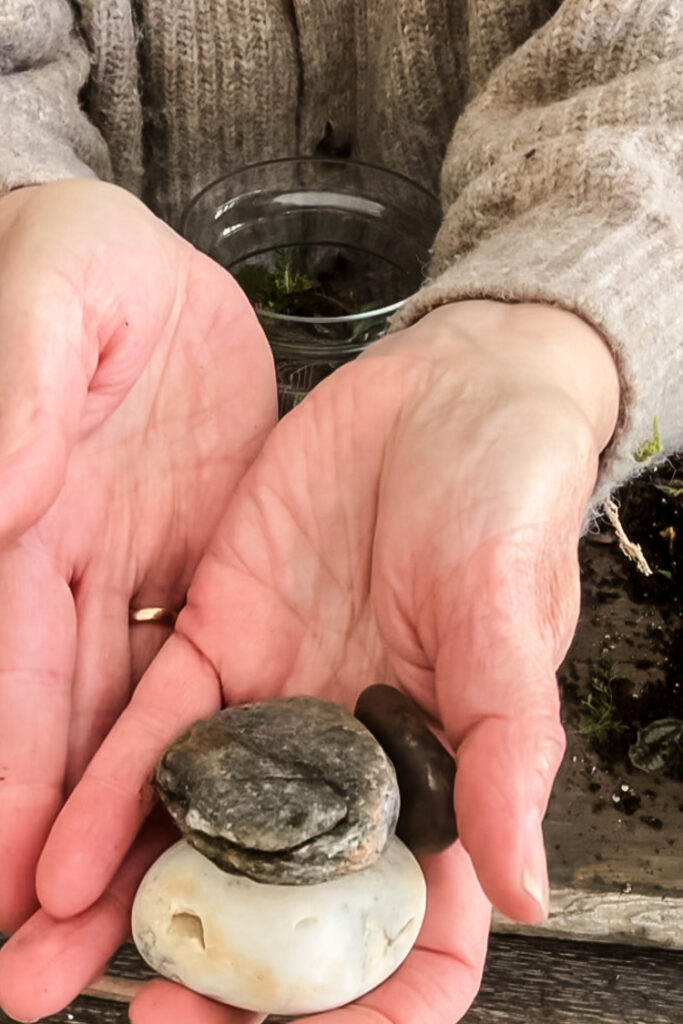

Final Decorative Touches: I nestled three smooth beach stones into my moss. They add a natural focal point and lovely visual weight.
Step 8: The First Drink & Sealing the World
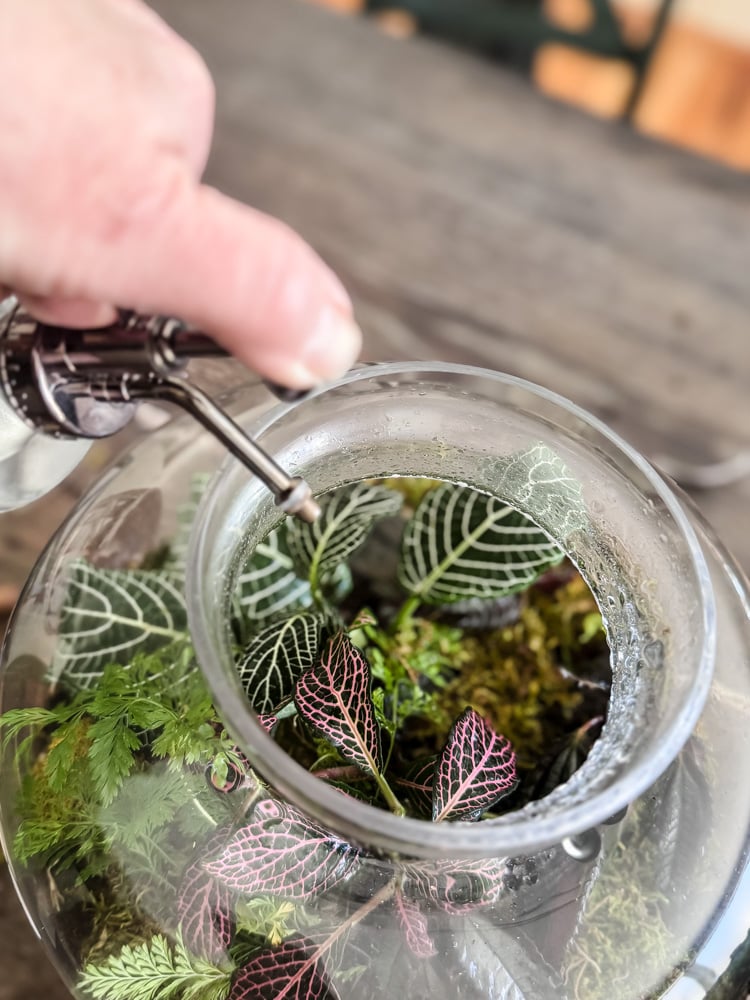
- Using a spray bottle, give the entire terrarium a light, gentle mist until the soil is visibly moist (like a wrung-out sponge) but not soggy. Think of a soft morning dew.
- The Essential Final Touch: Before placing the lid, use a clean, dry cloth or paper towel to gently wipe the inside of the glass. This removes any water droplets, soil flecks, or moss debris that splashed up during planting. A clean glass gives you a crystal-clear view of your miniature world.
- Now, place the lid on.

Watch the Magic: Within hours, you should see a delicate condensation forming on the glass. This is your tiny world breathing—the water cycle has begun! It’s the sign you’ve built it correctly.
watch my video tutorial!

The Golden Rule of Care & Simple Troubleshooting
The beauty of a well-made closed terrarium is its simplicity. Once established, it asks for very little. Your main job is observation.
The One Golden Rule:
If you see condensation on the glass for part of the day, do nothing. Your ecosystem is cycling perfectly. Only water if the glass remains completely clear for multiple days in a row. Then, add just a teaspoon or two of distilled or filtered water to the soil. Overwatering is the only real way to fail.
The Complete Care Cheat Sheet:
- Light: Bright, indirect light is ideal. An east-facing windowsill or a spot a few feet back from a south/west window is perfect. Never place in direct, hot sun (it will cook your plants).
- Watering: Follow the Golden Rule above. Less is always, always more.
- Pruning: Use long scissors or tweezers to snip back any leaves that press against the glass or plants that outgrow the space. This encourages bushier growth and prevents rot where leaves touch condensation.
- Feeding: Don’t. Fertilizer will cause rapid, leggy growth that disrupts the mini-ecosystem.
Troubleshooting Your Tiny Ecosystem
Even with the best setup, you might need to make small adjustments. Here’s how to read your terrarium’s signals:
Troubleshooting tips
- Problem: Constant Heavy Fog or Water Pooling at Bottom.
- Cause: Too much moisture.
- Fix: Simply remove the lid for 24-48 hours to allow excess moisture to evaporate. Replace lid. It should now cycle normally.
- Problem: No Condensation Ever, Plants Look Dry.
- Cause: Not enough moisture or a poor seal.
- Fix: Add 2-3 teaspoons of water to the soil. Ensure the lid fits snugly. If the lid doesn’t seal (like with a cork), you may need to lightly mist weekly.
- Problem: White Mold on Soil or Wood.
- Cause: Common in new terrariums; usually harmless fungal growth from excess organic matter.
- Fix: 1.) Scrape off the visible mold. 2.) Increase air circulation by leaving the lid off for a few hours each day for a week. 3.) Ensure it’s not in a dark corner; bright, indirect light helps.
- Problem: Plants Turning Yellow, Mushy, or Rotting.
- Cause: Overwatering and/or insufficient drainage.
- Fix: Immediately remove the affected plant and any rotten material. Leave the lid off for several days to dry out significantly. You may need to start over if the problem is widespread.
- Problem: Plants Growing Leggy or Pale.
- Cause: Not enough light.
- Fix: Gradually move the terrarium to a brighter location (but not into direct sun)
Enjoy Your Living Art!
And there you have it-your own magical, miniature forest. This little world you’ve built is more than just plants in a jar; it’s a living, breathing piece of decor that tells a story of patience and simplicity. Place it on a bookshelf, a side table, or a windowsill (just not in direct sun) where light can filter through the glass. I’d love to see your creations! If you build one using this guide, please send me a photo! It makes my day to see what you have created.
See your projects featured! If you are inspired by this or any of my other DIY projects, I would love to see them and add you to the Reader’s Spotlight gallery. Send a photo to me at jennifer@cottageonbunkerhill.com
xo, Jennifer
P.S. Loved this project? You might also enjoy:
Love projects like this? Don’t miss out! Join my newsletter family for more cozy, budget-friendly DIY ideas delivered right to your inbox. You’ll get exclusive tips, early access to tutorials, and all the inspiration you need to make your home feel handmade and heartfelt.


Thank you!
This is a wonderful idea that I have never tried, looking forward to it!