
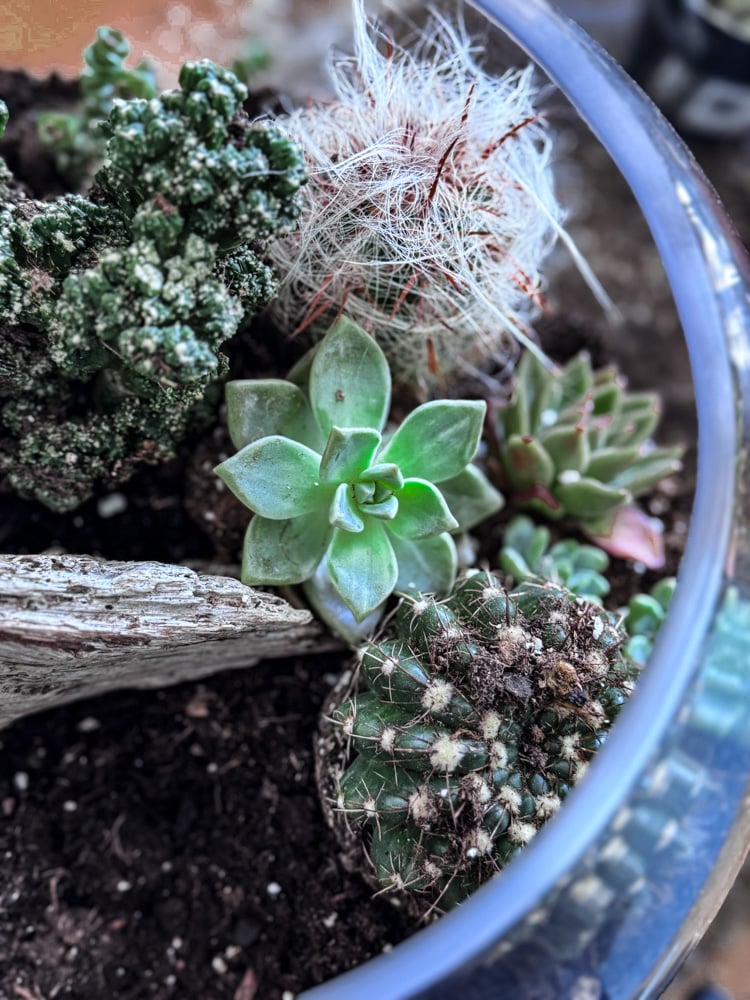
If the closed terrarium is a humid, secret forest, then this project is a bright, rocky desert landscape captured in a bowl. After so many of you asked for more succulent projects, I knew I had to create the definitive guide to an open terrarium dish garden-the right way.
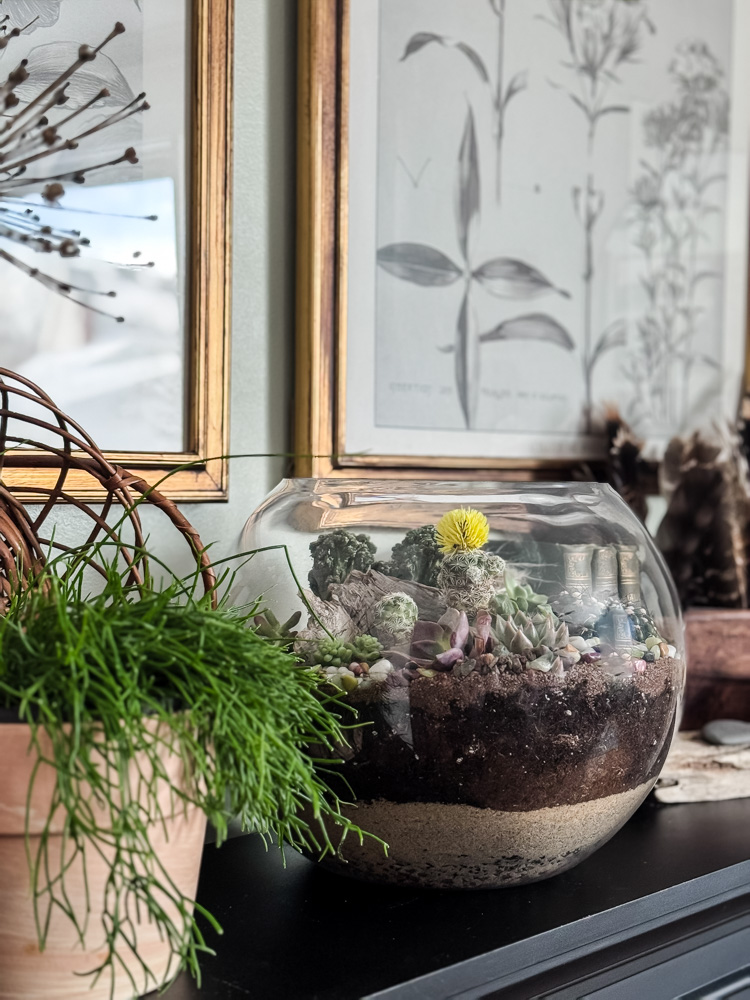
The key difference? Drainage and airflow. Succulents and cacti despise “wet feet,” so we’re building a home that lets every drop of excess water escape. Today, I’m using a gorgeous, oversized 12-inch bubble bowl to create a generous, eye-catching display. I’ll walk you through the special layering technique, how to handle prickly plants safely, and my trick for planting in a deep, rounded vessel.

Hi, I’m Jennifer. To me, home is an ongoing practice in intentional living. Through the rhythms of the New England year, I look for ways to make our spaces not only beautiful, but truly nurturing. I’m so glad you’re here to explore it with me.
This post may contain affiliate links, which means we receive a small commission if you purchase through our links. See our disclaimer page for more information.
What Exactly Are Succulents
Think of succulents as nature’s ultimate hoarders. These plants have evolved to survive in arid climates by storing water in their thick, fleshy leaves, stems, or roots. Cacti are a type of succulent, but not all succulents are cacti. Most cacti have spines instead of leaves and are especially adapted to dry environments. Because of their water-storing ability, both succulents and cacti prefer fast-draining soil, minimal watering, and bright light, making them perfect for open terrariums like this one.
Gathering Your Supplies
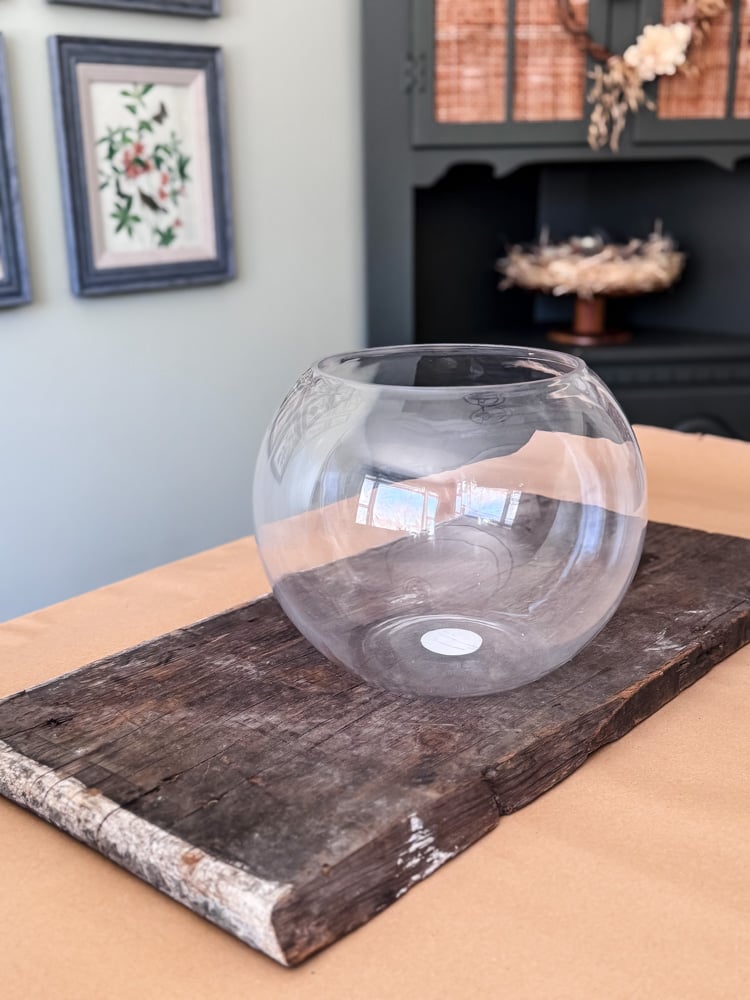
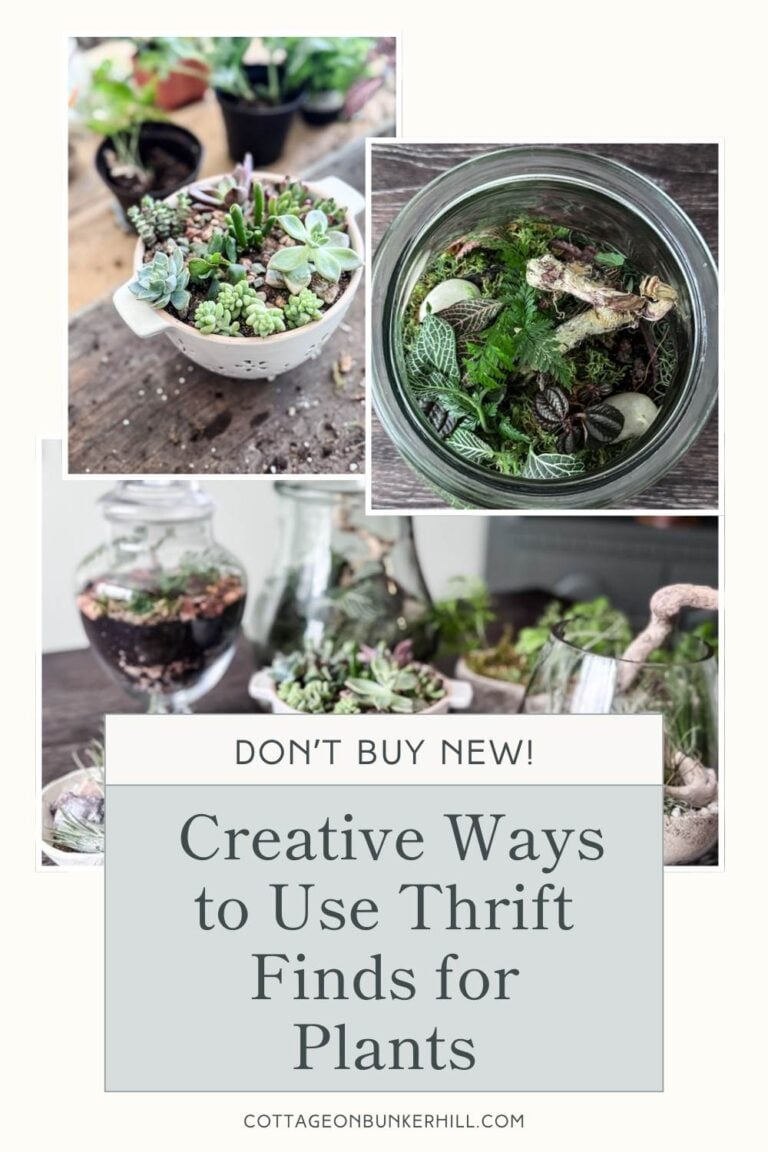
The beauty of an open succulent terrarium is its flexibility. You don’t need a fancy vessel-just an open glass bowl or container that lets air circulate and excess moisture escape. I’m using a large 12-inch bubble bowl today, but you could easily thrift an old glass fishbowl, a wide-mouthed vase, or even a vintage ceramic dish. As long as it’s open and has some depth for layering, it will work beautifully!
Now, the non-negotiables. Every successful succulent garden starts with two essentials: pebbles for drainage and gritty, fast-draining succulent soil. These are your foundation. Everything else builds from there.
I also highly recommend adding a layer of coarse sand between your pebbles and soil. This isn’t just decorative-it acts as a barrier, preventing your soil from sifting down and clogging up the drainage layer below. Think of it as nature’s filter, keeping everything in its place while allowing water to flow freely away from those sensitive roots. It’s a small step that makes a big difference in the long-term health of your plants.
With those basics covered, you can customize everything else-the size of your bowl, the mix of plants, the decorative toppings. Let’s look at exactly what I used for this project.
Materials for this Project
- The Vessel: A large, open bubble bowl (12″ across provides great scope).
- The Functional Layers:
- Lava Rock Pebbles: For ultimate drainage.
- Activated Charcoal: To keep the soil fresh.
- Horticultural Sand: Creates a sharp drainage barrier.
- Cactus & Succulent Potting Mix: Gritty and fast-draining.
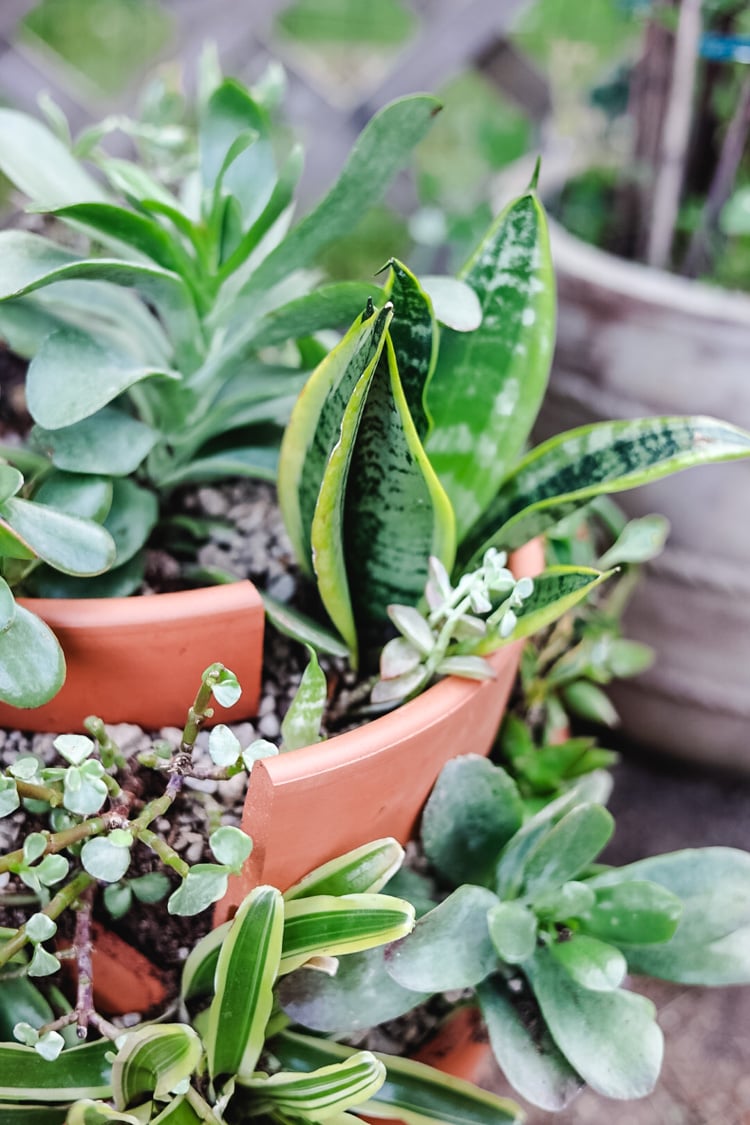
- The Plants: A variety of shapes, heights, and textures. Think: a tall columnar cactus, a few rosette echeverias, some trailing sedum. (I bought these succulents)
- The Decor: A piece of driftwood for structure, plus decorative sand and pebbles for the top dressing.
- The Tools: Trowel, chopstick or long-handled spoon, spray bottle, and heavy-duty gloves!
- Helpful Books:

The Step-by-Step: Building for Drainage
Now let’s get into the build! I’m showing you the basics
Step 1: The Drainage Foundation
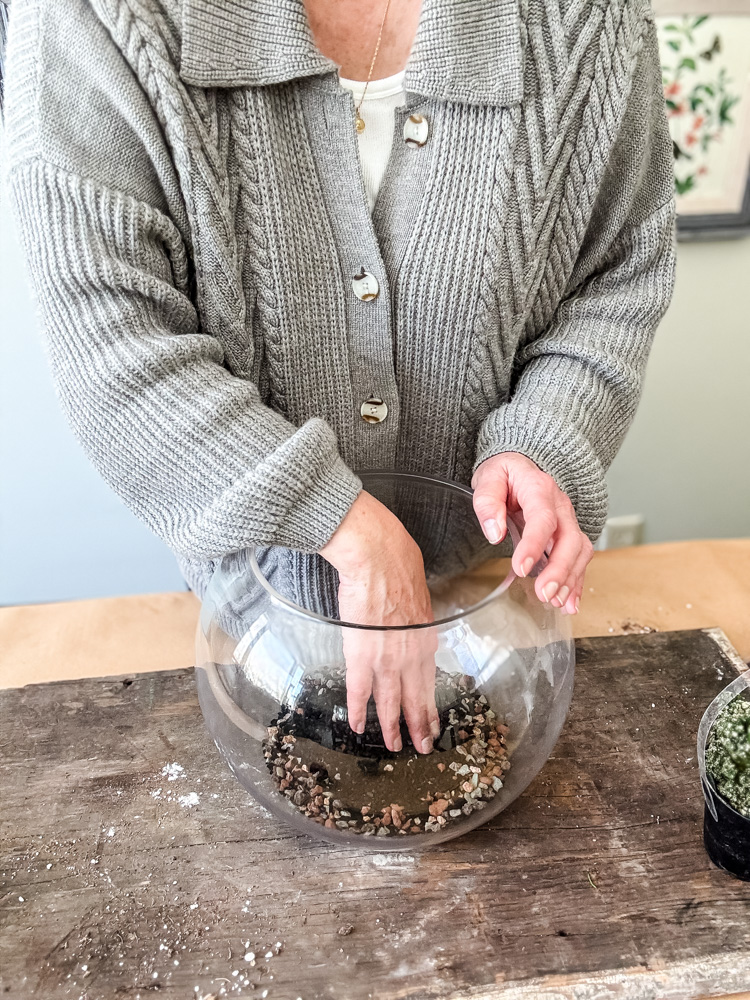
Fill the bottom of your bowl with a generous layer of lava rock pebbles (or other small pebbles). This is non-negotiable and the first step to preventing root rot.
Step 2: The Purifier
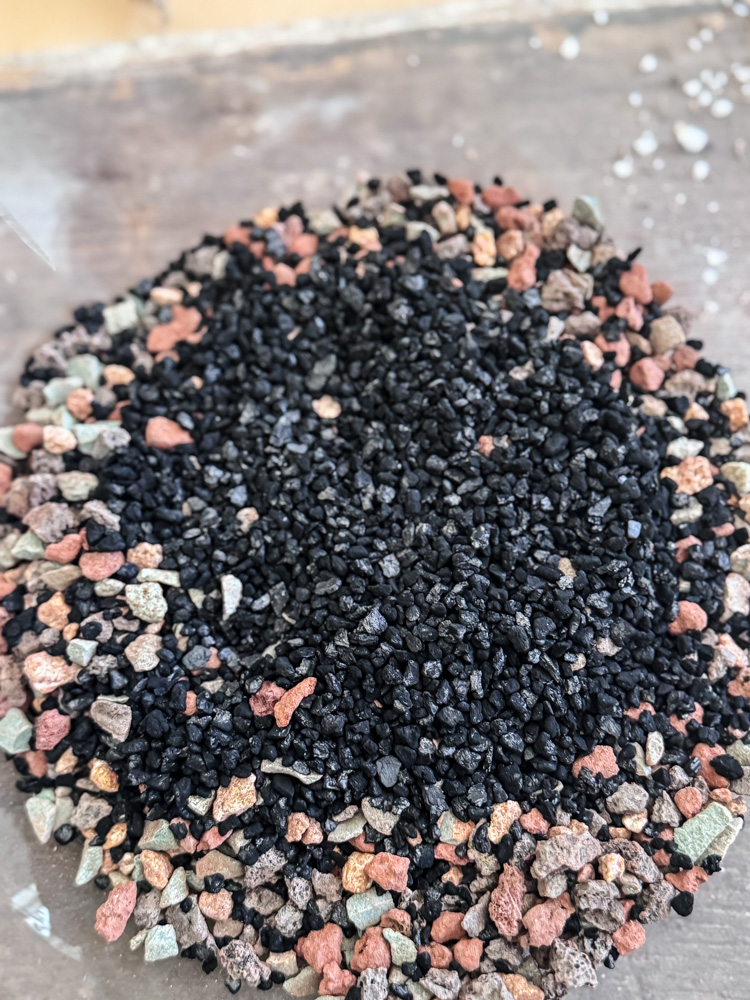
Next, sprinkle a thin, even layer of activated charcoal over your pebbles. This step is easy to skip, but it’s one of the smartest things you can do for a long-lasting terrarium.
Why it matters: Charcoal is a natural filter. It absorbs impurities, prevents bacteria growth, and keeps the soil from turning sour or developing that dreaded “swampy” smell. In an open container like this, it’s less critical than in a closed terrarium, but I still never skip it. Think of it as a little insurance policy for a fresh, healthy root environment.
A light dusting is all you need. You’re not building a campfire-just creating a clean foundation for your plants to thrive!
Step 3: The Barrier
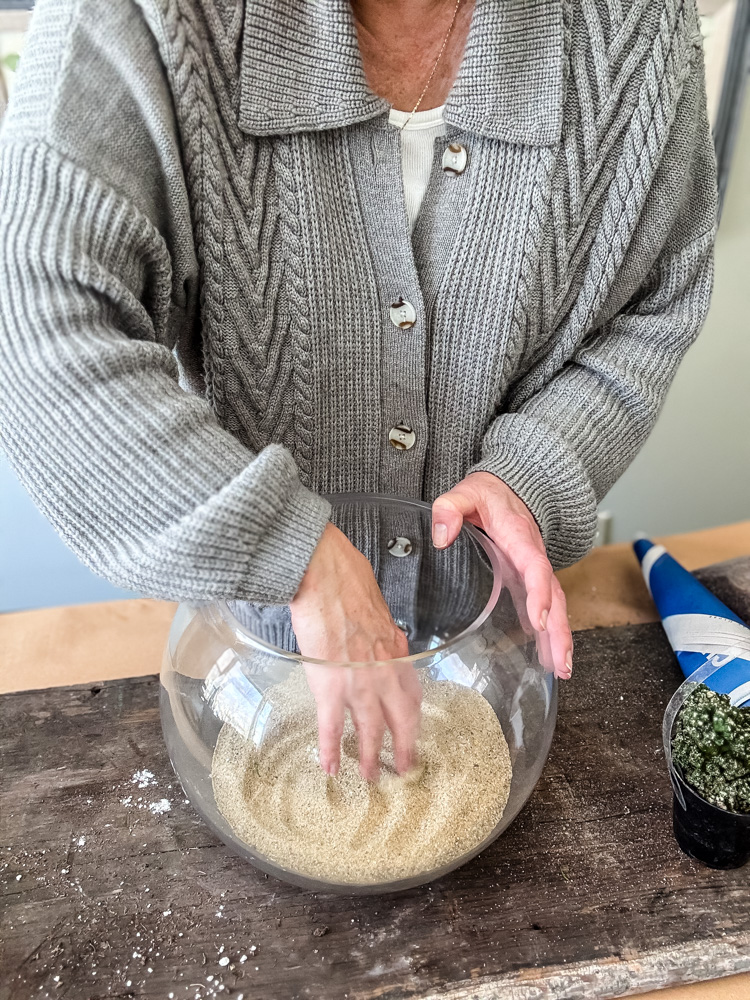
Now, add a generous layer of coarse horticultural sand over your charcoal. I know-another layer! But this one is doing important work behind the scenes.
Why it matters: Think of sand as the bouncer at a very exclusive club. Its job is to keep your fine potting soil from sifting down and settling into the pebble layer below. Without this barrier, water drainage gets clogged, and your carefully built foundation turns into a muddy mess. The sand holds everything neatly in place while still allowing water to pass through freely.
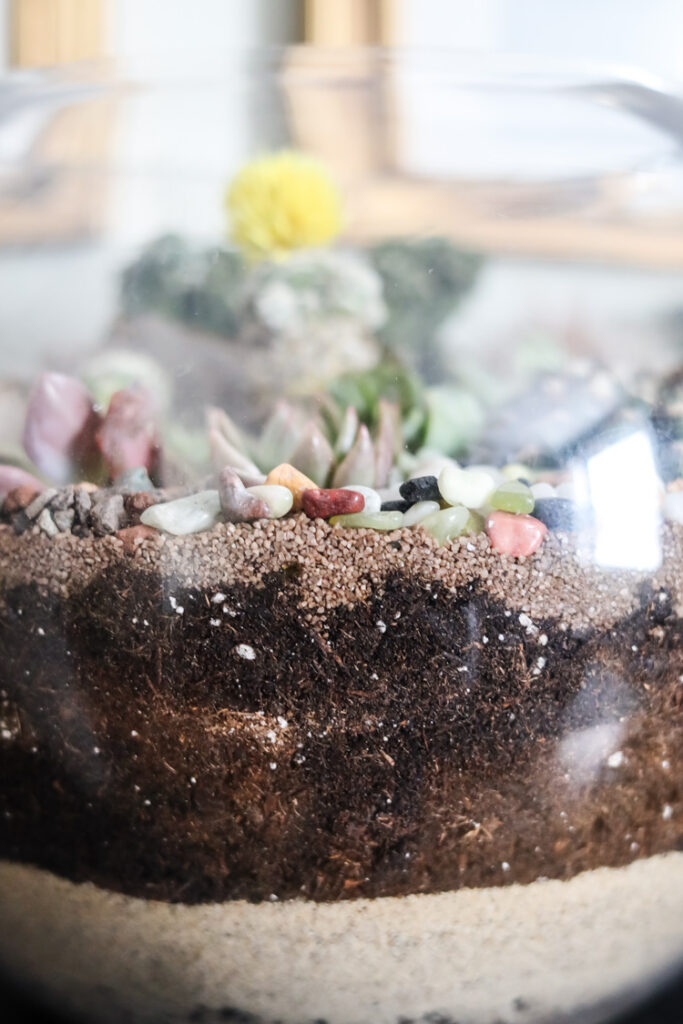
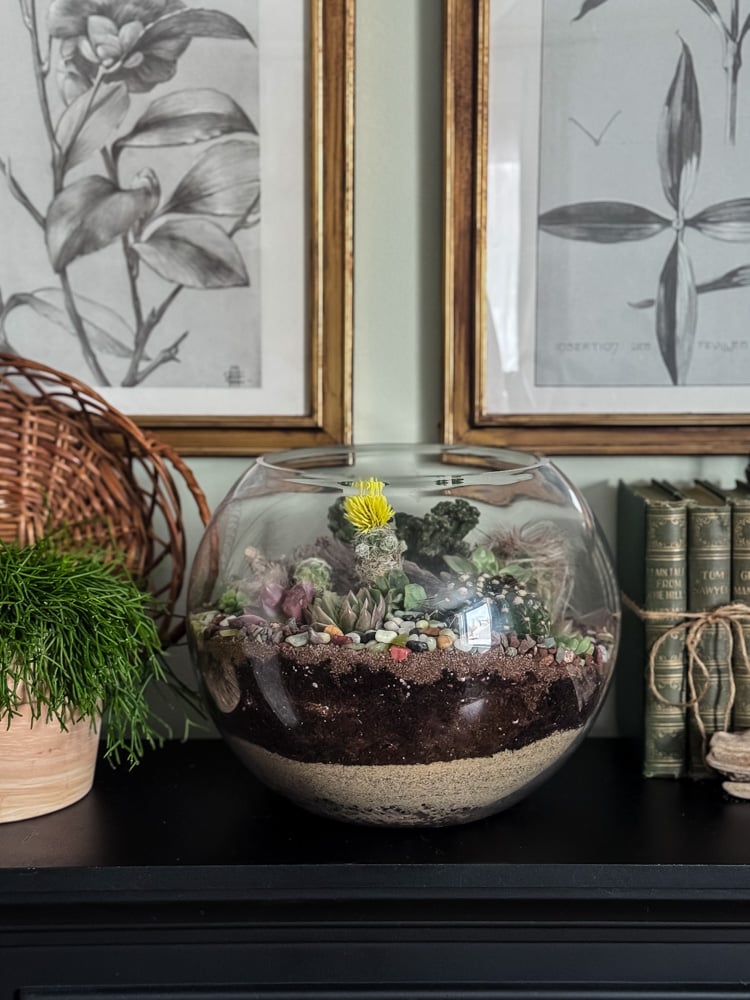
It also adds a lovely, natural texture when viewed from the side of a clear glass bowl. A win for function and beauty.
Step 4: The Gritty Foundation
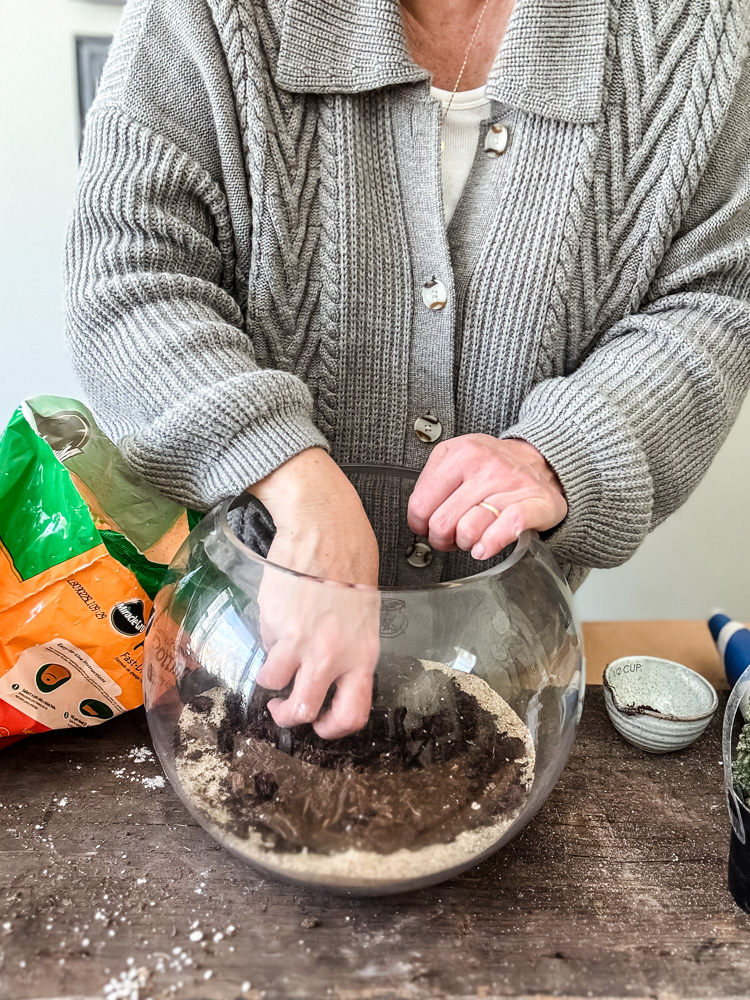
Now for the good stuff: cactus and succulent potting mix. This is not the time to grab that bag of all-purpose potting soil from the garage. Regular potting soil holds onto moisture like a sponge, which is the exact opposite of what our sun-loving plants need.
Succulent mix is specially formulated to be gritty, fast-draining, and lean. It often contains a blend of soil, perlite, pumice, and coarse sand—all working together to create air pockets that let water flow through quickly and roots breathe easily.
- Pour in a generous layer, at least 2-3 inches deep.
- Mound it up in some areas and leave it lower in others.
- This isn’t a perfectly flat foundation; it’s a tiny landscape! Those gentle hills and valleys will give you more visual interest and different planting pockets to work with.
- Now your stage is set. Time to add the stars of the show.
- But keep the bag handy because you may need to add some more as you build your terrarium.
Planting Your Succulent & Cactus Terrarium
Your layers are set, your soil is mounded, and now comes the best part:bringing your miniature landscape to life!
Step 5: Designing Your Desert Landscape

Before You Plant: Add Your Hardscape
This is the moment to place any decorative anchors that will give your arrangement structure and interest. Driftwood, interesting stones, a piece of sea glass, or even a small ceramic figure can transform a simple bowl of plants into a story. I nestled a beautiful piece of driftwood into my soil first, letting it rise like a weathered desert monument. Play around with placement until it feels right-you can always adjust as you go.
I’m adding a healthy chunk of driftwood I found after the last storm when I went for a walk at the beach. That’s one advantage of living so close-I have a nice collection of driftwood, sea glass, beach rocks, & sea glass!
Other Hardscape Ideas:
- Smooth river stones or beach pebbles
- Small geodes or crystals
- A miniature terra cotta pot
- Decorative sand in contrasting colors
- Sea shells or coral (rinsed well)
- A tiny ceramic animal or fairy garden accent
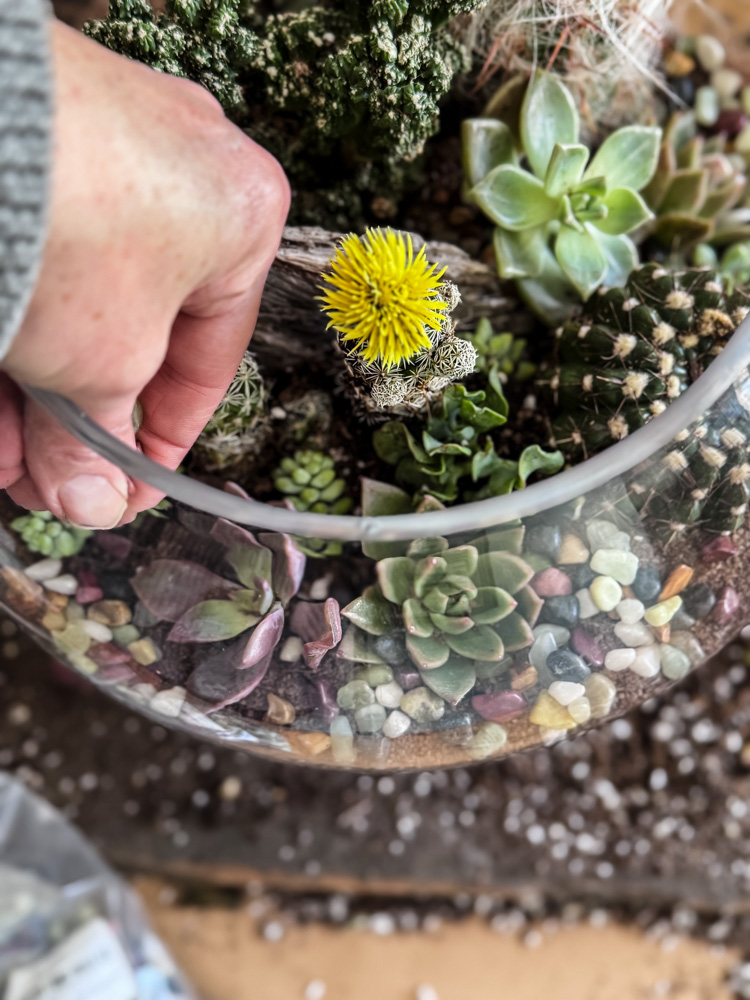
Step 6: Planting From The Top Down
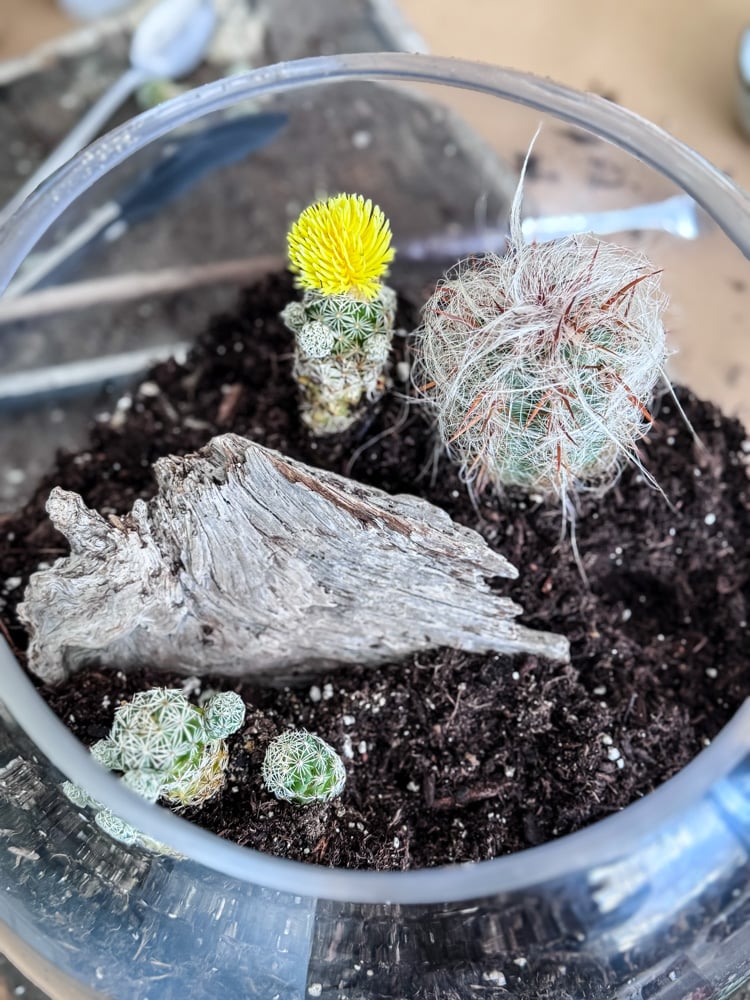
I always start with my largest plants first-they establish the bones of the design. In this bowl, that meant the cacti.
A Word on Safety: Please, please wear gloves when handling cacti! I learned this the hard way years ago. I use silicone-coated gardening gloves that give me good dexterity while protecting my fingers from those tiny, invisible spines. Even with gloves, I like to use long tongs or chopsticks to hold and position the cactus while I backfill around it. This gives me confidence and keeps the plant exactly where I want it.
Make a small well in the soil, nestle the roots in, and gently firm the mix around the base. Don’t bury the stem too deeply-you want the plant to sit at the same soil level it was in its nursery pot.
I found my cacti at both my local Lowe’s and the Home Depot stores. They both had interesting selections and were not expensive at all.
Step 7: Filling In The Gaps
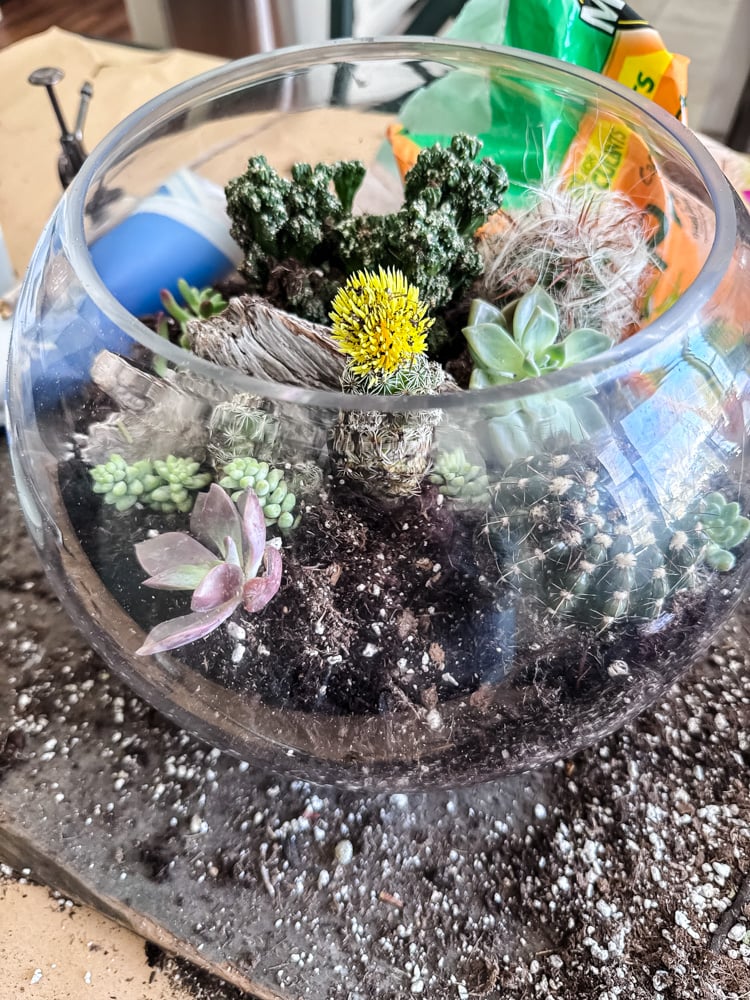
Once your anchor plants are settled, it’s time for the supporting cast—smaller succulents in varying shapes, colors, and textures. I added trailing sedums, rosette-forming echeverias, and a few spikey friends to create contrast.
Here’s the trick: As you tuck smaller plants into the curved sides of the bowl or into tight spaces behind the cacti, you’ll notice the soil level drops. This is totally normal! I kept a spoon nearby and added spoonfuls of fresh potting mix as I went. A long-handled iced tea spoon is perfect for reaching into deep bowls and gently backfilling around new plants.
Take your time. Step back and look at your arrangement from all angles. Rotate the bowl. Does it feel balanced? Is there a good mix of heights and textures? There’s no wrong answer-just your own beautiful, imperfect creation.
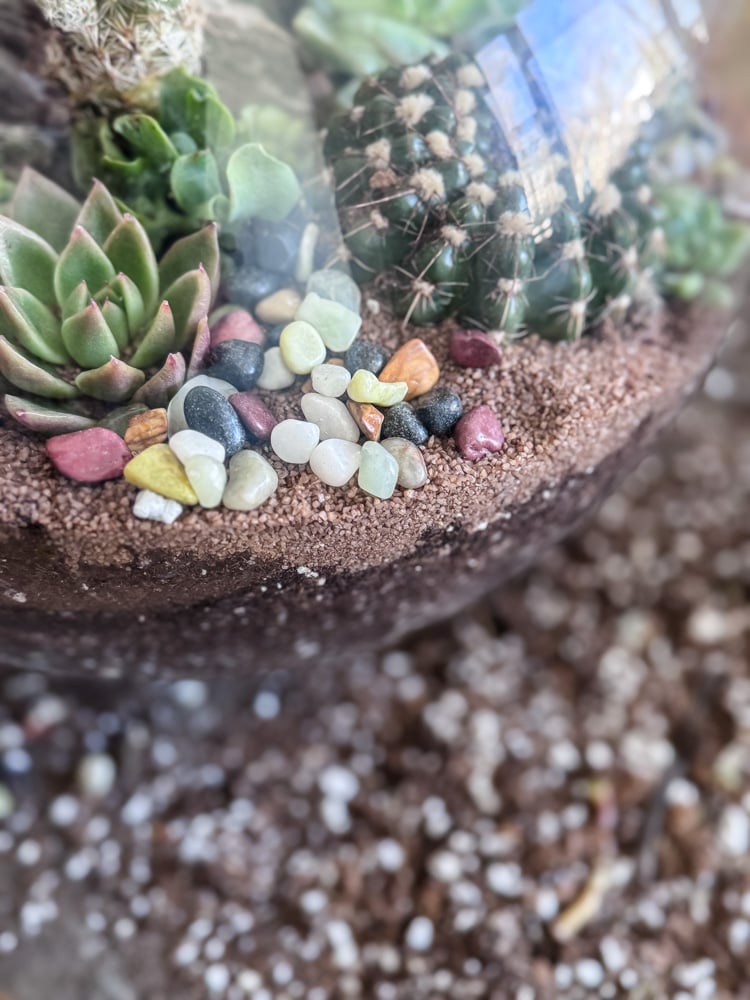
Step 8: The Finishing Touches

Once every plant is in place and the soil is built up around them, brush away any dirt that is on your plants with a soft paintbrush. I used a very small brush to get into the crevices of succulents and then a crafting chip brush for the cacti.
Now add your decorative top dressing: a final layer of fine sand, tiny pebbles, or crushed granite. This isn’t just pretty; it helps keep the base of the plants dry and gives your bowl a polished, intentional look.
Caring for Your Succulent & Cactus Bowl: Less is More
You’ve built something beautiful. Now let’s keep it that way. The good news? Succulents and cacti practically thrive on neglect. Your job is mostly to admire them and stay out of their way.
Watering: The Soak & Dry Method
This is the only rule you really need to remember: Water deeply, but infrequently. Wait until the soil is completely bone-dry all the way through. Depending on your home’s light and temperature, this might take 2-4 weeks. When in doubt, wait another week.
When it’s time to water:
- Use a dropper or small watering can with a narrow spout. Water slowly and evenly across the soil, avoiding the plants’ leaves and centers as much as possible.
- You want to moisten the soil without creating a swimming pool at the bottom.
- The key: Stop before water collects above the pebble layer. Unlike a pot with a drainage hole, that water has nowhere to go. Your goal is a thorough drink, not a flood.
Light: They Are Sun Worshippers
These plants want bright, direct sunlight. A south-facing window is prime real estate. An east or west window can work too, though growth may be slower.
Signs they’re not getting enough light:
- Stretching, leggy growth reaching toward the window
- Pale or faded color
- Widely spaced leaves
If you see this, move them closer to the light, gradually, to avoid sunburn.
Maintenance: A Little Goes A Long Way
Here are some easy maintenance tips to keep your terrarium looking fantastic:
- Remove dead or dried leaves from the soil surface to prevent mold
- Rotate the bowl every few weeks for even growth
- Prune leggy growth and propagate the cuttings!
- Refresh the top dressing if it gets displaced by watering
Troubleshooting: How to Read Your Plants

|
What You See |
The Likely Culprit |
The Quick Fix |
|---|---|---|
|
Yellow, mushy, or translucent leaves |
Overwatering (root rot) |
Stop watering immediately. Let the bowl dry out completely in a bright spot. |
|
Tall, leggy stems with wide gaps between leaves |
Etiolation (Lack of Light) |
Your plant is “reaching” for the sun. Move the bowl to a brighter location. |
|
Dry, crispy, brown spots on leaves |
Sunburn |
Surprisingly, glass can magnify heat! Move it back a few inches from the direct window pane. |
|
Shriveled, wrinkled leaves |
Under-watering |
Give it a targeted drink. Succulents use their stored water when they’re thirsty. |
|
Small white, cottony fluff in the crevices |
Mealybugs (Pests) |
Dip a Q-tip in rubbing alcohol and dab the bugs directly to kill them. |
A Final Gentle Reminder
Unlike a closed terrarium, this open bowl is not a permanent ecosystem. Your plants will grow. Some will outcompete others. In time, you may want to refresh the arrangement: prune back the overachievers, replace a struggling plant, or simply redesign with fresh soil.
That’s not failure; that’s gardening! And gardening, even on this tiny scale, is a practice of patience & care.
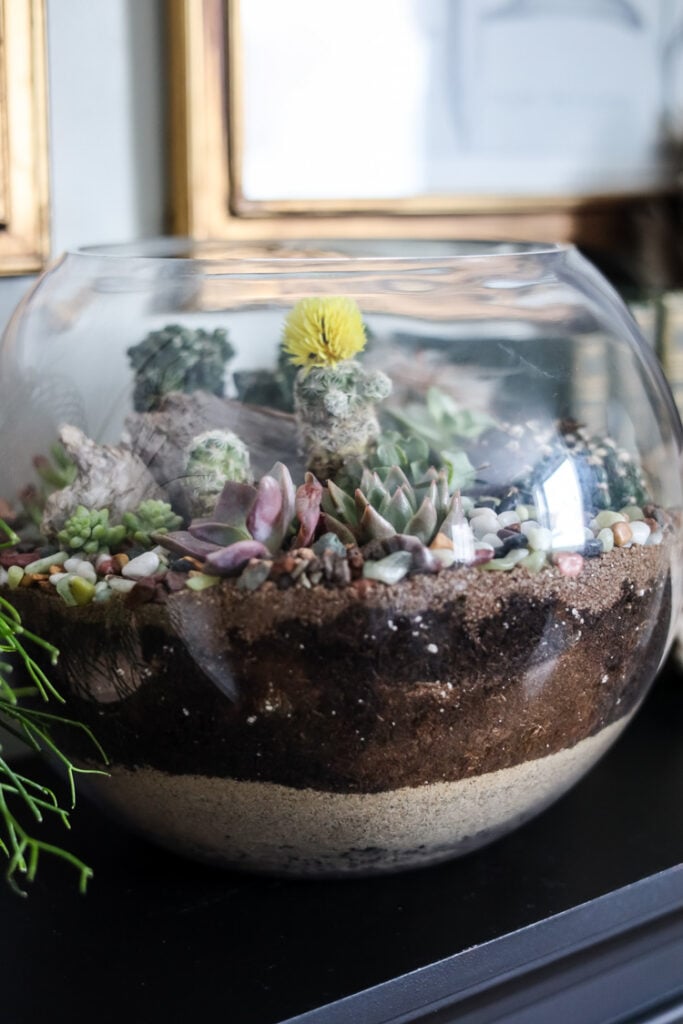
Your Desert Landscape, Complete
And there it is! Your own sun-drenched, sculptural desertscape, ready to brighten the brightest spot in your home. Every time I finish a bowl like this, I find myself just staring at it. It’s a living artwork, and you made it with your own two hands.
This project asks very little of you going forward. A sunny window. A patient hand with water. An occasional moment of observation. In return, it offers quiet beauty, slow growth, and the satisfaction of knowing you created something that thrives.
What’s Next?
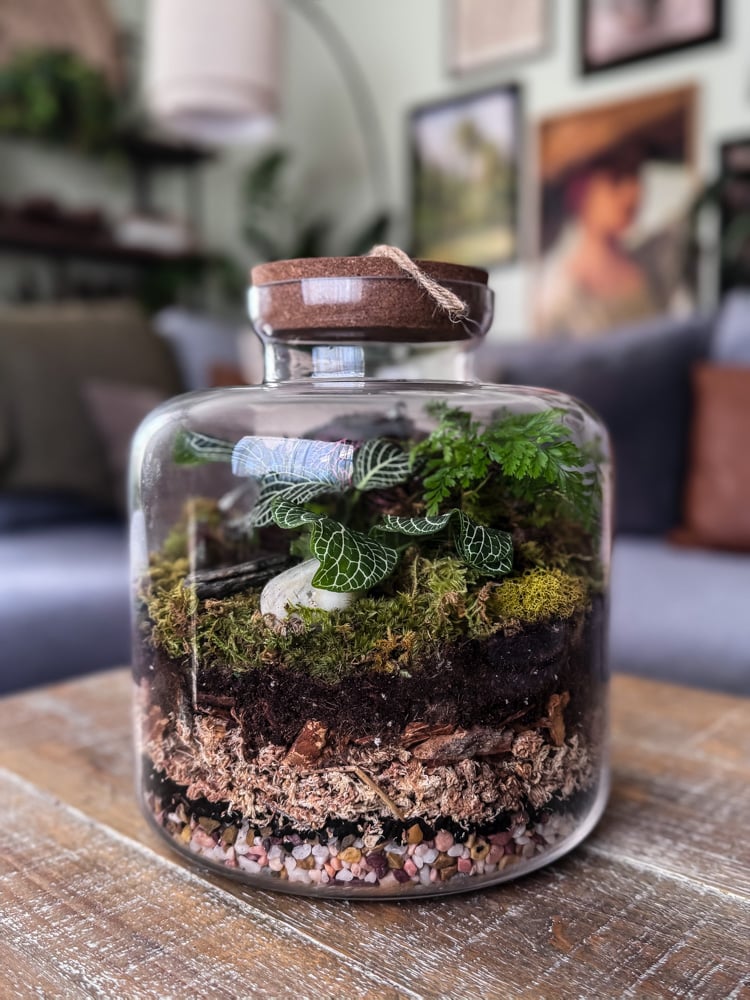
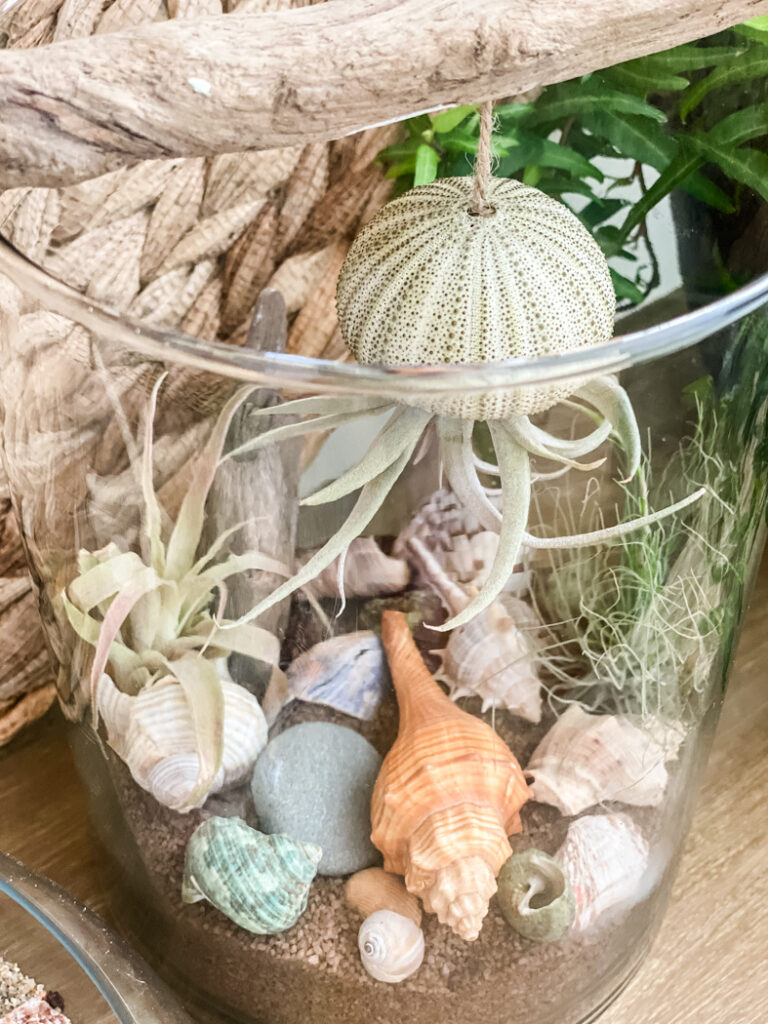
We’re building a whole terrarium library here at Cottage on Bunker Hill! You’ve mastered the humid, self-sustaining closed forest and now the sun-loving open desert. Up next? The best of both worlds: air plant terrariums—no soil required, just mist and magic.
Until Next Time, Happy Planting!
xo, Jennifer
Love projects like this? Don’t miss out! Join my newsletter family for more cozy, budget-friendly DIY ideas delivered right to your inbox. You’ll get exclusive tips, early access to tutorials, and all the inspiration you need to make your home feel handmade and heartfelt.


What a great post! I learned so much about how to plant succulents and cactus. Your planter came out beautiful.