
Looking for something to fill your vases this time of the year that is easy and looks elegant? I have the perfect thing for you to try, my easy-to-make moss branches.
DIY Your Own Moss Branches
This is a super easy DIY project and you will love how these moss branches look in a vase! They are the perfect thing for this time of the year when you are tired of winter greens but it feels too early to put out tulips or other spring flowers.

This post may contain affiliate links, which means I may earn a small commission if you make a purchase through my links, at no extra cost to you. Read my disclosure policy here.
Inspiration:

The inspiration for this project was a bundle of moss & lichen branches that I saw on the Terrain website. They sell for $68 plus an extra $10 shipping charge…yikes!! One thing I knew for sure is that I could make a knockoff bunch of branches for a heckuva lot less!!
Supplies:

- Artificial Willow branches (around $17 on Amazon)
- Moss Variety Pack (Around $8 on Amazon)
- Hot Glue Gun

The branches come in a pack of 10. Today I am going to use 6 of the pack and save the others for another project.
They are really easy to work with! Honestly, when the small shipping bag was delivered from Amazon I was a little taken aback because of the size, and when I opened it and the branches were bent in half.
But the branches are super pliable and so easy to shape, this crafter was impressed.

Moss is one supply I always have on hand down in my craft studio.
I’m telling you it comes in so handy for so many projects!!
One bag of this mixed moss is more than enough to do the entire set of branches if you want to make all 10. I had a couple of half-used bags of moss on hand already.
Making the Moss Branches

To make the moss-covered branches simply run your glue gun down the branch where you want to add moss then glue a small amount to it.

I concentrated on the main parts of the stems, especially where they forked. Also, I varied the types of moss and then would glue a small piece of the lichen on top of the moss.

There really isn’t a right or wrong way to create these branches. If you want a heavier coating of moss on your branches go ahead, it will look fabulous!
Also, make sure to wrap the moss around the branch so it covers all sides.
Carefully do this so you don’t burn your fingers on the hot glue!

Each branch I made was slightly different. On some I went heavier on the moss, some branches I added more lichen or the lighter moss.
Just trying to make each one unique.
This was a quick DIY project too!
Finished Set of Moss Branches

Aren’t they pretty?? The organic, natural look and the mixture of colors and textures are lovely!

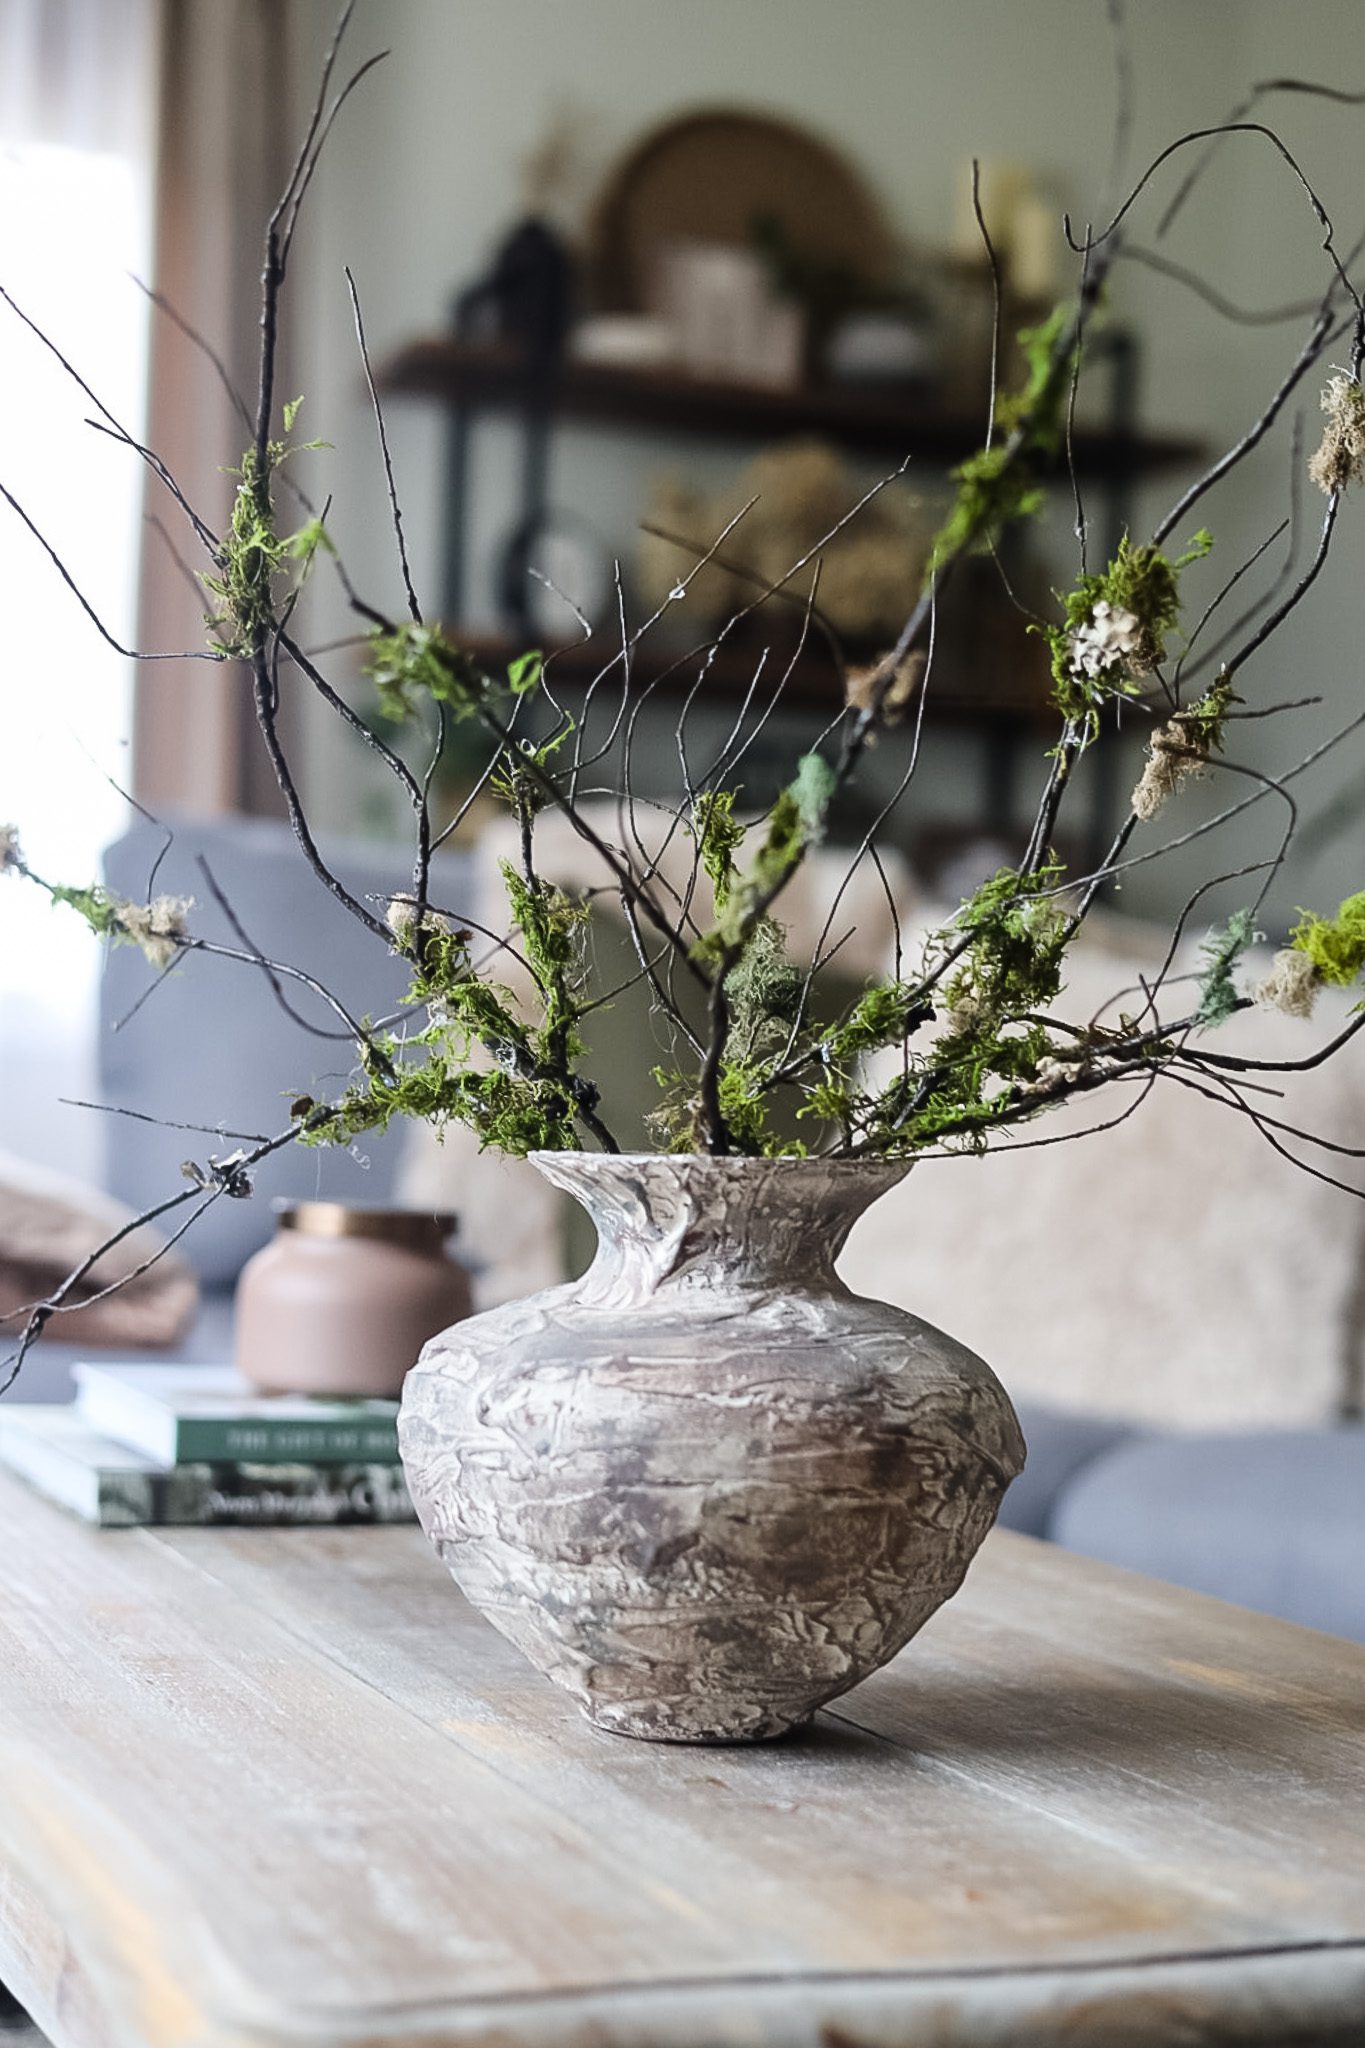
Now for the fun part! Styling the branches and finding the best vase to display them. After I pulled out a couple of my DIY vases I settled on this Pottery Barn Dupe Vase because it is the perfect size for my coffee table and I liked the contrast of the colors and textures.

This is a shorter vessel so I bent the bottoms of the branches in a U shape before sticking them into the vase. Bending the branches like this also keeps them in place.
The moss branches will definitely look great in a taller vase as well. I played around with them in this thrift store flip vase and then also this larger DIY vase.
Easy to Make Moss Branches

Ahhhh, yes, I love how they came out! One thing that I love is that the moss branches are perfect for any season of the year.
You could also make an arrangement using the moss branches along with some artificial flower stems of the season you are in.
Another way to use them is to mix a few of the moss branches in a vase with a few of the plain branches for a more subtle look that is still very natural looking.
If you are inspired to make this project (or any of my others) I would love to see them! Send in your photos to jennifer@cottageonbunkerhill.com to be added to the Reader’s Spotlight page.
xo, Jennifer

My Favorite DIY Vases
DIY vases to try—

fake it ’til you make it
17 Pottery Barn
Inspired DIYs


Oh my goodness these turned out incredible! I can’t wait to look at all your other creations! Thank you so much for all the guidance and ideas!
I’m so happy you liked them!! Really a project that I love & have out somewhere in my house year-round!
Love these branches; just ordered some!
They are fantastic! Have you seen KariAnne’s project where she adds the wood slices?? It’s so cool!
I’ve actually got a (non working) chandelier I’m thinking to use this technique on as part of a “Cottagecore” bedroom design. I love these mossy twigs and I am so grateful for the DIY tutorial!
OOOOh, you have to send me a picture! I will share you on my weekly rewind. That sounds amazing!!
They look amazing, what a great DIY. Thank you for sharing.
Thanks so much, Linda!!
Jennifer, These moss branches came out amazing. I love using moss when I decorate. It brings such a fun natural element. The branches are such a great idea and perfect to transition into Spring. Pinned! I would love to invite you to stop by Tuesday to our Home Imagined Link party (9am). Have a great week.-Meagan
Oh, I am going to write that down because I always forget to do link parties!!
This is such a great idea. I actually bought a bunch of fake green branches a few years ago and paid a fortune for them. You’re a lot smarter than me!
They are so expensive!!! You have pretty branches out in your yard, you definitely have to make some…they will look so pretty on your dining table!
I love this idea, Jennifer! Thanks for the inspiration. I’ve been collecting branches from the yard to do this myself. I’m sharing this in my Saturday roundup tomorrow!
Thanks so much Kim!!
Jennifer
These look great and what money saver.
I can’t even imagine paying Terrain prices for these!!
This is such a great idea. I love it. Hugs to you.
They are perfect for this time of year!! I need more green in my home to cheer me up!!
This is such a great idea! Buying these in a store can be so expensive. You just saved me a bunch of money because I really want to try this! Thanks, Jennifer!
Definitely! It’s the perfect thing for this time of year. I need some green in here but not winter greenery.