
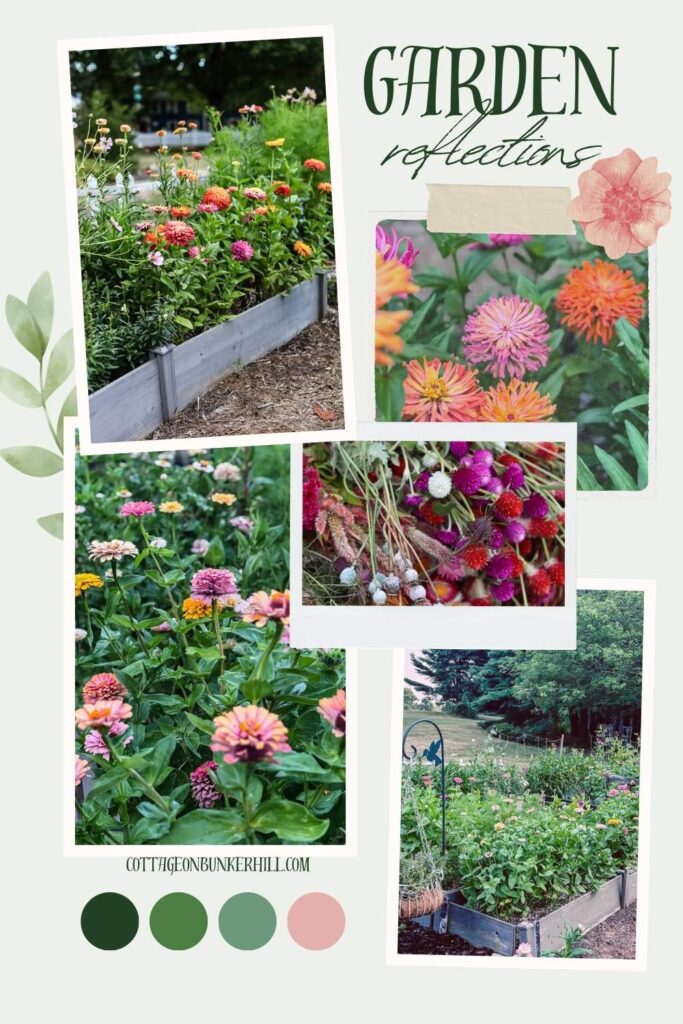
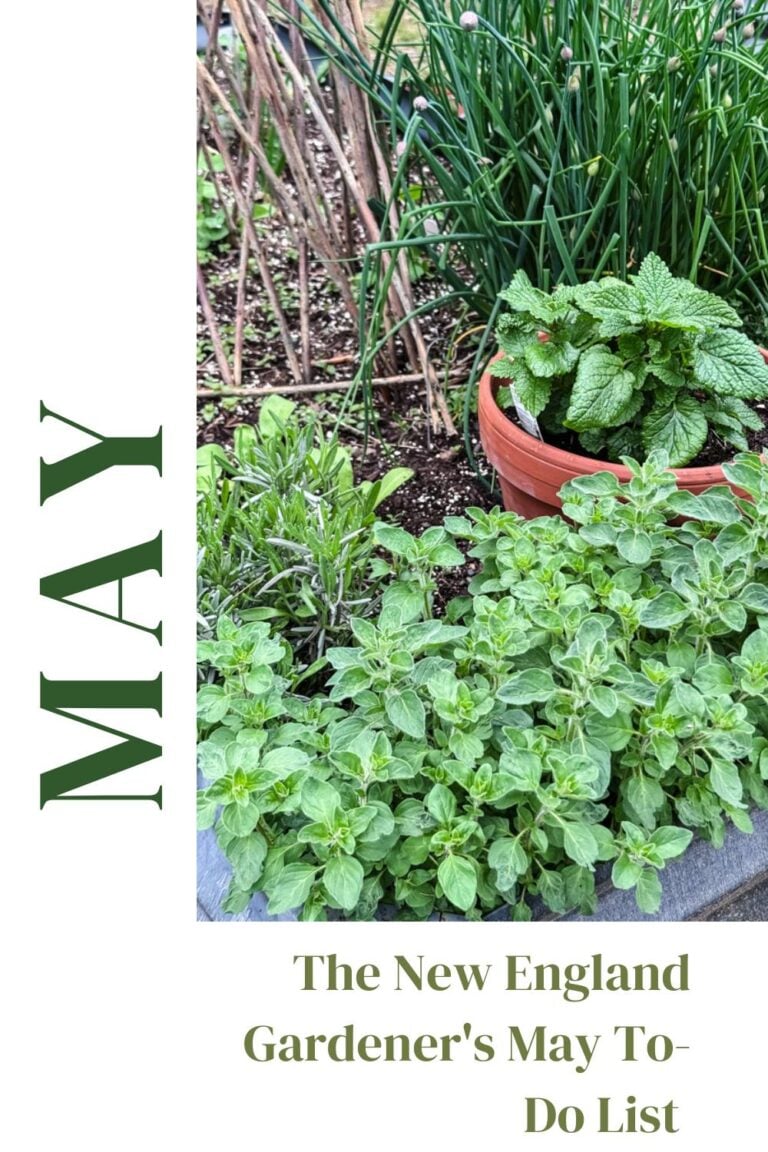
Every January, I sit down with my seed catalogs and whatever notes I scrawled in the margins of my garden journal, and I do a little post-mortem on the season. What worked. What didn’t. What I’m doing differently. And last year? I have a lot to say.
After 2024’s absolute disaster of a summer: the record rainfall, the vegetables that gave up, the cut flowers that barely showed up. I went into 2025 with low expectations and a very focused plan. (If you missed last year’s garden reflection, you can catch up here.) I was going to grow more flowers. Better flowers. Flowers I could dry and use for the next twelve months of projects. I was going to stop fighting with the sweet peas and actually figure out why they kept failing me. And I was going to let myself enjoy the garden instead of just being frustrated by it.
Reader, 2025 delivered.
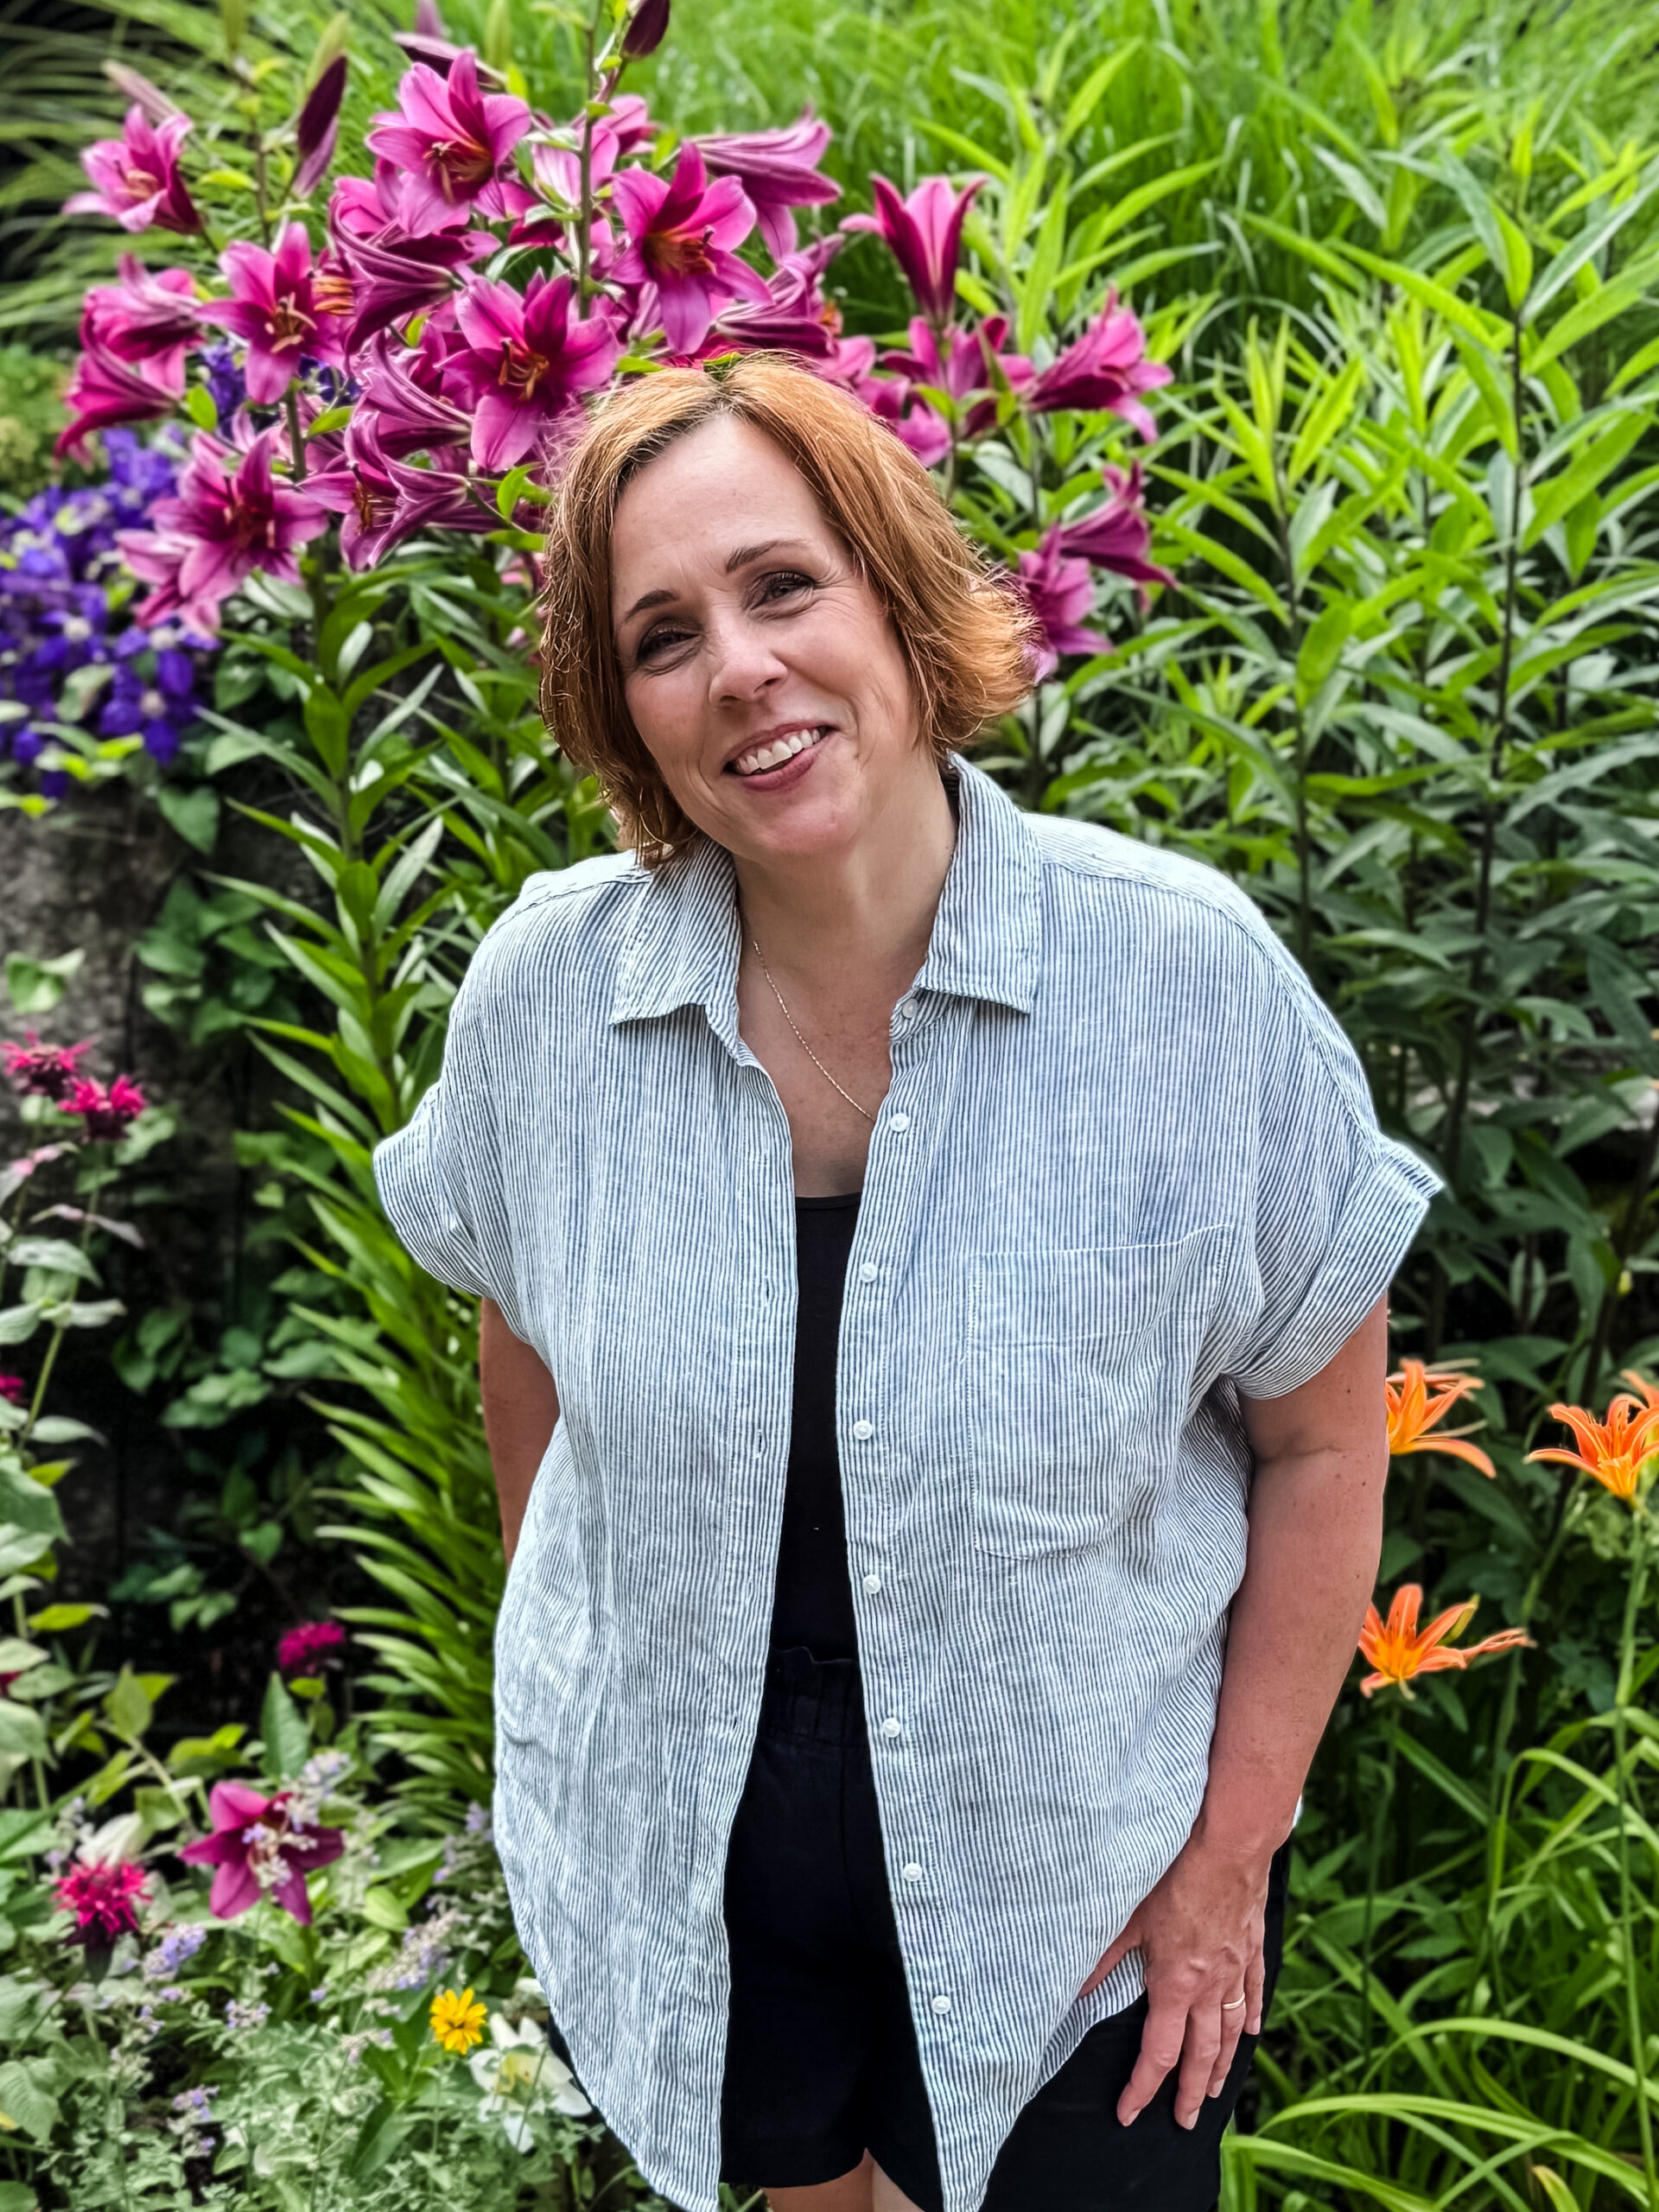
Welcome! I’m Jennifer from Cottage on Bunker Hill. A home gardener for over 20 years, I’ve spent the last 5 specializing in our cut flower garden, learning through trial, error, and a lot of dirty knees what actually works. My focus is on growing flowers with a purpose, whether for a vase on the kitchen table or for lasting projects, using simple, repeatable methods that fit into a real, busy life.
This post may contain affiliate links, which means we receive a small commission if you purchase through our links. See our disclaimer page for more information.
The Star of the Season: Strawflowers Finally Had Their Moment
If you’ve been following along here for a while, you might remember why I started growing a dried flower garden and how it all started with strawflowers. Those papery, jewel-toned blooms were the very first flowers that made me realize my garden could be a craft supply as much as a cutting garden.
So it stings a little to admit that the year before last, they failed almost completely. I don’t know if it was the weather, a bad seed batch, or just one of those gardening mysteries you never fully solve but I got almost nothing.
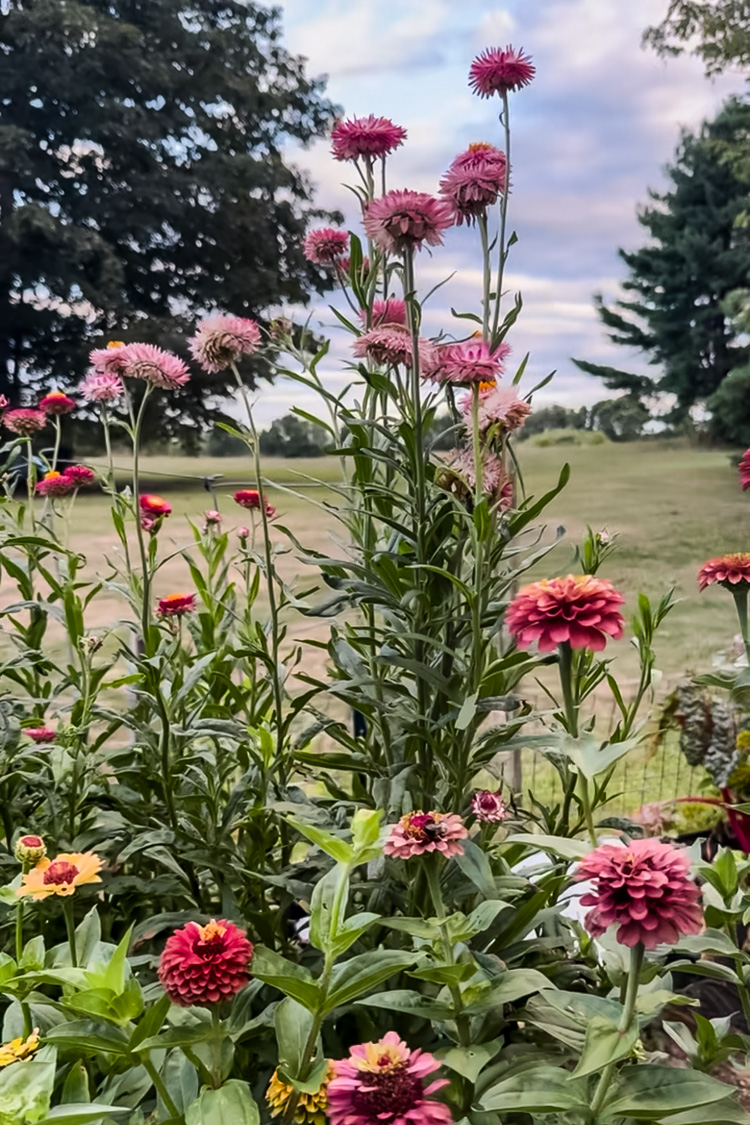
Last summer? Every single seed germinated. Every. One.
I had strawflowers in every color: deep burgundy, soft blush, electric orange, creamy white, and hot pink. The beds were absolutely overflowing with them. I was out there harvesting bundles every few days, hanging them in the hallway on my accordion peg rack to dry, and still had more coming. By fall, I had the most beautiful stash of dried strawflowers I’ve ever accumulated, and they ended up in everything: wreaths, the dried flower hanging frame, holiday arrangements, you name it.
Sometimes the garden just gives you exactly what you’ve been waiting for. 2025 was that year for strawflowers.
Tips for Growing Strawflowers
- Start indoors 4-6 weeks before your last frost: Strawflowers need a long season. I’ve had poor luck direct sowing here in New Hampshire. They just don’t have enough time to bloom.
- Don’t bury the seeds: They need light to germinate, so press them gently onto the surface of your seed starting mix and mist to moisten.
- Pinch early for more blooms: When plants are about 8–10 inches tall, pinch off the top to encourage branching. One stem becomes five or six.
- Harvest before they fully open: The center should still be tight when you cut them. If you wait too long, the petals will shatter when dry.
- Hang upside down in a dark, airy spot: The hall between my kitchen and living room works perfectly-away from sunlight, good airflow, and it looks pretty while it dries.
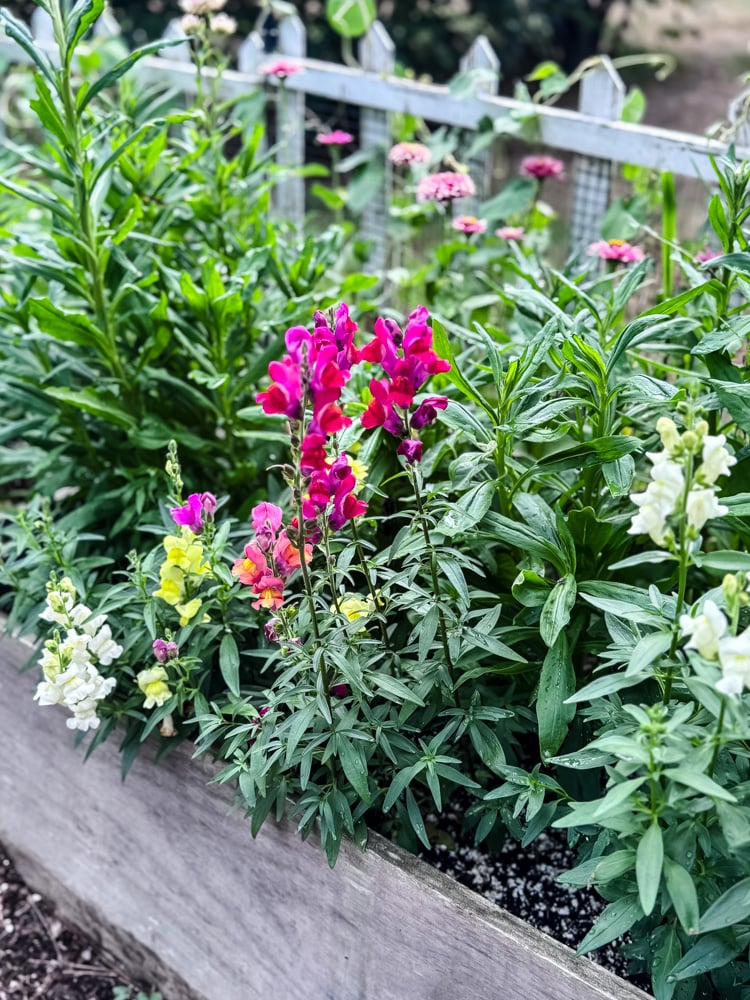
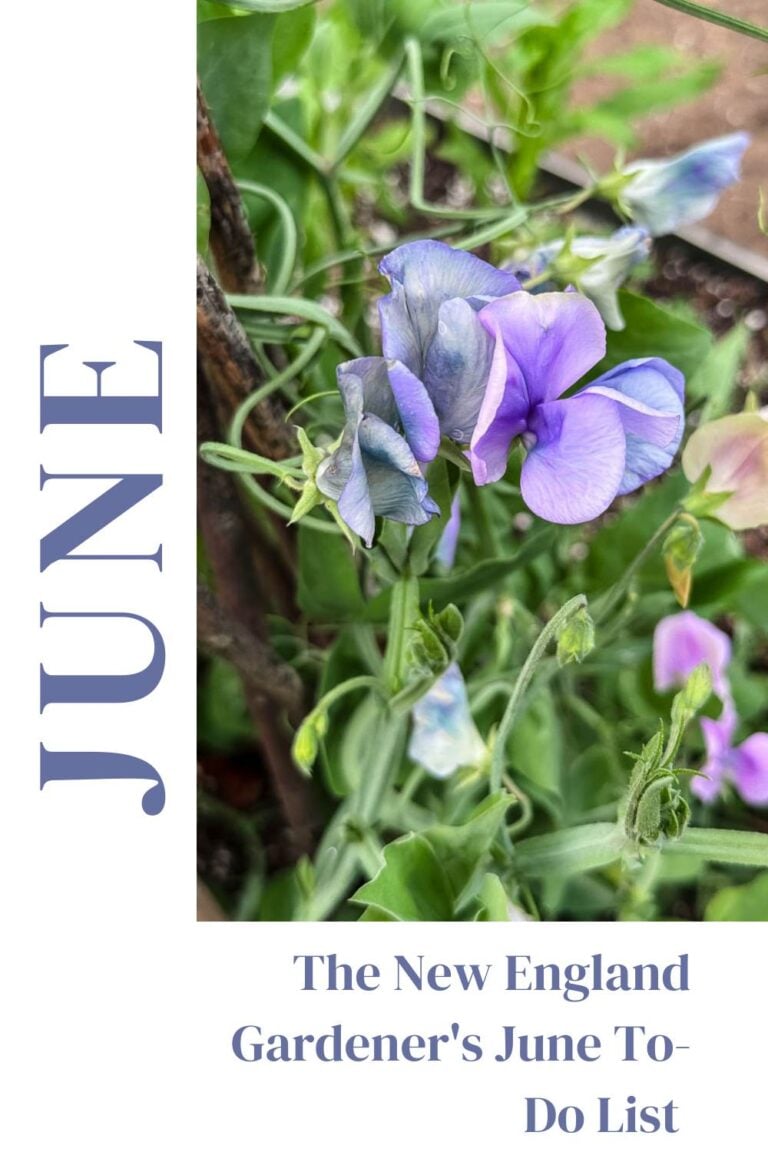
The Breakthrough I’d Been Chasing for Years: Sweet Peas
Okay, I need to talk about the sweet peas.
Every single year, I have tried to grow sweet peas. Every year I direct sow them in the spring, the way every beginner guide tells you to do, and every year, I end up with a handful of scraggly vines that bloom briefly and then fizzle out before summer really gets going. I’d resigned myself to the idea that maybe I just wasn’t a sweet pea person. Maybe my part of New Hampshire wasn’t a sweet pea place. Maybe the universe was sending me a message.
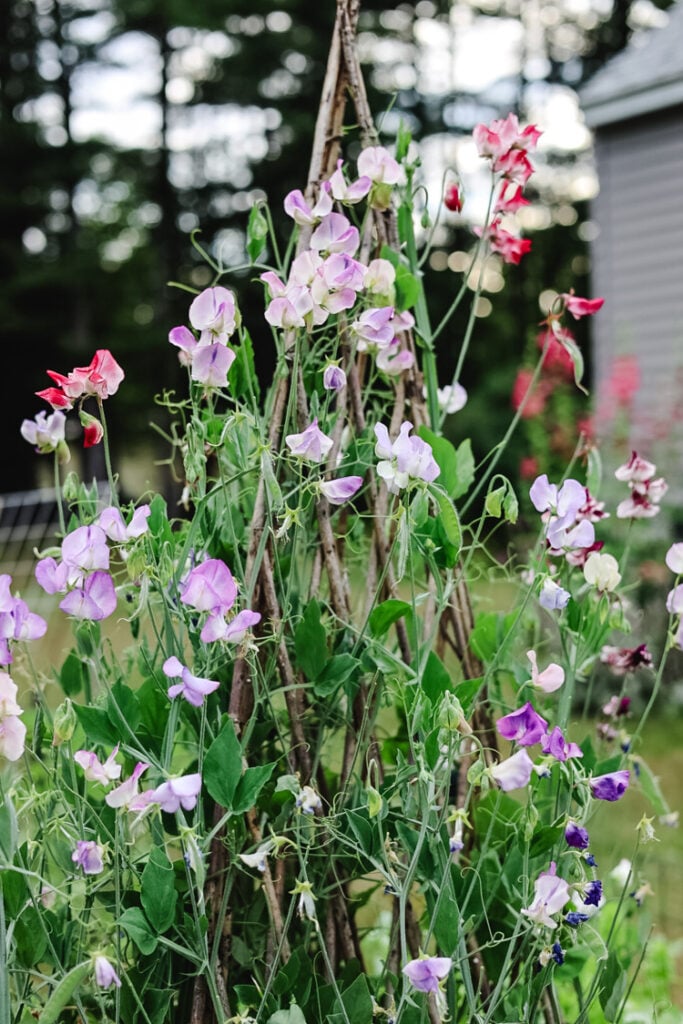
Last winter, I tried something different: winter sowing.
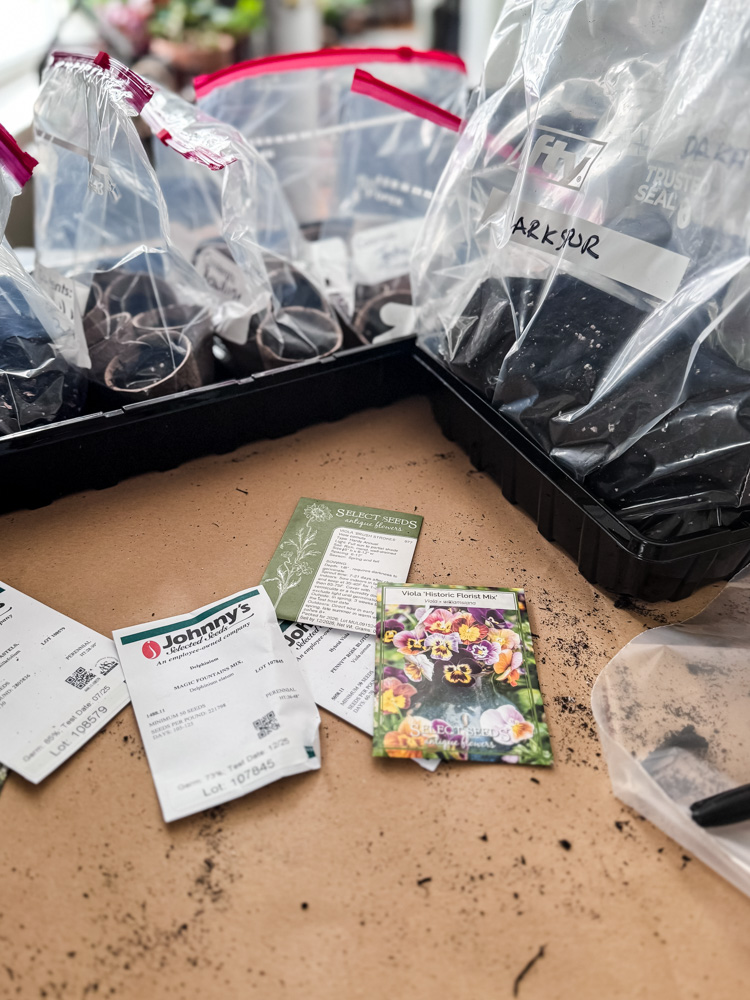
I tucked my Spencer Ripple Formula Mix from Johnny’s and April in Paris from Select Seeds into big salad containers, set them outside to go through the cold, and crossed my fingers. And this summer, for the first time ever, I had strong sweet pea plants that wound up my willow trellises and flowered all summer long. The ruffled, bi-colored blooms were everything I’d been dreaming of. My front beds smelled incredible.
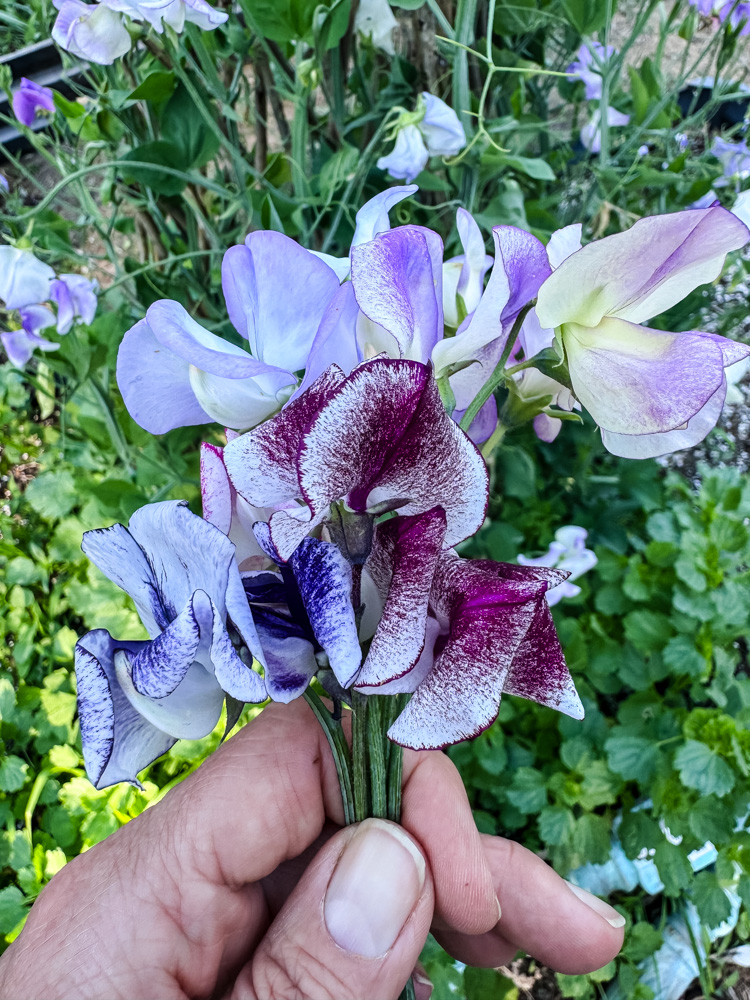
I was genuinely shocked. After years of disappointment, the fix was that simple: let the seeds do what they want to do naturally, which is experience a cold period before they germinate.
If you’ve been struggling with sweet peas, please try winter sowing them. I cannot recommend it enough.
Tips for Winter Sowing Sweet Peas
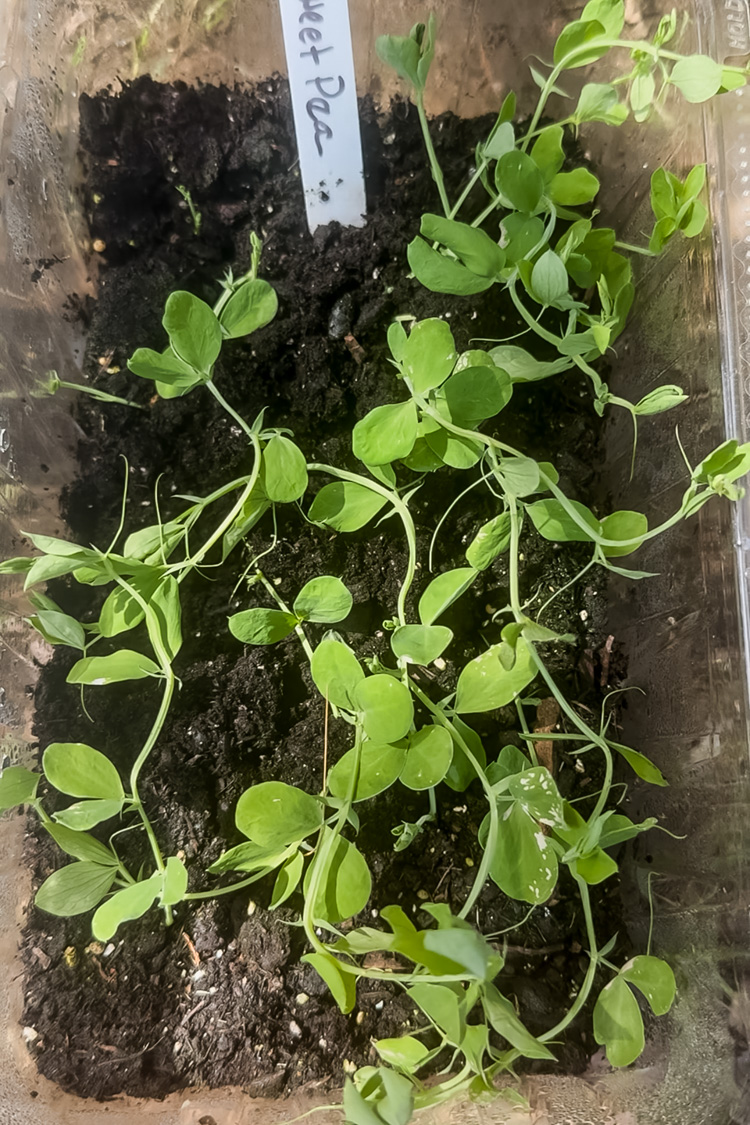
- Sow in late winter. I aim for January or February here in zone 6a. Sweet peas actually want the cold, so don’t stress about timing too much.
- Use a deep container. Sweet peas develop long roots early on, so a tall milk jug or deep container gives them room to grow.
- Soak seeds overnight first. This softens the seed coat and speeds up germination.
- Don’t coddle them. Leave the lids vented or off entirely once temperatures are consistently above freezing during the day. They want fresh air.
- Give them something to climb immediately. As soon as you transplant, have your trellis, netting, or willow branches ready. Sweet peas want to grab on right away.
- Cut often. The more you cut sweet peas, the more they bloom. Don’t let spent flowers go to seed or the plant will stop producing. (plus they smell heavenly. I fill small bud vases with them and scatter around the house.)
latest video
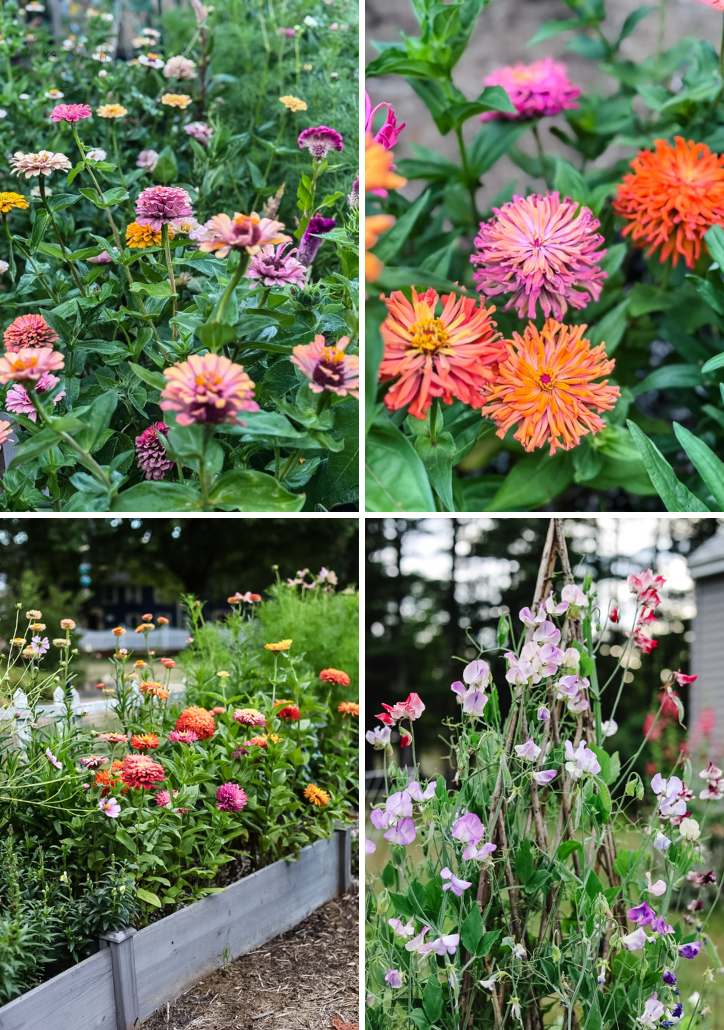
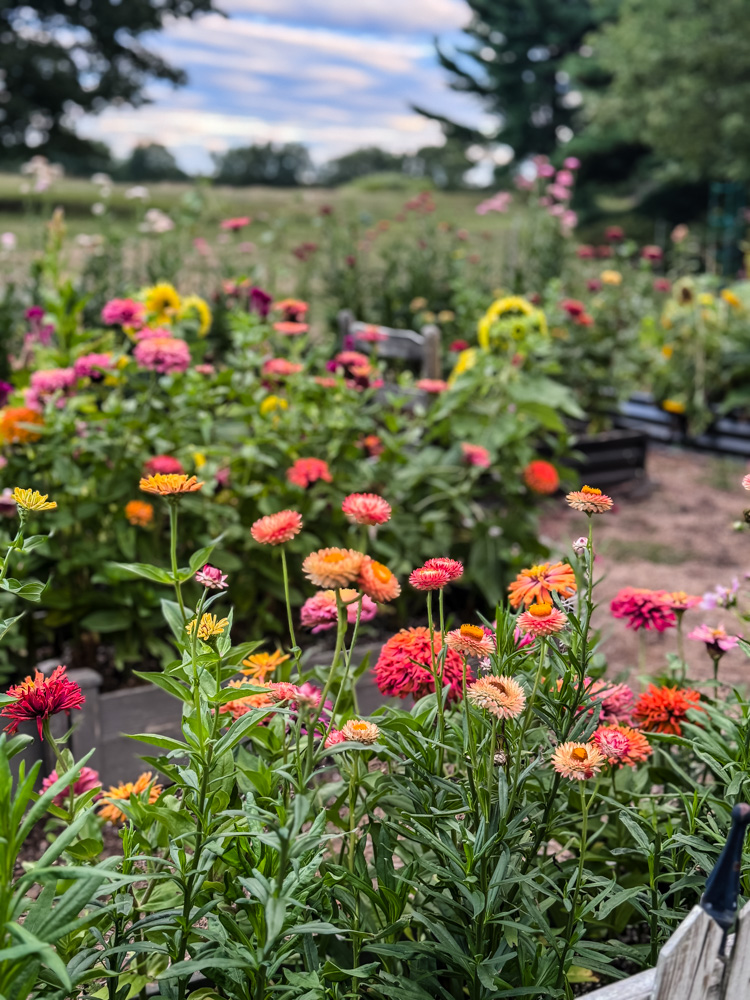
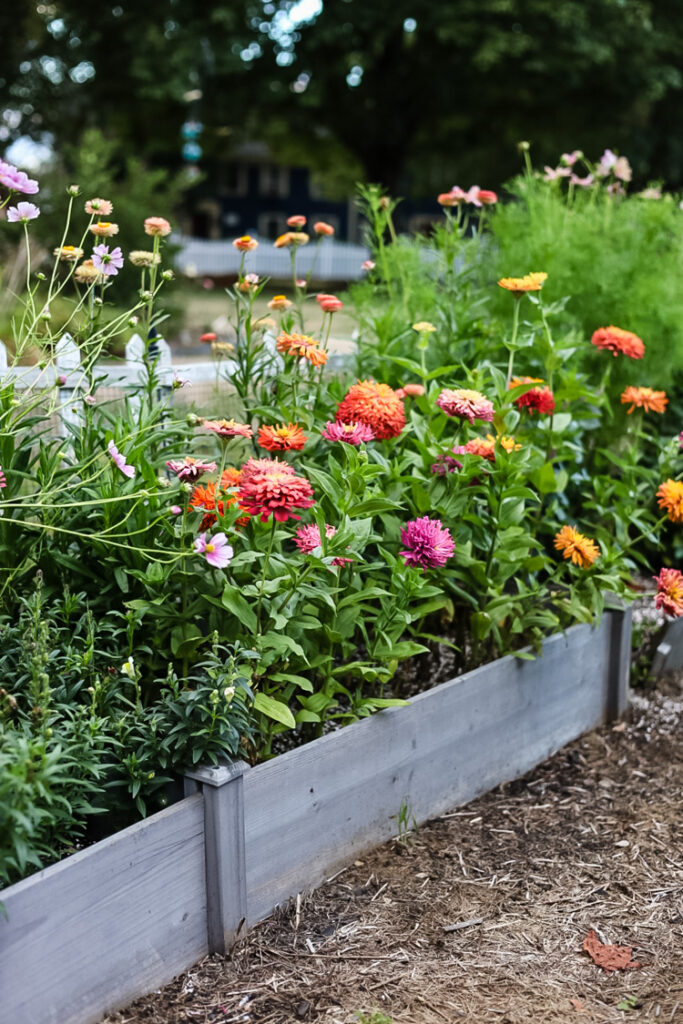
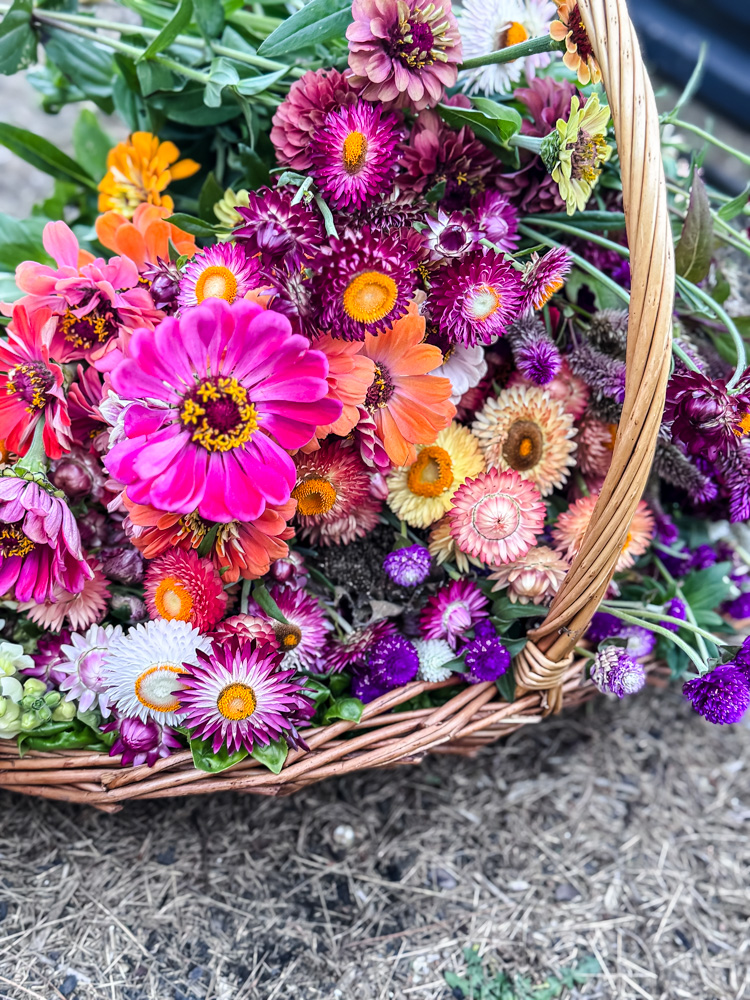
The Zinnia Trio That Ran the Show
My zinnia beds in 2025 were the best I’ve ever grown, and I credit a lot of that to the dry, hot summer we had. Zinnias thrive in the heat here.
Zinnias are a non-negotiable in my garden every single year. The color range alone is reason enough! You could grow a different variety every season and never run out of options. If you’re brand new to cutting gardens and not sure where to start, start here. Low fuss, high reward, and they’ll have you hooked by August. Plus, the more you cut, the more they will continue to push flowers out.

‘Agave’ Zinnias 
‘Ballerina’ Zinnias
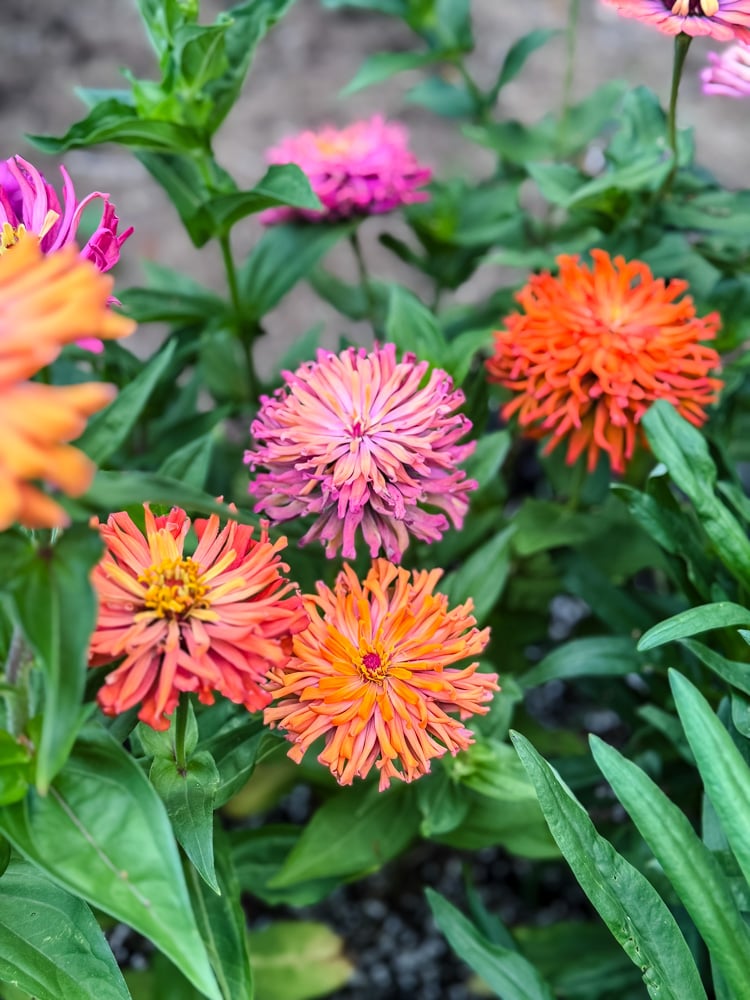
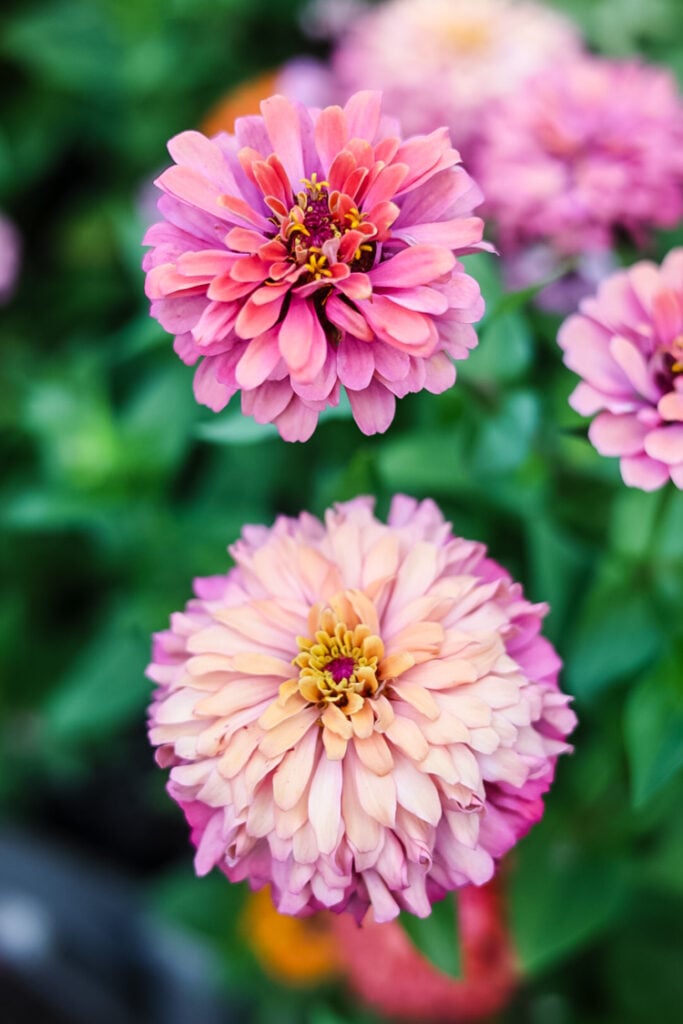
This year, I tried 3 new varieties: Aurora, Agave, and Ballerina from Johnny’s. All different shapes and color palettes, all incredibly prolific, all stunning together in a vase. Aurora gave me those big, classic zinnia blooms in warm peachy tones. Agave brought in more unusual flowers and shades that photograph beautifully (they reminded me of something you would see in a Dr. Seuss-themed garden bed). Ballerina — with its fluffy, almost dahlia-like form was my absolute favorite to arrange.
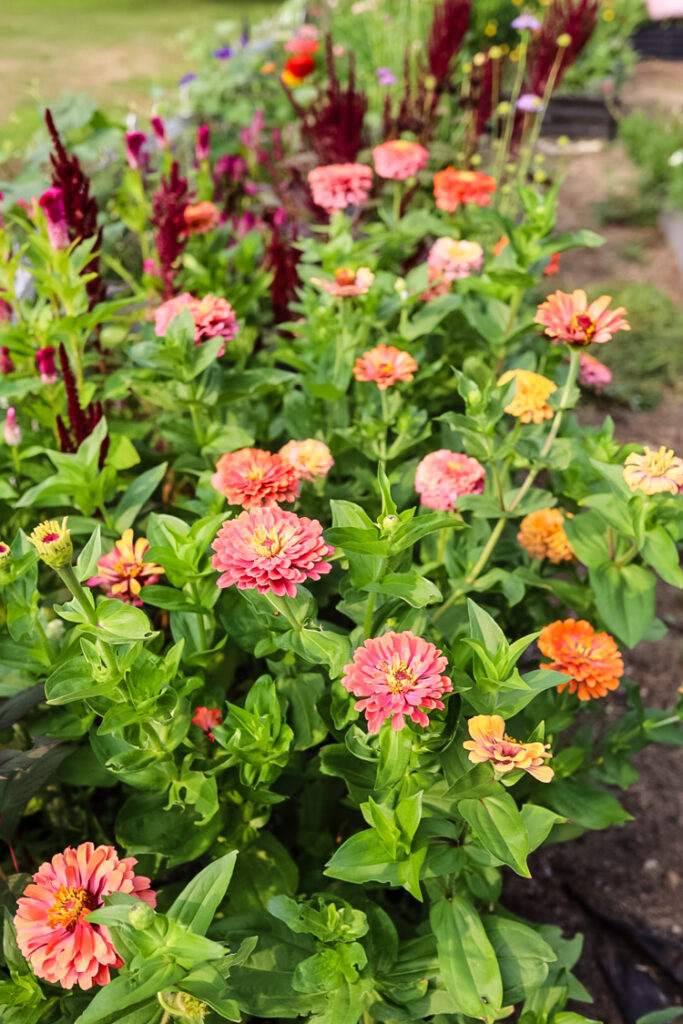
Zinnias aren’t the best flowers for drying (they get crispy and lose their shape), but they’re unbeatable for summer bouquets. I had fresh arrangements on my kitchen table all season long, and the plants just kept producing, no matter how much I cut.
While Aurora, Agave, and Ballerina were my three standout varieties last year, they’re far from the only zinnias in my garden. I also grew Benary’s Giants (a full mixed pack with all those incredible colors together), Queeny Mix, Illumination, and some Floret originals. Zinnias are one of those flowers where more is just more! They fill the beds with bright, saturated color from early summer all the way to the first frost, and they’re endlessly useful as cut flowers. I’ll always have a big, overflowing zinnia section no matter what else I’m growing that year.
Tips for Growing Zinnias
- Direct sow after your last frost when the soil is warm. Zinnias hate cold soil and will just sit there sulking if you plant too early. I wait until Memorial Day weekend here in New Hampshire.
- Pinch the first bud. I know it’s hard. But pinching that very first center bud when plants are young encourages a much bushier, more productive plant.
- Cut to a node. When harvesting, cut the stem back to a set of leaves or a side shoot; this tells the plant to branch and produce more flowers.
- Pick before the center shows pollen. For the longest vase life, cut zinnias when the petals are open but the center is still tight.
My Favorite Zinnia Varieties:
- Benary’s Giants
- Queeny Mix
- Illumination
- Aurora
- Agave
- Ballerina
- Floret Originals
- Isabellina
The Underrated MVPs: Gomphrena, Sunflowers, and My New Experiments
Not every great flower gets a headline, but a few deserve a proper shoutout before we get to the fails.
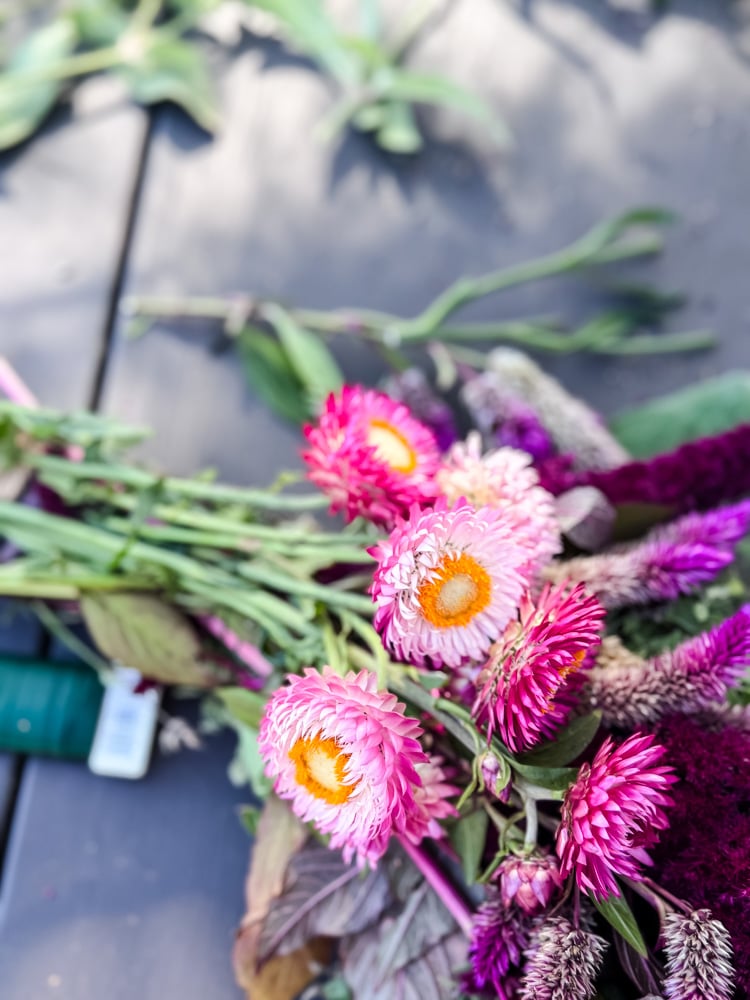
Gomphrena
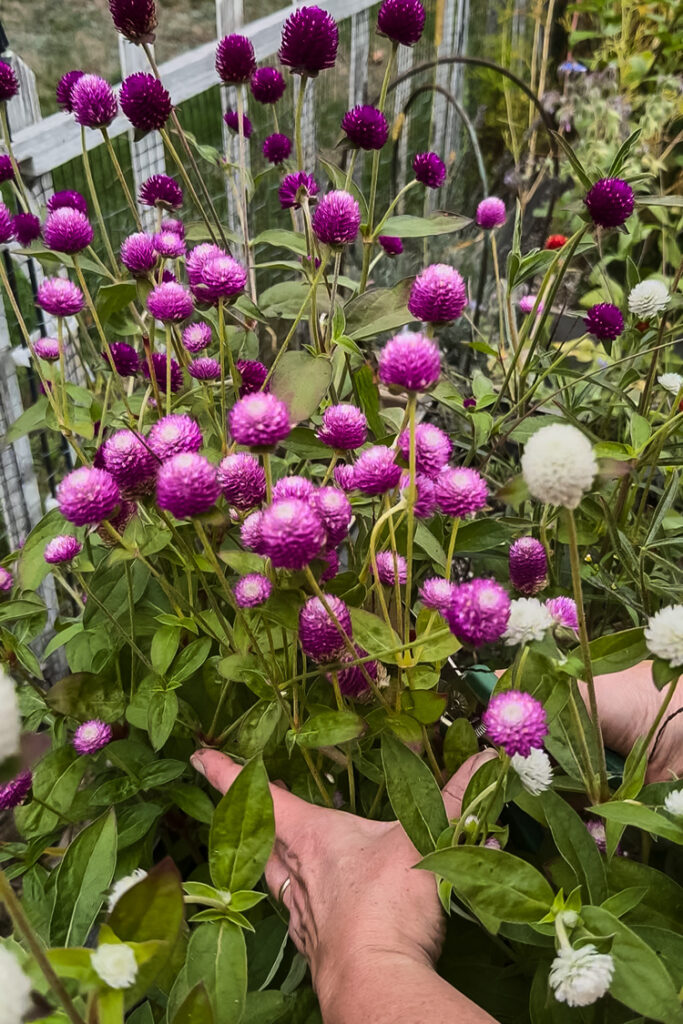
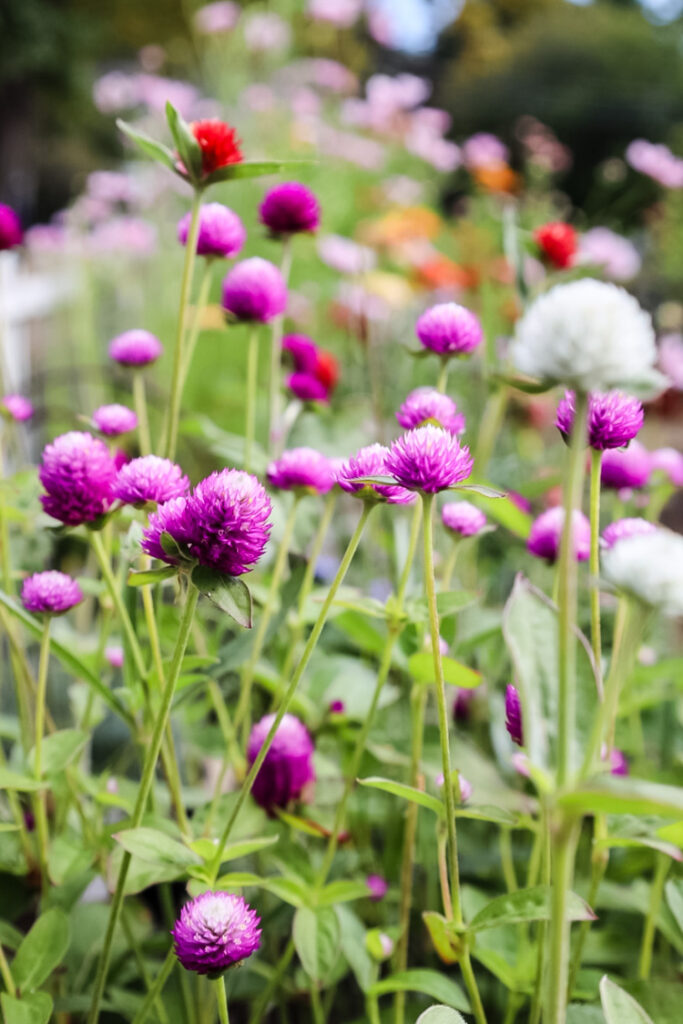
Gomphrena had an absolutely banner year. If you’re not growing gomphrena, I really want to convince you to start. Those cheerful, clover-like globes in deep magenta, soft pink, and bright red are some of the most reliable, heat-tolerant flowers you can put in a cutting garden, and they just keep going all season, no matter how hot or dry it gets.
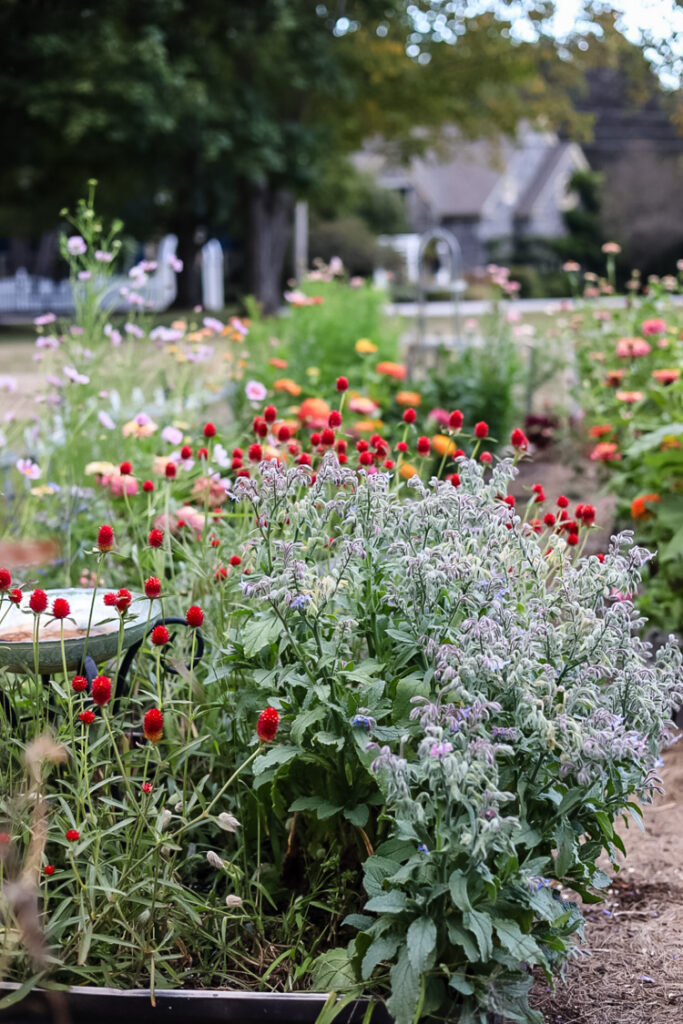
Last summer, I was cutting big handfuls for fresh bouquets alongside the zinnias and celosia, and they looked beautiful together. But the real magic happens when they dry: gomphrena holds its color and shape almost perfectly, making it one of my most-used dried flowers for wreaths and arrangements. If you’ve been skipping it because it’s not flashy, give it another look. It earns its spot every single time.
Tips for Growing Gomphrena
- Start 6–8 weeks indoors before your last frost. Gomphrena is a slow starter and really benefits from a head start indoors.
- It loves heat- don’t rush it outside. Wait until the soil is genuinely warm and all frost risk has passed. Gomphrena sulks in cool conditions and won’t take off until it’s really warm.
- Don’t pinch. Unlike strawflowers and zinnias, gomphrena doesn’t need pinching; just let it do its thing.
- Cut often for more blooms. The more you harvest, the more flowers you’ll get. Cut stems all the way back to a set of leaves to encourage branching.
- For drying: harvest when the globe heads are fully colored and firm. They’ll hold their color beautifully for months.
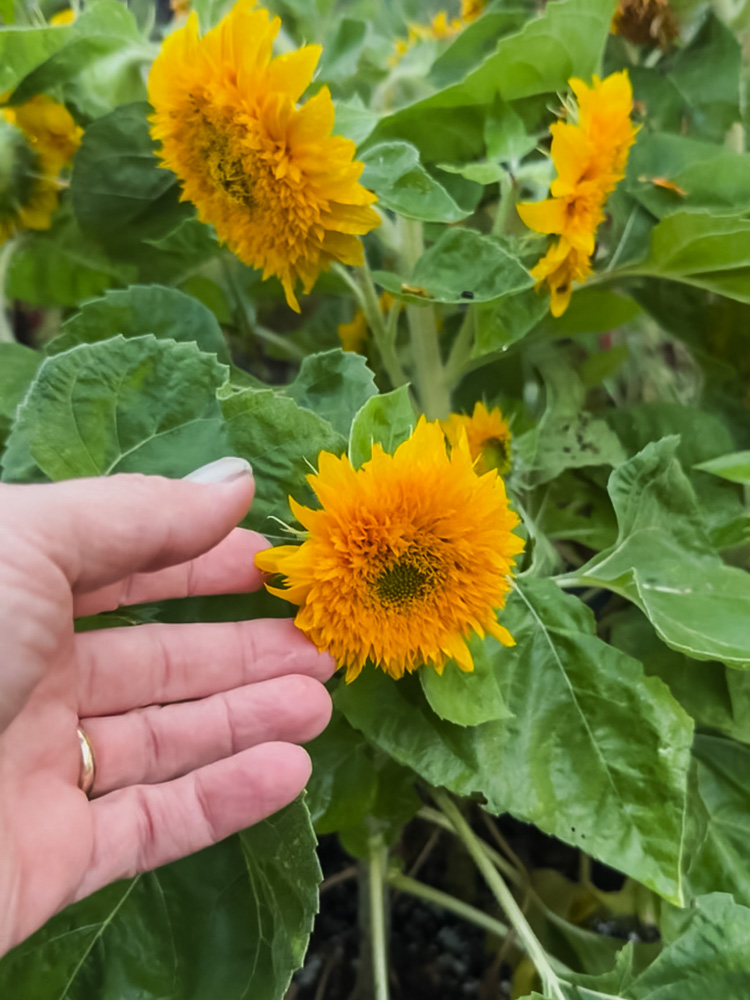
Small Sunflowers
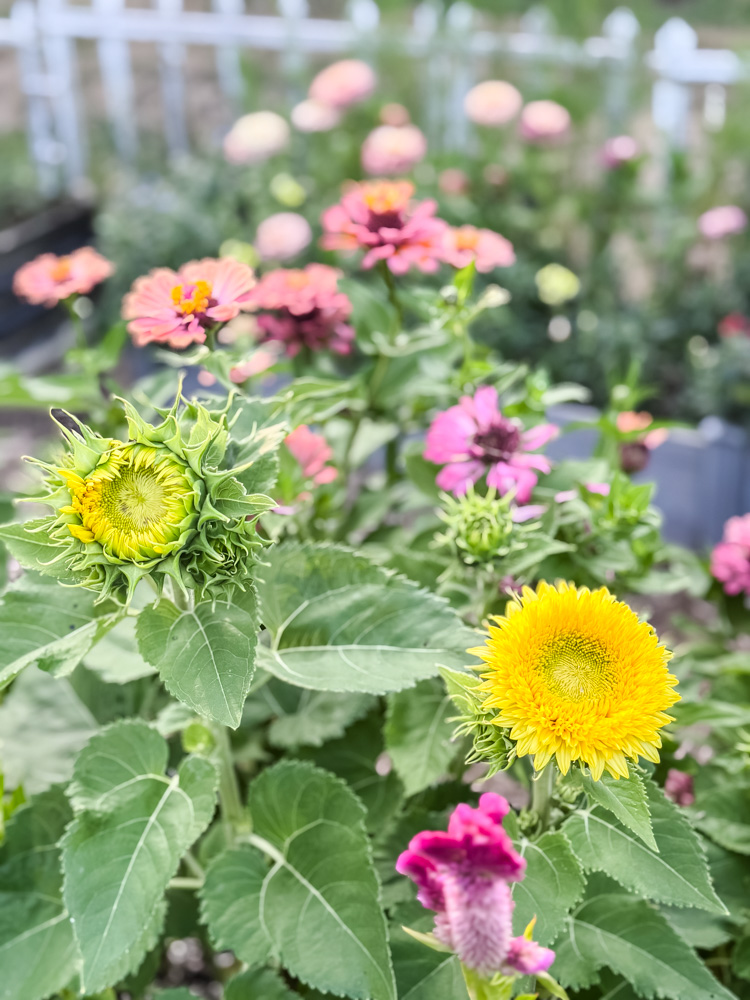
Smaller Sunflowers were a new addition that I fell completely in love with. I grew a couple of smaller sunflower varieties: Gummy Bear and Teddy Bear last year, and those fuzzy, golden pom-pom blooms were such a happy surprise among the pinks and purples that dominated the rest of the cut flower beds. There’s something almost childlike and joyful about them.
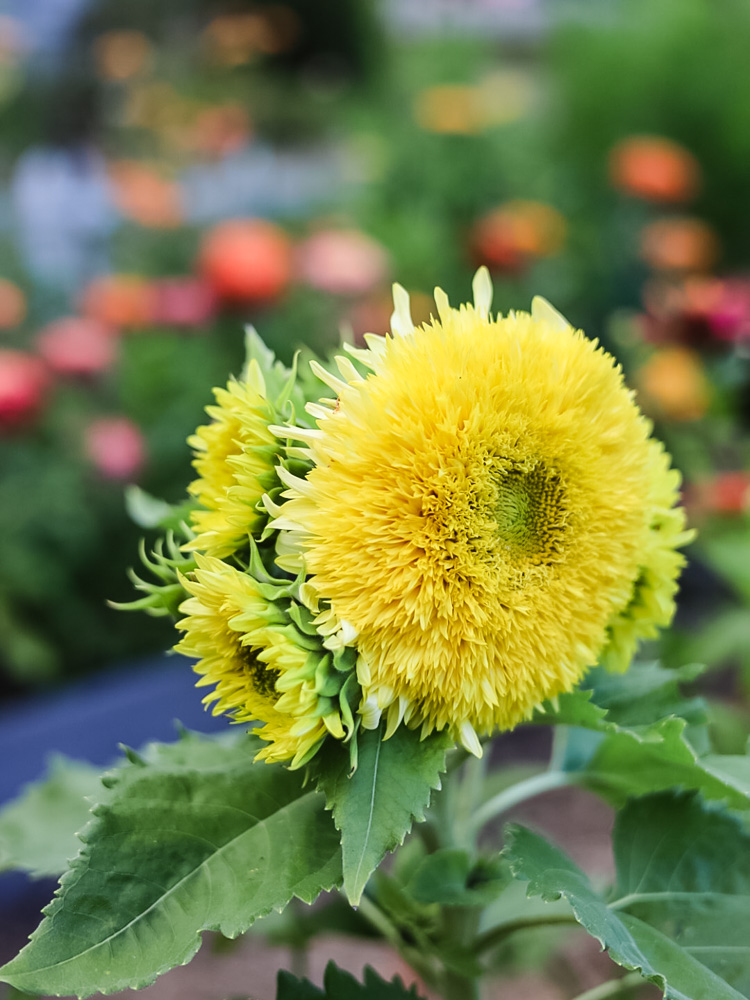
They’re not your typical tall, stately sunflower. They’re compact and fluffy, and they made me smile every single time I walked past them. Sunflowers, in general, are wonderful for cutting, and the smaller varieties are especially good because they fit in arrangements without taking over.
Tips for Growing sunflowers
- Direct sow after your last frost when the soil has warmed up. Sunflowers grow so quickly that there’s no need to start them indoors;they’ll catch right up.
- Give them full sun. They really mean it. Six or more hours a day for the best, sturdiest plants.
- Sow every couple of weeks through early summer for a longer harvest window instead of one big flush all at once.
- Cut when the petals are just starting to open for the longest vase life. Fully open blooms won’t last as long once cut.
- Teddy Bear varieties are compact, so they work well even in smaller beds and won’t shade out neighboring flowers the way tall single-stem varieties can.
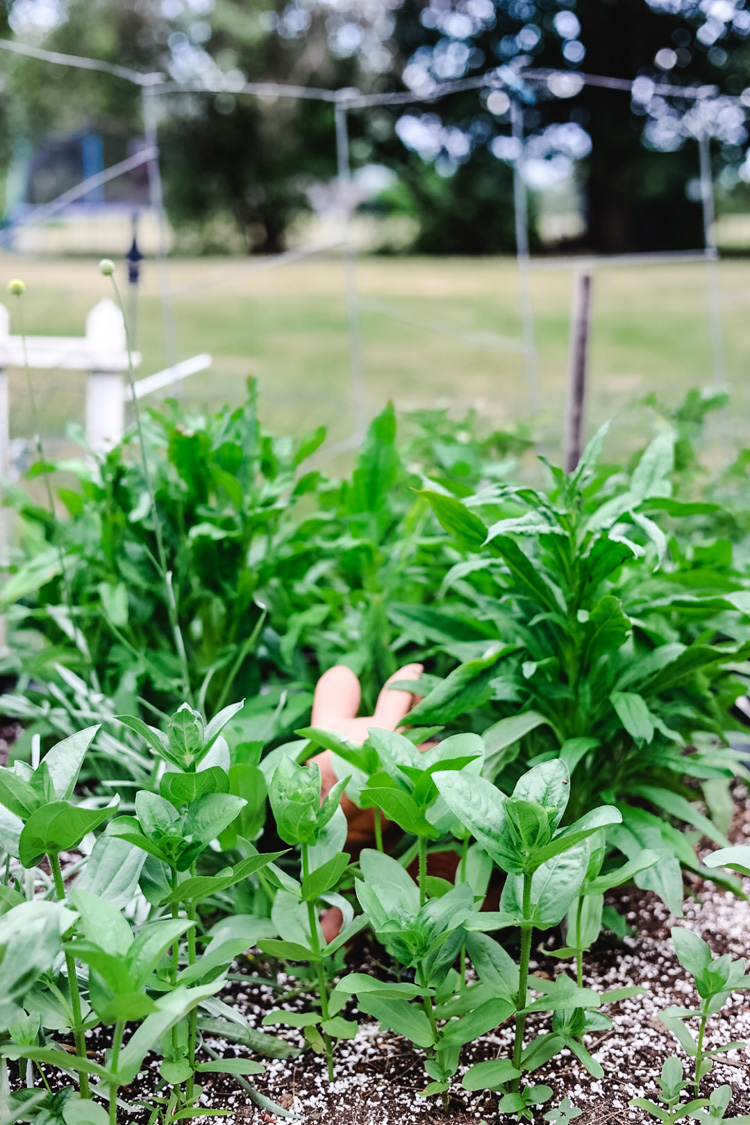
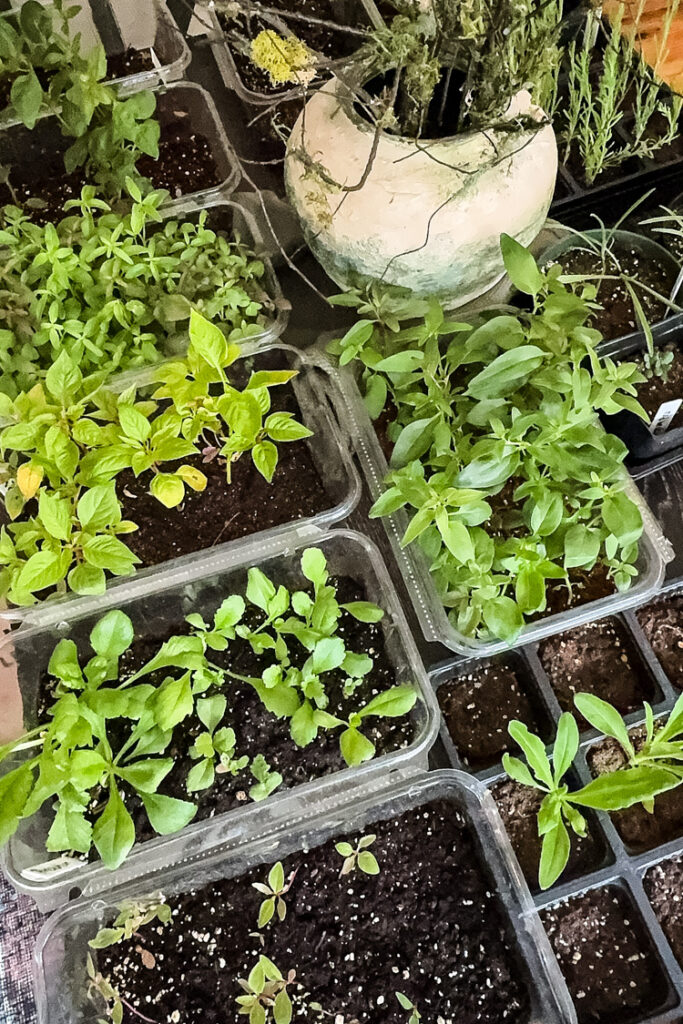
New Things I Tried

New this year: bunny tail grass and craspedia (drumsticks): Every season, I try a handful of flowers I’ve never grown before, and 2025’s experiments were bunny tail grass and craspedia. Both are fantastic dried flowers with really distinct shapes: bunny tail grass has those soft, fluffy seed heads that add incredible texture to arrangements, and craspedia gives you those perfect little yellow spheres on straight stems that look almost architectural.
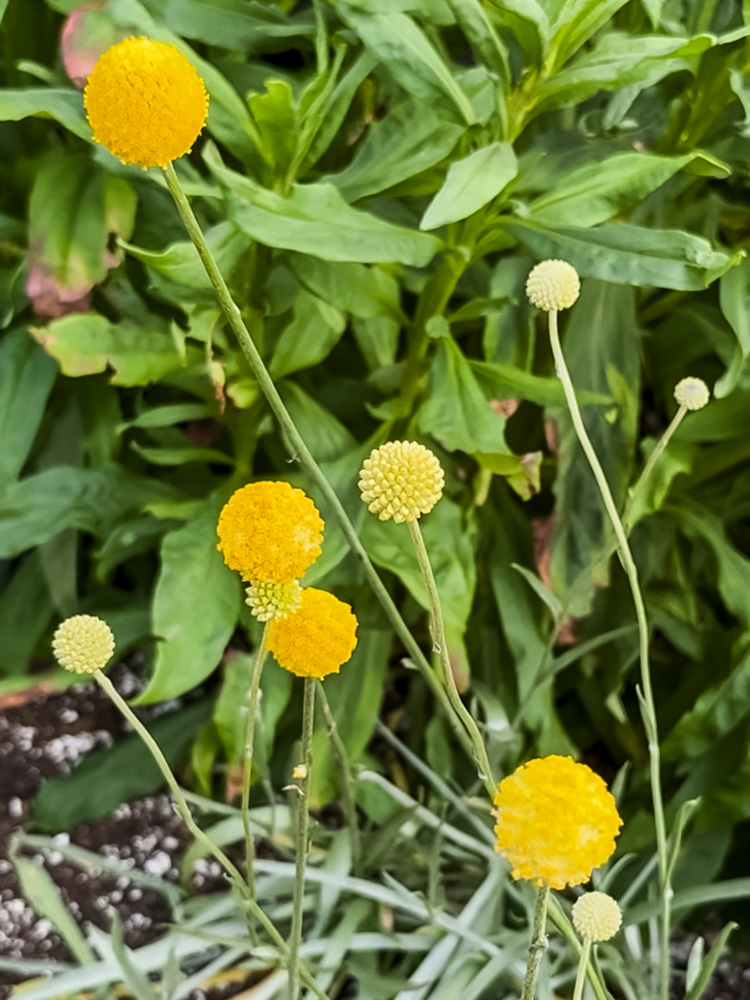
My harvests were small since I was starting with just a few plants, but both are going into the 2026 lineup in much bigger numbers. If you’re building a dried flower garden and want something a little different, either of these would be a great addition.
I started both flower seeds indoors 6-8 weeks before my last frost date.
The Rest of the Garden Was Pretty Magical Too!
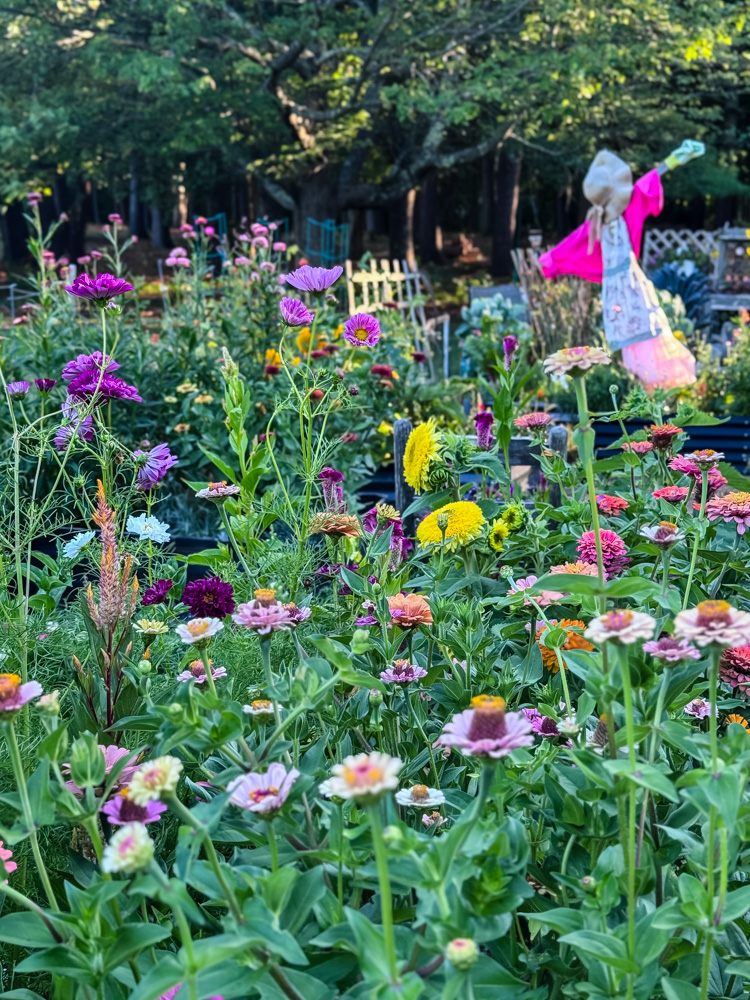
I’d be leaving out half the story if I didn’t mention that 2025 was just a good year across the board. My celosia was stunning, those velvety plumes in deep burgundy and coral are some of my favorite things to dry. The scabiosa came through beautifully, the snapdragons were prolific, the bells of Ireland added that gorgeous architectural green I love so much in arrangements, and the cosmos? Just a cloud of color all summer long. It honestly felt like every single seed I put in the ground was magic! After 2024’s struggles, I think I needed that.
Read in more detail about my favorite cut flowers to grow in your garden here.
The Fails (Because There Are Always Fails)
Look, I wouldn’t be honest with you if I only told you the good parts!
Growing Stock (Major Fail!)
Stock: I tried growing stock last year because I love the fragrance and the cottage-garden look of it. I started the seeds indoors, and they looked good, but when I transplanted them, not a single one survived! I’ve since learned that stock actually does better with a cold period before germination, so this winter I’m experimenting with winter sowing it alongside my other cool-season flowers. We’ll see. I’m cautiously optimistic.
Poppies
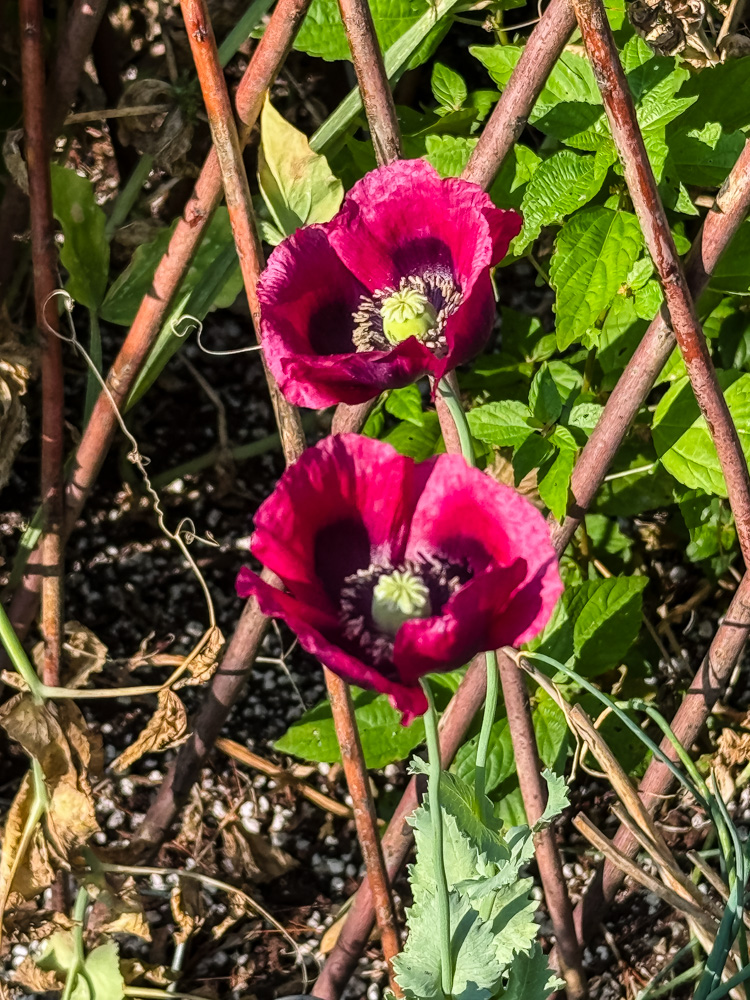
Poppies: This one, I actually think that I figured out, which feels like a win disguised as a fail. I’ve been direct sowing poppy seeds in my garden beds in early spring the past few years with minimal luck, and I always assumed they weren’t germinating. Some years I got a few stunners, other years not a single bloom! Last summer, after I had lost all hope, a few popped up midsummer, which is very late for poppies.
My theory? The birds and critters were eating the seeds. Poppy seeds need to be sown on the surface of the soil because they need light to germinate, which also makes them a very easy target for anything with a beak or a nose for free food.
My Fix for Growing Poppies (and Why It Should Work)
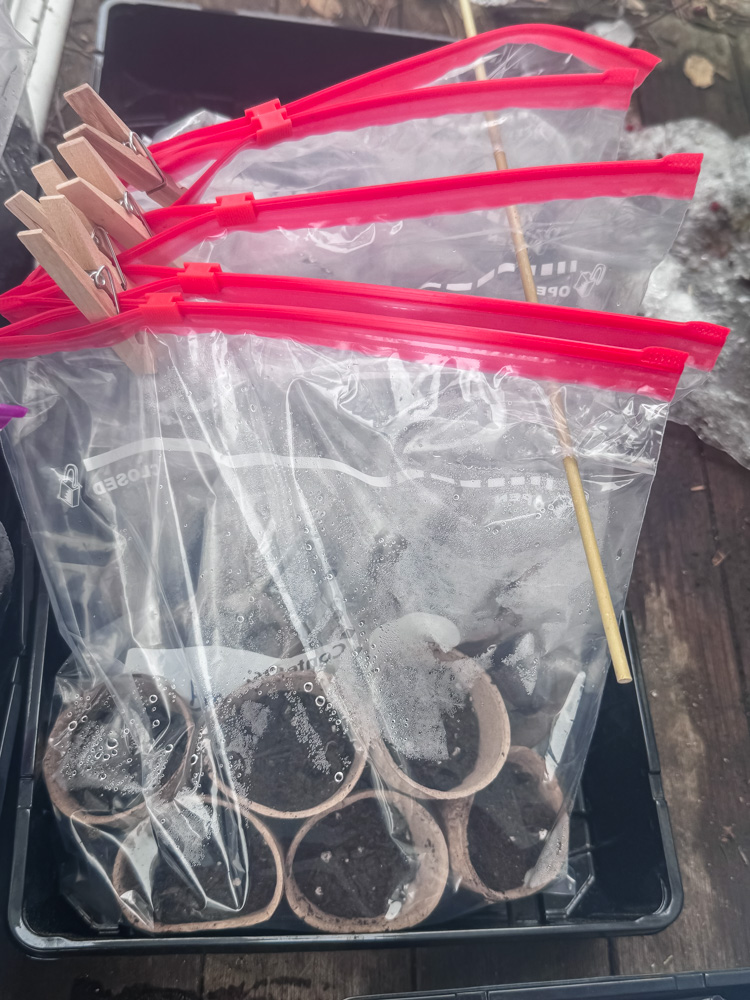
This year, I’m winter sowing my poppies in peat pots inside zip-loc bags. Since poppies really hate being transplanted — their roots are fragile, and they don’t bounce back well from disturbance the peat pot solves that problem beautifully. Once the seedlings are ready to go in the ground, you just open up the bottom of the pot and plant the whole thing directly into the soil. No root disturbance, no transplant shock. And because the seeds are protected inside the bag on my porch rather than sitting on top of garden soil, no birds are getting a free breakfast.
I’ll report back this summer on whether it works. Fingers crossed.
A few general poppy growing tips:

- Surface sow only: Poppies need light to germinate and should never be covered with soil.
- Direct sow as early as possible: Poppies want cool weather to get established. In New England, that means late winter or very early spring. They can handle a frost.
- Thin ruthlessly: Poppies don’t like crowding. Thin to at least 6 inches apart for the best blooms.
- Save the pods: Even though the flowers are gorgeous, I really want to use the dried pods in projects!
Cottage Garden
Favorite Products
Shop my gardening favorites! Raised beds, plant supports, & tools to make your garden grow.
What’s Already Happening (Winter Sowing)
It’s February, which means seed starting season has officially begun here at the Cottage- even if the garden itself is buried under 3 feet of snow.
Today I set out my winter sowing containers: poppies (in those peat pots I mentioned), sweet peas, larkspur, violas, snapdragons, Queen Anne’s lace, stock, & a few other flowers. My setup is 2.5-gallon Ziploc bags on the front porch, which is the only spot I can actually reach right now. The snow in the yard is so deep I can’t get to the garden at all, so the porch it is for now. They’ll sit out there for now, and when the snow melts, I’ll bed like to move them to the garden. They are getting rained and snowed on right on the porch, doing exactly what they’re supposed to do.
There’s something really satisfying about this part of the year. The garden looks like nothing right now just white, frozen, dormant. But those containers on the porch tell a different story. Things are already starting.
A Quick Note on Winter Sowing
If you’ve never tried winter sowing, it’s one of the most forgiving and low-effort ways to start seeds. No grow lights, no heat mats, no babysitting. You essentially create a tiny greenhouse out of a milk jug, ziploc bag, or clear container, sow your seeds, and let nature do the work.
- Milk jugs: Cut the jug partway around the middle to create a hinged lid, leave the top open for ventilation, and poke drainage holes in the bottom.
- Zip-loc bags: Leave the top open a couple of inches for air circulation and cut a few small drainage slits in the bottom. I put a coffee filter inside over the slits before adding potting soil so the soil doesn’t just wash straight out, such a simple trick, and it works perfectly.
- Large salad mix containers: Honestly, my favorite. Poke holes through both the top and the bottom, and you have a perfect little ready-made greenhouse. The clear sides let you see exactly what’s happening inside.
If you’ve never tried winter sowing, it’s one of the most forgiving and low-effort ways to start seeds: no grow lights, no heat mats, no babysitting. You essentially create a tiny greenhouse out of everyday containers, sow your seeds, and let nature do the work.
Good candidates for winter sowing:
- Cool-season flowers: larkspur, poppies, violas, snapdragons, sweet peas, Queen Anne’s lace, bells of Ireland, stock
- Hardy annuals that benefit from cold stratification
- Anything the seed packet describes as “direct sow in early spring” or “cold hardy”
Not ideal for winter sowing:
- Warm-season flowers that need heat to germinate (zinnias, celosia, strawflowers)
Anything very slow-growing that needs a long head start indoors under lights
Plans for 2026: More of What Works
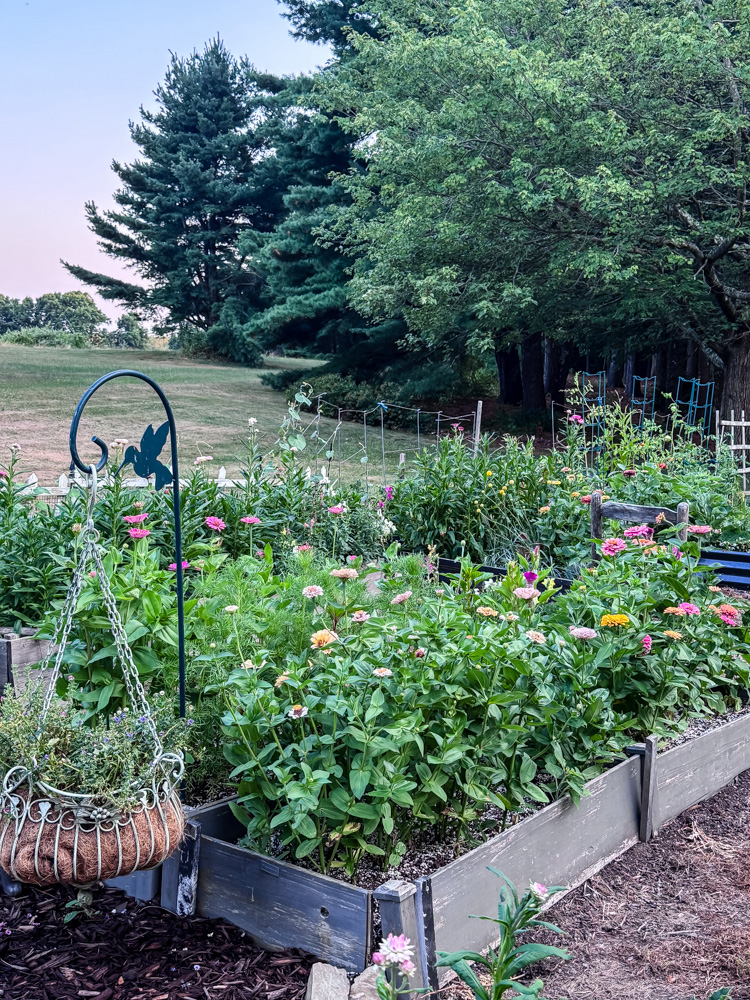
I’m not expanding the garden this year. After a season as good as 2025, I don’t want to mess with what’s working. I’m keeping my mixed beds: vegetables, herbs, flowers, and climbers all growing together, and focusing on growing more of what I know I’ll use.
One thing I’m really proud of from last year was how I planted each raised bed. Instead of filling a bed with one or two varieties and calling it done, I did three distinct rows in each one, planned by height: shorter flowers in the front, medium height in the middle, and the tallest varieties in the back. So a bed might have compact snapdragons up front, zinnias in the middle row, and tall celosia towering behind them.
It made each bed look intentional and interesting, almost like a little living arrangement, and it meant the garden looked full and layered all season, rather than a jumble of things at the same height. I’m keeping that approach in 2026 and being even more deliberate about it from the planning stage.
More strawflowers. More gomphrena. More of those zinnia varieties. Bigger plantings of bunny tail grass and craspedia. The sweet peas are absolutely coming back. I’m giving stock one more serious chance via winter sowing, and I’m genuinely excited to see how the poppy experiment plays out.
The goal, as always, is a garden that feeds both the vase and the wreath basket. Flowers that look beautiful in summer and keep on giving through the winter. That full-circle, seed-to-project loop is what I love most about this whole process, and 2025 reminded me exactly why I do it.
I’ll keep you posted as the season unfolds. And if you’re winter sowing too, I’d love to hear what’s going into your containers this year!
xo, Jennifer
Want to see what I make with all those dried flowers? Browse my full collection of Floral & Botanical Projects for year-round inspiration. And if you missed my complete guide to growing flowers for drying, that’s right here.
More garden help:
Love projects like this? Don’t miss out! Join my newsletter family for more cozy, budget-friendly DIY ideas delivered right to your inbox. You’ll get exclusive tips, early access to tutorials, and all the inspiration you need to make your home feel handmade and heartfelt.


Jen… did you find that by growing the different flowers so close together ..didnt you get mold on the flowers.. don’t they need space to breathe?
Im going to try again Winter sowing… I really dont have a place for them to grow. I could put them in the kitchen or spare bedroom . My basement doesn’t have good light. I dont want to buy grow lights.
Lorri- I emailed you!
Thanks for the very helpful post!