
There’s something about a little unfinished wood birdhouse from the craft store that just begs to be transformed. They’re inexpensive, they’re everywhere this time of year, and honestly? With the right materials, they can look like you paid three times what you did. This one cost me just a few dollars, and the bark on the roof came straight from my own woods, which means this project was practically free.
I’ve nestled into a little Spring display on my entryway table, and I keep catching myself smiling at it every time I walk past. That’s the goal, right?
This post may contain affiliate links, which means we receive a small commission if you purchase through our links. See our disclaimer page for more information.
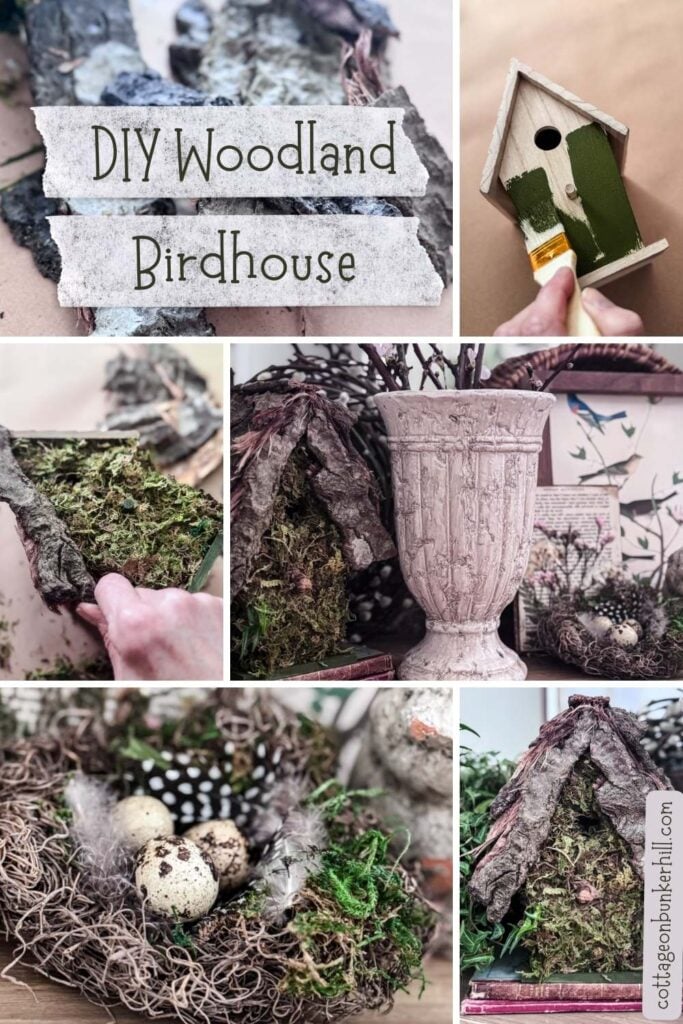
A Little Bit of Spring: Foraged Bark Birdhouse Makeover
You know those projects that sit in the back of your mind…and maybe the back of a closet, just waiting for their moment?
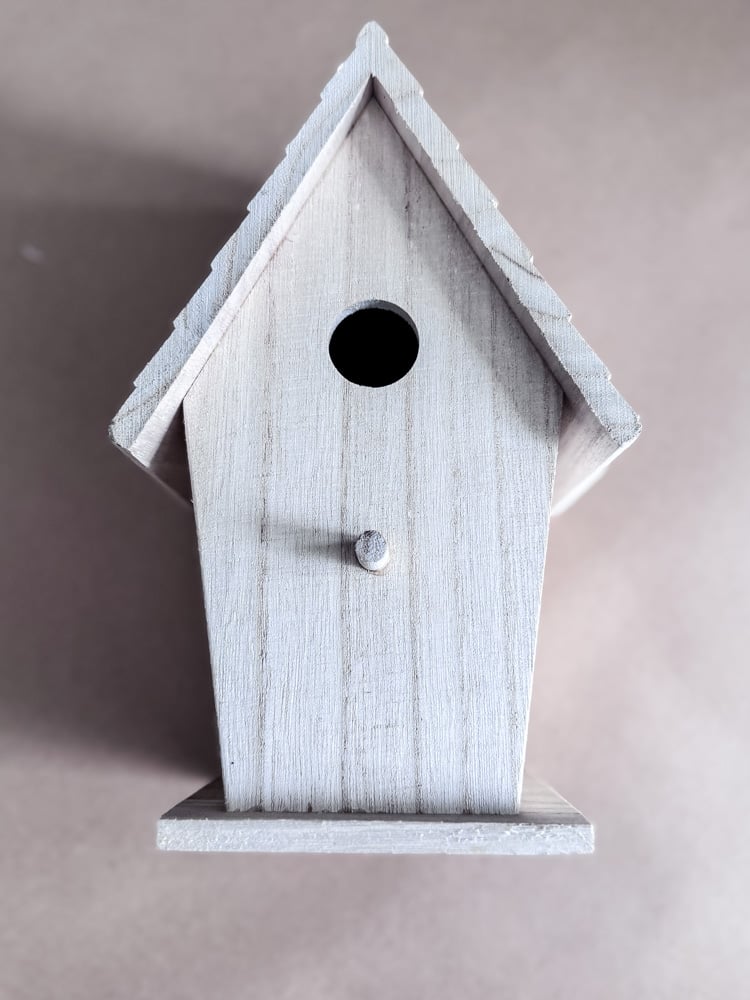
Last spring, I picked up this little unfinished wooden birdhouse at the craft store. I had no immediate plans for it, but something about its simple shape whispered potential. I tucked it away, always knowing that when inspiration struck, it would become something woodland-inspired.
Well, that moment finally arrived today.
I was craving a little taste of Spring (aren’t we all?), and that little birdhouse came out of hiding. Before I knew it, I was gathering supplies and pulling out a box of treasures I’d foraged from my own woods last Fall: bark that I had peeled from fallen pine trees, dried to perfection after months in the garage. (And yes, for those of you who will ask: it’s been sitting since autumn, so it’s completely bug-free!)
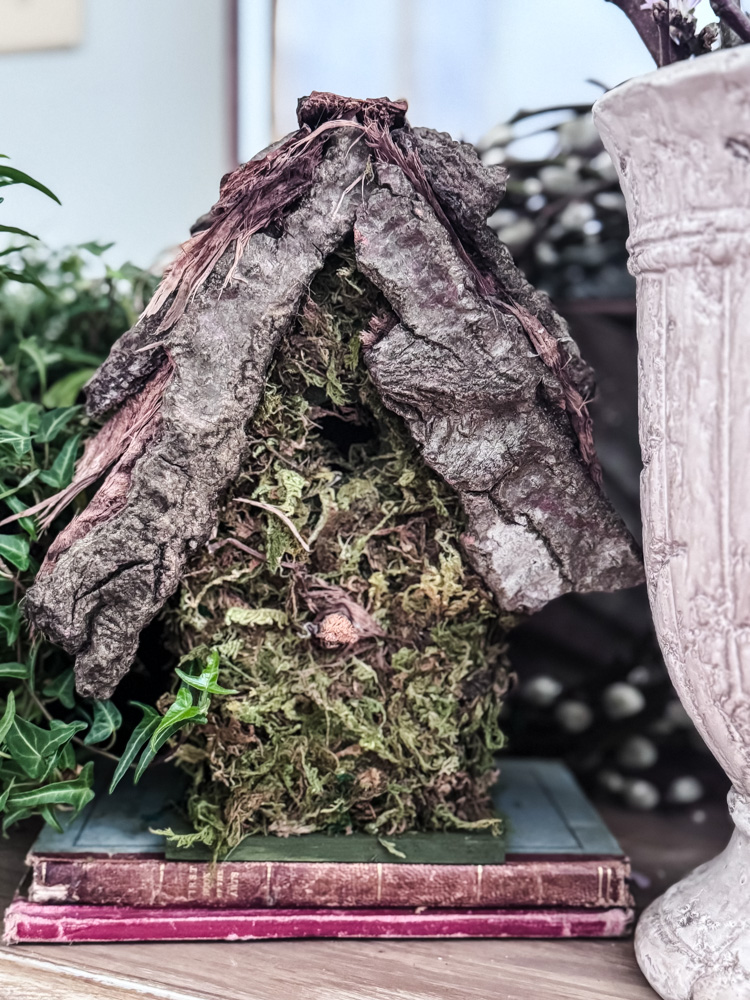
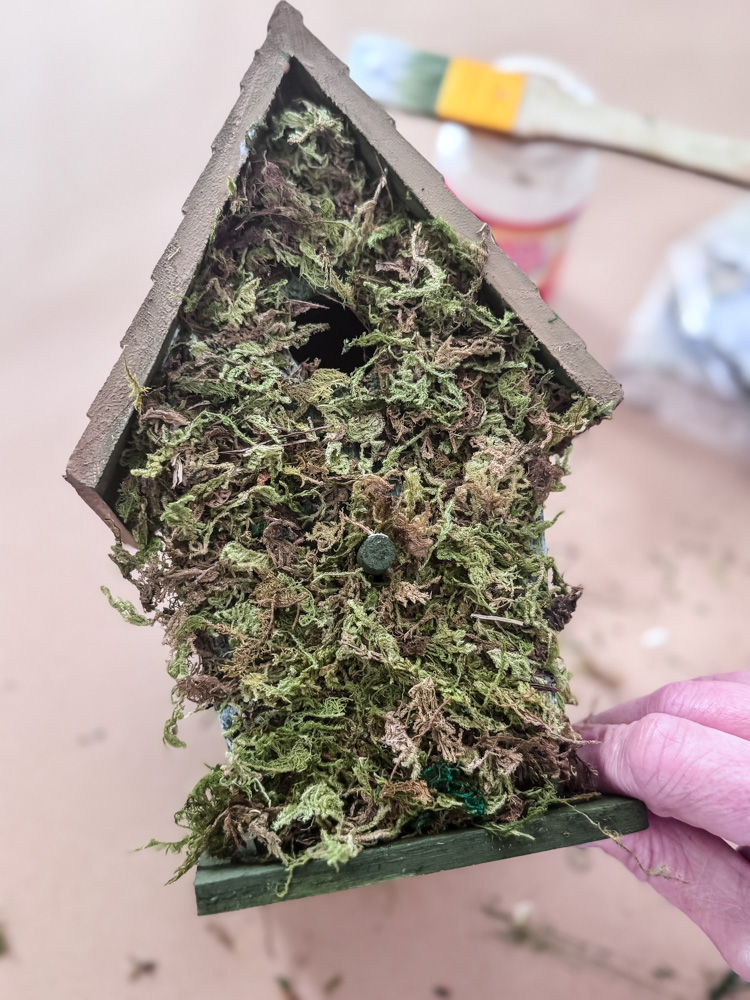
In about 45 minutes, that plain birdhouse transformed into the sweetest little woodland accent for my entryway table. Green moss, textured bark, a little paint, and a whole lot of charm.
If you’re craving a quick, satisfying project that brings a whisper of the outdoors in, grab a cup of tea and come along. I’ll show you how easy it is.
What You Will Need
Materials for this Project
- Unfinished wood birdhouse (craft store: Michael’s, Hobby Lobby, etc.)
- Green acrylic paint + brown acrylic paint
- Mod Podge
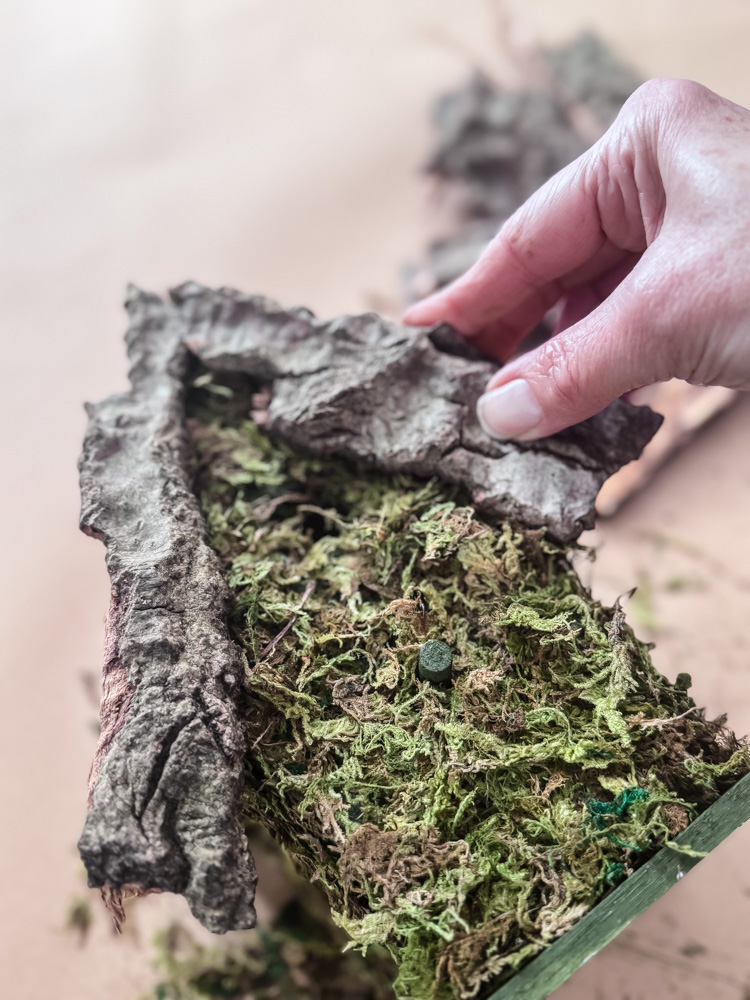
- Sheet moss
- Bark pieces, small twigs, or thin branches for the roof
- A foam brush & paintbrush
- Scissors
- Hot glue gun (this is my favorite)
A note on the bark vs. twigs swap: If you don’t have bark available, small twigs or thin branches work beautifully and give the birdhouse an even more woodsy, rustic look. Use what you’ve got; that’s always the best approach.
Step-by-Step: From Plain to Woodland Whimsy
This whole project comes together in just a few simple steps: paint, moss, bark, done. You’ll start by giving the birdhouse its base colors, then layer on the moss for that lush, garden-y look, finish the roof with bark or twigs, and then the best part: styling it into a display you’ll actually want to look at every day. No special skills required, and the whole thing can be knocked out in an afternoon.
Step 1: Paint The Base and Roof
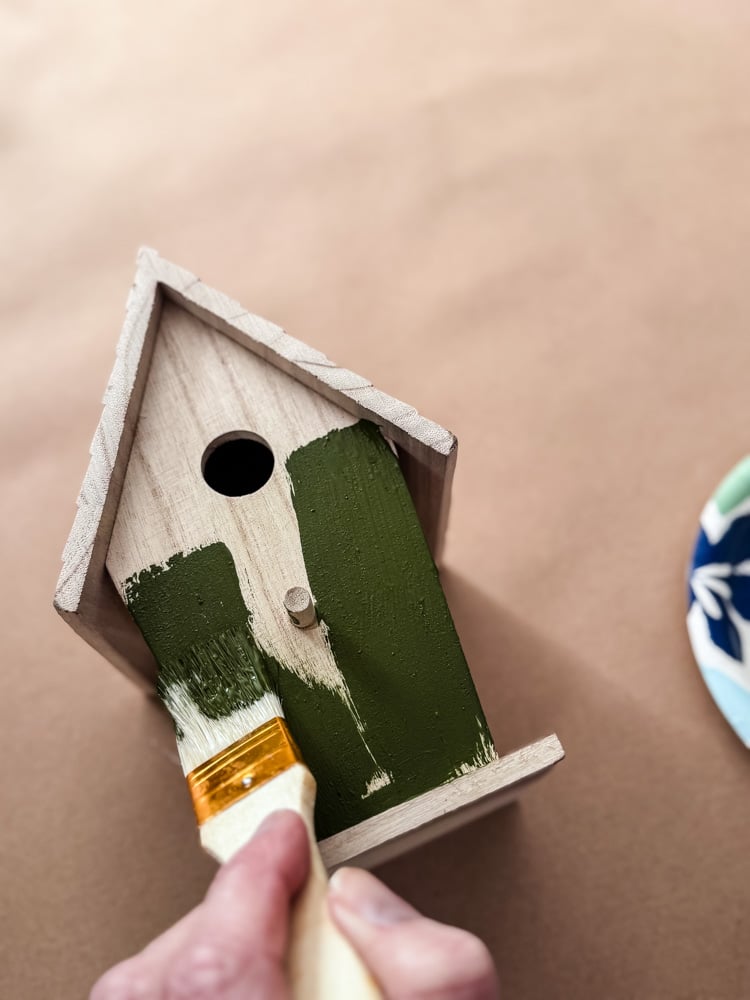
Paint the base and roof
Start by painting the body of the birdhouse green and the roof brown. Don’t stress about getting perfect coverage! The paint is to just cover the unfinished wood color. We will be covering both the roof and body of the birdhouse in the next steps. Let it dry completely before moving on.
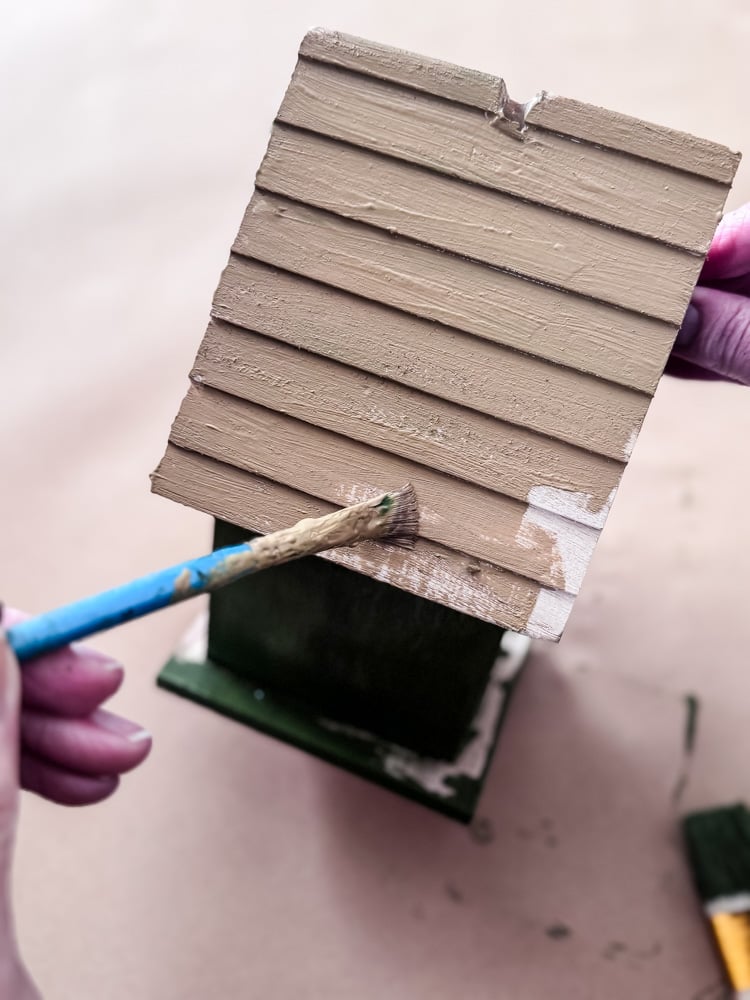
Use whatever tones of green and brown paint that you have on hand. It really won’t matter in the end.
Step 2: Apply The Moss To The Body
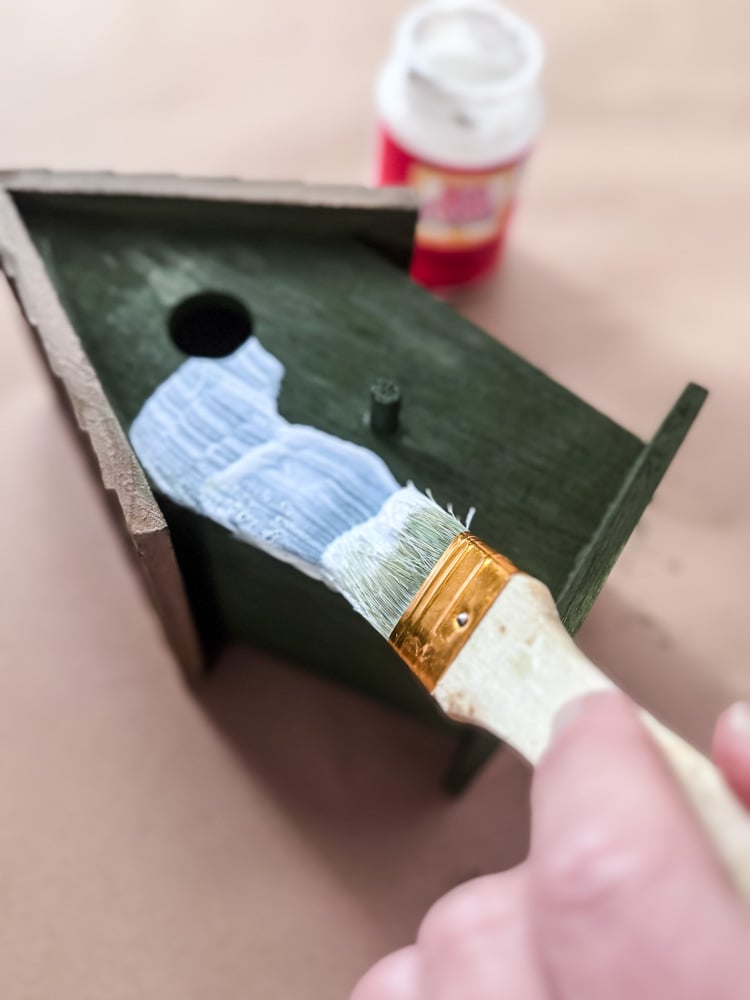
Apply the moss to the body of the birdhouse
Brush a generous layer of Mod Podge onto the body of the birdhouse and press pieces of sheet moss firmly into it. Overlap the edges slightly as you go so you don’t end up with gaps. It doesn’t need to be perfectly uniform in fact, the more natural and a little wild it looks, the better.
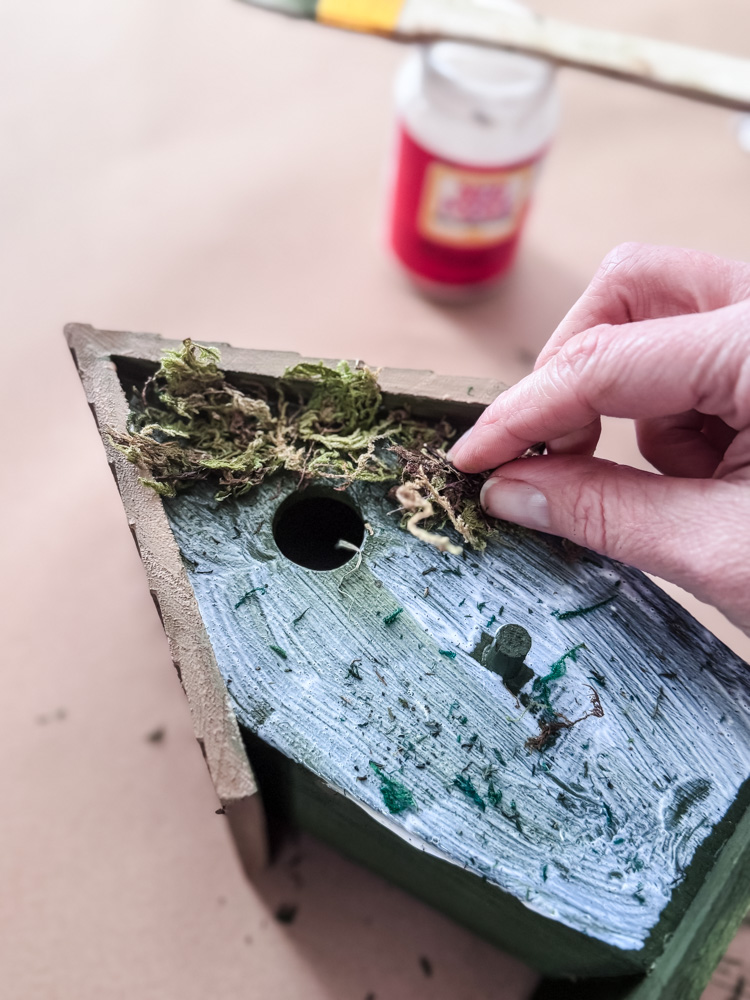
As you fill in the surface, reach for the thinner, flatter pieces of moss rather than the chunky clumps. You’re really just trying to cover the painted wood. You don’t need a lot of depth or thickness to get a great look.
Step 3: Cover The Roof with Bark or Twigs
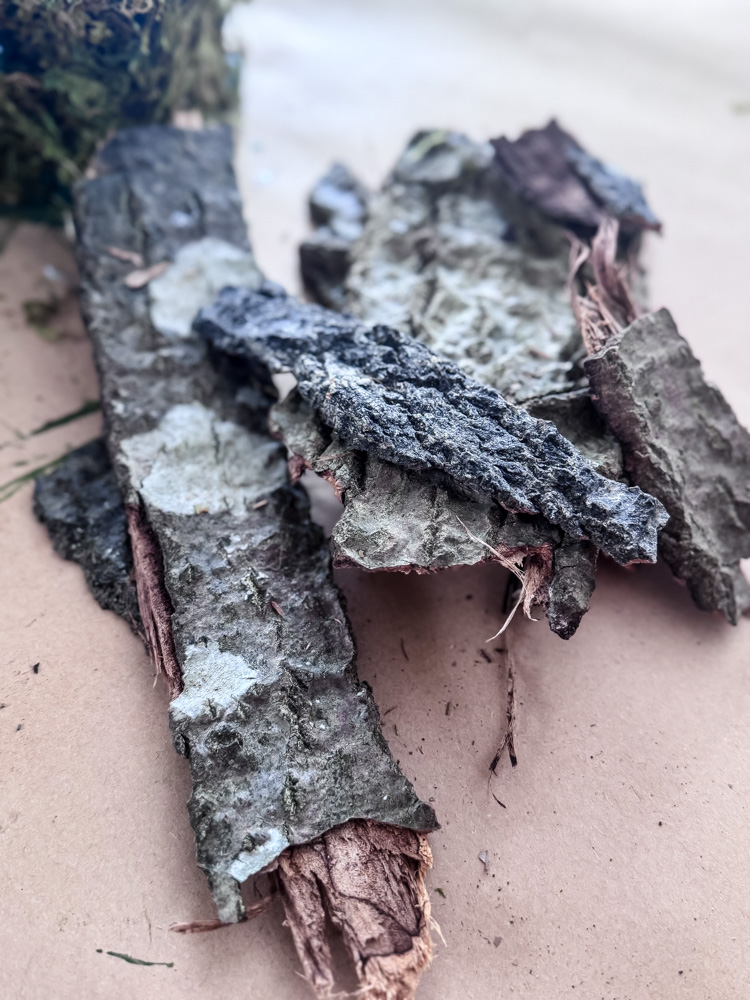
Prep Your Bark: The dried pine bark I collected last Fall is wonderfully brittle, which made it easy to break into just the right-sized pieces for the job. No special tools needed—just my hands and an eye for interesting shapes.

Start with a Foundation: I began by gluing two longer, thin pieces of bark along the front of the house, following the roof peak. This created a nice base layer and gave me a guideline to work from.
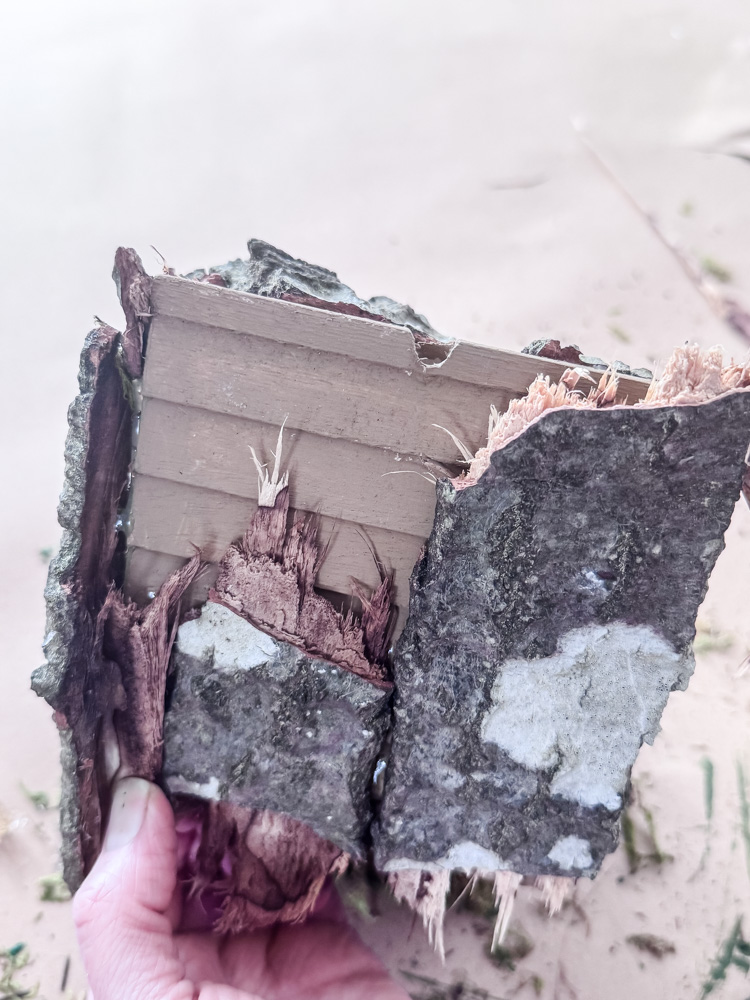
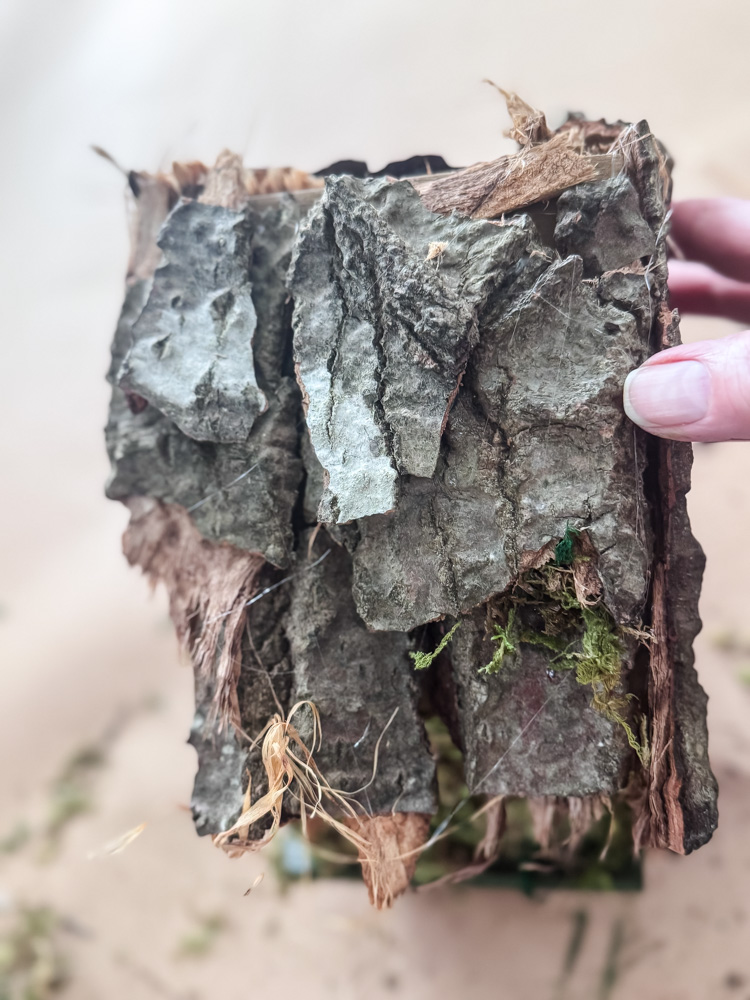
Work from the Bottom Up: Starting at the bottom edge of the roofline, I hot glued small pieces of bark, breaking each piece to size as I went. I love how the back side of the bark (I’m not sure of the proper name, but it has this lovely texture) adds such wonderful visual interest. I let some of those fibrous edges hang out here and there for a more organic, woodland feel.
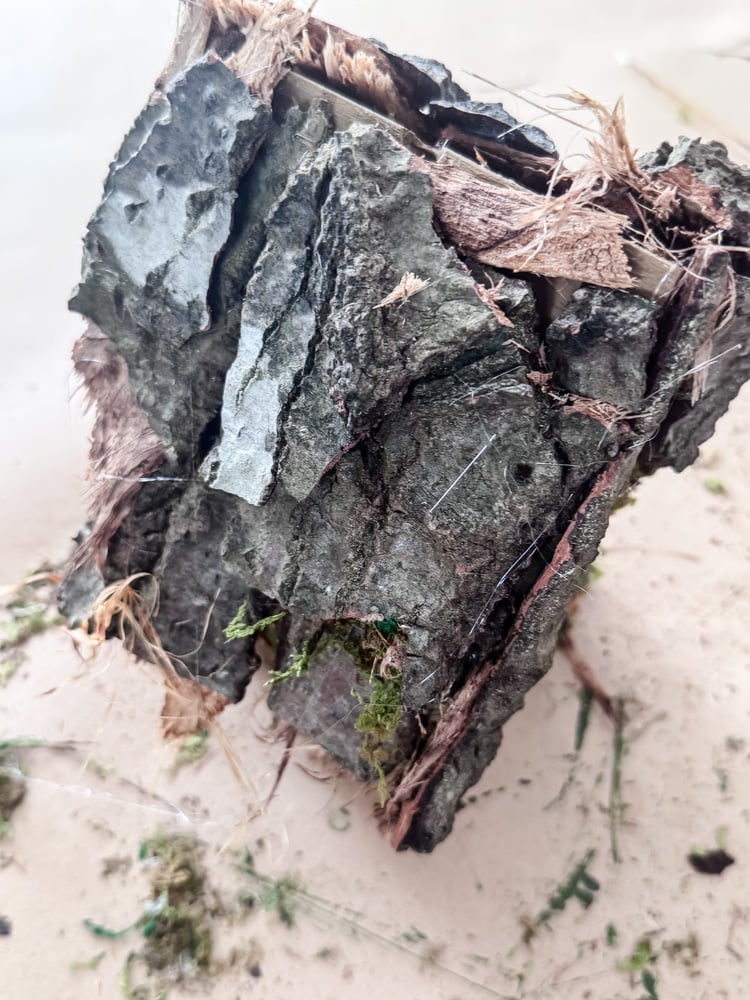
Repeat on the Other Side: Once the front was covered, I repeated the process on the other side of the roof, matching the texture and flow.
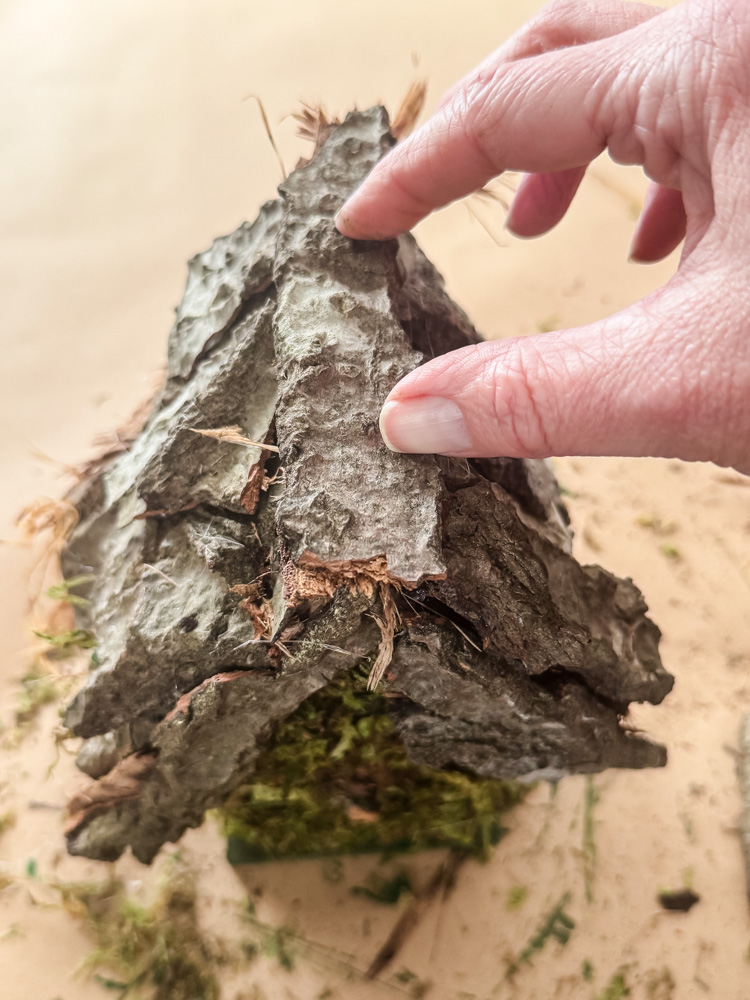
Finish the Peak: Finally, I hot glued a straight, longer piece of bark down the very center of the roofline to cover the seam and give it a clean, finished look.
A Little Troubleshooting!
A Little Troubleshooting (That Became a Feature!): I’ll be honest with you, I got a little glue-happy on this step. There were definitely some dried glue drips peeking out in places. But instead of stressing, I grabbed some tiny pieces of leftover moss and pressed them over the drips. Problem solved!
It added to that whimsical “cottage in the forest” feel, and now I can’t imagine it any other way. A happy accident, as they say!
No bark? No Problem
Even if you don’t have a forest in your backyard with fallen trees to forage bark from, you can still make a whimsical birdhouse for yourself!!
If you’re working with twigs instead, you’ve got two really lovely directions you could go:
- Birch Twig Roof: Use thin birch twigs (or any small, straight twigs) and glue them horizontally in neat rows, like miniature log cabin shingles.
- Hanging Branch Roof: Use slightly thicker, shorter branch pieces and glue them vertically so they hang down over the sides of the roof like little wooden fringe.
I honestly think both would be absolutely charming, and I’m planning on trying both ideas as soon as I pick up a couple more birdhouses. Stay tuned!
A Quick Word About Foraging Bark
The bark I used came from pine trees that had fallen in my woods a couple of years ago. By the time I collected it last Fall, it was so dry and brittle it practically peeled off in sheets. That’s actually your best indicator that you’re in good shape: no moisture means no environment for insects to live and thrive. The bark itself was already well past the point of being hospitable to anything creepy-crawly. If you’re foraging your own, look for bark that’s dry, brittle, and peels away easily; that’s exactly what you want, both for bug peace of mind and for how easy it makes the project.
Spring Styling
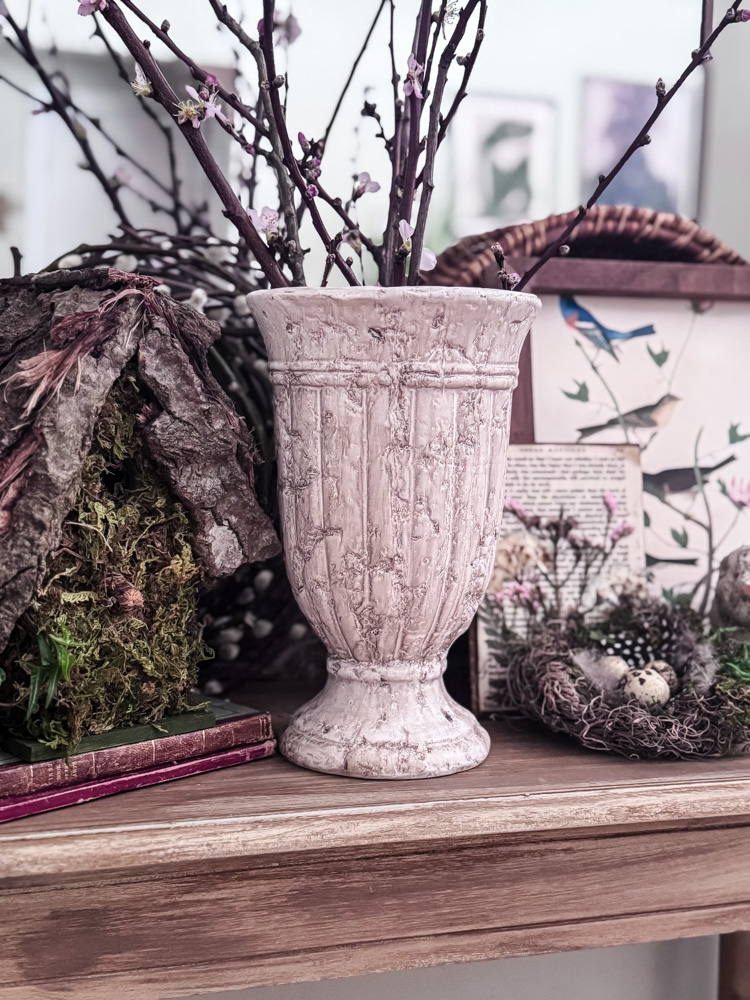
Once the birdhouse was finished, it found a perfect home on my entryway table as part of a little Spring vignette I put together. I grouped it with a thrifted vase of cherry blossom branches, a DIY bird nest, a small pussy willow wreath I made by bending fresh branches and securing them with floral wire, a vintage cement bird, some vintage books, botanical artwork, and, of course, a plant. Everything has that same natural, woodland-meets-spring feeling, and the birdhouse anchors it all perfectly. It’s the kind of display that looks like it came together intentionally but really just grew organically from things I already loved — which is honestly my favorite way to decorate.
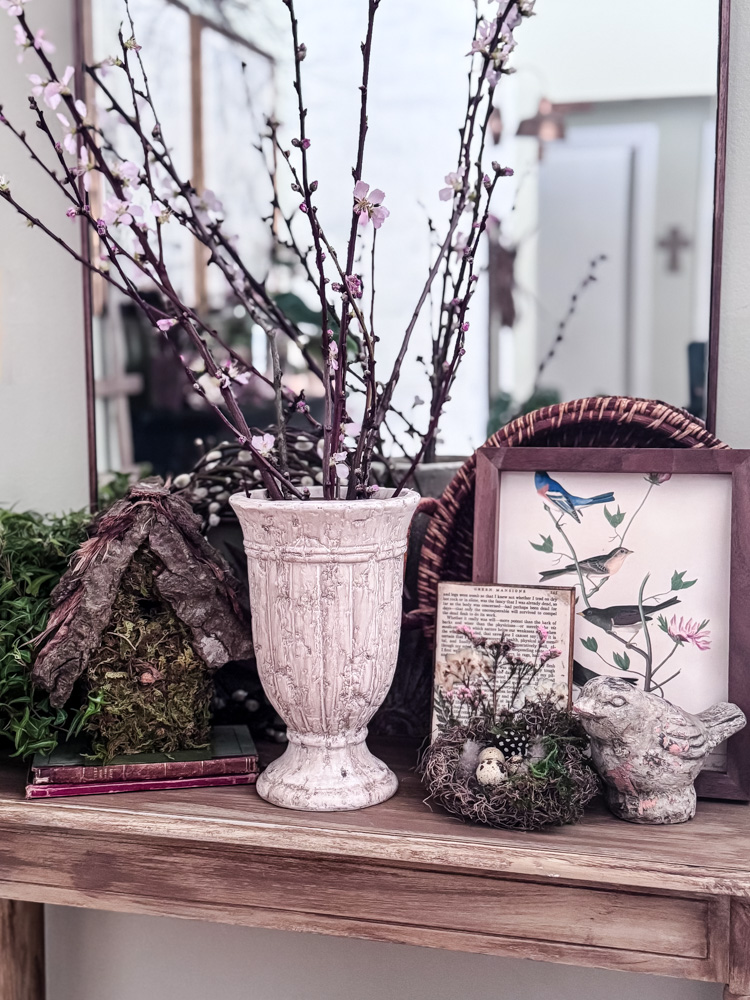
- Cherry Blossom Branches: A thrifted vase holds delicate cherry blossom branches (from Trader Joe’s), adding that soft pink blush of early spring.
- A DIY Bird Nest: A tiny nest I made from Spanish moss & added eggs and feathers. It feels like the birdhouse’s natural companion.
- Vintage Books: A small stack of aged books for the birdhouse to sit upon. adds height and that cozy, collected-over-time feel I always love.
- Art & a Cement Bird: A little piece of leaning art and a vintage cement bird (I found at an antique shop years ago) add layers of texture and whimsy.
- Pussy Willow Wreath: I bent fresh pussy willow branches into a small wreath, securing them with floral wire. It’s soft, fuzzy, and so quintessentially early spring.
- A Living Plant: Because every vignette needs a little living green, a trailing ivy plant in a simple pot rounds out the scene.
- Make the Botanical Pressed Flower Plaques
- Free Set of Vintage Bird Botanical Printables Exclusively For Cottage Insiders
Bonus! My Bird Nest Secret
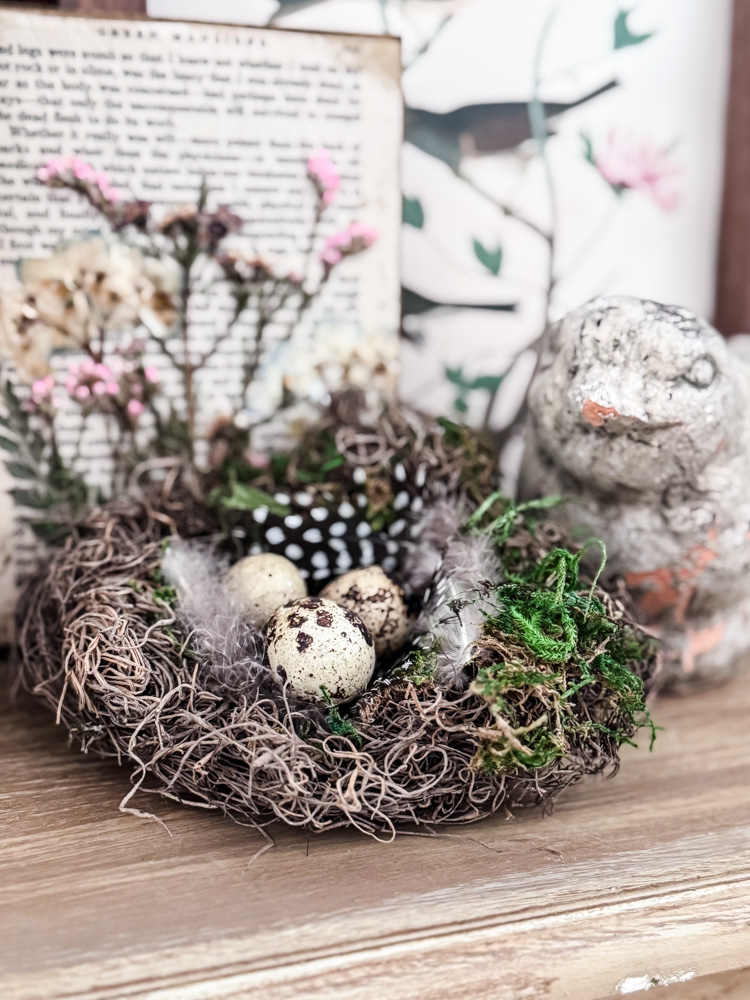
One of my favorite budget-saving decorating ideas! To make your own decorative bird nest, you will need a bag of Spanish moss (dollar store usually has it!), a can of spray adhesive, & disposable gloves.
- Wearing gloves, grab a clump of Spanish moss in one hand
- Mist with the spray adhesive
- Use your fingers to form a nest shape, pushing down in the center to make the indent.
- Optional: add small pieces of moss, feathers, and mini eggs.
Little Projects, Big Joy
Sometimes the simplest projects bring the deepest satisfaction. This little birdhouse sat on a shelf for nearly a year, waiting for its moment. And in one cozy afternoon, with a handful of foraged bark and a bit of moss, it became exactly what I’d always imagined: a tiny piece of the woods, right inside my front door.
Every time I walk past my entryway table now, I smile. The birdhouse sits among its springtime friends. The cherry blossoms, the pussy willow wreath, and the little nest, together whisper that warmer days are coming. It’s a small scene, but it fills our cottage with hope and whimsy in equal measure.
That’s the thing about crafting, isn’t it? It transforms not just objects, but how we feel in our spaces. A plain birdhouse becomes a story. A pile of forgotten bark becomes a treasure. And a corner of your home becomes a little woodland getaway.
I hope this project inspires you to look at the simple things around you, a craft store find, a foraged handful of nature, an afternoon with nothing planned, and see the possibility. Because sometimes the best projects aren’t the biggest ones. They’re the ones that make you stop and smile as you walk by.
If you give this one a try whether you go the bark route, the twig route, or some combination of your own, I’d love to see it! There’s nothing I love more than seeing these projects come to life in your own spaces! That’s why I have a page dedicated to you and your projects! Check out all of the talented readers! Email me your photos at cottageonbunkerhill@gmail.com to be featured in the gallery.
Happy crafting, friend. May your Spring be filled with little moments of making and joy.
xo, Jennifer
Love projects like this? Don’t miss out! Join my newsletter family for more cozy, budget-friendly DIY ideas delivered right to your inbox. You’ll get exclusive tips, early access to tutorials, and all the inspiration you need to make your home feel handmade and heartfelt.


This is adorable! I love these types of creations.
I’m so glad! Me too, I love creating fun little projects like this.
Such a cute project!
Thanks, Kimmy!
Really cute. The bark roof just makes it perfect.
Thanks, Teddee!!!