

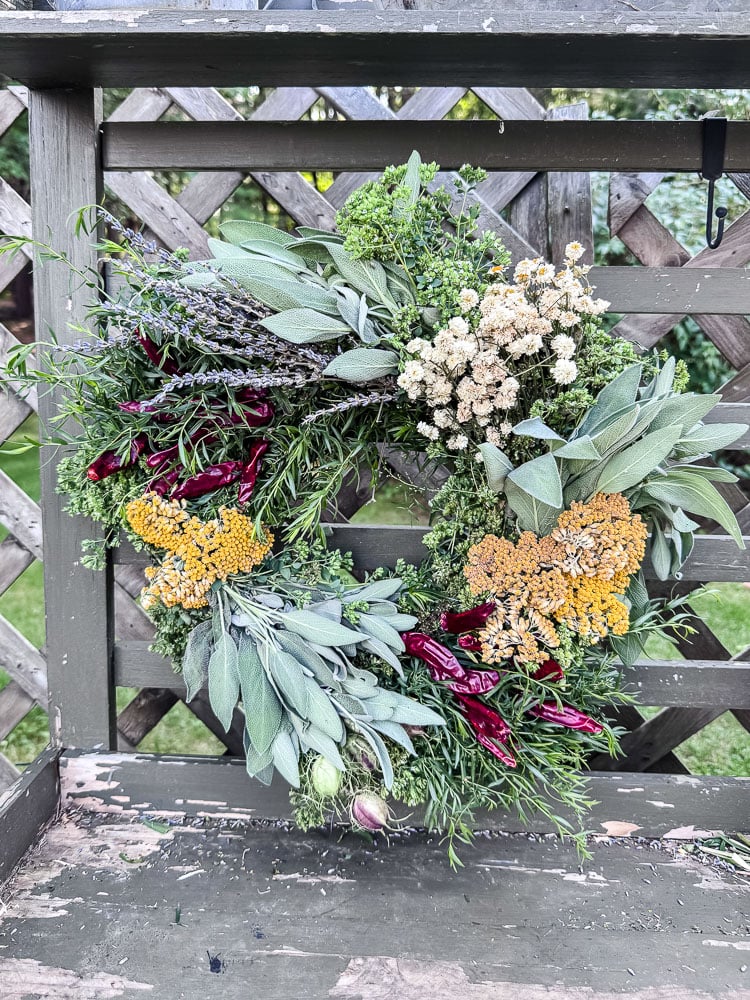
A Kitchen Herb Wreath Made Almost Entirely From My Garden
There’s something really satisfying about making something beautiful from what’s already growing right outside your door. This herb wreath started with an armful of oregano clipped from the garden and ended up as one of my favorite things I’ve made all summer, and the only things I bought were a bag of dried chili peppers and a straw wreath form I already had in my craft stash.
Everything else? Straight from the garden. Sage, lavender, tarragon, yarrow, nigella pods, feverfew. All of it growing just a few steps from my potting bench where I made the whole thing on a warm summer afternoon.
I’ve been calling this my kitchen herb wreath because that’s exactly where it belongs, hanging on the kitchen door in the room where I actually cook with these herbs. It smells incredible, it looks like something you’d find in a farmhouse boutique, and it’s going to get even better as everything dries in place over the next few weeks. Which, if you read my butterfly wreath post, you already know is my favorite kind of wreath to make.
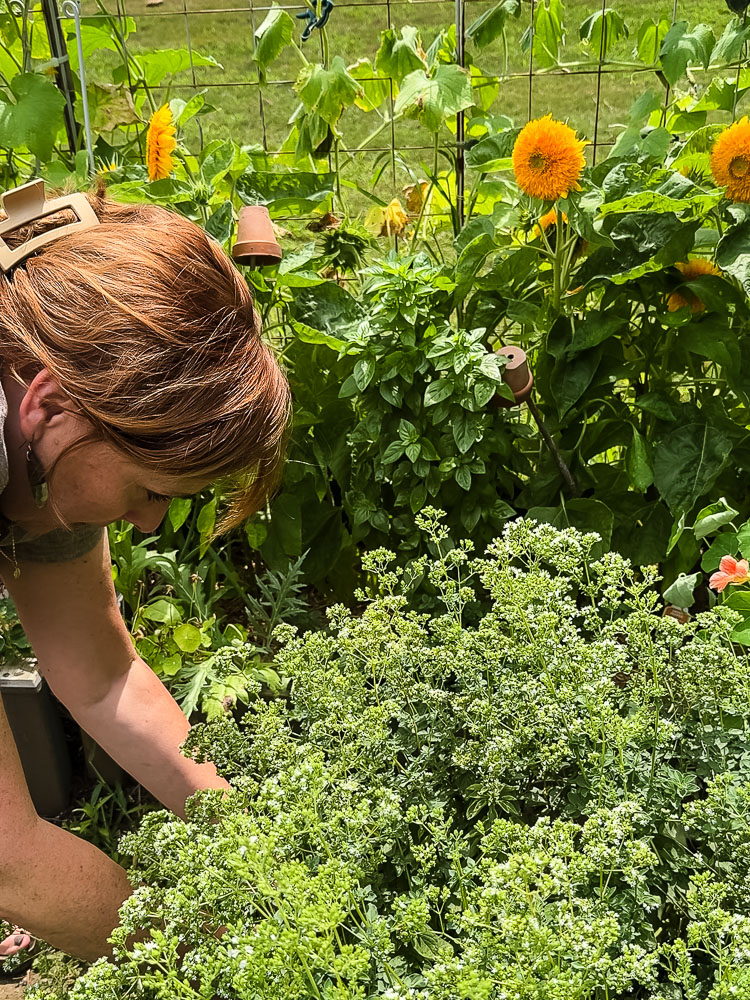
This is another project in my garden-to-home series, the ongoing collection of projects rooted in the idea that what you grow outside should find its way inside in the most beautiful way possible. A wreath made from your own herb garden hanging in your kitchen might be the most literal version of that philosophy yet.
Let me show you how I made it.
Garden to Home
I’ve always believed the line between garden and home should be blurry. This series is all about crossing that line. Taking what grows outside and bringing it indoors in beautiful, lasting ways. New projects posted monthly.
Let’s grow together!
This post may contain affiliate links, which means we receive a small commission if you purchase through our links. See our disclaimer page for more information.
What You’ll Need
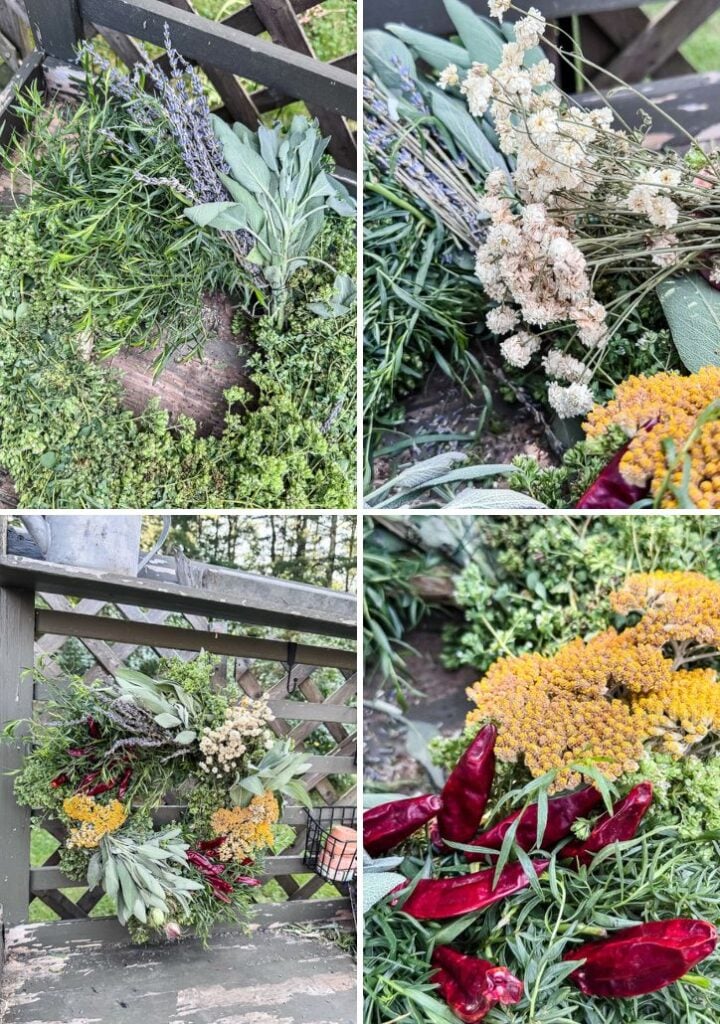
Materials for this Project
The Base
Tools
- Garden snips
- Hot glue gun and glue sticks
- Floral wire paddle
- Small pieces of floral wire (for the pepper picks — more on that in a minute)
From the Garden
- Oregano that has gone to flower (you’ll want an armful)
- Fresh sage
- Dried lavender
- Tarragon
- Dried yellow yarrow
- Nigella pods
- Dried feverfew
The One Thing I Bought
- A bag of small dried chili peppers (I ordered mine from Amazon, but you can find them in your grocery store too)
A note on quantities: I’m intentionally not giving you exact stem counts here because every garden is different on what you have available and every wreath will be a little different. The general rule is to cut more than you think you need; you can always dry out the extra herbs.

Welcome! I’m Jennifer, and I’ve always believed nature is the most beautiful art supply. For years, I’ve been preserving New England’s blooms and foliage through pressing, drying, and crafting. Let me show you how to capture a little bit of the season and bring it indoors—simply and beautifully.
The Pepper Pick Trick
Let’s talk about the chili peppers for a minute, because this little trick is worth its own spotlight.
Dried chili peppers are beautiful wreath material. That glossy deep red against the green herbs is exactly the pop of color this wreath needed. The problem is that they don’t have a stem to wire or tuck into a wreath the way a flower or herb bundle would. So I made my own picks, and it took just a couple of minutes.
Here’s how:
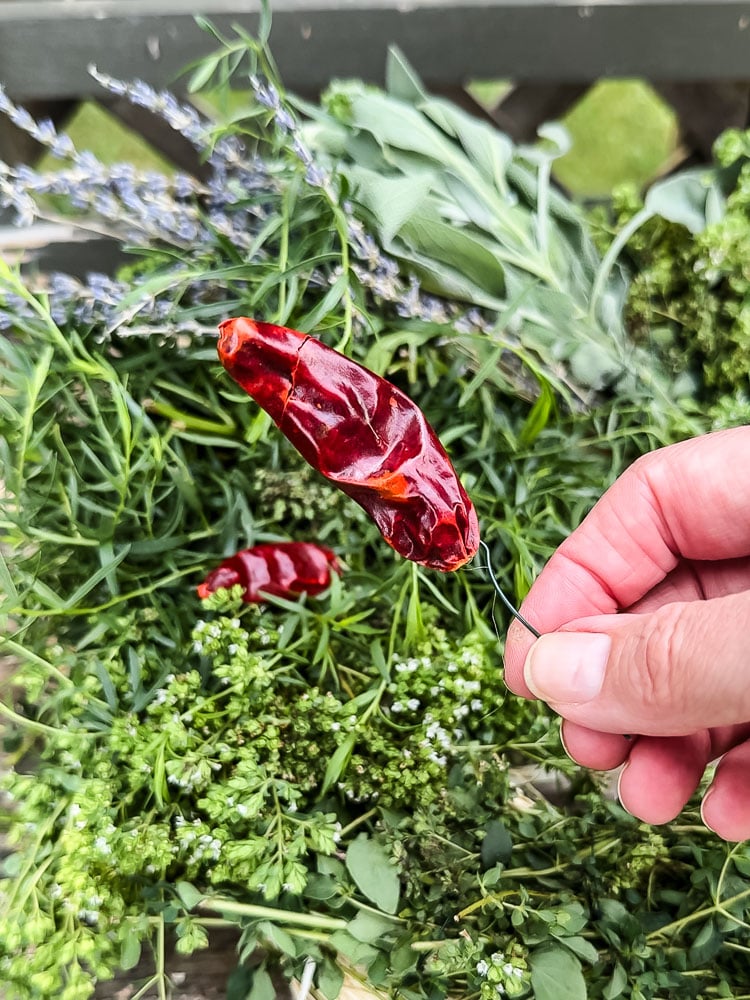
Cut a small piece of floral wire; just a few inches is all you need. Dip one end into your hot glue and immediately insert it into the top of the pepper where the stem would be. Hold it still for a few seconds while the glue sets. That’s it. You now have a little pick that you can push directly into the straw wreath form to secure the pepper exactly where you want it.
I made a whole little pile of pepper picks before I started adding them to the wreath, which I’d recommend; it’s much easier to do them in a batch than one at a time while you’re mid-wreath and trying to keep everything in place.
This same trick works for any small decorative element that doesn’t have a sturdy enough stem to secure on its own like small pine cones, seed heads, dried berries. File it away for future wreath projects because you’ll use it again.
Kitchen Herb Wreath: How To Make It
Now, before I walk you through the steps, you don’t have to raid your garden for the exact same herbs and flowers I used. Work with what you’ve got.
The secret to a wreath that looks intentional rather than thrown together is two things: a good mix of textures and colors, and repetition. When you see the same element pop up in two or three spots around the wreath, it gives the whole thing a sense of rhythm. That’s really all there is to it!
Step 1: Cover the Base with Oregano
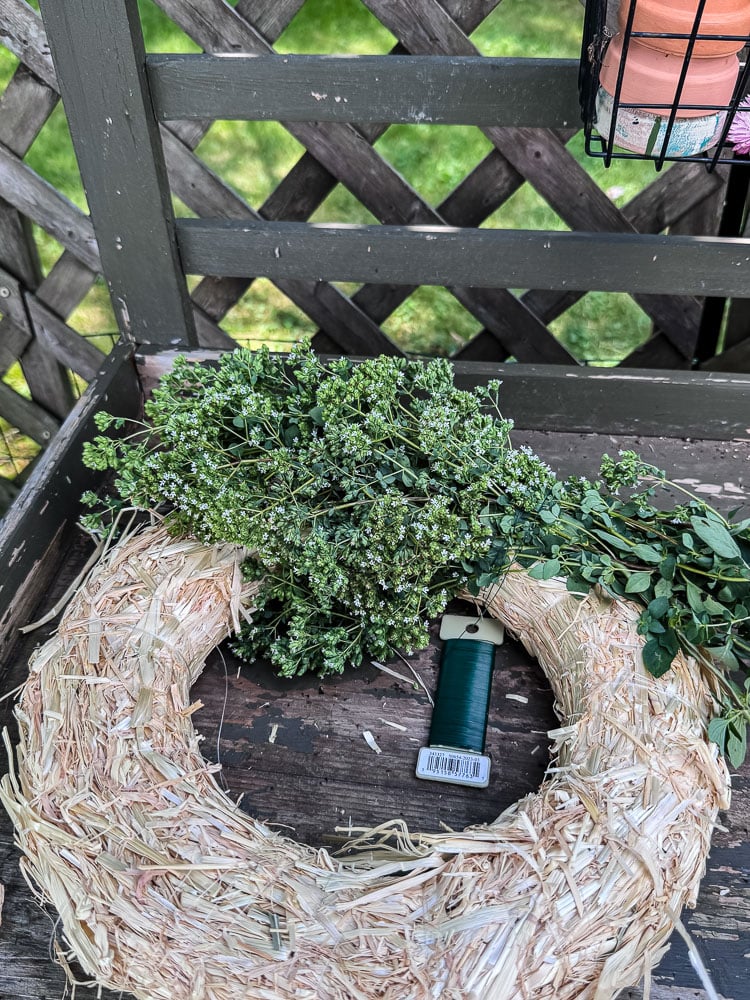
I started with an armful of oregano that has gone to flower. The flowering tops add beautiful texture, and the stems are sturdy enough to wire securely onto the wreath form.
Work in bunches, laying each one onto the straw base and wrapping the floral wire paddle around both the stems and the form to hold everything in place. Work your way around the entire wreath until the straw base is completely covered.
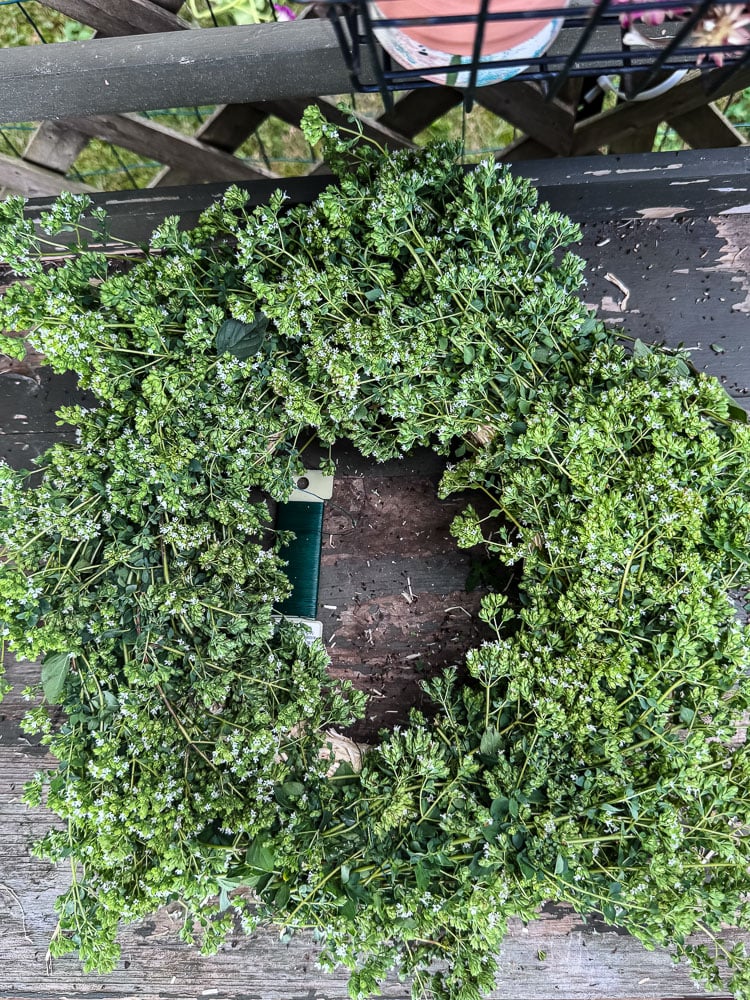
Here’s the thing about oregano: it dries down smaller than it looks fresh. I went deliberately heavy on my oregano base for exactly this reason. I wanted to make sure the straw stayed covered even after everything dried and shrunk down a little. Don’t be shy with it. When you think you have enough, add a little more!
Step 2: Add The Sage
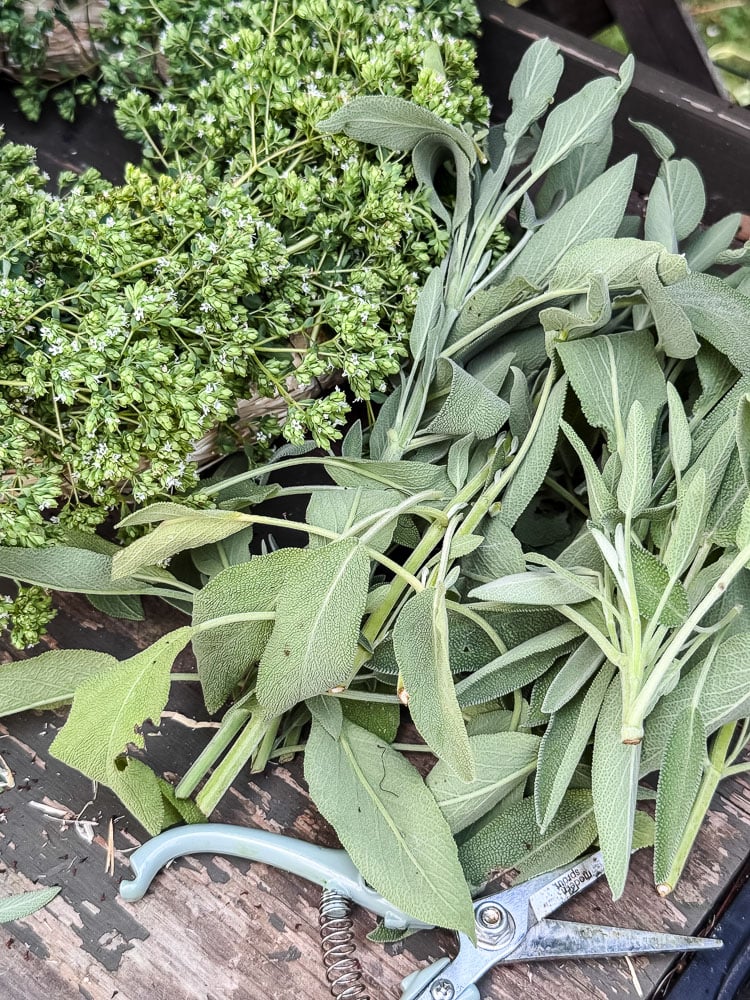
Clip a good handful of fresh sage and gather it into a bundle. Starting at the top of the wreath, tuck the bundle underneath where an oregano bunch begins. This gives it something to nestle into naturally. Use the wire paddle to secure it in place.
The silvery green of the sage against the oregano is already beautiful at this stage. I’ll be repeating the sage bundles as we work around the wreath. Spacing them evenly so the sage appears in a few different sections of the finished wreath.
Step 3: Insert The Lavender
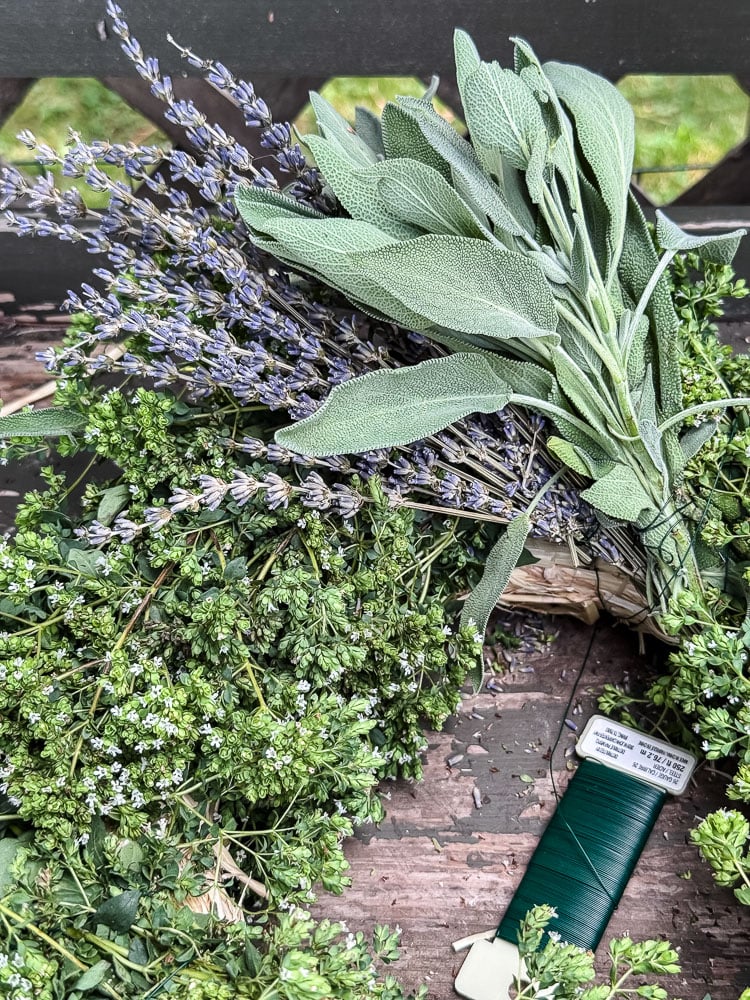
Take your dried lavender and either push the stems directly into the straw wreath base or use the floral wire to secure it in place. One reason I love working with the straw wreaths is it’s easy to just stick stems right in place.
Tuck the lavender in wherever it feels natural, letting the purple spikes rise up above the oregano and sage for a little height variation.
Step 4: Add the Tarragon
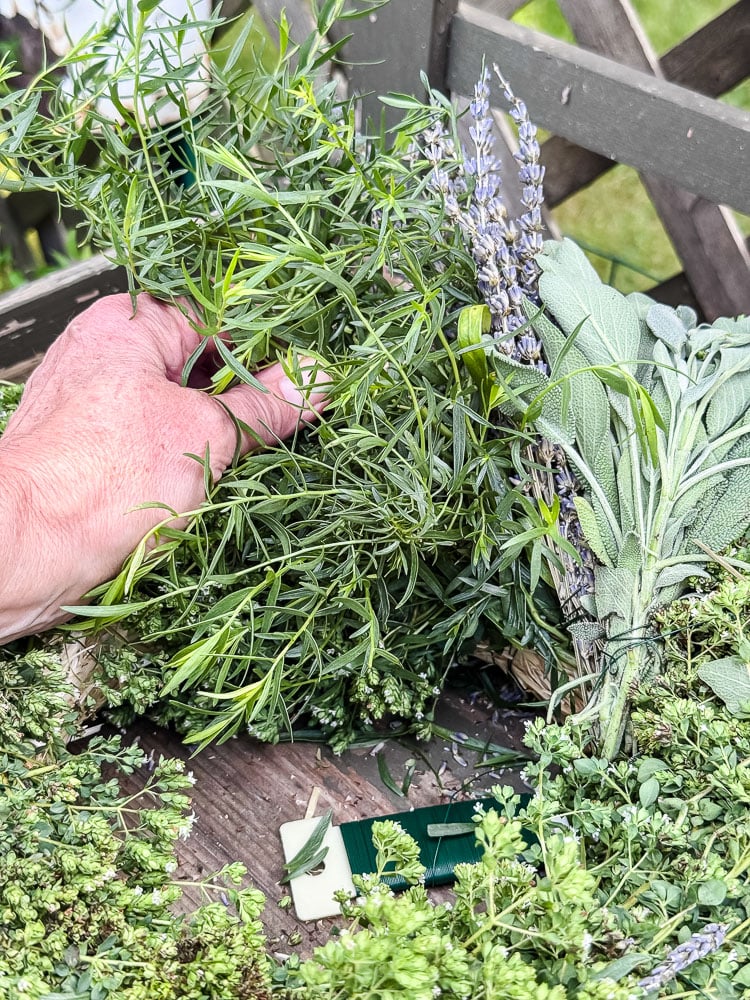
Gather a nice fluffy bunch of tarragon and secure it to the wreath. I just popped it right into the straw wreath; the tarragon has a woody stem and slid right.
Tarragon has a wonderful airy, feathery quality that adds softness and texture between the chunkier herbs.
Step 5: Add The Pepper Picks
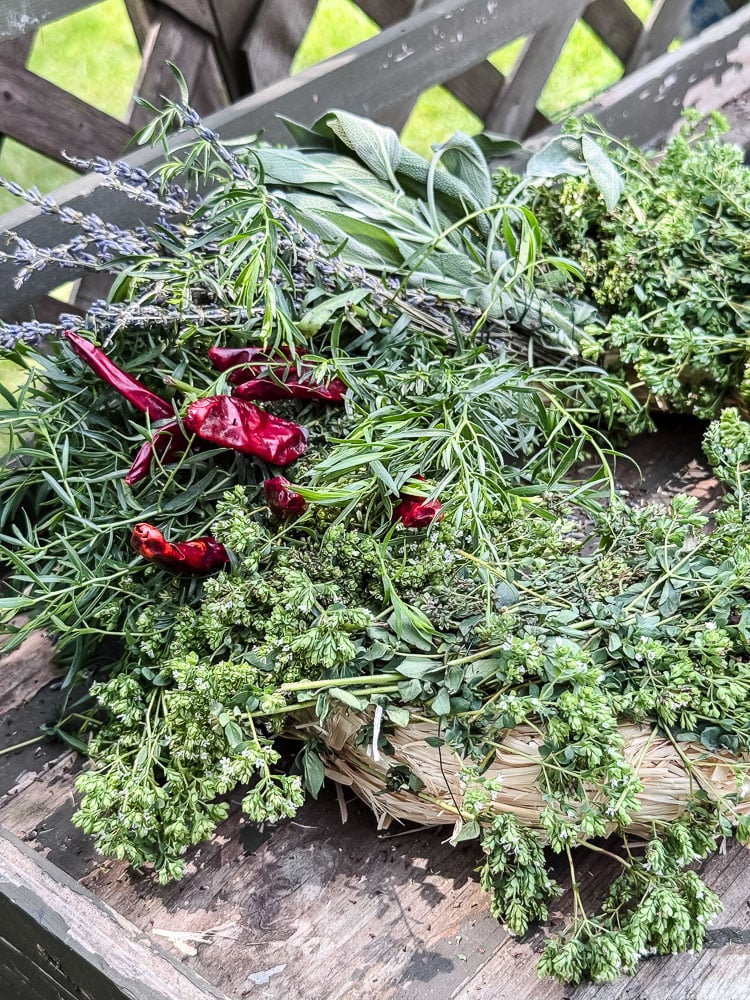
Take your pre-made pepper picks and push them directly into the tarragon section, inserting the wire end into the straw base to hold them securely. Cluster them together for the most visual impact. And I would suggest using an odd number; it’s visually more appealing.
.The glossy red against the soft green tarragon is such a striking combination and honestly one of my favorite moments in this whole wreath.
Step 6: Add The Yarrow
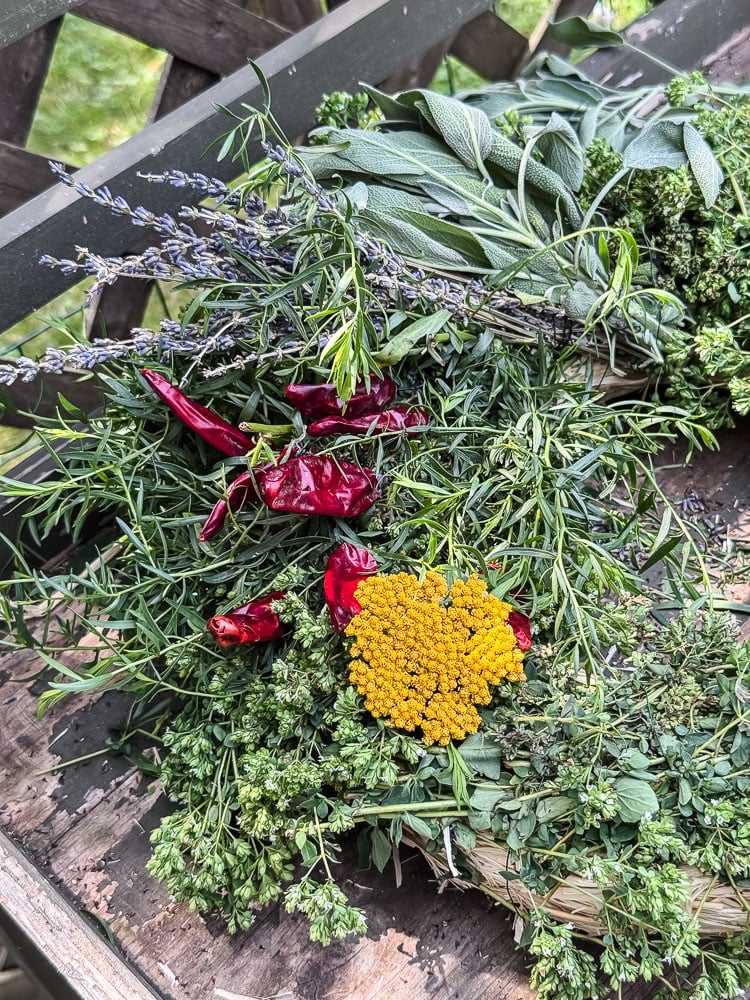
Tuck a few pieces of dried yellow yarrow into the wreath for a pop of warm color. The golden yellow plays beautifully against the red peppers, purple lavender, and green herbs. It ties the whole color palette together without competing with anything else. Push the stems directly into the straw base where you can, and wire anything that needs a little extra help staying put.
Don’t have yarrow? Replace it with another yellow dried flower like strawflowers.
Step 7: Layer & Repeat
This is where the wreath really comes together. I continued around the wreath and repeated some of the elements: more sage, more tarragon with pepper picks, more yarrow.
Filling in any gaps and building up the fullness of the wreath.
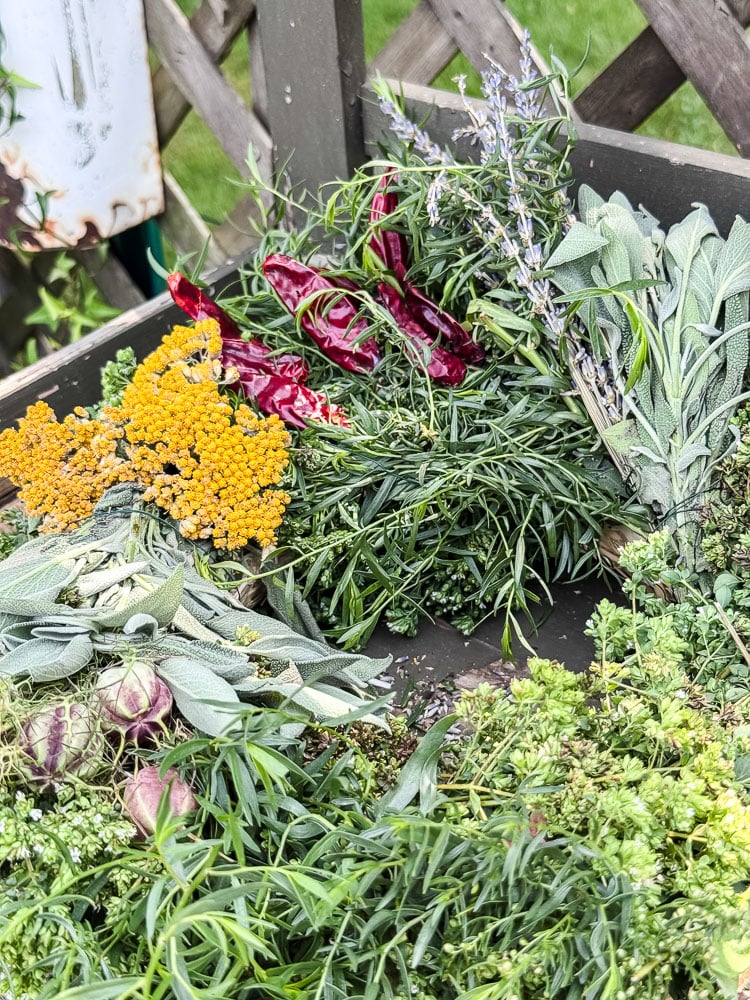
After the second bunch of sage, I tucked in a few nigella pods (love-in-a-mist); those little striped pods add such a beautiful structural element among all the soft herbs.
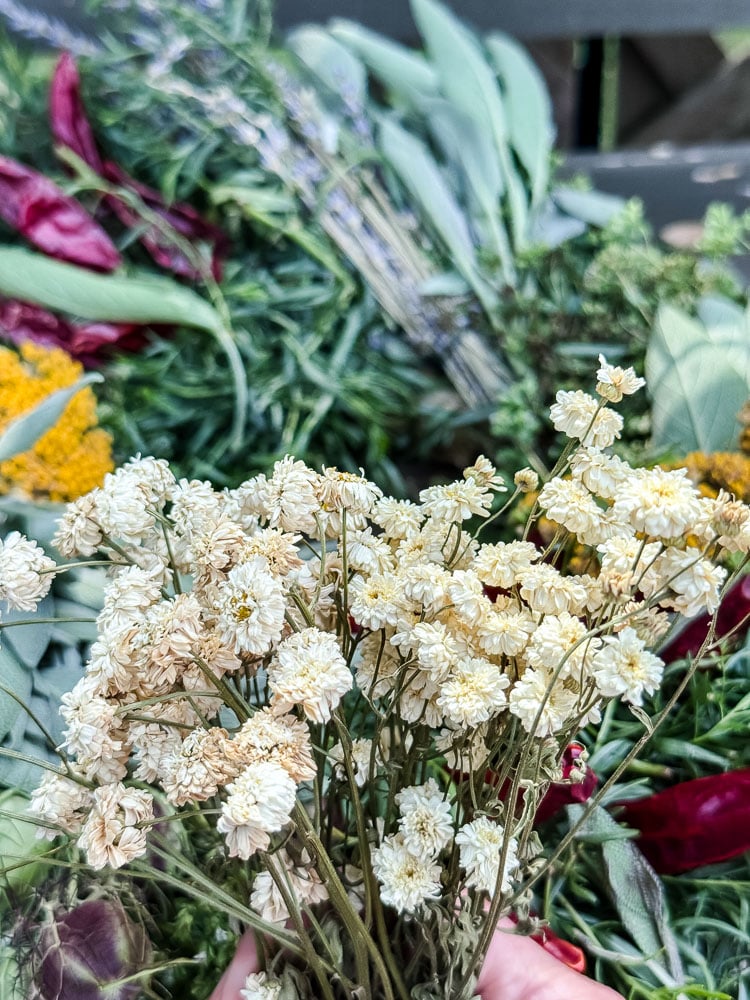
The final addition was a bunch of dried feverfew, which adds a soft, airy quality similar to baby’s breath but larger.
Finished Herb & Flower Wreath
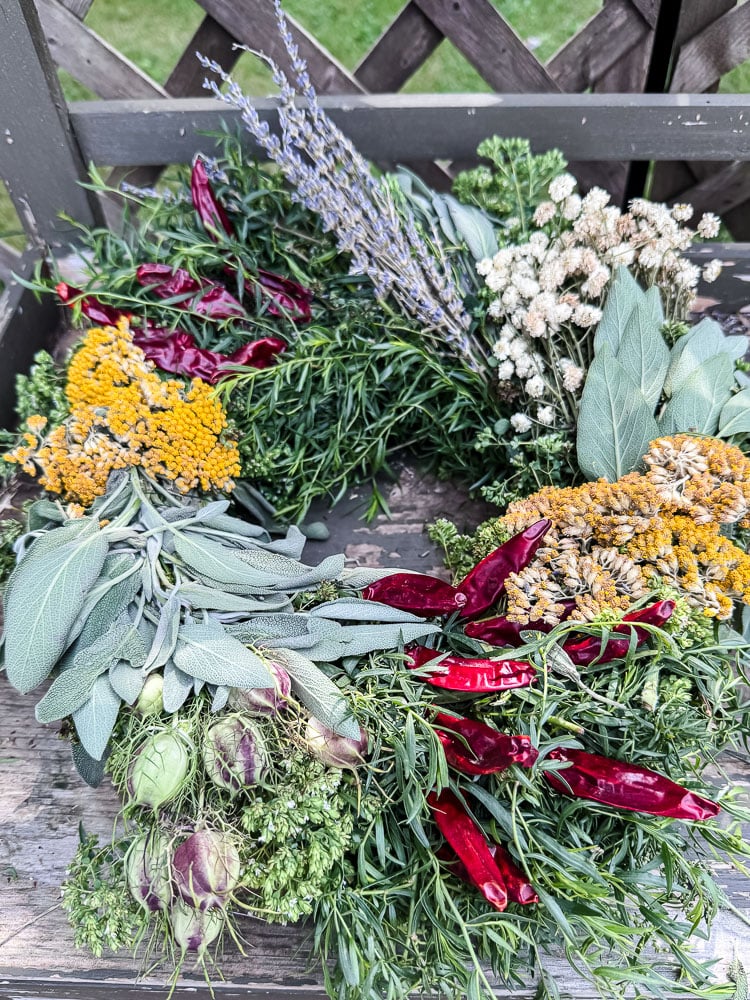
One tip is to step back every few minutes and check the overall balance. You want the colors and textures distributed evenly so no one section feels too heavy or too sparse. Keep going until every inch of the wreath feels full, layered, and intentional.
What Happens When It Dries
One of the things I love most about this wreath is that you truly don’t have to do anything once it’s hanging. Everything on it was chosen with drying in mind, and over the next few weeks it will slowly transition from a fresh herb wreath into a gorgeous dried botanical wreath without you lifting a finger. Here’s what to expect:
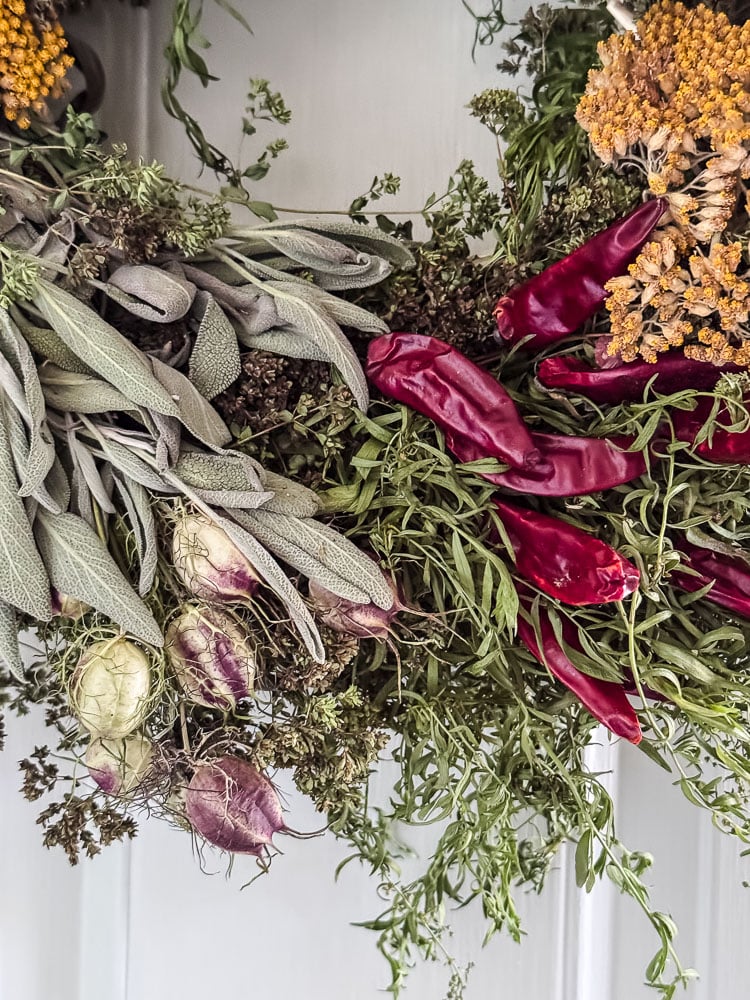
- Oregano will dry down and shrink a little, which is exactly why I went heavy on it at the base layer. What feels like too much fresh oregano becomes just right once dried. The flowering tops hold their shape beautifully and take on a lovely rustic quality as they dry.
- Sage dries to an even more beautiful silvery grey-green than it starts. The velvety texture of the leaves holds up really well, and the color actually deepens and becomes more interesting over time.
- Tarragon dries down to a delicate, wispy version of itself. Still beautiful, just a little airier and finer. It works perfectly even dried.
- Yarrow, Nigella Pods, Feverfew, & Lavender: The flowers were already dried, so they will stay just how they are today, unless they are in direct sunlight, which will fade the color of your flowers.
Tips for the Best Results
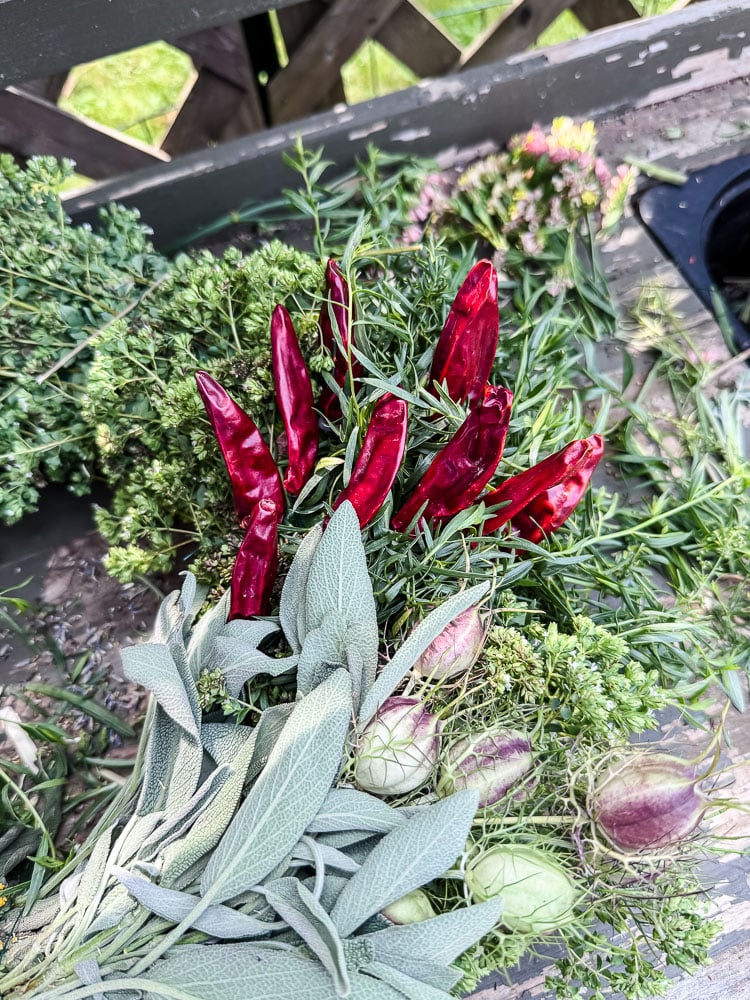
- Go heavy on your base layer. I said it in the steps, and I’ll say it again here because it really matters. Fresh oregano dries down smaller than you expect. What looks almost too full and bushy fresh will be just right once dried. This applies to any herb you’re using as a base layer, not just oregano. When in doubt, add more.
- Know which stems need wiring and which don’t. Stronger, woodier stems like lavender, nigella pods, and yarrow can often be pushed directly into the straw base without any wiring at all. Softer, more flexible stems like oregano and tarragon need the wire paddle to hold them securely. When you’re not sure, wire it. A stem that falls out mid-project is more frustrating than one you wired unnecessarily.
- Make your pepper picks in a batch before you start. I mentioned this in the pepper pick section, but it bears repeating. Sitting down and making a whole pile of picks before you begin is so much easier than stopping mid-wreath to fire up the hot glue gun every time you want to add a pepper. Get them all done first and set them aside ready to go.
- Work on a flat surface. I made this wreath right at my potting bench, which was perfect. Having a stable flat surface to lay the wreath on while you work makes everything easier, especially when you’re trying to wire bunches in place and hot glue pepper picks at the same time
- .The straw base is your friend. One of the reasons I chose a straw wreath form for this project rather than a grapevine base is that the straw gives you so much more flexibility for inserting stems directly. You can push almost anything with a reasonably sturdy stem straight into the straw, and it will hold. It makes the whole process faster and gives you more freedom to adjust placement as you go.
Where To Display Your Herb Wreath
The kitchen is the most natural home for a wreath like this, and that’s exactly where mine is headed on the kitchen door, where I’ll walk past it every single day. There’s something really lovely about having a wreath made from herbs you actually cook with hanging in the room where you actually cook with them. It’s decorative and deeply personal at the same time.
But the kitchen door isn’t the only option. A few other spots that would be beautiful:
A screened porch or back door: the herbs will hold up well in a sheltered outdoor spot, and the rustic, garden-fresh quality of this wreath feels right at home outside.
Above a kitchen window: if you have a window with a little ledge or a curtain rod with some clearance, a wreath hung above it looks incredibly charming and very farmhouse kitchen. My wreath was a little big to hang between my two small windows behind my kitchen sink, or this would have been my first choice (it would be perfect if I made one with an 8-inch wreath form)
A dining room or mudroom: The color palette of deep red peppers, silvery sage, and golden yarrow works beautifully in a fall dining room, especially as everything dries down.
One thing worth mentioning: keep it out of direct sunlight if you can. Sunlight is the enemy of dried botanicals and will fade the colors faster than anything else. A kitchen door that gets indirect light is perfect. A south-facing window that gets full afternoon sun is not.
Your Kitchen Deserves a Little Garden Magic!
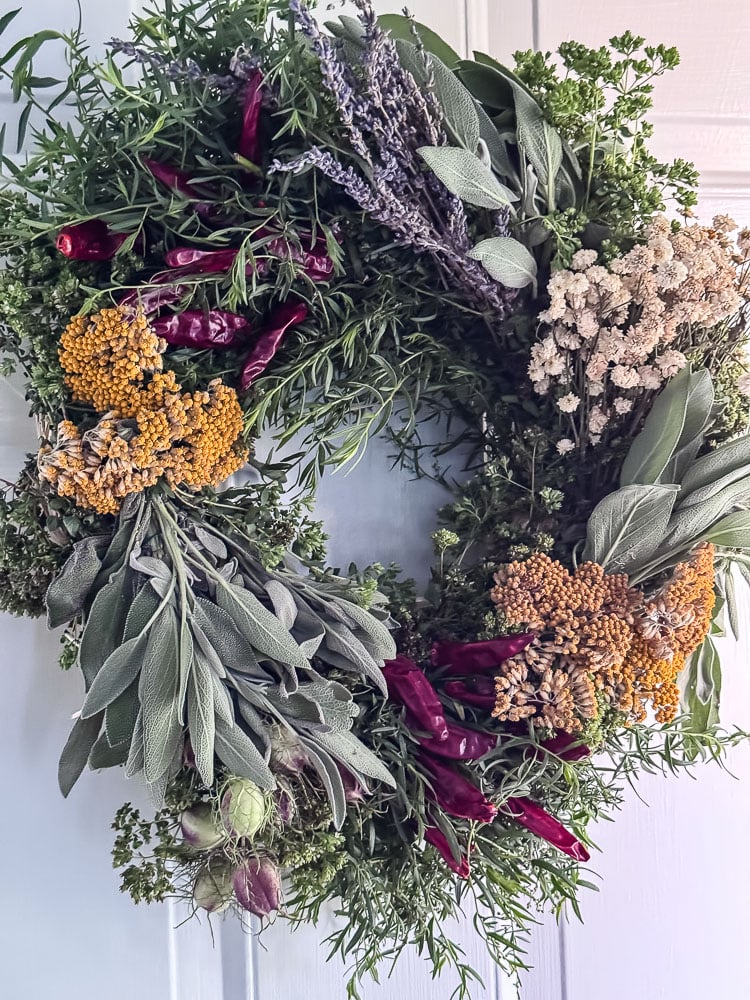
I have made a lot of wreaths over the years; it’s kind of my thing! But there’s something about this one that feels especially satisfying. Maybe it’s because almost everything on it came from my own garden. Maybe it’s because the smell when you walk past it is just incredible, with that combination of lavender and sage and dried herbs that is basically aromatherapy.
Or maybe it’s because I know that in a few weeks, when everything has dried down and settled into itself, it’s going to look even better than it does right now. That’s the magic of working with what your garden gives you. You put in the work in spring, you tend it all summer, and then in August you walk outside with your snips and come back in with a wreath that looks like it cost a fortune and smells even better!
This is exactly what my garden-to-home philosophy is all about. And honestly? I can’t wait to see what I make next.
If you make this wreath, I would love to see it and tell me what herbs you used! I have a feeling every version of this wreath is going to look a little different depending on what’s growing in your garden, and I love that.
See your projects featured! If you are inspired by this or any of my other DIY projects, I would love to see them and add you to the Reader’s Spotlight gallery. Send a photo to me at jennifer@cottageonbunkerhill.com
xo, Jennifer
Love projects like this? Don’t miss out! Join my newsletter family for more cozy, budget-friendly DIY ideas delivered right to your inbox. You’ll get exclusive tips, early access to tutorials, and all the inspiration you need to make your home feel handmade and heartfelt.



That is a thing of beauty! AND bounty! which your garden really delivers. I’d never be able to grow enough to make one. I can almost smell it. The kitchen is the obvious place but I can imagine one above my laundry room window❤️ the nigella pods are my favorite thing, never seen those before.