

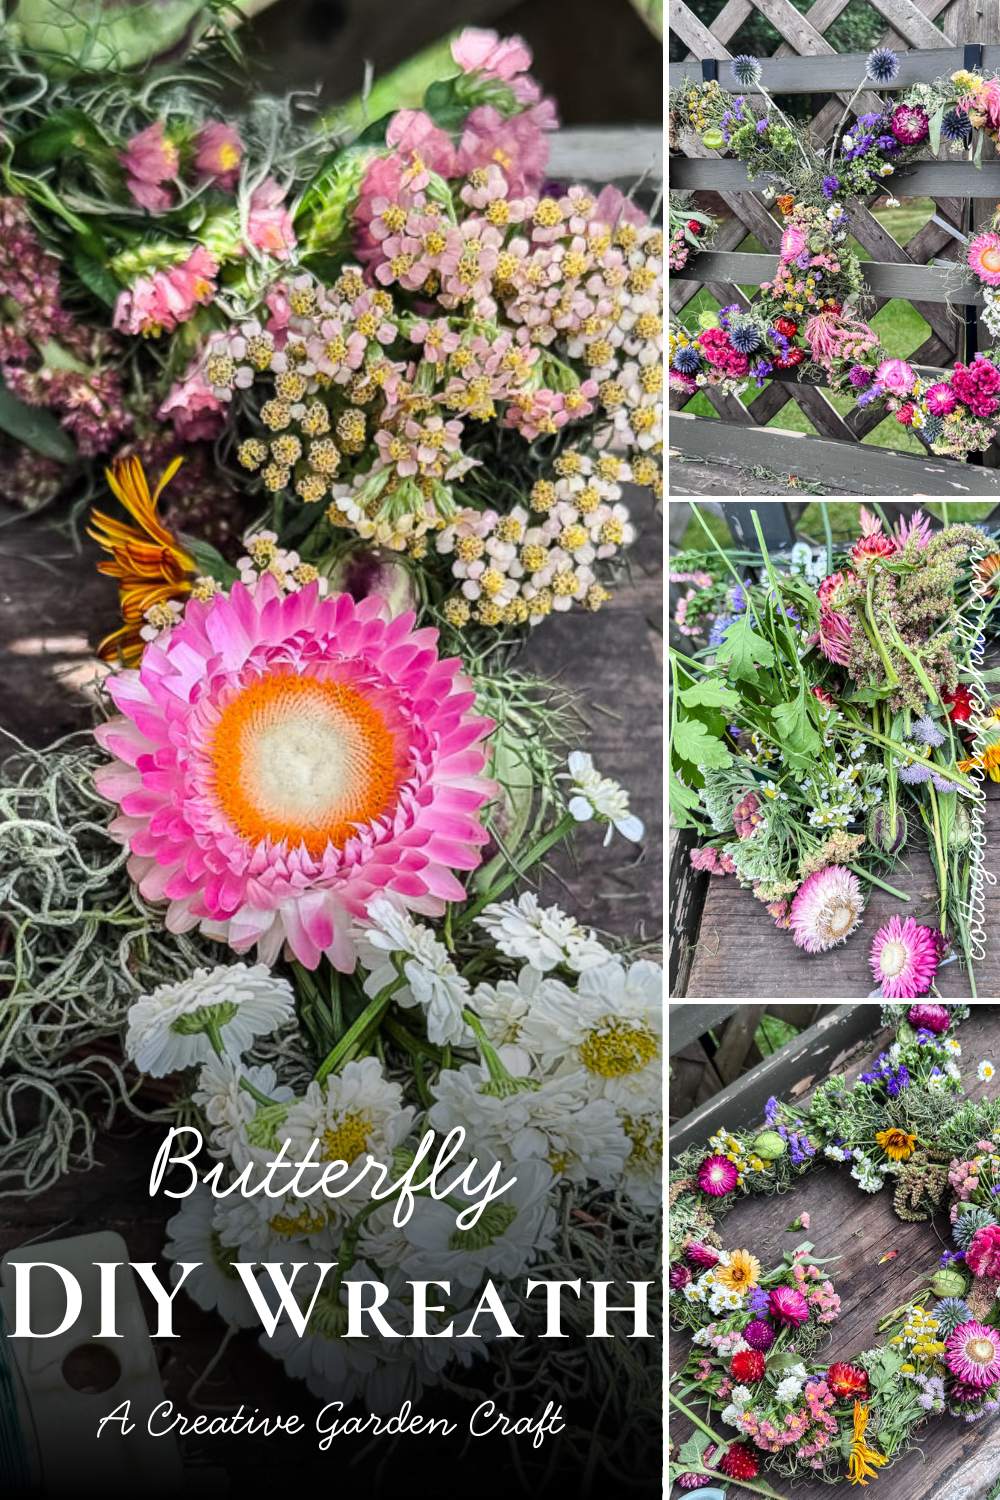
Learn how to turn two heart grapevine forms and freshly snipped garden blooms into a whimsical, long-lasting butterfly wreath that naturally dries into a gorgeous piece of botanical art.
Why You’ll Love This Project
I have to be honest with you, this one started as a bit of an experiment. I had two heart-shaped grapevine wreath forms sitting in my craft stash, a garden absolutely bursting at the seams in midsummer, and one of those “wait, what if I just” moments that either ends in a Pinterest fail or something you’re genuinely proud of. This was the second one.
By overlapping the pointed ends of two heart forms and securing them together with a simple zip tie, you get the most charming butterfly wing shape, and I’m a little embarrassed it took me this long to figure it out. From there, it was just a matter of heading out to the garden with my snips and gathering everything that was blooming: strawflowers, statice, celosia, feverfew, yarrow, floss flower, lavender, echinops, and nigella seed pods. Two stems of globe thistle at the top for antennae, and honestly? I stood back and couldn’t believe how good it looked.
Here’s the part I really love though: every single flower in this wreath was chosen because it dries beautifully in place. Just hang it up and let it do its thing; you’ll have a gorgeous dried botanical wreath without lifting a finger. The feverfew is the one exception to “looks exactly the same”; it softens and fades to something that looks a lot like baby’s breath, which honestly just adds another layer of texture.
If you don’t have a cutting garden, don’t worry, I’ve got notes at the end for making this with faux florals too. But if you do grow any of these flowers, this is exactly the kind of project your garden has been waiting for.

Welcome! I’m Jennifer, and I’ve always believed nature is the most beautiful art supply. For years, I’ve been preserving New England’s blooms and foliage through pressing, drying, and crafting. Let me show you how to capture a little bit of the season and bring it indoors—simply and beautifully.
This post may contain affiliate links, which means we receive a small commission if you purchase through our links. See our disclaimer page for more information.
What You’ll Need
The basics are the 2 grapevine wreath frames, and then you can personalize it with the flowers from your own garden, bouquets you pick up at the grocery store or local farmer’s market, or even use artificial flowers…I’m just giving you the basics as the jumping-off point on how I made mine.
Materials for this Project
- The Frame
- 2 heart-shaped grapevine wreath forms (mine were 12 inches)
- Zip ties (a couple is all you need)
- For Covering the Base
- The Flowers
- Strawflowers
- Celosia
- Statice
- Feverfew
- Globe amaranth
- Yarrow
- Floss flower (ageratum)
- Lavender
- Echinops (you’ll need at least 2 stems with long enough stems for the antennae!)
- Nigella seed pods
- Other Supplies
- Garden snips
- Jute twine (optional for a wall hanging style)
Tip: Don’t have a cutting garden? This wreath works beautifully with high-quality faux florals too. Just focus on mixing textures and colors the way you would with real flowers. More on that in the tips section below.
Garden to Home
I’ve always believed the line between garden and home should be blurry. This series is all about crossing that line. Taking what grows outside and bringing it indoors in beautiful, lasting ways. New projects posted monthly.
Let’s grow together!
This wreath is part of what I think of as my garden-to-home philosophy. The idea that what you grow outside should find its way inside in the most beautiful way possible. Whether that’s a vase of zinnias on the kitchen table or a wreath on the front door made entirely from what’s blooming in August, I’m always looking for ways to close that loop between the garden and the home. This project is one of my favorites for doing exactly that.
How To Make It
I know it looks like a lot going on, but I promise it comes together quickly. I’ve walked through every step with photos so you can follow right along and make one yourself.
Step 1: Create the Butterfly-Shaped Base
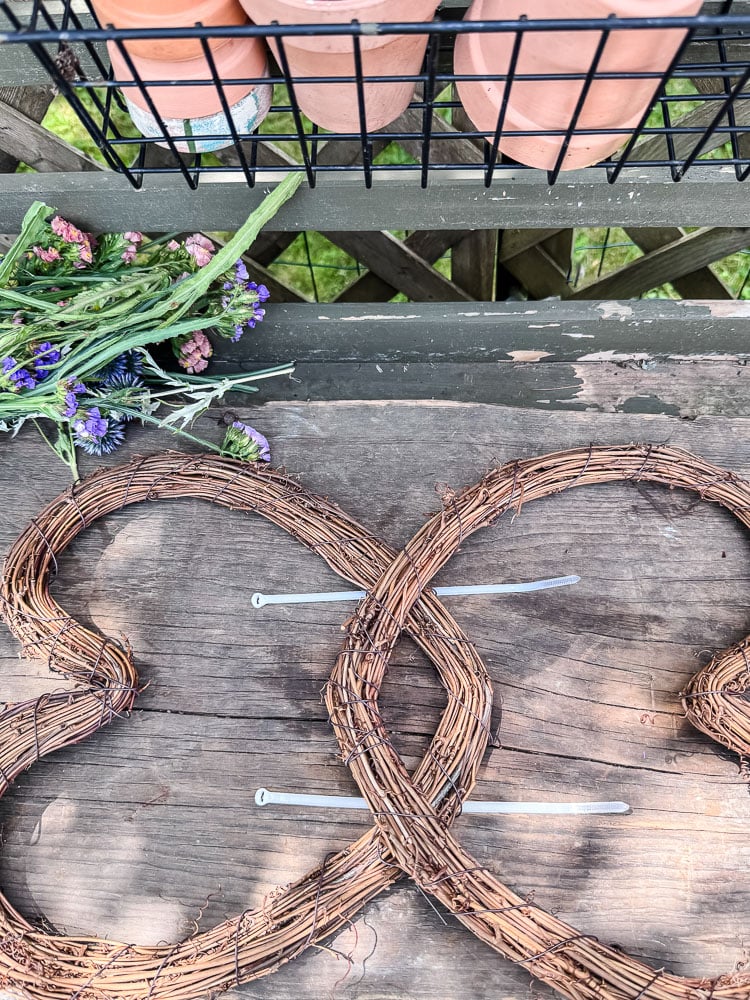
This is the clever part, and I promise it’s easier than it sounds. Take your two heart-shaped grapevine forms and overlap the pointed bottoms so they meet in the middle, forming the two halves of a butterfly’s wings.
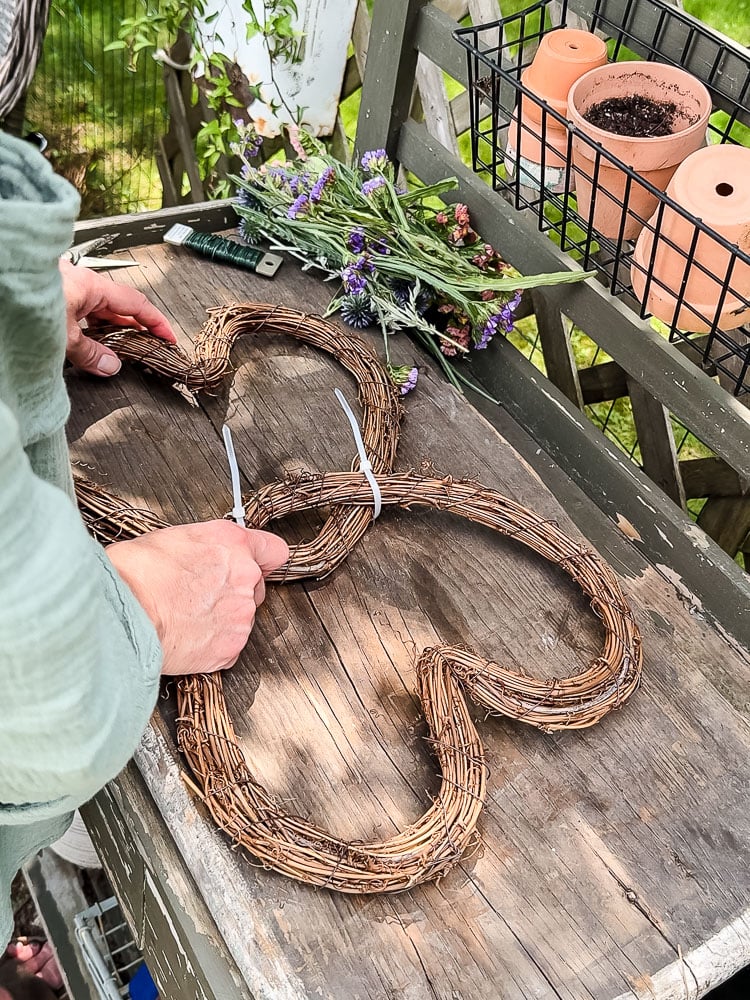
Once you have the shape you like, secure the overlapping points together with zip ties. That’s it. Two heart wreaths, two zip ties, instant butterfly. I love a good “why didn’t I think of that sooner” moment.
Quick Steps:
- Take your two heart-shaped grapevine wreaths and turn them so the pointed ends face inward toward each other.
- Overlap the bottom points slightly so they mimic top and bottom butterfly wings.
- Secure the center overlap tightly with zip ties. Snip off any excess zip-tie tails.
Step 2: Cover the Base with Spanish Moss
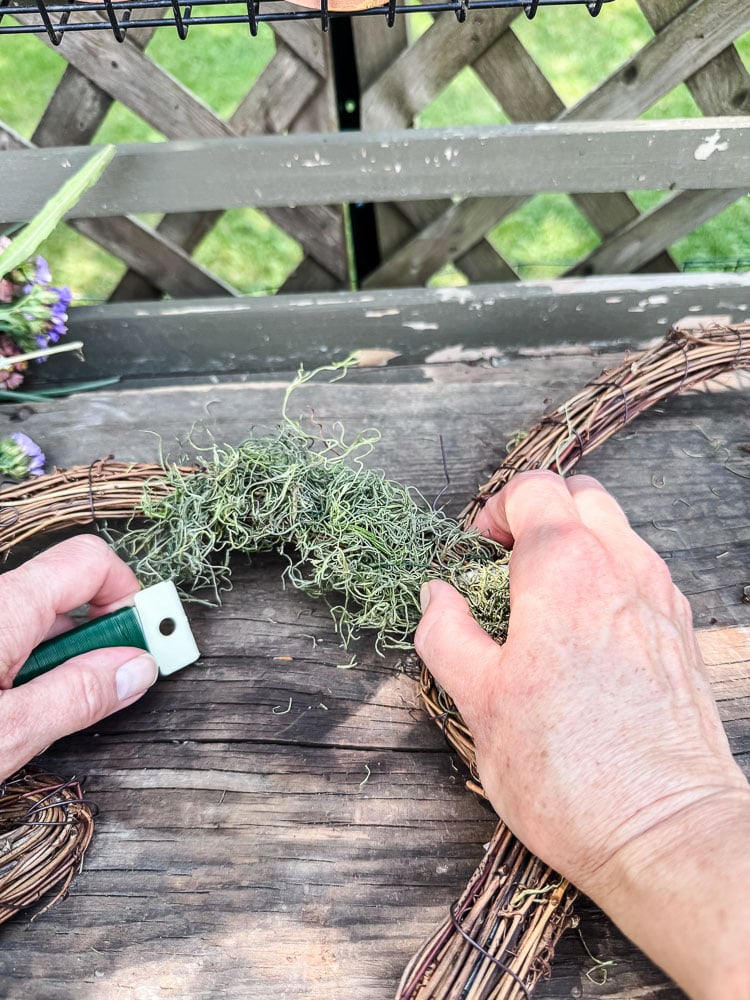
Before you touch a single flower, cover your grapevine frame with green Spanish moss (feel free to use natural Spanish moss if that’s all that’s available). This does two things: it fills in the gaps in the frame so you’re not fighting to cover bare spots later, and it gives your flowers something soft and natural-looking to nestle into.
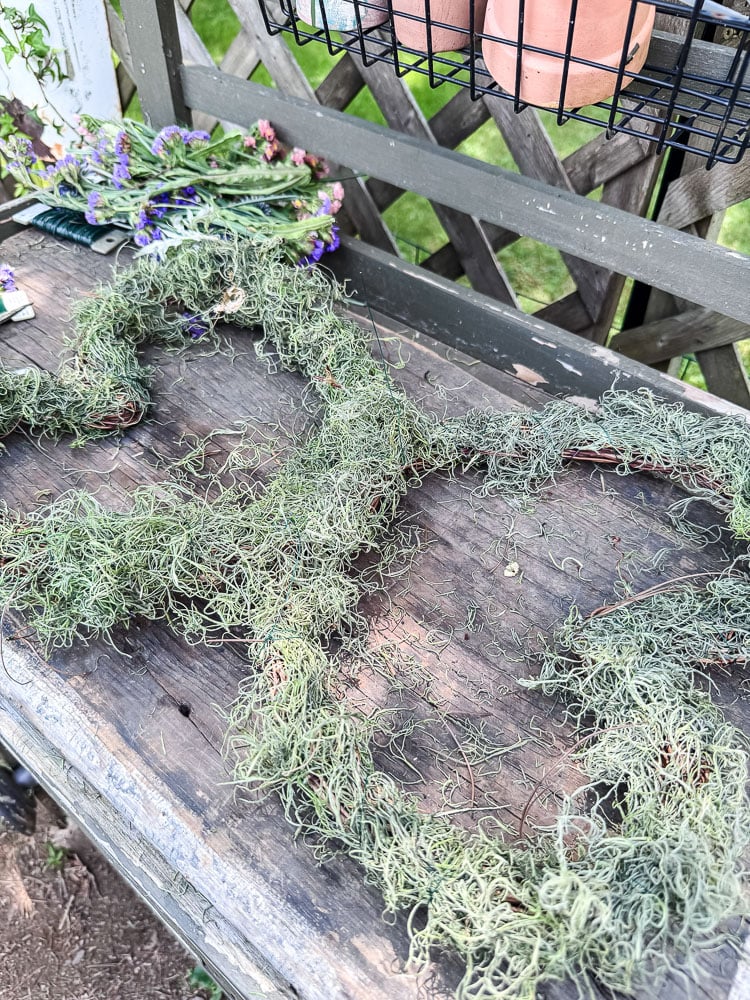
Use your floral wire paddle to wrap and secure the moss as you go, working your way around the entire frame, including the middle section where the two hearts meet. Don’t worry about it being perfect; the flowers will cover most of it.
Quick Steps:
- Secure the end of your floral wire paddle to the grapevine frame with a quick twist.
- Fluff out handfuls of green Spanish moss and lay them along the top face of the grapevine.
- Wrap the wire paddle snugly around the frame and moss to bind it in place, working your way all around the wing shapes.
Step 3: Add Your Flowers
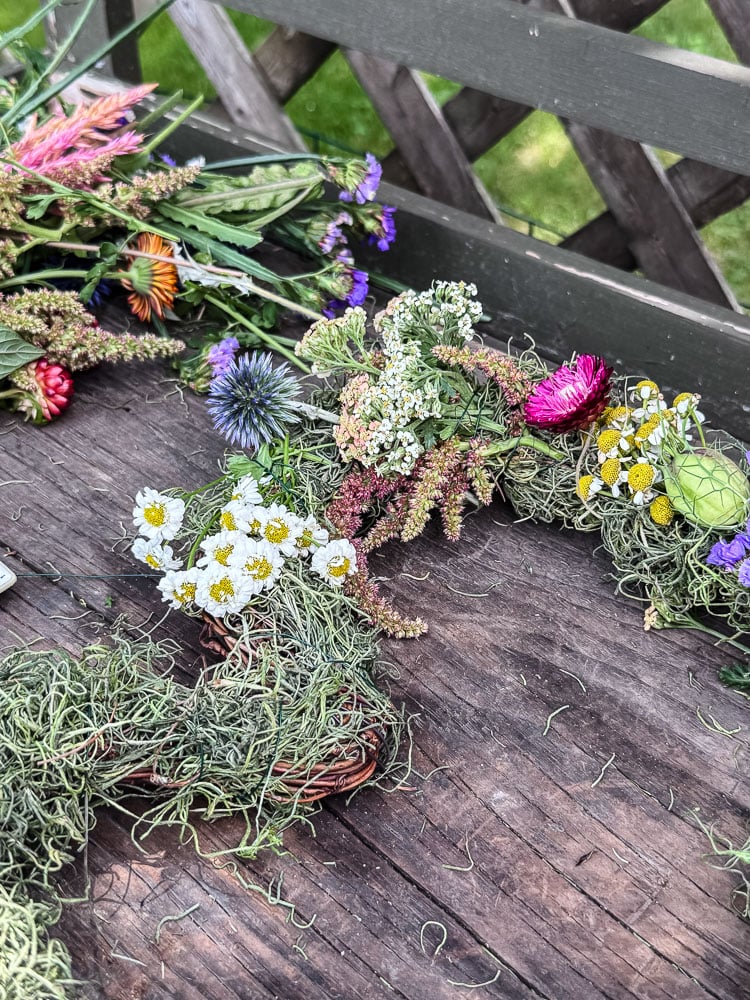
Now the fun part. Head out to the garden with your snips and gather your flowers, then start working your way around the frame. I didn’t follow a strict pattern; I just made sure
I was distributing colors and textures evenly so no one section felt too heavy or too sparse.
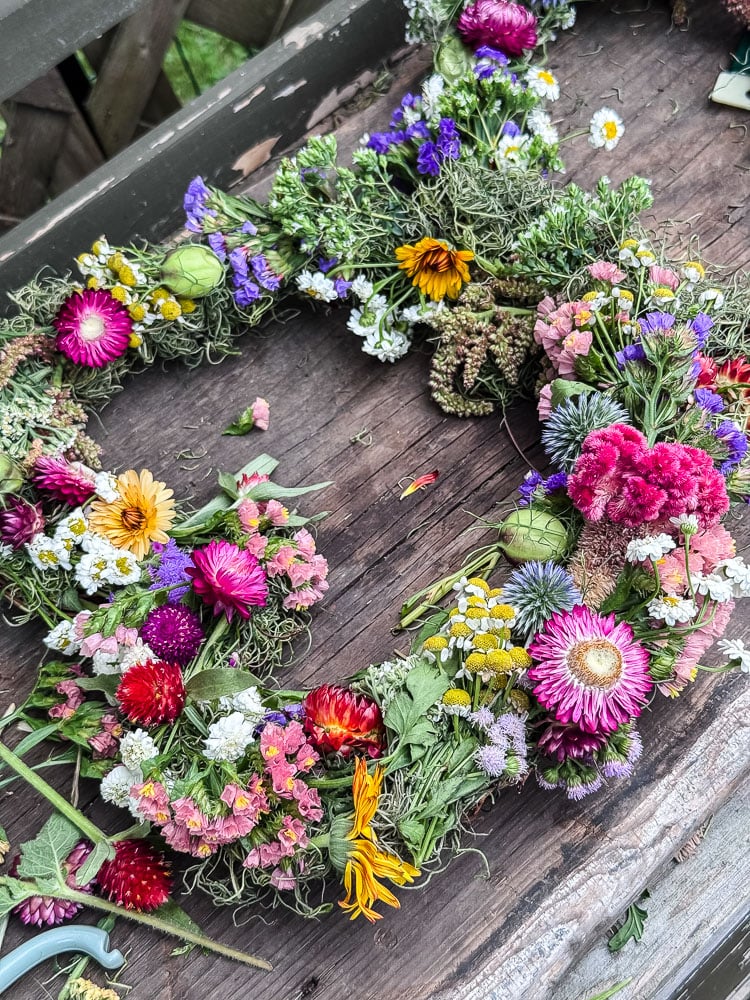
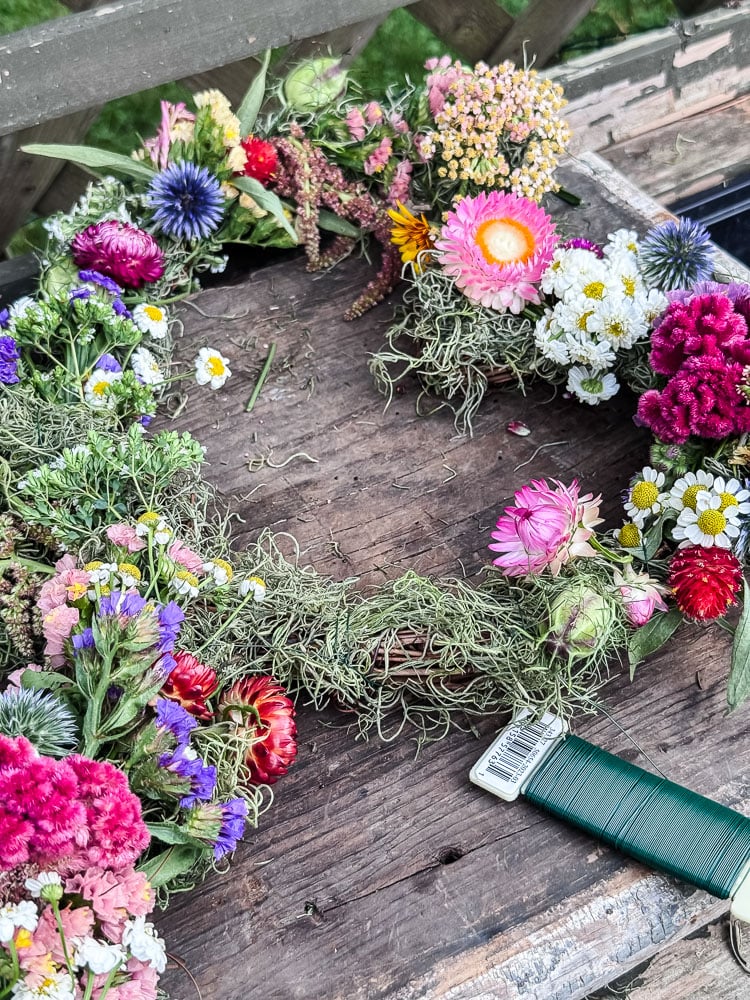
As you place each stem, use the floral wire paddle to wrap around both the stem and the frame to hold everything securely in place.
A few tips as you go:
- Tuck stems down into the moss rather than just laying them on top; it gives a fuller, more natural look
- Alternate your flower sizes, clustering some of the smaller blooms like feverfew and floss flower between the bigger statement flowers like strawflowers and celosia
- Step back every few minutes to check the overall shape. It’s so easy to get tunnel vision on one section
Keep going until the entire frame is covered and you’re happy with how it looks.
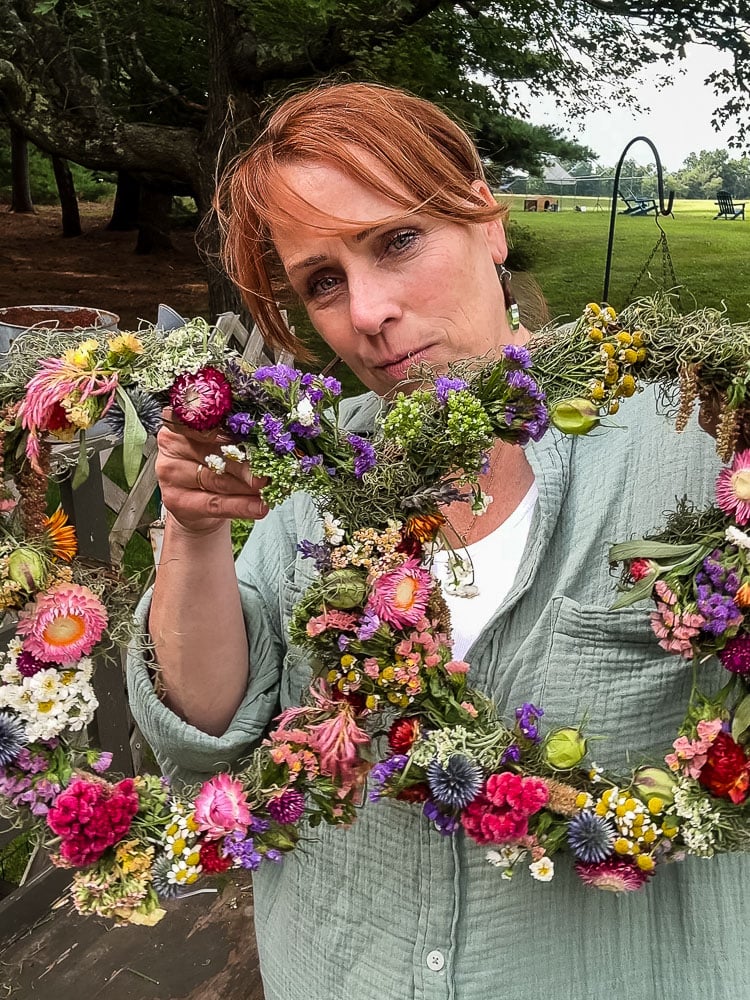
Quick Steps:
- Group small mixed bunches of your freshly harvested flowers (strawflowers, yarrow, celosia, feverfew, and floss flowers).
- Lay the first bunch down over the moss base and wrap the floral wire firmly around the stems 2–3 times to secure them.
- Tuck the next bunch slightly under the flower heads of the previous bunch to hide the stems and wire, wrapping as you go.
- Continue layering around the entire wing shape, mixing in structural elements like nigella pods and spikey lavender stems for variety and height.
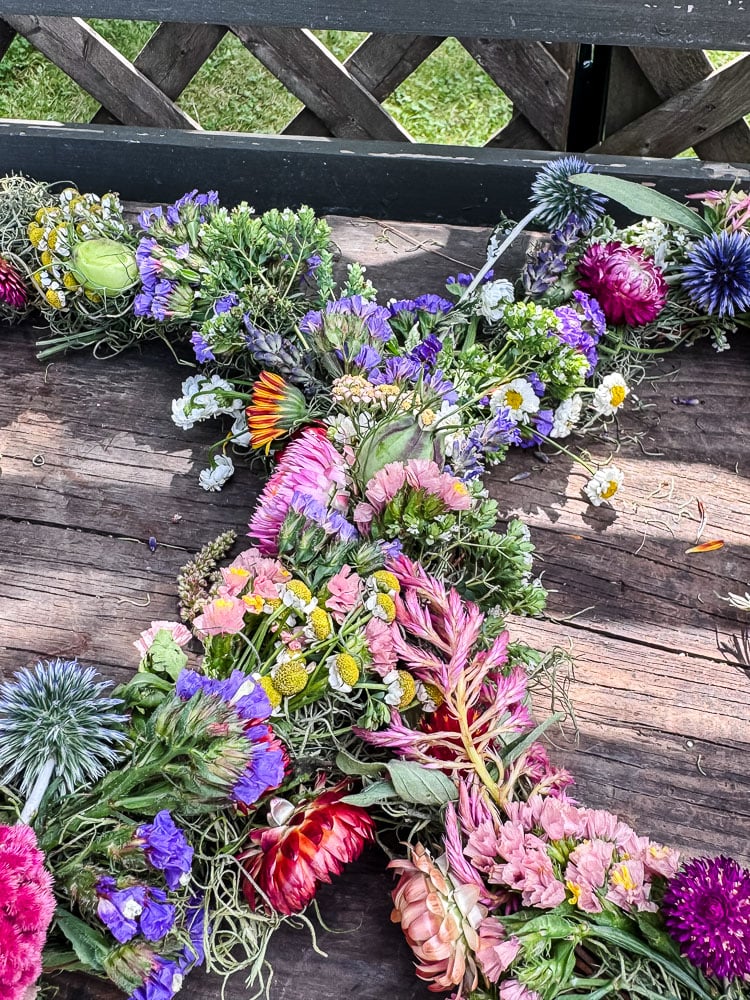
Step 4: Add the Antennae
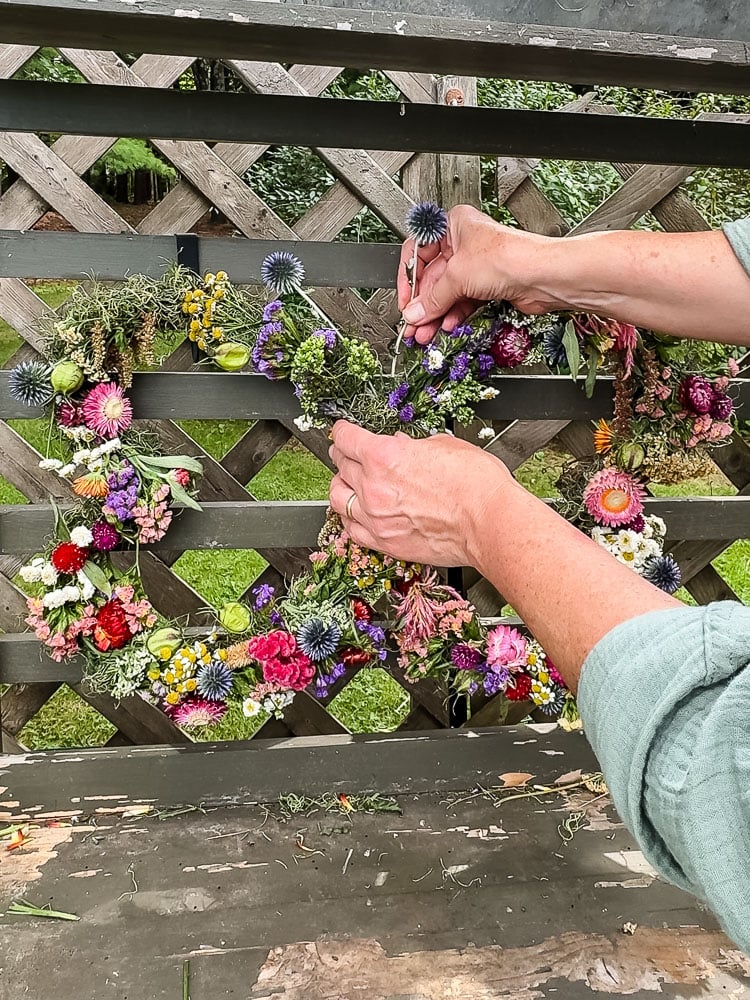
This is the finishing touch that takes it from “pretty dried flower wreath” to “wait, is that a butterfly?!” Take two Echinops (globe thistle) stems with a good length to them and tuck them into the top center of the wreath right where the two heart forms meet, angling them upward and slightly outward.
The spiky, sculptural shape of Echinops is perfect for this; it looks exactly like butterfly antennae and adds that little bit of whimsy that makes people do a double take.
Quick Steps:
- Select two long, sturdy stems of Echinops
- Insert the cut ends down into the top center of the overlapping grapevine joints where the “head” of the butterfly would sit.
- Angle them outward slightly to form natural antennae, securing the bases with a bit of hidden floral wire if needed (I just inserted them into the grapevine)
Step 5: Hang & Let Dry
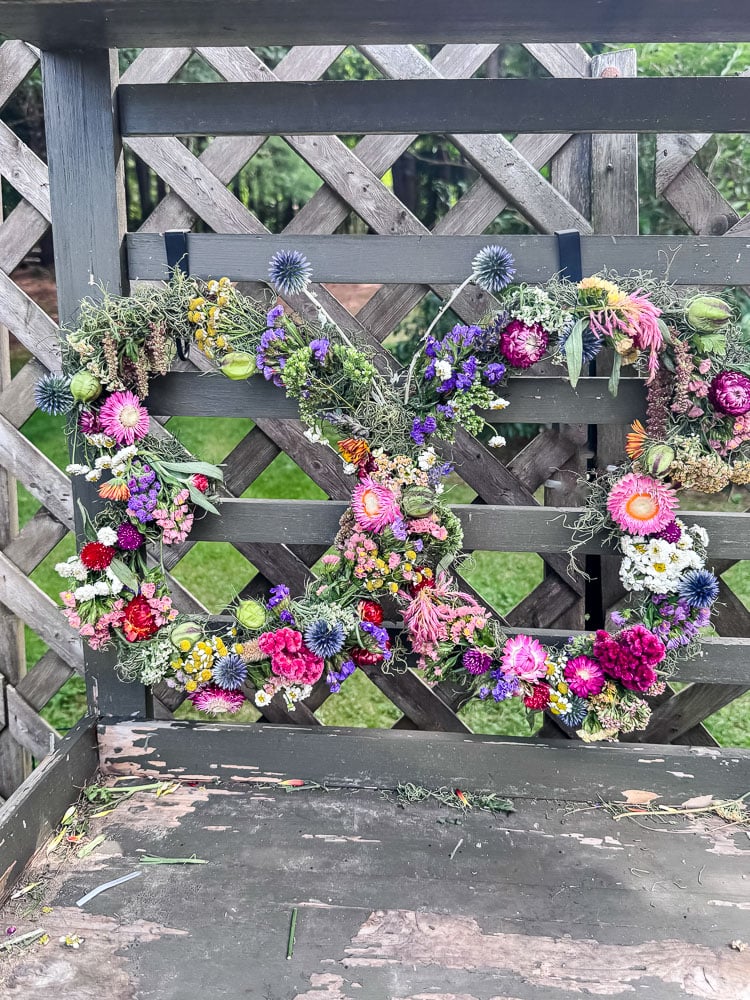
You have two options here depending on where you want to display it:
Door or hook display: To hang it on a door, simply use the zip-tied center as your hanging point; it works just like any wreath hook. Or for a really pretty display, space two Command hooks apart and hang one on each side of the butterfly wings so the whole shape is on full display
Wall display: Cut a length of jute twine and tie it through the grapevine frame on both sides at the widest point of the wings, one piece on each side. This lifts the butterfly shape and keeps it looking intentional on the wall rather than just resting flat against it. It also lets you hang it from a single nail without the wreath tilting to one side.
Tips & Variations
Making It with Faux Florals
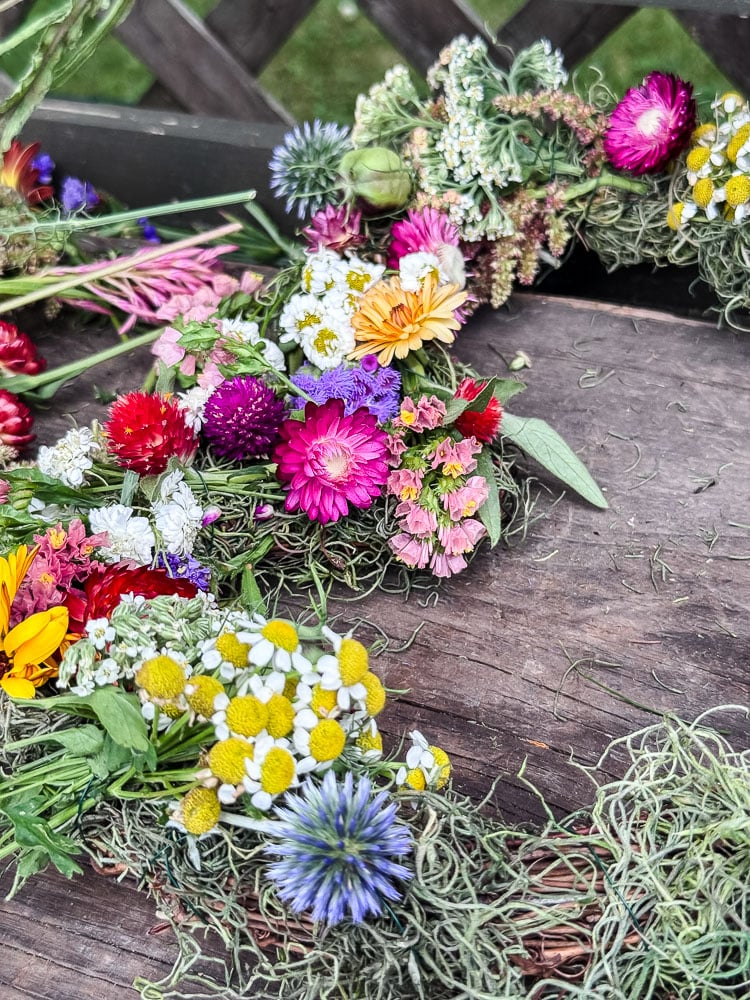
Not everyone has a cutting garden, and that’s completely okay! This wreath translates beautifully with high-quality faux florals. The key is to mimic what makes the real version work: a mix of textures, a variety of scale (some statement flowers, some fillers, some interesting pods or grasses), and a color palette that feels cohesive without being too matchy. Look for faux strawflowers, dried-look lavender, and realistic seed pods. The craft store options have gotten really good. The construction process is exactly the same, and your wreath will last even longer.
Other Flower Suggestions
Don’t grow everything on my list? No problem. The main thing you’re looking for is flowers that air-dry well without losing their shape or color. Good substitutes include:
- Zinnias (smaller varieties)
- Baby’s breath
- Drumsticks, Starflower
- Chamomile (similar vibe to feverfew)
- Dried grasses or seed heads for texture
A Note on Timing
Cut your flowers at peak bloom, not past it. Flowers that are already starting to fade or drop petals won’t improve as they dry. For the best results, cut in the morning after the dew has dried but before the heat of the day sets in.
Pro Tips For Success
Storing Between Seasons
If you want to pack this away at some point, store it in a cool, dry place out of direct sunlight. A large box with some tissue paper tucked around the flowers works well. Avoid plastic bags or airtight containers; dried flowers need a little airflow, or they can get musty.
Size Variations
I used 12-inch heart forms, but this works with whatever size you can find. Smaller forms make a sweet, delicate butterfly perfect for an interior wall. Larger forms make more of a statement piece for a front door or porch. Just know that larger forms will need more flowers and will require 2 hooks to hang. So plan your garden harvest accordingly! Typing this, I just had a lightbulb moment: I think making 3 different-sized butterflies would make for pretty wall art (can you picture it in a nursery??)
Bring Your Garden Inside: One Clever Wreath at a Time
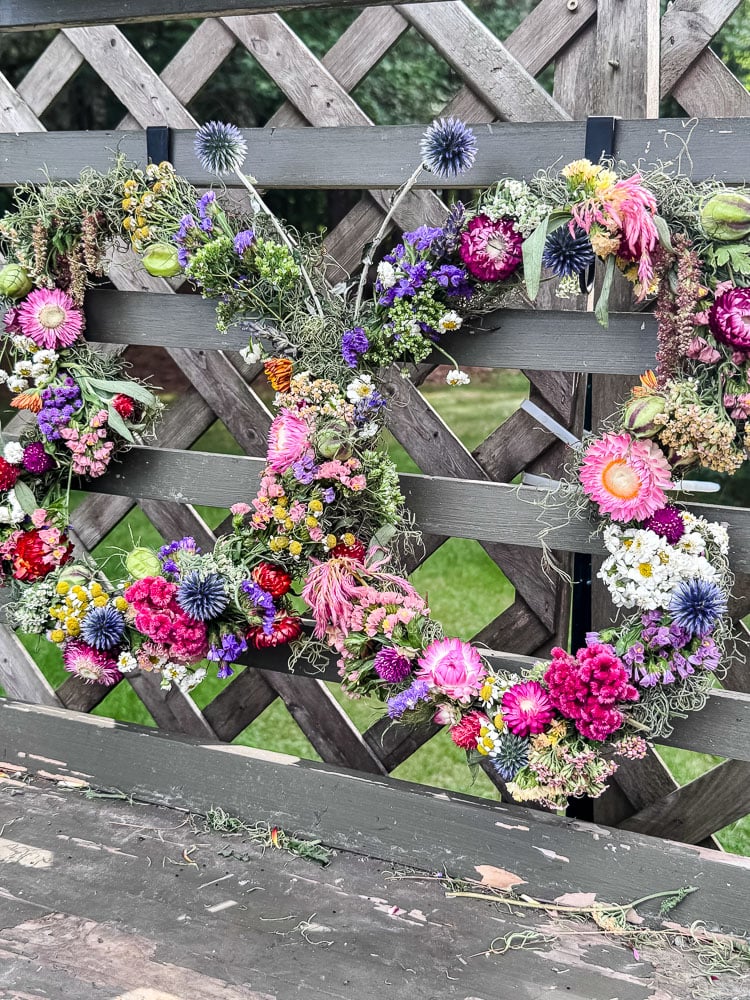
This is exactly the kind of project that captures everything I love about having a cutting garden. You grow the flowers, you bring them inside in the most beautiful way possible, and then you get to enjoy them for months without doing another thing. No expensive trip to a floral shop, no synthetic wreath that looks like everyone else’s. Just your garden, a couple of grapevine forms, and a little creativity.
I hope the two-heart butterfly trick inspires you to look at your craft supplies a little differently too. Sometimes the most clever ideas are just a matter of turning something familiar sideways and asking “what if?”
If you make this wreath, I would absolutely love to see it!! And if you grow any flowers I didn’t mention, I want to hear which ones you used! This is the kind of project that looks a little different in every garden, and that’s exactly what makes it special.
See your projects featured! If you are inspired by this or any of my other DIY projects, I would love to see them and add you to the Reader’s Spotlight gallery. Send a photo to me at jennifer@cottageonbunkerhill.com
xo, Jennifer
More Floral + Botanical Projects You’ll Love
- Make Your Own Stunning Dried Flower Wreath for Fall
- Beyond the Vase: Why I Started Growing a Dried Flower Garden
- My Annual Ritual: Crafting a Modern Foraged Fall Wreath
- Don’t Deadhead, Decorate! Fall Style from the Garden
Love projects like this? Don’t miss out! Join my newsletter family for more cozy, budget-friendly DIY ideas delivered right to your inbox. You’ll get exclusive tips, early access to tutorials, and all the inspiration you need to make your home feel handmade and heartfelt.





I love this Jennifer! You did a fantastic job and it’s such a clever idea. I’m all about letting blooms dry naturally and this is a beautiful way to do it. XO- MaryJo
Thanks Maryjo!! Sorry I missed your comment!