
Spring is the perfect time to refresh your home decor, and what better way to welcome the season than with a handmade early spring wreath? In this tutorial, I’ll show you how to create a stunning wreath using simple materials and easy steps
DIY Early Spring Wreath: Easy Tutorial for a Fresh Seasonal Look
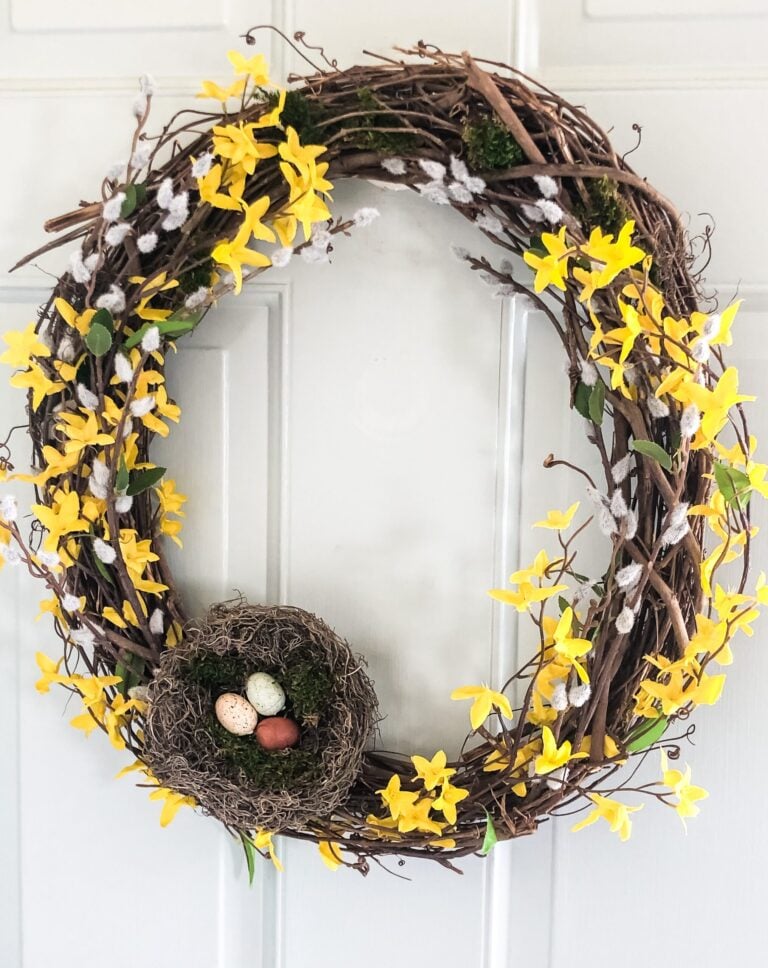
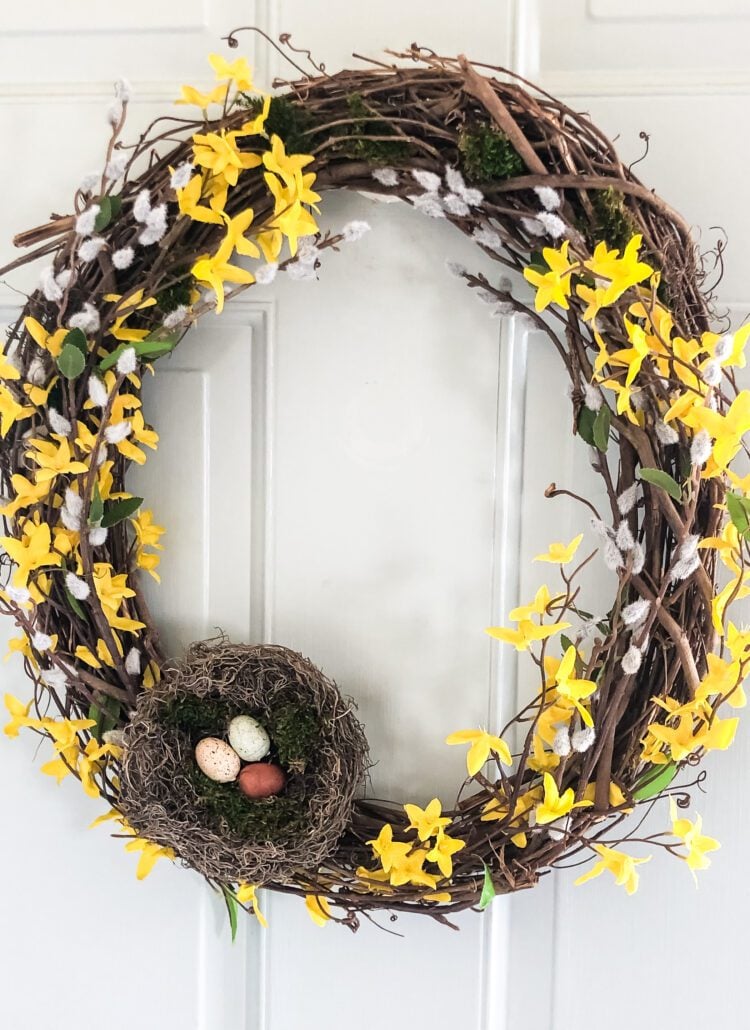
Here’s an easy and quick DIY wreath for Spring that will brighten your day in minutes! Using yellow Forsythia stems and fuzzy pussy willow branches plus I’ll show you a DIY bird’s nest hack to make the most realistic addition to your Spring wreaths!
I’m so ready for spring in New Hampshire! Seeing the buds appear on my forsythia bush always feels like a little victory after a long winter. Forsythia is the first to bloom around here, and its bright yellow flowers are the perfect inspiration for a spring wreath.

This was originally published in 2020 and has been a fan favorite ever since—so much so that it’s earned a spot in my Blog Hall of Fame! I’ve updated it with new images, tips, and fresh ideas to help you create the perfect Spring wreath. Whether you’re a longtime reader or new to Cottage on Bunker Hill, this tutorial is a must-try for adding a touch of seasonal charm to your home.
This post may contain affiliate links, which means I may earn a small commission if you make a purchase through my links, at no extra cost to you. Read my disclosure policy here.
Forsythia Wreath: Step-By-Step

Step 1: Prepare and Attach the Forsythia Stems

Begin by carefully trimming the flower portions from your Forsythia branches. Each branch typically has 3 separate stems, which makes it perfect for creating a full, lush look.
Starting at the bottom center of your grapevine wreath base, gently weave the Forsythia stems into the vines. This technique helps secure the stems naturally without the need for glue. However, if you prefer a more permanent hold, you can use a hot glue gun to attach the stems in place.
Pro Tip: I rarely use hot glue for my wreaths because I love to take them apart and reuse the materials for new projects. But if you’re creating a wreath you’d like to keep intact, a little hot glue can be a great way to ensure everything stays secure!
Step 2: Shape and Arrange the Stems

As you work your way up one side of the wreath, gently shape the Forsythia stems to create a natural, flowing look. Tuck the flowers into the grapevine base, making sure they’re evenly spaced and securely nestled into the vines. Take your time to adjust the placement until you’re happy with how it looks.
Once you’ve finished one side, repeat the same process on the opposite side of the wreath. Start again at the bottom center and work your way upward, weaving and tucking the stems as you go. This symmetrical approach ensures your wreath looks balanced and full from every angle.
Pro Tip: If any stems feel loose, you can secure them with a bit of floral wire or hot glue. But don’t worry too much—part of the charm of a grapevine wreath is its rustic, organic feel!
Step 3: Add the Pussy Willow Stems

Now it’s time to incorporate the Pussy Willow stems for added texture and charm. Just like with the Forsythia, trim off the top portions of the Pussy Willow stems and discard the bottoms.

Gently tuck the trimmed stems into the grapevine wreath, bending them to follow the natural curve of the wreath. Take a moment to adjust their placement so they blend seamlessly with the Forsythia.

Fun Observation: I’m always amazed at how realistic artificial Pussy Willows look these days—honestly, it’s hard to tell they’re not real! The quality of faux flowers has improved so much over the years, making them a fantastic option for long-lasting decor.

Step 4: Repeat on the Opposite Side
Once you’ve finished adding the Pussy Willow stems to one side, repeat the same process on the opposite side of the wreath. This ensures your design feels balanced and cohesive from every angle. Take your time to tuck and shape the stems, making sure they blend naturally with the Forsythia for a harmonious, Spring-inspired look.
Create a DIY Bird’s Nest for Extra Charm
Now it’s time to add a touch of whimsy to your wreath with a handmade bird’s nest! This simple DIY project looks incredibly natural and is so much more unique than the pre-made rattan nests you’ll find at craft stores. Plus, it’s surprisingly easy to make!
Here’s what you’ll need:
Quick Tip: Before you start, grab a pair of gloves—this part can get a little sticky, but trust me, it’s worth it for the adorable result!


- Step 1: Put on a pair of gloves and grab a decent-sized clump of Spanish moss.
- Step 2: Lightly spray the moss with the adhesive and start shaping the moss into a nest shape.
- Step 3: Make sure to push down in the center of the nest and form a circle indent.
- Further down in this post is the link to my YouTube video… at the 4:20 mark you can see me make the nest.
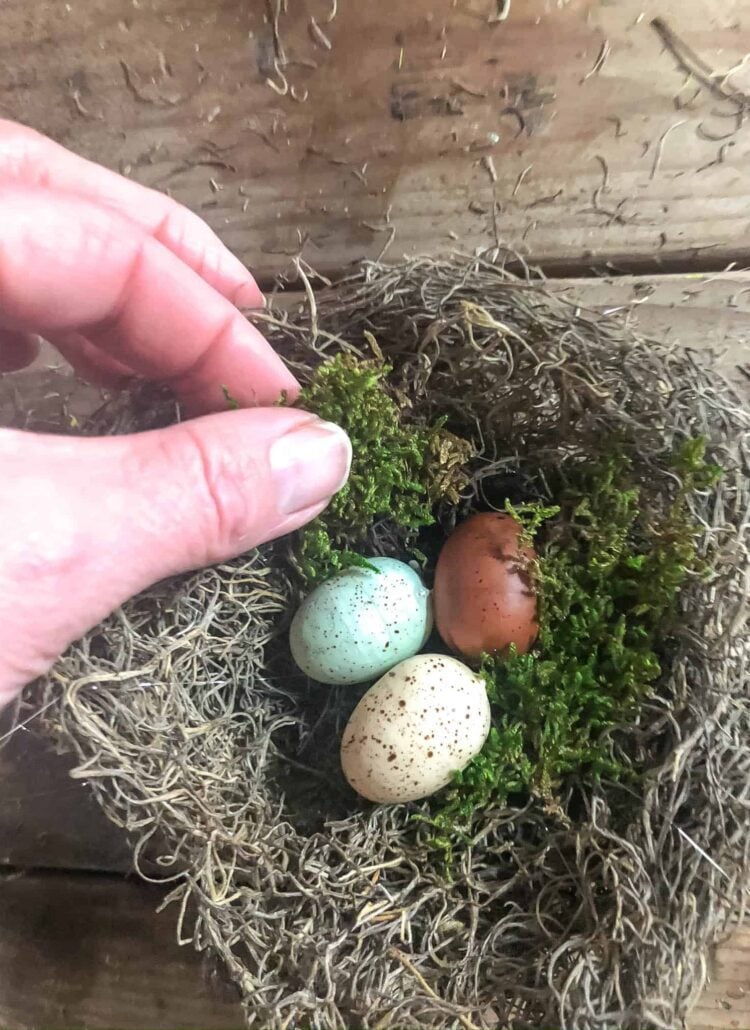
Using my hot glue gun I added 3 tiny eggs and for an added touch I glued on a couple of small pieces of green preserved moss.
To attach the nest to the wreath I applied a generous amount of hot glue on the back of the nest, then I put it left of center on the bottom of the wreath…facing slightly upward.

Final Touch: Add Moss for a Polished Look

To give your wreath that extra touch of realism and charm, I tucked small pieces of moss into some of the open spaces. This subtle detail helps fill in any gaps and adds a natural, cohesive look to your design. It’s these little finishing touches that elevate your DIY wreath and make it look like it was crafted by a professional!

I love how it came out and I can’t wait to run upstairs and hang it on my front door!

A Fresh Welcome to Spring!
And there you have it—a beautiful, handmade early spring wreath that’s sure to brighten your front door and welcome the season with style! This project is not only quick and easy but also a wonderful way to add a personal touch to your home decor. Whether you’re a seasoned crafter or trying your hand at wreath-making for the first time, this DIY is perfect for anyone looking to bring a little springtime cheer indoors.
I’d love to see how your wreath turns out! Share your creations with me, or leave a comment below with your thoughts and tips. If you enjoyed this tutorial, don’t forget to check out my other seasonal DIY projects for more inspiration. Happy crafting, and here’s to a fresh and blooming Spring!
xo, Jennifer
See your projects featured! If you were inspired by this or any of my other DIY projects I would love to see them and add you to the Reader’s Spotlight gallery. Send a photo to me at jennifer@cottageonbunkerhill.com
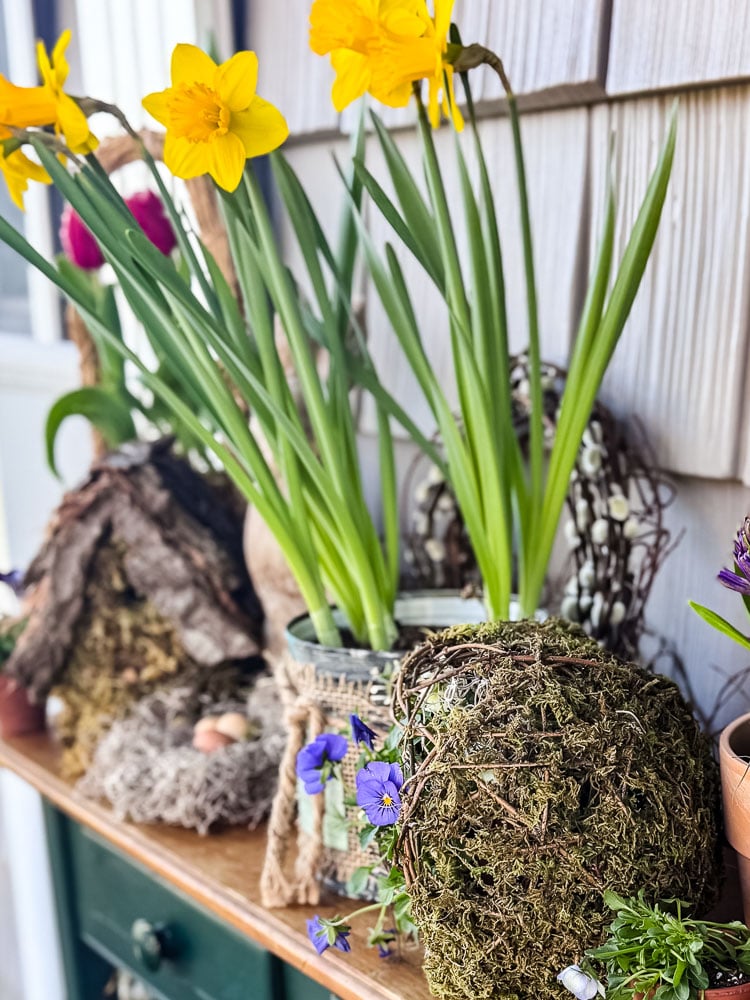
Shop Spring Florals

Check Out My 12 DIY Wreaths… A New One For Each Month!

Are you looking for more Spring Inspiration?


Friend, your wreath is stunning!!! I actually like it more than the crazy expensive store-bought one. Another fabulous DIY dupe.
Thanks!! I could never spend that much on a wreath!!!
This wreath is so pretty! Perfect for Spring. Way better price point. You are amazing!
Thanks, Renae!!!!
Hi Your project inspired me to go into my craft stash, and try my hand at the Spring wreath. I had most of the supplies, except the nest. Looking forward to the project . I’m hoping it looks as professional as yours.
Jane P
Yay!! Love having this be the first thing I read this morning!! Send me a picture when it’s done if you like and I will share it on my Weekly Rewind. (jennifer@cottageonbunkerhill.com)
This really turned out beautifully Jennifer. Well done my friend.
Thank you, Kim!! I wish the forsythia were really blooming..
This so pretty. I bought fake pussy willows and they look amazingly real
Thanks, Cindy! Yes, it’s crazy how realistic artificial flowers are getting!!
They are all so beautiful.
Thank you so much Jackie!!!