
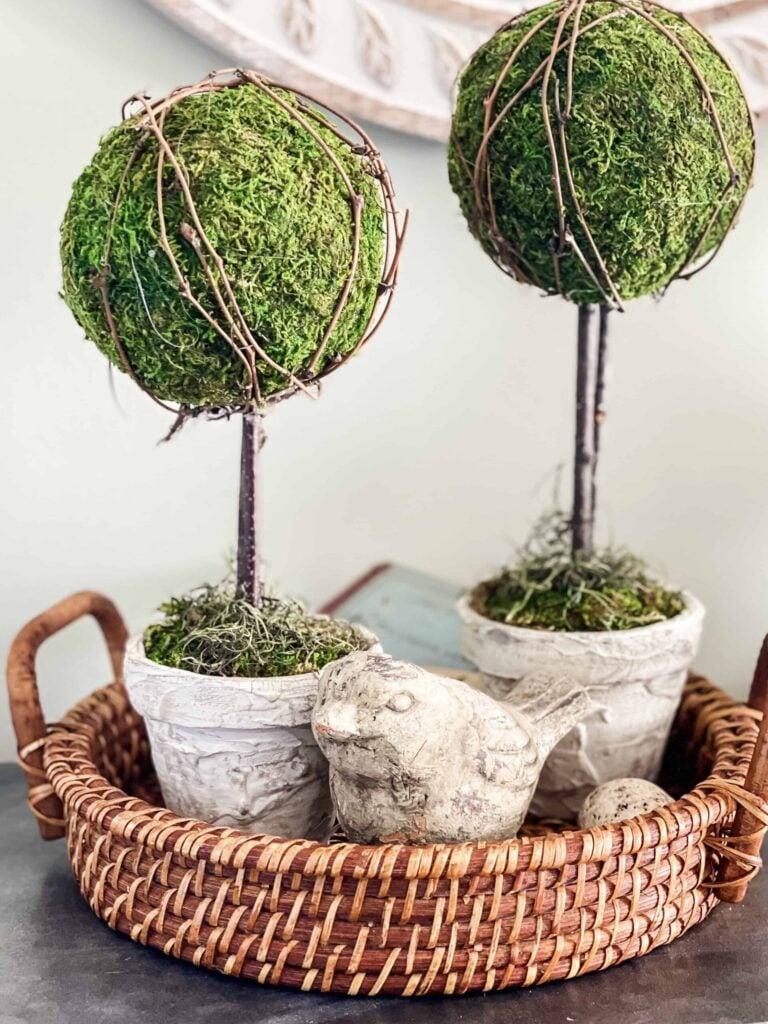
DIY Topiary. Make a set of moss ball topiaries for a fraction of the cost of store-bought. I will also show you how to make new pots look old with a joint compound trick.
DIY Moss Ball Topiaries: Easy Step-by-Step Guide for Stunning Home Decor
Bring a touch of nature into your home with these stunning DIY moss ball topiaries! Perfect for adding greenery to small spaces or creating a focal point in your decor, these easy-to-make topiaries are as low-maintenance as they are beautiful. This is a fairly easy DIY project and I think would be perfect for a beginner-level craft. This step-by-step guide will help you create your own moss ball masterpiece in no time!

This post may contain affiliate links, which means I may earn a small commission if you make a purchase through my links, at no extra cost to you. Read my disclosure policy here.
Supplies Needed To Make Topiaries

- 4-inch clay pot
- 5 or 6-inch moss balls
- joint compound
- thin sticks
- floral wire
- floral foam
- paint
- grapevine garland
- moss
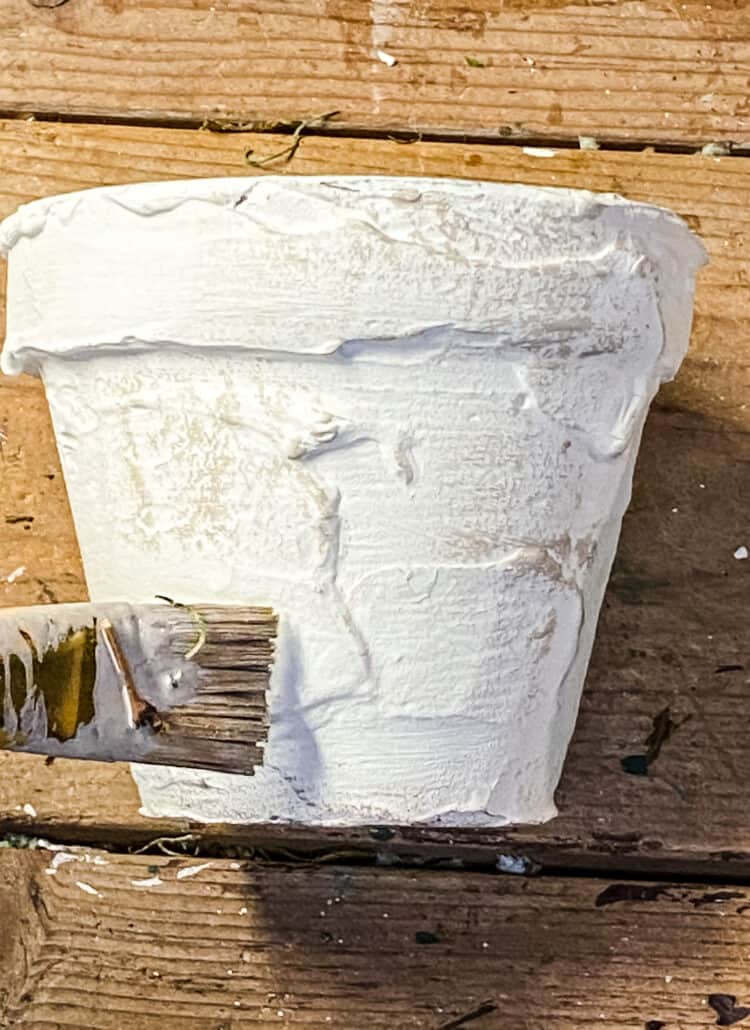
Step 1: Age Your Clay Pots
I wanted my pots to have a timeless, weathered look—like they’ve been around for years. While you could hunt for pre-aged pots, it’s easy to transform a new $1 clay pot with just a few minutes of work.

Here’s how:
- Using a plastic putty knife, spread joint compound evenly over the surface of the clay pot. Think of it like frosting a cake—smooth and consistent!
- Don’t forget to apply some compound around the rim of the pot for a cohesive, aged effect.
- Let the pot dry overnight before moving on to the next step.
Next, I painted the pot with a coat of off-white chalk paint.
Step 2: Paint and Add Dimension to Your Pot

- Apply the Base Coat: Start by painting the entire pot with a coat of off-white chalk paint. This creates a clean, neutral base and allows the texture from the joint compound to shine through. Make sure to cover the pot evenly, including the rim and inside edges if desired. Let the paint dry completely.
- Dry Brush for Depth: Once the base coat is dry, lightly dip your brush into a light brown chalk paint (or any earthy tone you prefer). Wipe off most of the paint onto a paper towel so only a small amount remains on the brush. This is called dry brushing.
- Gently brush over the pot’s surface, focusing on the raised areas and textured details created by the joint compound. The goal is to highlight the texture and give the pot a naturally aged, timeworn appearance.
- Don’t worry about being perfect—the randomness of the dry brushing technique adds to the rustic charm!
- Let It Dry: Allow the paint to dry completely before moving on to the next step
Step 3: Create the Topiary Stick
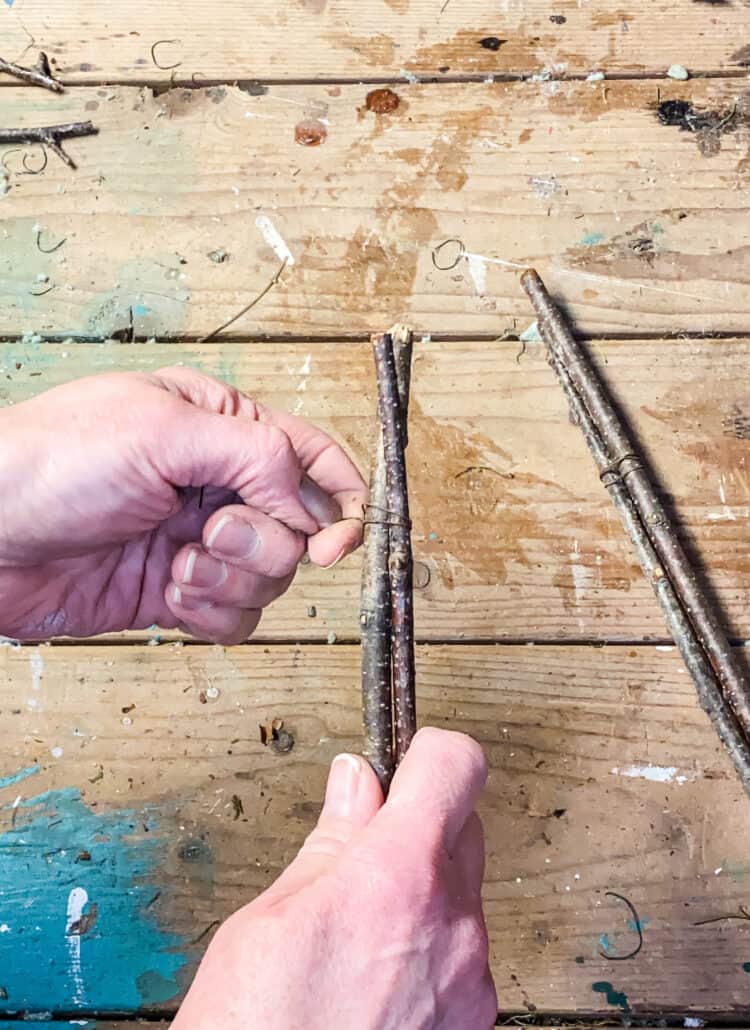
- Prepare the Branches: Cut thin branches into 12-inch pieces. You’ll need 2-3 branches to create a sturdy stem. Make sure the branches are straight and free of any loose bark or debris.
- Bundle and Secure:
- Gather the branches together, aligning them evenly at the top and bottom.
- Use floral wire to tightly secure the branches at the top, about 1 inch from the end. Wrap the wire around the branches several times to ensure they stay firmly in place.
- Repeat the process near the bottom of the branches, leaving about 1-2 inches unwired at the base. This unwired section will make it easier to insert the stem into the pot later.
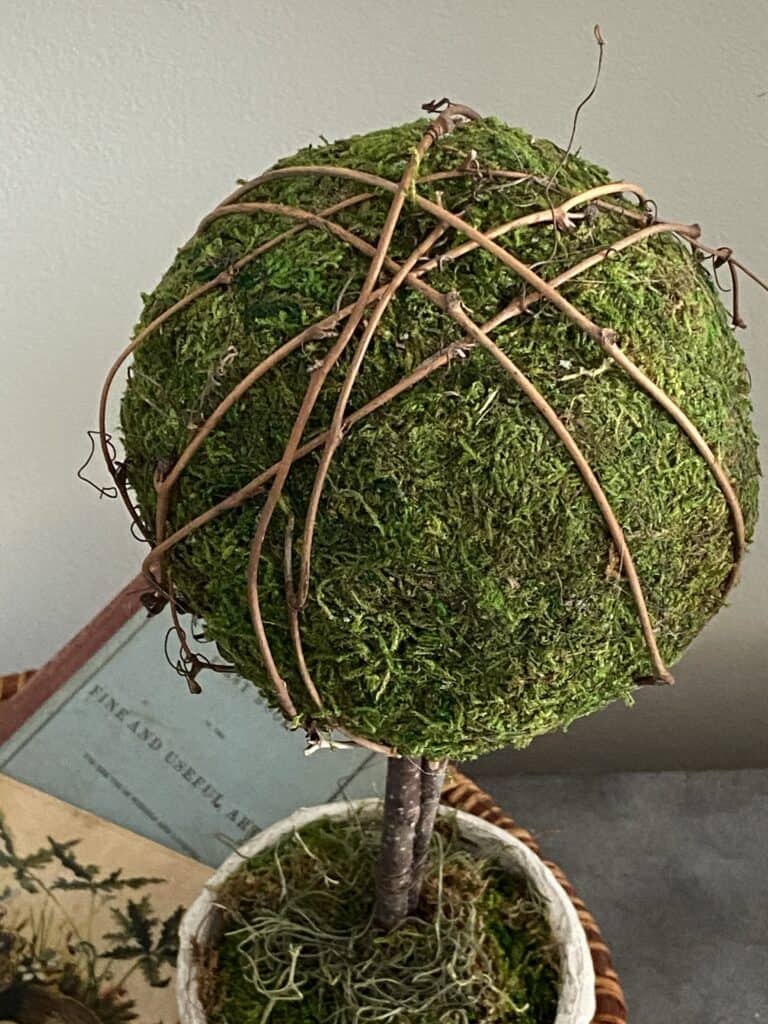
Step 4: Prepare the Moss Balls and Add Extra Flair
The 5″ moss balls that I am using are from Craft Outlet (they are my secret weapon for crafting supplies). You can also check craft stores like Michaels or Hobby Lobby, or even browse Amazon for options.
While the moss balls look beautiful on their own, I wanted to add a little extra charm to my topiaries. Here’s how I did it:

- Gather Your Materials: I used leftover grapevine garland from a previous project (like the heart-shaped wreath I made). If you don’t have grapevine garland, you can find it at most craft stores or online.
- Untwist the Garland: Carefully untwist the grapevine garland to separate the vines. This will give you flexible, natural-looking pieces to work with.
- Wrap the Moss Balls: Take a few strands of the grapevine and gently wrap them around the moss balls. Secure the ends by tucking them into the moss or using a small dab of hot glue if needed. The grapevine adds a rustic, textured touch that complements the moss beautifully.

Pro Tip: If you want to personalize your topiaries even more, consider adding small decorative elements like dried flowers, faux berries, or tiny fairy lights. These little details can make your topiaries truly unique!
Step 5: Assemble Your Topiary

- Attach the Moss Ball:
- Center the moss ball over the top of the bundled branches.
- Gently push the moss ball onto the branches, ensuring it sits securely. If needed, you can use a small amount of hot glue to hold it in place.
- Prepare the Pot:
- If you’re using floral foam to anchor the branches, place it inside the pot and insert the stem firmly into the foam. This will keep your topiary stable.
- Add the Finishing Touches:
- To cover the floral foam and give your topiary a polished look, use sheet moss or Spanish moss.
- Tear off small pieces of moss and press them into the top of the pot, covering the foam completely. Layer the moss until it looks full and natural.

Pro Tip: For an extra touch of elegance, you can add decorative elements like small pebbles, dried flowers, or even a ribbon around the base of the pot. This will give your topiary a personalized, finished look.
And Your Done!

Creating your own moss ball topiary is such a fun and rewarding project—it’s a perfect way to bring a touch of nature indoors while adding a unique, handmade element to your home decor.
I hope this tutorial inspired you to try making your own moss ball topiary! If you do, I’d love to see how it turns out. Share your creations with me jennifer@cottageonbunkerhill.com or tag me on social media—I’m always excited to see your DIY adventures.
Don’t forget to pin this post or save it for later so you can come back to it whenever you’re ready to make another one (because trust me, once you start, you’ll want to make more!).
Check out these adorable mini heart-shaped topiaries that I recently made!
Happy crafting!
xo, Jennifer
my crafting must-haves
shop my amazon store
Pin For Later!


I am LOVING this tutorial!!! This looks like such a fun project. I have got to give this a try:)
Thank you Maria!!! Yes, make them!!
These topiaries are adorable!! I need to try that spackling technique on the clay pots I have on hand this spring! Thanks for sharing – and I pinned this project!
Thank you Cindy!! It’s a neat technique to use on pots.
I love this so much Jennifer! I’m so excited to be featuring you tomorrow. Pinned.
Thanks you Kim!!!
Jennifer,
Love this fun idea. Look for your feature on Wednesday’s Charming Homes & gardens link party.
Rachel
Thank you Rachel!! You girls are the best!!