

Looking to add a touch of nature-inspired charm to your home decor? These adorable mini moss heart topiaries are the perfect DIY project! Easy to make and oh-so-sweet, these little guys are sure to steal your heart. Plus, you can customize them to fit your style with different moss colors and decorative accents.
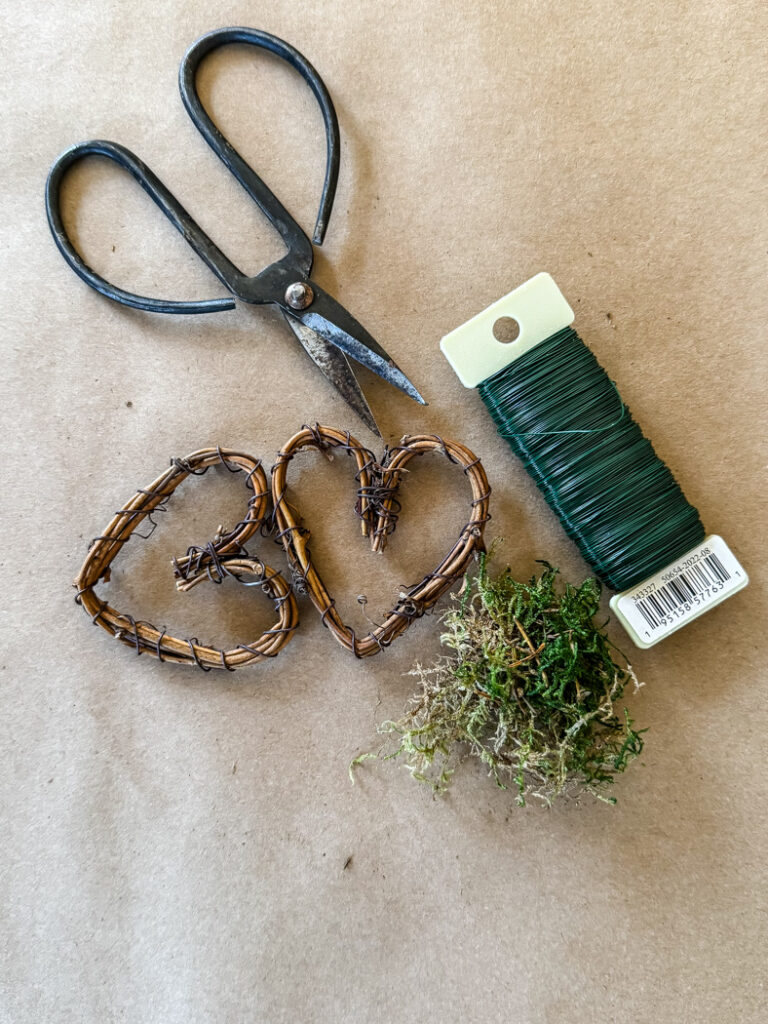
Materials: What You Will Need
This post may contain affiliate links, which means I may earn a small commission if you make a purchase through my links, at no extra cost to you. Read my disclosure policy here.
- Mini grapevine hearts (hobby lobby)
- Preserved Moss
- Mini flower pots
- Paint (for the pots)
- Floral foam
- Floral wire paddle (lightweight works better)
- Floral wire stems (green or brown) or small branches
- Spanish moss (dollar tree has the best price though!)
- Hot glue gun and glue sticks
Step-by-Step Instructions
This project is easier than you might think! We’ll start by preparing the mini flower pots with a coat of paint and a distressed finish. Then, we’ll cover the grapevine hearts with moss to create the charming base for our topiaries. Next, we’ll attach stems to the moss hearts and secure them in the pots. Finally, we’ll add a finishing touch of Spanish moss to complete these adorable mini topiaries.
1. Prepare the Pots:
- Paint the pots your desired color.
- Distress the pots for a vintage look.
- Hot glue a small piece of floral foam into the bottom of each pot.
Paint & Distress:
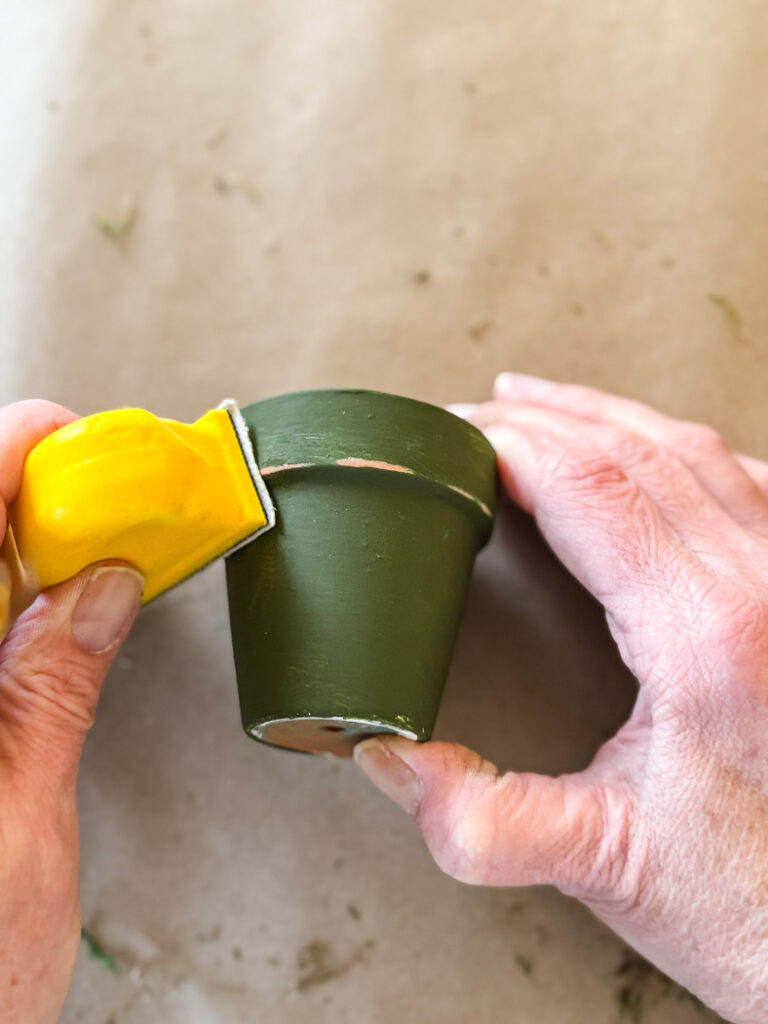
To create these petite topiaries, we’ll be using small terracotta pots, which you can easily find at your local craft store. While the natural terracotta color looks lovely, I opted to paint mine an English ivy green.
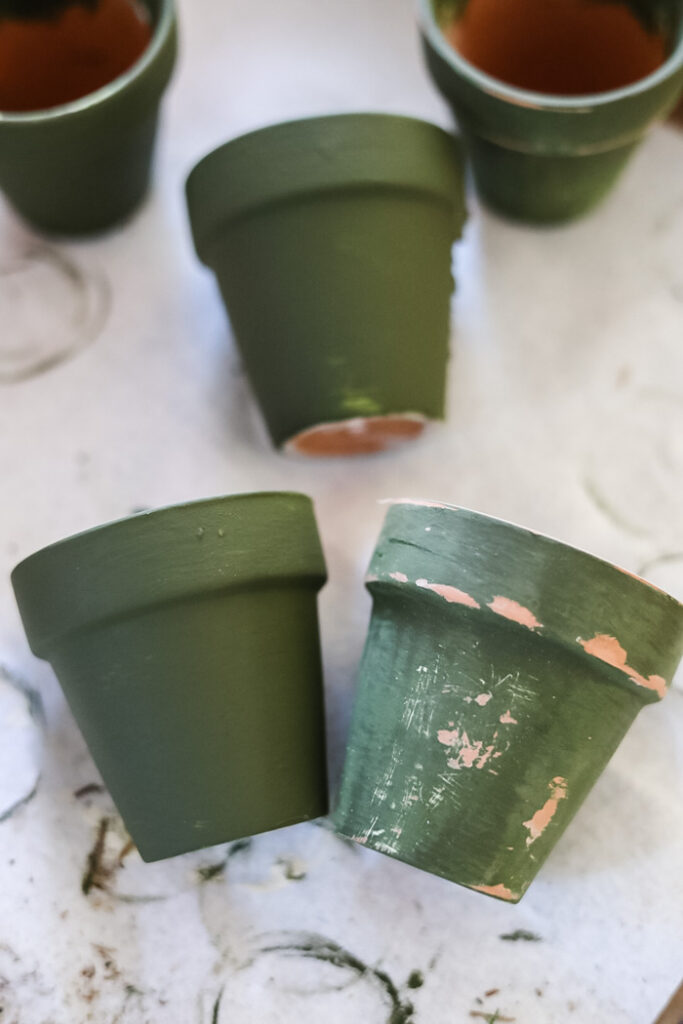
To give the pots an aged, vintage feel, I lightly sanded them with fine-grit sandpaper after the acrylic paint had fully dried. I focused on the edges and raised areas to reveal a hint of the original pot color.
Add Floral Foam:
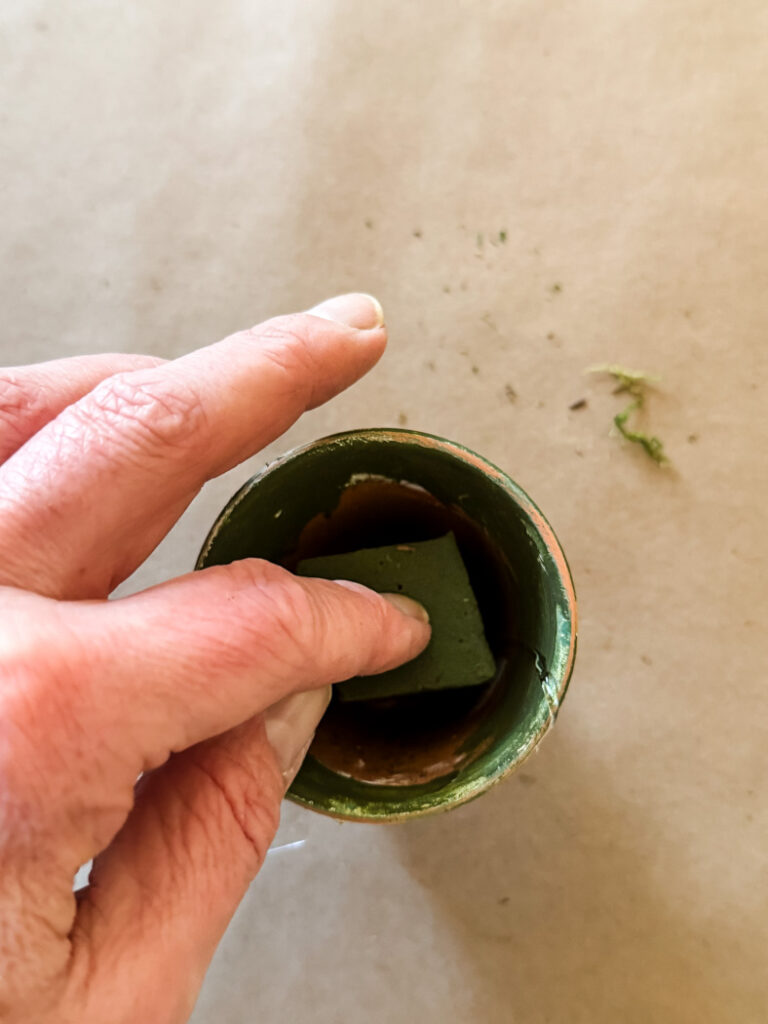
Once the pots are prepared, hot glue a small piece of floral foam to the bottom of the planter. This will hold the mossy heart stems in place to create the topiary look.
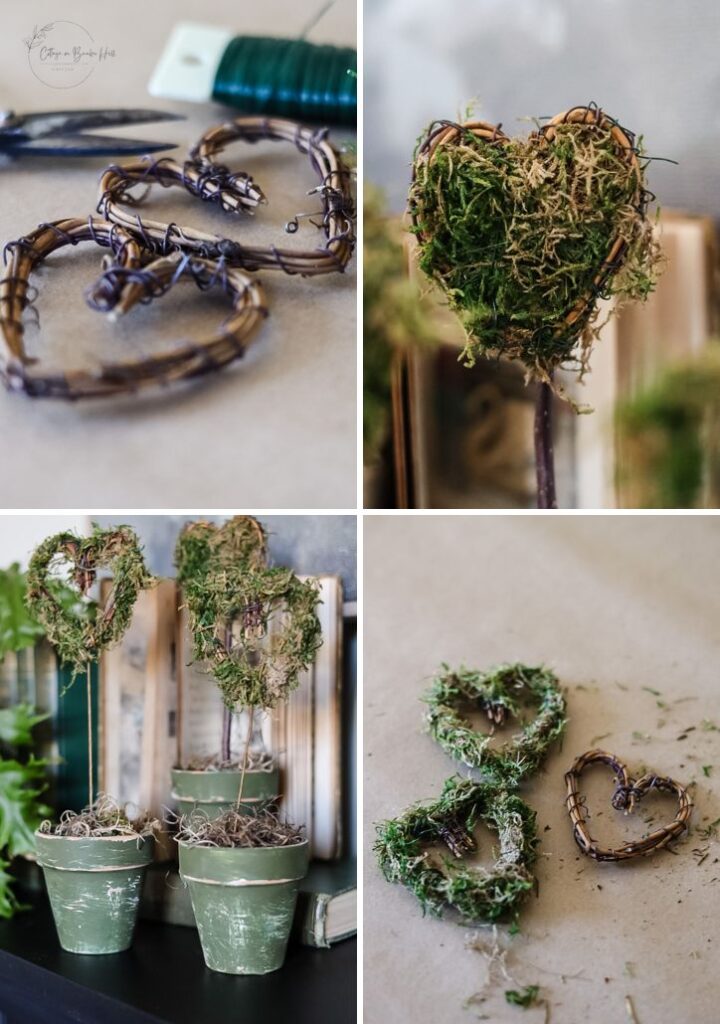
2. Make The Moss Hearts
I found these charming petite grapevine hearts in the wedding section of Hobby Lobby. You can easily adapt this project to create larger topiaries by using larger grapevine hearts and selecting slightly larger terracotta pots. The steps remain the same!
To showcase the versatility of this project, I’ll show you two different mossing techniques: a simple wrap around the heart for a more delicate look, and a fully covered approach for a lusher appearance.
Simple Moss Heart Look
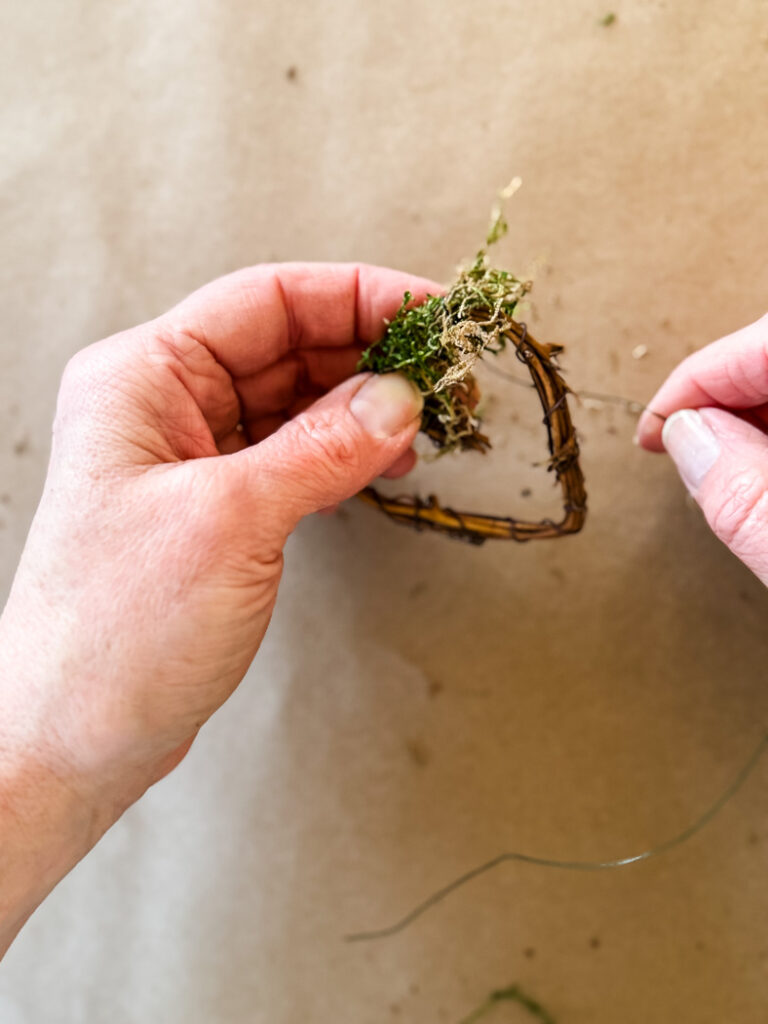
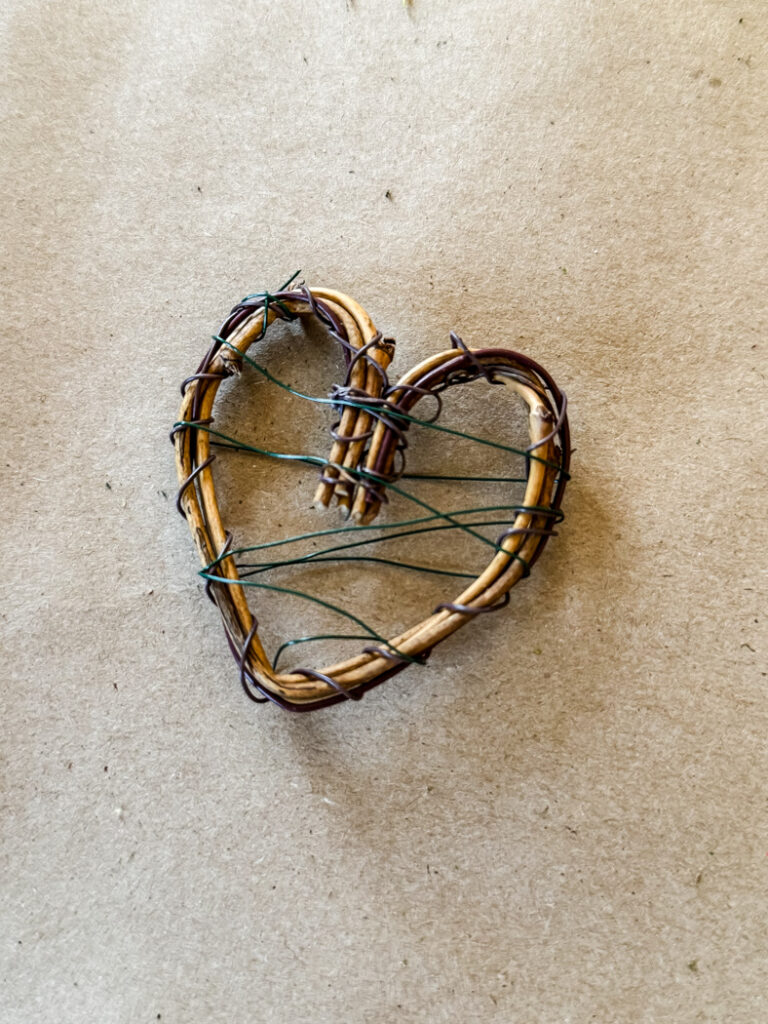
Start by cutting a length of floral wire (the floral wire paddle is too large to go through the heart).
Then, hold a small piece of green moss in place on the heart with one hand.
With your free hand, wrap the floral wire tightly around the moss to anchor it to the grapevine.
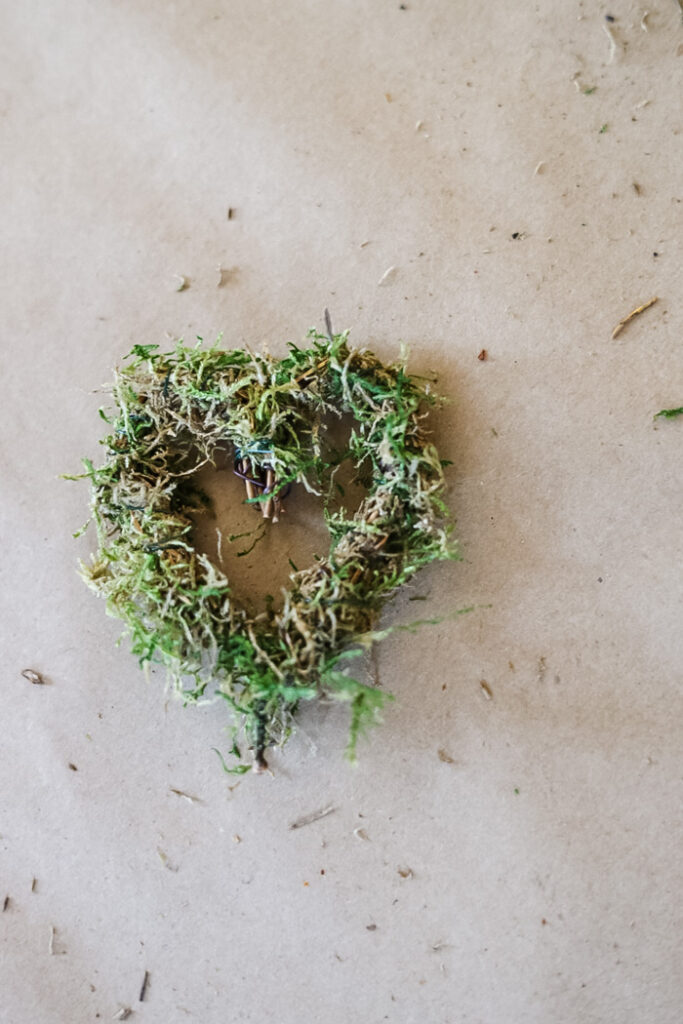
Continue adding small pieces of moss, securing each one with wire until the entire heart is covered.
Now it’s time for a little cleanup! Carefully trim away any excess moss that extends beyond the edges of the heart. This will give your topiary a neat and finished look.
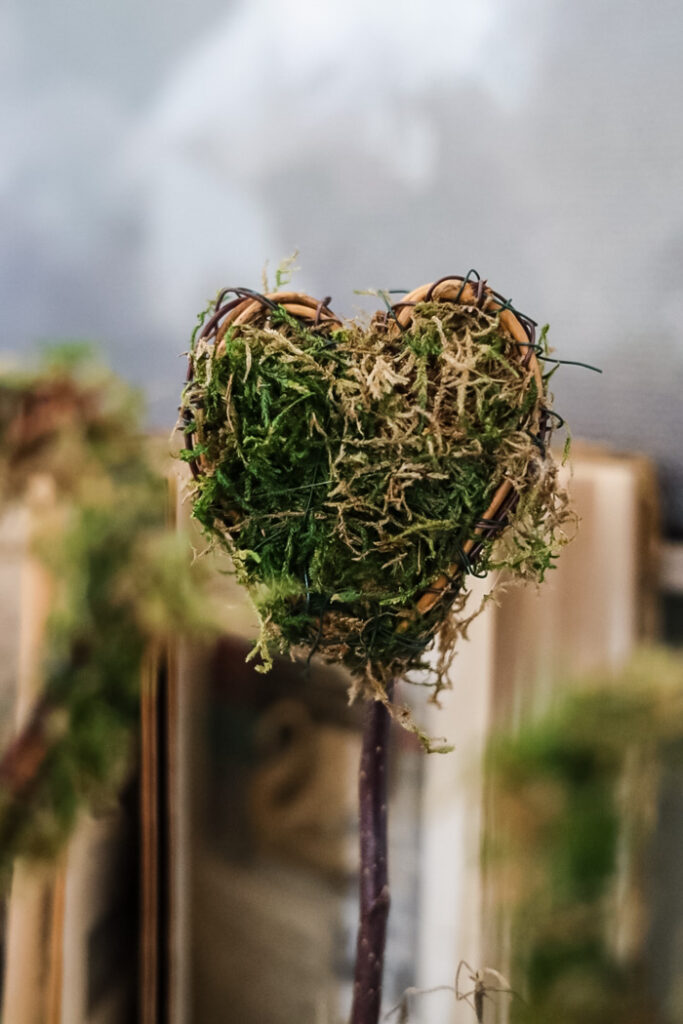
Fully Covered Hearts
To completely cover the grapevine heart with moss we will use a different technique that is also very simple to recreate.
To ensure the moss stays firmly in place, start by zig-zagging floral wire over the entire heart. This will create a sturdy base for the moss.
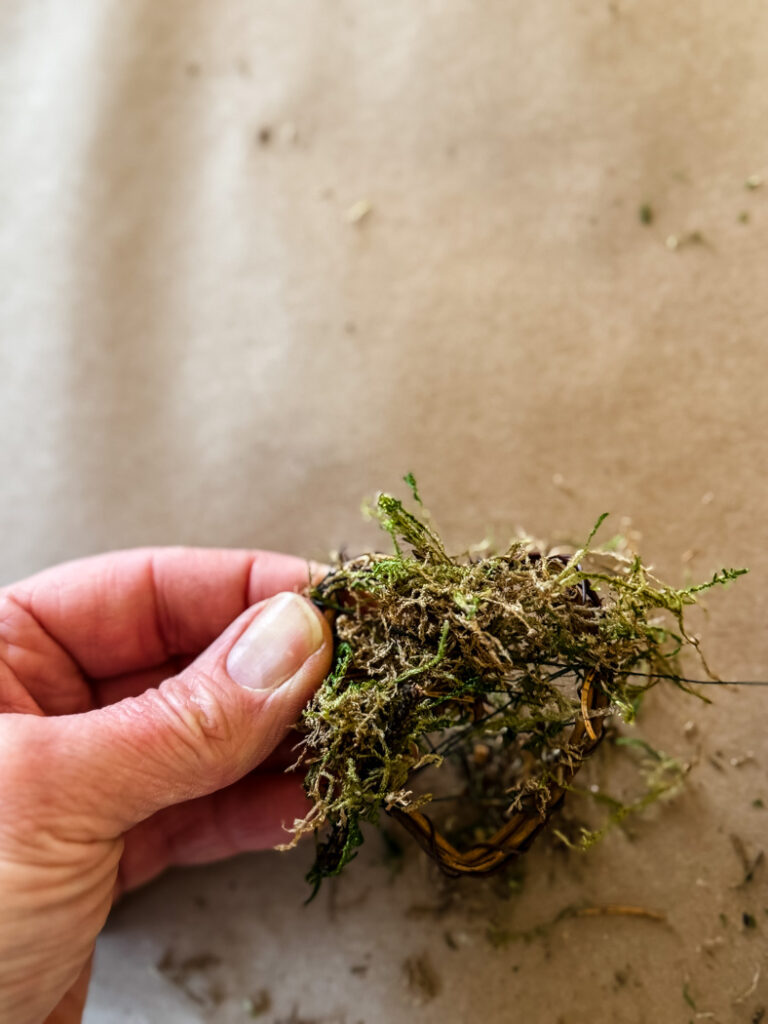
Now, it’s time to fully cover the heart with a layer of green moss. Wrap the floral wire tightly around the moss to ensure it stays securely in place.
Add more moss to the back of this heart for a finished look.
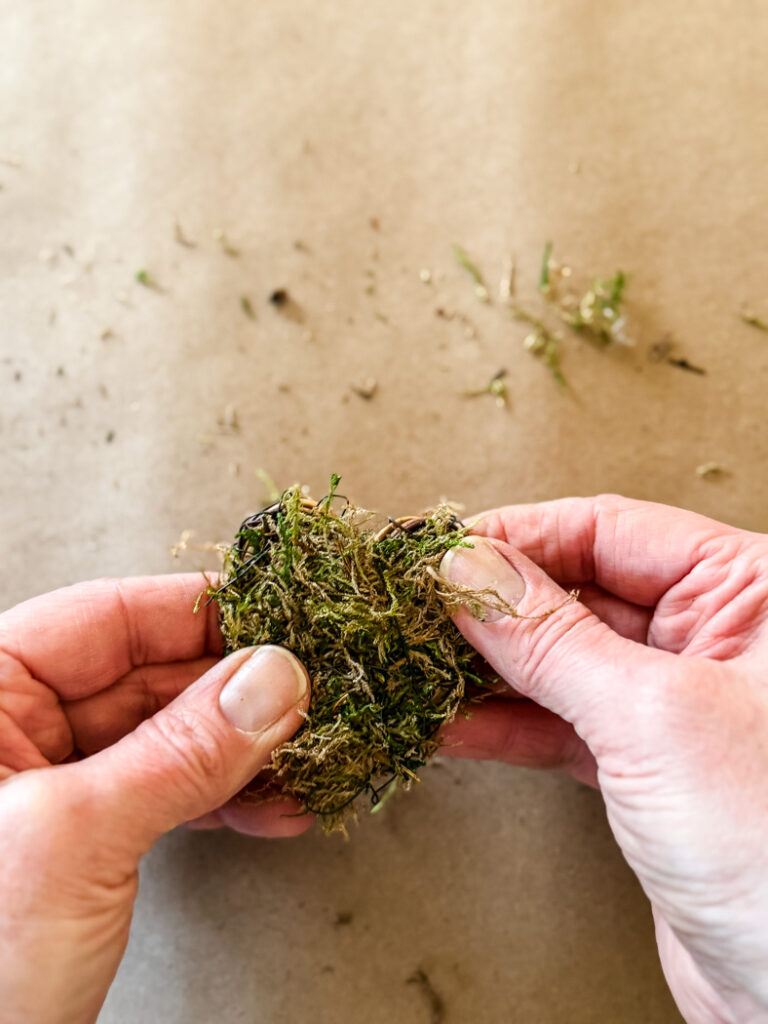
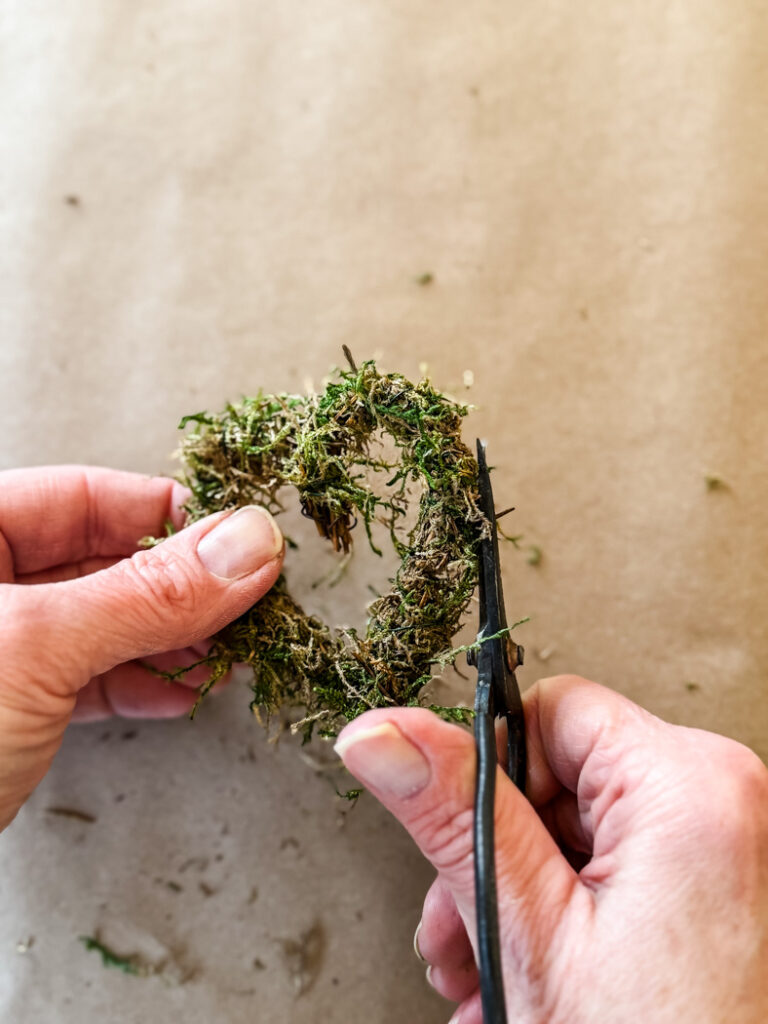
After covering the heart with moss, gently press down on the moss with your fingers to ensure it’s evenly distributed. Then, carefully trim away any stray pieces of moss to create a tidy appearance.
3. Assemble the Topiaries:
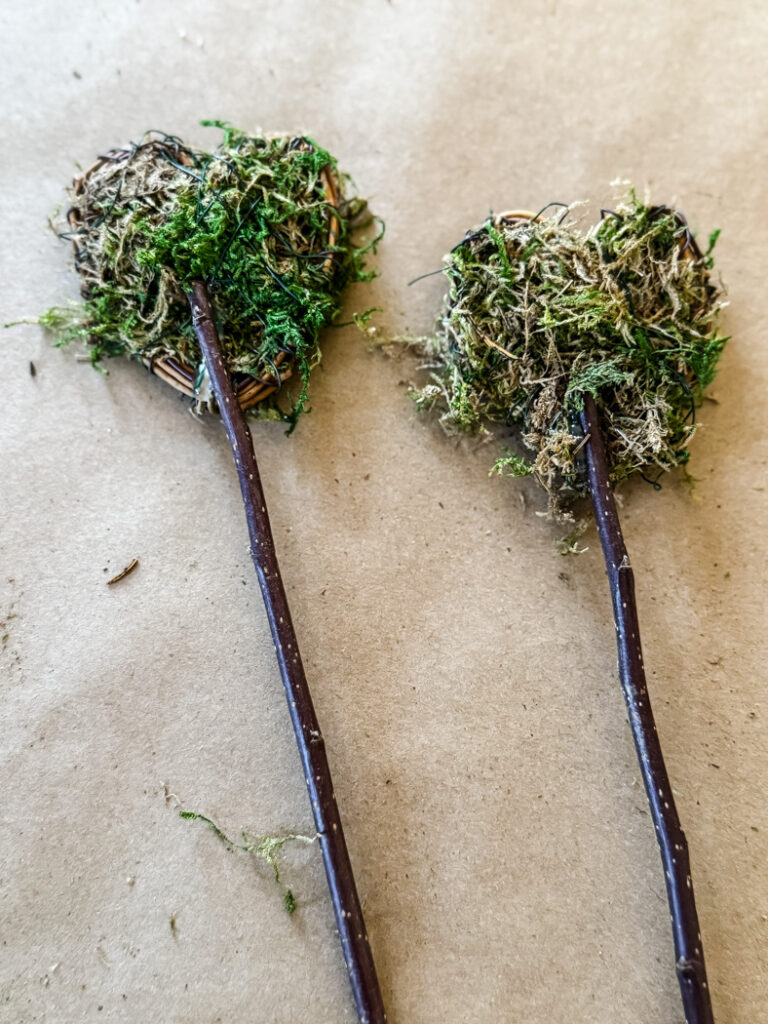
Now it’s time to put it all together. Grab the floral wire stems or small branches, the hearts, and the terracotta pots.
- Attach floral wire stems or small branches to the bottom of the moss hearts.
- Insert the stems into the floral foam in the pots.
Add Wire Stems to Hearts:
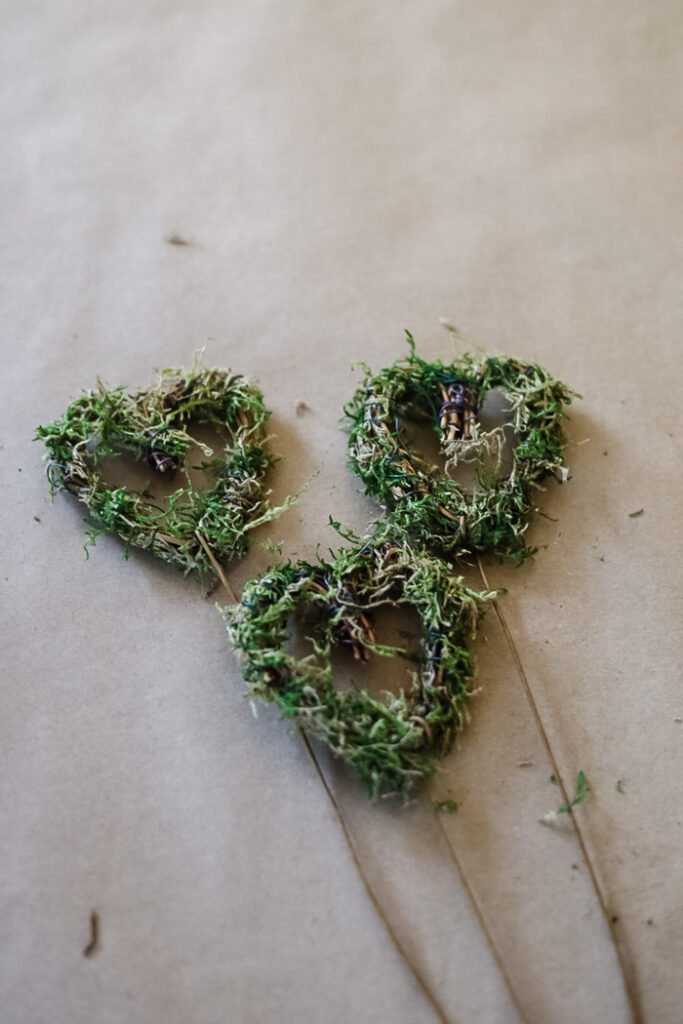
Floral wire stems, which you can find in the floral section of most craft stores, are sturdy, straight pieces of wire. These are a great option for creating your topiaries.
Trim the wire stems to your preferred height, usually between 6 and 8 inches.
To attach the wire stem, carefully wrap the end of the wire around the bottom center of the grapevine heart. Be gentle to avoid bending the wire out of shape.
Stay More Natural:
The second option for your topiaries is to use small straight branches for a more natural look. For this method you will simply hot glue the stick to the back of the mossy heart.
4.Finish Off The Topiaries
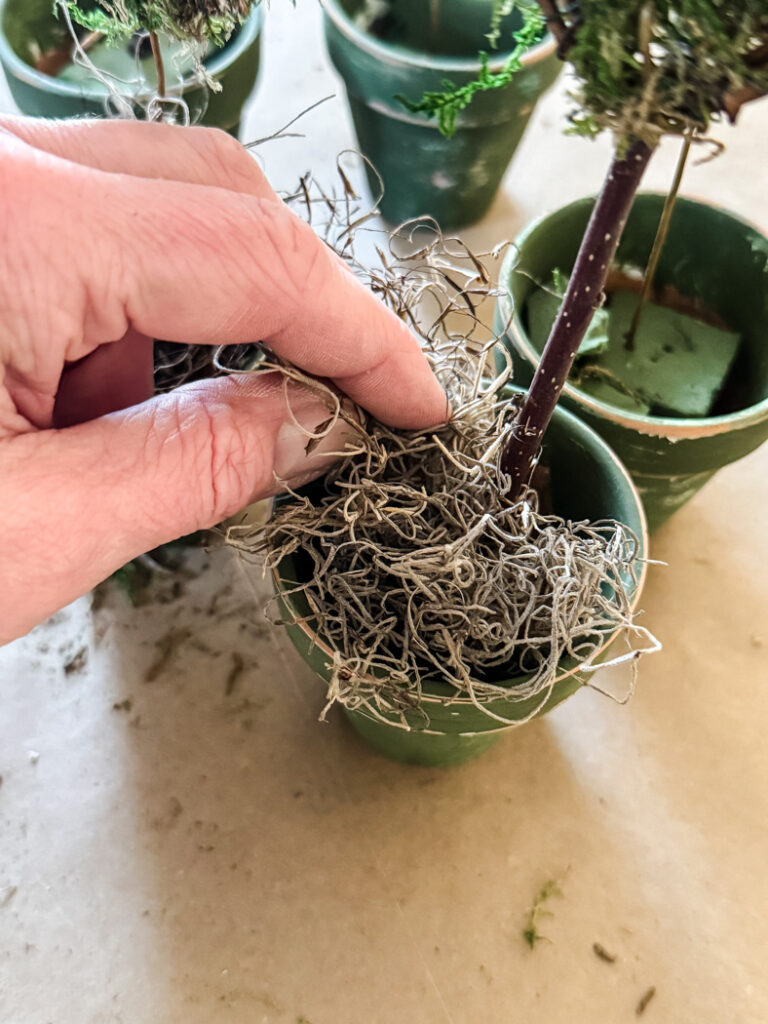
To begin, insert the stems or branches into the center of the floral foam in each pot. Aim for the center of the planter for a balanced look.
Now for the finishing touch! Fill the pots with Spanish moss to hide the floral foam and give your topiaries a completed look.
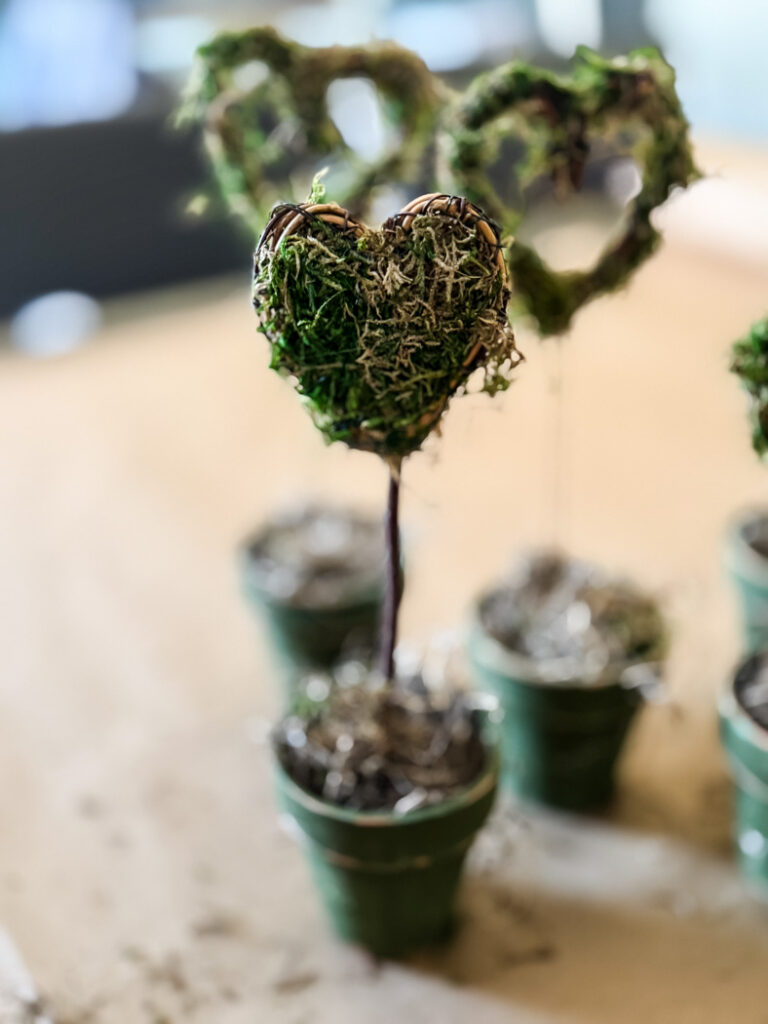
Time To Display!

These charming mini topiaries offer endless possibilities for creative display! For a cohesive and eye-catching look, group them together on a shelf, mantelpiece, or coffee table.
Get creative and incorporate them into a centerpiece for a touch of natural elegance. And let’s not forget that these adorable topiaries make wonderful gifts for friends and family!
I hope you enjoyed this tutorial on creating mini moss heart topiaries. These charming little plants are sure to bring a touch of nature-inspired joy to your home. Don’t be afraid to experiment with different moss colors, shapes, and decorative elements.
Tips and Variations:
- Experiment with different colors of moss.
- Use different shapes of grapevine bases (e.g., stars, circles).
- Add decorative elements like ribbons or small charms to the pots.
- Create a matching set of moss heart wall hangings.
See your projects featured! If you were inspired by this or any of my other DIY projects I would love to see them and add you to the Reader’s Spotlight gallery. Send a photo to me at jennifer@cottageonbunkerhill.com
xo, Jennifer
More Pretty Heart-centric Ideas To Make:


Fine Art Printables
29 Free Downloads
exclusively for email subscribers
25 DIY Projects Using
flowers & botanicals
Pin for Later!


Adorable, Jennifer!! The miniature hearts are SO cute! What a fun display for Valentine’s day!
Awww, thanks!!
Jennifer
These turned out so cute. Very sweet 😘
Thanks!! They are cuties! Fun project to make.