
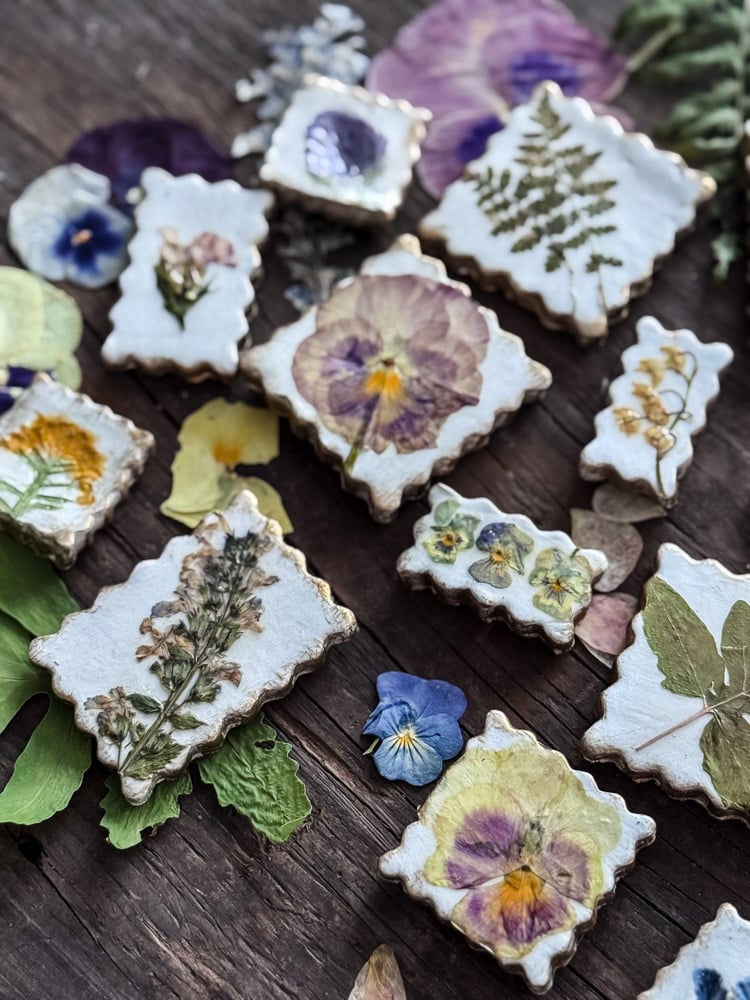
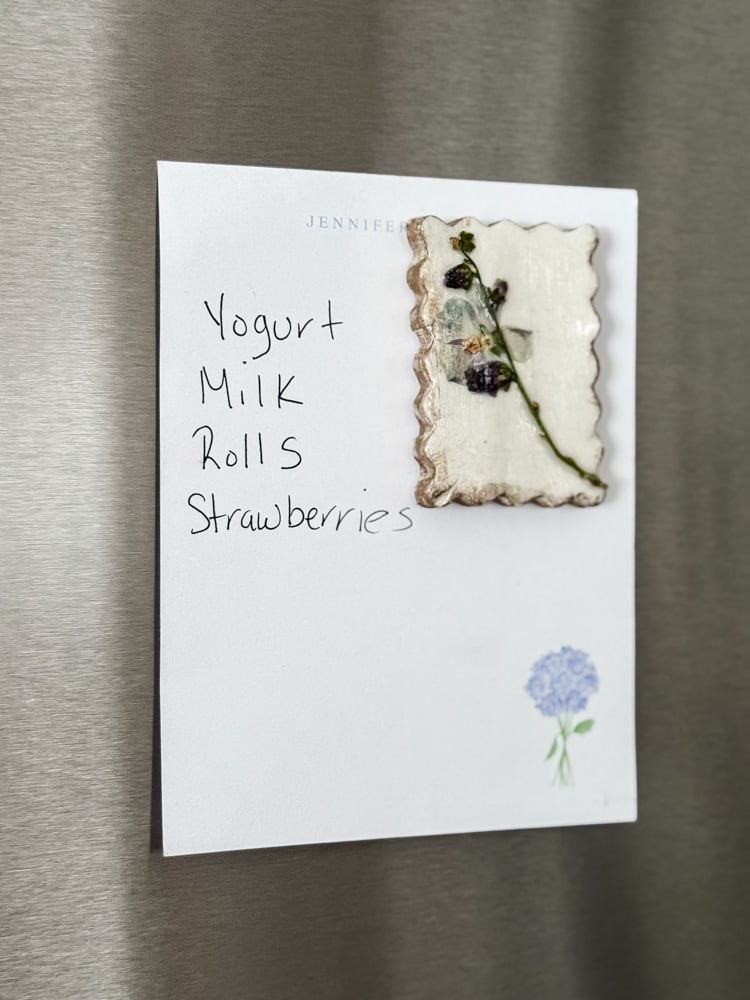
These little magnets look like tiny handmade ceramics but they’re actually made with inexpensive air-dry clay and real pressed flowers. They make beautiful spring gifts, bridal shower favors, or a sweet addition to your kitchen fridge. The best part? No kiln needed.
There’s something special about capturing a garden in miniature. These tiny magnets start with flowers I grew myself. Lavender from the herb bed, pansies from the spring planting, little ferns from the shady corner, pressed and saved until I had just the right project for them.
Today I’m sharing how to turn those pressed blooms into handmade clay magnets with watercolor accents, glossy finishes, and just a touch of gold. They’re small enough to make an afternoon feel productive, and lovely enough to give as gifts that people actually treasure.
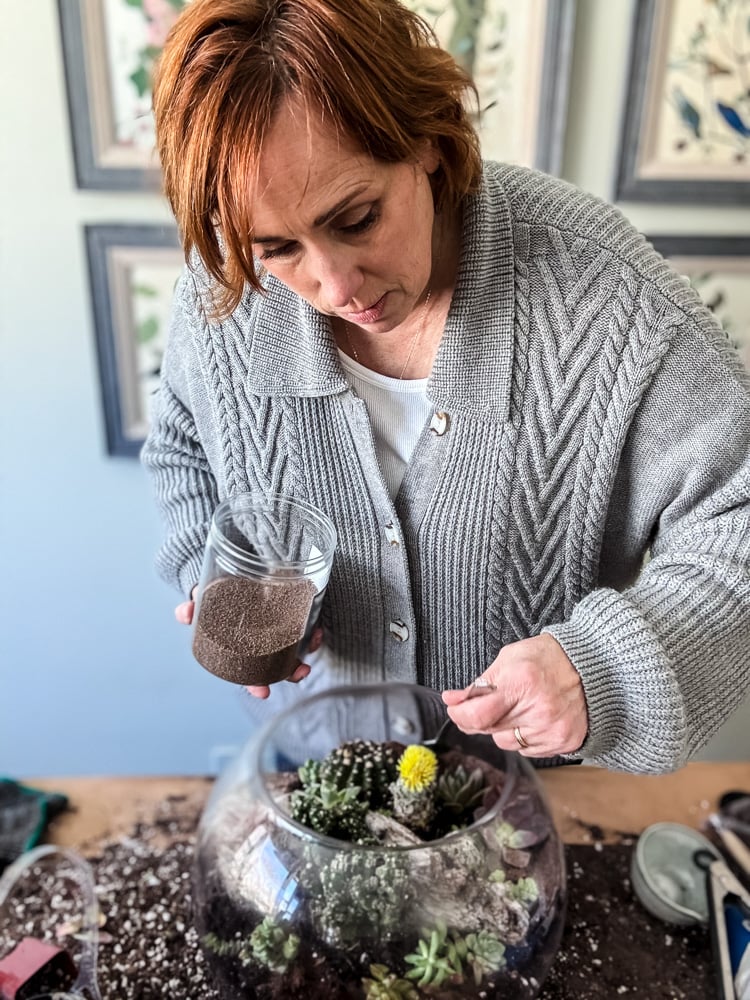
Welcome! I’m Jennifer, and I’ve always believed nature is the most beautiful art supply. For years, I’ve been preserving New England’s blooms and foliage through pressing, drying, and crafting. Let me show you how to capture a little bit of the season and bring it indoors—simply and beautifully.
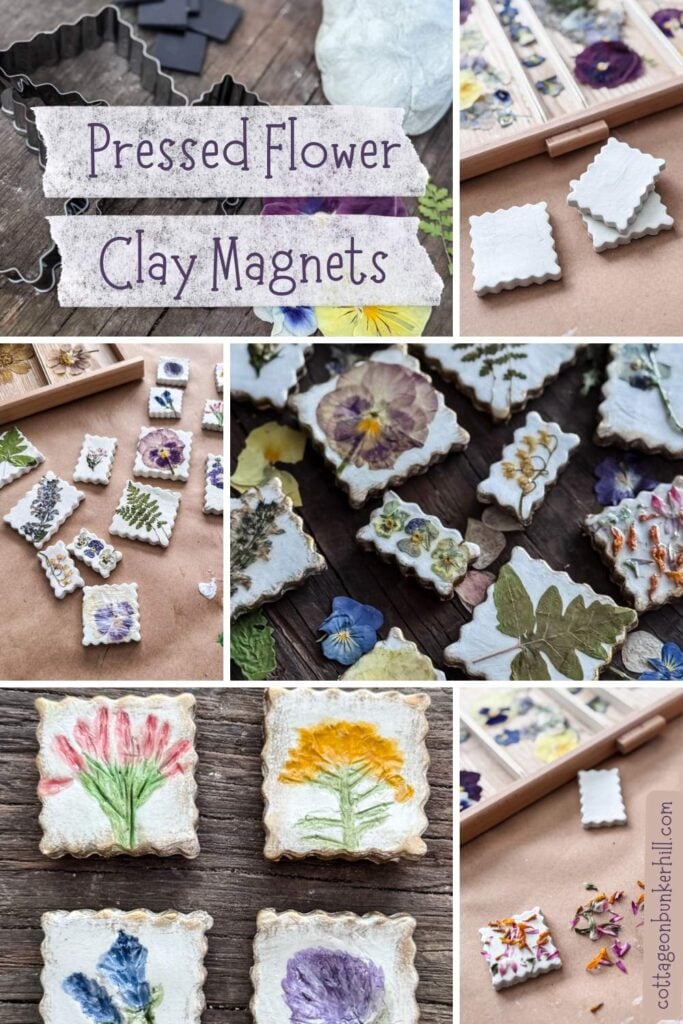
How to Make Pressed Flower Magnets with Air Dry Clay (A Simple Garden-to-Home DIY)
I think about my garden as an extension of my home. The line between indoors and out has always felt blurry to me, in the best way. So when I’m looking for new projects, I naturally turn to what’s growing right outside my door.
These pressed flower magnets are the perfect example. I grew the lavender. I pressed the pansies. I shaped the clay, mixed the paint, and brushed on the gold. By the time they’re stuck to my fridge, they’ve traveled from garden to clay to kitchen-a full circle that feels deeply satisfying.
This post may contain affiliate links, which means we receive a small commission if you purchase through our links. See our disclaimer page for more information.
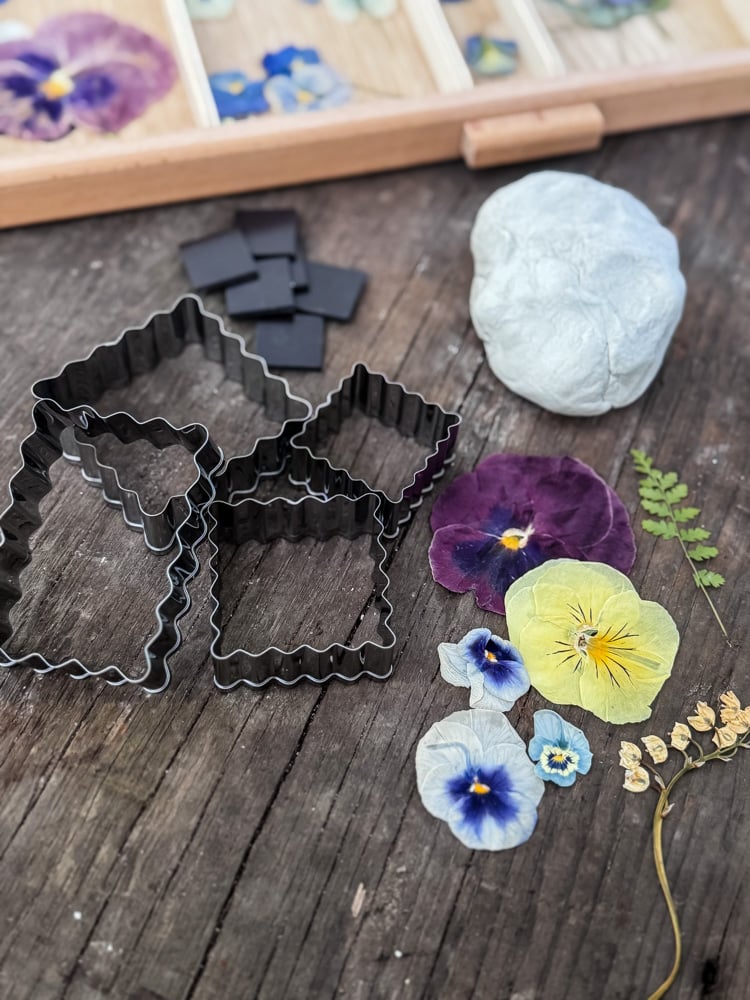
What You Will Need
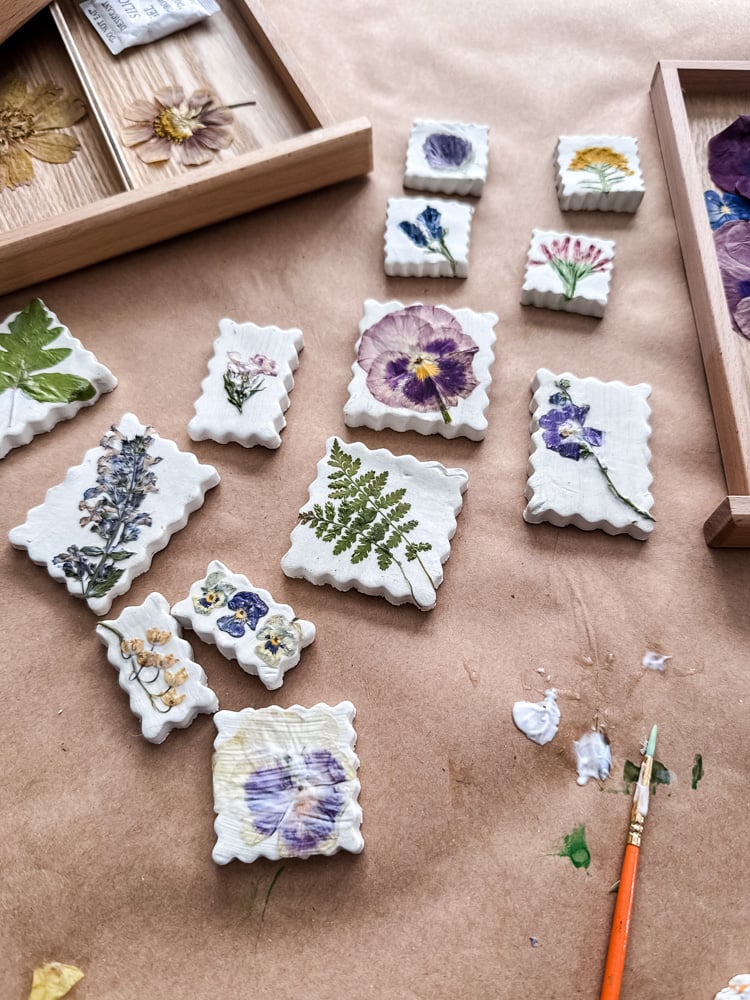
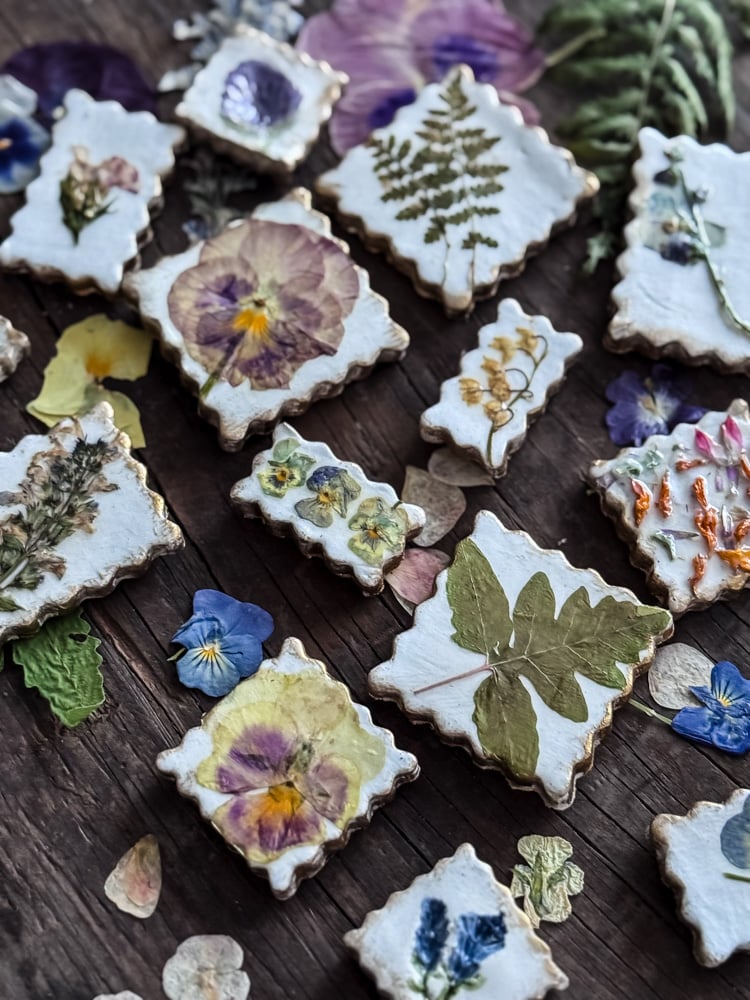
I absolutely adore how these little clay cut-outs turned out using postage stamp-shaped cookie cutters. There’s something so charming about their tiny, uniform shape-they feel like miniature works of art just waiting to be hung. I highly recommend them for this project!
But here’s the thing: use whatever shape makes you happy! Hearts, circles, stars, tiny flowers, they’ll all be beautiful. My only advice is to keep them on the smaller side so they function well as magnets. A tiny heart on your fridge? Adorable. A giant slab? Less practical.
Supplies:
- Air-dry clay
- Postage stamp-shaped cookie cutters (or any small shapes you love)
- Rolling pin
- Two bamboo plant stakes or small dowels (for even thickness!)
- Parchment paper
- Baking cooling rack
- Pressed flowers from your garden (or order a set)
- Small flowers/herbs for imprinting (lavender, tiny leaves, etc.)
- Watercolor paints + fine brush
- Mod Podge (glossy)
- Air-dry clay varnish (optional, for extra shine)
- Rub ‘n Buff in gold leaf
- Small magnets
Step-By-Step Instructions
Let me walk you through this project step-by-step. I’ve tested the process, made the mistakes, and figured out what works, so you can jump right in and create something beautiful with confidence. Same results, less guesswork!
Step 1: Roll Even Clay (The Bamboo Trick!)
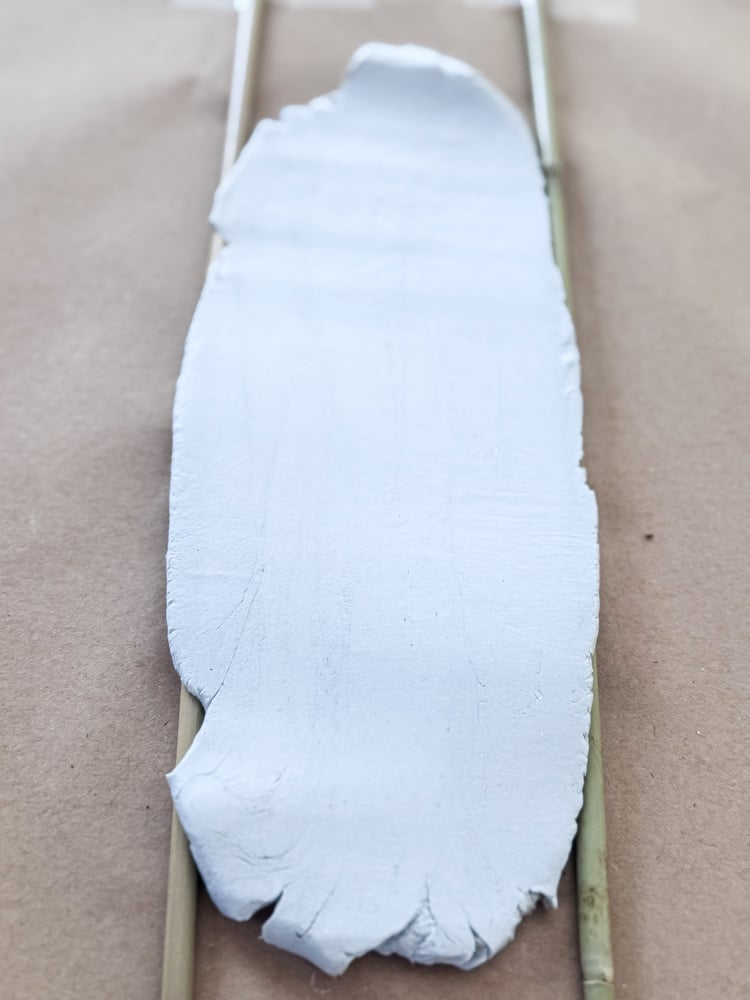
This was my first time trying a trick I’d seen online, and honestly? Game changer.
Here’s how:
Tape two bamboo plant stakes (or small dowels) to your work surface, parallel to each other. Space them about as wide as your cookie cutters, slightly wider, so you have room to roll. Place a mound of clay between them, then roll your pin across the stakes.
The stakes act as guides, giving you a perfectly even thickness every time. I aimed for about ¼ inch thick, sturdy enough for magnets, not so thick that they feel heavy.
Step 2: Cut Your Shapes
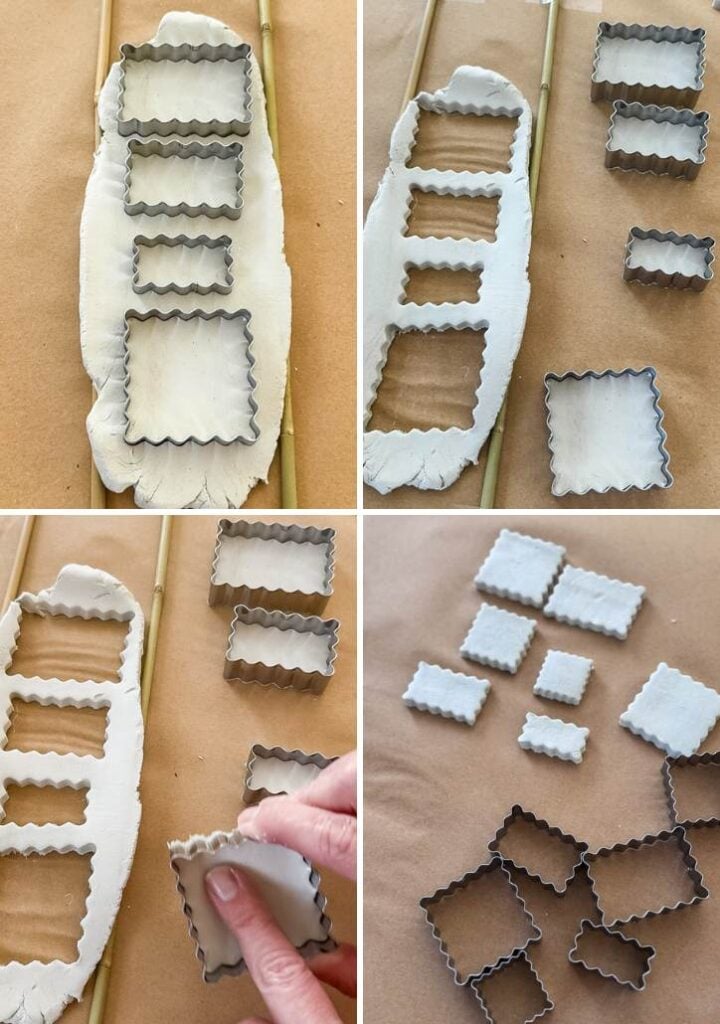
Roll out your clay evenly (remember the bamboo stake trick!) until it’s about ¼ inch thick. Then start cutting!
Press your cookie cutter firmly into the clay, then lift the cutter with the clay still inside. Use your finger to gently pop the shape out. The clay should release easily-if it sticks, a little wiggle usually does the trick.
A note on clay:
I’m using DAS brand air-dry clay for this project, and I have to say it’s a dream. It releases beautifully from metal cutters, doesn’t crumble at the edges, and is forgiving enough for beginners while still giving lovely results. Highly recommend!
Continue cutting and popping until you’ve used as much of your rolled clay as possible. Reroll scraps gently and keep going—just be careful not to overwork the clay, or it can dry out.
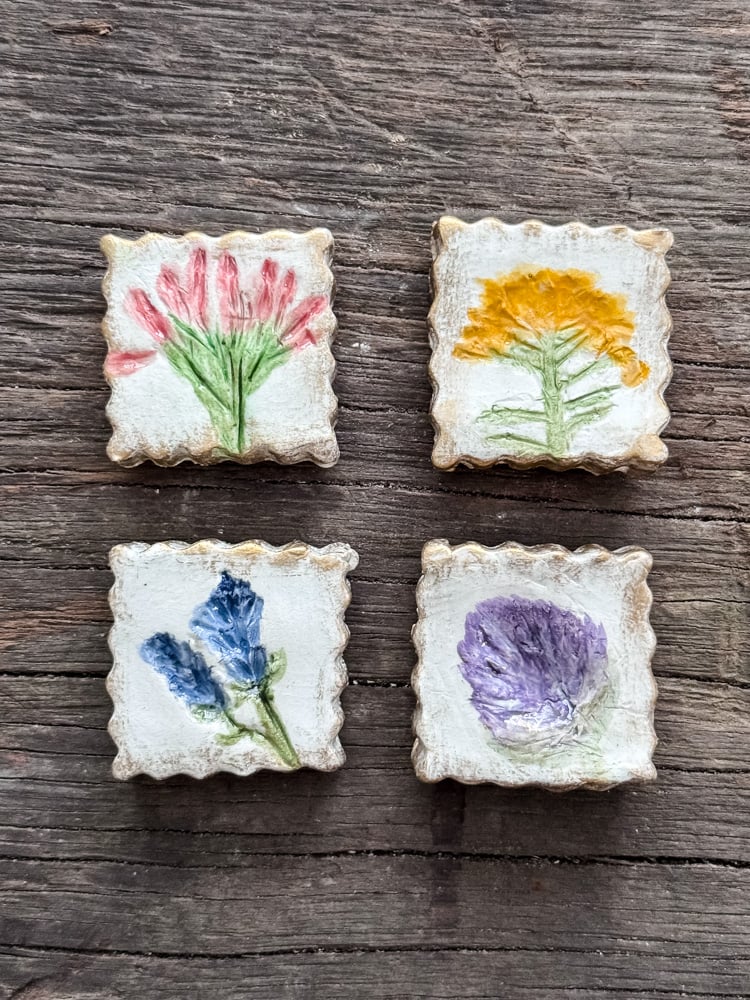
Step 3: Add Impressions (For Some of Them)
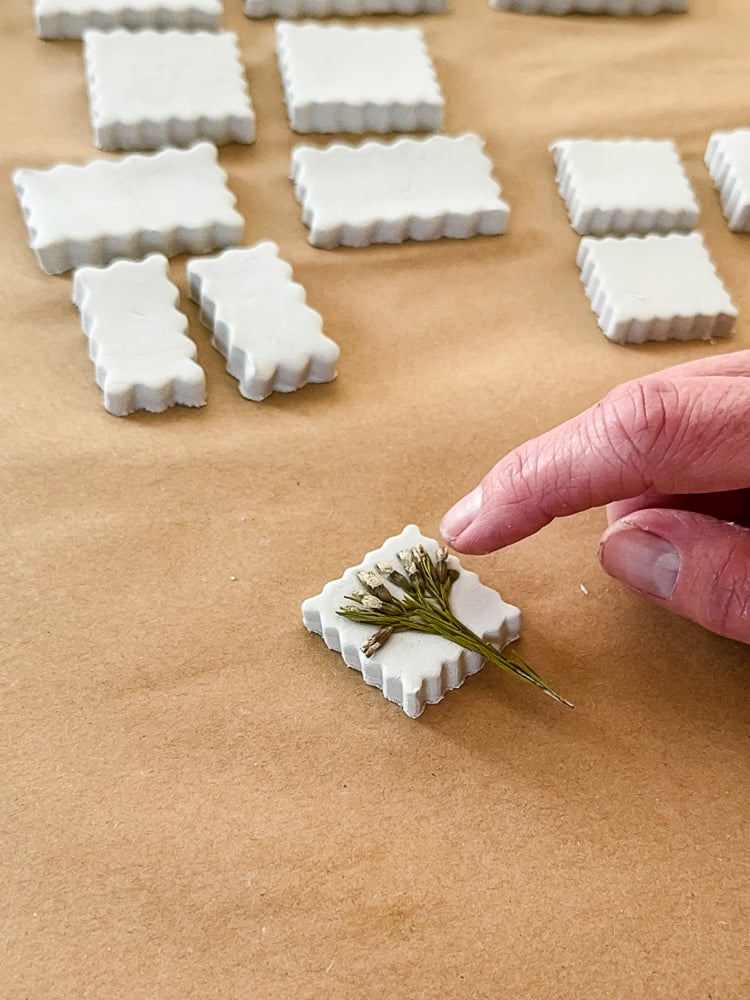
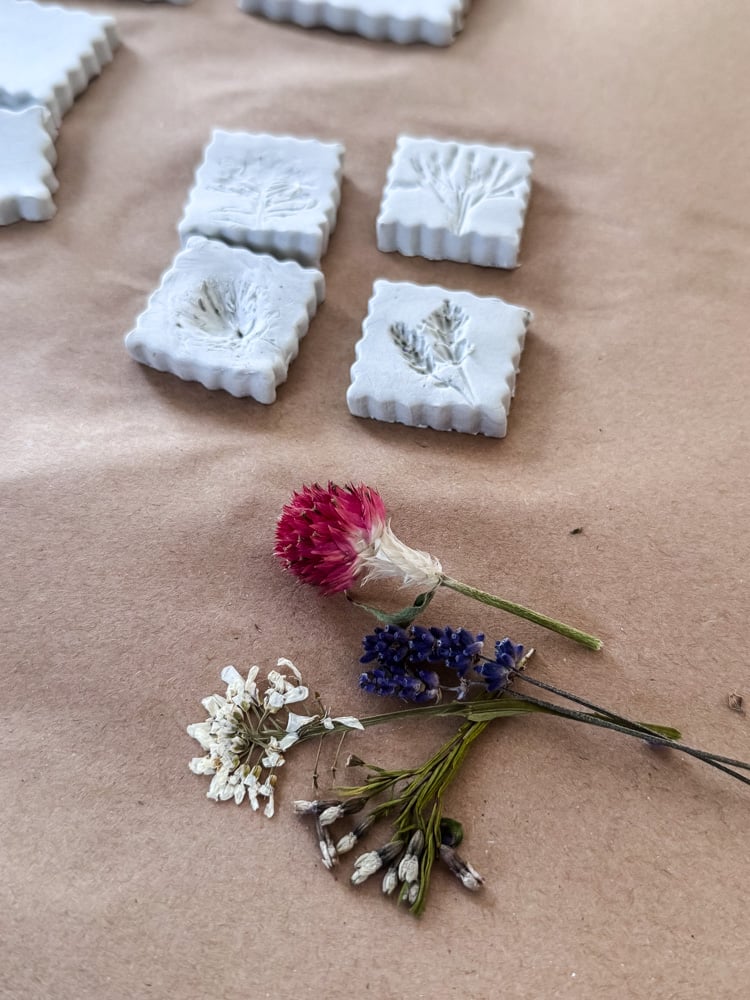
For four of my smallest squares, I wanted a different look: flower imprints instead of pressed flowers on top.
Here’s how I did it:
While the clay was still wet, I gently pressed tiny sprigs of lavender and a few other small flowers into the surface. Then very, very gently-I used my rolling pin to roll over the flowers, just enough to transfer their shape without squishing the clay. For some of the more delicate ones, I used my finger to press them in by hand.
Not too deep. Just enough to leave their shape behind.
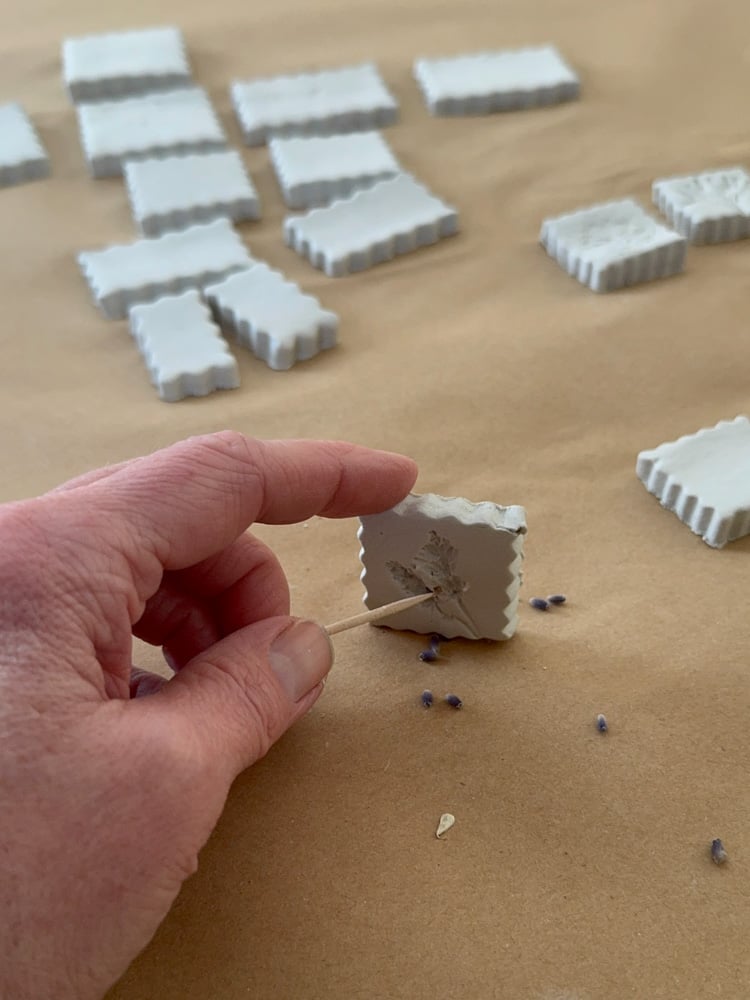
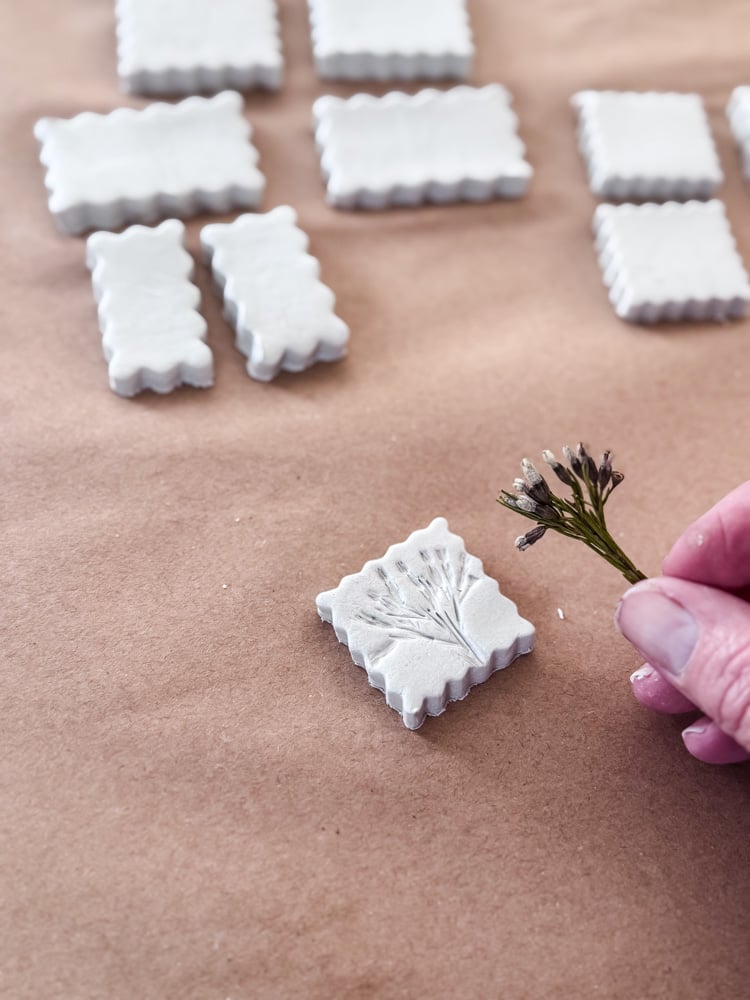
Then came the careful part: lifting the flowers out to reveal the imprint. I used a toothpick to pick out any tiny bits of flower debris that got left behind.
And now, a little honesty:
I messed up a couple of these. The first flower I tried was a strawflower, and it just… didn’t work. The imprint was muddy, unrecognizable. Then I got a little too enthusiastic with the rolling pin on another one and completely smooshed the clay shape. Had to start over.
And you know what? That’s totally fine. It’s part of the process. Clay is forgiving—you can just roll it up and start again. No wasted materials, no harm done. Just a little lesson learned.
By the time I got to the lavender, I had the hang of it. That imprint? Perfect. And honestly, my favorite!
Step 4: Patience (Let Them Dry!)
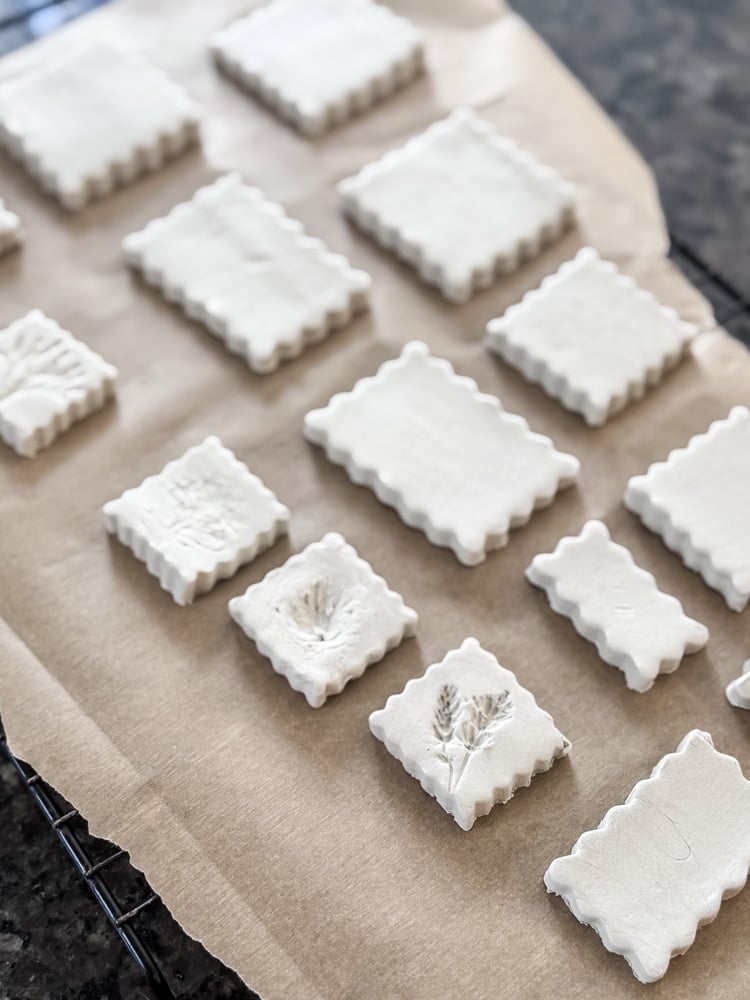
This part takes time, and that’s okay. Arrange the clay cutouts on a piece of parchment paper on top of a baking cooling rack. I let my clay pieces dry for two full days, flipping them halfway through to ensure both sides got equal airflow. The cooling rack helps tremendously with this. You do not want to place your wet clay shapes directly on a rack, or you will end up with grid-mark imprints.
Wait until they’re completely dry before moving to the next step. No shortcuts here!
Step 5: Paint The Impressions
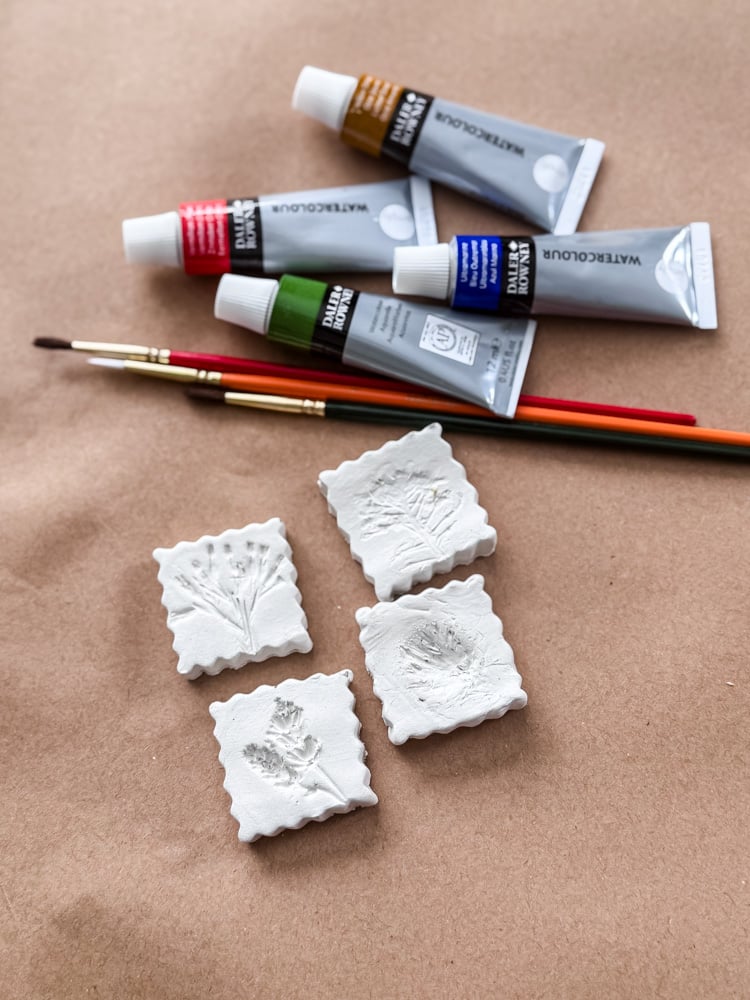
Once the imprinted squares were bone-dry, I pulled out my watercolor paints and a fine-tip brush.
Here’s the thing: you do not need to be an artist for this. At all.
I tried to match the original flowers as closely as I could: blueish-purple for the lavender, golden yellow for one, & dusty pink for a pressed waxflower. But the technique is what makes it work.
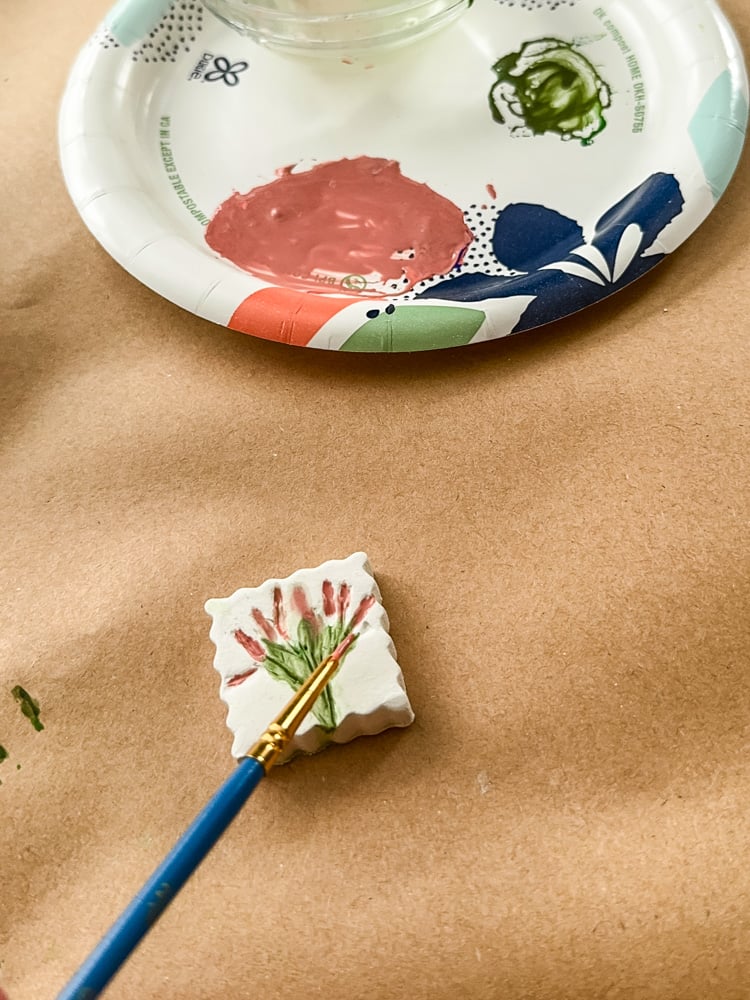
Just rest your very wet paintbrush into the impressions. The watercolor will naturally flow and fill the recessed areas. Then lightly run your brush through the impression to guide it where you want-the paint will follow. It doesn’t have to be perfect! In fact, a little imperfection makes it look more organic, more hand-done.
The watercolor sinks into the imprints beautifully, catching in the recessed areas and leaving the raised surface clean. It’s like the flowers left tiny fossils behind!!

A few tips:
- Use a fine-tip brush for better control
- Keep your brush fairly wet; the paint needs to flow
- Blot any mistakes quickly with a paper towel.
- If you go outside the lines? Honestly, it probably still looks lovely
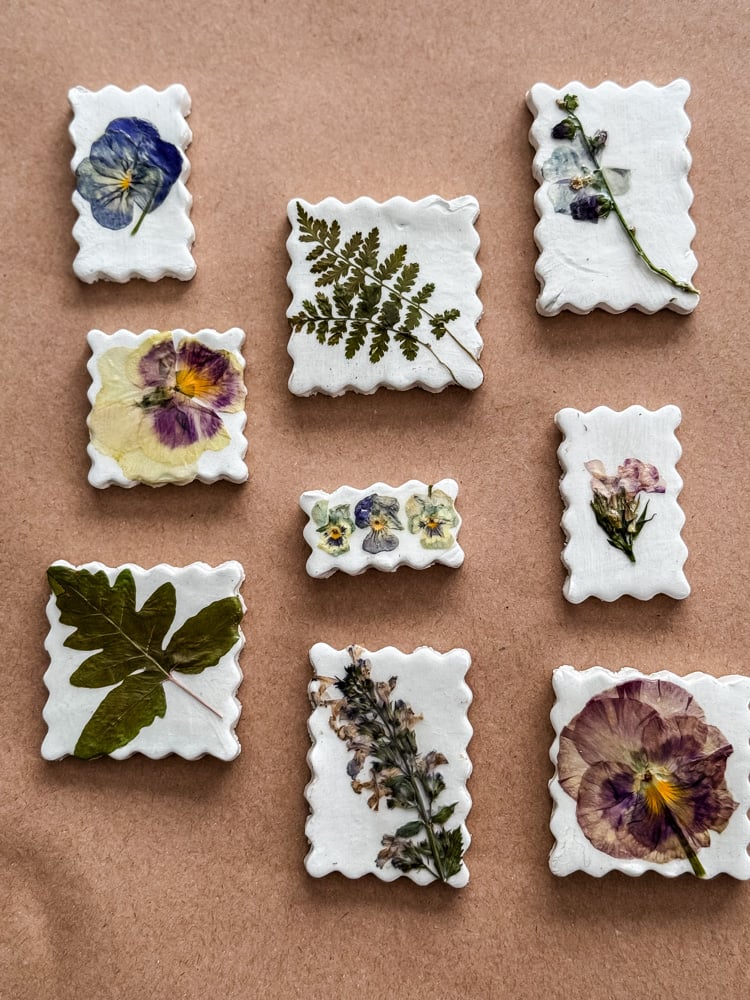
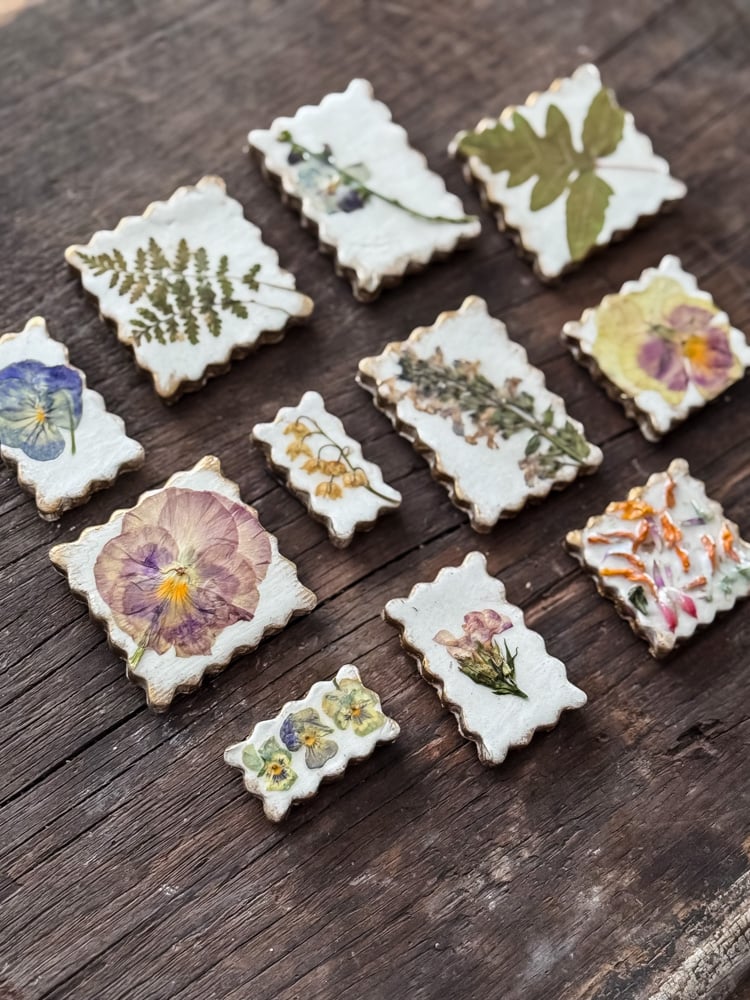
Step 6: Adhere Pressed Flowers To The Rest

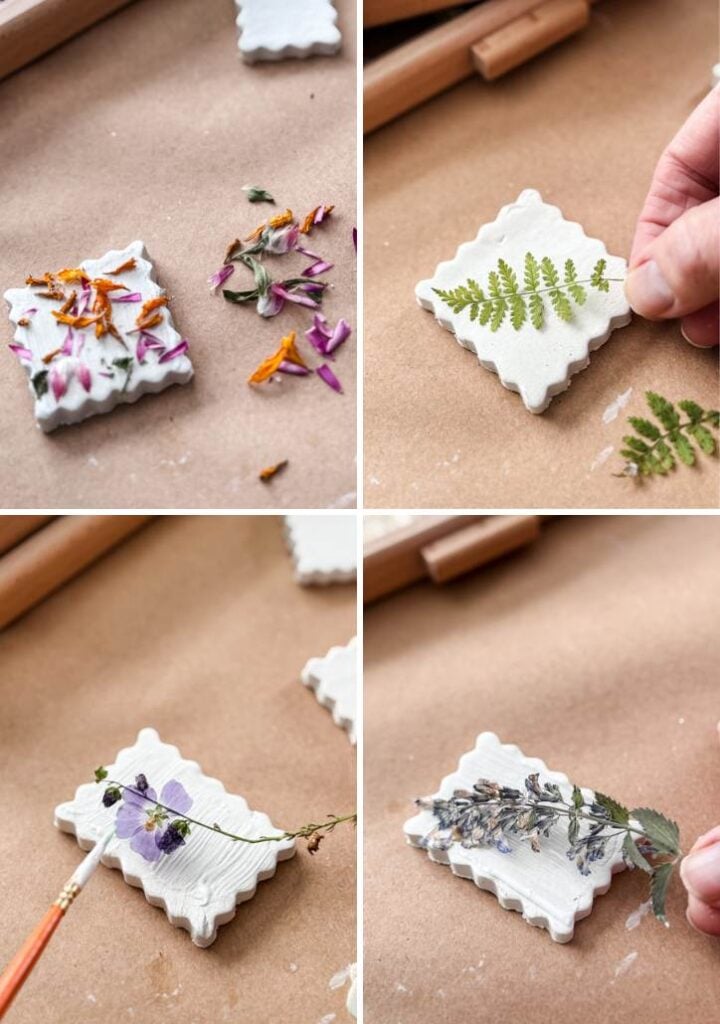
For the remaining clay shapes, it was time to bring out my collection of pressed garden flowers: pansies, violas, tiny ferns, and more.
Here’s my method:
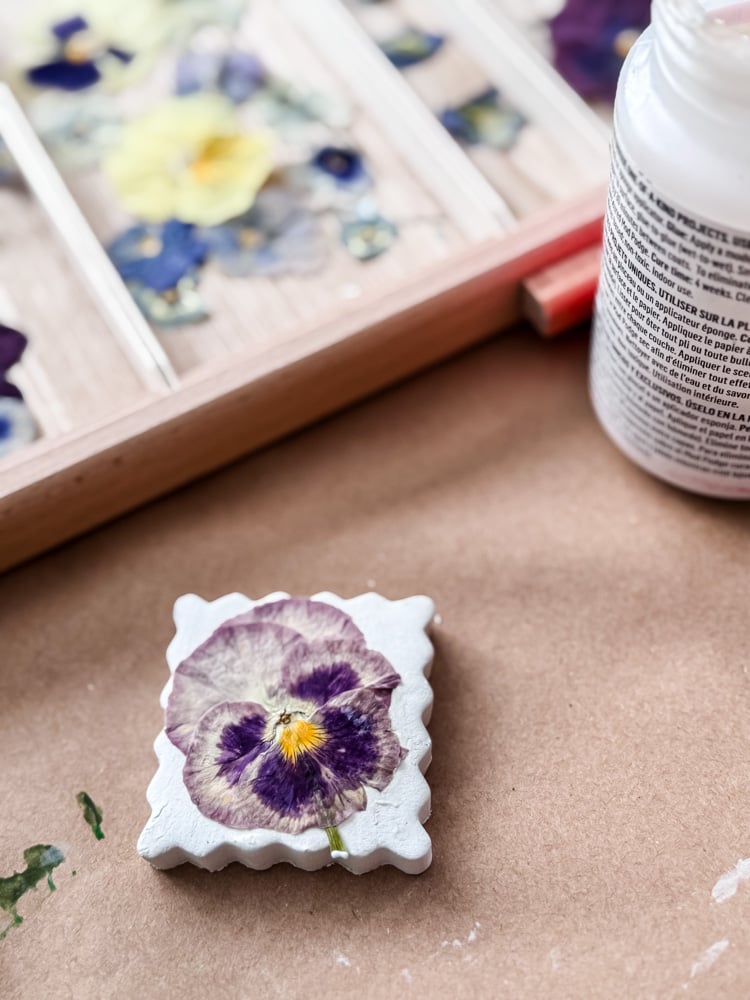
First, I brushed a thin layer of glossy Mod Podge onto the clay surface where the flower would go. Then, using tweezers or a very gentle hand, I positioned each flower and pressed it into place.
A quick tip on smoothing:
Take your time here! For the larger pansy, I noticed a few air bubbles trapped under the petals. I simply used my fingertip to gently smooth them out, working from the center toward the edges. The Mod Podge gives you a little working time before it sets, so don’t rush.
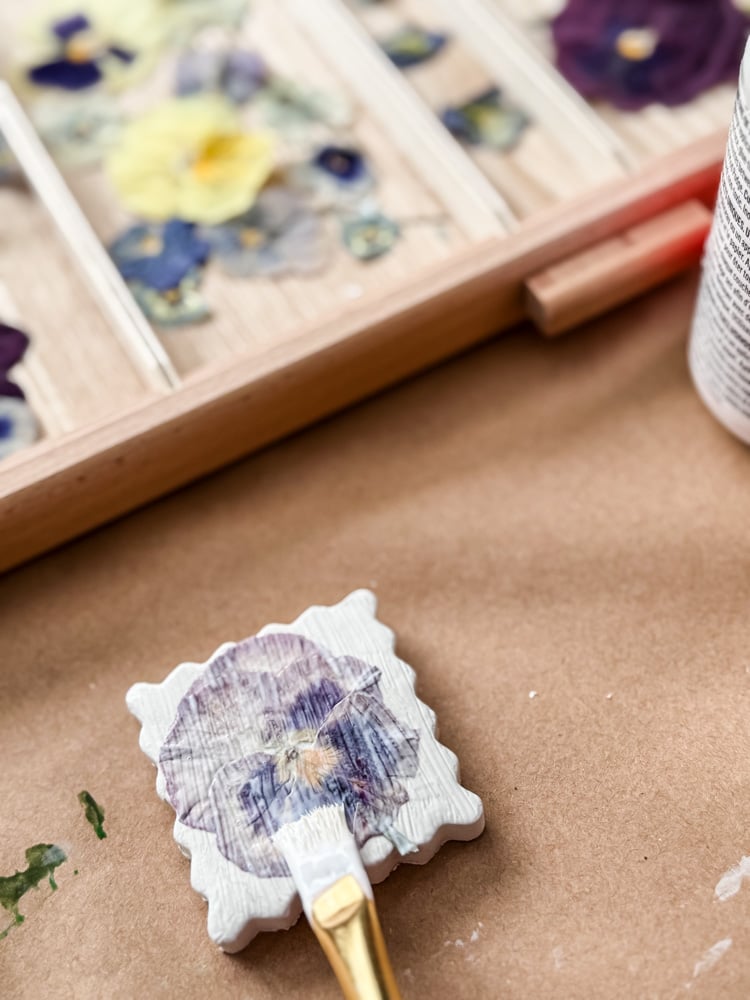
Once the flower was positioned exactly how I wanted it, I brushed another gentle layer of Mod Podge over the entire clay shape, flower and all. This seals everything in and gives that lovely glossy finish.
The fun part? Playing with arrangements.
- One square got a single large pansy, bold and beautiful all on its own
- Another I covered with petite fern fronds, delicate and lacy
- One of my favorites is a tiny square with three miniature violas, clustered together like a tiny bouquet
- And for one special square, I did something a little different: I pinched a few small petals right onto the clay—a sunflower petal here, a bit of strawflower there, a tiny piece of gomphrena. No pre-planning, just whatever felt right in the moment. It ended up being one of my favorites.
There’s no right or wrong here. Let the flowers guide you. Some shapes want to be alone. Some want to be crowded. Some just want a few scattered petals, like confetti from the garden.
Trust your eye—and have fun with it!
Let these dry completely before moving on to the next step. The Mod Podge will be clear when they dry.
Step 7: Seal & Shine
Here’s where you have options:
- Stop here if you love the look of glossy Mod Podge (it’s pretty and protective!) My suggestion would be to add a second coat.
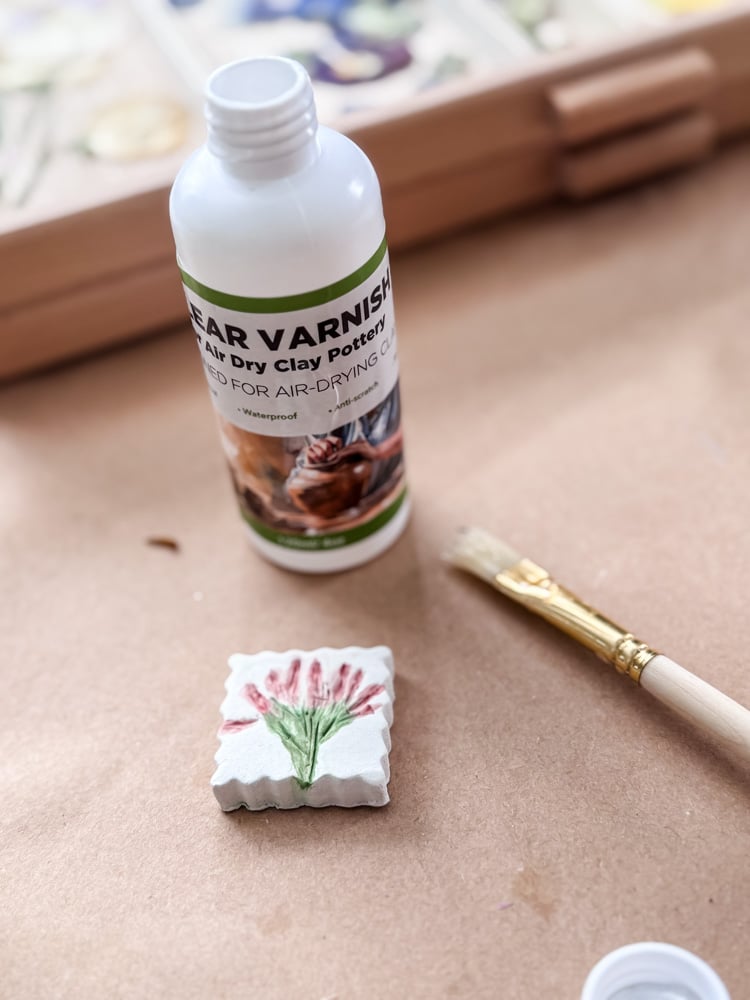
- Go further with an air-dry clay varnish for that real-pottery shine.
I tried both, and honestly? The varnish adds something special. It gives the magnets a depth and gloss that feels like glazed ceramic, without a kiln in sight. I also saw that Mod Podge has a super-thick gloss formula, but I have not worked with it before.
Step 8: Gild The Edges Optional, But Gorgeous!)
Here’s where you have a choice, and both options are beautiful:
- Option A: Stop here. Your magnets are already lovely with just the varnish, all glossy and protected. Honestly, they look wonderful this way.
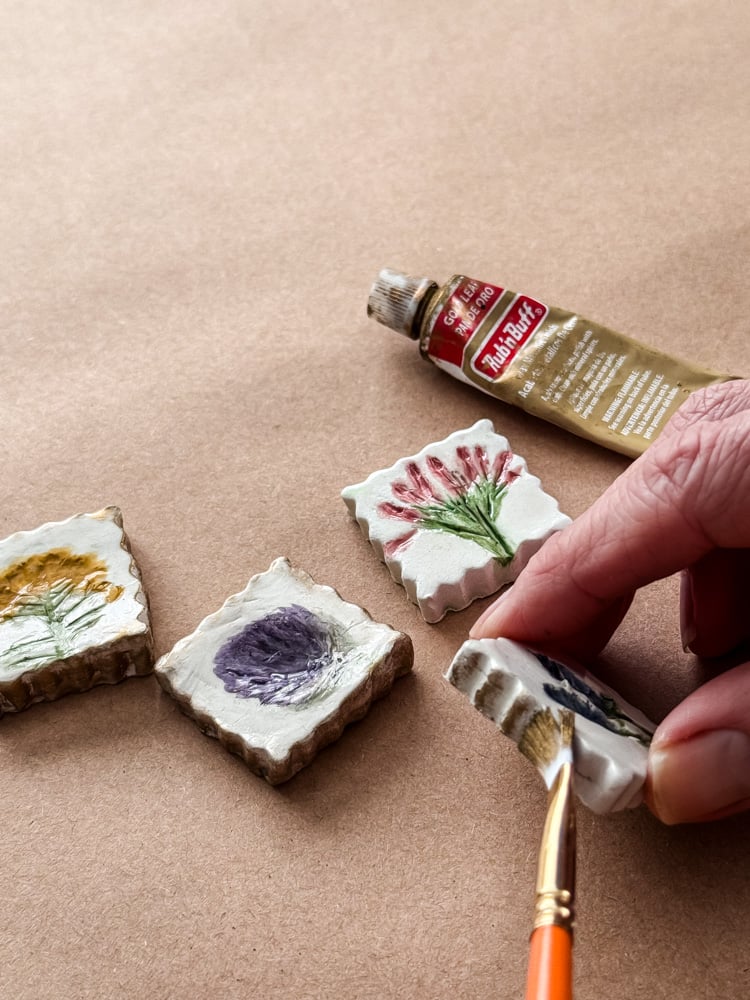
- Option B: Add a touch of gold. This is my favorite part.
I am a little obsessed with Rub ‘n Buff. It’s one of those products that feels like cheating because it’s so easy and looks so good. But if you’ve never used it before, here’s what you need to know: it’s a wax, not a paint. A tiny, tiny bit goes a long way.
Here’s how I did it:
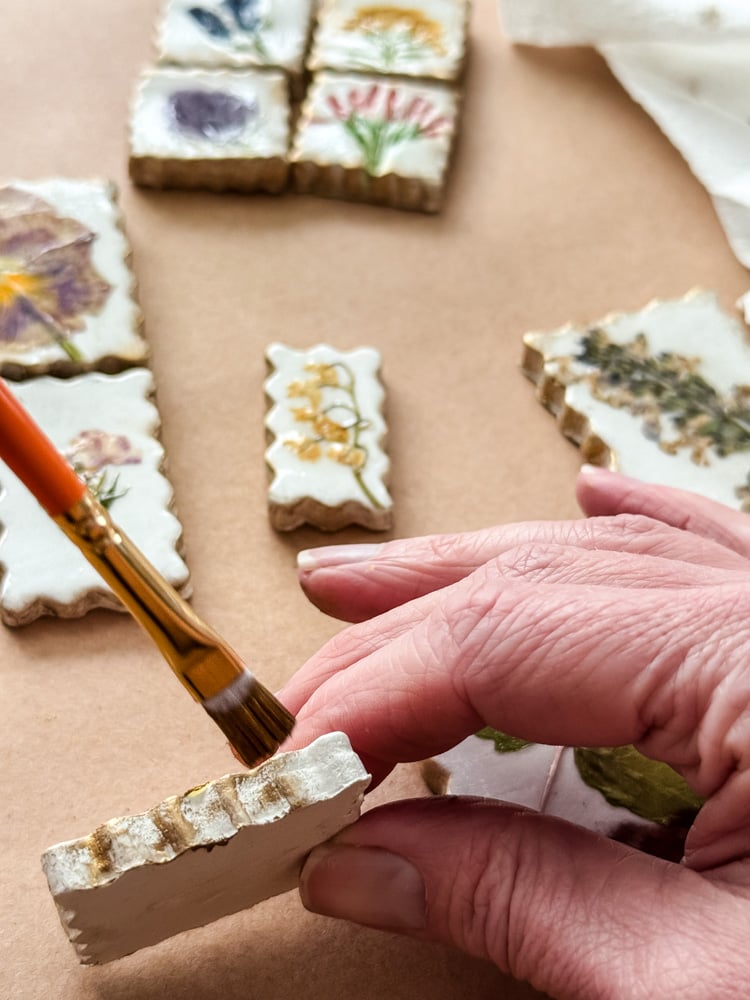
I squeezed a small dab onto a paper towel-and I mean small, about the size of a pea- and ran a small paintbrush through it. Then, working on one magnet at a time, I brushed the gold along the ridges on the sides, letting it catch on the texture.
Then came the magic part: I gently feathered the brush from the bottom of the magnet to the top, barely touching the surface. This creates the most beautiful aged, burnished effect—like antique gold leaf, but without the fuss or the price tag.
That thin line of gold catches the light and gives the whole piece an elevated, finished look. It adds dimension and makes something handmade feel heirloom.
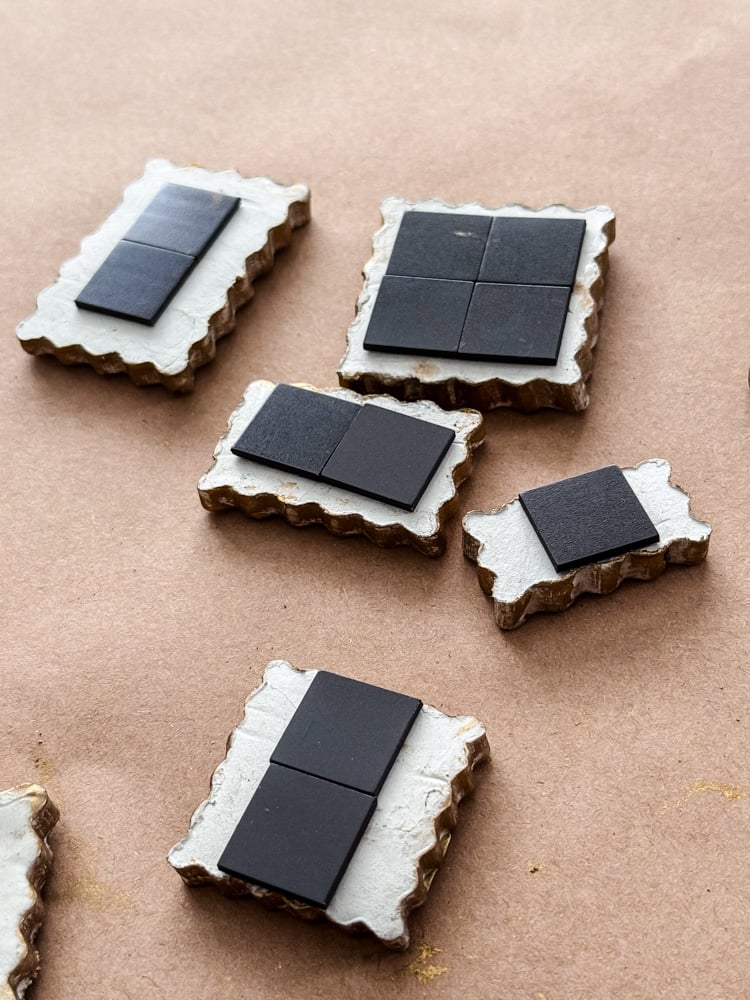
Step 9: Add The Magnets
We’re at the finish line! Now it’s time to actually make these clay beauties magnets.
I flipped each clay shape over so the back was facing up. Then came the easy part: self-adhesive magnets. No glue, no waiting for anything to dry-just peel and stick.
Here’s the trick: depending on the size of the clay piece, I added 1, 2, 3, or even 4 magnets. The tiny squares? One magnet was plenty. The larger ones? A few extras ensure they stay put without sliding down the fridge.
I love these small square magnets because they have such a low profile. They don’t create a gap between the clay and your surface, so your magnets sit flush against the fridge or memo board-no wobbling, no awkward tilt.
Just peel off the backing, press firmly into place, and let them adhere for a few minutes before sticking them up. That’s it!
How to Use Them
These little magnets are tiny, but they have so many lives to live:
On your fridge, obviously. Every time you reach for the milk, you’ll catch a glimpse of your garden looking back at you.
On a magnetic board in the kitchen, office, or entryway. They add such a sweet, personal touch.
As gift toppers. Attach one to a wrapped package, and it becomes part of the present-a little something extra that keeps on giving.
In lockers or cubicles. A tiny bit of garden beauty for desks and dorms.
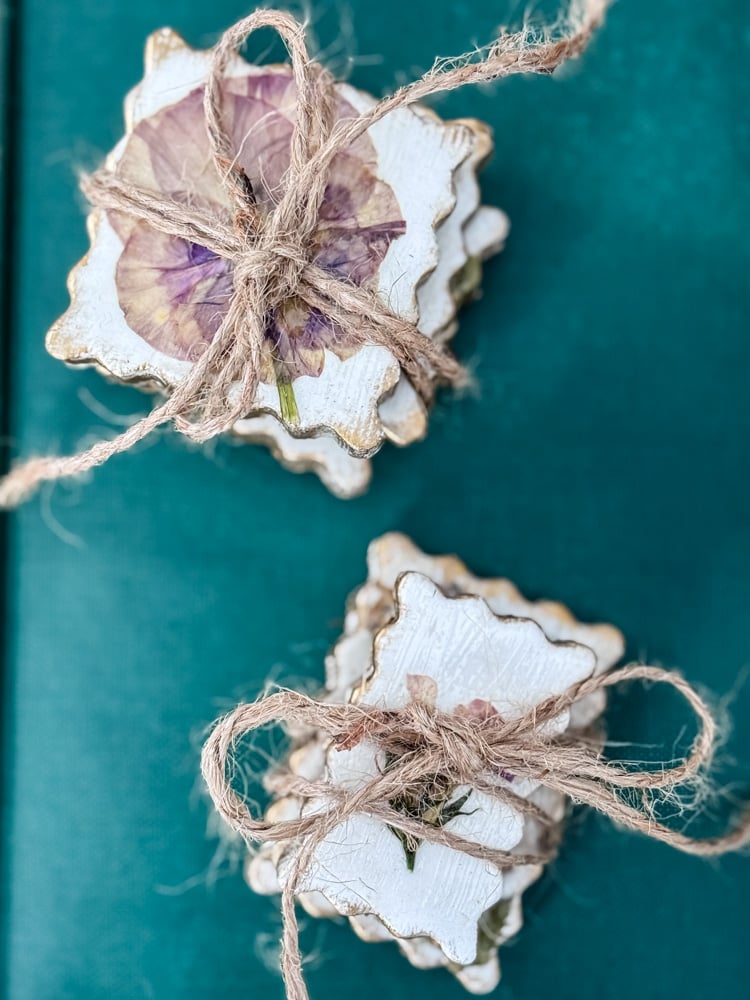
Give them as sets. Tie a few together with twine, pop them in a little box, and suddenly you have the sweetest hostess gift or stocking stuffer.
And my favorite idea: bridal shower favors! Imagine little magnets made with a variety of pressed flowers, or simply in colors that match her wedding palette. Tuck one into a pretty box for each guest, and you’ve given something personal, handmade, and lasting. How lovely to have a piece of the celebration living on someone’s fridge for years to come. Plus, you can make lots of magnets for not that much $$.
Shop The Supplies
I have them all gathered in my Amazon store
Final Tips From My Workbench
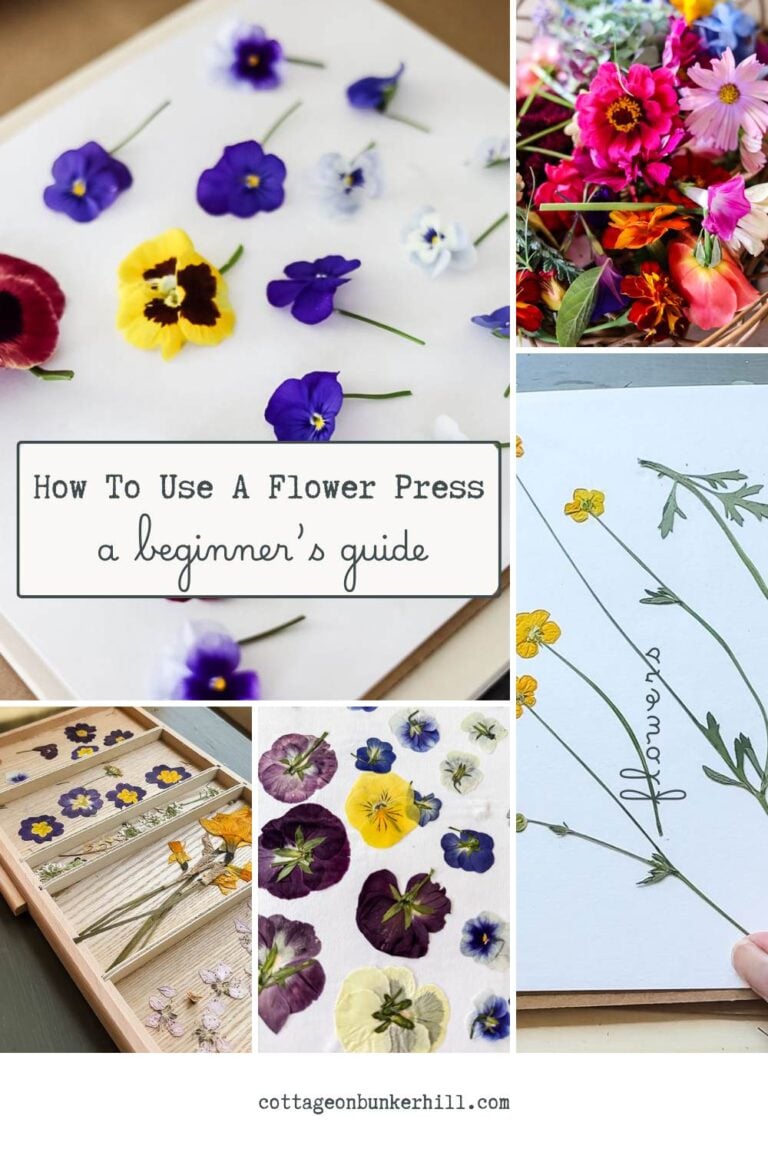
- Press your own flowers. It’s easy, free, and makes the project deeply personal. I’ll teach you how to do it!
- Match your paints to the real thing-or don’t! There’s no rule that says lavender has to be purple.
- Rub ‘n Buff is worth it. A tiny tube lasts forever, and that gold edge makes everything look intentional.
- The bamboo stake trick works. I’ll never freehand-roll clay again.
- Don’t rush the drying. Two days felt like forever, but impatient clay cracks. Let it be!
A Garden, Preserved
There’s something quietly magical about opening your fridge and finding a piece of your garden looking back at you. A pansy from last spring. Lavender from July. A tiny fern from that shady walk you took when you needed to clear your head.
These little magnets hold all of that.
They’re small enough to decorate in an afternoon, but meaningful enough to become tiny heirlooms. Give them as gifts. Tuck them into packages. Save them for bridal showers. Or just keep them all for yourself—I won’t tell.
Every time I look at mine, I’m reminded that the best projects aren’t always the biggest. Sometimes they’re the ones small enough to hold in your palm, made from flowers you grew yourself, pressed and preserved, and turned into something that lasts.
Now it’s your turn. I’d love to see what you create! Send in your photos to me cottageonbunkerhill@gmail.com to be featured in the Reader’s Spotlight page
xo, Jennifer

Love Flowers? Me too
Dried & Pressed Flowers
check out some of my favorite tutorials:
Love projects like this? Don’t miss out! Join my newsletter family for more cozy, budget-friendly DIY ideas delivered right to your inbox. You’ll get exclusive tips, early access to tutorials, and all the inspiration you need to make your home feel handmade and heartfelt.


Oh boy Jenn
The air dried magnets are adorable. I have two young girls come to my home weekly to craft and bake. This September we have a huge 50th Anniversary of the Harwich Cranberry Festival here on Cape Cod. A new addition is a “Young Entrepreneur “ area where kids can make and sell their creations. Guess what will be part of their projects??!! 👍👍 These will be a sure hit!!
Thank you for the brilliant idea!
Kathy 😊
Oh Kathy, I love that!! You have to send me pictures. I wish I lived closer to you because I would be there for sure!
These are absolutely beautiful and I can’t wait to take my daughter out once spring arrives, to look for flowers to press! These remind me of delicate British cookies that you indulge on while you sip warm tea. I think my kids will enjoy making these and giving them to their teachers and grandparents…and some for me, of course! Thank you for sharing!