

Today I am going to show you how to make yarn pumpkins using discount store foam pumpkins and some extra yarn. Make a few of these fuzzy, adorable yarn pumpkins to use in your Fall decorating this year!
Embrace the Cozy Charm of Fall with DIY Yarn-Wrapped Pumpkins
Learn how to transform ordinary foam pumpkins into yarn-wrapped pumpkins that capture the essence of fall. Whether you’re a crafting novice or a seasoned pro, this DIY project offers a and add a touch of homemade charm to your decor.
Have you seen all the adorable sweater pumpkins in the stores for Fall? I love how cozy and fuzzy they are!
I had a stockpile of different foam pumpkins that I bought at a discount store for $1 and a bunch of different yarn leftover from my DIY Yarn Tree project for last Christmas. I knew I could figure out a way to DIY yarn pumpkins.

This post may contain affiliate links, which means I may earn a small commission if you make a purchase through my links, at no extra cost to you. Read my disclosure policy here.
YARN PUMPKIN SUPPLIES
I’m going to make 3 different pumpkins for this project. For each pumpkin, I used a foam pumpkin, textured yarn, a yarn needle, a wood stem (Dollar Tree sells bags of them), and a hot glue gun.

SUPPLIES:
- Small Foam Pumpkins
- Assorted Textured Yarn
- Yarn Needle
- Wood Stems
- Hot Glue Gun.
How To Make A Yarn Pumpkin
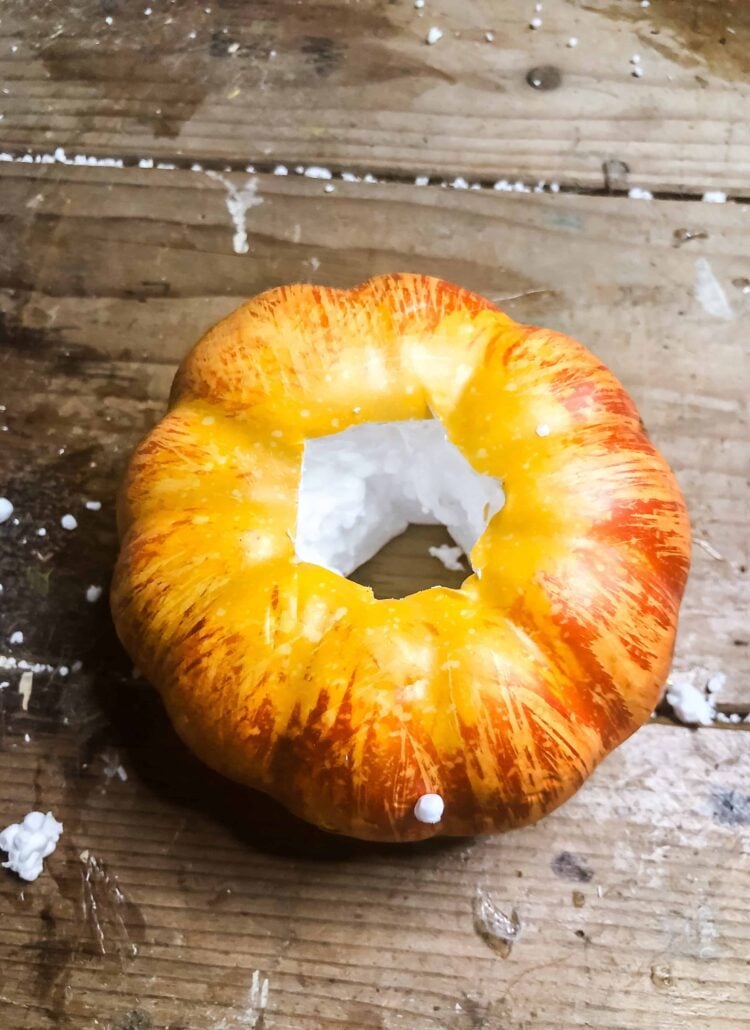
1. Hollow Out The Pumpkins
To start, I removed the fabric from my pumpkin and used a knife to hollow it out…you need space inside the pumpkin when you wrap the yarn around it.


2. Thread the Yarn Through Pumpkins
I cut a piece of yarn about 5 feet long and tied one end to the yarn needle. I simply weaved the yarn through the center and wrapped it around the pumpkin.
When I got to the end of the strand I hot glued the end to the pumpkin; I then cut another 5 ft length of yarn and repeated until I had covered the pumpkin.
It doesn’t matter where the piece of yarn happens to end because it will be hidden by the other strands of yarn.
I overlapped the yarn as I was wrapping it around the pumpkin to make sure the white of the foam pumpkin wouldn’t show through.

Here are the stages of threading the yarn through the pumpkin


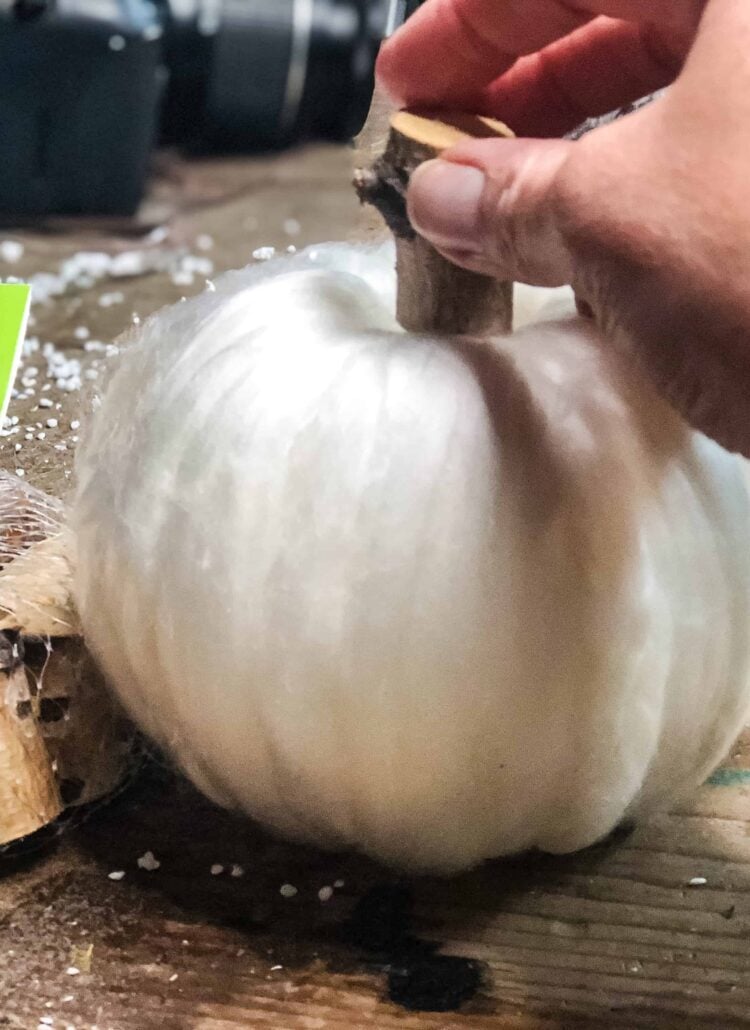
3. Add A Wood Stem

I hot glued a wood stem on top and pushed it down a little.
Pumpkin With Chunky Yarn
For the last pumpkin, I used a super chunky yarn. I didn’t even need a needle; it’s so easy to just thread it through the center by hand.


Aren’t they adorable? I nestled them in a wooden crate with some greenery and baby’s breath.

Another great thing about this yarn pumpkin project is that you can personalize it to fit in with your own home decor. They would look fantastic with different brown neutral yarns to fit in with more rustic Fall decor.


DIY Yarn Pumpkins
Learn how to transform ordinary foam pumpkins into yarn-wrapped pumpkins that capture the essence of Fall
Materials
- Foam Pumpkins
- Asst. Textured Yarn
- Hot Glue
- Wood Stem (Dollar Tree)
- Yarn Needle (if using thinner yarn)
Instructions
If your pumpkin is covered in fabric, remove it.
Hollow out the middles of the foam pumpkins. There needs to be space inside the pumpkin when you wrap the yarn through it.
Cut a piece of yarn about 5 feet long and tied one end to the yarn needle. Weave the yarn through the center and wrapped it around the pumpkin.
When you reach the end of the piece of yarn hot glue the end. (hide it behind another piece of yarn) Cut another strand of yarn and repeat until the pumpkin is covered.
Hot glue a wood stem to the top once the pumpkin is covered in yarn.
Notes
If you are using chunky yarn then you won't need a yarn needle and will be able to thread the yarn through with your fingers.

Cozy Fall Finds

Are you looking for more pumpkin ideas to make this Fall? Then check out this collective of 11 pumpkin projects that I have made.
xo, Jennifer

Fall Inspiration
decorating + DIY ideas:

PIN FOR LATER!


These are ADORABLE!! I have a lot of yarn around so now I’m going to keep my eyes open for potential pumpkins like you did. Love it!
Thanks Allison!I just found another container of pumpkins when I was organizing my storage bins…I can send you some!!!
I love crafts like this!
Me too!
So cute. I love these. Be sure to look for your feature tomorrow on Charming Homes & Gardens.
Rachel
OOOhhh, thanks so much!! I’m going to close my computer right now so I can end my day on a positive note!!
I love these! I did something similar at AR Workshop using chunky knit yarn, but I really like your variations. I had no idea you could buy the wood stems, I’m usually out hunting in my yard for sticks, LOL! Thanks for sharing!
Thanks Misty!! I know, I love those little wood stems…I still grab sticks from the yard for tiny pumpkins.
Jennifer, your pumpkins are adorable! I love how you styled them! I’ll have to look for those stems at the dollar store. Pinned and shared to my FB page!
Thanks so much Cindy!! I really appreciate it!!
What a great project! I’m not much a DIYer, but I’m inspired to try. Love the stems. Just darling! xo
Thanks so much Juliet! I love the little wood stems too…saves me time trying to saw down a branch!!!
These are such a cute idea!
Thanks so much Stacy!!
These are so cute! I didn’t know that Dollar Tree had those stems! I am going to have to get some!
I know, right!! It’s one of those things that I’ll buy everytime I go!
Such a cute idea!
Thanks!! I think they came out cute too! I love Fall decorating!
This is fun! Love the texture!
Thanks Jeanne!!
Thanks for the tutorial! I love all the texture on these cutie patootie pumpkins!
Thanks Jennifer!! I’m addicted to Fall decorating!
I am loving these! Thanks for sharing this process with us!
Thank you Kim!! They were fun to make…and after enjoying the summer it was nice to get back downstairs to my workshop!
I seriously LOVE these! They are so pretty and perfect for fall.
Thanks Mary Beth!! They definitely got me in the Fall mood!!
This is so beautiful! Thank you for showing how easy it is!
Thanks so much Linda!
Love the texture variety. Fun craft!
Thanks so much Linda!
These are adorable. I love them. I’ve got one of those pumpkins hanging out in my basement – I’m going to go find it. Thanks.
Thanks Carol! I bet we all have a stray one hanging out in the basement with a few of those plastic eggs!!