
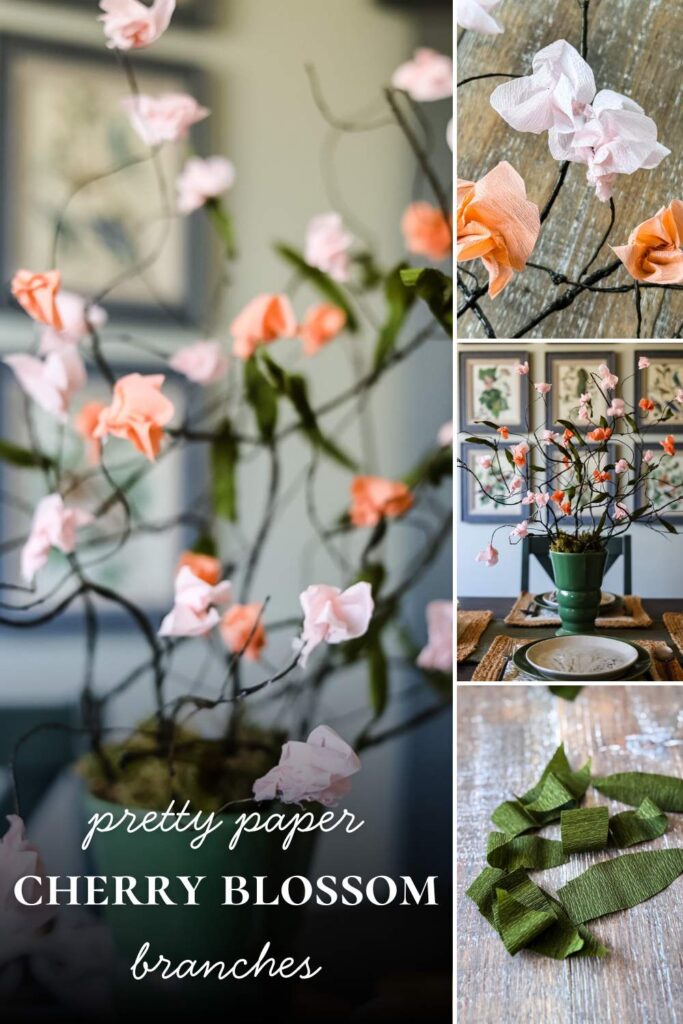
Transform bare branches into an explosion of springtime with this easy, budget-friendly DIY project! Using simple paper, a trusty glue gun, and a sprinkle of creativity, you’ll create the prettiest blossoms to brighten your home.
A few years ago, I first shared this tutorial using lightweight rice paper (or tissue paper) for quick, fluffy blooms that layered easily and were perfect for beginners, offering fast results. This year, I gave the project a fresh 2026 twist by switching to soft pink crepe paper for a more realistic cherry blossom vibe. The crepe paper brings beautiful texture and natural crinkles that make the petals look and feel so much more lifelike. The best part? You can customize it to fit your style with any color of paper you love.
Once you learn the easy technique, make a rainbow of branches if you want! And materials are minimal: just branches (I used bendable artificial ones, but foraging for small branches outdoors makes it even more budget-conscious), paper, and a glue gun.
Bonus: I’ve also added a simple crepe paper leaf DIY section to this tutorial.
Welcome! I’m Jennifer, and I’ve been sharing my home’s journey since 2019, always with a focus on budget-smart and achievable style. If you love the charm of New England but need it to work for real life, you’re in the right place. I break down my projects to help you create a home that tells your story, without the overwhelm.
Instant Spring Decor: Make These Pretty Paper Cherry Blossom Branches
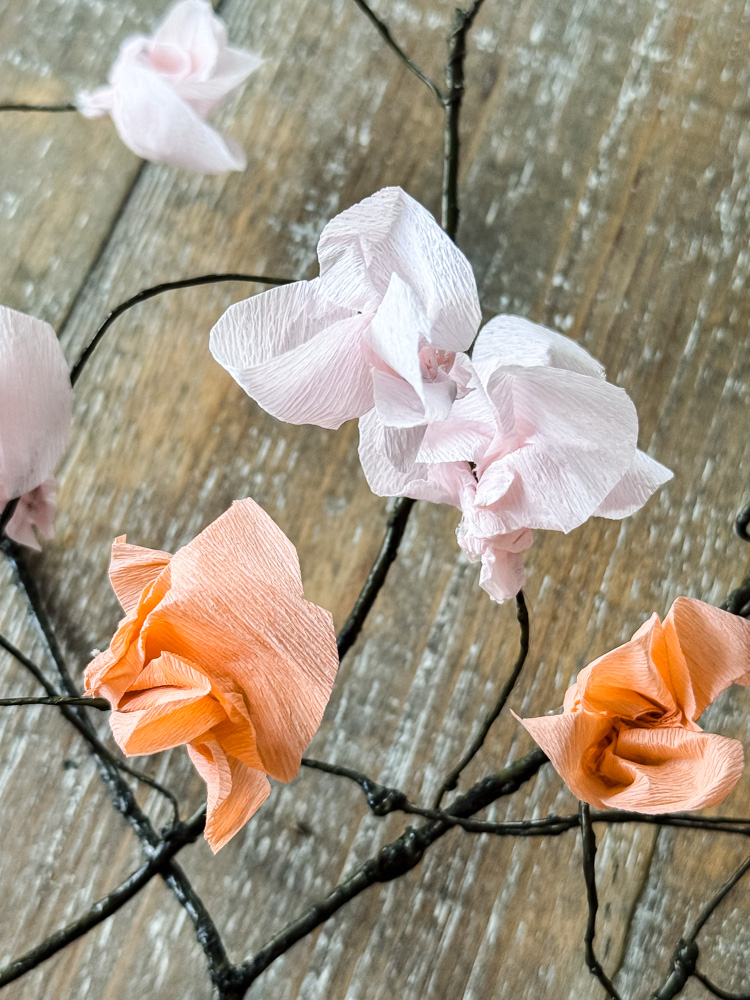
Here’s my honest take after testing both: Crepe paper delivers gorgeous, dimensional texture that’s worth the extra effort, but it’s thicker than rice or tissue paper, so layering multiple sheets isn’t practical. Instead, I cut each scalloped petal layer individually, which took a bit more time, but the crinkly, realistic payoff was absolutely worth it. Whether you’re going for quick and fluffy (rice/tissue) or richly textured (crepe), this project is forgiving and fun either way.

This post may contain affiliate links, which means I may earn a small commission if you make a purchase through my links, at no extra cost to you. Read my disclosure policy here.
My Latest Video
Materials To Make Paper Blossom Branches

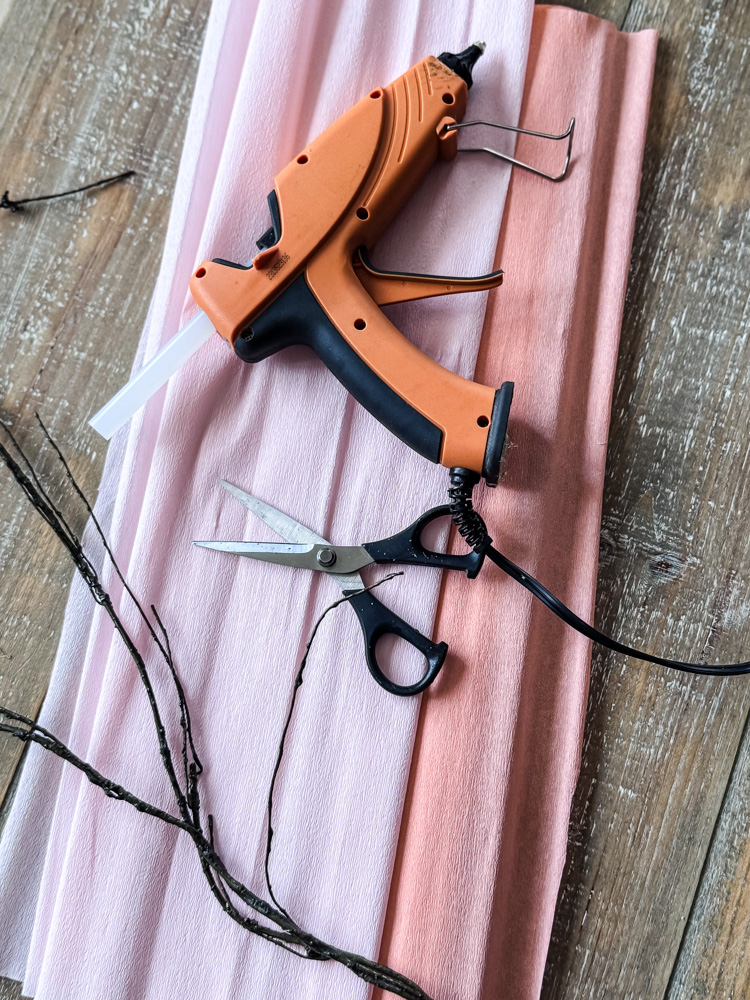
Materials for this Project
- Bendable Branches
- Tissue Paper (this would be so pretty!)
- or Rice Paper
- Hot Glue Gun
- Scissors
- Ruler
- For Crepe Paper Cherry Blossoms: Crepe Paper Sheets
Choose whatever color of tissue, crepe, or rice paper you are drawn to for your set of flowering branches. When I first made these blooming branches, I already had this rice paper in my craft supply stash, and wanted to use up what I had on hand (free option is always the best!)
If it is easier for you to find tissue paper, white tissue paper will get you the same look as mine. But I love this champagne shade of tissue paper; it looks similar to cherry blossoms.
Making the Paper Blossoms with Crepe Paper
The basic process for using crepe paper or the thinner tissue/rice paper is the same. First, I will show you the latest crepe paper cherry blossom branches that I made.
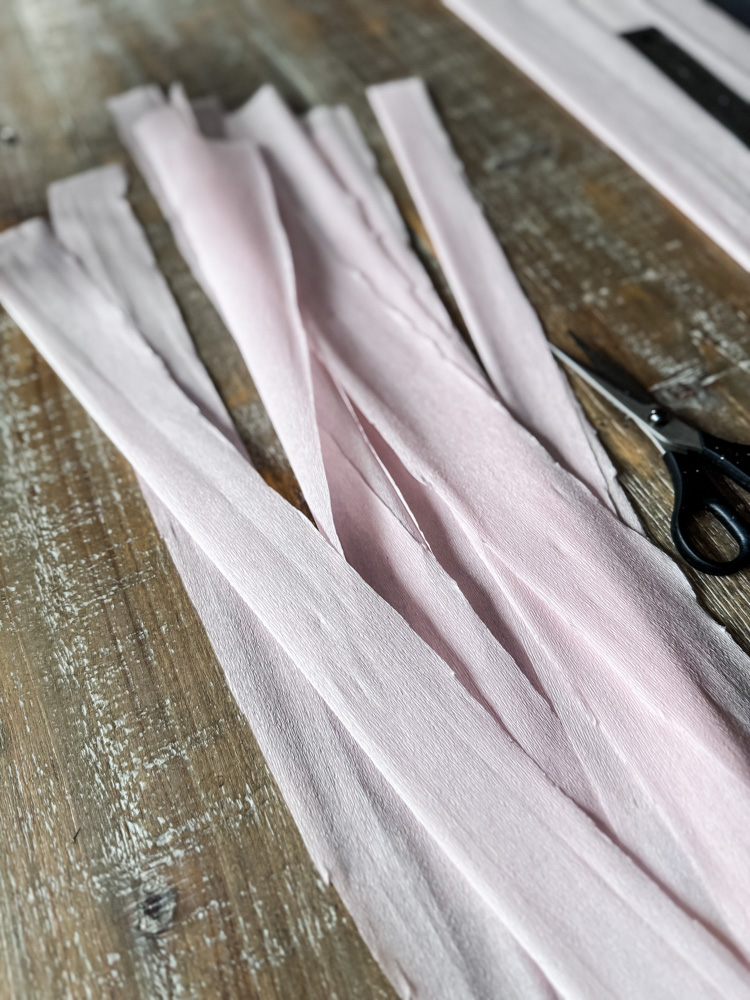
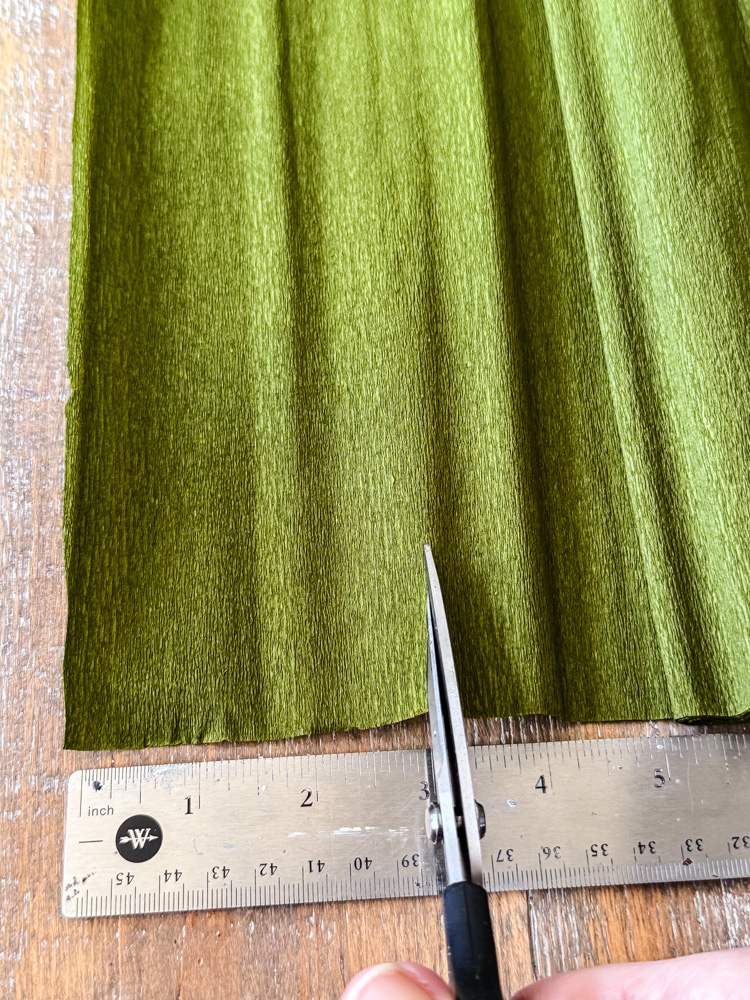
Step 1: Cut Paper Strips
For my cherry blossom version, I used crepe paper in two delicate colors: a soft pink and a very soft peach. This creates a lovely, natural variation in the flowers. My crepe paper sheets are 20 inches wide. I cut my strips to a width between 1.5 and 2 inches. This project isn’t about perfection, so don’t stress on this step; it’s nice to have a slight variation in flower size.
Step 1: Cut & Fold Paper Strips
- Cut your crepe paper into strips that are 1.5 to 2 inches wide across. If using 10-in wide paper, skip the next step.
- Fold each 20-inch strip in half lengthwise & cut at the fold.
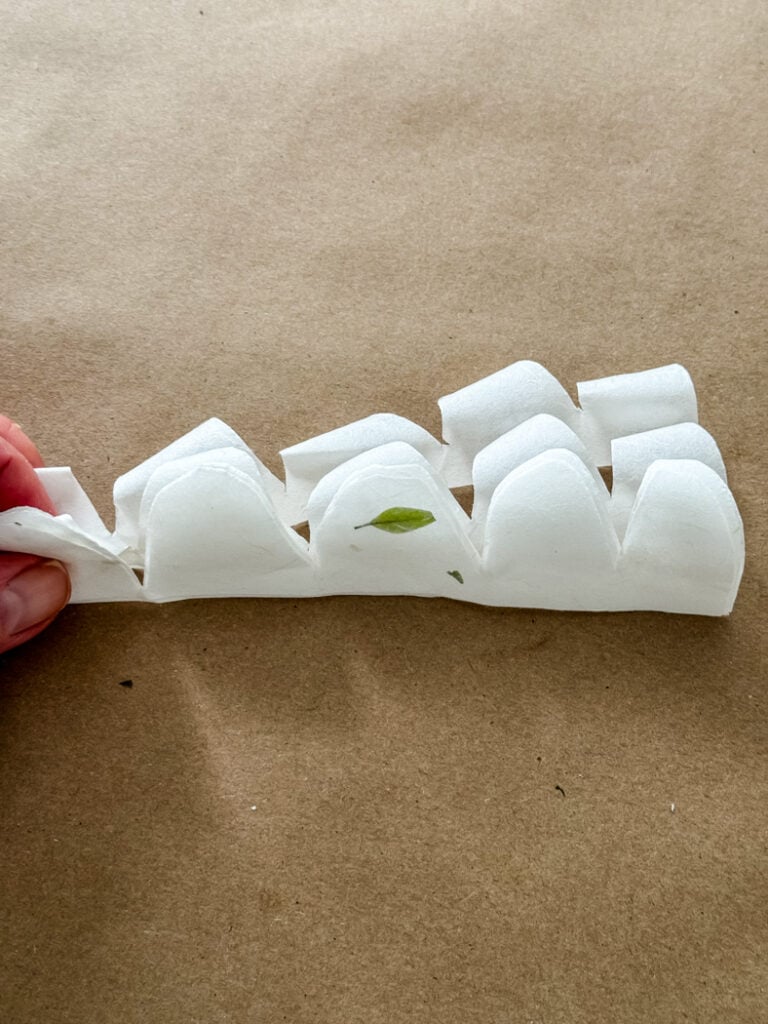
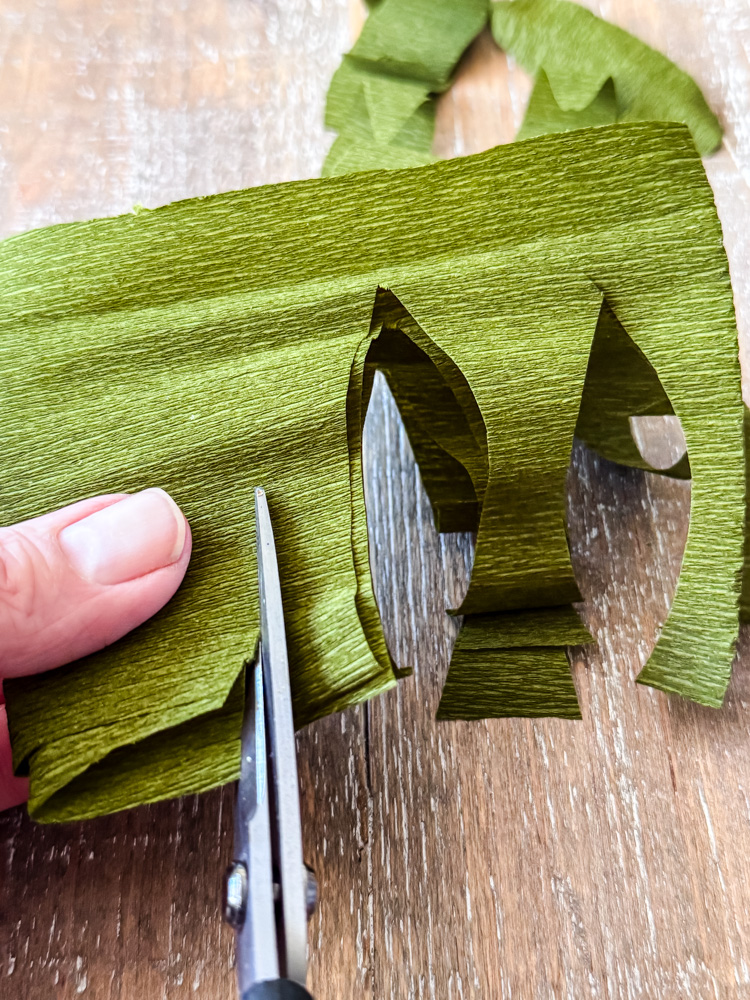
Step 2: Scallop The Edges
This is the only step that’s a little different from using tissue paper. Because crepe paper has more texture and thickness:
- Work with one folded strip at a time. Unlike the thin rice paper, it’s difficult to layer and cut multiple sheets of crepe paper cleanly. Two was the max for me
- Using sharp scissors, cut 5-6 gentle scallops along the unfolded, raw edge of your strip. These will become your petals. Don’t worry about perfect uniformity!
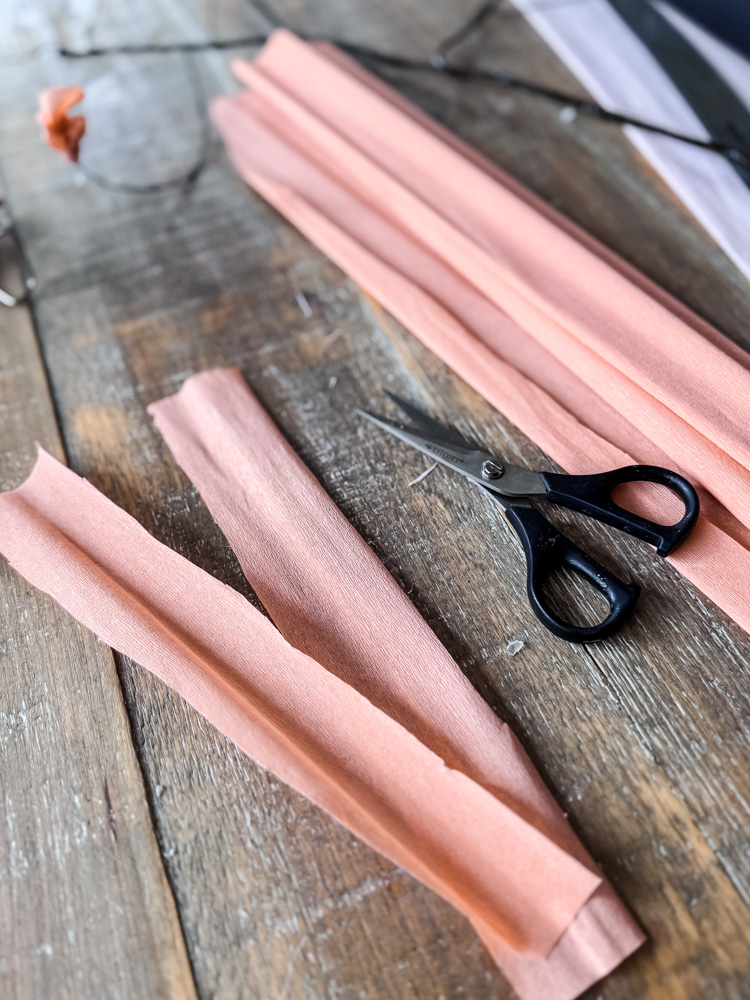
Step 3: Form The Flowers
- Start Pleating: Hold one end of your folded paper strip. Begin folding the paper back and forth in small, accordion-like pleats, gathering it around your fingers.
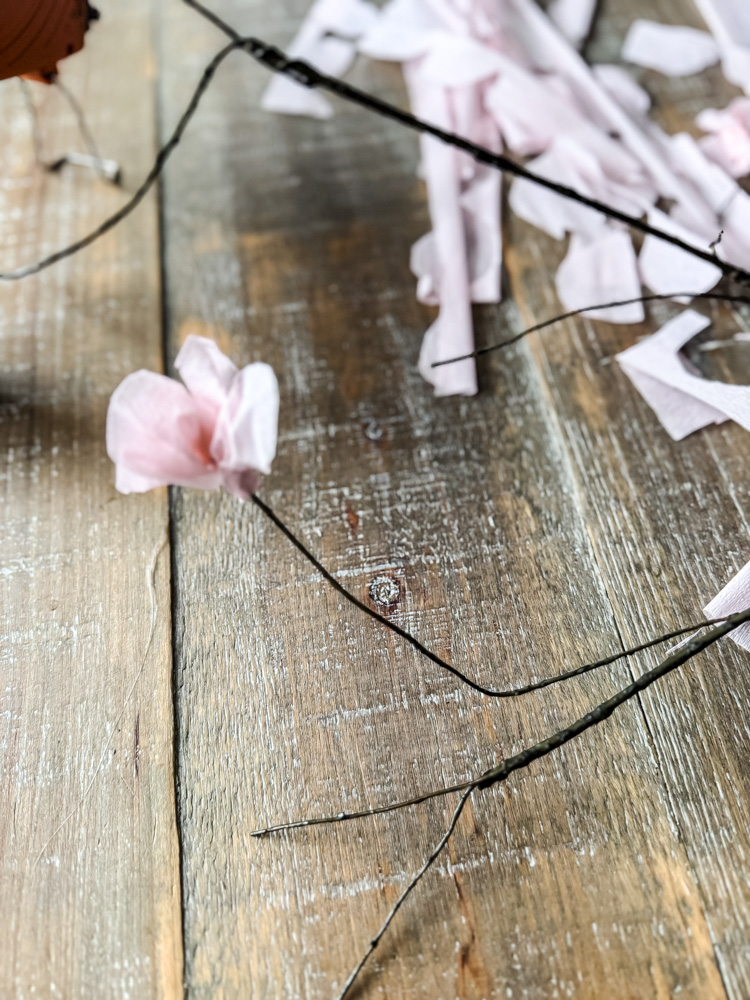
- Secure the Base: Once the entire strip is gathered into a ruffled bundle, firmly twist the straight, bottom edges together. This creates the flower’s center & stem (this is where we will glue to the branch next).
- Fluff the Blooms: Gently separate and fluff the scalloped “petal” edges with your fingers to open up the blossom.
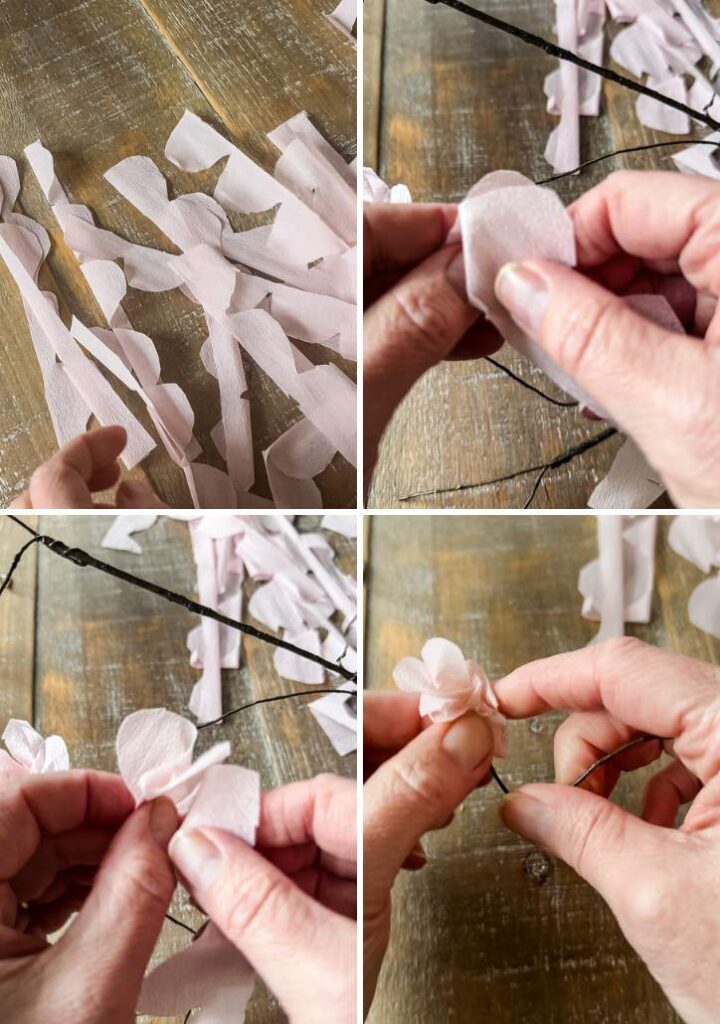
Step 4: Assembling The Cherry Blossom Branches
With your hot glue gun ready, add a very small dot of glue directly to the end of a branch. Quickly press the twisted base of a paper blossom into the glue and hold it for a few seconds until set.
My workflow is to make each blossom and glue it to the branch immediately, while the paper is still easy to shape.
- Prepare the Glue: Have your hot glue gun heated and ready. Remember: use minimal glue. A small, pea-sized drop is plenty. Too much will seep through the paper and look messy.
- Attach the Blossom: Place a tiny drop of glue on the very tip of your branch. Immediately press the twisted paper base of your blossom into the glue. Hold it securely for a few seconds until the glue sets. Always use silicone finger protectors to prevent burns!
- Pro-Tip for an Invisible Finish: For the cleanest look, apply the glue to the branch first, not the paper. This prevents glue from oozing out over the delicate petals. After attaching, you can gently pinch and fluff the base of the blossom around the branch tip to hide it completely.
**Always use silicone finger protectors to safely press the delicate paper onto the hot glue.**
My Finished Branch Formula:
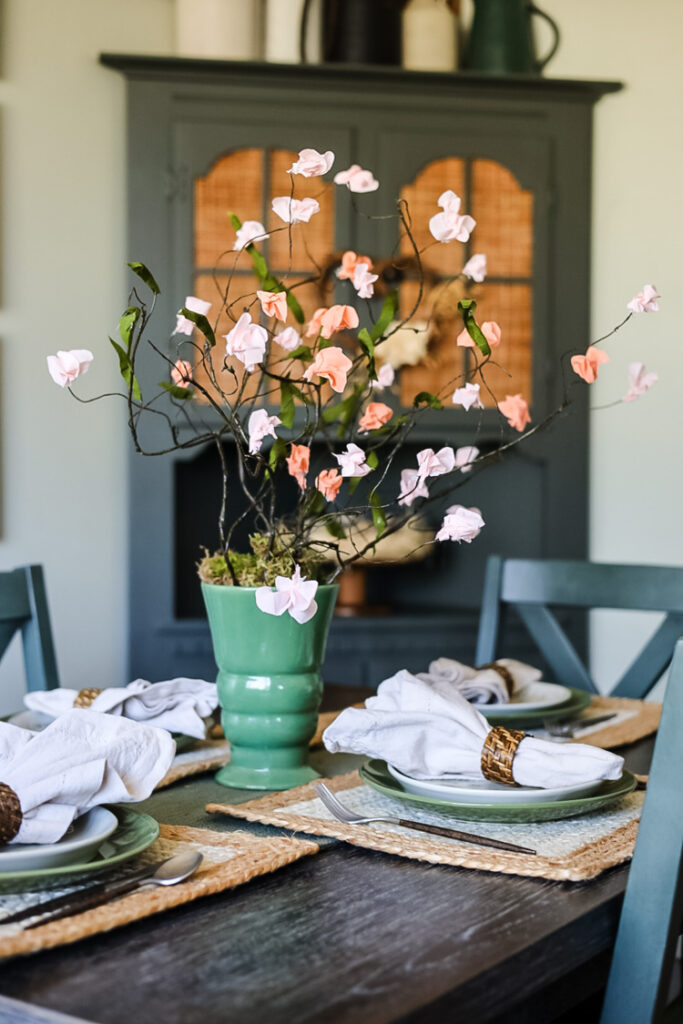
A Note on Styling & Color: For each of my finished cherry blossom branches, I used a mix of 7 pink and 3 peach blossoms. This creates a lovely, natural variation in color. I also left some of the smaller offshoots on the artificial stems empty, which helps the arrangement look more organic and less crowded.
Remember, this is your project! You can cluster multiple blossoms together at a branch tip for a fuller look, or keep it light and airy as I did here. This tutorial focuses on the simple, beginner-friendly method, but once you master the basic blossom, the possibilities are endless!
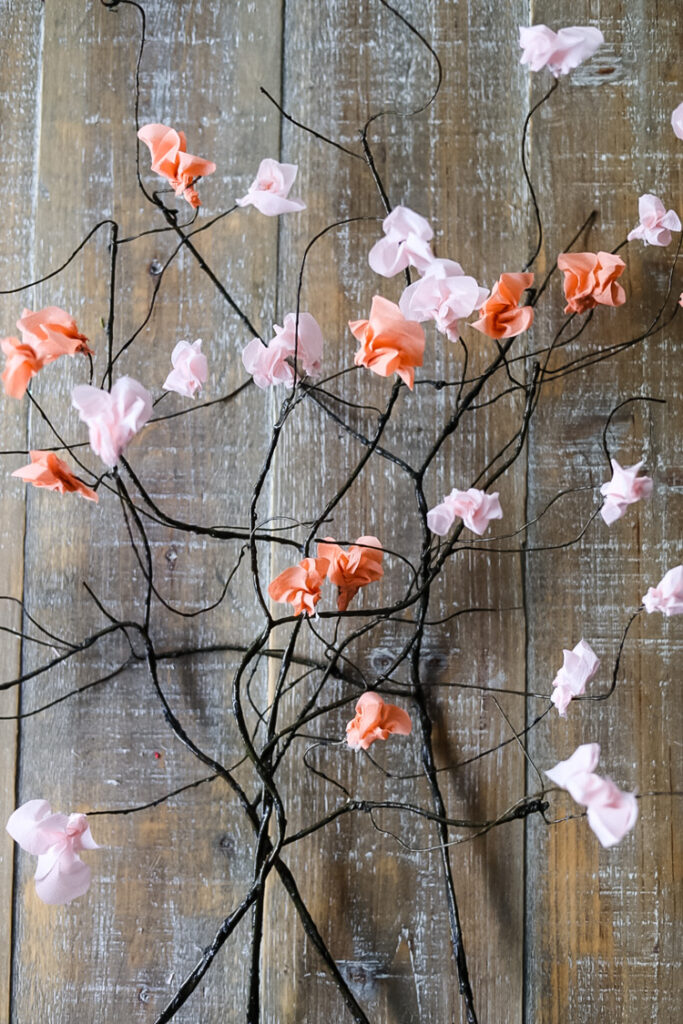
- Color Mix: I used 7 soft pink and 3 soft peach blossoms per main branch for a subtle, natural blend.
- Placement: I glued blossoms to the ends of the main stems and a few larger offshoots, leaving many of the smaller, delicate twigs bare. This creates balance.
- Your Turn: Feel free to adapt this! Create dense clusters by gluing 2-3 blossoms together at one point, or keep it minimalist. This tutorial gives you the basic skill. You decide the final style!
The Original Method: Tissue or Rice Paper
The new cherry blossom branches are made using the same foundational technique as my original project. If you have tissue or rice paper on hand, follow the same steps for cutting strips and creating scalloped petals.
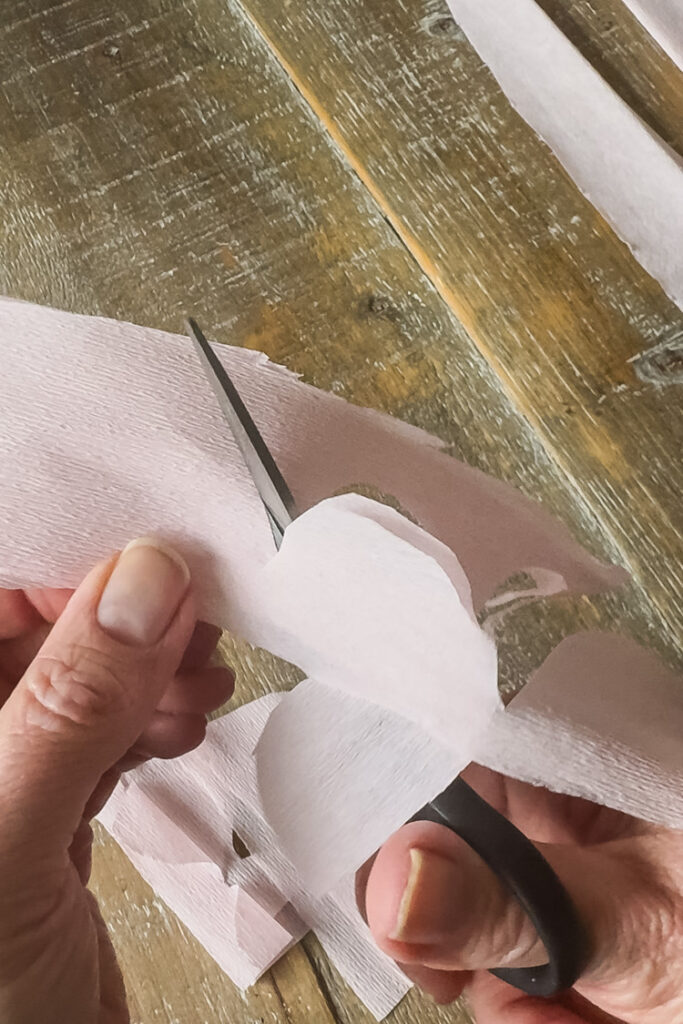
Step 1: Cutting The Scallop Edges


Once you have your paper strips cut, make scallops along one edge to form the petals. Both tissue and rice paper are thinner, so you will be able to layer a few strips together before cutting your scallops.
A good rule of thumb: for an 8-inch strip, aim for 5 scallops; for a 10-inch strip, aim for 6. Remember, they don’t have to be perfect!
- 8-inch paper strip = 5 scallops
- 10-inch paper strip = 6 scallops
Step 2: Curling The Edges
This step is optional but gives the finished blossoms a much softer, more natural look.

How To Curl Edges:
- Hold your scissors open. Place the paper strip between the blade and your thumb, just like you’re holding a ribbon.
- In one smooth, firm motion, pull the strip through while gently pressing the blade against it. This will gently curl the scalloped edge outward.
- A safety tip: I find this much easier and safer to control with a pair of blunt-ended kids’ scissors.
The quick, pulling motion is key-don’t try to saw back and forth.
Step 3: Form & Attach Paper Blossoms
Forming the tissue/rice paper blossoms and gluing to the branches is the same method that we used for the crepe paper cherry blossom branches.


1. Form the Blossom:
- Hold one end of your prepared paper strip (with scalloped edges).
- With your other hand, pleat the entire strip back and forth into small, accordion-like folds, gathering it into a ruffled bundle.
- Firmly twist the straight, bottom edges of the gathered paper together to form a secure base. This twisted part is what you will glue.
2. Attach to the Branch:
- Place a very small dot of hot glue onto the tip of your branch.
- Immediately press the twisted paper base of the blossom into the glue.
- Hold it in place for a few seconds until the glue sets. Use a silicone finger guard for safety
This core technique creates the foundation for endless variations in color, paper type, and arrangement style.
Adding Realistic Greenery: DIY Paper Leaf Branches
Materials for Paper Leaf Branches
- Green Crepe Paper
- Same Bendable Branches
- Scissors
- Hot Glue/Gun
- Silicone Finger Protector
A Late-Night Realization & A Morning Fix: Confession Time
I assembled my new cherry blossom branches yesterday, styled them, and snapped what I thought were the final pictures. But last night, I had a designer’s moment—the arrangement looked beautiful but just a bit… flat. It needed greenery! So first thing this morning, I set out to fix it with these simple paper leaf branches.
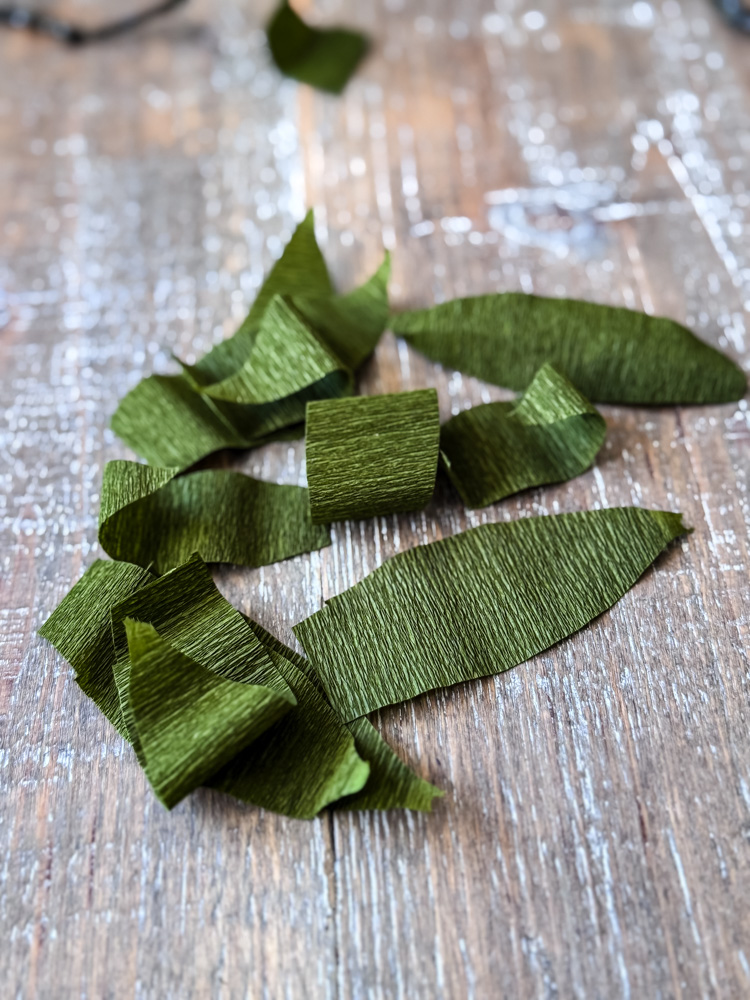
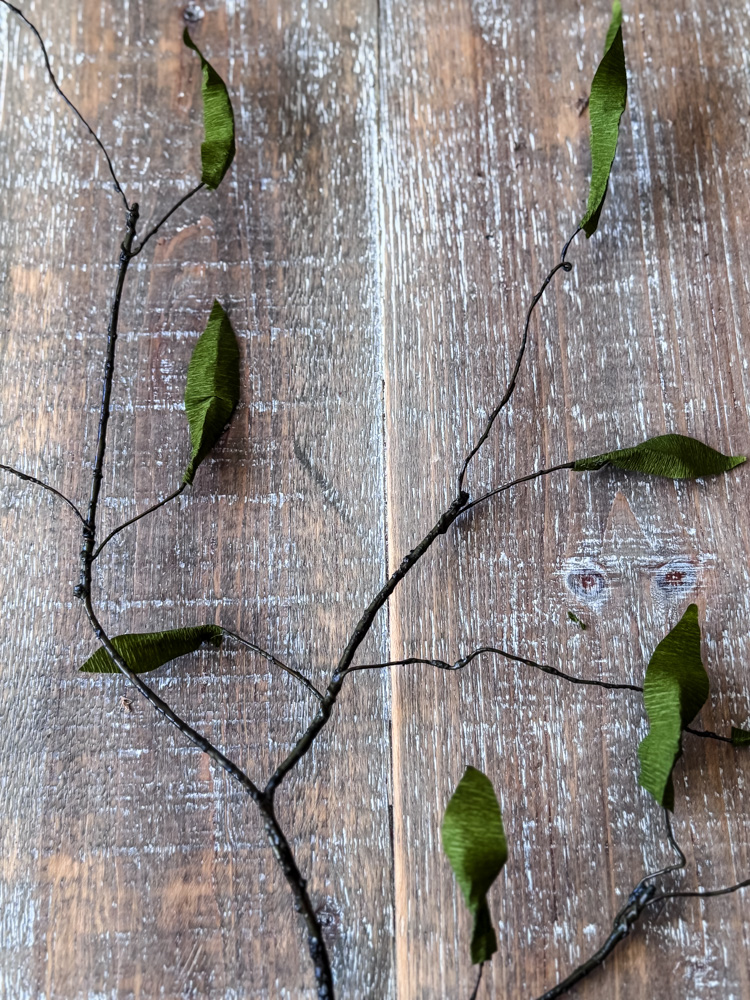
Step 1: Cut the Leaf Shapes
- Cut the green crepe paper into strips approximately 3 inches wide.
- Stack or fold the strips so you can cut multiple layers at once.
- Freehand cut simple, narrow leaf shapes from the strips.
- Don’t worry about perfection-variation looks more natural.
Step 2: Prepare the Leaves
- Gently fold each leaf in half lengthwise to create a central crease. This acts as the leaf vein and provides a strong folding point for gluing.
- You will need about 12 leaves per branch to create a full, realistic look.
Step 3: Attach The Leaves To The Branch
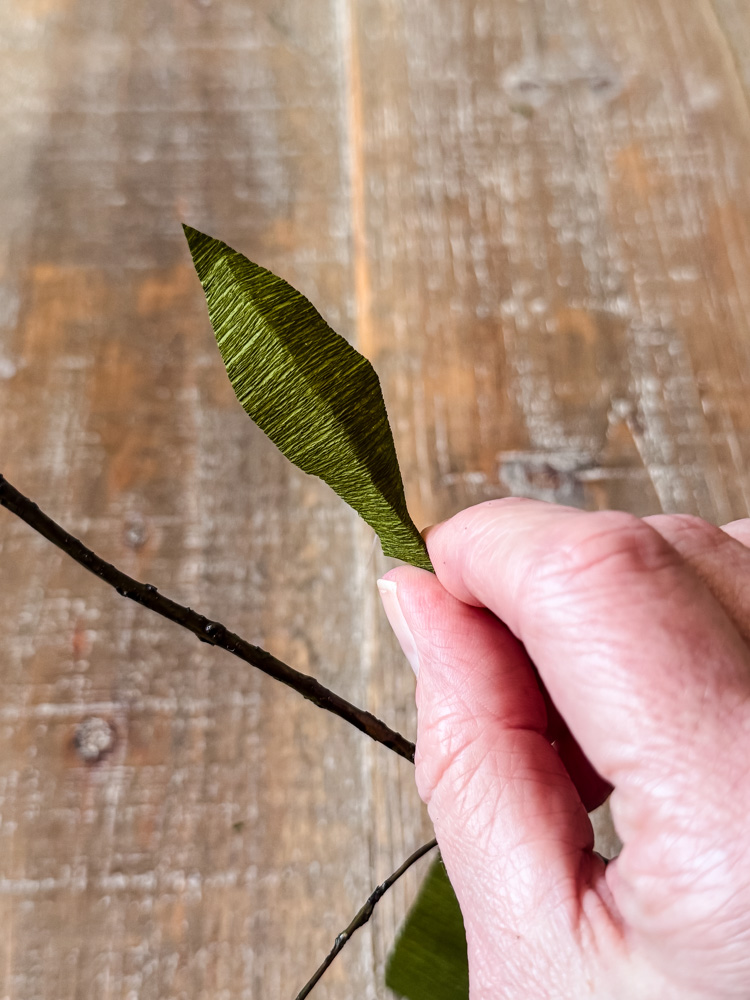
- Run a thin bead of hot glue along the final 1-2 inches of a branch tip.
- While the glue is still hot, carefully press the center crease (the “vein”) of a leaf directly onto the glued section of the branch.
- Immediately and gently shape the paper with your fingers to curve the leaf, creating a natural, dimensional shape.
- Repeat, working down the branch and varying the angle of the leaves, until you achieve your desired fullness.
Finished Paper Leaf Branch
Each main branch on the faux willow stem gets one full-sized leaf. To ensure the smaller side shoots don’t look overwhelmed, I scaled down their leaves by cutting straight across the bottom of the paper leaf to shorten them. This simple adjustment creates a much more natural, harmonious effect.
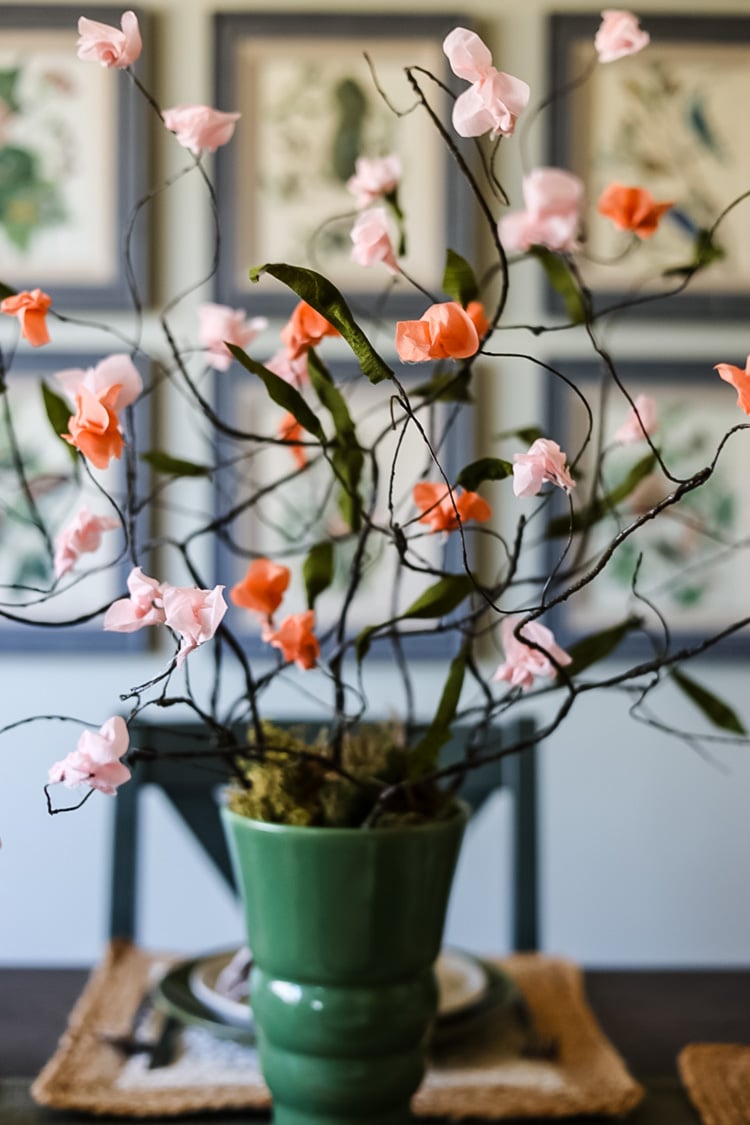
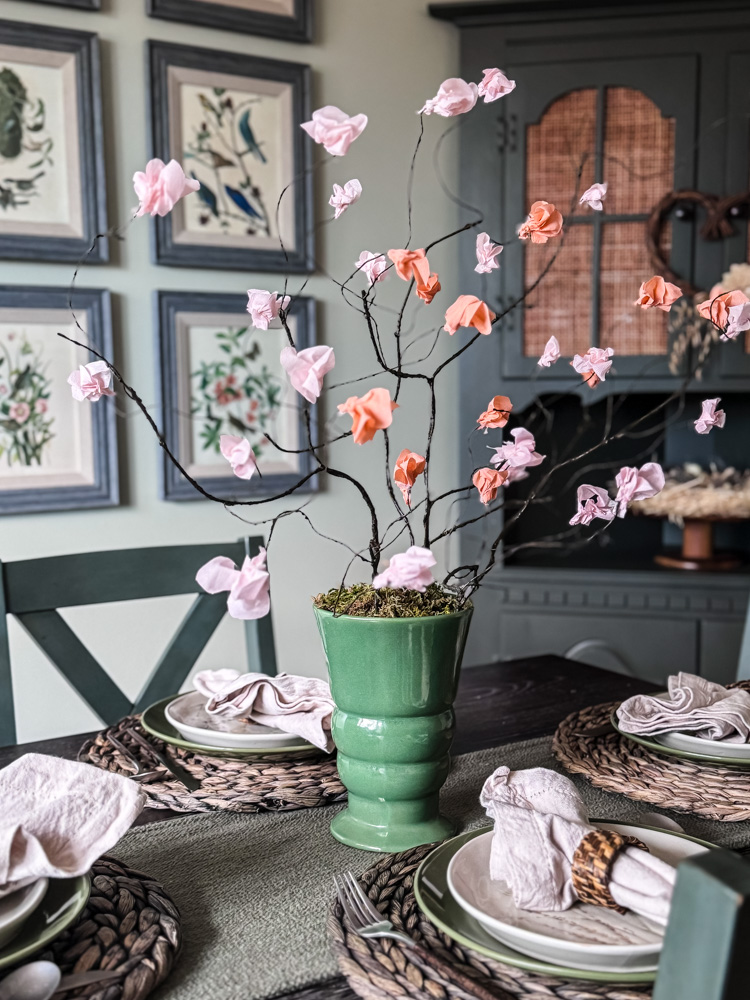
Styled For The Season: New Version
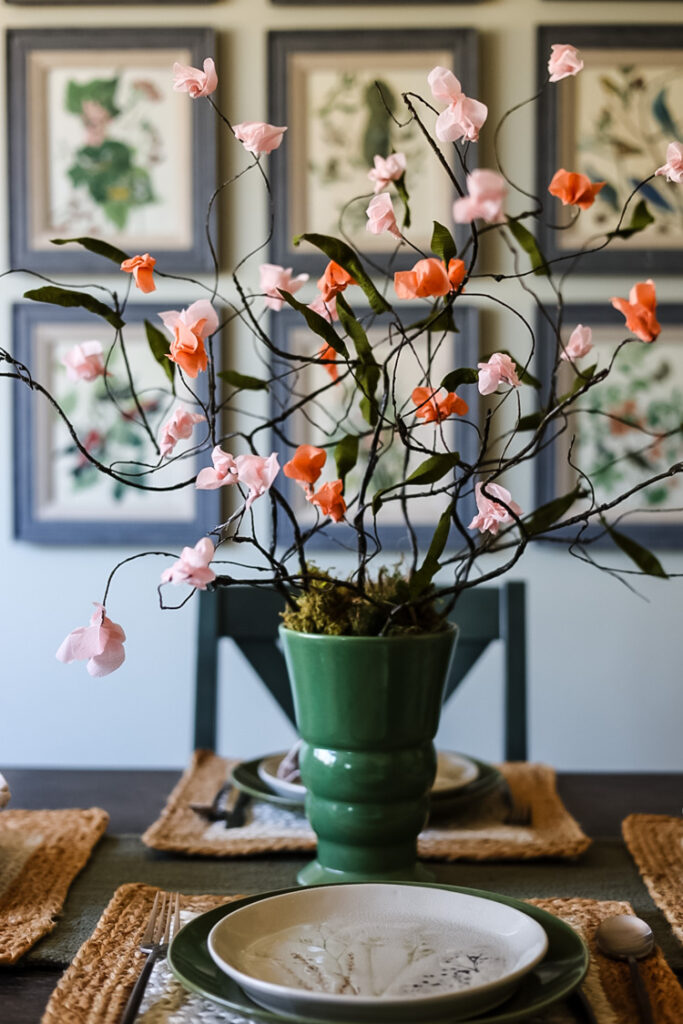
A DIY project isn’t truly finished until it’s styled in your home! To give you some inspiration, here’s how I used the cherry blossom stems with the green leaf branches to create a fresh Spring feel on my dining table ( a girl can dream about Spring, right?).
You can also grab my new bird digital downloads for free by signing up to become an email subscriber below(I promise I’m not spammy, just send out the latest!).
Pro-Tip for a Perfect Vase Arrangement
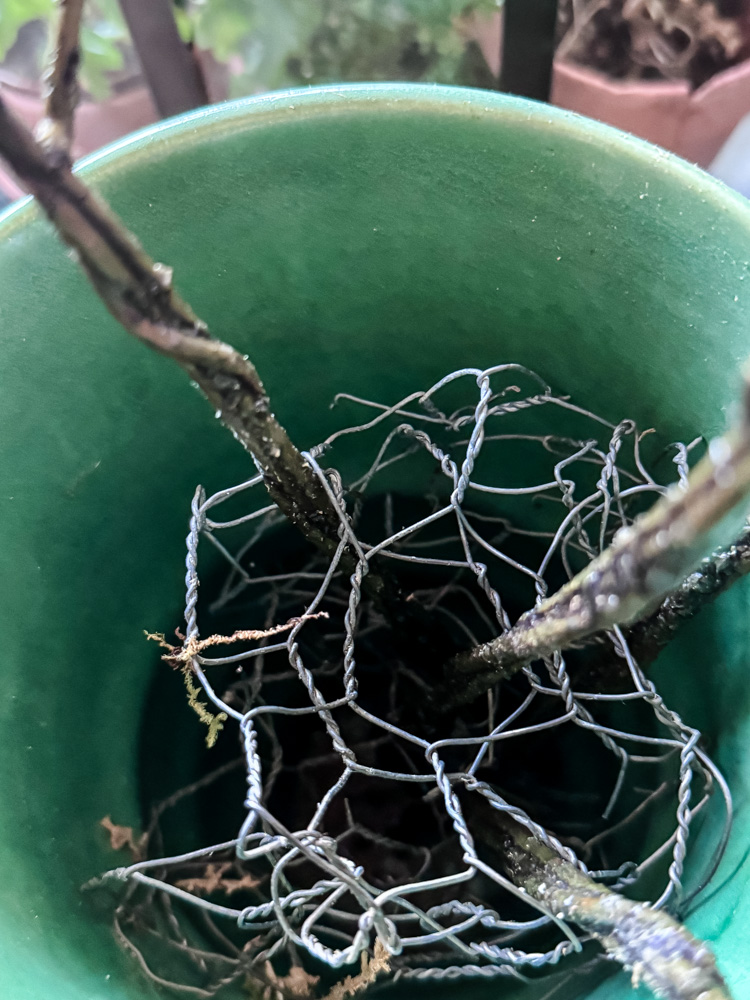
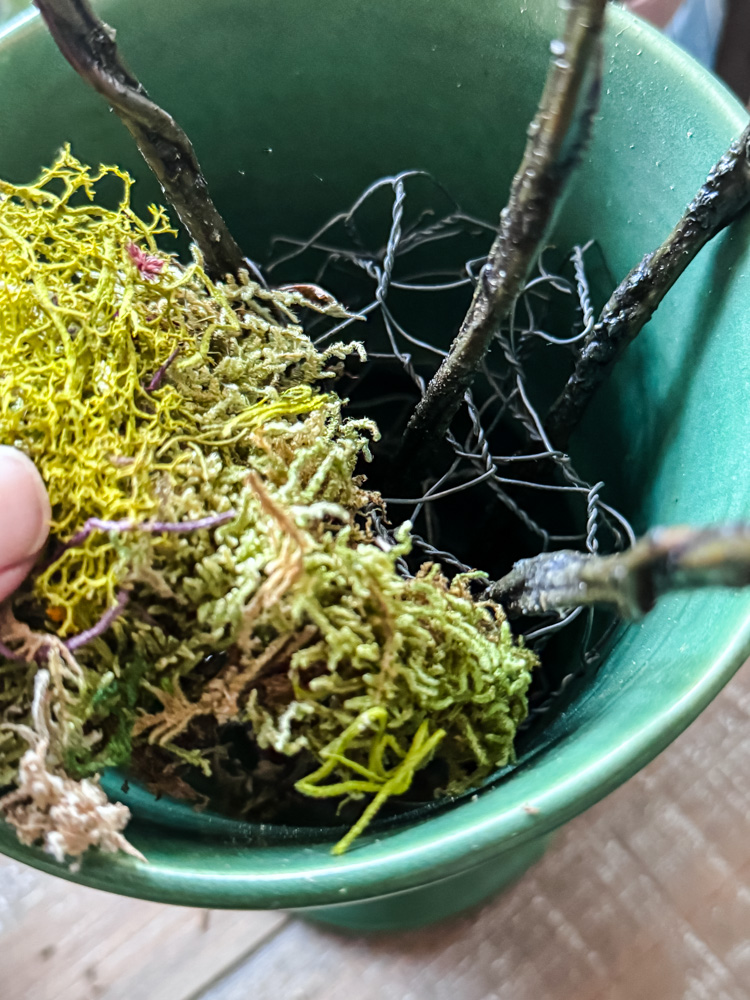
To keep your paper branches securely in place, use a classic florist trick: scrunch up a small piece of chicken wire and place it in the bottom of your vase. The stems will nestle right into it. For a natural finish on this faux arrangement, I hid the wire by tucking pieces of sheet moss around the top. This works wonders with fresh flowers, too!
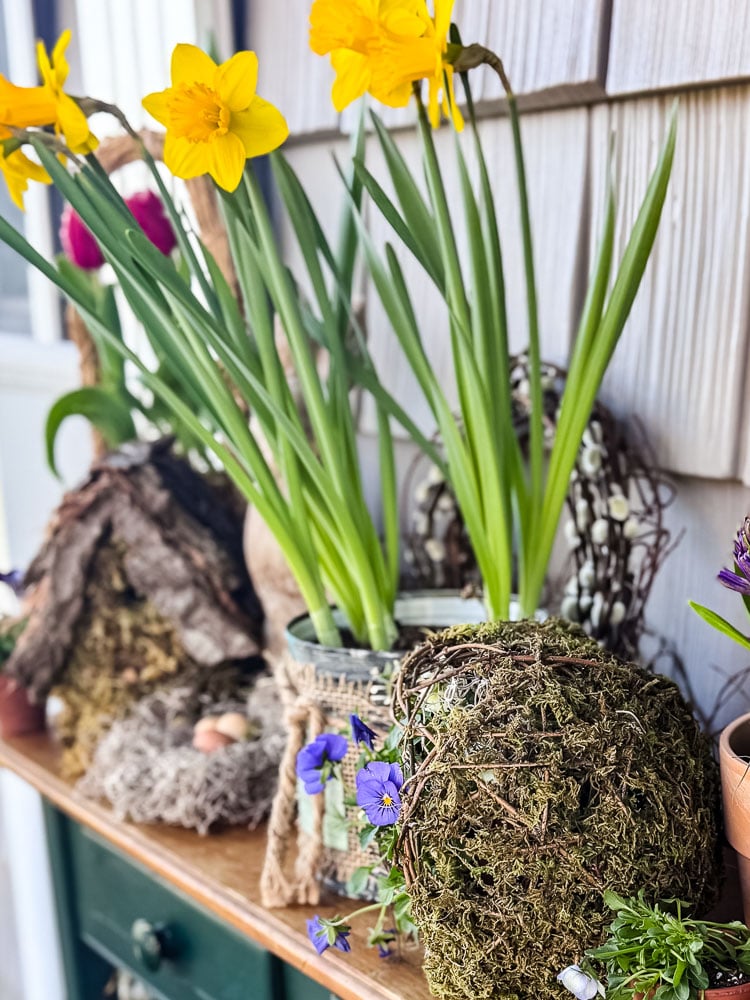
Finished Flowering Branches: Original Version

One thing I love about an easy DIY project like this is the immediate gratification! In under an hour, you can have a stunning set of branches ready to style. Whether you make the new cherry blossom version with crepe paper, the classic ethereal look with rice/tissue paper, or add realistic green leaf branches to complete the arrangement, the result is a custom piece of spring decor that lasts all season long.
A note on branches: There’s a big selection online, but I swear by these bendable willow stems (around $15 for a set of 10). They’re the perfect base-I’ve used them for everything from these paper blossoms to my Moss Branch DIY Project. Forget waiting for stubborn real branches to cooperate. These papery beauties are ready to brighten your home whenever you are, outlasting the last grumpy snow cloud of the season.

So grab your trusty glue gun and some paper that tickles your fancy—pink crepe, peach tissue, green for leaves-and let’s get crafting! Trust me, arranging your own faux blooms will lift your mood. And if anyone asks, just wink and say, “Shh, they’re not real… but aren’t they fabulous?”
See your projects featured! If you are inspired by this or any of my other DIY projects, I would love to see them and add you to the Reader’s Spotlight gallery. Send a photo to me at jennifer@cottageonbunkerhill.com
xo, Jennifer
Blossom Branches
DIY Project
Visit My Amazon Storefront


Jennifer
Such a cute idea. Love it.
* * * Dear Jennifer * * *
Your Cherry Blossoms are magnificent. Thank you for sharing your gorgeous flowers with us. Looking forward to purchasing supplies to start this wonderful project. You are so creative and inspirational. I’ll be designing my flowers with shades of pink and magenta, highlighted with just a bit of red. Sounds delicious. Yes.
Have a Beautiful Week,
Hugs, xox Madison
Sounds amazing!! Send me a picture (cottageonbunkerhill@gmail.com)
Jennifer, first I love that tissue paper. The flowers on the branches are so real looking. Gorgeous!
Thanks, Tam! Fun project!
Pinned! I want to make these for myself! They’re so sweet!
Make them and send me a pic!
This may be a perfect option to use for a wedding ceremony for my niece who will be home from Japan with her Japanese husband and family!
That would be pretty!!
LOVE!! Omg it looks SO high-end!! Such an EASY and pretty way to bring a subtle touch of Spring into the house. Amazing job, Jen!!
So easy to make too, Rachel!!