
Looking for a quick and easy Halloween decoration that’s both spooky and stylish? Look no further than this DIY floating ghost canvas. With just a few simple supplies, you can create this eerie yet enchanting piece of art to hang in your home
Spooky Simple: DIY Floating Ghost Canvas

Today I am going to show you a cute and easy Fall project, perfect for those of you that aren’t into spooky Halloween (like me!).
Not only is this one pretty simple, you will only need a few inexpensive supplies to create these floating ghost canvases.
This post may contain affiliate links, which means I may earn a small commission if you make a purchase through my links, at no extra cost to you. Read my disclosure policy here.
Materials Used

- Black canvas
- Cheesecloth
- Mod Podge
- Water
- Dried flowers
- Black craft paint
- Raffia (for bow)
Making The Ghost Canvas: Step-By-Step
This is a simple project but your fingers will get a little messy. Start with a 8×10 black canvas (I found mine at Walmart but most craft stores have them), if you can’t find a black canvas then you will need to paint a white one with black acrylic craft paint and let dry before starting this project.
Step 1: Cut The Cheesecloth

Cut the Cheesecloth: Measure and cut a piece of cheesecloth that reaches from the top to the bottom of your canvas. Cut uneven edges on ends on the cheesecloth to make it look more like a ghost.
Step 2: Mix The Mod Podge
Combine equal parts of Mod Podge and water in a small bowl, stir until the mixture is combined. For the large ghost on the 8×10 canvas, I mixed 1/4 cup of each.
Step 3: Soak the Cheesecloth

Dip the cheesecloth into the Mod Podge mixture. Making sure that all of the cheesecloth is wet with the mixture. This is the messy part but the Mod Podge mixture washes right off your fingers.
Squeeze out the excess Mod Podge from the cheesecloth.
Step 4: Create The Ghost Shape

Unfurl the cheesecloth and place in the middle of the canvas. Spread the cheesecloth downward, creating intentional creases to resemble a ghost. Smooth the cheesecloth in the face area.

Next, dip a paintbrush into the Mod Podge mixture. Brush the mixture over the entire cheesecloth ghost. Once the ghost is covered, brush the Mod Podge over the rest of the canvas. Allow the canvas to dry overnight
Finishing Touches

Paint the Eyes: Use black craft paint to paint two eyes on the ghost’s face.

To add a cute touch, I created a small bouquet using a sprig of dried baby’s breath. I tied a small brown raffia bow around the stem and then hot glued the bouquet to the ghost’s hand

Here’s Another Variation To Try!
To make this multiple floating ghost canvas, follow the same steps as you did for the single larger ghost project. But this time, turn the black canvas horizontally and then measure 3 smaller pieces of cheesecloth on it.
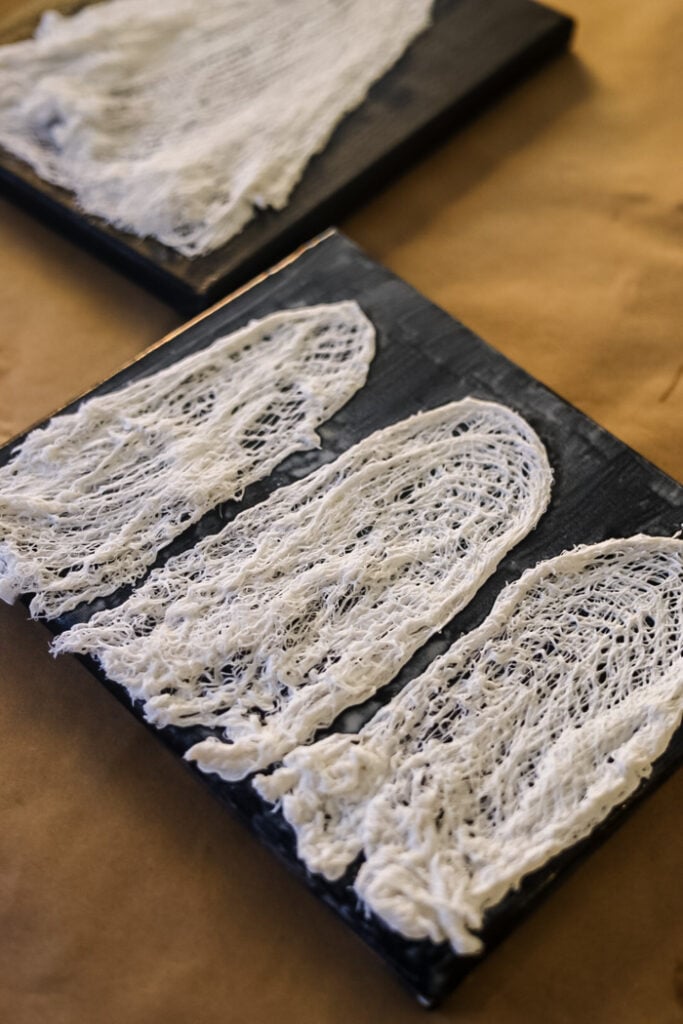
Experiment with different ghost sizes and add variations like bows or different bouquets. For my triplet ghosts, I added a bouquet to the middle ghost, a bow to the left ghost’s head, and a bow tie to the right ghost’s neck (using brown raffia but narrow ribbon works too).

Finished Ghost Canvases

This DIY floating ghost canvas is a fun and easy way to add a not-to-spooky touch to your Halloween decorations. With a few simple supplies and a little creativity, you can create a one-of-a-kind piece of art that adds a whimsical touch to your home.

So, grab your supplies and get ready to make the cutest ghosts on the block! Happy Haunting!
See your projects featured! If you are inspired by this or any of my other DIY projects I would love to see them and add you to the Reader’s Spotlight gallery. Send a photo to me at jennifer@cottageonbunkerhill.com
xo, Jennifer
floating ghost
canvas diy
visit my amazon store.
Halloween…but pretty!

A pretty take on a witch’s broom. Try this one made from the garden using greenery and flowers.
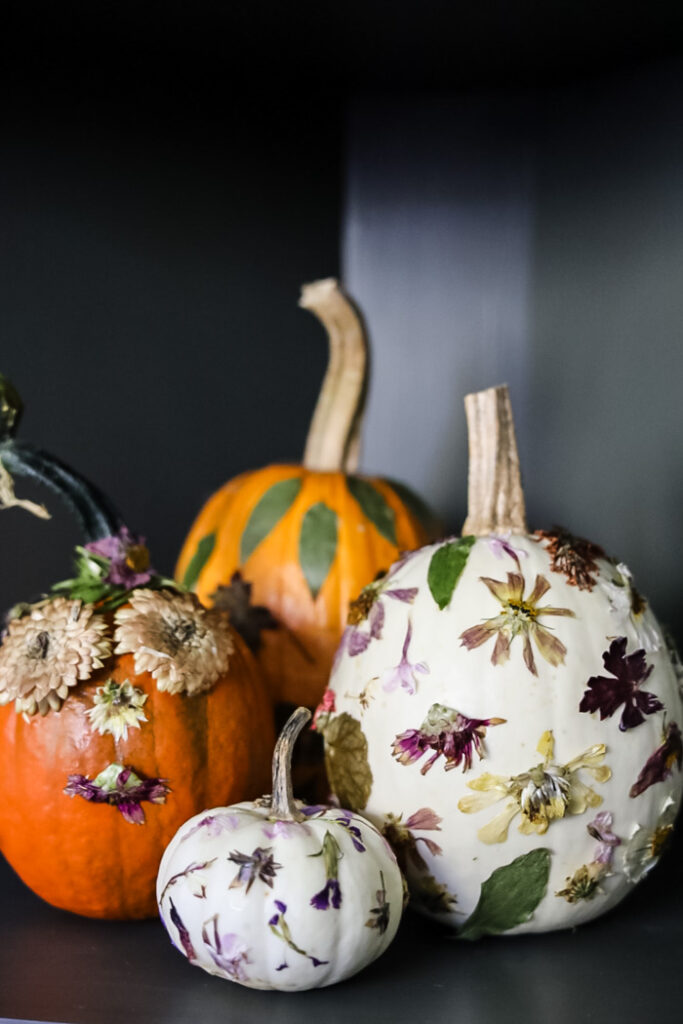
Pumpkins…but pretty! Try making these pressed flower pumpkins this Fall for a whimsical touch to your table or porch.


I think you should rename your blog craft queen… because that’s what you are. You are so creative.
My husband says I’m the queen of something!! I’ll take craft queen!!
These are so cute Jen!