

I designed a free Spring printable for you to print out at home and then you can make this Spring sign following this step-by-step tutorial.
Ok, ok, maybe I do have a little Spring fever!! I can’t help it…Winter is no joke in New Hampshire. I get more and more excited each day that gets checked off the calendar!!
It’s so fun decorating for Spring. I love the pretty flowers, tiny bird’s nests, sweet bunnies…bring it all on!
I was looking for a little Spring sign and amazingly didn’t have one. I did make a free bunny printable last Spring but after the bunnies destroyed my garden last year I’m in no mood for that one…
This post includes affiliate links; you can read my disclosure policy here.
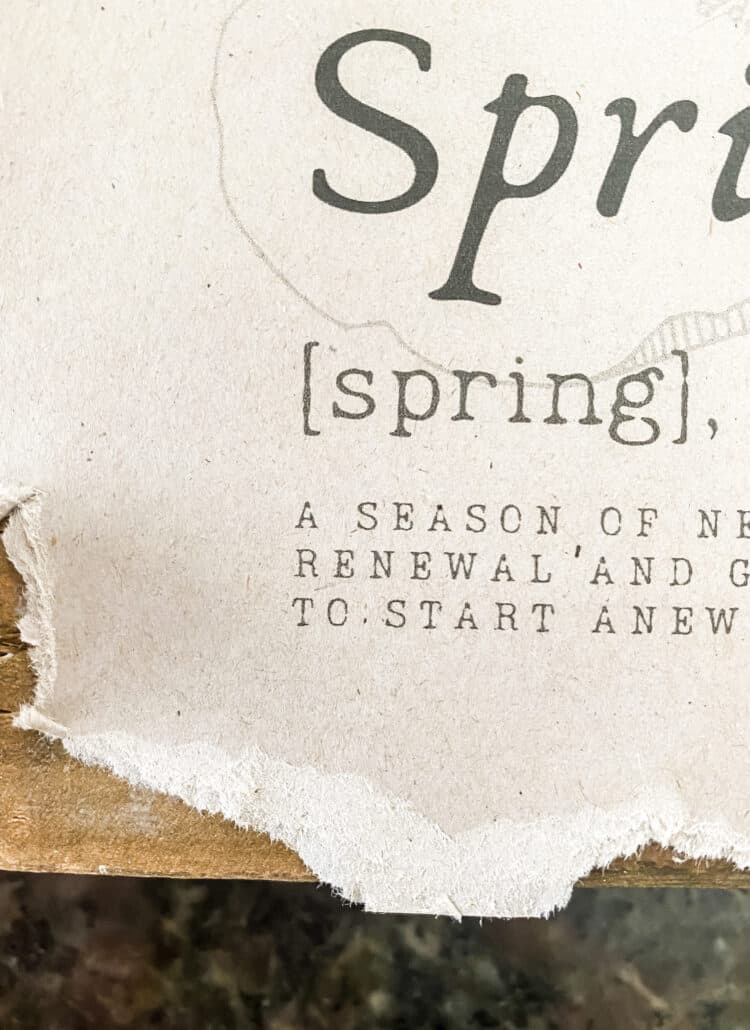
Spring Printable
So I hopped on my laptop and designed one and I’m going to share it with you.

I had this 6×6 wooden sign that I picked up in the Walmart craft section. If you haven’t been through their craft section lately…go! They have so many cool things for DIYing.
Making A Sign For Spring
When you are printing an odd size like this 6×6 printable you have to make sure you uncheck the “fit to size” on your printer settings or it will print out too large.
On my printer, I had to go under advanced settings to print 100% instead of fit to size of paper.
I bought the paper I’m using at Walmart, it came in a set with other natural shades of copy paper but I can’t find it on their site to link for you.

I used a ruler to measure and cut out the Spring printable to make sure it was 6×6.
For a little extra detailing, I carefully tore just a little bit of paper from around the edges.
Using matte Mod Podge, I applied some to the backside of the printable first and centered it on the sign.
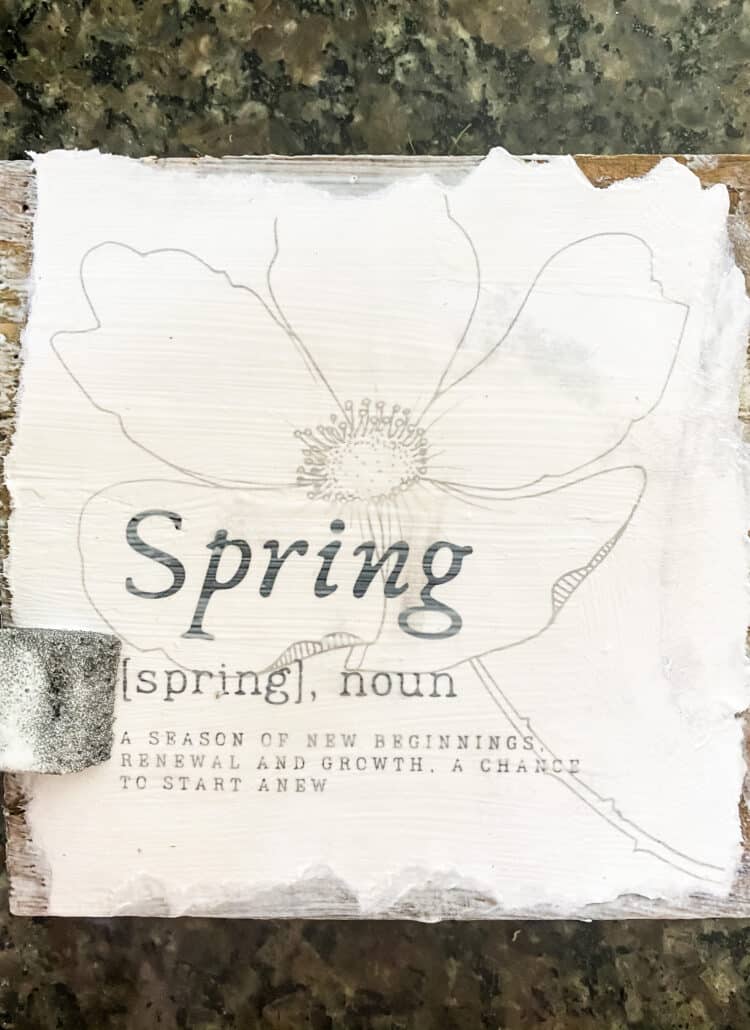
Then brushed the Mod Podge over the entire sign. I ran my finger over the top to smooth out the bubbles.
It takes a few hours for the Mod Podge to dry completely; it does dry completely clear too if you aren’t familiar with it or have never used it before.
Here’s My Finished Spring Sign


It’s on my entryway table for now ( I’m always moving things around!!). The vases were thrift store finds...check out how I DIY’d them.


Just printed it out and it’s lovely!! Thank you talented lady. Can’t wait for Spring!!
Yay! I’m glad I’m not the only one dreaming about Spring!!
I couldn’t wait and get a piece of wood so applied to canvas from $ store …. well it didn’t look as nice as yours so next try WILL put on wood ….. Thanks so much for sharing
Oh, I love that Cat!!