

I’ll show you how I used unfinished wood beads and made them look like sea glass using a Pottery Barn item as my inspiration for this project.
Making a Sea Glass Inspired Rope Garland Using Wood Beads
My inspiration for this project was from the Summer Pottery Barn catalog. They have a beautiful sea glass bead garland. Like all of my high-end catalog dupes I wanted to try to recreate the look on a much smaller budget!!
This post may contain affiliate links, which means I may earn a small commission if you make a purchase through my links, at no extra cost to you. Read my disclosure policy here.

Supplies for the Beaded Garland
SUPPLIES FOR THIS PROJECT:
- 50mm Unfinished Wood Beads (I used 14 beads)
- 5mm Thick Twine
- Krylon Looking Glass Spray Paint
- Krylon Sea Glass Spray Paint (Amazon) (Michael’s)
- Valspar Limewash
First, I searched for clear plastic or glass beads to try for this project but couldn’t find anything. So I decided to try and use large wood beads instead. The largest-sized bead that I could find is 50mm…about 2 inches.

Now I had to figure out how I could get a glass-like look with wood!!! I tried 3 different methods on a scrap piece of wood to see what I could do: 1) Just Krylon sea glass paint 2) silver spray paint topped with sea glass paint 3 )Krylon looking glass paint topped with the sea glass paint.
By far the combination of a coat of Krylon Looking Glass paint topped with Krylon Sea Glass paint looked the best on the scrap wood! Both of these paint are considered specialty paints because of the special effect they have when you use them.
The Looking Glass paint creates a mirror effect and the Sea Glass paint had a cool semi-translucent finish. I’ve seen Looking Glass paint on Amazon, but also at Lowe’s and Walmart. I bought my Sea Glass paint at an Ace Hardware store but it’s available on Amazon and I’ve seen it at Michael’s and Hobby Lobby too. The price fluctuates greatly on Amazon depending on the shade and the day!
Step 1. Krylon Looking Glass Paint

Now here’s my trick for painting beads, this works on smaller beads as well. I used a long thin dowel and strung the wood beads onto it and then rested the dowel over an old recycle bin (any box will work as long as the beads don’t touch the bottom.

I did one coat of the Krylon Looking Glass paint on the wood beads. I sprayed them lightly while twirling the dowel when I wanted to get all the sides covered in the paint.
Step 2. Krylon Sea Glass Paint

Once the Looking Glass paint was completely dry (it dries quickly!) it was time to add the Sea Glass paint. I had the cornflower shade in my paint stash leftover from another project so I decided to use it, but if I make this project again I would love to try the Sea Foam shade.


Once the Sea Glass paint was dried the beads had the prettiest blue shimmer to them from the combination of the 2 paints together!
Step 3. Valspar Limewash Glaze
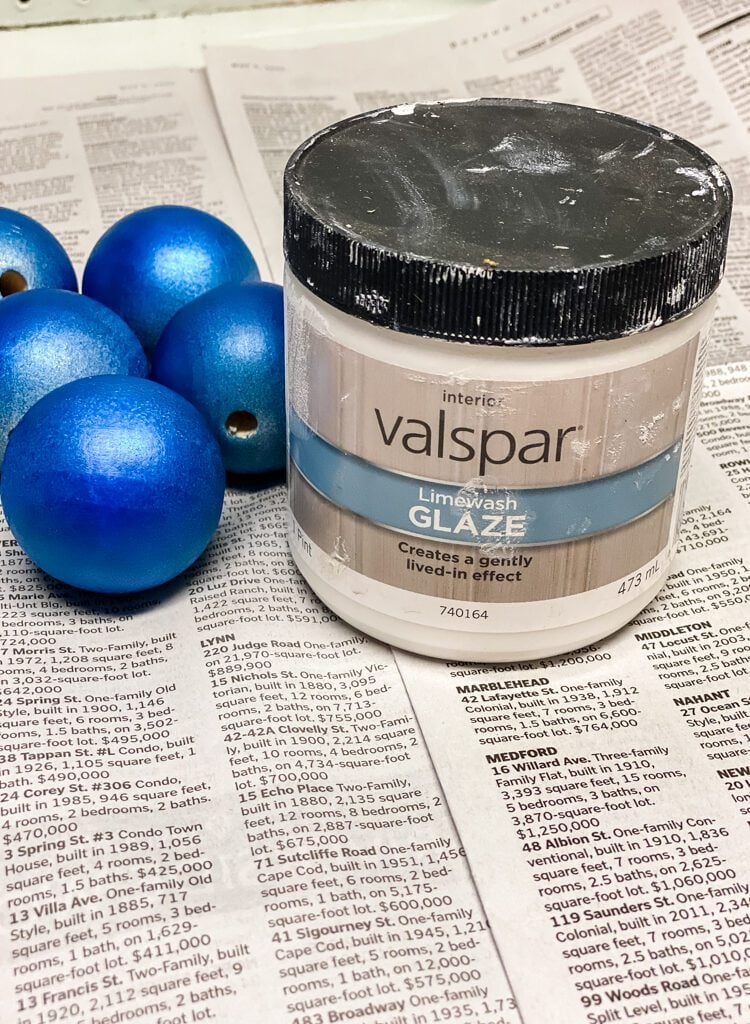
When I was workshopping this project in my brain (that’s an interesting conversation!!) trying to figure out how to get that cloudy sea glass look I remembered that I had a jar of Valspar Limewash Glaze in my paint stash. I had used it for a couple of other projects and knew it creates a slightly gritty cloudy white finish when you put it over paint.
There’s not another product that I know of that creates the same finish but you could try making a whitewash with a little baking soda added to it, I haven’t tried it myself though.

Using a round paintbrush I tapped the Limewash glaze over the blue beads. Just a light tapping motion over the entire surface of the beads.

Then I let the glaze dry completely before the next step of putting the rope garland together.
Step 4. Stringing the Rope Garland

Now it’s time to make the rope garland! Using 5 mm jute twine to achieve that chunky knotted look like the Pottery Barn inspiration; I checked the hole size of the beads before I ordered it to make sure the twine would be able to thread through.

To be safe, I cut a 7-foot piece of the jute rope off of the 65 ft bunch because I had no idea how much I would need with the knotting between the beads.
Also, to make it much easier to string the rope through the beads I wrapped Scotch tape on the end of the rope.

For the first bead, I made 2 simple knots at the end and then used the extra length of rope to make a big loop (I tucked the end through the knots)

After each bead was added I made a simple double knot between each one. This part of the project was easy and quick!

Once I had the last bead strung on I finished the rope garland with a double knot and a loop on the end.

Finished Sea Glass Rope Garland

So what do you think?? In real life, they would definitely fool someone and they do resemble glass too!
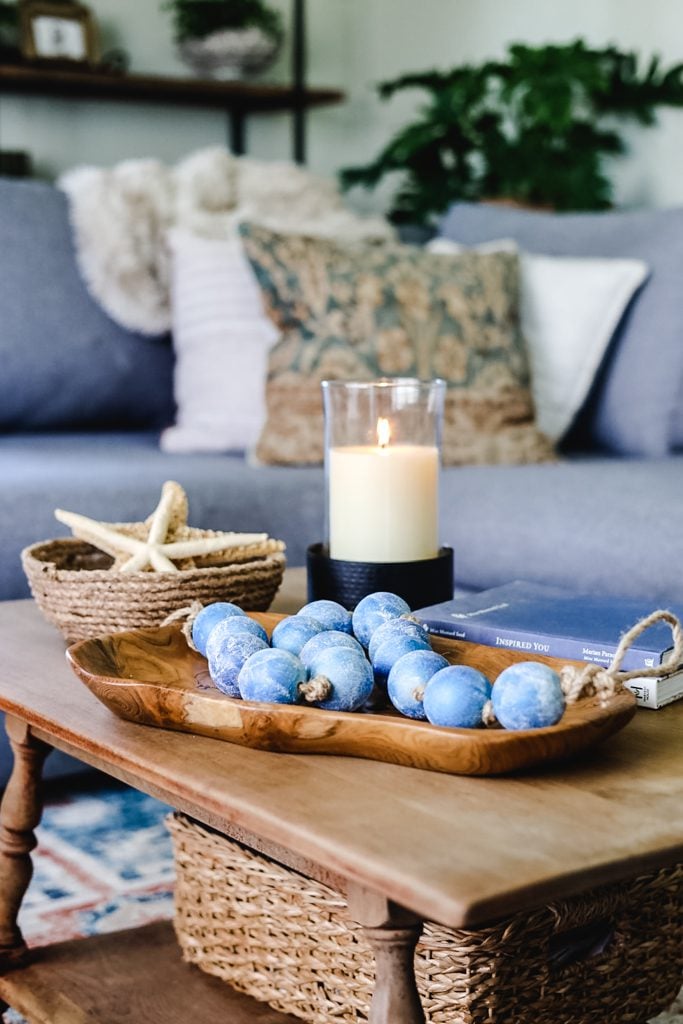
For fun, I thought I would style them similar to the Pottery Barn inspiration picture from their catalog!! There are a couple of other DIY projects in this picture too! You can see how I made the DIY Rope Bowl and also my recent tutorial on my new to me coffee table.

I’m really pleased at how this project came out! This is one that I am anxious to try again and I think it would make a cool gift too.
See your projects featured! If you are inspired by this or any of my other DIY projects, I would love to see them and add you to the Reader’s Spotlight gallery. Send a photo to me at jennifer@cottageonbunkerhill.com
xo, Jennifer

fake it ’til you make it
17 Pottery Barn
Inspired DIYs
shop the post
Pin for Later


Oohhh, this was fun to read and to look at the great pictures! One thing I especially noticed were the “house for sale” ads in your newspaper table covering. I live in Arizona now, but am an 11th generation New Englander and I loved seeing the Boston-area town and city names. What fun! And the beads are stunning! Thank you for another great DIY idea!
Wow, Jen!!! This is AMAZING!! I love the look of that deep blue that you used. It’s so much fun to create things on the cheap that turn out so beautiful!! Lovely job. Pinned!!
Thanks so much, Rachel!
What a fun project! They look so pretty. Go a little darker blue and you’d have giant sugared blueberries! Pinned and sharing this weekend.
Now I want blueberries!!!
Hi Jennier! They don’t really look like sea glass but they are pretty awesome! Great job!
Jennifer I don’t know how I missed this DIY but I’m obsessed!
I really like how this one came out…you never know when you start a DIY how it’s all gonna work out!!
Jennifer, this project looks so good. Those glass beads are expense! I know all too well. Love how you made some at fraction of the cost. You need to be selling them. Hugs to you!
Thanks, Tammy!!!
Jennifer,
LOL, I was going to do a project similar to this but I love your Idea so much better than mine. I’d love to share your idea on my Blog on Sunday.
Thanks for sharing!! I bet yours will be awesome!
What a great idea! I love the look! Gonna try this one!😊👍
Thanks, Kathy!! They came out better than I had imagined! I’m going to look for the white sea glass paint and make another set.
These are just stunning! You are so creative!
Thanks, friend!!!
Love this idea. My daughter has been looking for something like this to hang over the mantel. I think I’ll surprise her.
Thanks so much, Sharon! I’m sure she will love it!