In this tutorial, I will show you how to create artificial tulip bulbs using artificial stems and a couple of craft store items. Then I’ll put together a tulip bulb planter This is the perfect DIY to chase away the Winter blues!
DIY Tulip Bulb Planter
It’s the middle of January here in New Hampshire and the winter blues have really kicked in. I’m dreaming of when the Spring bulbs start popping out from the earth signaling that you made it through another New England winter; I thought of this fun idea to bring that feeling indoors. Here’s my faux tulip bulb planter that looks real!
This post may contain affiliate links, which means I may earn a small commission if you make a purchase through my links, at no extra cost to you. Read my disclosure policy here.
Supplies To Make Faux Tulip Bulbs
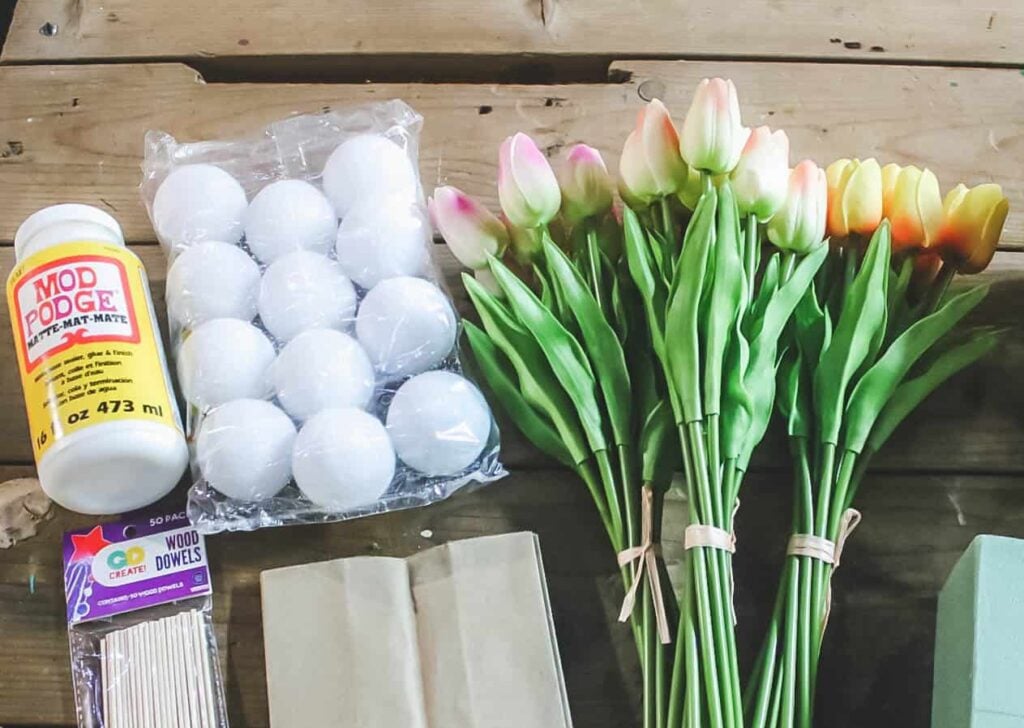
Materials for this Project
- Artificial Tulip Stems
- 2 Inch Foam Craft Balls
- Paper Lunch Bags
- Mod Podge
- Floral Foam Block

Making The Tulip Bulbs
For this project, I’m using a “real touch” variety of artificial tulips. They look quite realistic! The set I bought off of Amazon came with 30 tulips for around $20 (the price goes up and down all the time!)
To make the tulips, I started by cutting off a few inches of green plastic to expose the wire inside. I simply ran the scissors around the plastic until it broke off.
Also, I removed the leaves and put them aside to use later. (I’ve since remade this project and I slid the leaves down the stem instead of removing/gluing back at the end.)
1. Cut off the End


Poke the wire all the way through the foam ball. You want to have a long enough wire to secure into the foam block when you put your planter together.
2. Poke flower Stem Through Foam Ball
After I cut the plastic off the end of the bulbs I just poked them through the center of a 2-inch foam craft ball.

3. Cover with Lunch Bag
Next, I cut the bottom off of a paper lunch bag. Once the bottom was gone I cut the bag down the side and opened the bag flat then cut the bag down one of the seams.
I took one of the lunch bag sections and poked the end of the tulip through the center and wrapped the bag over the bulb…make sure it is completely covered with the paper bag.

Twist the bag around the flower stem until it’s taut, then cut off the excess paper at the top.
4. Add Mod Podge
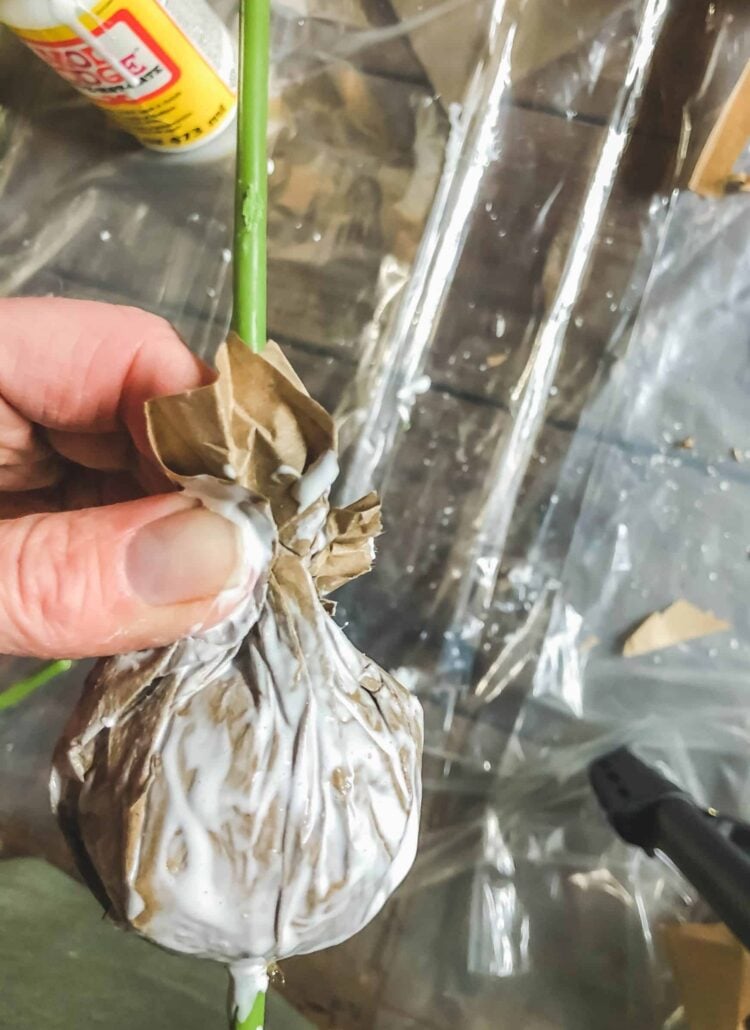
Brush a generous amount of Mod Podge over the paper bag using a foam brush.
Use your fingers to really make sure it gets into all the wrinkles while twisting the bag around the stem…have something on hand to wipe off your sticky fingers!!

The easiest way to let the bulbs dry is to pop them into a foam block.

5. Add Detail
Once the Mod Podge had dried I brushed a little bit of dark brown paint over the paper bags to add a little more lifelike detail.
*When you dry brush you want to wipe off most of the paint on your brush ( I did this by wiping my brush back and forth onto a paper bag).*


Final Touches
To finish up my tulip bulbs, I hot glued a small clump of Spanish moss onto the bottom of the bulb and glued the tulip leaves to the bottom of the stem.

Put Together a Planter or Container
Now it was time to put together a planter, I placed a foam block in the bottom of a Dollar Tree container and inserted the tulips.

I filled in the empty space inside with more Spanish moss, you could use small pieces of floral foam to keep things steady too.

To finish my tulip container I used pieces of sheet moss to cover up the foam. I used small pieces in between the bulbs.

Here’s the finished tulip bulb planter!
Well, it does make it feel a little bit like Spring!

Since I first made this project I’ve done it a couple more times because I loved it so much! I made a very sweet Daffodil Arrangement using the same technique for making the bulbs.

For this planter, I used a wooden rectangular box planter and I love the rustic look of it! I also added a teeny bit of yellow paint along with the dark brown over the bulbs and it really elevated the look of the bulbs!
One extra little detail I added to this planter box was adding a few thin twigs that I had picked up in my yard.All I did was pop a few into the floral foam between the tulips.
See your projects featured! If you are inspired by this or any of my other DIY projects I would love to see them and add you to the Reader’s Spotlight gallery. Send a photo to me at jennifer@cottageonbunkerhill.com
xo, Jennifer

Ideas for tulip planter
Looking For More Spring Decorating Ideas?
Spring decorating makes everyone so cheerful!! At least for me up here in New Hampshire…by the end of January, all I can think about is “When the heck is Spring getting here!!”…
Here are a few of my most popular Spring articles. From a reader’s favorite Spring wreath to a little more challenging DIY project (birdhouse candlesticks). You can also find ALL my Spring DIY’s Here
Early Spring Wreath
My Early Spring Wreath will just make you feel happy! Yellow forsythia and pussy willows are the first signs of Spring so what’s better than combining the two! I also show you how to make the little bird’s nest that looks so real!!

Spring Printable Sign
Here’s a quick little DIY for Springtime. I made a Spring printable that you can use to make a mini sign to use in your Spring decor. Check out the Spring Printable Sign post to get all the details.

Spring Porch Decor
I was so excited to be outside decorating my porch for Spring! I love bringing in vintage pieces when I’m decorating inside or out! Pretty Spring flowers make the entire porch look cheery.

Birdhouse Candlesticks
If you love a creative DIY with a few steps you have to try out my Birdhouse Candlestick DIY. The roof of one of the candlesticks is made with pieces from a pinecone…it gave it such a cool rustic look!!


