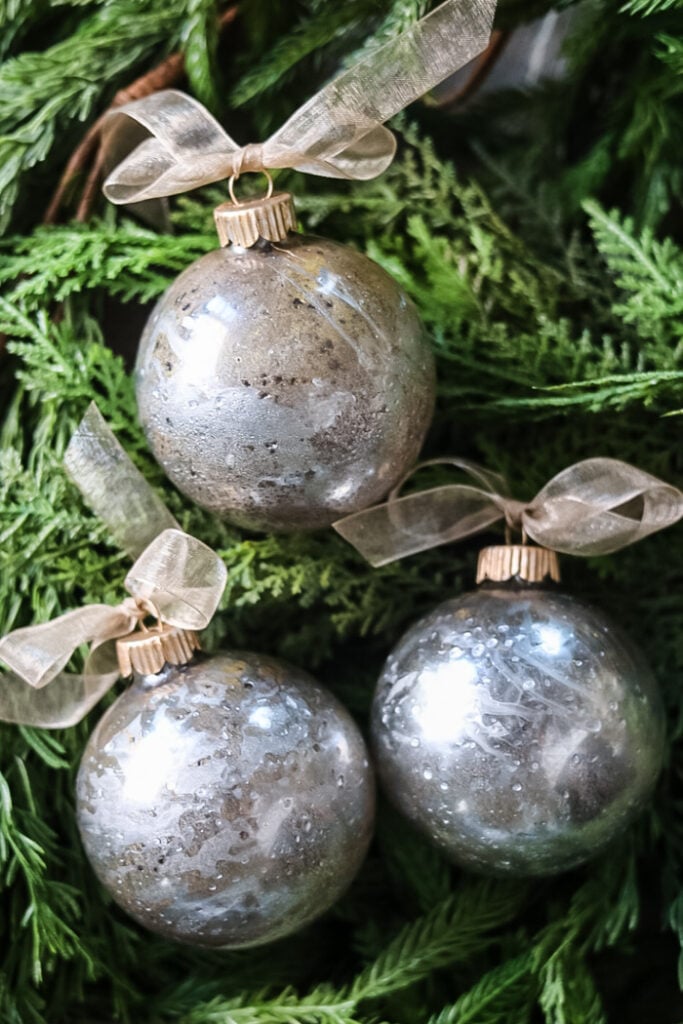
Tired of the same old plain ornaments? Give your Christmas decorations a glamorous makeover with a simple DIY project! In this tutorial, we’ll show you how to transform ordinary glass ornaments into stunning metallic masterpieces. With just a few supplies and a little creativity, you can create unique ornaments that will add a touch of sparkle to your holiday decor.
A Metallic Makeover for Your Christmas Ornaments
Do you love the gorgeous mercury glass ornaments you have been seeing this holiday season from top-end retailers?? But then you check out the price…ouch! Well I am going to show you how with a few supplies you can make as many as you want to fill your Christmas tree without breaking the bank.

This post includes affiliate links; you can read my disclosure policy here.
Materials For This DIY Ornament Project:
- Clear Glass Ornaments
- Looking Glass Spray Paint
- Gold Spray Paint
- Bronze Spray Paint
- Small Spray Bottle with a 50/50 vinegar&water solution
- Rub n Buff (in gold or bronze)
- Hairdryer
Prepare For The Project

- Gather your supplies.
- In a small spray bottle mix a 50/50 vinegar to water solution.
- Choose a well-ventilated area to work.
- Lay down newspaper or a drop cloth to protect your surface.
Apply the Looking Glass Paint

- Remove the top from the ornament.
- Give the can of looking glass paint a good shake.
- Spray a few short bursts of the paint inside the ornament.
- Roll the ornament around to distribute the paint evenly.
Create the Mercury Glass Effect

- Spray a few short bursts of the vinegar solution into the ornament.
- Use the hairdryer to dry the ornament. The looking glass effect will develop as the paint dries.
- Note: If the ornament still looks clear in spots, repeat with looking glass paint and vinegar solution.

Add Gold Metallic Accents

- Shake the can of gold spray paint well.
- Spray a few short bursts of the metallic paint inside the ornament.
- Roll the ornament to distribute the paint.
- Spray a few short bursts of the vinegar solution into the ornament.
- Dry with hairdryer
Repeat With Bronze Paint

- Repeat the process with bronze paint.
- You may need to add a final spray of bronze paint without following with the vinegar solution to create a dark background for the mercury glass look to really pop.
Let Dry Completely

Let the paint dry completely inside the ornaments. To allow any excess paint to drip out, turn the ornaments upside down. You can use the original plastic dividers from the ornament packaging to hold them in this position.
Glam Up The Caps

Want to make your DIY ornaments look more expensive? Here’s a quick and easy trick! Use Rub ‘n Buff, a versatile product that can add a touch of elegance to your projects. Simply take a small amount of Rub ‘n Buff (in gold or bronze) and apply it to the ornament caps with a small paintbrush. It’s that easy!
Your Ornaments, Transformed

With a little creativity and effort, you can transform ordinary glass ornaments into extraordinary pieces of art. These stunning mercury glass-inspired ornaments are the perfect way to elevate your holiday decor.
Don’t limit them to your Christmas tree! Get creative and use them to decorate your home in various ways. Fill a tall glass cylinder vase with ornaments for a festive centerpiece, or arrange them on a tray or in a decorative bowl with greenery. The possibilities are endless!

See your projects featured! If you are inspired by this or any of my other DIY projects I would love to see them and add you to the Reader’s Spotlight gallery. Send a photo to me at jennifer@cottageonbunkerhill.com
xo, Jennifer
2024
Holiday Shop
My Top Finds To Deck Your Halls This Season
Fine Art Printables
29 Free Downloads
exclusively for email subscribers
More Christmas Ideas To Try!


These look like the real deal, Jennifer. Stunning!
WOAH!!! OMG. You would NEVER guess these are handmade…they look just like the real deal! Mind blown. You are SO GOOD!
Thanks Rachel!! They came out cool.
Love the results with this!! Thanks for sharing!!