

Easy to make Fall Dollar Tree DIY! Using a bag of wood beads, paint, and wood leaf ornament to create this cute Fall bead garland.
How to Make A Fall Bead Garland with Dollar Tree Items
I made the cutest little Fall decorating accessory the other day! I have to show you how I made this Fall bead garland.
The best part….it’s so cheap to make!!! That’s my favorite kind of DIY
I started with a bag of wood beads from Dollar Tree.
Wood Beads

I took a super thin wood dowel and strung a bunch of beads on to give them a quick coat of cream-colored spray paint.
String The Beads

Once they were dried I was ready to make the garland!
Using a length of jewelry wire I strung the beads on; there were 3 different sizes of beads and I did them in a random pattern.
You could make this as long or short as you want to, depending on where you want to use it.

When my garland was long enough for where I wanted to hang it I slipped a big bead over both ends of the wire.

Chalk Paint (cream then copper)

After I finished stringing the beads I gave them a quick touch-up of the same color chalk paint. I could see a little of the original bead colors at the ends of the beads where the spray paint didn’t touch.
I did a light touch of copper chalk paint all over the garland. Using a dry brush technique where I dipped my brush in the copper paint and then brushed most of it off onto the paper towel before hitting the beads with my paintbrush.
Dry brushing is a great way to get just a hint of color or detail onto anything you are painting.

Adding a Leaf Detail
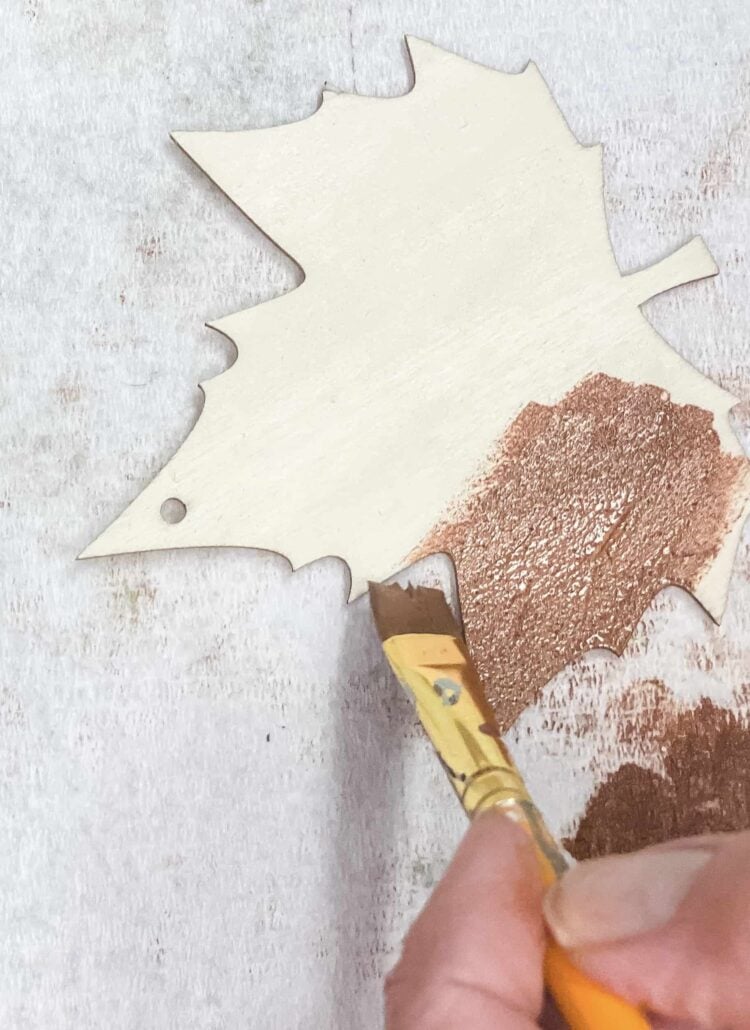
For an added Fall detail to the bead garland, I grabbed a wooden leaf ornament (they come in a bag of 5 at Dollar Tree) and painted it copper.
Putting It All Together
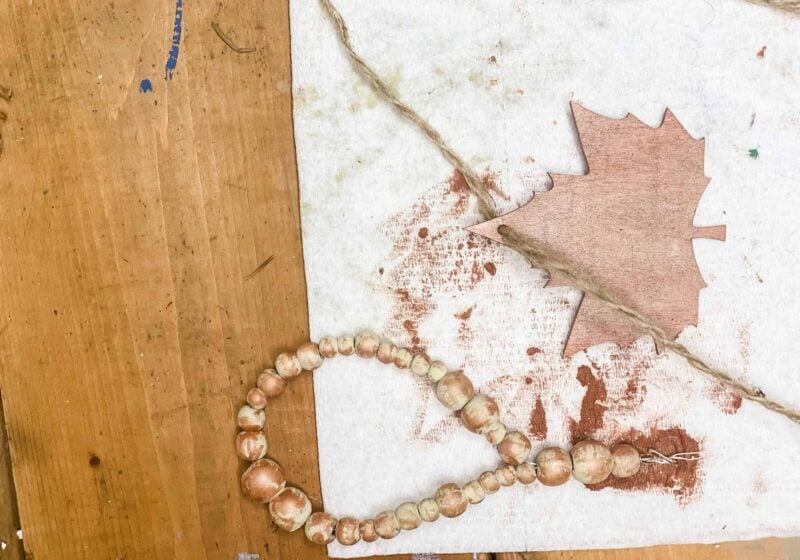
To attach the leaf to the garland I strung jute twine through the leaf ornament.
I made a loose knot with the ends of the wire ( large enough for the twine with the leaf to fit through.
I put a little hot glue onto the wire and wrapped another piece of twine around it tightly.

The last step was to tie the ornament onto the wire loop at the end of the garland.

Ready to see how cute my Dollar Tree garland looks…

This post may contain affiliate links, which means I may earn a small commission if you make a purchase through my links, at no extra cost to you. Read my disclosure policy here.
SHOP MY KITCHEN


