
How to build a garden obelisk. Follow my step-by-step tutorial and photos to make one for your garden in a couple of hours.
DIY | Wood Garden Obelisk
Recently, my husband and I were exploring a local nursery here in New Hampshire (well, I was exploring and my husband was holding my plants!). I saw these tall, unfinished wooden garden obelisks lined up and I ran over to look at them; I’ve always wanted to add one to my garden. I almost dropped when I saw the price tag… $130!
After studying how it was put together I knew that I could build one on my own for so much less so I added it to my to-do list for Spring.
This post may contain affiliate links, which means I may earn a small commission if you make a purchase through my links, at no extra cost to you. Read my disclosure policy here.

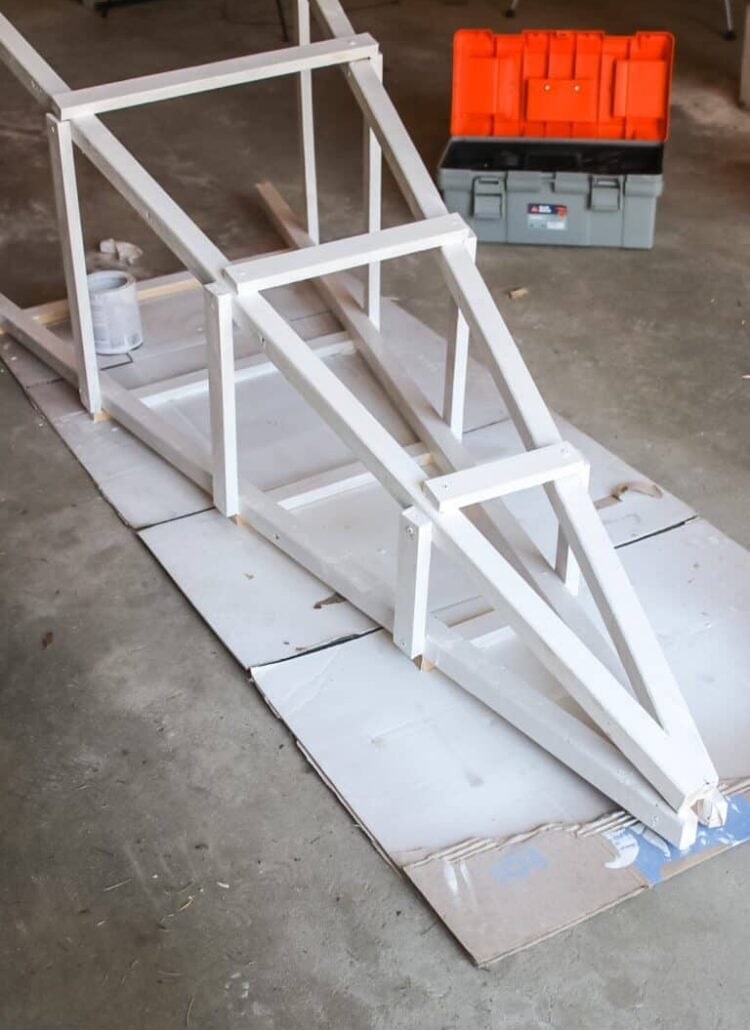
1. Cut The Wood to Size For The Garden Obelisk
I decided that I wanted my garden obelisk to be 7 ft. tall. I cut 12 inches off the bottom of the thicker 2x2x8 pieces of wood that will make the frame. (Most home improvement stores will do this for you at no cost.)
The 1x1x8-foot pieces of wood will make the horizontal slats of the obelisk. There will be 4 slats on each side. You will need to cut 4 pieces to each of the following sizes: 8, 14, 21, and 27 inches.

2. Build the Obelisk Frame

Place 2 of your 7 ft. pieces of wood on a flat surface and touch the tops to make a teepee shape.
Measure up 12 inches from the base of your frame and mark this spot with a pencil on both legs. This is the spot for your first board, the 27-inch size.
Adjust the legs accordingly so the board runs to the end on both sides.

I spaced the boards out 16 inches apart: I marked the spot for each board with a pencil mark to make sure I kept them straight while drilling. This is what your frame should look like.
3. Secure the Boards

Using my Blue Ridge Cordless Drill I secured each board into place with a screw on each end of the board. The drill was so easy to use and not as heavy or bulky as most drills I have used in the past; it fits in my hand perfectly.
I’m using screws that don’t require pre-drilling so I didn’t need to drill pilot holes first to prevent the wood from splitting.
4. Repeat The Steps To Make The Other Side
Next, I repeated the steps to make the second frame for my garden obelisk.
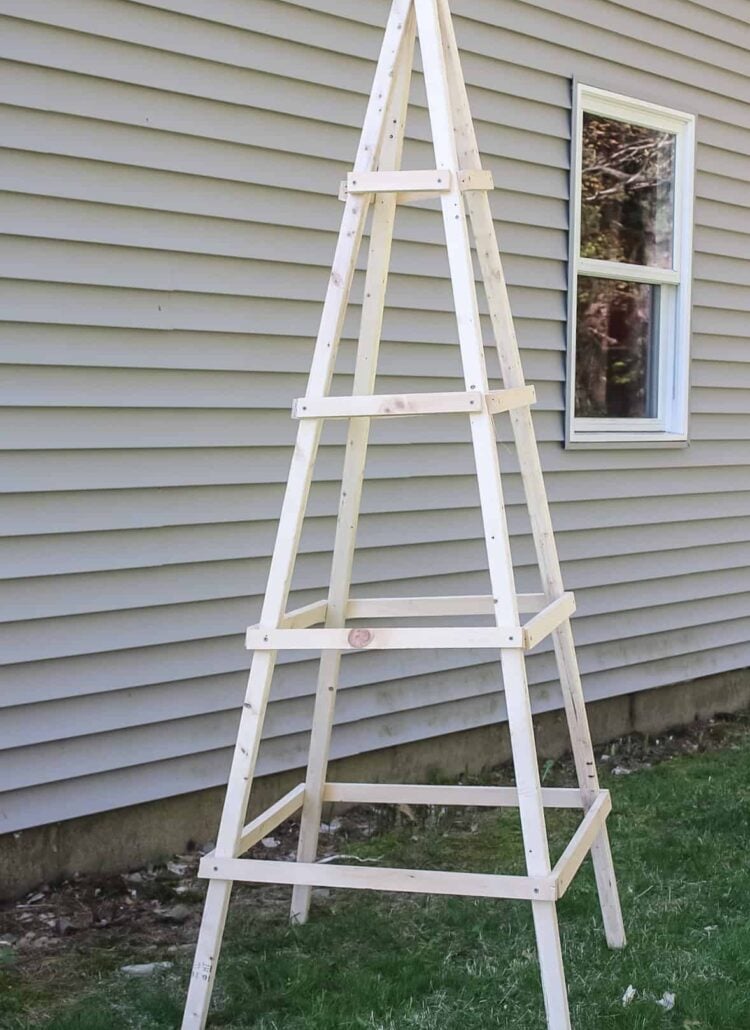
5. Adding the Side Slats to the Obelisk
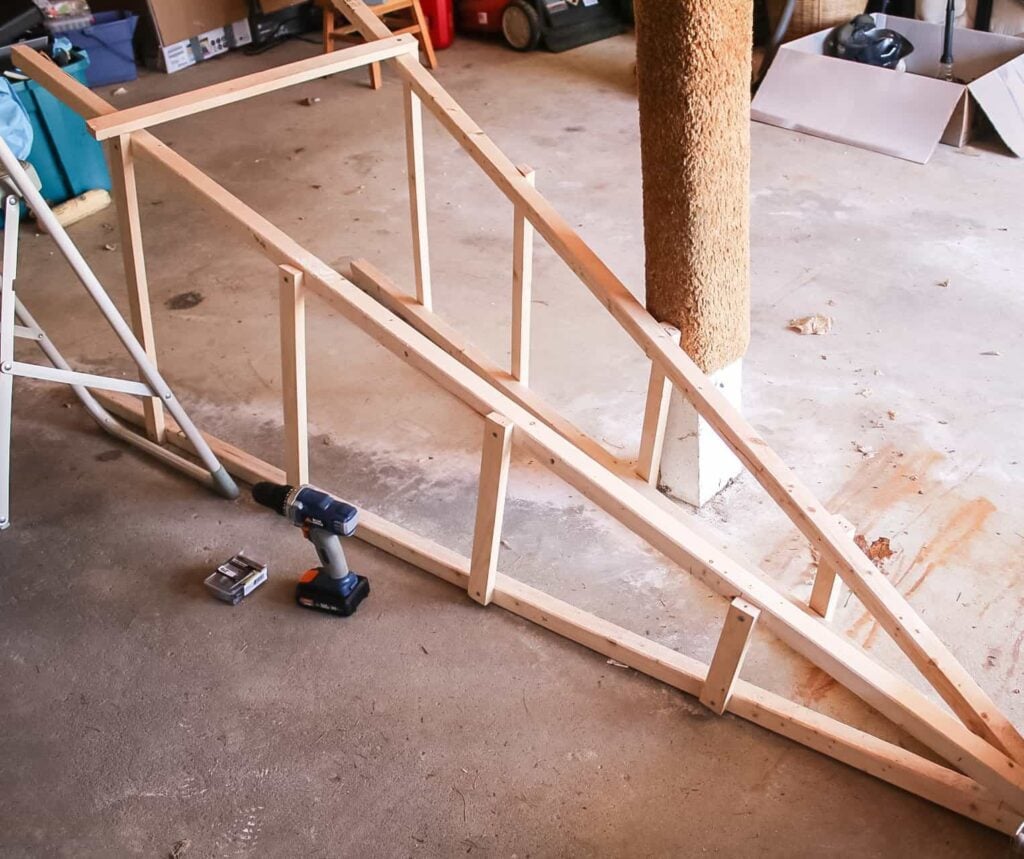
Now that I had the two main parts of the frame completed it was time to add the side slats. This part would have been a little easier with two people but it was early in the morning and really, who has time to wait for teenage boys to wake up!
I used a pole and a step stool to brace the frame. The side pieces will go on quickly; you just need to use the already finished frame pieces as a guide for where to place the side slats. Again, use one 2” screw on each end of the board. Flip the obelisk over and repeat on the other side.
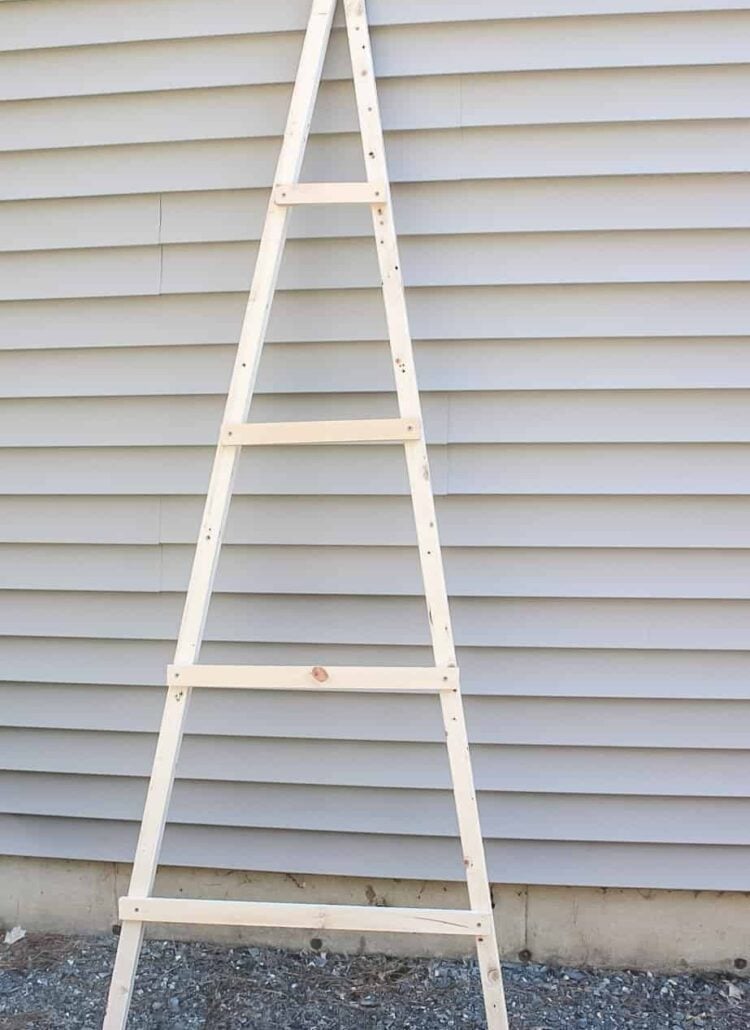
6. Sanding the Garden Obelisk

Now it was time for a quick sanding. Using my Blue Ridge Detail Sander I went over the rough spots on the wood. This was a great little sander to get into all the corners and crevices.
7. Paint or Stain the Obelisk
I had originally planned on staining ( I had even bought the stain!) but decided that I wanted it to be painted white. I did two coats of indoor/outdoor semi-gloss latex.
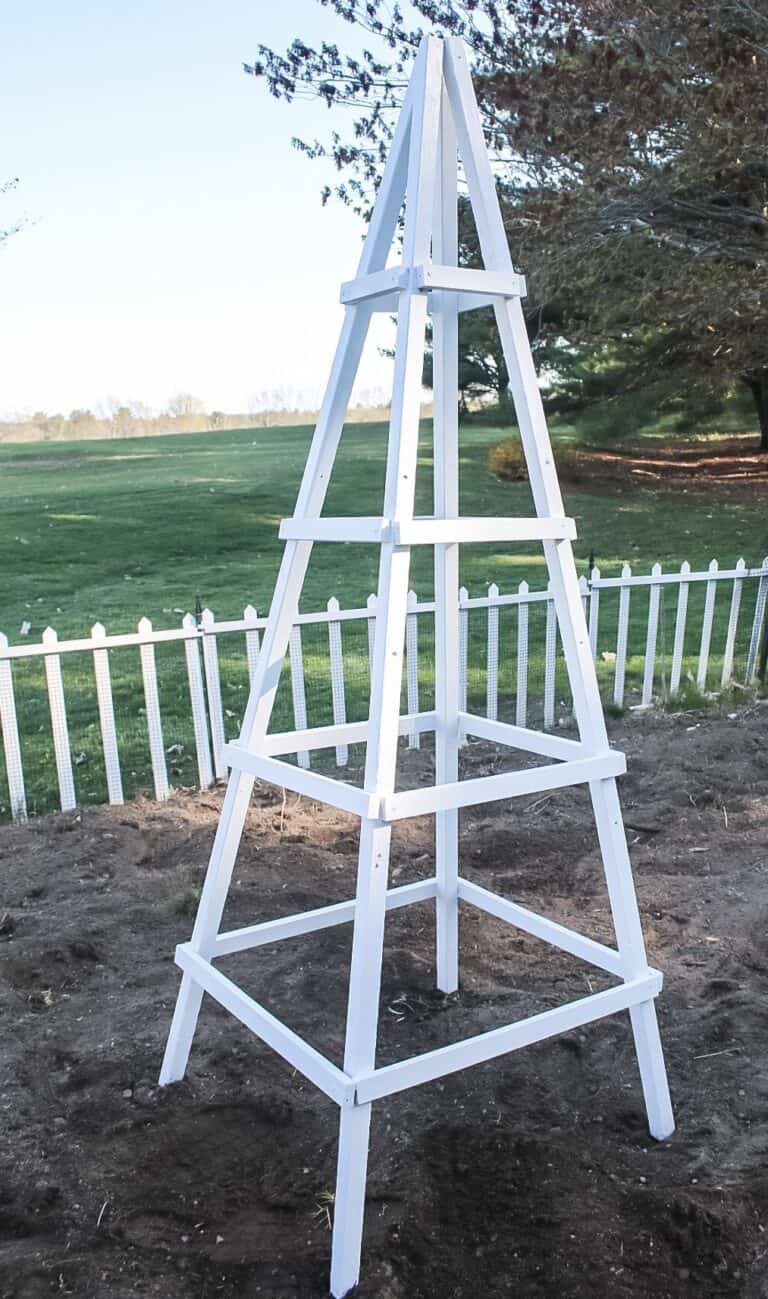
READY FOR THE GARDEN!
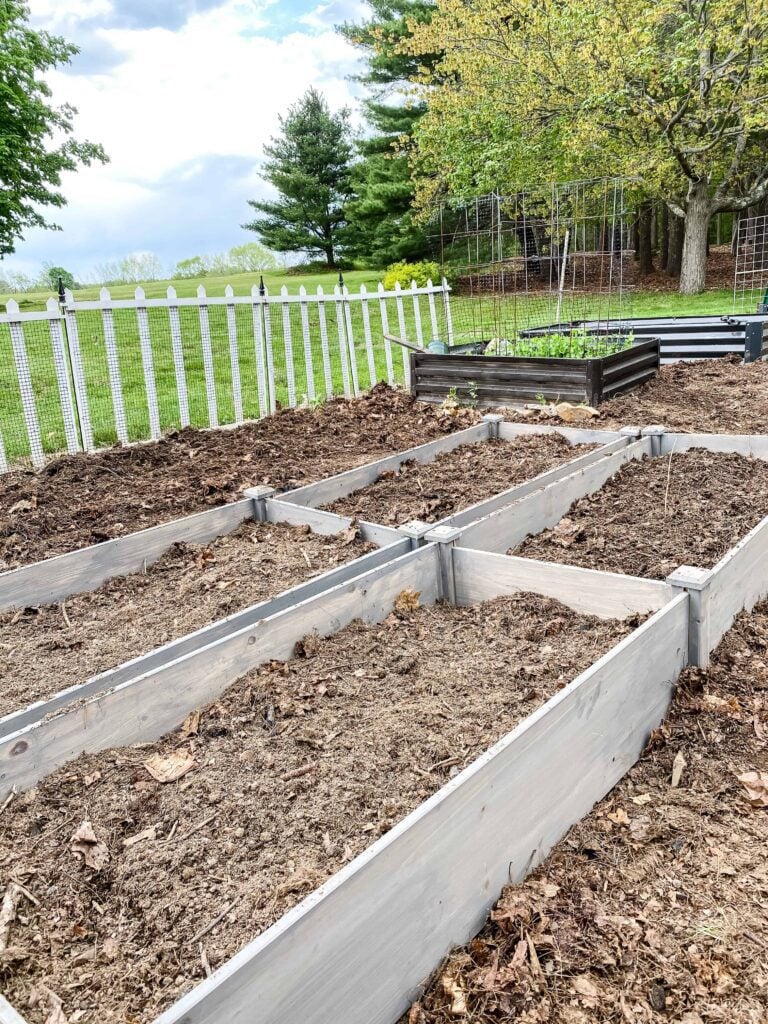
Now it’s time to bring the garden obelisk over to the garden. I love how it turned out and looks so pretty in the center of my vegetable garden.

You can read about my vegetable garden for this season here.

Last year after I did my big garden expansion I ended up painting the garden obelisk gray. Here’s a shot of my green beans starting to grow up the tower. This has been the most amazing thing to grow pole green beans on! They wet all the way up to the top and covered the entire thing so you couldn’t even see the garden tower underneath.
See your projects featured! If you are inspired by this or any of my other DIY projects, I would love to see them and add you to the Reader’s Spotlight gallery. Send a photo to me at jennifer@cottageonbunkerhill.com
xo, Jennifer

pin for later!

-
Why I Intentionally Broke My Terracotta Pot (And You’ll Want to Too!)

Discover how smashing a terracotta pot created my favorite succulent planter! (Sometimes, a little destruction leads to…
-
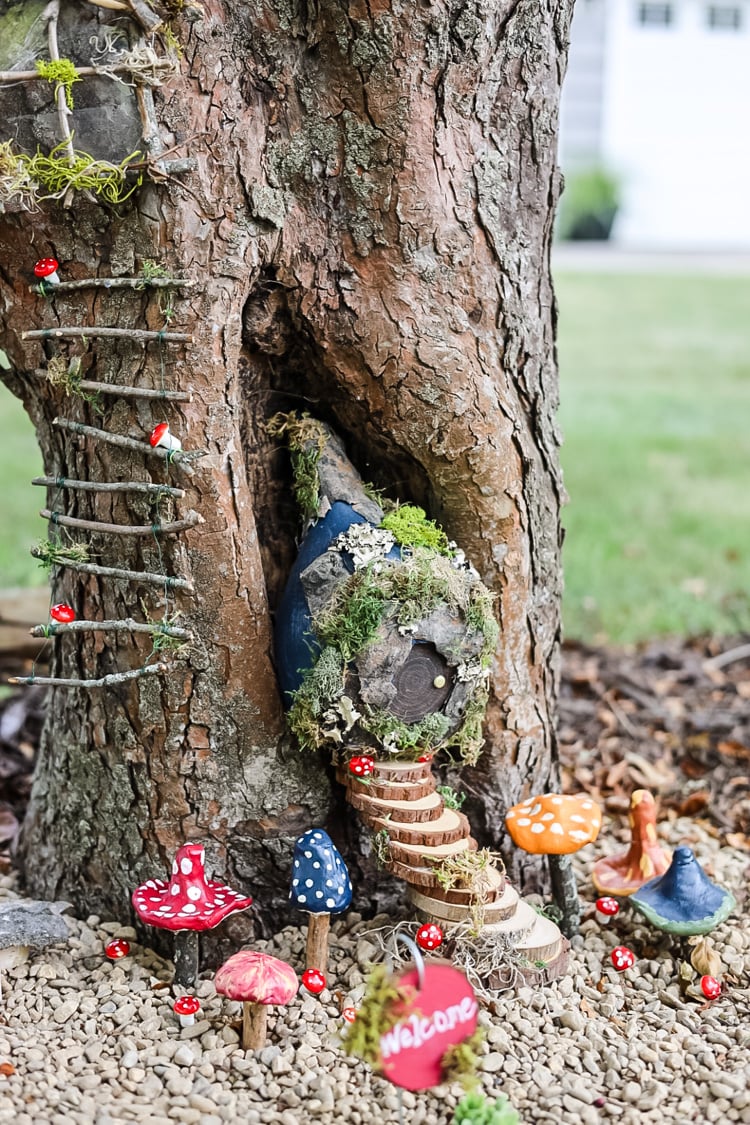
Whimsical Fairy Tree Garden: A DIY Project for a Magical Yard
When I noticed the natural hollow at the base of our crabapple tree, I knew it had…
-
DIY Air-Dry Clay Mushrooms for Fairy Gardens (No Fancy Tools!)
Bring your fairy garden to life with these charming, easy-to-make clay mushrooms! Made with simple air-dry clay and…


Thank you! This is such a simple, clear tutorial!
I’m definitely going to have to make a couple of these. Thanks for the tips.
I understand the height is 7 ft. What is the base width and depth. It appears to be 24+ inches. I have limited space and need to know how deep and wide it is. Thanks!
Good Morning Kim-
You could make this as wide or narrow as you wanted, when you lay out the long sides (before you cut the short side bars) adjust them to the width you want; then measure the widths for the side bars. I had a big space to put it in so I wanted it to be substantial. I was going to make a smaller one for my clematis in my front garden but somehow the summer got away from me and I’m digging out my sweaters😂
Wow! Wonderful addition to your garden! I want one! 😉
Adding to my “Honey do” list!
Thanks!