• Home
  • Blog
  • Meet Jennifer
    • Meet Jennifer Howard
    • Work With Me
    • Disclosure + Privacy
    • Contact
  • Shop
  • Nav Social Icons

  • Skip to primary navigation
  • Skip to main content
  • Skip to primary sidebar
  • Skip to footer
  • Home
  • Blog
  • Shop My Favorites
  • DECORATING
    • Decorating Tips & Tricks
    • DIY Decorating Projects
    • High End Dupes
    • Thrifting
    • Home Tours
    • Wreaths
    • Spring & Easter Ideas and Projects
    • Summer Decorating and Projects
    • Fall Decorating Ideas & Projects
    • Christmas Decorating Ideas & Projects
    • Shopping
  • GARDENING
    • Flower Gardening
    • Gardening Project Ideas
    • Vegetable Gardening
  • LIFESTYLE
    • Weekly Rewind
    • Recipes
    • Around New England
    • Visiting Magnolia
  • Meet Jennifer
    • Work With Me
    • Contact
    • Disclosure + Privacy
  • Mobile Menu Widgets

Cottage On Bunker Hill

Cottage On Bunker Hill

Home & Garden in New England

  • LIFESTYLE
    • Weekly Rewind
    • Recipes
    • Around New England
    • Visiting Magnolia
  • DECORATING
    • High End Dupes
    • Decorating Tips & Tricks
    • DIY Decorating Projects
    • Thrifting
    • Wreaths
    • Shopping
    • Home Tours
    • Spring & Easter Ideas and Projects
    • Summer Decorating and Projects
    • Fall Decorating Ideas & Projects
    • Christmas Decorating Ideas & Projects
  • GARDENING
    • Flower Gardening
    • Gardening Project Ideas
    • Vegetable Gardening
    • Grow With Me Gardening Series
  • Home
  • Blog
  • Meet Jennifer
    • Meet Jennifer Howard
    • Work With Me
    • Disclosure + Privacy
    • Contact
  • Shop

How To Stencil a Faux Tile Kitchen Backsplash

In: Decorating Tips & Tricks, DIY Decorating Projects

In this DIY tutorial, I am going to show you how to stencil a faux tile kitchen backsplash. This is an easy project and perfect if you don’t have a tile backsplash and want to add something interesting to your kitchen.

DIY Stencil Backsplash Tutorial

I have a small counter area in my kitchen that I use as my coffee bar. I don’t have a backsplash on this wall and it looked a bit boring. I decided to give it a little makeover. This stencil faux tile backsplash was an inexpensive project, with just a little bit of paint that I already had and the cost of the stencil from Amazon.

This post may include affiliate links; you can read my disclosure policy here.

Before

The small counter where I set up all the things for coffee and tea was super boring! This is on the opposite side of the kitchen from my other counters so I thought I could add a bit of personality over here with a stenciled backsplash.

Stencil

I picked a 6 inch by 6-inch stencil for the wall. It’s 12 inches in height so I can do 2 rows of the stencil. Depending on what height your backsplash is there is probably a stencil that will work for your space. Stencils come from 4-inch sizes all the way up to 12-inch sizes; Amazon has a ton to choose from too.

Close up of the stencil

Supplies

  • STENCIL
  • STENCIL BRUSH
  • BLACK ACRYLIC PAINT (STENCIL)
  • WHITE LATEX PAINT (WALL)
  • PAINTER’S TAPE

How To Stencil A Backsplash

step 1:

The first step was to paint my wall with a coat of white paint and let it dry completely before proceeding with the stenciling.

My backsplash area is 12″ in height and I used a 6″ stencil so I could stack two. I used this stencil from Amazon.

step 2:

First, I lined up my stencil with my starting point and used a couple of pieces of painter’s tape to hold the stencil in place.

I used a little bottle of black acrylic craft paint for the stencil and stippled it on with a stencil brush.

This stencil is easy to work with because it makes the petals for the next area on the wall so you can use that as your guide as you move to the next section.

Around the electrical outlet was a little tricky but I just did the best that I could.

It took me about 2 hours to finish this wall and I really love how it came out!
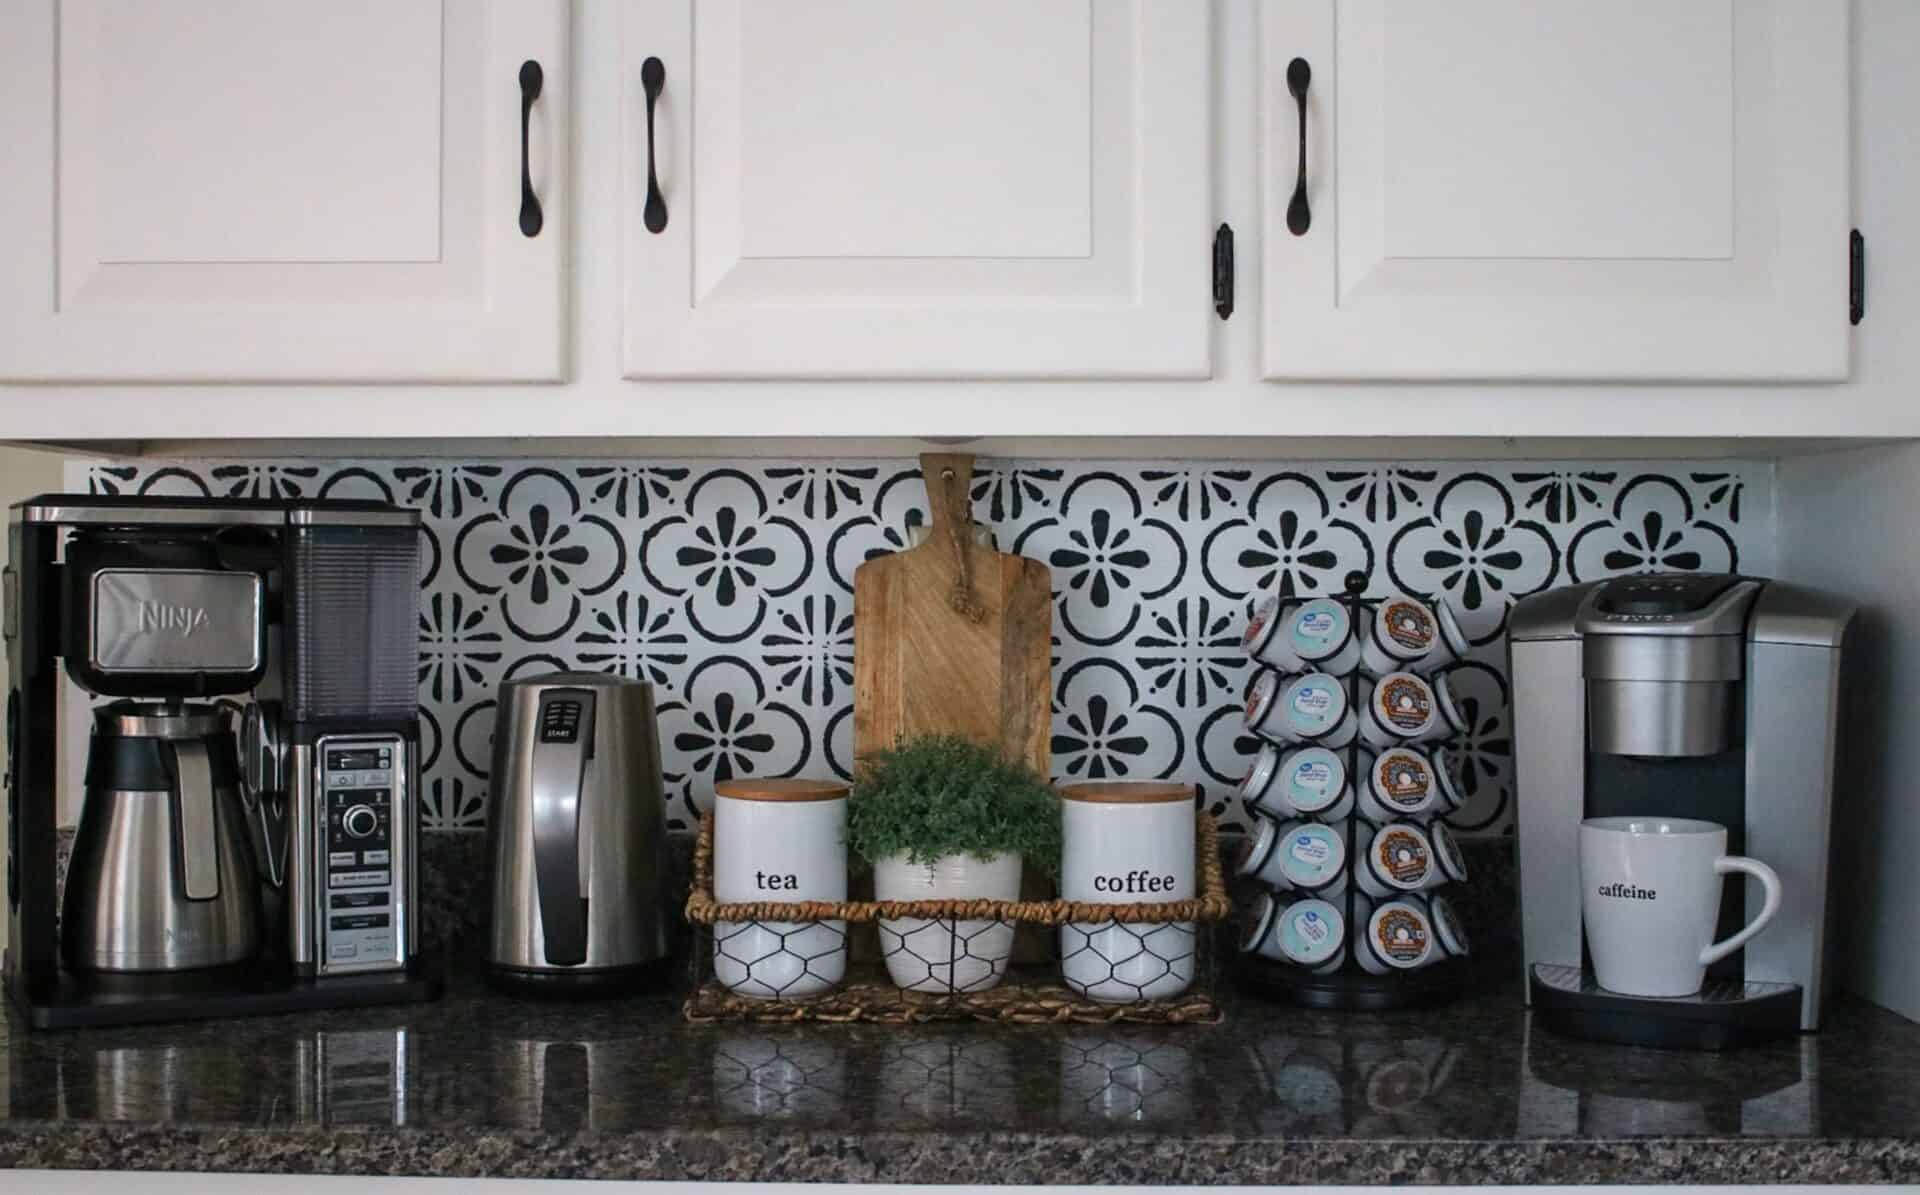
After

I’ve updated this area a little more and gave the cabinets a fresh coat of paint and updated the hardware. You can see the updates right HERE.

By: Jennifer Howard · In: Decorating Tips & Tricks, DIY Decorating Projects

you’ll also love

Vintage New England Red & Green Christmas Porch
How to Paint a Gingerbread House Doormat
christmas gift wrapping suppliesDIY Natural Holiday Gift Wrap Ideas

Reader Interactions

Comments

  1. Jackie says

    January 13, 2023 at 3:55 pm

    This stenciled backsplash turned out so good! I might have to try this technique out! We are having our kitchen cabinets refinished next week so maybe once that is done! Thanks so much for sharing!

    Reply
  2. Jackie says

    January 13, 2023 at 1:08 pm

    This stenciled backsplash turned out so good! I might have to try this technique out! We are having our kitchen cabinets refinished next week so maybe once that is done! Thanks so much for sharing!

    Reply
  3. Ann Marie says

    January 28, 2022 at 11:37 pm

    Hi There!
    Your “tiles” look GREAT!! I have been looking for 4″ stencils to do this under shelves that are over my washer and dryer so it would be under the bottom shelf to the top of the washer and dryer, only about 2 or 3 rows at most. But i cant find the stencils. I would settle for 6″ if i could find them!! Where did you get yours?

    Reply
    • Jennifer Howard says

      January 30, 2022 at 6:43 pm

      Ann Marie, I got mine off of Amazon. I’m going to go look and see if I can find a 4″ stencil…

      Reply
    • Jennifer Howard says

      January 30, 2022 at 6:51 pm

      Ann Marie, I did a quick search on Amazon and I found some 4 inch stencils. This is the link https://rstyle.me/+1Dumpdq5-N1M6TSPOoIYXA

      Reply
  4. Stephanie says

    November 20, 2020 at 2:56 pm

    Hello! I’ve been wanting to do this in our kitchen for awhile now, so thank you for showing how great it can turn out! You’ve encouraged me to try it! Also, I LOVE your cabinet pulls! May I ask where you found them at? Thank you!

    Reply
    • Jennifer Howard says

      November 22, 2020 at 8:22 am

      They were already here when we moved in. I’m so glad you commented because I just saw the final pictures on this post aren’t showing up!!! Going to update it now.

      Reply

Leave a Reply Cancel reply

Your email address will not be published. Required fields are marked *

Recipe Rating


Next Post >

Neutral Fall Decor

Primary Sidebar

Search

Catagories

Behind the blog

Behind the blog
Meet Jennifer

Hey friends, I'm so glad you are here! I'm a life-long New England gal who started Cottage On Bunker Hill as a hub to share all my DIYs, decorating ideas, budget shopping ideas and so much more!!

Read More

Stay Connected!

Get The Latest

See Me In The October Issue!!

Footer

Categories

Archives

 •••Cottage on Bunker Hill does not accept guest posts and I only link to sites that I find myself. No need to email me with requests•••

COPYRIGHT CONTENT PERMISSION

All images and tutorials on this blog are copyrighted material.

I’m happy to allow you to use ONE photo with appropriate credit and link back to cottageonbunkerhill.com

Please contact me if you would like to use any media, tutorials, or ideas from this blog.  Contact Jennifer via email: jennifer@cottageonbunkerhill.com

FEEL FREE TO PIN AWAY! IT’S APPRECIATED!

Cottage On Bunker Hill is a participant in several affiliate programs including the Amazon Services LLC Associates Program, an affiliate advertising program designed to provide a means for sites to earn fees by linking to Amazon.com and affiliated sites. For more information, see full disclosure statement (here)

Copyright © 2023 · Theme by 17th Avenue