

Here is how to make seashell shadow boxes that were inspired by the ones from Pottery Barn. I’ll show you 4 different seashell shadow boxes that you can make to create a set to hang in your home.
How to Make Seashell Shadow Boxes
OK, I have to make a confession…I love Pottery Barn but when I find things I like, instead of adding them to my cart I’m trying to figure out how I can dupe them!!
So when I was looking through the Summer catalog and saw an amazing seashell shadow box I had to check it out! Yikes, it was $399!! So you know I had to figure out a way to DIY seashell shadow boxes on a budget.
This post includes affiliate links; you can read my disclosure policy here.
My inspiration

Supplies to make seashell shadow boxes
- Shadow Box Frames
- Various Sea Shells
- Linen/Cotton Fabric
- Hot Glue Gun/Glue
find the frames
The first thing I did was do a search for shadow box frames. The Pottery Barn frame was large, but unless I wanted to build a frame on my own they were wicked expensive!!
Then I saw that Michael’s was having a frame sale and they had 12×12 frames that came in a set of 2…this is when I had the aha moment and decided to make a set of 4 seashell shadow boxes.
Sidenote: wait for the Michael’s 1/2 price frame sales, they have them every few months. I got the set of 2 for $14.99.
If you don’t have a Michael’s near you I found a similar frame on Amazon

Then I had to figure out what seashells to use for the 4 frames. I wanted a variety of sizes and textures to make it all more interesting.
Pick out the seashells
I found these little scallop shells and mini sand dollars on Amazon.
I had a bag of resin starfish from the Christmas Tree Shops and a large real starfish in my crafting stash; Amazon has a zillion choices if you don’t have a local store that has seashells for crafting.
fabric
For the backing on the shadow boxes, I wanted a neutral tone. There are no fabric stores close to me so I ordered this natural-color linen.
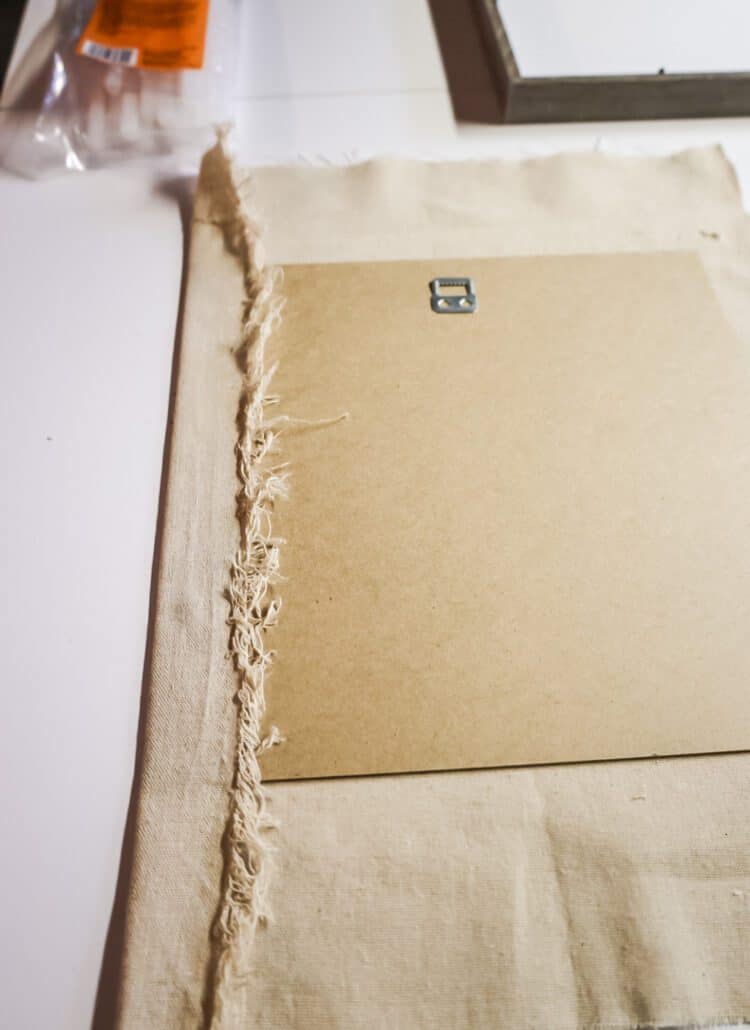
Putting The Shadowbox Together
First, I took the backing off of all the shadow box frames and centered it on the linen. Then I just hot glued the linen to the frame backing.
For my first shadow box, I used small scallop shells. This one is going to be a circular pattern so I found the center of the frame and hot glued on one of the shells.

Then I did a circle of the scallop shells around the center shell. It was helpful to lay out the shells before gluing them into place to make sure they fit in a circle and can be spaced evenly…the shells in my bag were all slightly different shapes and sizes.

Then I did one larger circle of the scallop shells.

You can see me make this seashell shadow box in a Facebook live I did last month over on my page!!
starfish shadow box
This shadow box was much quicker to make! All I did was hot glue the starfish 3 across and made sure they were equally spaced out (I totally eyeballed it!).

large starfish shadow box
Talk about easy… Just a large starfish glued to the center!! Bam…done!

sand dollar shadow box
For the 4th and final seashell shadow box, I used teeny sand dollars.
They were super delicate but really pretty! A few sand dollars were harmed in the making of this craft…

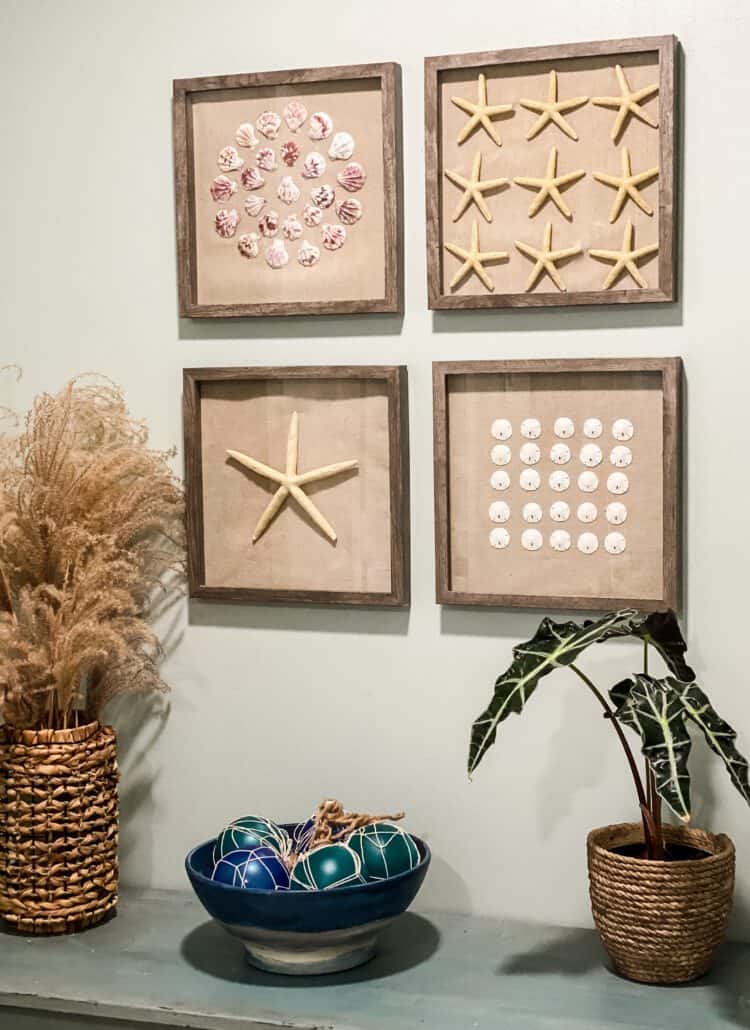
Finished Seashell Shadow Boxes
I’m so happy at how the shadow boxes came out…and 4 of them for a fraction of the cost as my inspiration shadow box from Pottery Barn!
They are the perfect accent for my bathroom wall.
Do you like seashell crafts? Check out the wreath I made this summer!
here are a few links to my supplies and some other shells


Thanks just what I was looking for
I’m so glad to hear that!
This was such a helpful article! Thank you 🙂
I’m so happy to hear that! If you happen to make a version of these please send in a picture and I’ll add it to the reader’s project gallery! My email is jennifer@cottageonbunkerhill.com
Jennifer
I made one of these years ago and just donated it when we remodeled our beach cottage. Now I wish I’d kept the shells and made an updated version. Love them and will share your link next Sunday.
They would look so cute in your cottage!!
How did you keep the rows of sand dollars nice and straight?
Diane, I did the top row across and then that first row down after that it was easy to line them up with the one next to it and on top of it…I’m left-handed and notorious for doing things crooked but that kept me straight!