If you’ve been around here for a while, you know my big goal has been to stop overbuying and use what I already have, and also to encourage you all to give it a whirl! And Fall is a perfect time to test it out. Every store I walk into has an aisle of faux leaves, pumpkins, and wreaths practically begging you to take them home.
So this year, before I bought a single thing, I went for a walk.
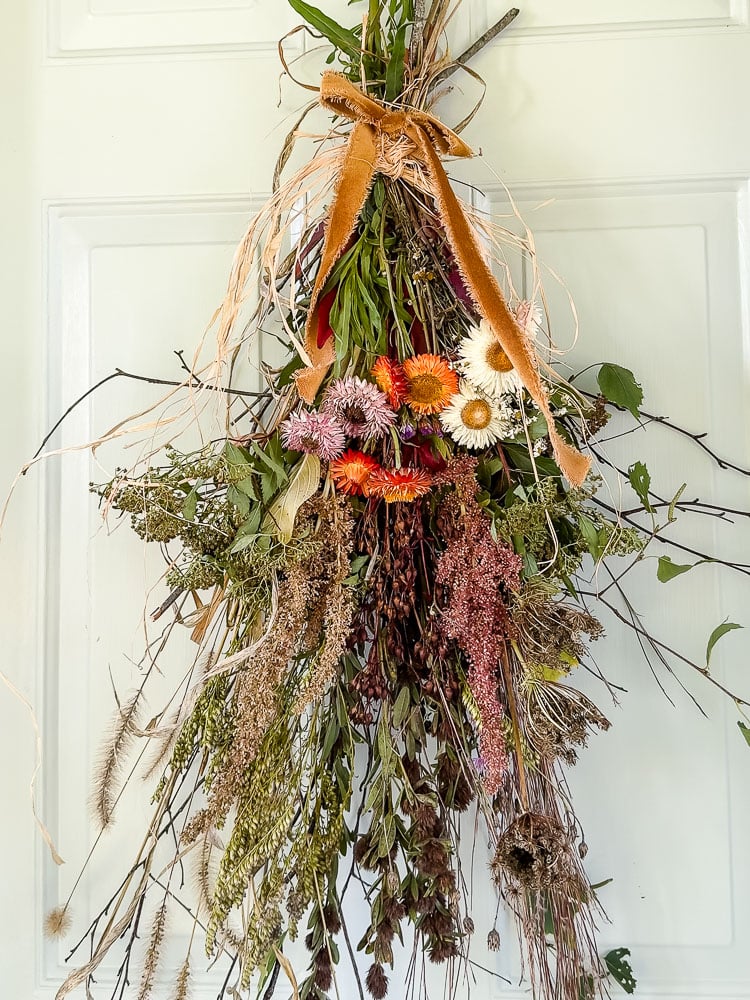
I came back with an armful of branches, grasses, and seed heads, and then I grabbed a few dried flowers from my garden. About 30 minutes later, I had this door swag, and I honestly love it more than any wreath I’ve bought.
It’s loose, a little wild, and full of texture, which is exactly how fall in New England looks. Best of all, it cost me nothing!!
Here’s how to make your own.

Welcome! I’m Jennifer, and I’ve always believed nature is the most beautiful art supply. For years, I’ve been preserving New England’s blooms and foliage through pressing, drying, and crafting. Let me show you how to capture a little bit of the season and bring it indoors—simply and beautifully.
This post may contain affiliate links, which means we receive a small commission if you purchase through our links. See our disclaimer page for more information.
What Is A Door Swag
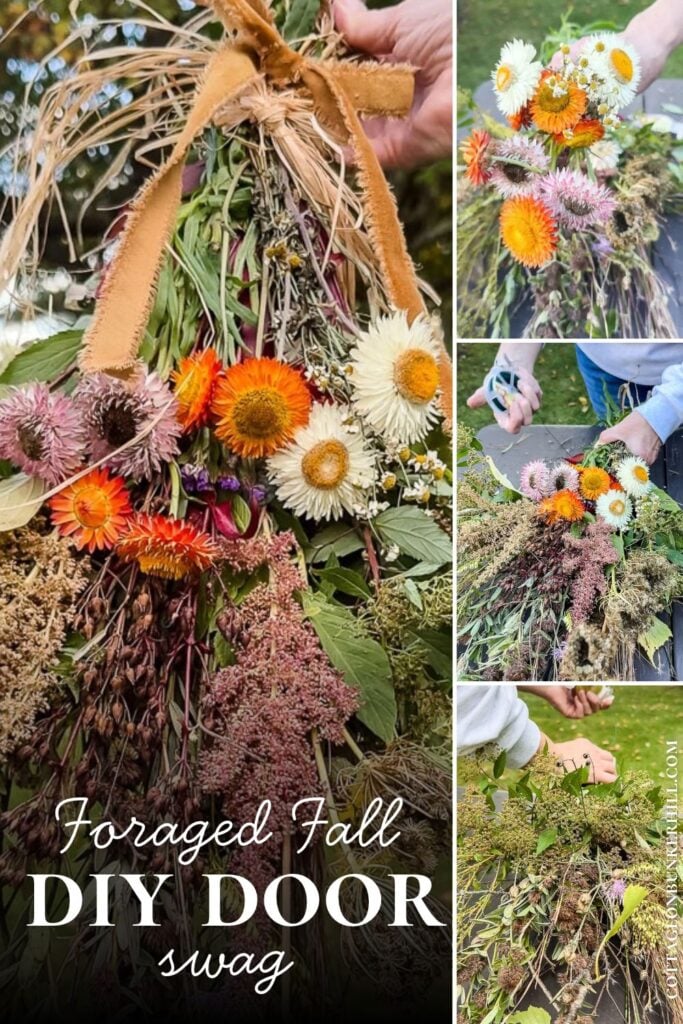
A door swag is basically a bouquet that hangs upside down on your door. Instead of being wired into a circle like a wreath, the stems are bundled and tied at the top, so they fall naturally toward the ground.
Here’s why I love them:
- No wreath form needed. No frame, no foam, no hot glue marathon.
- They’re forgiving. A swag is supposed to look loose and a little untamed, so there’s no such thing as a messy one.
- They use what’s out there. Long grasses, wiry branches, and floppy seed heads that would never behave on a wreath look right at home in a swag.
- They dry in place. Hang it fresh, and it slowly dries right on your door, changing color as the season goes.
Foraging For Your Swag
Grab a pair of clippers and a basket or bag, and head out. You don’t need deep woods. The edges of trails, fields, and even your own yard are full of good stuff this time of year.
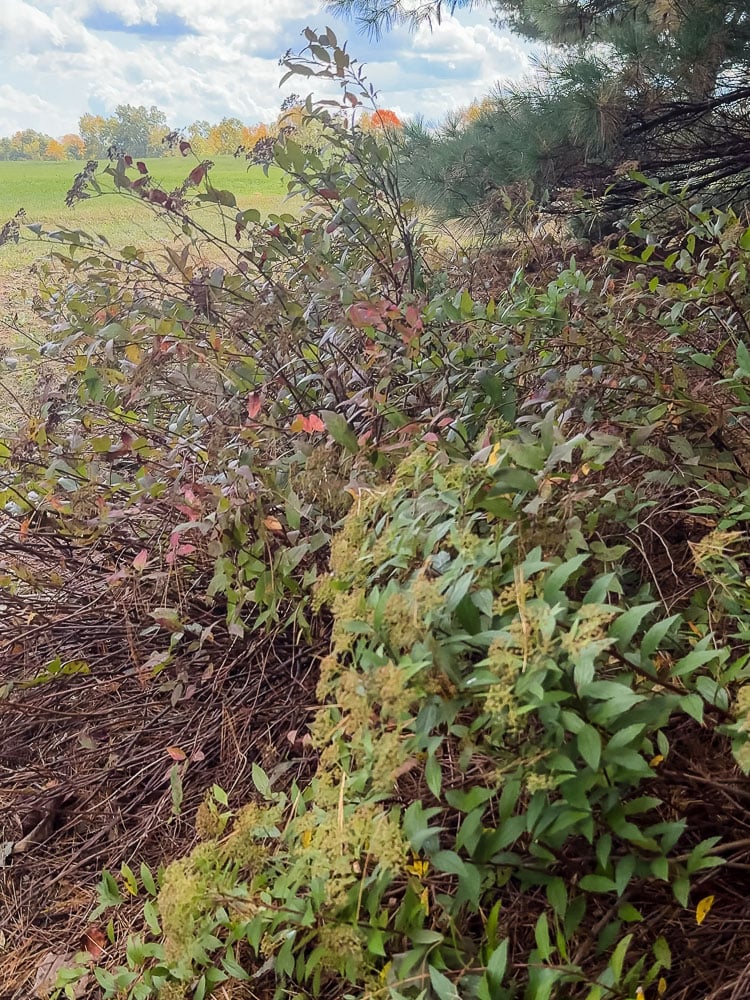
What to look for:
- Branches with character. Bare, twiggy, or curvy branches give your swag its shape and some drama.
- Grasses. Foxtail and other seedy grasses add movement and a soft, wispy look.
- Seed heads. Queen Anne’s lace that has curled into little nests is one of my favorites. So pretty, and so fall.
- Fading wildflowers. Here in New England, there are lots of pretty wildflowers and even pretty weeds throughout the woods and meadows.
- Greenery and a few leaves. A little green keeps it from looking all brown.
A few ground rules:
- Ask before you cut on private property.
- Check the rules at parks and conservation land, since many don’t allow collecting.
- Only take a little from any one spot, and leave plenty for the birds and pollinators.
- Give everything a good shake outside before you bring it in. Trust me on this one.
Cut more than you think you need. A swag takes a surprising amount of material to look full.
Garden to Home
I’ve always believed the line between garden and home should be blurry. This series is all about crossing that line. Taking what grows outside and bringing it indoors in beautiful, lasting ways. New projects posted monthly.
Let’s grow together!
What You’ll Need
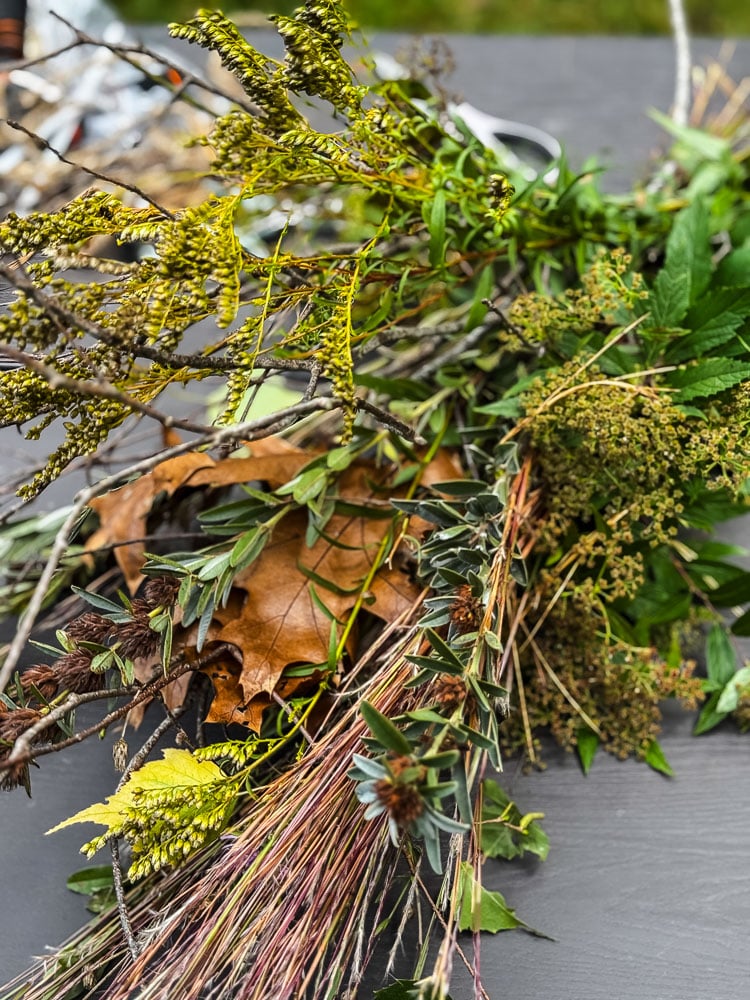
Here’s What I Used
From my walk (and garden):
- Bare branches and twigs for base
- Long grasses, like foxtail
- Wildflowers & flowering weeds
- Queen Anne’s lace seed heads
- Colorful Amaranth & Monarda
- Greenery
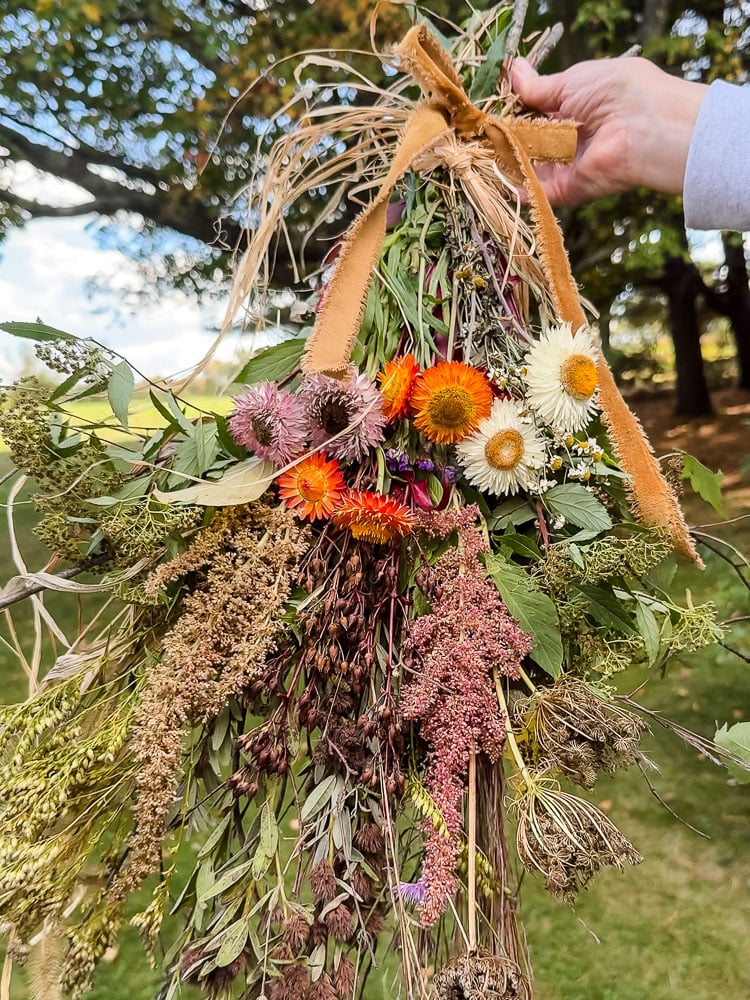
- Dried strawflowers in orange, pink, and white
Supplies:
How To Make A Foraged Door Swag
I’ll walk you through exactly how I made mine, using the botanicals I found around my yard and woods in zone 6a New Hampshire. You may have completely different plants and trees where you live, and that’s the fun part! Use whatever is growing near you. The basic process will be the same.
1. Sort Your Stems
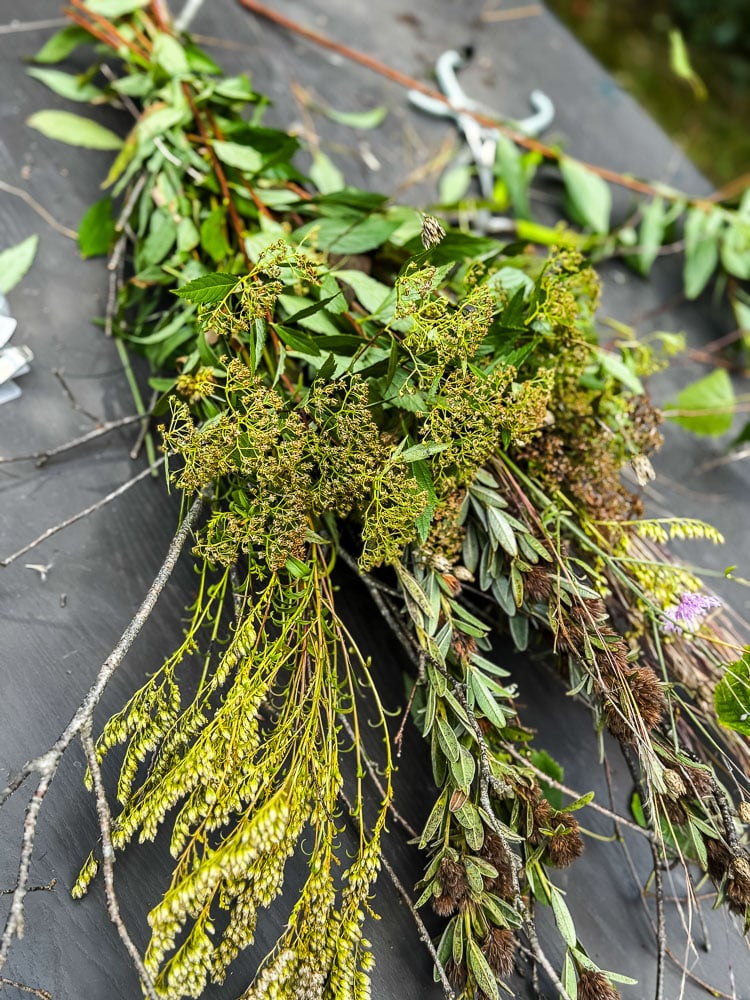
Lay everything out and group it by type: branches, grasses, fillers, and your prettiest flowers. Strip any leaves off the bottom few inches of each stem, where you’ll be tying it together.
2. Create Your Base
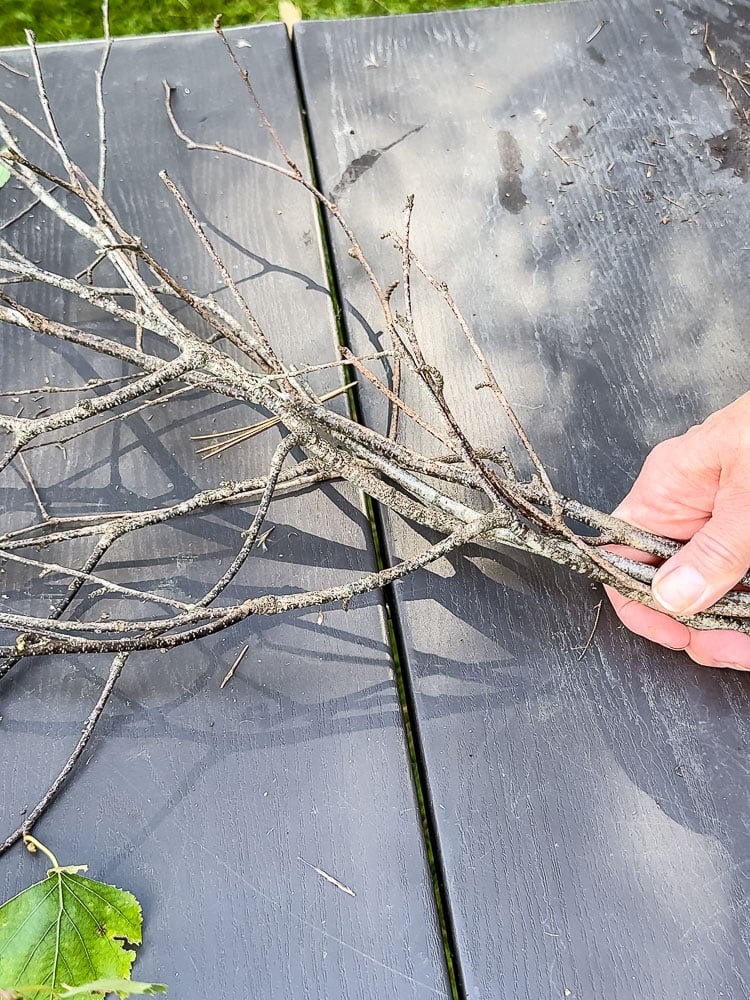
Lay your twiggy birch branches down flat on your work surface. These make the back layer and set the overall size and shape of your swag.
I purposely kept mine a little longer than most swags you’ll see. I was going for a wild, just-gathered botanical look rather than a neat, curated door swag, so I let the branches run long and angle out to the sides. If you prefer something tidier, trim them shorter and keep them closer together.
3. Fill In With Wildflowers & Grasses
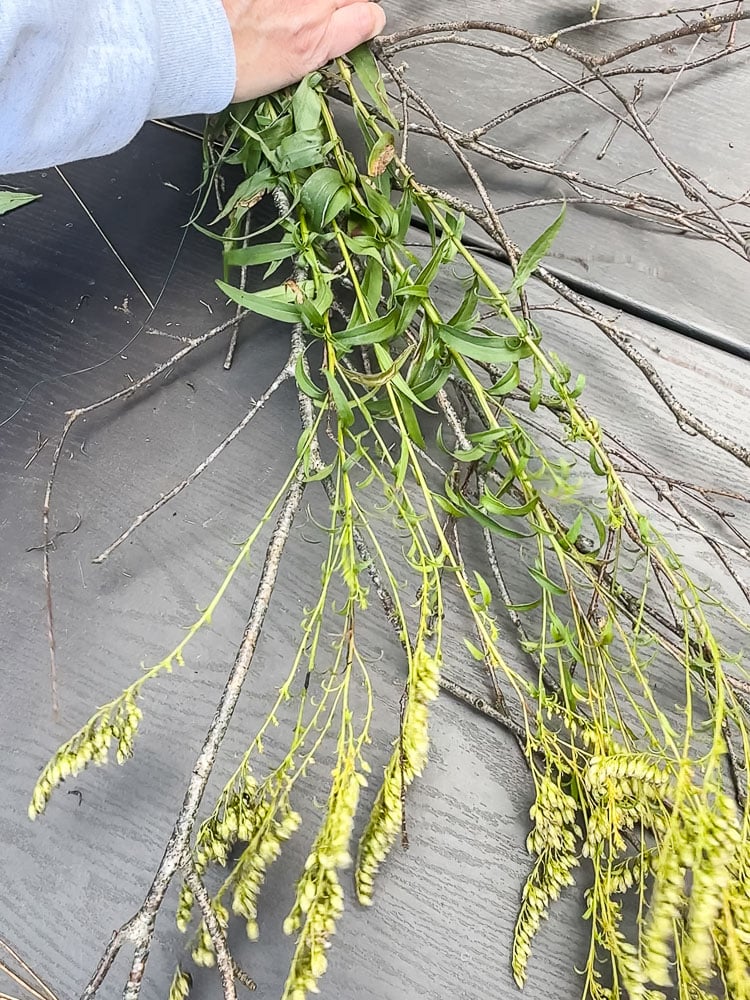
Next, layer the flowering weeds and longer wildflower stems on top of your birch base. I used the longest things I’d gathered here to fill in the shape and add some fullness.
Then I grabbed a handful of the long dried grass I’d cut and, keeping the clump together, added it all in one spot. Grouping it like this gives the swag a more natural, just-gathered look than spreading single stems all over.
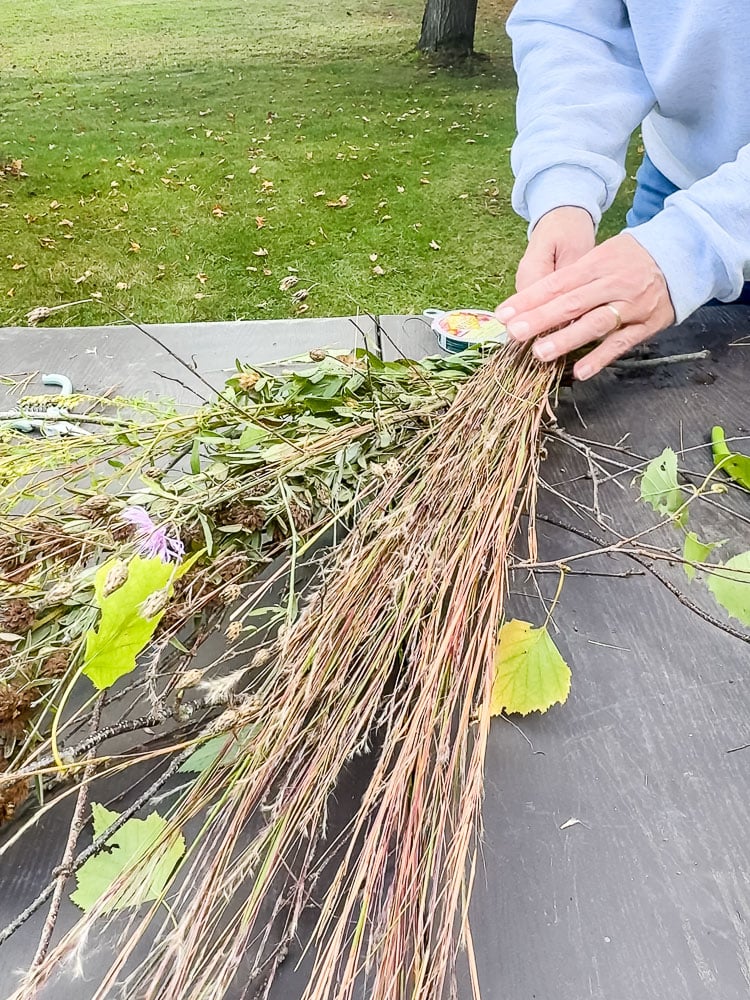
After each addition, wrap your paddle of floral wire around the stems a couple of times to hold everything in place. Don’t cut the wire! Just keep wrapping as you go.
4. Add A New Texture
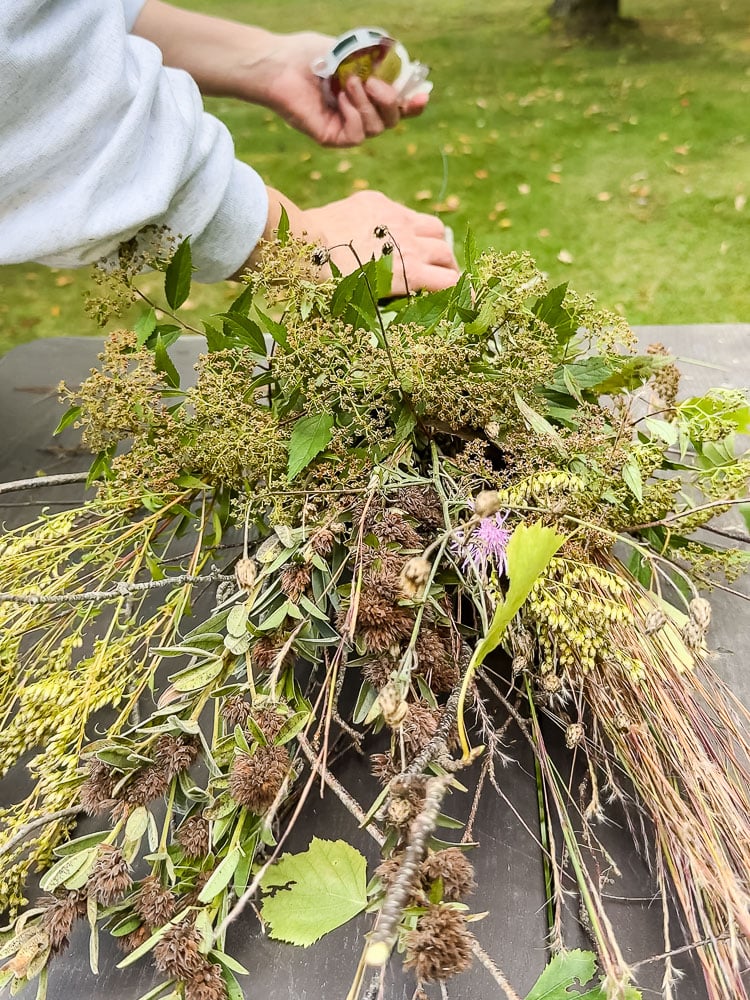
Once the wildflowers and grasses were in, I added a few branches of dried spirea flower heads. Their clusters of tiny flowers bring a completely different texture than the wispy grasses and wildflowers, and that contrast is what keeps a swag from looking flat.
If you don’t have spirea, look for anything with a different shape than what you’ve already added, like seed pods, berries, or clustered flower heads. Wrap the floral wire around a couple more times to secure them.
5. Shop Your Garden For The Finishing Touches
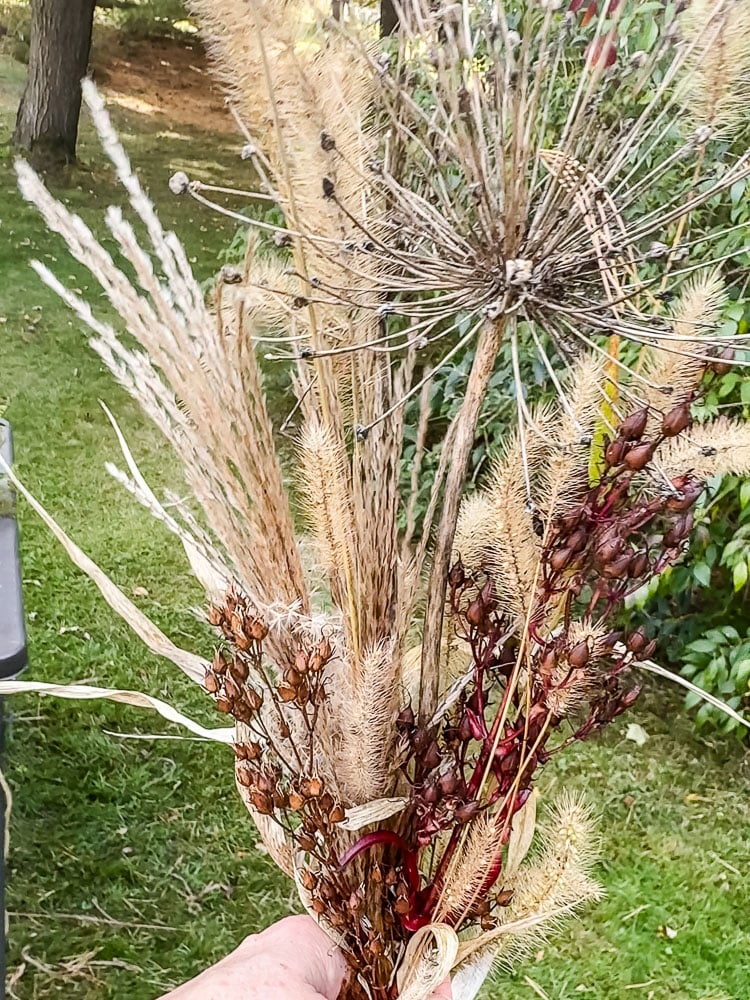
For the last layer, I headed over to my garden. From my perennial beds I snipped ornamental grass plumes, dried monarda seed pods with their bright red leaves and stems, and, funny enough, a few foxtail grass weeds that had popped up. Hey, after September I’m done weeding! Turns out they look great in a swag.
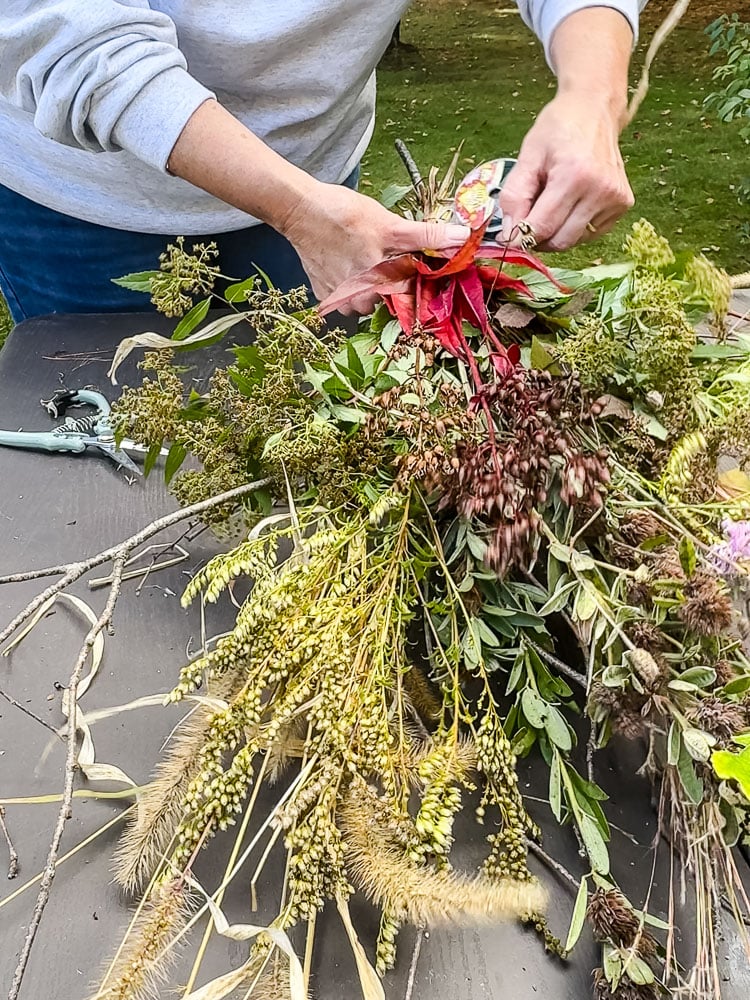
No garden? A few stems from a grocery store bouquet, or dried flowers you already have around the house, work just as well.
6. Let’s Add A Pop Of Color
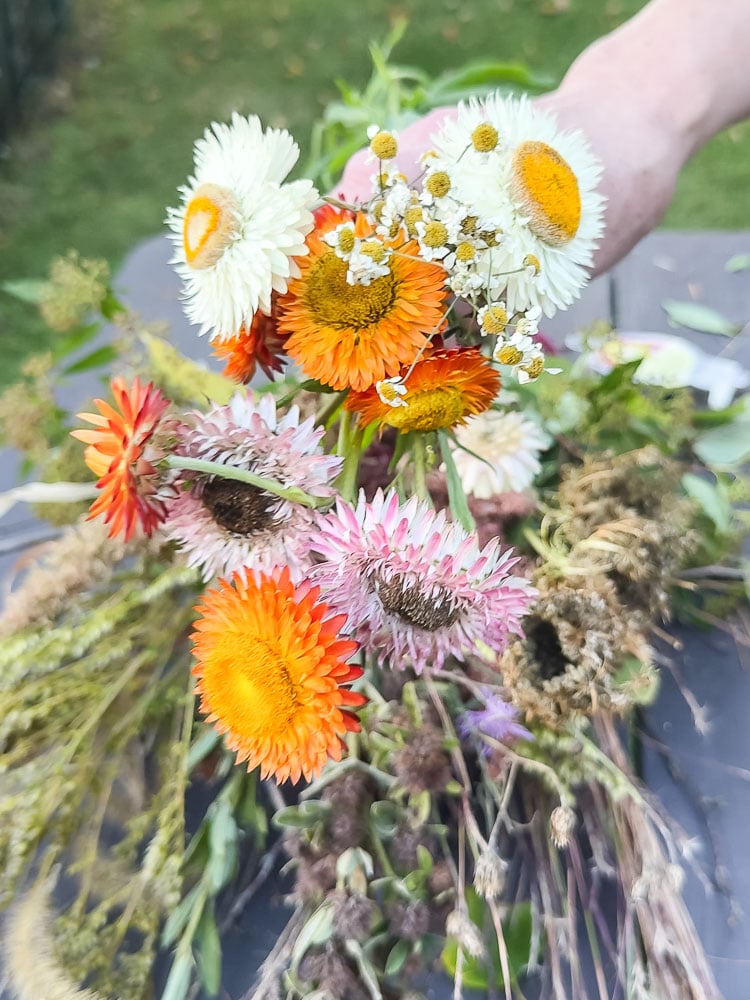
For a little pop of color, I wandered into my cut flower garden and snipped some strawflowers and a couple of plumes from a colorful amaranth plant.
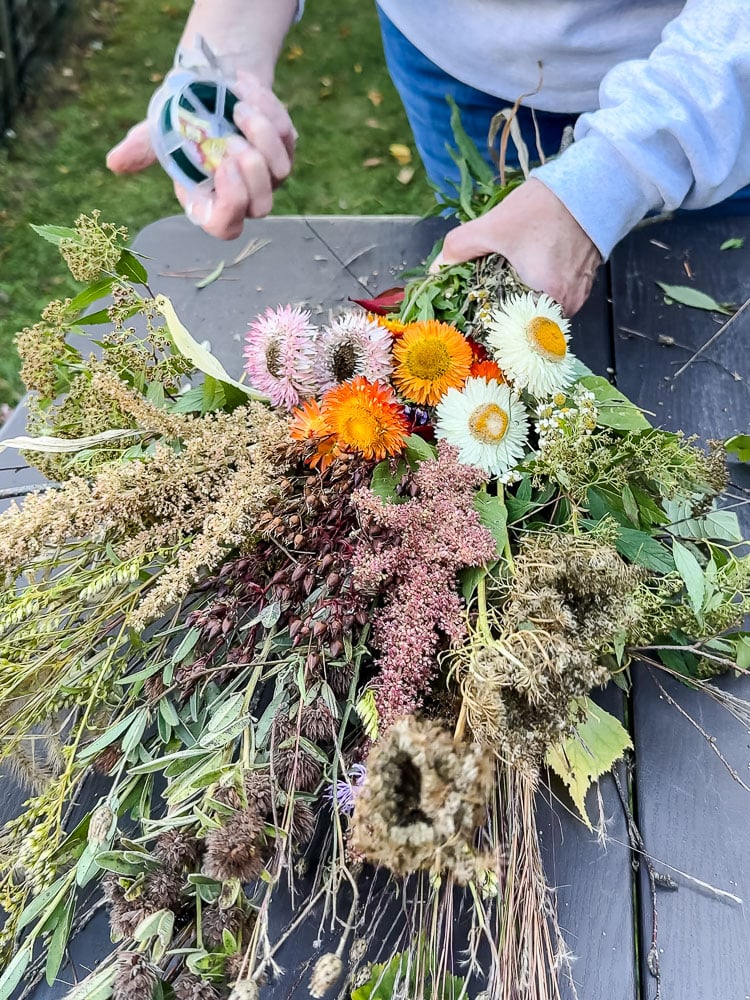
Tuck your brightest blooms in near the top, just below where everything is wired together. That’s where the eye goes first, so that’s where your color should be. Give the floral wire a few more wraps to lock it all in.
No garden? A few stems from a grocery store bouquet, or dried flowers you already have around the house, work just as well.
7. Finish Off With Raffia & Ribbon
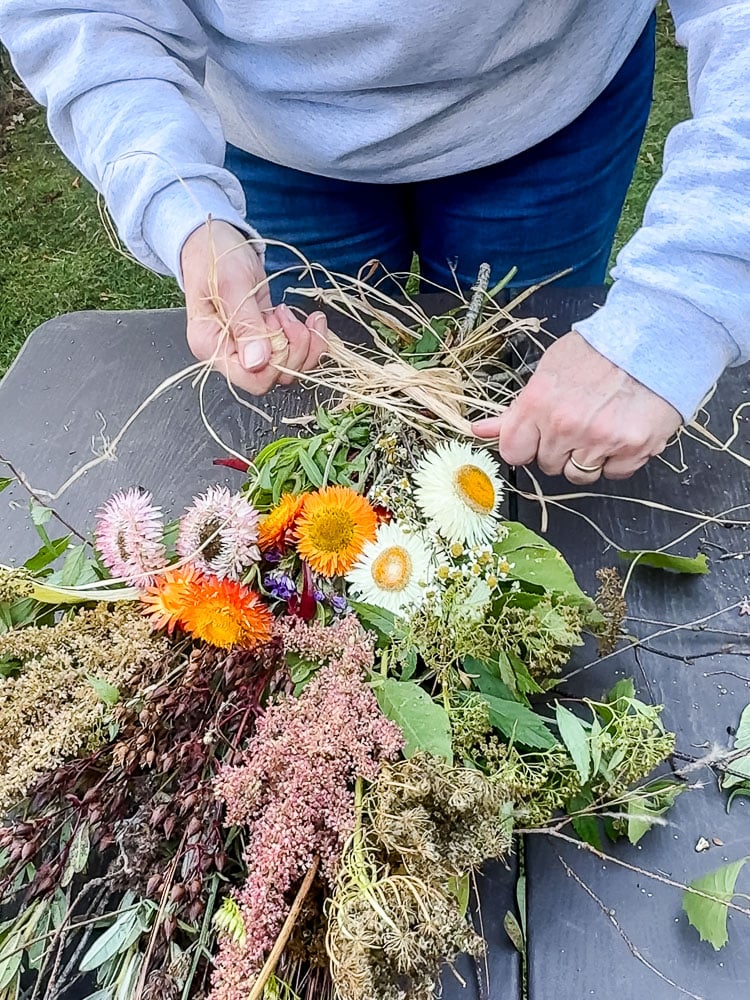
Wrap a big handful of raffia around the tie point to cover the floral wire, and let the ends hang loose. Then tie on your ribbon and let the long tails trail down through the swag. Go loose and natural here. A perfect bow would look out of place.
- This frayed velvet ribbon from Hobby Lobby is the best & most affordable that I have ever found, just $2.99 when it’s on sale (I always stock up!)
8. Hang It Up
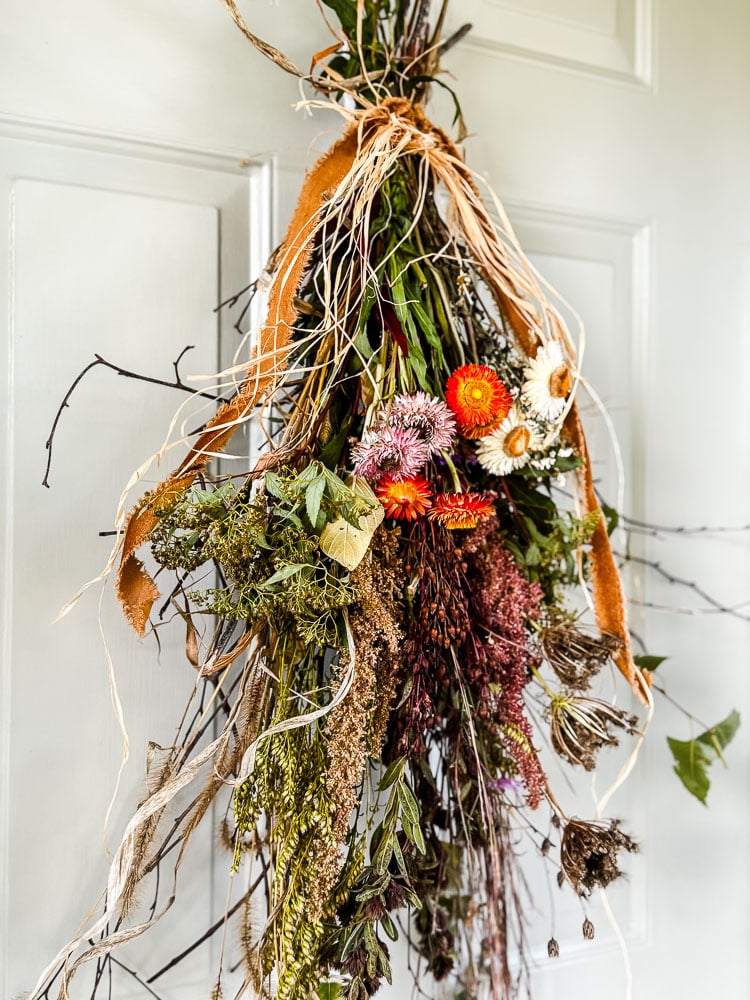
Then it’s time to hang up the foraged swag.
I just slipped my door hook under the floral wire at the top of the swag to hang it up. Then I spent a minute arranging and adjusting the materials in the swag-once it’s hung up, it’s easy to see what needs to be tweaked or trimmed.
How Long Will It Last
Because most of what goes into a swag dries well, yours should look good for most of the season. The greenery will fade, and the leaves will crisp up, but honestly that’s part of the charm. It just gets more autumn-y as the weeks go by.
Tips to keep it looking its best:
- Let it dry in place. You don’t need to dry anything first. Hang it fresh and let nature do the work.
- Protect it from heavy rain if you can. A covered porch or a door with an overhang helps it last longer.
- Expect a little shedding. Grasses and seed heads drop bits as they dry, so you may need to sweep the step now and then. (Amaranth is notorious for dropping its small round seeds)
- Refresh it as you go. Tuck in new finds on your walks, like a few berries or a branch of bright leaves, to keep it changing with the season.
This little swag is a reminder that the prettiest fall decor isn’t sitting on a shelf in a store. It’s growing along the edge of the woods, out in a field, and in the corner of my garden.
So before you head to the store this season, take a walk. Bring your clippers. You might be surprised by what comes home with you.
If you make your own swag, I’d love to see it!
See your projects featured! If you are inspired by this or any of my other DIY projects, I would love to see them and add you to the Reader’s Spotlight gallery. Send a photo to me at jennifer@cottageonbunkerhill.com
xo, Jennifer
Love projects like this? Don’t miss out! Join my newsletter family for more cozy, budget-friendly DIY ideas delivered right to your inbox. You’ll get exclusive tips, early access to tutorials, and all the inspiration you need to make your home feel handmade and heartfelt.
featured
pressed flower art
My top choices & supplies that I have used in my pressed flower tutorials