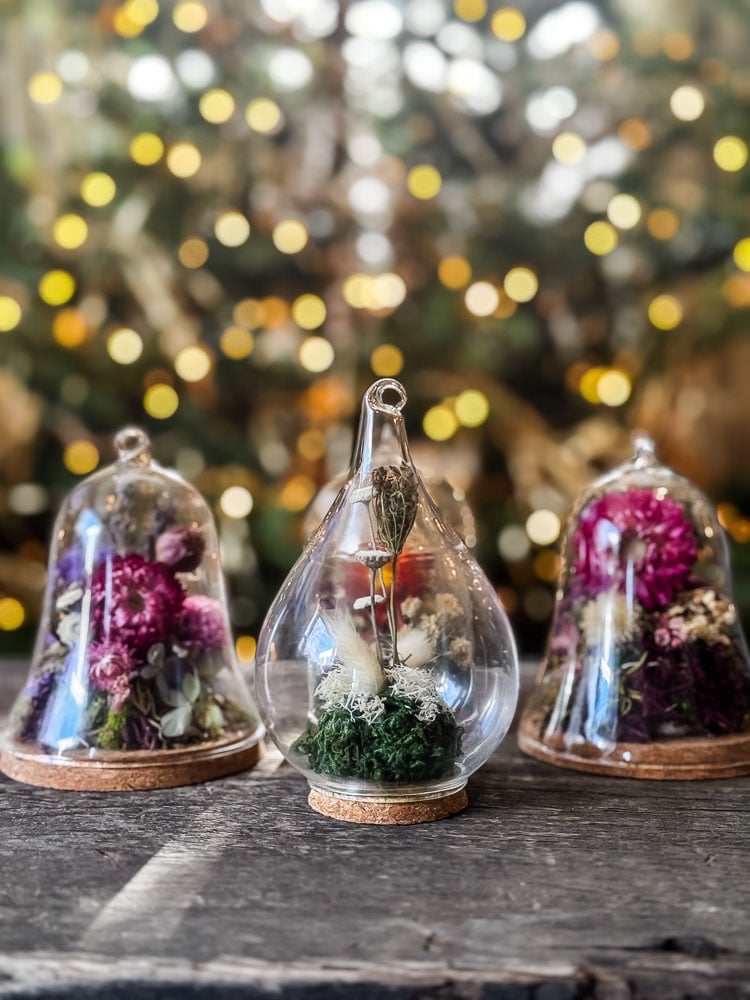
If you’ve been around here for a while, you know I dry pretty much everything that comes out of my garden. I have racks of dried flowers hanging all over the place (at this point they’re basically part of the decor), and I’m always looking for new ways to actually bring them into my home instead of just admiring them from the drying rack.
This time, I came up with a way to use them for Christmas: tiny garden worlds tucked inside little glass cloche ornaments. They look like something you’d find in a fancy boutique, but they cost a few dollars each and come together in an afternoon. I made four (because once you make one, you’ll want to make another), and I’ll walk you through exactly how I did it, including the little trick that saved my sanity with floppy strawflower stems. And no, you don’t need a cutting garden to make these. I’ll share some options for that, too.
This post may contain affiliate links, which means we receive a small commission if you purchase through our links. See our disclaimer page for more information.
What You Will Need
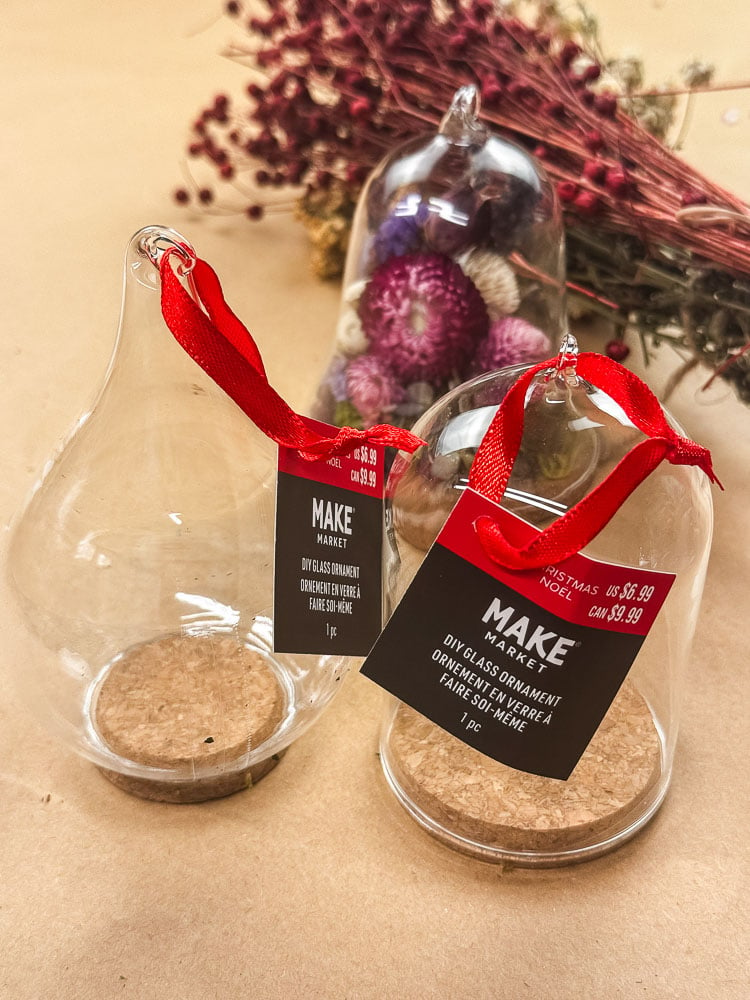
Materials for this Project
- Glass bell ornaments with cork bottoms. The cork bottom pops out, so you build your scene on the cork and slide the glass back over it.
- Styrofoam balls, cut in half (or a small piece of floral foam)
- Dried moss, a mix of textures if you have them (sheet moss, reindeer moss, mood moss)
- Dried flowers and grasses in small sizes
- Floral wire
- Hot glue gun and glue sticks (a low-temp or mini gun is helpful for the tiny details)
- Small scissors or snips

Welcome! I’m Jennifer, and I’ve always believed nature is the most beautiful art supply. For years, I’ve been preserving New England’s blooms and foliage through pressing, drying, and crafting. Let me show you how to capture a little bit of the season and bring it indoors—simply and beautifully.
A Quick Note On The Foam
I originally planned on using floral foam for the base, then remembered I had a bag of styrofoam balls stashed away from some long-forgotten craft. I cut a few in half and honestly? The half-dome shape turned out to be the best part. It gives the scene a gentle little hill, so the flowers rise up toward the center of the ornament instead of sitting flat. Happy accident, and one less thing to buy.
Floral foam works fine too. Just trim it into a small mound to keep that same rounded shape.
How to Make Dried Flower Cloche Ornaments
I made a set of 4 ornaments, and with each one I tried to use different flowers and color combinations. I had 3 styles of glass ornament shapes: traditional cloche, bell, and a teardrop.
Step 1: Cut, Shape, & Glue
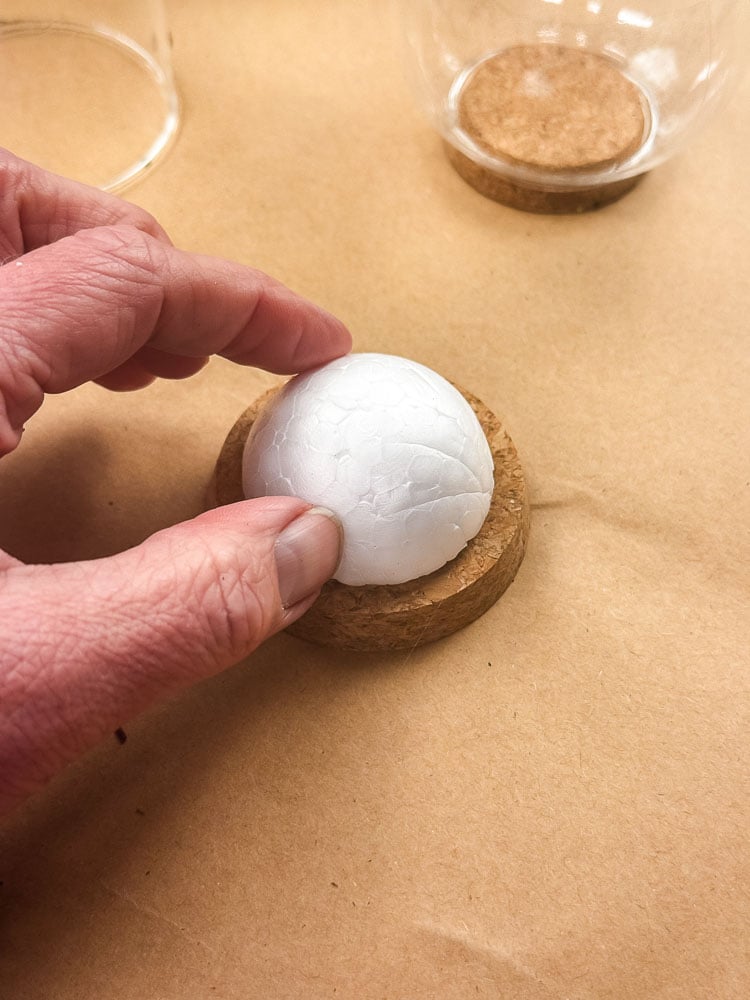
Use a knife to cut a styrofoam ball in half or to size your piece of floral foam. Set the glass bell over the cork with the foam on it to check the fit.
You want room around the edges and enough headroom above for your flowers. If it’s too big, shave it down a bit at a time.
Add a dot of hot glue to the flat side of the foam and press it onto the center of the cork bottom. Hold it for a few seconds until it sets.
Step 2: Cover The Base With Moss
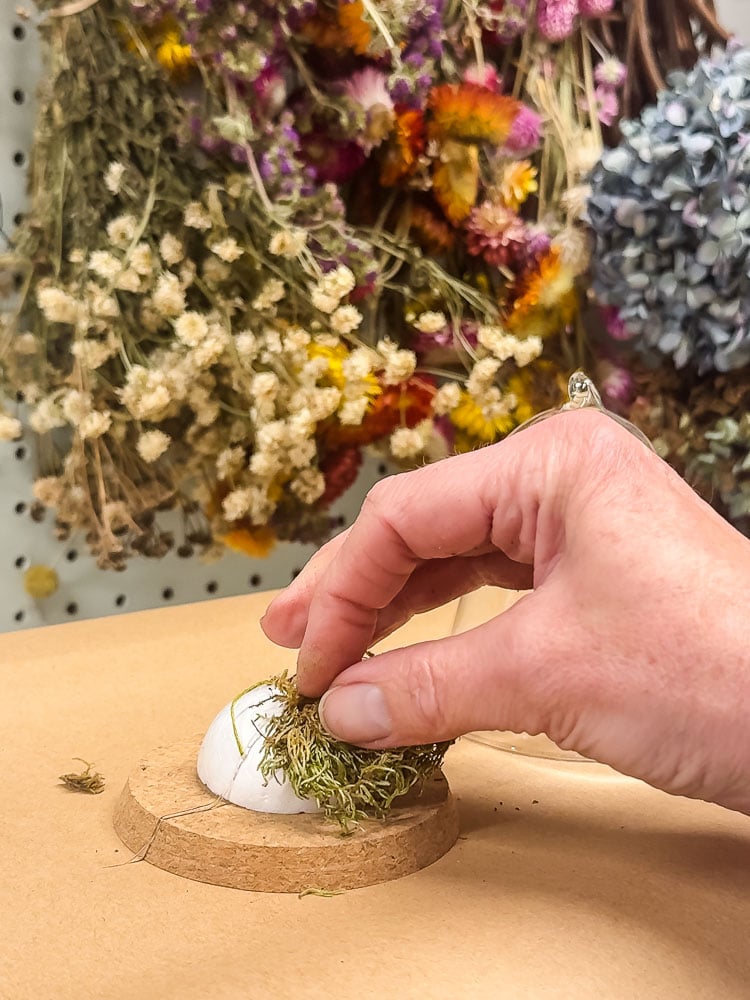
Hot glue small pieces of moss all over the foam until none of the white shows. Work in small sections, since hot glue cools fast. Tuck a little moss around the base too, so it looks like the hill is growing right out of the cork.
This mossy base does double duty: it hides the foam, and it gives you something soft to tuck your flowers into.
Step 3: Plan Your Little Garden
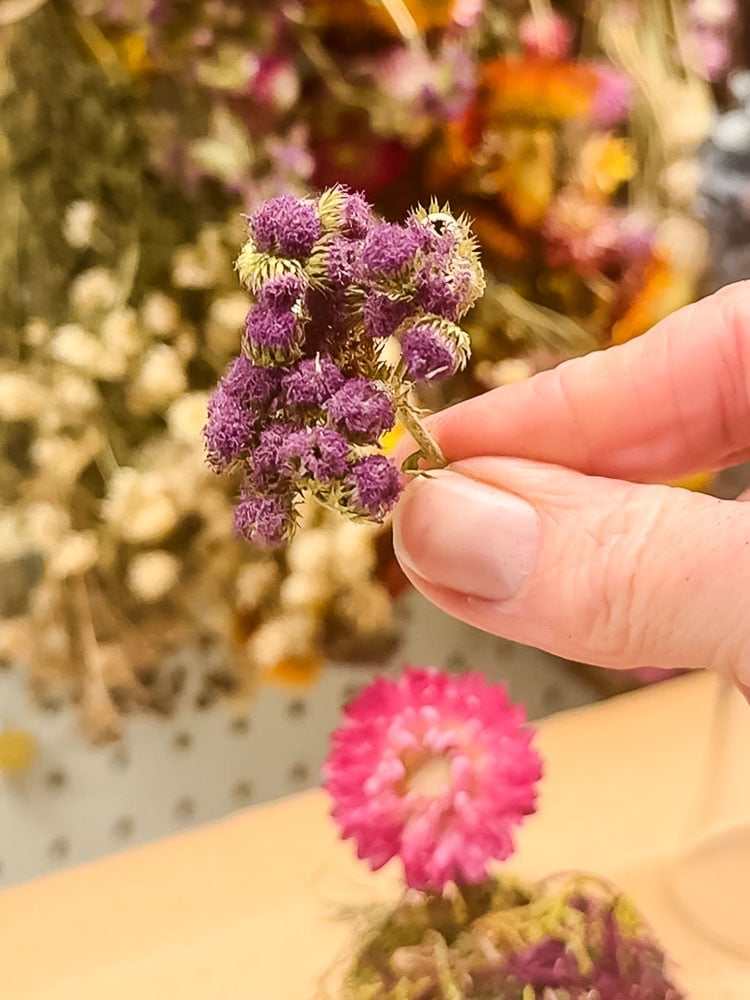
Before you glue anything, lay out your flowers and play around with the arrangement. I found it helpful to think of it like a real garden bed:
- One or two “focal” blooms in the center (strawflowers, globe amaranth, a tiny rose)
- Something tall and airy toward the back or middle (grasses, statice, lavender)
- Filler around the edges (baby’s breath, tiny seed heads, bits of statice)
Keep holding the glass bell over it to check your height. Anything that touches the glass will get squished when you put it on (but the squishing looks cool; you just don’t want things bent in a way they may break)
Step 4: Add Your Flowers
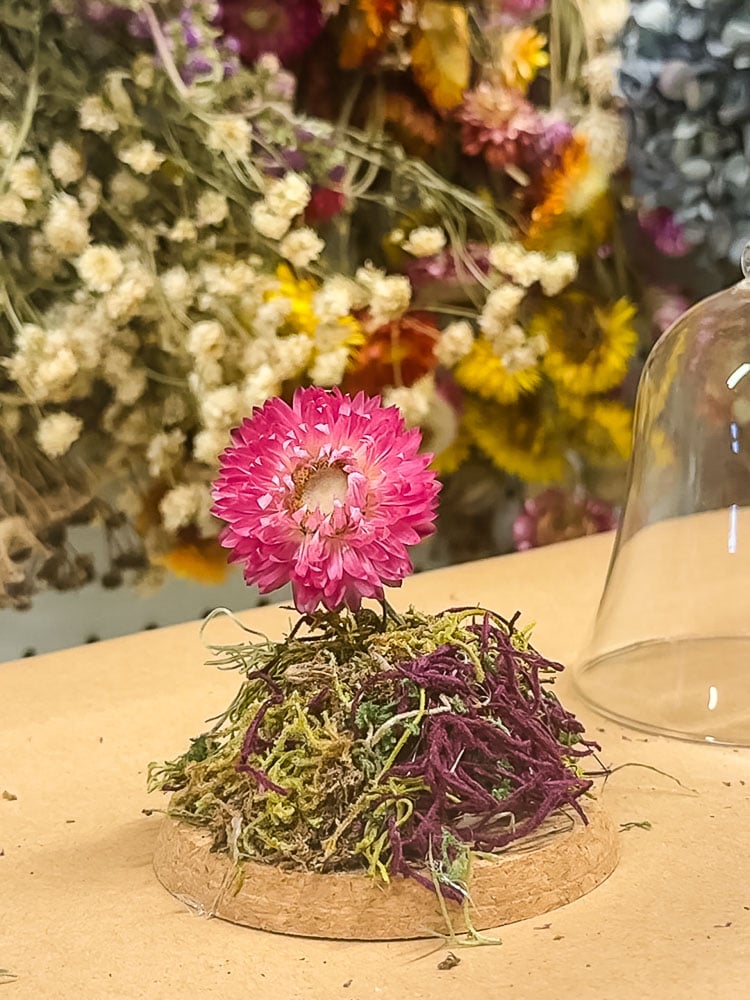
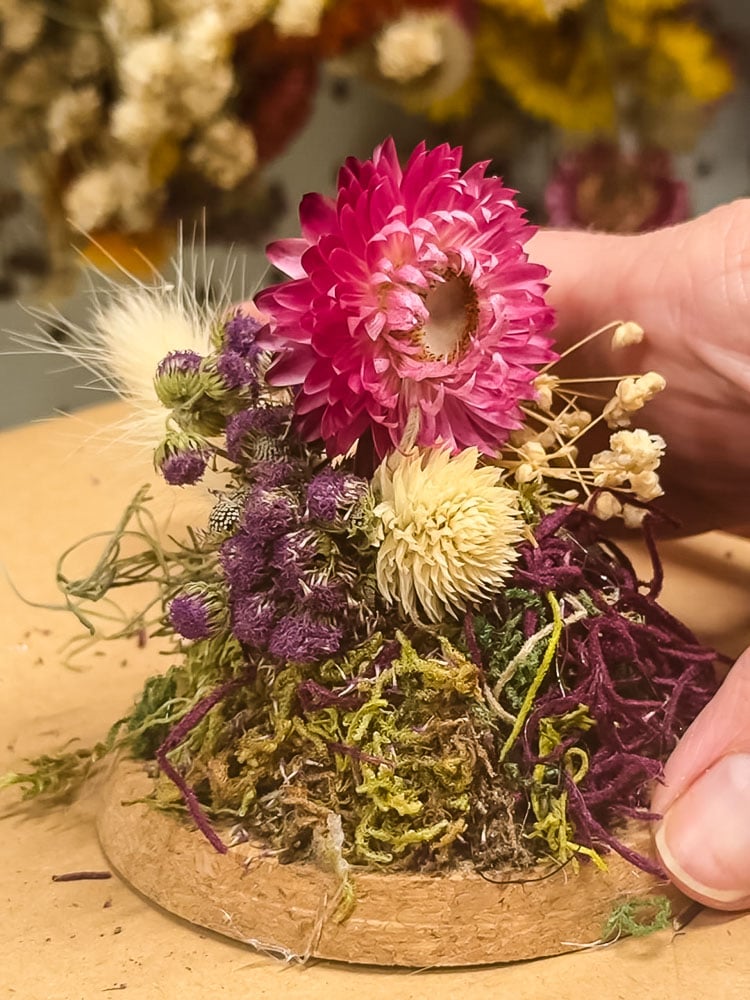
Trim stems short and push them into the foam through the moss. Add a tiny dab of hot glue to the stem end first if you want it to really stay put. Start with your focal flowers, then work outward with the taller pieces and filler.
Strawflower Note
Here’s where I hit a snag. Strawflowers are gorgeous dried, but their stems are weak and tend to snap or flop right off the flower head. So I skipped the stems entirely.
Instead, I cut a short piece of floral wire, bent the end over, put a small dot of hot glue on the underside of the flower head, and pressed the wire into it. Once the glue cooled, I had a sturdy little “stem” I could push right into the foam. Works like a charm, and you can bend the wire to tilt the bloom exactly where you want it.
This trick works for any dried flower with a fragile or missing stem.
Step 5: Close It Up
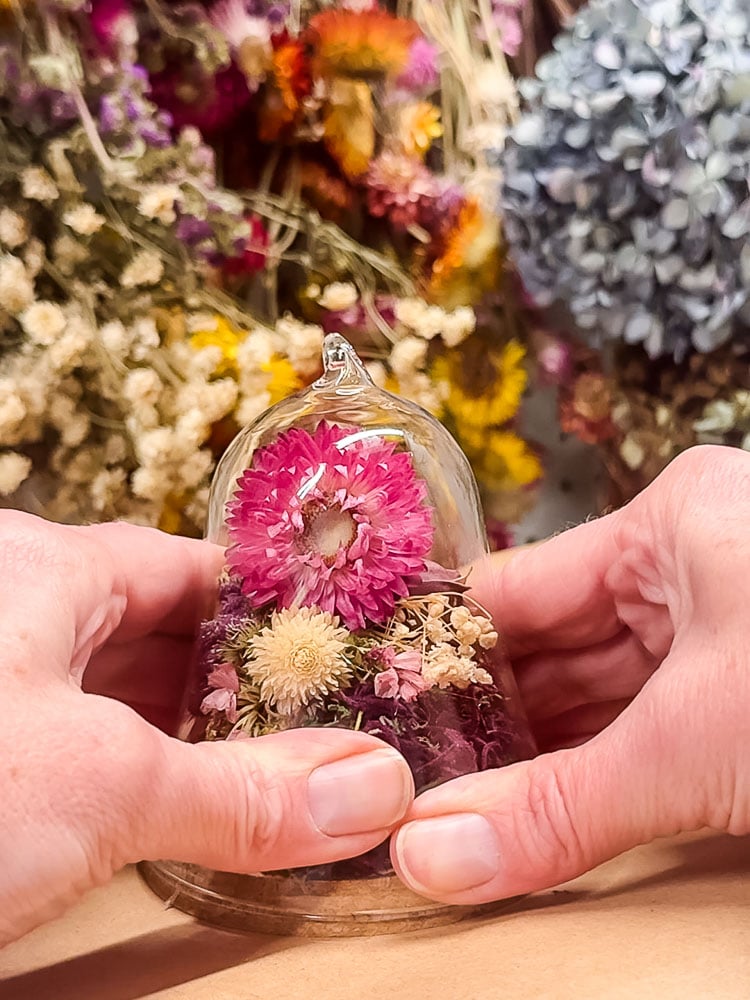
Once you love your little scene, carefully lower the glass bell over the top and press the cork back into place. Double-check for hot glue ‘spider webs‘; I didn’t notice a couple until the dome was on and the light hit it.
Add a ribbon through the top loop if needed, and it’s ready for the tree.
My Four Ornaments
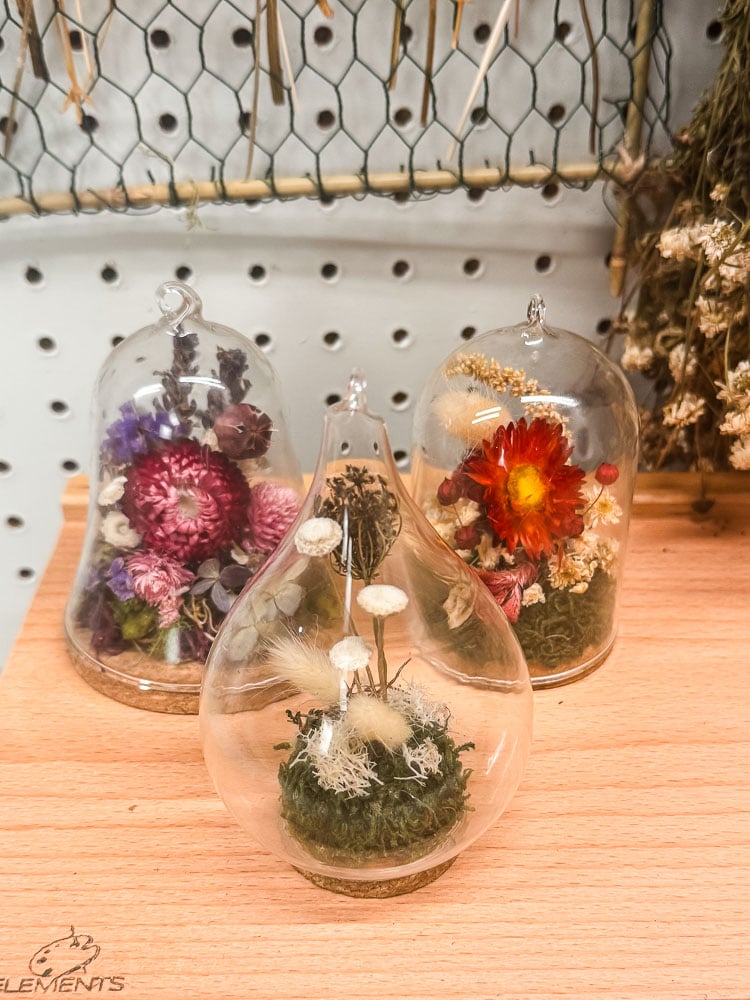
I ended up making a set of four, and I had fun mixing things up with each one, using different flowers and color combinations so no two look alike. I played with the glass shapes, too, using three styles: a traditional cloche, a bell, and a teardrop. Here’s a peek at each one:
1. Traditional Cloche
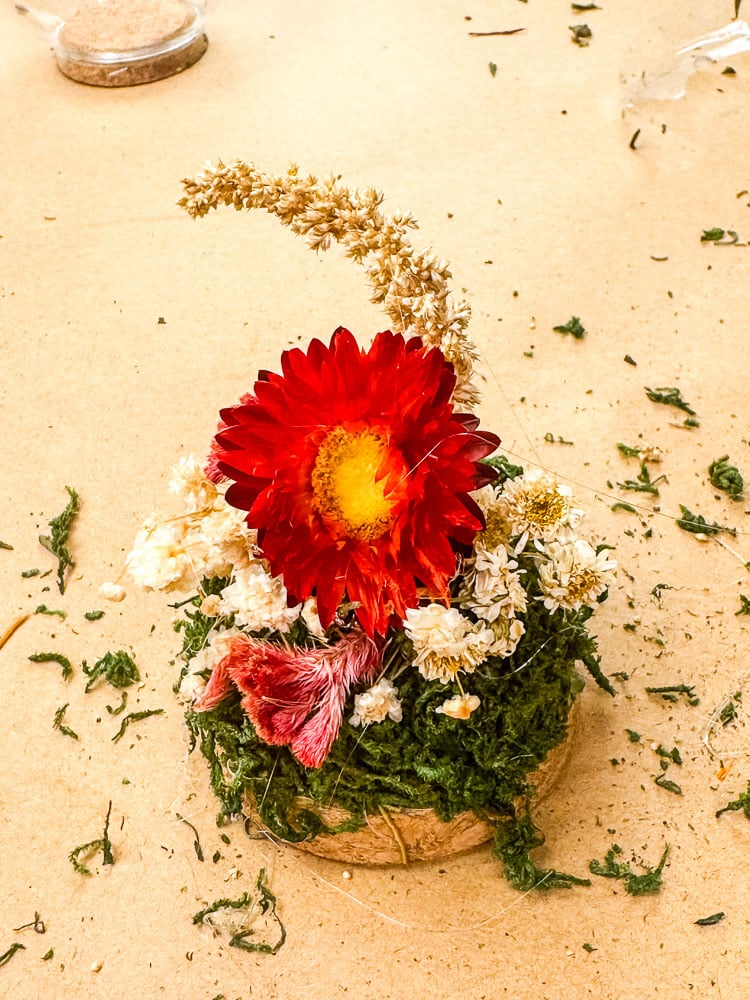
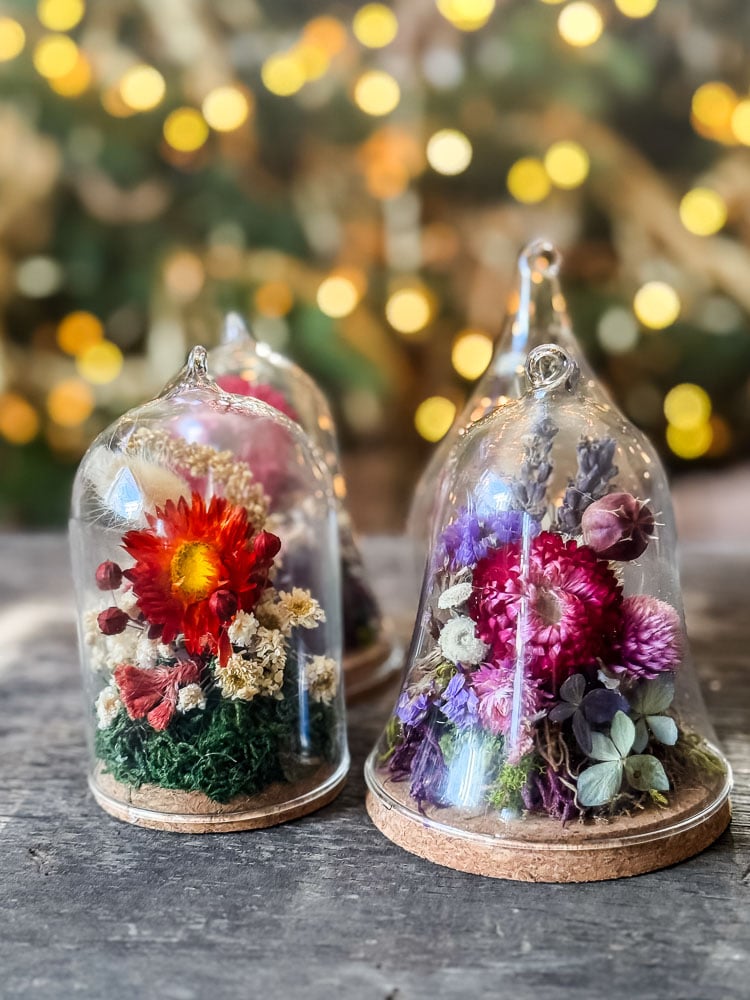
The traditional cloche: This one is all warm, cozy colors. A big orange-red strawflower sits front and center, surrounded by tiny cream feverfew and a wisp of pink celosia. A tall piece of cream amaranth adds some height in the back, and everything sits on a bed of bright green moss. The red and green feel festive without screaming “Christmas,” so it could honestly stay out all winter.
2. The Teardrop
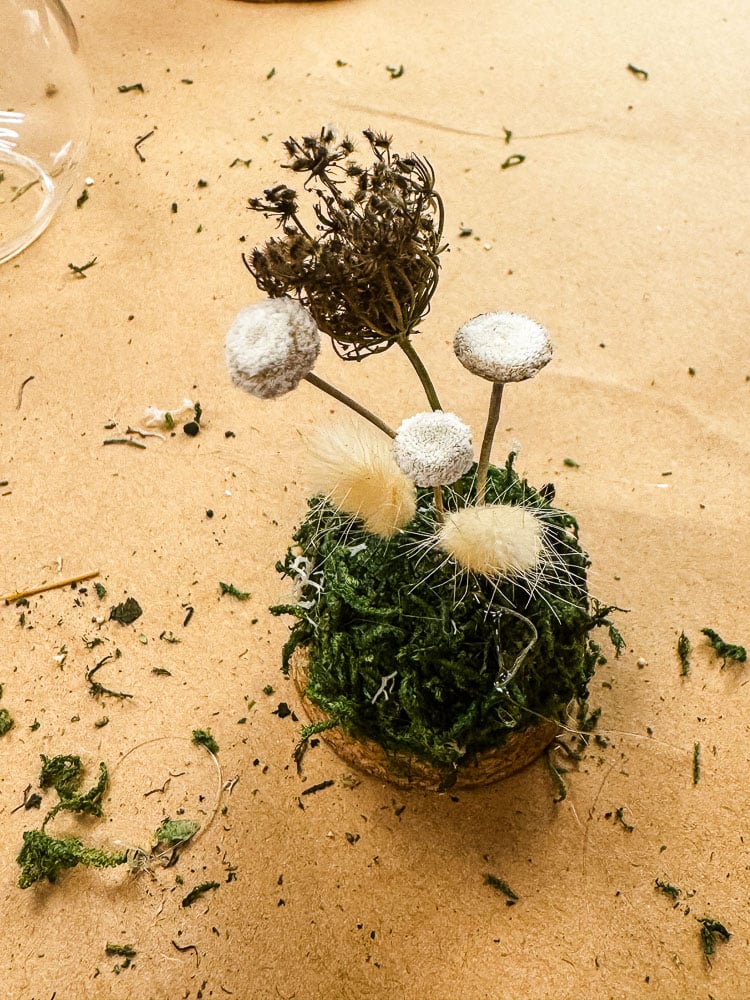
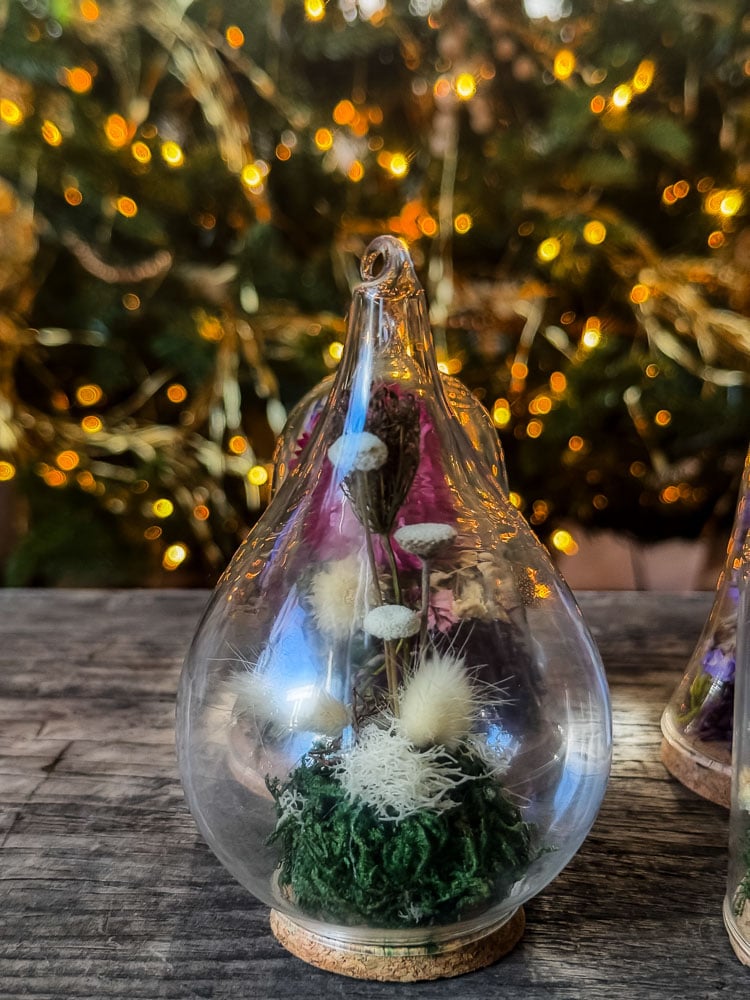
The teardrop: This one feels like a little woodland scene. Tiny white button flowers on skinny stems (another Hobby Lobby dried bunch) look just like a cluster of mushrooms popping up through the moss, and a few fluffy bunny tails, and a small Queen Ann’s Lace make it look like a frosty morning. I topped the green moss with a bit of white moss so it looks like a dusting of snow. The tall, narrow shape of the teardrop gives the stems room to stretch up.
3. The Bell
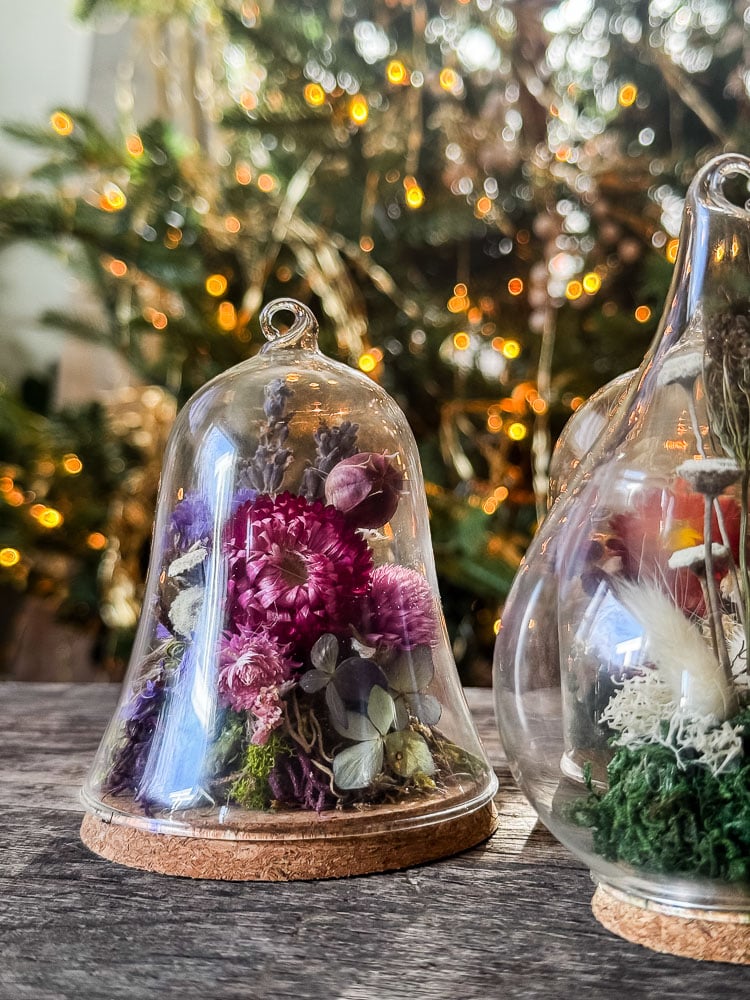
The bell: This is the jewel-toned one, all berry pinks and purples. A big magenta strawflower is the star, with pink globe amaranth and a purple nigella pod tucked beside it. Sprigs of lavender stand up in the back, and I added some purple statice for extra color. Little bits of hydrangea in soft green and dusty purple and a few silvery leaves fill in around the base. The wide bell shape gives you room for a fuller, cottage-garden kind of arrangement.
4. The Second Bell
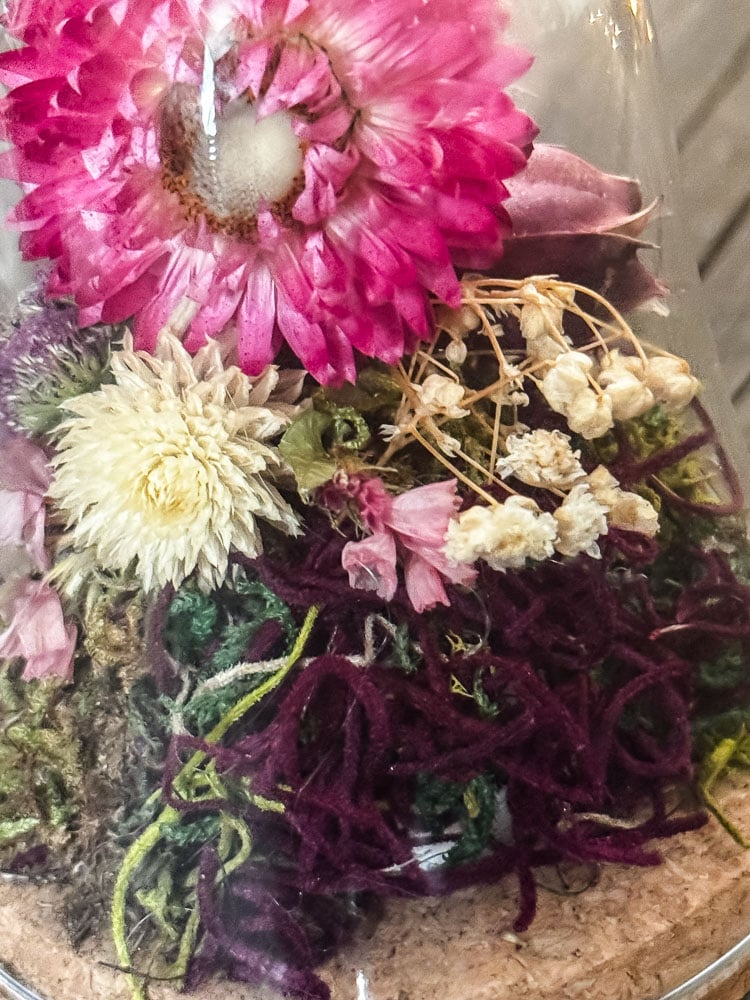
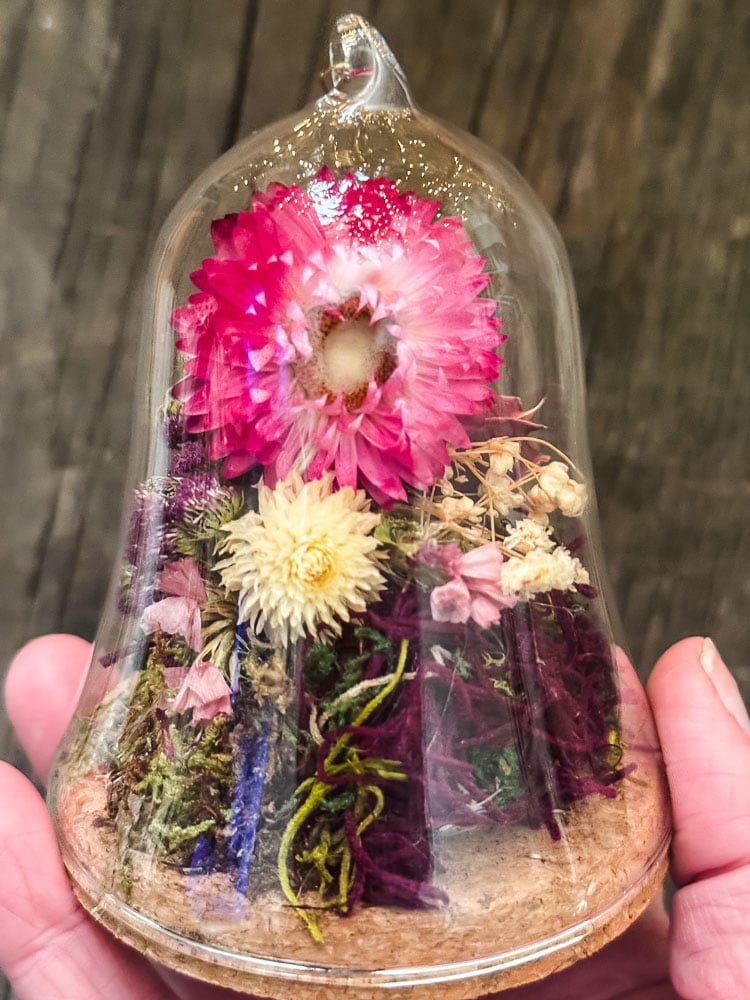
The second bell: For my last one, I went soft and romantic. A pink strawflower takes center stage, with white gomphrena and airy baby’s breath around it and a nigella pod tucked in for a little texture. Pieces of apricot statice add a warm, peachy glow, and a single bunny tail gives it some height. Instead of the usual green, I used purple moss for the base, which makes all those soft colors pop.
Don’t Have a Garden? No Problem
Most of my flowers came from my own cutting garden, but you absolutely don’t need one to make these. A few other options:
- Buy dried flowers. Craft stores and local flower farms often sell small bundles, and one bundle goes a long way at this scale.
- Forage. Grasses, seed heads, and tiny pinecones from a walk can look lovely.
- Use artificial flowers. Mini faux florals and picks work too, and they’ll last forever.
- Mix it up. A few real dried flowers with some faux filler is a budget-smart way to stretch what you have.
Tips For Success
- Think small. Smaller blooms read better in a 4-inch bell. Save the big flowers for wreaths.
- Test the fit often. Keep setting the glass over your scene as you go so nothing gets crushed at the end.
- Use tweezers for placing the tiniest pieces.
- Go easy on the glue. Hot glue strings are hard to hide inside clear glass. Just pull them off gently-it’s easy!
- Handle dried flowers gently. They’re brittle, so trim them over a tray to catch the crumbs (and the petals you’ll inevitably knock off).
Christmas
22 DIY Ornaments
Learn to Make 22 Different Christmas Ornaments!
Now It’s Your Turn!
There’s something so sweet about hanging a little piece of summer on the tree in December. These would also make lovely gift toppers, place settings for a holiday table, or a handmade gift for the gardener in your life.
If you make your own, I’d love to see what kind of tiny garden you create!
And if you are looking for more flower-centric ornament ideas, you need to check out these simple dried flower ornaments.
See your projects featured! If you are inspired by this or any of my other DIY projects, I would love to see them and add you to the Reader’s Spotlight gallery. Send a photo to me at jennifer@cottageonbunkerhill.com
xo, Jennifer