


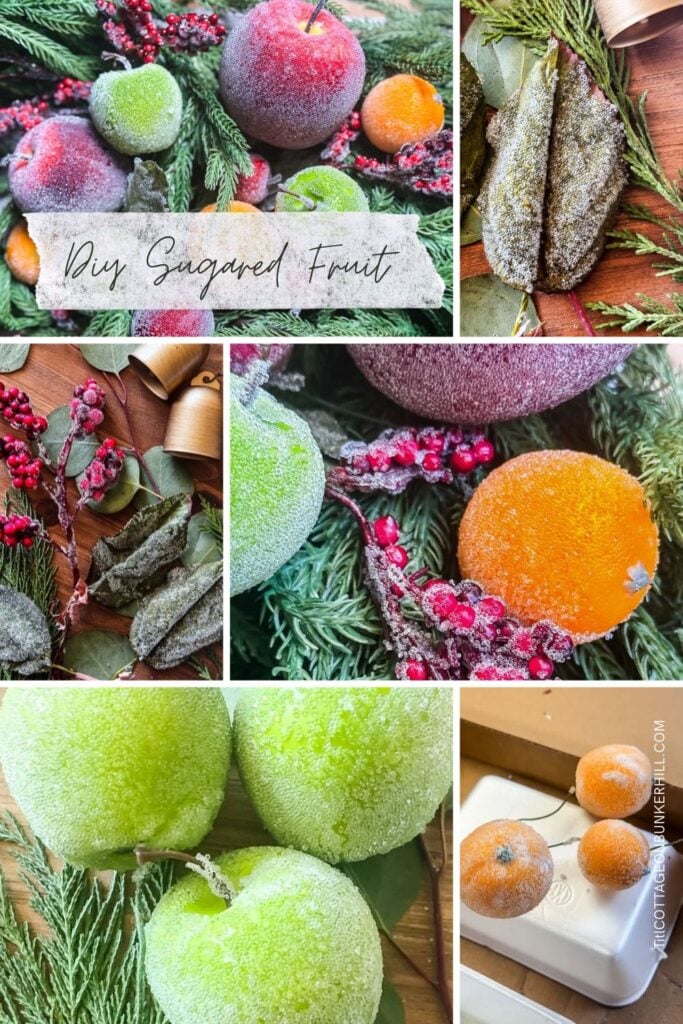
Sugared fruit is everywhere this Christmas! Here’s how I made DIY sugared fruit from a thrifted wreath with Mod Podge and glass microbeads.
If your feed looks anything like mine this week, it’s wall-to-wall sugared fruit. Frosty apples, glittering pears, oranges that look like they’ve been rolled in sparkly snow. It’s everywhere, and I am not mad about it.
So of course I had to ask myself why. Why now?
Part of it is just the season we’re in. The big retailers went all in on it this year. Sugared fruit ornaments showed up across the UK Christmas collections. Here in the States, I’ve seen super pricey sets on the rise; forecasters are also pointing to a bigger “traditional fruit” moment, with some tying it to America’s 250th anniversary and a pull toward old-fashioned, heritage-style decorating.
But I think the bigger reason is nostalgia, and it comes in two layers.
Why is Everyone Suddenly Sugaring Fruit?
The old-old nostalgia. Sugaring fruit goes way, way back. In 1600s England, it was a way to preserve food. The Victorians picked it up and ran with it, because if there was a way to make something more decorative, the Victorians found it. Think fruit pyramids on the holiday table and wax fruit under glass domes in the parlor.
The 90s nostalgia. This is the one that got me. Raise your hand if your grandmother or mom had a bowl of beaded or sugared fruit on the dining room table, or a frosted apple ornament or two on the tree. The 90s were the era of themed Christmas trees, and “Victorian Christmas” was a big one (I remember this one!). Those frosty fruits were all over the place, and now they’re showing up at thrift stores and antique shops. (Which is exactly where this project started.)So here’s my take: it’s cozy, it’s a little bit kitschy in the best way, and it feels like Christmas at Grandma’s.
That’s a pretty good combination. The only problem? Buying it new adds up fast. So I made my own, using a thrifted wreath I already had in my holiday bin. Let me show you how.

Welcome! I’m Jennifer, and I’ve been sharing my home’s journey since 2019, always with a focus on budget-smart and achievable style. If you love the charm of New England but need it to work for real life, you’re in the right place. I break down my projects to help you create a home that tells your story, without the overwhelm.
This post may contain affiliate links, which means we receive a small commission if you purchase through our links. See our disclaimer page for more information.
What You Will Need
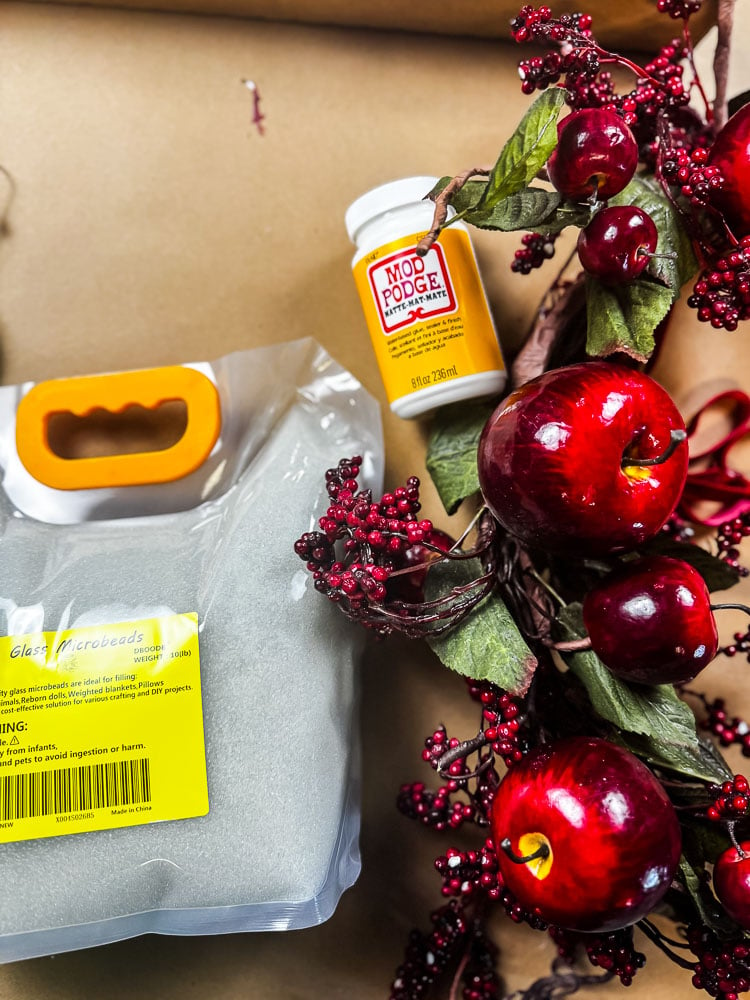
Materials for this Project
- Faux fruit, berries, and leaves. I took mine from a red apple and berry wreath I found at the thrift store last year. Then I added some small artificial green apples and oranges.
- Mod Podge. This is your “glue” for the sugar look.
- A small sponge paintbrush for brushing on the Mod Podge.
- Clear glass microbeads. This is what gives you that sugary, frosted sparkle. 1 lb,2 lb bag, 10 lb bag
- A spoon for spooning the beads over the fruit.
- A shallow box or tray to catch the beads. Trust me on this one.
- Floral wire stems and wire cutters for making little handles on loose fruit.
- A piece of styrofoam to stand everything up while it dries. I used a chunk of packaging foam from a delivery box.
- Optional: a clear spray sealer, gold cord, and hot glue (more on these below).
How To Make DIY Sugared Fruit
I’ll walk you through the step-by-step process so you can replicate it at home and get the same results. Since I am deconstructing a thrift store wreath for most of this project, that will be the only thing that will be different for you. But check out your own old wreath or garland stash to see if you already have something that can be sugared.
Take Apart My Wreath
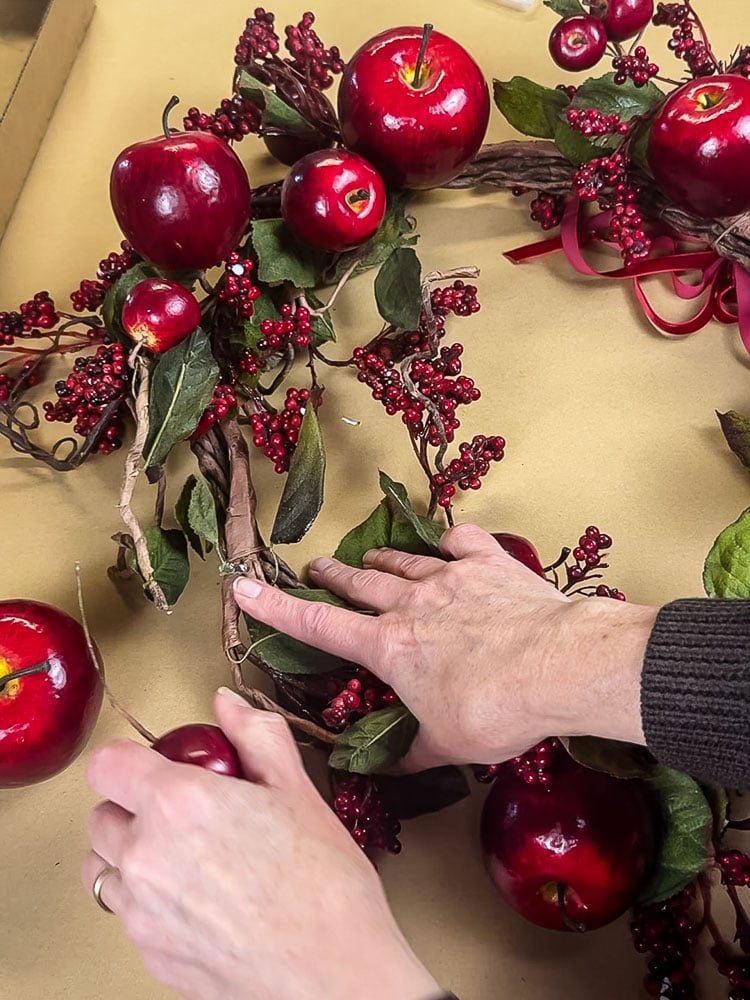
Take apart your wreath/garland if you are upcycling something you already have in your stash. I pulled off the apples, berries, and a few leaves off the wreath. Here’s a happy surprise: when I pulled out my apples, their wire came with them. That wire is your built-in handle, so don’t cut it off!
Add Wire Stems For Handling
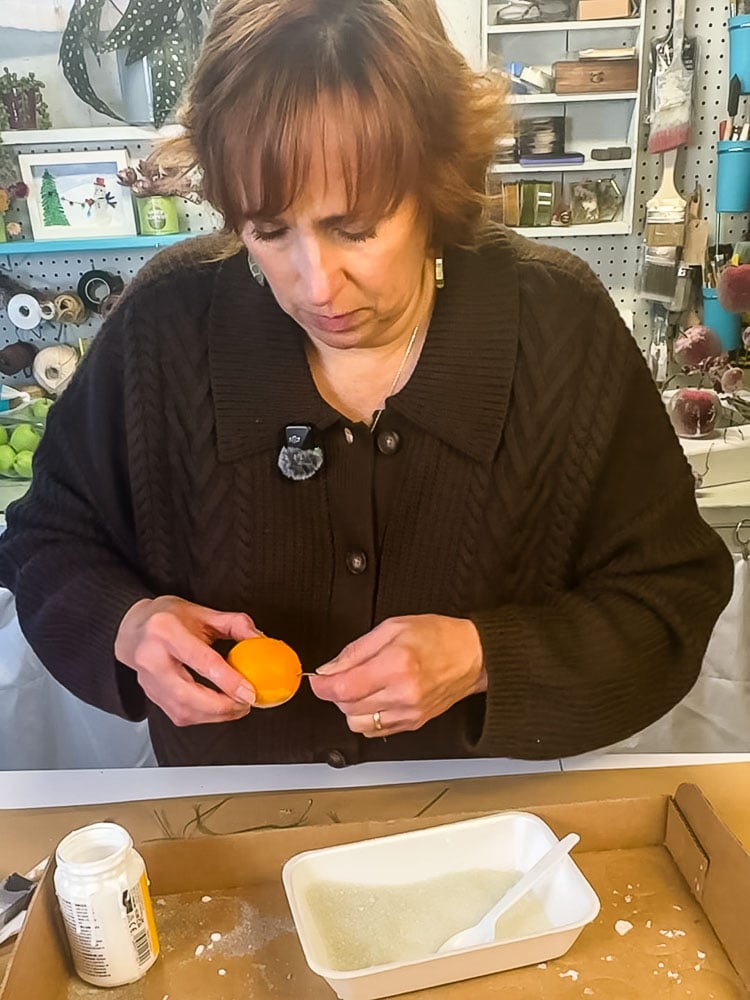
Add handles to loose fruit. My small green apples and oranges didn’t have wires. Cut short pieces of floral wire stems and push one into the bottom or stem end of each fruit. Now you have something to hold onto while you work, and you won’t end up with sticky fingerprints in the sugar.
If you touch the fruit when it’s wet with the microbeads on it, it will smudge...ask me how I know!!
Put your shallow box on the work table. I used the cardboard from a case of soda. Every bit of beading happens over this box. Glass microbeads roll everywhere, and you’ll be finding them for weeks if you skip this step.
Brush On The Mod Podge
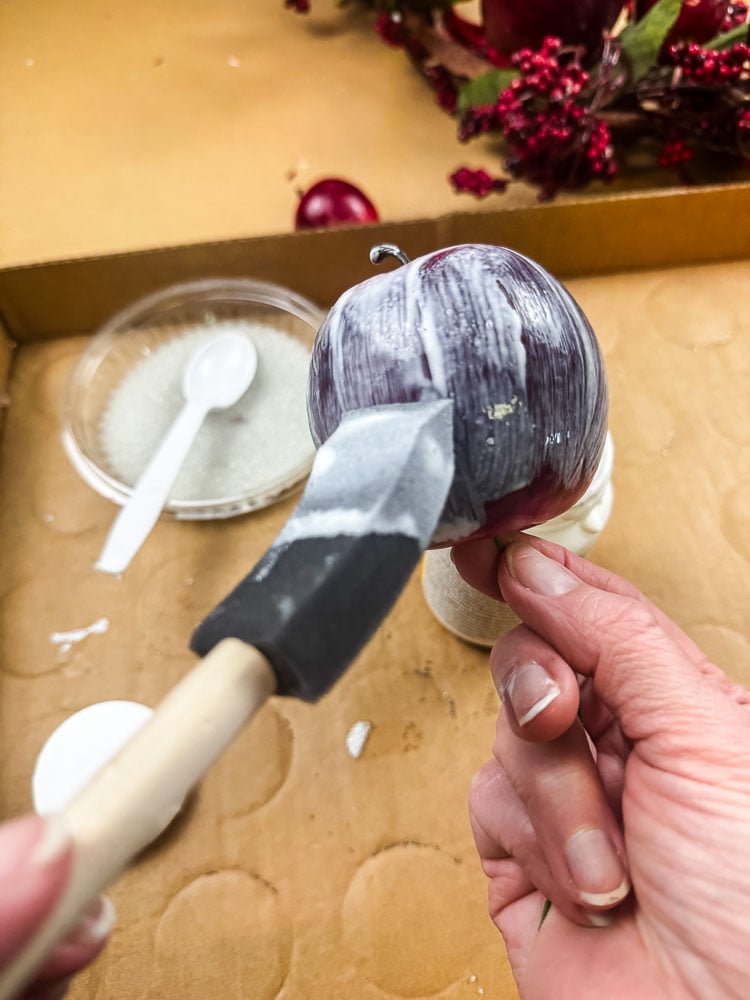
Holding the wire, brush a thin, even coat over the whole piece of fruit. Work on one piece at a time so it stays wet. You want an even coat of the Mod Podge, not too much so that it is drippy; the glass beads will run down the fruit.
Spoon On The Microbeads
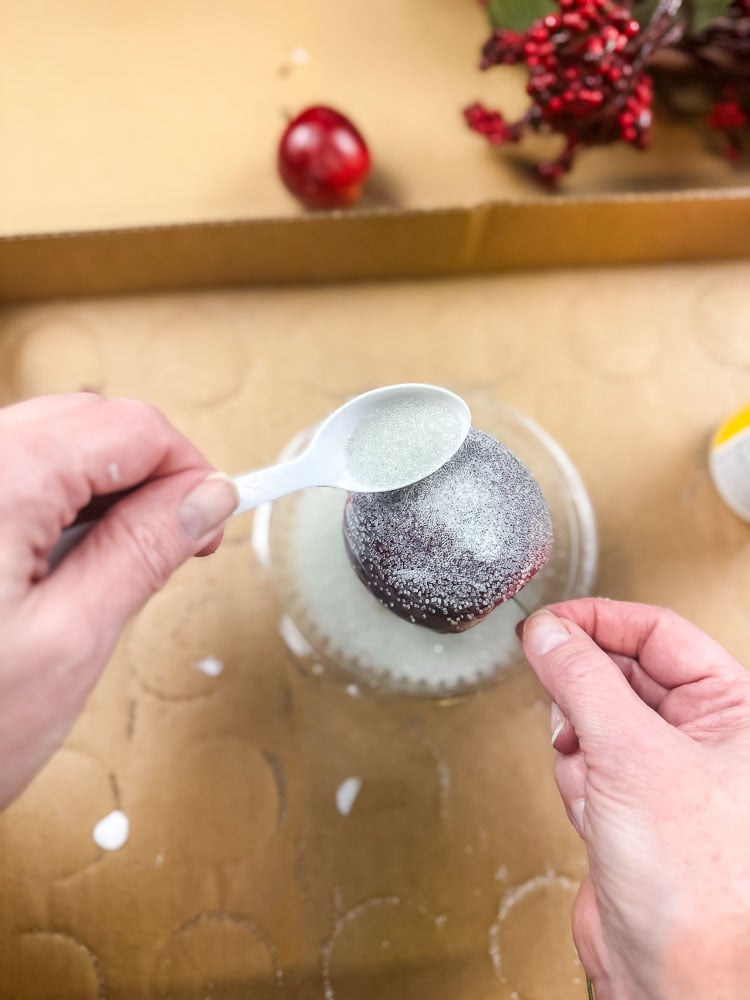
Hold the fruit over the box and spoon the beads over the wet Mod Podge, turning it as you go. Spooning works better than rolling because you get even coverage without crushing the coating. Tap gently to knock off the extras, which drop right back into the box for the next piece.
Stand It Up To Dry
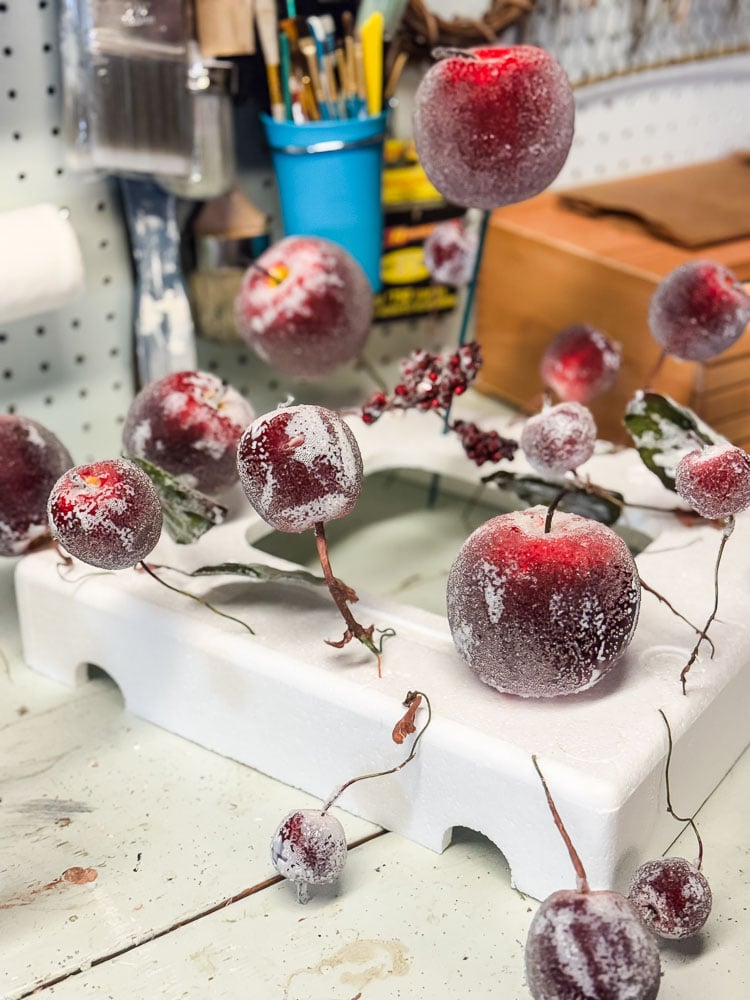
Poke the wire into your styrofoam so the fruit stands up without touching anything. Let it dry completely
Repeat With Berries & Leaves
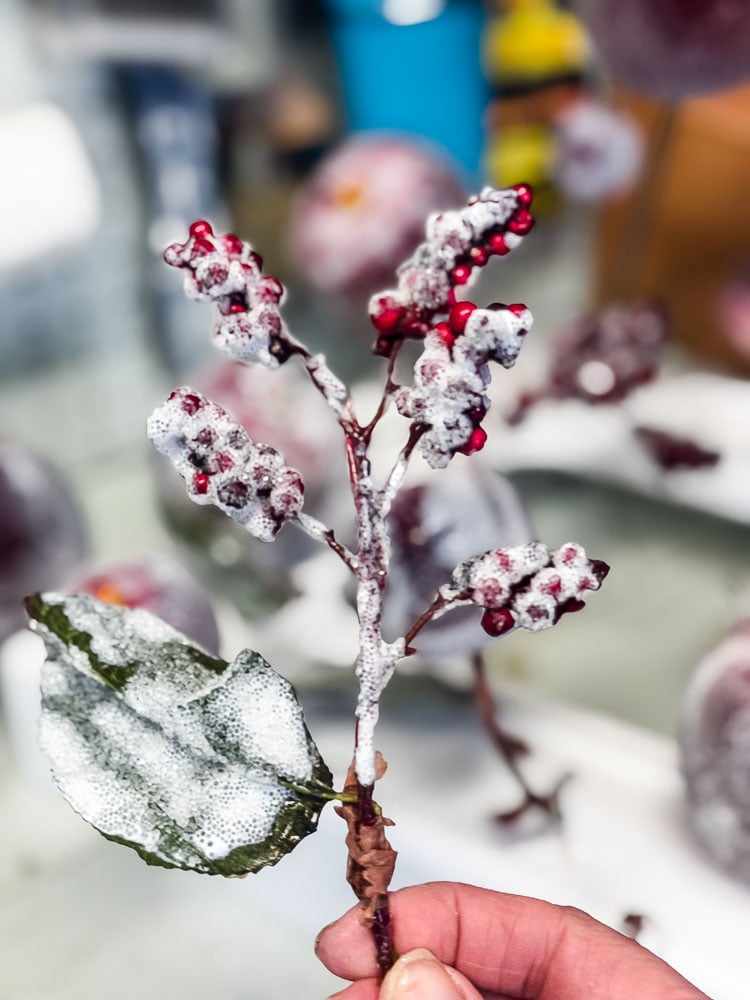
Same method. Brush, spoon, tap, dry. Do the leaves on both sides if they’ll be seen from the back.
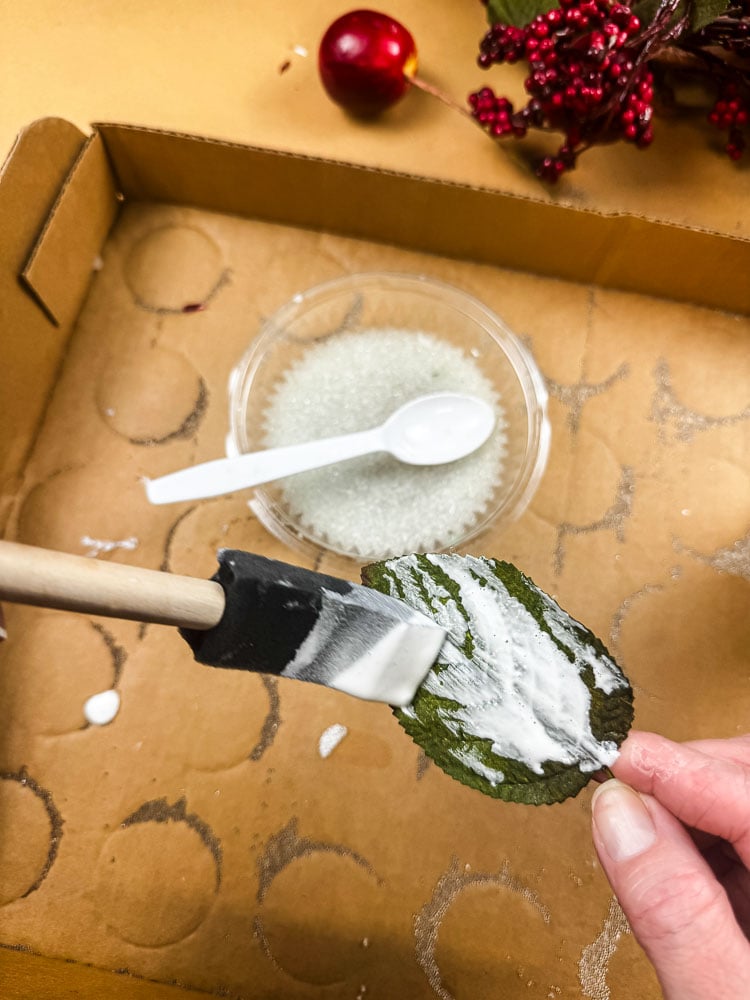
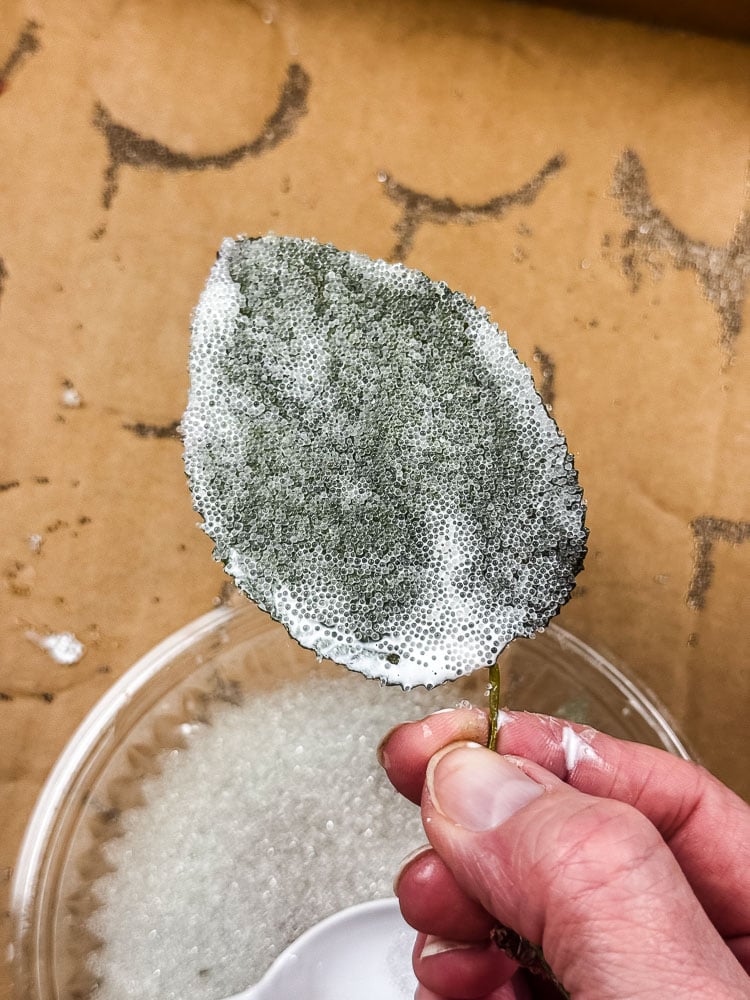
I found that when I was working with the berry picks, it was much easier to brush Mod Podge on them while they were flat on my worktable.
Note: You definitely do not have to coat the entire leaf or berry stem with Mod Podge; it looks nice to have some clear areas of both.
Works On All Kinds Of Fake Fruit!
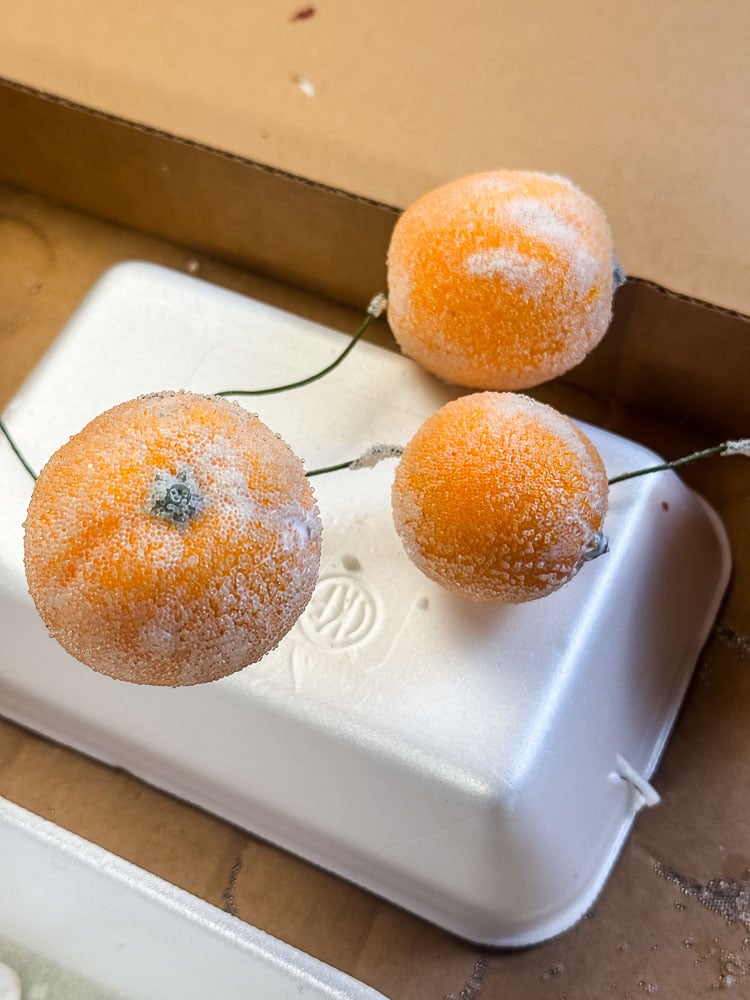
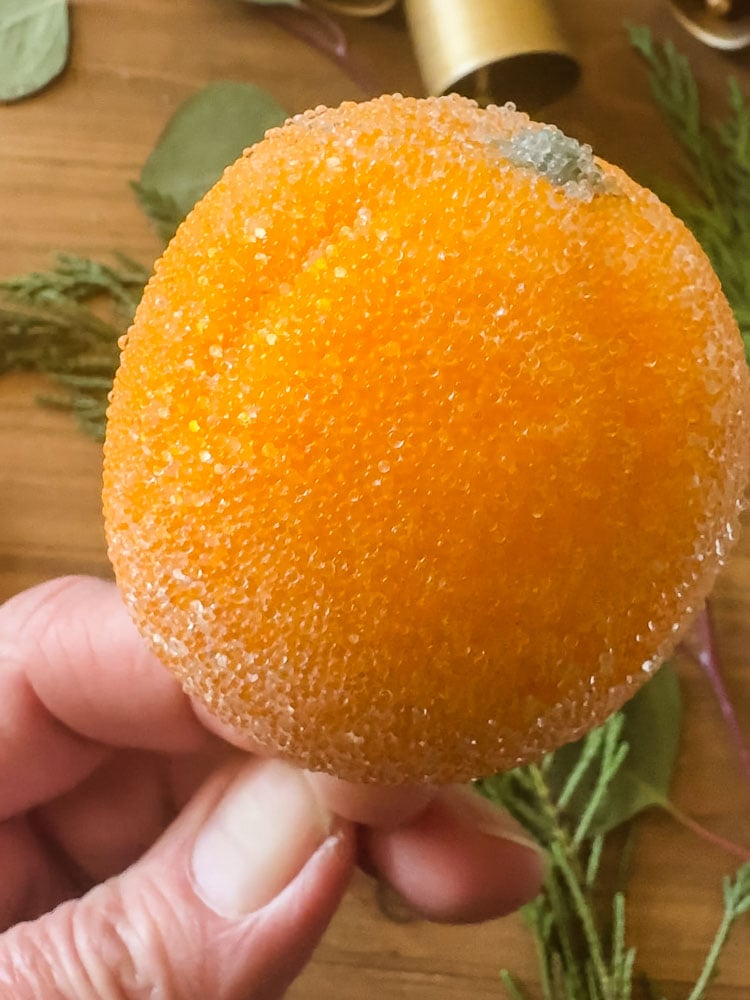
In addition to the red apples from my thrift store wreath, I also did oranges and green apples that I had picked up from the craft store.
Tips (And One Big Surprise)
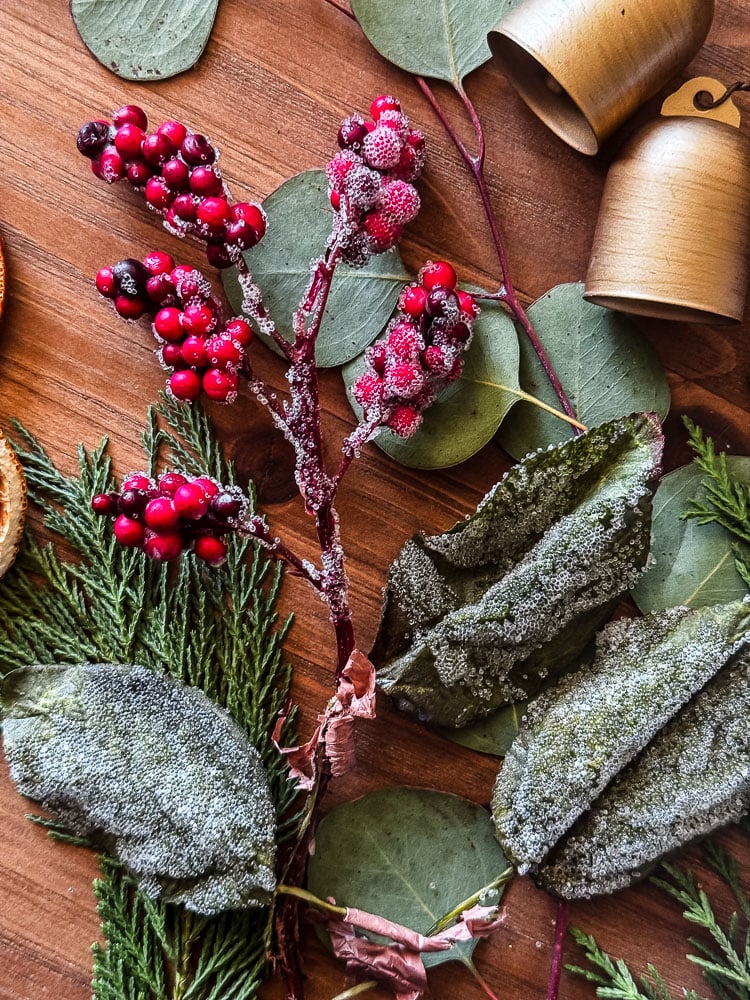
•The berries and leaves stole the show. I went into this thinking the apples would be the star. Nope. The red berries and the sugared leaves are honestly the prettiest part. The tiny berry clusters catch the light like real frost, and the leaves look like a winter morning in the garden. If you only sugar one thing, make it the berries.
•Keep your Mod Podge coat thin. Too thick and it can pool or drip before the beads set. A thin, even layer gives you the best frosty texture.
•Reuse your beads. Everything that falls into the box goes right back into the spoon. A small container goes a long way.
•Think about a sealer. I didn’t seal mine, but if you want these to last for years of Christmases, a clear spray sealer would help lock the beads in and cut down on shedding. That’s on my list for next time.
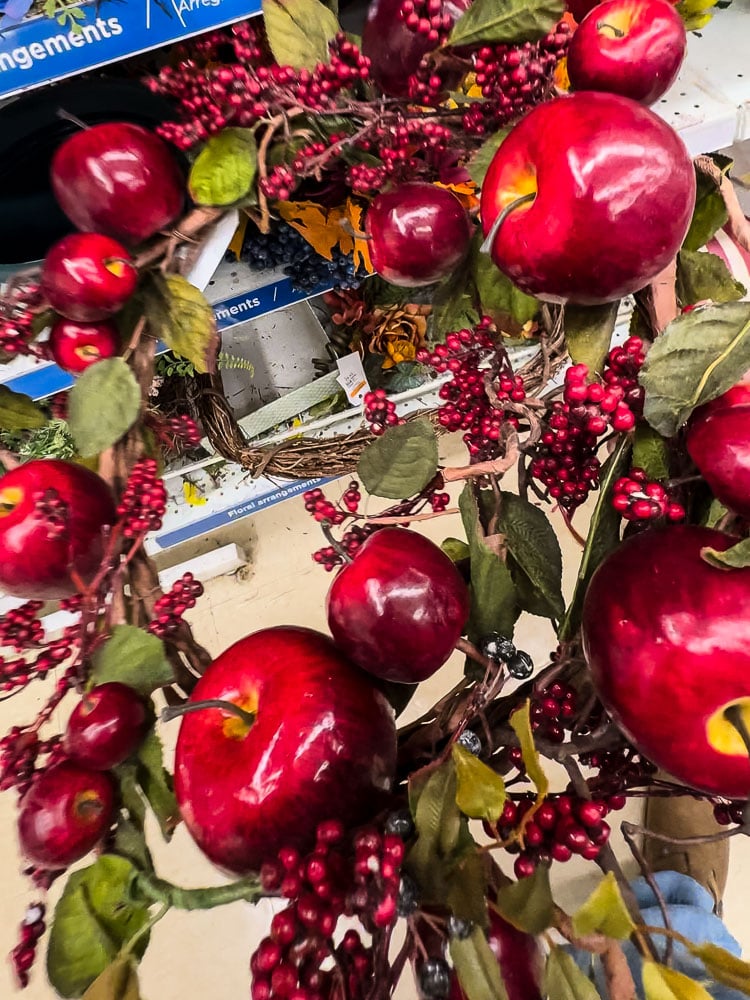
•Check the thrift store first. Old fruit wreaths, garlands, and picks are everywhere this time of year. Even a dated, kind of sad wreath can give you a whole bowl of fruit to work with.
How To Use Your Sugared Fruit
I’m planning to work mine into a garland or a wreath (stay tuned!), but there are lots of ways to show them off.
- Tuck them into the tree. Leave the floral wire on and just twist or tuck it around a branch. No hooks needed.
- Hang them as ornaments. Tie a small gold cord around the apple stem and add a dab of glue to hold it in place. Simple, and so pretty against the greenery.
- Add them to a garland or wreath. Use the wires to attach them to fresh or faux greens, like the arrangement in my photo.
- Pile them in a bowl. A thrifted silver or milk glass bowl full of sugared fruit is the most 90s-Grandma centerpiece there is, and I mean that as a compliment.
The Sweetest (Sugar-Free) Project Of The Season

I’m honestly amazed at how this turned out. A thrifted wreath, some Mod Podge, and a jar of glass beads turned into something that looks like it came off a boutique shelf, for a fraction of the price. That’s my favorite kind of holiday project: budget-smart, a little nostalgic, and made with what you already have.
If you try this, tell me what you sugared! And keep an eye out for the garland I’m making with these. I’ll share it soon.
See your projects featured! If you are inspired by this or any of my other DIY projects, I would love to see them and add you to the Reader’s Spotlight gallery. Send a photo to me at jennifer@cottageonbunkerhill.com
xo, Jennifer

Shop
CHRISTMAS TREES
TOP PICKS FOR 2026
2026
Holiday Shop
My Top Finds To Deck Your Halls This Season


