Here is a DIY Countdown to Christmas advent calendar wood sign that you can make in an afternoon. Using wood disc cutouts for each day that you can flip to reveal the number.
How To Make A Countdown To Christmas Wood Advent Calendar
I’ve been playing around with my WORX MakerX wood/metal crafter since I got it. I made this cute Rustic Christmas Tree Sign last week and this week I put together the cutest countdown to Christmas wood advent calendar! Let me show you…
I’m using a wood-burning tool for this project but you could totally do this with a paint pen to handwrite the numbers and get the same look!
I also did the “25” to make the sign rows even…I know most advent calendars go to 24. Looking back at this project I might just make a Christmas tree disc for Christmas Day.
This post may contain affiliate links, which means I may earn a small commission if you make a purchase through my links, at no extra cost to you. Read my disclosure policy here.
Sign
I started with a wood board that was 20″ x 21″ I actually already had this piece left over from another project. I had stained it with a Kona/ Classic Gray combo but any stain color would work for this Advent calendar. Painting the wood sign to match your holiday color scheme is another great idea.
Walmart and the big craft stores have a nice selection of unfinished wood signs and pallet boards that would work great for this project.

Making the Advent Calendar Numbers
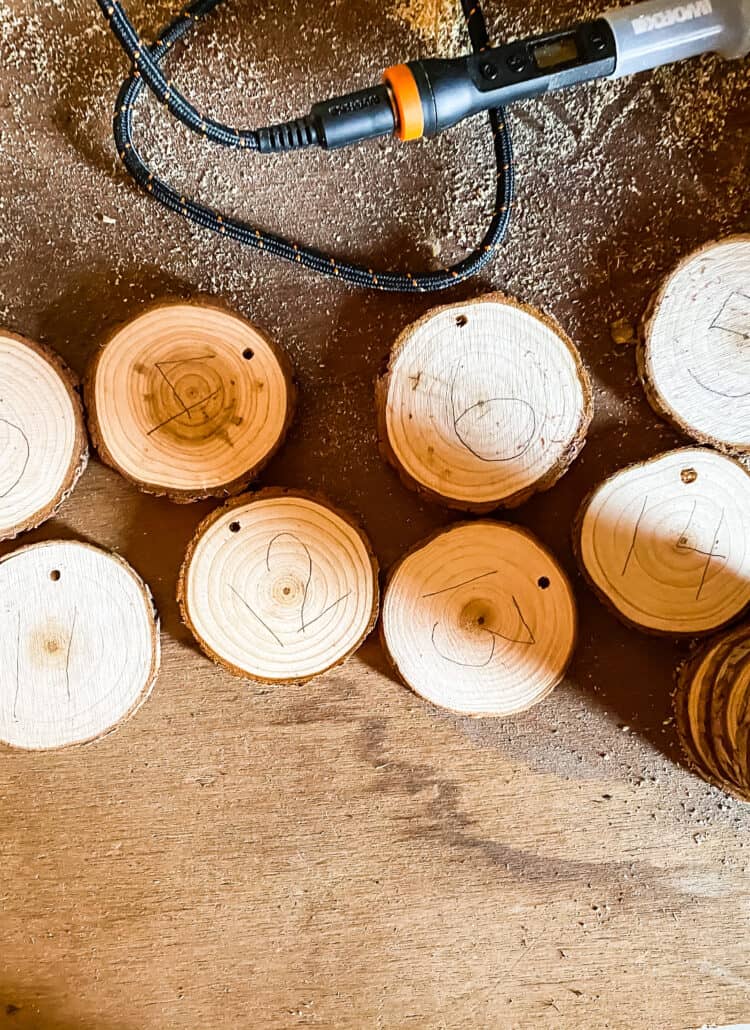
To make the countdown to Christmas numbers I used 2.5-inch natural wood slices. First, I hand-wrote out the numbers 1-25.
If I was going to use a paint pen to make the numbers I would probably still use a pencil to write the numbers lightly on the wooden discs…but I tend to write crookedly being left-handed.

Next, I used my wood crafter tool to burn in the numbers on the slices.

I have to say it’s pretty fun using the MakerX wood crafting tool! I am by no means a professional wood burner but I like trying to learn new DIY skills.

The Finished Numbers

I gave the sides of the board a quick coat of white paint to break up the stained look and to add a bit of detail.

Adding the Hanger Hooks
For my board, I started the first row of hooks 2 inches from the top.
I measured 4 inches between the rows of hooks. There are 5 rows both down and across
I am using 1-inch right-angle hooks.

Drilling pilot holes first made it easier to screw in the hooks.

I wore thin work gloves to save my fingers…the metal was killing my fingers!!

The finished sign has 25 hooks that are equidistant (OMG, I never thought I would get to use geometry terms in real life!!)

Making the Hanging Wood Number Tags
On the back side of the number ornaments, I added wooden snowflakes.
The unfinished snowflakes come in a bag with lots of shapes.
I gave them a quick coat of white acrylic paint, then hot glued them on the wood slices.

As I was gluing on the snowflakes I tried to vary the designs along the way.

The bag of wood slices came with cute red & white bakery string that I used for hanging the ornaments onto the metal hooks on the sign. I thought it would add a little pop of festive color to my sign.
Finished Wood Countdown to Christmas Advent Calendar

I stapled a piece of nautical rope to the back of the sign to make a sturdy hanger. I use Monkey Hooks to hang just about everything in my house…I love those things!!

Now we are ready to start the Countdown To Christmas!! I think we all need something to look forward to this year!!!
You can find out more of my holiday festive ideas right HERE.


Hello, could you share a link to pallet boards or unfinished wood signs that could be used for this? Thank you
Sarah, if you go to the lumber dept at Lowe’s or HD you can have them trim down a pine board for you. Or grab a 2’x3′ project panel(the edges are finished) and ask them to trim it down for you.
I love this idea! And it’s great that you can use it every year.
This is so cute!!! What a great idea! I love the look of it!
This is so cute and you did such a great job on the tutorial. We love it so much that we are featuring it at the Farmhouse Friday link party! Hope you link up again soon. 😉 Pinned
Oh, Thanks Cindy! That made my night!
I”m in love with this! Snowflakes + Wood is perfect for my house! So inspired! Thanks for sharing at Charming Homes & Gardens!
Thanks so much Kristin!! It was a fun project to make.
Jennifer,
These are so cute! Look for your feature on Wednesday’s Charming Homes & Gardens Link Party
Ooohh, Thanks Rachel!!!
I just love this Jennifer! Pinning so I can make this. I am so glad you shared this at Charming Homes and Gardens! I will be featuring you this week.
Awww, Thanks Kim!!!